
Manuels Connexes pour THOMSON THPRIMO245DFULL


Sommaire des Matières pour THOMSON THPRIMO245DFULL
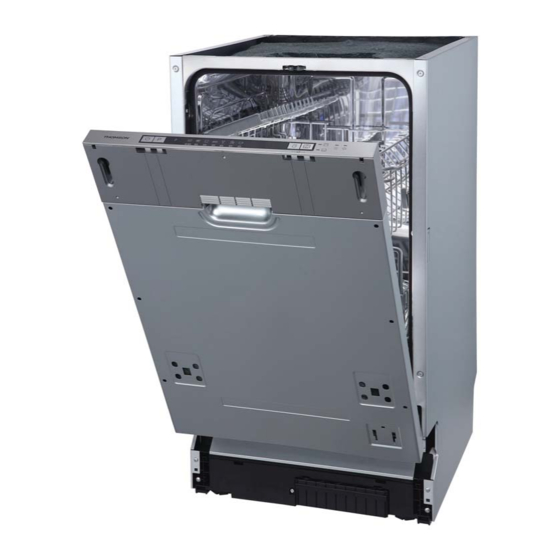
- Page 1 T T HPRIMO245DFULL AVE-VAISSELLE ISHWASHER AATWASSER MANUEL D'UTILISATION HANDLEIDING...
-
Page 2: Table Des Matières
TABLE DES MATI RES ......................2 MISES EN GARDE IMPORTANTES ..........................6 DESCRIPTION DU PRODUIT ..................7 AVANT D INSTALLER VOTRE LAVE-VAISSELLE .......................7 INSTRUCTIONS D INSTALLATION ......................13 AVANT DE CHARGER LES PANIERS ......................14 CHARGEMENT DU LAVE-VAISSELLE .......................16 AJUSTER LE PANIER SUP RIEUR .......................... -
Page 3: Mises En Garde Importantes
MISES EN GARDE IMPORTANTES MERCI DE BIEN VOULOIR LIRE LES CONSIGNES DE SÉCURITÉ ATTENTIVEMENT AVANT D’UTILISER L'APPAREIL ET CONSERVER POUR RÉFÉRENCE ULTÉRIEURE. Avertissements Cet appareil est destiné à être utilisé dans des applications domestiques et analogues telles que: les coins cuisines réservés au personnel des magasins, bureaux et autres environnements professionnels;... - Page 4 En ce qui concerne les informations détaillées sur la méthode et la fréquence du nettoyage, référez-vous dans la section “NETTOYAGE ET ENTRETIEN” en pages 2 -2 . Les ouvertures de ventilation ne doivent pas être obstruées par un tapis.
-
Page 5: Précautions De Sécurité
Précautions de sécurité L'installation et les réparations doivent être effectuées par du personnel qualifié. Cet appareil est conçu pour une utilisation domestique seulement. Pour éviter tout risque de choc électrique, n’immergez pas l'appareil, le câble ou la prise d’alimentation dans de l'eau ou dans tout autre liquide. - Page 6 N'utilisez jamais de savon, de détergent à lessive ou de détergent pour le lavage des mains pour le lave -vaisselle. La porte ne doit pas être laissée ouverte, car cela pourrait augmenter le risque de trébucher. Ne modifiez pas les boutons de contrôle. ...
-
Page 7: Description Du Produit
DESCRIPTION DU PRODUIT Tuyau interne Bras d'aspersion inf rieur R servoir sel Assemblage du filtre Distributeur Panier sup rieur Panier inf rieur Panier couverts tag re Bras d'aspersion tag re verres couverts sup rieur Panneau de contr le 65 C 55 C 50 C 50 C... -
Page 8: Avant D Installer Votre Lave-Vaisselle
Affichage : Indique le programme que vous avez choisi Indique la dur e du lavage, la dur e avant le d part diff r ou les codes d'erreur. Programmes de lavage : 55-65 C 65 C 55 C 50 C 50 C 35 C P1 Auto... -
Page 9: Connexion Du Tuyau De Vidange
Raccordement à l’eau froide L'installation du tuyau doit ’ tre effectuàe par des professionnels. Raccordez le tuyau dé alimentation en eau fourni ê un connecteur filetà de 3/4 "et assurez-vous qué il est bien serrà. Si les conduites d'eau sont neuves ou n'ont pas àtà utilisàes pendant une pàriode prolongàe, laissez l'eau couler pour que l'eau soit claire. -
Page 10: Branchements Électriques
En cas de fuite, fermez immàdiatement lé alimentation en eau et inspectez intàgralement les raccords du tuyau. Resserrez les raccordements si nàcessaire. Si pour une raison quelconque vous ne parvenez pas ê arr’ ter la fuite vous-m’ me, demandez conseil ê un plombier qualifià. Branchements électriques L'installation de l'àquipement àlectrique doit ’... -
Page 11: Exigences D'ouverture Du Lave-Vaisselle
Vérifiez le niveau d'avant en arrière Vérifiez le niveau d'un côté à l'autre Exigences d’ouverture du lave-vaisselle Prises électriques, de vidange et d’alimentation en eau Espace entre le bas du lave-vaisselle et le sol FR-10... -
Page 12: Préparer Et Assembler Un Panneau Décoratif (Non Fourni)
Il doit y avoir un espace de 50 mm au minimum entre le bord de la porte du Lave-vaisselle lave-vaisselle et les murs ou les meubles Meuble qui lui sont adjacents. Porte du lave-vaisselle Espace de 50 mm au minimum Préparer et assembler un panneau décoratif (non fourni) (Unità... - Page 13 Réglage de la tension du ressort de la porte La porte du lave-vaisselle est attachàe ê des ressorts. Ils sont assemblàs en usine pour garantir qué ils soient ê la tension appropriàe, de sorte que la porte puisse ’ tre ouverte et fermàe en douceur. Après avoir assemblà...
-
Page 14: Fixer Le Lave-Vaisselle En Place
AVERTISSEMENT : Si la tension du ressort de la porte n'est pas ajustàe, cela pourrait endommager l'appareil. Fixer le lave-vaisselle en place Il y a deux façons de le faire : A. Sur un plan de travail normal : Placez le crochet d'installation dans la fente du plan latàral et fixez-le au plan de travail ê... -
Page 15: Chargement Du Lave-Vaisselle
Articles d artisanat Plats en plastique (sauf s il est indiqu qu ils peuvent tre lav s dans un lave-vaisselle) Plats et objets en cuivre, zinc, tain ou laiton. Plats en aluminium Vaisselle et couverts en argent ... -
Page 16: Panier Couverts
Chargement de l'étagère à couverts et du panier à couverts Veuillez placer les couverts làgers dans le panier ê couverts. Le poids total doit ’ tre infàrieur ê 1,5 kg. Panier couverts 1. Cuillères ê soupe 5. Cuillères ê dessert 2. -
Page 17: Ajuster Le Panier Sup Rieur
AJUSTER LE PANIER SUP RIEUR Pour soulever le panier sup rieur, il suffit de Pour abaisser le panier sup rieur, soulevez les soulever le panier par le centre de chaque c t poign es de r glage de chaque c t pour lib rer jusqu' ce que le panier se verrouille en position le panier et abaissez-le en position inf rieure. - Page 18 syst me d adoucissement d eau. Remplissez le r servoir sel avant de d marrer le programme de lavage. Ainsi, la solution excessivement saline sera imm diatement vacu e par l eau. La pr sence prolong e d eau sal e dans le r servoir peut provoquer de la corrosion.
-
Page 19: Utilisation Des Distributeurs De Rin Age Et De D Tergent
UTILISATION DES DISTRIBUTEURS DE RIN AGE ET DE D TERGENT Fonction du liquide de rin age Le liquide de rin age est lib r pendant le rin age final pour viter que l eau ne forme des gouttelettes sur la vaisselle, ce qui laisserait des traces ou des tra n es. Il am liore galement le s chage en emp chant l eau d adh rer la vaisselle. -
Page 20: Affichage
Réglage du distributeur du liquide de rinçage Pour obtenir une meilleure performance de séchage avec un liquide de rinçage limité, le lave-vaisselle est conçu pour que l'utilisateur ajuste la consommation. Suivez les étapes ci-dessous : 1. Mettez le lave-vaisselle en marche. 2. -
Page 21: Programmes De Lavage
PROGRAMMES DE LAVAGE Besoin tergent Dur e Energie Description du Pr lavage/ liquide Programme Type de vaisselle Eau (L) programme Lavage (kWh) cycle (minutes) principal rin age ? Lavage d tection Pr lavage ( automatique pour Auto nettoyage une vaisselle / 20 g 55-65 l g rement sale,... - Page 22 PROGRAMMES DE LAVAGE Besoin tergent Dur e Energie Description du Pr lavage/ liquide Programme Type de vaisselle Eau (L) programme (kWh) Lavage cycle (minutes) principal rin age ? Lavage d tection Pr lavage ( automatique pour Auto nettoyage une vaisselle / 14 g 55-65 l g rement sale,...
-
Page 23: D Marrer Un Cycle De Lavage
législation européenne en matière d’écoconception. Charger le lave-vaisselle ménager jusqu’à la capacité indiquée par le fabricant contribuera à économiser de l’énergie et de l’eau. Le prérinçage manuel de la vaisselle augmente la consommation d’énergie et d’eau et n’est pas recommandé. Laver la vaisselle au moyen d’un lave-vaisselle consomme généralement moins d’énergie et d’eau en fonctionnement que de laver la vaisselle à... -
Page 24: Nettoyage Et Entretien
2. Une fois que les bras d aspersion ont cess de fonctionner, vous pouvez ouvrir compl tement la porte. 3. Ajoutez les plats oubli s. 4. Fermez la porte. 5. Le programme reprend partir du point o vous l avez interrompu. Changement d'un programme de lavage en cours 55-65 C 55 C... - Page 25 Nettoyage du dispositif de filtrage Le dispositif de filtrage situ la base de la cuve de lavage retient les gros d bris du cycle de lavage. Les gros d bris r cup r s peuvent obstruer les filtres. V rifiez r guli rement l' tat des filtres et nettoyez-les au besoin sous l'eau courante.
- Page 26 Pour retirer le bras d aspersion Pour retirer le bras d aspersion inf rieur, sup rieur, maintenez l' crou au centre tirez le bras vers le haut. et tournez le bras d aspersion dans le sens inverse des aiguilles d'une montre pour le retirer.
-
Page 27: Guide De D Pannage
Pas de solvants ou de nettoyage abrasif Pour nettoyer l'ext rieur et les pi ces en caoutchouc du lave-vaisselle, n'utilisez pas de solvants ni de produits de nettoyage abrasifs. Utilisez uniquement un chiffon avec de l'eau ti de savonneuse. Pour liminer les taches ou les traces de la surface int rieure, utilisez un chiffon imbib d eau et un peu de vinaigre, ou un produit nettoyant sp cialement con u pour lave-vaisselle. - Page 28 Du liquide de rin age a t Essuyez toujours tout liquide de rin age qui aurait renvers . d bord . Les surfaces int rieures de Le d tergent utilis contient Assurez-vous que le d tergent ne contient pas de la cuve sont du colorant.
-
Page 29: Fiche Produit
Messages d'erreur Codes Signification Causes possibles Solution Possible Ouvrez le robinet d'eau. Le robinet nest pas ouvert, ou V rifiez si le tuyau d'arriv e Larriv e d eau prend l alimentation en eau est n est pas bloqu . trop de temps. - Page 30 Lien internet vers le site web du fournisseur où se trouvent les informations visées à l’annexe II, point 6, du règlement (UE) 2019/2022 de la Commission: ) Pour le programme eco. Thomson et le logo Thomson sont des marques de Technicolor (S.A.) ou de ses filiales et sont utilis es sous licence par Fnac Darty (S.A.). FR-29...
- Page 31 SERVICE DE RÉPARATION ET PIÈCES DE RECHANGE Ne démontez pas et ne réparez pas l'appareil vous-même. Ne pas respecter cette consigne peut entraîner un choc électrique ou des blessures. Pour demander une r paration professionnelle et commander des pi ces de rechange, veuillez vous adresser au service apr s-vente FNAC DARTY.
-
Page 32: Mise Au Rebut
MISE AU REBUT En tant que distributeur responsable, nous accordons une grande importance la protection de l environnement. Nous vous encourageons respecter les proc dures correctes de mise au rebut de votre appareil, des piles et des l ments d emballage. Cela aidera pr server les ressources naturelles et garantir qu il soit recycl d une mani re respectueuse de la sant et de l environnement. - Page 33 CONTENTS IMPORTANT SAFETY INSTRUCTIONS ......................2 PRODUCT OVERVIEW ............................5 BEFORE INSTALLING YOUR DISHWASHER ....................7 INSTALLATION INSTRUCTIONS ........................7 BEFORE LOADING THE BASKETS ........................13 LOADING THE DISHWASHER .........................14 ADJUSTING THE UPPER BASKET ........................16 FOLDING THE CUP RACK ..........................16 FOLDING SPIKES ...............................16 USING THE WATER SOFTENER........................16 USING THE RINSE AND DETERGENT DISPENSERS ..................17 WASHING PROGRAMS ............................19 STARTING A WASH CYCLE ..........................21...
-
Page 34: Important Safety Instructions
IMPORTANT SAFETY INSTRUCTIONS PLEASE READ THE FOLLOWING SAFETY WARNINGS AND THE INSTRUCTIONS CAREFULLY BEFORE USING THE APPLIANCE AND KEEP FOR FUTURE REFERENCE. Warnings This appliance is intended to be used in household and similar applications such as: staff kitchen areas in shops, offices and other working environments;... -
Page 35: Safety Precautions
cleaning, refer to the section “Cleaning and Maintenance” in pages 22-24. The openings must not be obstructed by a carpet. The new hose-sets supplied with the appliance are to be used; old hose-sets should not be reused. The maximum number of place settings to be washed by this dishwasher is 10 place settings. -
Page 36: Earthing Instructions
appliance, cord or plug in water or any other liquid. Turn off and unplug the appliance before cleaning and performing maintenance. Do not sit on, or stand on the door or dish rack of the dishwasher. Do not operate your dishwasher unless all enclosure panels are properly in place. -
Page 37: Product Overview
breakdown, earthing will reduce the risk of an electric shock by providing a path of least resistance of electric current. This appliance is equipped with an earthing conductor plug. The plug must be plugged into an appropriate outlet that is installed and earthed in accordance with all local codes and ordinances. - Page 38 Cutlery basket Upper basket Lower basket Cutlery rack Upper spray arm Cup rack Control Panel 55-65 C 65 C 55 C 50 C 50 C 55 C 35 C 55-65 C 65 C 55 C 50 C 50 C 55 C 35 C Buttons: Power...
-
Page 39: Before Installing Your Dishwasher
Indicator lights: Upper zone wash Refill rinse aid Lower zone wash Refill salt BEFORE INSTALLING YOUR DISHWASHER Before connecting your dishwasher to the power supply, check that the voltage stated on the rating label of your appliance corresponds to the voltage in your home. The appliance must be grounded. The manufacturer is not responsible for damages that may occur as a result of usage without grounding. -
Page 40: Electrical Connection
in place. If the water pipes are new or have not been used for an extended period of time, let the water run to make sure that the water is clear. This precaution is needed to avoid the risk of the water inlet to be blocked and damage the appliance. Connection of the Drain Hose Insert the drain hose into a drain pipe with a minimum diameter of 4 cm, or let it run into the sink, making sure to avoid bending or crimping it. - Page 41 Do not, under any circumstances, cut or remove the earthing connection from the power cord. Ensure the voltage and frequency of the dishwasher correspond to those indicated on the rating plate. Only insert the plug into an electrical socket which is earthed properly. If the electrical socket to which the appliance must be connected is not appropriate for the plug, replace the socket, rather than using a adaptors or the like as they could cause overheating and burns.
- Page 42 Cabinet Opening Requirements There should be at least a 50 mm gap between the side of the dishwasher door and the wall or cabinet next to it. GB-10...
- Page 43 Preparing and Assembling the Aesthetic Panel (not supplied) (Unit: mm) GB-11...
- Page 44 Adjusting the Tension of the Door Spring The dishwasher door is attached to springs. They are set at the factory to ensure that they are at the proper tension, so that the door can be opened and closed smoothly. After the furniture door has been fitted, you will need to adjust the tension of the door spring.
-
Page 45: Before Loading The Baskets
Securing the Dishwasher in Place There are two ways to do this: A. Normal work surface: Put the installation hook into the slot of the side plane and secure it to the work surface with the screws. B. Marble or granite work top: Fix the side with Screw. BEFORE LOADING THE BASKETS ... -
Page 46: Loading The Dishwasher
LOADING THE DISHWASHER Loading the Upper and Lower Baskets The upper basket is designed to hold delicate and light items such as glasses, cups, saucers, serving bowls and shallow pans. The lower basket is designed to take saucepans, lids, plates, salad bowls, cutlery etc. ... - Page 47 Loading the Cutlery Rack and Basket Please place the lightweight flatwares on the cutlery rack. The total weight is less than 1.5kg. Cultery Basket 1. Soup spoons 5. Dessert spoons 2. Forks 6. Serving spoons 3. Knives 7. Serving forks 4.
-
Page 48: Adjusting The Upper Basket
ADJUSTING THE UPPER BASKET To raise the upper basket, just lift the upper To lower the upper basket, lift the adjuster basket at the center of each side until the basket handles on each side to release the basket and locks into place in the upper position. -
Page 49: Using The Rinse And Detergent Dispensers
will be immediately removed by the water; the prolonged presence of salt water inside the tank may lead to corrosion. Adjusting the salt consumption 1. Open the door and switch on the appliance. 2. Enter the status of adjusting the salt consumption by holding down until the display shows H3. - Page 50 USING THE RINSE AND DETERGENT DISPENSERS Function of the rinse aid The rinse aid is released during the final rinse to prevent water from forming droplets on your dishes, which can leave spots and streaks. It also improves drying by allowing water to roll off the dishes. WARNING! Only use branded rinse aid for dishwasher.
-
Page 51: Washing Programs
Adjusting the rinse aid dispenser To achieve a better drying performance with limited rinse aid, the dishwasher is designed to adjust the consumption by user. Follow the below steps: 1. Power on the dishwasher. 2. Within 60 seconds after powering on the dishwasher, press and hold for about 5 seconds and then press... - Page 52 For normally- Pre- wash(45 C) soiled loads Wash(55 C) such as pots, Rinse (1 or 2 1.395 13.9 plates, glasses Rinse Universal pieces) and lightly- Rinse(60 C) soiled pans Drying Standard cycle Wash( for normally Rinse soiled loads (1 or 2 (*EN such as pots, Rinse(...
-
Page 53: Starting A Wash Cycle
For normally- Pre- wash(45 C) soiled loads Wash(55 C) 4/14g such as pots, Rinse (1 or 2 1.395 13.9 plates, glasses Rinse Universal pieces) and lightly- Rinse(60 C) soiled pans Drying Standard cycle Wash( for normally 4/14g Rinse soiled loads (1 or 2 (*EN such as pots,... -
Page 54: Cleaning And Maintenance
6. Add the required amount of detergent into the dispenser according to the Washing Program chart. 7. Press to switch on the dishwasher. 8. Repeatedly press to select the desired washing program. The display will show the number of the program you have chosen. ... - Page 55 Never use abrasive cleaners or scouring pads on the outer surfaces because they may scratch the finish. Cleaning the door and the door seal Clean the door seals regularly with a soft damp cloth to remove food deposits. When the dishwasher is being loaded, food and drink residues may drip onto the sides of the dishwasher door.
- Page 56 WARNINGS! Do not over tighten the filters. Put the filters back in sequence securely, otherwise coarse debris could get into the system and cause a blockage. Never use the dishwasher without filters in place. Improper replacement of the filters may reduce the performance level of the appliance and damage dishes and utensils.
-
Page 57: Troubleshooting
Frost precaution Please take frost protection measures on the dishwasher in winter. Every time after washing cycles, please operate as follows: 1. Cut off the electrical power to the dishwasher at the supply source. 2. Turn off the water supply and disconnect the water inlet pipe from the water valve. 3. - Page 58 Check kitchen sink to make sure it is draining well. Kitchen sink clogged If kitchen sink is not draining, you may ask a plumber to check it. Use only the detergent special for dishwasher to avoid suds. If this occurs, open the door and let the suds evaporate.
-
Page 59: Product Fiche
WARNINGS! If overflow occurs, turn off the main water supply before calling service. PRODUCT FICHE This dishwasher s product fiche has been setup in conformity with EU Regulation No 1059/2010. Brand Thomson Model THPRIMO245 Rated capacity (standard place settings) Energy efficiency class... -
Page 60: Product Informatione Sheet
Weblink to the supplier s website, where the information in point 6 of Annex II to Commission Regulation (EU) 2019/2022 is found: www.darty.com ) for the eco programme. Thomson and the Thomson logo are trademarks of Technicolor (S.A.) or its affiliates and are used under license by Fnac Darty (S.A.). GB-28... -
Page 61: E Rpair And Spare Parts Service
REPAIR AND SPARE PARTS SERVICE Do not disassemble or repair the appliance by yourself. Failure to do so may result in an electric shock or personal injury. To access to professional repair and order spare parts, please get the support from FNAC DARTY after-sales service. -
Page 62: Disposal
DISPOSAL As a responsible retailer we care about the environment. As such we urge you to follow the correct disposal procedure for the appliance and packaging materials. This will help conserve natural resources and ensure that it is recycled in a manner that protects health and the environment. You must dispose of this appliance and its packaging according to local laws and regulations. - Page 63 INHOUDSOPGAVE ..................2 BELANGRIJKE VEILIGHEIDSVOORSCHRIFTEN ......................5 BESCHRIJVING VAN DE ONDERDELEN ................VOORDAT U UW VAATWASMACHINE INSTALLEERT ..........................7 INSTALLATIE-INSTRUCTIES ......................13 ALVORENS DE KORVEN TE VULLEN ........................14 DE VAATWASMACHINE VULLEN .......................16 DE BOVENSTE KORF AANPASSEN ........................16 HET BEKERREK DICHTKLAPPEN ..........................16 DE PINNEN DICHTKLAPPEN ........................16 WATERONTHARDER GEBRUIKEN ............18...
-
Page 64: Belangrijke Veiligheidsvoorschriften
BELANGRIJKE VEILIGHEIDSVOORSCHRIFTEN LEES DE VOLGENDE VEILIGHEIDSINSTRUCTIES AANDACHTIG DOOR VOORDAT U HET APPARAAT IN GEBRUIK NEEMT EN BEWAAR ZE VOOR TOEKOMSTIG GEBRUIK. Waarschuwingen Dit apparaat is bestemd voor huishoudelijk gebruik of gelijksoortige toepassingen zoals: personeelskeukens in winkels, kantoren en andere werkomgevingen;... - Page 65 Belemmer de openingen niet door een tapijt. Gebruik de nieuwe slangen die met het apparaat zijn meegeleverd en gebruik geen oude slangen opnieuw. Het maximum aantal couverts dat door deze vaatwasmachine kan worden gewassen is 10. De deur dient niet open gelaten te worden, daar dit een struikelgevaar zou kunnen inhouden.
- Page 66 een andere vloeistof om het risico op elektrische schokken te beperken. Zet het apparaat altijd uit en haal de stekker uit het stopcontact voordat u het apparaat reinigt of onderhoudt. Sta of zit niet op de deur of het afdruiprek van de vaatwasmachine. ...
-
Page 67: Beschrijving Van De Onderdelen
zorgen voor een weg van minste weerstand voor de elektrische stroom. Dit apparaat is voorzien van een geaarde stekker. Steek de stekker in een gepast stopcontact dat volgens alle lokale codes en voorschriften is geïnstalleerd en geaard. Een onjuiste aansluiting van de aardleiding kan resulteren in een risico op een elektrische schok. - Page 68 Bedieningspaneel 55-65 C 65 C 55 C 50 C 50 C 55 C 35 C 55-65 C 65 C 55 C 50 C 50 C 55 C 35 C Knoppen: Aan/Uit-knop Wasprogramma Zelfreiniging Vertraagde start Waszone boven- & onderaan Display: Toont welk programma is gekozen Om de wasduur, de uitgestelde startijd en foutcodes weer te geven.
-
Page 69: Voordat U Uw Vaatwasmachine Installeert
VOORDAT U UW VAATWASMACHINE INSTALLEERT Controleer voordat u uw vaatwasmachine op de netvoeding aansluit of de spanning op het typeplaatje van uw apparaat overeenstemt met de spanning bij u thuis. Het apparaat moet geaard zijn. De fabrikant is niet verantwoordelijk voor schade die ontstaat door het gebruik zonder aarding. WAARSCHUWING: Sluit de elektrische stroom af voordat u uw vaatwasmachine installeert. -
Page 70: Aansluiting Van De Afvoerslang
Aansluiting van de afvoerslang Steek de afvoerslang in een afvoerpijp met een minimale diameter van 4 cm, of laat in de gootsteen lopen, en zorg ervoor het niet te buigen of vouwen. De hoogte van de afvoerpijp moet minder dan 1000 mm zijn. Het vrije uiteinde van de slang mag niet in water worden ondergedompeld om het terugstromen ervan te voorkomen. - Page 71 iets dergelijks te gebruiken omdat deze oververhitting en brand kunnen veroorzaken. Zorg dat het apparaat juist is geaard voordat u het gebruikt. Uw vaatwasmachine waterpas zetten De vaatwasmachine moet waterpas staan voor een goede werking van het afdruiprek en de vaatwasprestaties. 1.
- Page 72 Vereisten voor de kastopening Ingangen voor elektrische, afvoer- en watertoevoerleidingen Ruimte tussen onderkant van kast en vloer Zorg voor een open ruimte van minstens 50 cm tussen de zijkant van de Kast Vaatwasmachine vaatwasmachinedeur en de aangrenzende wand of kast. Vaatwas hinedeur Minimale ruimte...
- Page 73 Het esthetisch paneel voorbereiden en monteren (niet meegeleverd) (Eenheid: mm) NL-11...
- Page 74 De spanning van de deurveer afstellen De vaatwasmachinedeur is vastgemaakt aan veren. Deze werden in de fabriek afgesteld om een juiste spanning te waarborgen zodat de deur probleemloos geopend en gesloten kan worden. Na het bevestigen van een keukenkastdeur is het echter nodig om de spanning van de deurveer opnieuw af te stellen.
-
Page 75: Alvorens De Korven Te Vullen
De vaatwasmachine op zijn plaats vastzetten Er zijn twee manieren om dit te doen: A. Normaal werkoppervlak: Stop de installatiehaak in de gleuf van het zijpaneel en maak het vast aan het werkoppervlak met behulp van de schroeven. B. Werkoppervlak van marmer of graniet: Maak de zijkant vast met schroeven. ALVORENS DE KORVEN TE VULLEN ... -
Page 76: De Vaatwasmachine Vullen
DE VAATWASMACHINE VULLEN De bovenste en onderste korf vullen De bovenste korf is ontworpen voor delicate en lichtere items zoals glazen, kopjes, schotels, kommen en ondiepe pannen. De onderste korf is ontworpen voor sauspannen, deksels, borden, slakommen, bestek, etc. ... - Page 77 Het bestekrek en de bestekkorf vullen Plaats de lichtgewicht borden op het bestekrek. Het totale gewicht is minder dan 1,5 kg. Bestekkorf 1. Soeplepels 5. Dessertlepels 2. Vorken 6. Serveerlepels 3. Messen 7. Serveervorken 4. Theelepels 8. Sauslepels Laat geen artikelen door de bodem uitsteken. Laad altijd scherpe artikelen met de scherpe punt naar beneden! NL-15...
-
Page 78: De Bovenste Korf Aanpassen
DE BOVENSTE KORF AANPASSEN Om de bovenste korf omhoog te brengen, til de Om de bovenste korf omlaag te brengen, til de bovenste korf aan weerskanten in het midden afstellingshendel aan weerskanten omhoog om op totdat de korf in de bovenste positie vast de korf los te maken en naar de onderste positie komt te zitten. - Page 79 waterontharder kunnen beschadigen. Vul het zoutreservoir voordat u het vaatwasprogramma opstart. Op deze wijze spoelt overtollige zoutoplossing onmiddellijk met het water weg. Langdurige aanwezigheid van zoutwater in het apparaat kan tot corrosie leiden. Het zoutverbruik aanpassen 1. Open de deur en schakel de vaatwasser in. 2.
-
Page 80: Het Glansspoel- En Vaatwasmiddelbakje Gebruiken
HET GLANSSPOEL- EN VAATWASMIDDELBAKJE GEBRUIKEN Functie van het glansspoelmiddel Het glansspoelmiddel komt vrij tijdens de laatste spoeling om te voorkomen dat er waterdruppels op de vaat ontstaan die vlekken en strepen kunnen achterlaten. Het glansspoelmiddel bevordert het drogen van de vaat door het water er beter te laten afstromen. WAARSCHUWING! Gebruik voor de vaatwasmachine alleen glansspoelmiddel van een merk. - Page 81 Instellen van de juiste dosering van het glansspoelmiddel Voor een beter droogresultaat met minder glansspoelmiddel, kan de dosering door de gebruiker worden ingesteld. Volg de onderstaande stappens: 1. Schakel de afwasmachine in. 2. Houd binnen 60 seconden na het inschakelen van de afwasmachine gedurende ongeveer 5 seconden ingedrukt en dan druk op om de instelmodus te openen.
-
Page 82: Vaatwasprogramma's
VAATWASPROGRAMMA'S Glansspoel- Omschrijving van Vaatwasmiddel Werkingstijd Energie Water middel Programma Soort vaatwerk de cyclus Voor-/hoofdwas (min) (kWh) nodig? Automatische sensor Voorwas ( voor het wassen van AutoWash licht, normaal en 55-65 0,981- ernstig vervuild (1 of 2 85-150 2-1 .9 Spoelen Autom 1,501... - Page 83 VAATWASPROGRAMMA'S Glansspoel- Omschrijving van Vaatwasmiddel Werkingstijd Energie Water middel Programma Soort vaatwerk de cyclus Voor-/hoofdwas (min) (kWh) nodig? Automatische sensor Voorwas ( voor het wassen van AutoWash licht, normaal en 4/14g 55-65 0,981- ernstig vervuild Spoelen (1 of 2 85-150 2-1 .9 Autom 1,501...
-
Page 84: Een Wascyclus Starten
Het ecoprogramma geschikt is voor het reinigen van normaal bevuild tafelgerei, dat het voor dit gebruik het meest effici nte programma is wat betreft het gecombineerde energie- en waterverbruik, en dat het wordt gebruikt om na te gaan of de EU-r egelgeving inzake ecologisch ontwerp wordt nageleefd. -
Page 85: Reiniging En Onderhoud
Vaat toevoegen Vergeten vaatwerk kan op elk moment, voordat het vaatwasmiddelbakje wordt geopend, worden toegevoegd. In dit geval, volg de onderstaande instructies: 1. Open de deur een beetje om het programma te stoppen. 2. Eenmaal de sproeiarmen niet langer werken, open de deur volledig. 3. - Page 86 De deur en de deurafdichting reinigen Reinig de deurafdichtingen regelmatig met een zachte doek om etensresten te verwijderen. Tijdens het vullen van de vaatwasmachine kunnen er etens- en drankresten op de zijkant van de vaatwasmachinedeur druppelen. Dit oppervlak bevindt zich buiten de wasruimte en kan niet worden bereikt met water van de sproeiarmen.
- Page 87 Om de bovenste sproeiarm te Om de onderste sproeiarm af te halen, verwijderen, houd de moer in het trek de sproeiarm opwaarts uit. midden vast en draai de sproeiarm tegen de klok in om het af te halen. Reinig de armen in een warm sopje en met behulp van een zachte borstel.
-
Page 88: Probleemoplossing
Geen oplosmiddelen of agressieve schoonmaakmiddelen Maak de buitenkant en rubber onderdelen van de vaatwasmachine niet schoon met oplosmiddelen of agressieve schoonmaakmiddelen. Gebruik alleen een doek en warm zeepwater. Om vlekken aan de binnenkant van de machine te verwijderen, gebruik een doek bevochtigd in water met een beetje azijn of een schoonmaakmiddel specifiek voor vaatwasmachines. - Page 89 afvoeren. Open de deur wanneer het water is afgevoerd en controleer of alle schuim is verdwenen. Herhaal indien nodig. Veeg gemorst glansspoelmiddel altijd Gemorst glansspoelmiddel onmiddellijk weg. Vlekken op de U gebruikt een Zorg ervoor dat het vaatwasmiddel zonder binnenkant van vaatwasmiddel dat kleurstof kleurstof is.
-
Page 90: Productfiche
WAARSCHUWINGEN! Als het apparaat overstroomt, draai de watertoevoer dicht alvorens met een reparateur contact op te nemen. PRODUCTFICHE De productfiche van deze vaatwasmachine is opgesteld in overeenstemming met EU-verordeningsnr. 1059/2010. Merk Thomson Model THPRIMO245 Nominale capaciteit (Standaard couverts) Energie-effici ntieklasse Van A (meest efficiënt) tot D (minst efficiënt) -
Page 91: Productinformatieblad
Link naar de website van de leverancier met de informatie zoals bedoeld in punt 6 van bijlage II bij Verordening (EU) 2019/2022 van de Commissie: ) van het ecoprogramma. Thomson en het Thomson-logo zijn handelsmerken van Technicolor (S.A.) of aangesloten maatschappijen en worden gebruikt onder licentie van Fnac Darty (S.A.). NL-29... - Page 92 SERVICE VOOR REPARATIES EN RESERVEONDERDELEN Demonteer of repareer het apparaat niet zelf om het risico op een elektrische schok of persoonlijk letsel te vermijden. Voor professionele reparaties of het bestellen van reserveonderdelen, neem contact op met de klantenservice van FNAC DARTY. Reserveonderdelen voor uw apparaten worden binnen 15 werkdagen na het ontvangen van de bestelling geleverd.
-
Page 93: Verwijdering
VERWIJDERING Als verantwoordelijke handelaar dragen we zorg voor het milieu. We moedigen u aan om de juiste verwijderingsprocedure voor uw apparaat en verpakkingsmateriaal te volgen. Dit draagt bij tot het behoud van de natuurlijke rijkdommen door deze te recyclen zodat zowel de menselijke gezondheid en het milieu worden beschermd. -
Page 94: Eu Declaration Of Conformity
Descriçào do produto: THOMSON Brand – Marque /Merk /Marca: Model number - THPRIMO245DFULL Référence commerciale: /Modelnummer / Numero de modelo / Numero do modelo: We declare that the above product has been evaluated and deemed to comply with the requirements of the listed European Directives and standards: Nous déclarons que le produit ci-dessus a été... - Page 95 Reference number Title 2014/30/EU EMC Directive (EMC) 2014/35/EU Low Voltage Directive (LVD) 2009/125/EC Eco design requirements for energy-related products (ErP) 2011/65/EU & (EU) 2015/863 RoHS EMC: EN 55014-1:2017 EN 55014-2:2015 EN IEC 61000-3-2:2019 EN 61000-3-3:2013/A1:2019 LVD: EN 60335-2-5:2015 EN 60335-1:2012+A11:2014+A13:2017+A1:2019+A14:2019+A2:2019 EN 62233:2008 ErP: (EC) No 1275/2008...