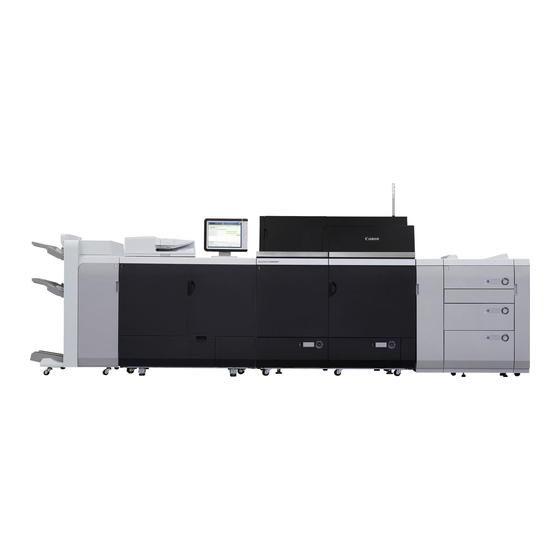
Table des Matières

Publicité

Les langues disponibles
  • FR

Les langues disponibles

Liens rapides

Quick Guide
Read this guide rst.
Please read this guide before operating this product. After you finish reading the guide, store it
in a safe place for future reference.
Guide rapide
Veuillez d'abord lire ce guide.
Lisez ce guide avant d'utiliser ce produit. Après avoir pris connaissance de son contenu,
conservez-le dans un endroit sûr pour pouvoir le consulter en cas de besoin.
Kurzanleitung
Bitte lesen Sie dieses Handbuch zuerst.
Bitte lesen Sie dieses Handbuch, bevor Sie mit dem Produkt arbeiten. Nachdem Sie das
Handbuch gelesen haben, bewahren Sie es zum Nachschlagen an einem sicheren Ort auf.
Guida rapida
Leggere questa guida.
Leggere questa guida prima di iniziare ad utilizzare il prodotto. Terminata la lettura, conservare
la guida in un luogo sicuro per eventuali consultazioni.
Guía breve
Lea esta guía primero.
Por favor, lea esta guía antes de usar este producto. Después de leer esta guía, guárdela en un
lugar seguro para posteriores consultas.
You can access canon.com/oip-manual
to read the User's Guide that describes
all functions of this machine.
Europe

Publicité

Table des Matières
loading

Sommaire des Matières pour Canon imagePRESS C10000VP

  • Page 1 Lea esta guía primero. Por favor, lea esta guía antes de usar este producto. Después de leer esta guía, guárdela en un lugar seguro para posteriores consultas. You can access canon.com/oip-manual to read the User’s Guide that describes all functions of this machine.
  • Page 2 C10000VP/C8000VP Practical Features Auto Gradation Adjustment for Various Paper Types The Auto Adjust Gradation function adjusts the gradation, density, and colour tone of images, and only requires you to scan the test page. This function can be used for various weights of paper so that a high quality print result can be obtained in different paper types.
  • Page 3 Easy Operation for Adjusting Image Position You can adjust the image positions easily with this machine. All you need is measuring marks on the test page and then entering the measured values on the touch panel display. After that, the machine will automatically adjust the image positions.
  • Page 4: Table Des Matières

    How to Turn ON the Main Power ....23 Contacting Your Local Authorized Canon Dealer ... . .43 Turning ON the Main Power .
  • Page 5: Keys And Buttons Used In This Manual

    [OK], [Add], [Cancel] Illustrations Used in This Manual Illustrations used in this manual are those displayed when the imagePRESS C10000VP has the following optional equipment attached to it: the Duplex Color Image Reader Unit-K1, Upright Control Panel-F1, and Saddle Finisher-AN2 .
  • Page 6: Important Safety Instructions

    OFF the main power switch, and disconnect the power cord from the power outlet. Then, contact your local authorized Canon dealer. CAUTION Do not install the machine in unstable locations Avoid installing the machine at high altitudes of about 3,000 metres above sea level, or higher.
  • Page 7 Important Safety Instructions Avoid installing the machine near televisions, radios, or similar electronic equipment. The machine might interfere with sound and picture signal reception. Insert the power plug into a dedicated power outlet, and maintain as much space as possible between the machine and other electronic equipment.
  • Page 8: Provide Adequate Installation Space

    Provide Adequate Installation Space Provide enough space on each side of the machine for unrestricted operation. 800 mm or more 500 mm or more 500 mm 4,851 mm 500 mm or more or more When the Finisher-AN1, Duplex Color Image Reader Unit-K1, Upright Control Panel-F1, and POD Deck-D1 are attached.
  • Page 9: Power Supply

    Important Safety Instructions ▀ Power Supply Plug the machine into an outlet that is 380 to 415 V AC 18 A or greater. WARNING • Do not use power supplies with voltages other than • Do not connect the power cord to a multiplug those specified herein, as this may result in a fire or power strip, or do not use extension cords, as this electrical shock.
  • Page 10: Handling

    Then, contact it may result in a fire or electrical shock. your local authorized Canon dealer. Continued use of • When moving the machine, always turn OFF the the machine in this condition may result in a fire or main power switch, disconnect the power plug from electrical shock.
  • Page 11 Important Safety Instructions Paper drawer (only for products with a paper drawer) Finisher (only for products with a finisher) • Do not insert your hand into the machine while • Do not place your hands in the part of the tray where the paper drawer is removed, as this may result in stapling is performed (near the rollers), especially personal injury.
  • Page 12: Laser Beam

    Laser beam The laser beam can be harmful to human bodies. Since radiation emitted inside the product is completely confined within protective housings and external covers, the laser beam cannot escape from the machine during any phase of user operation. Read the following remarks and instructions for safety. •...
  • Page 13: Transporting The Machine

    If you intend to move the machine over a long distance, contact your local authorized Canon dealer • Do not shake the machine or do not apply shock to beforehand. Do not attempt to move the machine the machine.
  • Page 14: Maintenance And Inspections

    ▀ Maintenance and Inspections Clean this machine regularly. The machine may not operate properly if dust accumulates. Make sure to read the followings when cleaning the machine. WARNING • When cleaning the machine, first turn OFF the main removed. If the power cord is connected for a long power switch, then disconnect the power cord.
  • Page 15: Consumables

    Important Safety Instructions ▀ Consumables WARNING • If you accidentally spill or scatter toner, carefully • Do not burn or throw toner cartridges in open wipe up the loose toner with a damp, soft cloth and flames. Do not store toner cartridges in places avoid inhaling any toner dust.
  • Page 16: Safety-Related Symbols

    ▀ Safety-Related Symbols Power switch: “ON” position Power switch: “OFF” position Power switch: “STAND - BY” position Push - push switch “ON” “OFF” Protective earthing terminal Dangerous voltage inside. Do not open covers other than instructed. CAUTION: Hot surface. Do not touch. Class II equipment Moving parts: Keep body parts away from moving parts NOTE...
  • Page 17: Parts And Their Functions

    Parts and Their Functions This section provides you with the names and functions of all the parts of the machine. The keys and display on the control panel are also described. Read this section to use the machine’s various functions smoothly. "Optional Products"...
  • Page 18: Internal View (Marking Engine)

    ▀ Internal View (Marking Engine) Toner Cartridge Test Button Open the cover to replace the toner cartridge. Located on the back of the power supply unit. Press this button to periodically test the circuit breaker. ITB (Intermediate Transfer Belt) Breaker Transfers the toner to the paper.
  • Page 19: Internal View (Fixing Station)

    Parts and Their Functions ▀ Internal View (Fixing Station) Primary Fixing Assembly Reverse Unit Fixes toner that has transferred to paper. Pull out Reverses paper and returns it to the marking engine the primary fixing unit to clear a paper jam inside when performing two-sided printing.
  • Page 20: Control Panel (Upright Control Panel-F1)

    Main Power Indicator When the Error indicator maintains a steady red Lights when the main power is turned ON. light, contact your local authorized Canon dealer. Edit Pen Settings/Registration key Use when operating the touch panel display, such Press to register and specify settings.
  • Page 21 Parts and Their Functions Reset key Status Monitor/Cancel key Press to restore the standard settings of the Press to check the status of jobs or to cancel print machine. jobs. Also, press to check status of the machine, such as checking the amount of paper remaining. ID (Log In/Out) key Quick Menu key Press to log in/out when a login service such as...
  • Page 22: Status Monitor/Cancel Screen

    Status Monitor/Cancel Screen If you press , the Status Monitor/Cancel screen appears, and you can confirm the status of jobs and consumables on this screen. By obtaining information, such as the completion time of the current job or the amount of paper remaining, you can perform smooth printing operation without interruption.
  • Page 23: How To Turn On The Main Power

    How to Turn ON the Main Power This section explains how to turn ON the main power. ▀ Turning ON the Main Power Make sure that the power plug is firmly inserted into the power outlet, and the breaker is turned ON. Open the main power switch cover.
  • Page 24: Shutting Down The Machine

    ▀ Shutting Down the Machine Do not turn OFF the main power in the following situations • When using the I-Fax function • When the message <Backing up stored data from the Remote UI...> is displayed • When operating scan or print function Press Press [Shutdown].
  • Page 25: Loading Paper

    Loading Paper Load paper by following the procedure below. In this section, A4 custom size paper is used as an example. Confirm the paper types that can be loaded. Confirmation "Available Paper," on p. 25 Register all paper types you are going to use. Preparation "Registering Paper Types in the Paper Database,"...
  • Page 26 Paper Deck of the Main Unit Paper Capacity Left and right decks: 1,000 sheets (80 g/m ) each Paper Type Thin 1 to 2, Plain, Heavy 1 to 8, Colour, Recycled 1 to 3, Pre-Punched 1 to 2, Transparency, Clear Film, Translucent Film, Labels, Tab 1 to 2, Bond, 1-Sided Coated Thin, 1-Sided Coated 1 to 9, 2-Sided Coated Thin, 2-Sided Coated 1 to 9, Matte Coated Thin, Matte Coated 1 to 9, Textured 1 to 7, and Vellum 1 to 2 Paper Size...
  • Page 27: Registering Paper Types In The Paper Database

    Loading Paper ▀ Registering Paper Types in the Paper Database Register all paper types you are going to use with this machine. You can register paper types by selecting paper types from the Paper Database. NOTE If you load paper which is already registered in the machine, such as plain or recycled paper, this step is not necessary. Proceed to the next step "Loading Paper into the Paper Deck".
  • Page 28: Loading Paper Into The Paper Deck

    ▀ Loading Paper into the Paper Deck Register the paper size for the paper deck at [Paper Settings] in [Preferences] (Settings/Registration). "Settings/Registration" > "Preferences" > "Paper Settings" > "Registering the Paper Size and Type for a Paper Source" in the User's Guide Open the paper deck.
  • Page 29 Loading Paper Adjust the position of the size change plates to align with paper. Set the paper of the target size to approximately 10 mm high. Slide the size change plates (front) and size change plates (back) to match the paper size. IMPORTANT •...
  • Page 30 Change the paper deck's size plate to match the new paper size. Gently push the paper deck back into the machine until it clicks into place in the closed position. • The inside lifter automatically rises, and prepares the paper deck for printing.
  • Page 31: Selecting Paper Types From The Paper Database

    Loading Paper ▀ Selecting Paper Types from the Paper Database Select the loaded paper type from the Paper Database. Press Press [Preferences]  [Paper Settings]  [Paper Settings]. Select the paper deck in which you loaded paper  press [Set]. Select the same paper type as the one you loaded ...
  • Page 32 Confirm that the selected paper type and size are displayed in <Details of Selected Paper>  press [OK].
  • Page 33: Cleaning And Maintenance

    Cleaning and Maintenance For optimum operation of the machine, we recommend to clean and check the machine regularly. ▀ Cleaning the Platen Glass If originals cannot be scanned properly, follow the cleaning procedure below. Clean with a cloth which is wrung after being dampened in water, and then clean with a soft and dry cloth.
  • Page 34: Cleaning The Feeder

    ▀ Cleaning the Feeder If originals which are fed from the feeder become dirty, follow the cleaning procedure below. Clean with a cloth which is wrung after being dampened in water, and then clean with a soft and dry cloth. Use the provided glass cleaning cloth for simple cleaning.
  • Page 35: Automatic Feeder Cleaning

    Cleaning and Maintenance ▀ Automatic Feeder Cleaning If originals which are fed from the feeder become dirty, follow the procedure below. Place 10 sheets of blank paper into the feeder. • Use A4 plain paper. Press Press [Adjustment/Maintenance]  [Maintenance]  [Clean Feeder]. Press [Start].
  • Page 36: Refreshing The Fixing Roller

    IMPORTANT This function is displayed only if the settings are made available by your local authorized Canon dealer. Even if this function is displayed, do not allow anyone to change the settings except for the system manager. For more information on changing the settings, contact your local authorized Canon dealer.
  • Page 37: Inspection Of The Breaker

    • If the breaker dial does not turn to the OFF position, repeat step 2. If the breaker dial does not turn to the OFF position, despite carrying out the above procedure two or three times, contact your local authorized Canon dealer. Turn the breaker dial all the way down until it stops.
  • Page 38 Turn the breaker dial to ON ("|" side). Turn ON the main power.
  • Page 39: Consumables

    Canon imagePRESS Toner T02 Yellow Be careful of counterfeit toners Please be aware that there are counterfeit Canon toners in the marketplace. Use of counterfeit toner may result in poor print quality or machine performance. Canon is not responsible for any malfunction, accident...
  • Page 40 Canon Multi-Functional machines. Experience the benefits of optimal print performance, print volume and high quality outputs, achieved through Canon's new advanced technologies. Therefore, the use of Canon genuine consumables is recommended for your Canon Multi-Functional machines.
  • Page 41: Troubleshooting

    Troubleshooting This section explains how to solve problems when paper jam occurs frequently or error messages are displayed. For information on the detailed procedures and precautions, see the User's Guide. "Problem Solving" in the User's Guide ▀ Clearing Paper Jams and Staple Jams If a paper jam or staple jam occurs, follow the instructions displayed on the touch panel display to clear the jam.
  • Page 42: When An Error Message Is Displayed

    If the machine cannot operate normally after turning the main power OFF and then ON, contact your local authorized Canon dealer. "Contacting Your Local Authorized Canon Dealer, " on p. 43 If a key for the Limited Functions mode is displayed:...
  • Page 43: Contacting Your Local Authorized Canon Dealer

    Note the error code. • Write down the error code "EXXXXX-XXXX". Turn OFF the main power. • Press [Shutdown] on the touch panel display. Remove the power plug from the power outlet. Confirm the product name, and contact your local authorized Canon dealer.
  • Page 44: If The Main Power Does Not Turn On

    If the machine cannot operate when the main power is turned ON, check the breaker. If the breaker is switched to the OFF position, do not attempt to turn ON the breaker yourself, and be sure to contact your local authorized Canon...
  • Page 45: Specifications

    Perfect Binder-E1 • Multi Function Professional Puncher-A1 ▀ Main Unit Item Specifications Name Canon imagePRESS C10000VP/C8000VP Type Reader-Printer Separated, Console type Colour Supported Full Colour Resolution for Writing 2400 dpi x 2400 dpi Paper Weight / Type Right/Left Paper Deck:...
  • Page 46 Item Specifications Print Speed Direct (sheet/minute) (Plain paper (80 g/m imagePRESS imagePRESS C10000VP C8000VP 330 mm x 483 mm 320 mm x 450 mm (SRA3) 305 mm x 457 mm The print speed may vary, depending on the settings for paper type, paper size, and the sending method.
  • Page 47 Specifications ▀ Duplex Color Image Reader Unit-K1 Item Specifications Type Printer separated, Stream feed (Feeder), No stream (Reader) Resolution for Reading 600 dpi x 600 dpi Number of Tones Acceptable Originals Sheet, book, three dimensional object (up to 2 kg) Size and Weight of Originals Size: A3, A4, A4R, A5, and A5R...
  • Page 48 ▀ POD Deck Lite-C1 Item Specifications Paper Size / Weight / Type Size: A3, A4R, A4, A5, 330 mm x 483 mm, 320 mm x 450 mm (SRA3), 305 mm x 457 mm, Custom Size (139.7 mm x 182.0 mm to 330.2 mm x 487.7 mm) Weight: 60 g/m to 350 g/m...
  • Page 49 Specifications Item Specifications Installation Space Including the Main Unit 4,378 mm x 1,152 mm (W x D) (When the Duplex Color Image Reader Unit-K1, the Upright Control Panel-F1, and the Finisher-AN1 (or the Saddle Finisher-AN2) are attached) ▀ LONG SHEET TRAY-A1 Item Specifications Paper Size / Weight / Type...
  • Page 50 Item Specifications Power Source / Maximum Power 100-240 V AC, 50/60 Hz, 1.0 A/120 W or less Consumption Dimensions (W x D x H) 746 mm x 793 mm x 1,407 mm (Including the Inserter Option controller Kit-A1) Weight Approximately 61 kg Installation Space Including the Main Unit 3,732 mm x 1,152 mm (W x D)
  • Page 51 Specifications ▀ Finisher-AN1 Item Specifications Paper Size / Weight / Type Size: <Upper Tray> A3, A4R, A4, A5, 330 mm x 483 mm, 320 mm x 450 mm (SRA3), 305 mm x 457 mm, Custom Size (148.0 mm x 182.0 mm to 330.2 x 762.0 mm) <Lower Tray>...
  • Page 52 Item Specifications Capacity Per Tray <Lower Tray> Non Staple Non Sort (Normal Stacking/Mixed Stacking) If it reaches either condition below, motion stops; A4 size: 285 mm (2,000 sheets) A4R/A3/330 mm x 483 mm/320 mm x 450 mm (SRA3) size: 147 mm (1,000 sheets) Z-fold: A3: 10 sheets per 1 set or 30 sheets Half-fold: A4: 50 sheets * In case of high volume stack mode...
  • Page 53 Specifications Item Specifications Max. Stapling Capacity / Available Staple Size A4 Size: Plain Paper; 60 g/m to 80 g/m : 100 Sheets 80.1 g/m to 81.4 g/m : 80 Sheets 81.5 g/m to 105 g/m : 60 Sheets 105.1 g/m to 200 g/m : 20 Sheets Over 200 g/m...
  • Page 54 ▀ Saddle Finisher-AN2 Item Specifications Paper Size / Weight / Type Finisher Size: <Upper Tray> A3, A4R, A4, A5, 330 mm x 483 mm, 320 mm x 450 mm (SRA3), 305 mm x 457 mm, Custom Size (148.0 mm x 182.0 mm to 330.2 mm x 762.0 mm) <Lower Tray>...
  • Page 55 Specifications Item Specifications Available Saddle Stitch Capacity / Size Saddle Stitch: 25 sheets (80 g/m ) (including 1 cover sheet) Saddle Folding: 5 sheets (80 g/m Size: 330 mm x 483 mm, 320 mm x 450 mm (SRA3) , 305 mm x 457 mm, A3, A4R, and Custom Size (210.0 mm x 279.4 mm to 330.2 mm x 487.7 mm) Cover Weight: Requires the paper weight of the main document (more than 64 g/m...
  • Page 56: Send Function

    ▀ Send Function Scan Features • Item Specifications Communication Protocol FTP (TCP/IP), SMB (TCP/IP), WebDAV Data Format TIFF, JPEG, PDF, XPS, OOXML (PowerPoint) Resolution 100 x 100 dpi, 150 x 150 dpi, 200 x 100 dpi, 200 x 200 dpi, 200 x 400 dpi, 300 x 300 dpi, 400 x 400 dpi, 600 x 600 dpi System Environment Windows Server 2003 R2 SP2, Windows Vista SP2, Windows Server 2008 R2, Windows 7,...
  • Page 57: Network Environment

    Specifications Item Specifications Original Size E-mail A3, A4, A4R, A5, A5R I-Fax A3, A4, A4R, A5* , A5R* Server Software Microsoft Exchange 2003 SP2, Microsoft Exchange 2007 SP3, Sendmail 8.14.4, Microsoft Exchange 2010, Lotus Domino R7.0 Other Searches a destination via the LDAP Server, Preview Optional PDF / XPS / OOXML Functions (E-mail only) Compact, Trace and Smooth, Limited Color, Encryption, OCR, Device Signature,...
  • Page 58: Product Name

    Safety regulations require the product’s name to be registered. In some regions where this product is sold, the following name(s) in parenthesis may be registered instead. imagePRESS C10000VP/C8000VP (F164400) EMC requirements of EC Directive This equipment conforms with the essential EMC requirements of EC Directive. We declare that this product conforms with the EMC requirements of EC Directive at nominal mains input 400 V, 50 Hz although the rated input of the product is 380 to 415 V, 50/60 Hz.
  • Page 59 For more information regarding return and recycling of WEEE products, please visit http://www.canon.co.in/environment or write to us at customer.delight@canon.co.in. Also, this product complies with the "E-Waste (Management) Rules, 2016" and prohibits use of lead, mercury, hexavalent chromium, polybrominated biphenyls or polybrominated diphenyl ethers in concentrations exceeding 0.1 % by weight and 0.01 % by weight for Cadmium, except for the exemptions set in Schedule II of the Rule.
  • Page 60 Canon Inc. This product includes software and/or software modules that are licensed by Canon Inc. or its licensors from third parties. Use and distribution of this software and/or software modules are subject to conditions (a) through (f ) below.
  • Page 61 Trademarks "MEAP" is a trademark of CANON Inc., referring to an "application platform" for Canon multifunction and single function printers. This product contains the Universal Font Scaling Technology or UFST® under license from Monotype Imaging, Inc. UFST® is a trademark of Monotype Imaging, Inc. registered in the United States Patent and Trademark Office and may be registered in certain jurisdictions.
  • Page 62 The PDF logo is a trademark or registered trademark of Adobe Systems Incorporated in the United States and other countries. Copyright © 2008 Adobe Systems Incorporated. All rights reserved. Protected by U.S. Patents 6,185,684; 6,205,549; 7,213,269; 7,272,628; 7,278,168; Patents pending in the U.S. and other countries. All instances of the name PostScript in the text are references to the PostScript language as defined by Adobe Systems Incorporated unless otherwise stated.
  • Page 63 Third Party Software This Canon product (the “PRODUCT”) includes third-party software modules. Use and distribution of these software modules, including any updates of such software modules (collectively, the “SOFTWARE”) are subject to license conditions (1) through (9) below. (1) You agree that you will comply with any applicable export control laws, restrictions or regulations of the countries involved in the event that this PRODUCT including the SOFTWARE is shipped, transferred or exported into any country.
  • Page 64: Fonctions Pratiques

    C10000VP/C8000VP Fonctions pratiques Réglage automatique des demi-teintes pour divers types de papier La fonction Régl. auto demi-teintes règle les demi-teintes, la densité et la quadrichromie des images, et ne nécessite que la lecture de la page de test. Cette fonction, disponible pour divers grammages de papier, permet d'obtenir une qualité...
  • Page 65: Opération Facile Pour Régler La Position D'image

    Opération facile pour régler la position d'image Les positions d'image peuvent être facilement réglées sur cette machine. Il faut simplement mesurer les repères sur la page de test puis saisir ces valeurs sur l'afficheur tactile. Une fois la saisie terminée, la machine règlera automatiquement les positions d'image.
  • Page 66: Conventions Adoptées

    Mise sous tension..........23 Contact avec le revendeur agréé Canon local ....43 Fermeture de la machine .
  • Page 67: Touches Et Boutons Utilisés Dans Ce Guide

    Boutons sur l'écran de l'ordinateur : [Nom du bouton] [OK], [Ajouter], [Annuler] Illustrations utilisées dans ce guide Les illustrations fournies dans ce guide représentent une machine imagePRESS C10000VP équipée des équipements optionnels suivants : le Lecteur Couleur recto verso-K1, le Panneau de configuration-F1et le Module de Finition P.A.C.-AN2 Rendez-vous sur canon.com/oip-manual...
  • Page 68: Consignes De Sécurité Importantes

    ARRÊT et débrancher la fiche d'alimentation de la prise secteur. Contacter ensuite le revendeur agréé Canon local. ATTENTION Ne pas placer la machine sur un support instable Éviter d'installer l'appareil à haute altitude, à savoir à...
  • Page 69 Consignes de sécurité importantes A côté d'un récepteur d'ondes hertziennes (télévision, radio, équipements électroniques similaires) La machine risque de provoquer des interférences. Prévoir une bonne distance et un branchement sur circuit électrique séparé. IMPORTANT Ne pas placer la machine à un endroit présentant dans une pièce peu aérée ou en cas de réalisation d'un l'une des caractéristiques suivantes grand nombre de copies.
  • Page 70: Prévoir Une Surface Suffisante

    Prévoir une surface suffisante Il convient de prévoir suffisamment d'espace de part et d'autre de la machine pour permettre son utilisation dans de bonnes conditions. 800 mm ou plus 500 mm ou plus 500 mm 4,851 mm 500 mm ou plus ou plus Si les produits Module de Finition-AN1, Lecteur Couleur recto verso-K1, Panneau de configuration-F1et Magasin Papier de POD-D1 sont installés.
  • Page 71: Alimentation Électrique

    Consignes de sécurité importantes ▀ Alimentation électrique Brancher la machine dans une prise de 380 à 415 V CA, 18 A ou supérieur. AVERTISSEMENT • Ne pas utiliser d'alimentation autre que celle • Ne pas brancher ni débrancher la fiche du cordon spécifiée car il y aurait sinon danger d'incendie ou avec des mains humides car cela pourrait provoquer d'électrocution.
  • Page 72: Manipulation

    Contacter composants électriques internes, il y aurait danger ensuite le revendeur agréé Canon local. L'utilisation d'incendie ou d'électrocution. prolongée de la machine dans cet état pourrait •...
  • Page 73 Consignes de sécurité importantes Touche Économie d’énergie (uniquement pour les • La machine est équipée d'éléments à haute tension. produits avec une touche Économie d’énergie) Ne pas toucher aux éléments étiquetés et aux pièces environnantes en retirant le papier bloqué ou en •...
  • Page 74 Laser Le rayonnement laser peut être dangereux. Le système optique étant conçu de sorte que les rayonnements émis demeurent captifs des capots de protection et des portes externes, à aucun moment du cycle de fonctionnement le faisceau laser ne risque de rayonner hors de la machine. Lire les remarques et instructions qui suivent concernant la sécurité.
  • Page 75: Transport De La Machine

    Si la machine a besoin d'être déplacée sur une longue distance, contacter le revendeur agréé Canon local • Ne pas secouer la machine ni lui faire subir de chocs. avant de le faire. Ne pas tenter de déplacer la machine •...
  • Page 76: Entretien Et Inspections

    ▀ Entretien et inspections Nettoyer la machine régulièrement. Elle risque de ne pas fonctionner correctement si elle est poussière. S'assurer de lire les consignes ci-dessous lors du nettoyage de la machine. AVERTISSEMENT • Lors du nettoyage de la machine, commencer •...
  • Page 77: Consommables

    Consignes de sécurité importantes ▀ Consommables AVERTISSEMENT • Si, par mégarde, vous renversez de l'encre, prenez • Ne pas brûler ou jeter les cartouches de toner au feu. soin d'essuyer les gouttes d'encre à l'aide d'un Ne pas stocker les cartouches de toner à proximité chiffon doux et humide de manière à...
  • Page 78: Symboles Relatifs À La Sécurité

    ▀ Symboles relatifs à la sécurité Commutateur d’alimentation : position “MARCHE” Commutateur d’alimentation : position “ARRÊT” Commutateur d’alimentation : position “VEILLE” Commutateur à poussoir “MARCHE” “ARRÊT” Prise de protection de mise à la terre Tension dangereuse à l’intérieur. Ne pas ouvrir les capots, sauf instructions contraires. ATTENTION : surface chaude.
  • Page 79: Nomenclature

    Nomenclature Cette section présente les noms et les fonctions de tous les éléments de la machine. Les touches et l'affichage du panneau de commande sont également présentés. Lire cette section pour utiliser correctement les différentes fonctions de la machine. "Produits en option" dans le Guide de l'utilisateur ▀...
  • Page 80: Vue Interne (Moteur D'impression)

    ▀ Vue interne (Moteur d'impression) Cartouche de toner Bouton de test Ouvrir le capot pour remplacer la cartouche de Situé à l'arrière de l'unité d'alimentation électrique. toner. Appuyer sur ce bouton pour tester le disjoncteur de manière périodique. CTI (Courroie de transfert intermédiaire) Disjoncteur Transfère le toner au papier.
  • Page 81: Vue Interne (Poste De Fixation)

    Nomenclature ▀ Vue interne (Poste de fixation) Ensemble de fixation principal Module de retournement Fixe le toner qui a été transféré sur le papier. Retirer Retourne le papier et le renvoie vers le moteur l'unité de fixation principale pour dégager un d'impression lors de l'impression recto-verso.
  • Page 82: Panneau De Commande (Panneau De Configuration-F1)

    Appuyer sur cette touche pour effacer les erreurs les instructions s'affichant sur l'afficheur tactile. de saisie. Lorsque ce témoin s'allume en rouge, contacter le revendeur agréé Canon local. Témoin d'alimentation Touche Réglages/Enregistrement S'allume lorsque la machine est sous tension. Appuyer sur cette touche pour mémoriser ou Styleur spécifier des réglages.
  • Page 83: Configuration Du Mode Économie D'énergie/Veille Pour Réduire La Consommation Électrique

    Nomenclature Touche Restauration Touche Suivi statut/Annulation Appuyer sur cette touche pour rétablir les réglages Appuyer sur cette touche pour vérifier le statut des standard de la machine. tâches ou pour annuler des tâches d'impression. Il est également possible de vérifier le statut de la Touche ID (Log In/Out) machine, notamment la quantité...
  • Page 84: Ecran Suivi Statut/Annulation

    Ecran Suivi statut/Annulation Si l'utilisateur appuie sur la touche , l'écran Suivi statut/Annulation s'affiche dans lequel il peut vérifier le statut des tâches et des consommables. Grâce aux informations indiquées telles que la durée d'exécution de la tâche en cours ou le nombre de feuilles de papier restantes, l'utilisateur peut imprimer en toute fluidité sans interruption. Situations utiles •...
  • Page 85: Mise Sous Tension De La Machine

    Mise sous tension de la machine Cette section explique comment mettre la machine sous tension. ▀ Mise sous tension S'assurer que la fiche du cordon d'alimentation est bien enfichée dans la prise secteur et que le disjoncteur est allumé. Ouvrir le cache de l'interrupteur principal. Positionner l'interrupteur principal sur "|".
  • Page 86: Fermeture De La Machine

    ▀ Fermeture de la machine Ne pas mettre hors tension la machine dans les situations ci-dessous • Pendant l'utilisation de la fonction I-Fax • A l'affichage du message <Sauvegarde données mém. depuis interf. util. dist...> • Pendant l'utilisation de la fonction de lecture ou d'impression Appuyer sur Appuyer sur [Fermeture].
  • Page 87: Chargement Du Papier

    Chargement du papier Charger le papier en suivant la procédure ci-dessous. Dans cette section, le format de papier personnalisé A4 est utilisé comme exemple. Confirmer les types de papier pouvant être chargés. Confirmation "Papier disponible", page 25 Mémoriser tous les types de papier à utiliser. Préparation "Mémorisation des types de papier dans la base de données papier", page 27 Charger le papier dans le magasin papier.
  • Page 88: Magasin Papier De L'unité Principale

    Magasin papier de l'unité principale Capacité Magasins de gauche et de droite : 1 000 feuilles (80 g/m ) chacun Type de papier Fin 1 à 2, Ordinaire, Epais 1 à 8, Couleur, Recyclé 1 à 3, Préperforé 1 à 2, Transparent, Film transparent, Film translucide, Etiquettes, Onglet 1 à...
  • Page 89: Mémorisation Des Types De Papier Dans La Base De

    Chargement du papier ▀ Mémorisation des types de papier dans la base de données papier Mémoriser tous les types de papier à utiliser avec cette machine. Il est possible de mémoriser les types de papier en les sélectionnant dans la base de données papier. REMARQUE Cette étape est inutile si le type de papier chargé...
  • Page 90: Chargement Du Papier Dans Le Magasin Papier

    ▀ Chargement du papier dans le magasin papier Enregistrer le format de papier pour le magasin papier dans [Réglages papier] dans [Préférences] (Réglages/ Enregistrement). "Réglages/Enregistrement" > "Préférences" > "Mémorisation du type et du format de papier d'une source d'alimentation" dans le Guide de l'utilisateur Ouvrir le magasin papier.
  • Page 91 Chargement du papier Ajuster la position des plaques d'ajustement du format pour qu'elles soient alignées sur le papier. Régler le papier du format cible à environ 10 mm de hauteur. Faire glisser les plaques d'ajustement du format (avant) et les plaques d'ajustement du format (arrière) pour qu'elles s'adaptent au format de papier.
  • Page 92 Modifier la plaque de format du magasin papier pour s'adapter au nouveau format de papier. Repousser doucement le magasin papier dans son logement, jusqu'à ce qu'un déclic se fasse entendre. • Le dispositif élévateur interne s'élève automatiquement, et prépare le magasin papier pour l'impression. ATTENTION Lors du retour du magasin papier à...
  • Page 93: Sélection Des Types De Papier Dans La Base De

    Chargement du papier ▀ Sélection des types de papier dans la base de données papier Sélectionner le type de papier chargé dans la base de données papier. Appuyer sur Appuyer sur [Préférences]  [Réglages papier]  [Réglages papier]. Sélectionner le magasin papier qui contient le papier chargé...
  • Page 94 Confirmer que le type et le format de papier sélectionnés s'affichent sous <Détails du papier sélectionné>  appuyer sur [OK].
  • Page 95: Nettoyage Et Maintenance

    Nettoyage et maintenance Pour maintenir son fonctionnement optimal, il est conseillé de nettoyer et de vérifier la machine régulièrement. ▀ Nettoyage de la vitre d'exposition Si les originaux ne peuvent pas être lus correctement, suivre la procédure de nettoyage ci-dessous. Nettoyer à l'aide d'un chiffon humecté...
  • Page 96: Nettoyage Du Chargeur

    ▀ Nettoyage du chargeur Si les originaux prélevés du chargeur deviennent sales, suivre la procédure de nettoyage ci-dessous. Nettoyer à l'aide d'un chiffon humecté d'eau et essuyer avec un chiffon doux et sec. Utiliser le chiffon de nettoyage de la vitre fourni pour effectuer un nettoyage simple.
  • Page 97: Nettoyage Automatique Du Chargeur

    Nettoyage et maintenance ▀ Nettoyage automatique du chargeur Si les originaux prélevés du chargeur deviennent sales, suivre la procédure ci-dessous. Introduire 10 feuilles vierges dans le chargeur. • Utiliser du papier ordinaire A4. Appuyer sur Appuyer sur [Réglage/Maintenance]  [Maintenance]  [Nettoyer chargeur]. Appuyer sur [Début].
  • Page 98: Nettoyage Du Rouleau De Fixation

    épais imprimé, suivre la procédure ci-dessous. IMPORTANT Cette fonction est affichée uniquement si les réglages sont mis à disposition par le revendeur agréé Canon local. Même si cette fonction est affichée, n'autoriser personne à modifier les réglages, à l'exception du gestionnaire de système.
  • Page 99: Inspection Du Disjoncteur

    2. Si la molette du disjoncteur ne se met pas en position d'arrêt, même après avoir réalisé la procédure ci-dessus deux ou trois fois, contacter le revendeur Canon agréé local. Tourner la molette du disjoncteur entièrement vers le bas,...
  • Page 100 Placer la molette du disjoncteur en position de marche (côté "|"). Mettre l'interrupteur principal sur Marche.
  • Page 101: Consommables

    Consommables Les consommables suivants sont disponibles pour cette machine. Pour plus d'informations, contacter le revendeur Canon agréé. Pour plus d'informations sur l'utilisation et le stockage des consommables, voir la section "Consommables", page 15. Papier recommandé Outre le papier ordinaire, d'autres supports sont disponibles tels que du papier recyclé, du papier couleur, des transparents/films transparents (recommandés pour cette machine), des films translucides (recommandés pour cette...
  • Page 102: Cartouche D'agrafes Dans L'ensemble D'agrafage

    Agrafes-P1 Consommables Canon Canon ne cesse de proposer des innovations technologiques en ce qui concerne les toners, cartouches et pièces fabriqués par Canon, spécialement conçus pour être utilisés sur les machines multifonctions de Canon. Les nouvelles technologies avancées de Canon permettent d'obtenir des performances et des volumes d'impression optimaux, ainsi que des tirages de qualité.
  • Page 103: Dépannage

    Dépannage Cette section explique comment résoudre les problèmes en cas de bourrages papier fréquents ou de l'affichage de messages d'erreur. Pour plus d'informations sur les procédures détaillées et les précautions à prendre, voir le Guide de l'utilisateur. "Résolution des problèmes" dans le Guide de l'utilisateur ▀...
  • Page 104: Lorsqu'un Message D'erreur S'affiche

    En cas de dysfonctionnement ou si la machine ne fonctionne pas normalement, un écran illustré à droite s'affiche. Si la machine ne peut pas fonctionner normalement après la mise hors puis sous tension, contacter le revendeur agréé Canon local. "Contact avec le revendeur agréé Canon local", page 43 Si une clé...
  • Page 105: Contact Avec Le Revendeur Agréé Canon Local

    • Ecrire le code d'erreur "EXXXXX-XXXX". Mettre l'interrupteur principal sur Arrêt. • Appuyer sur [Fermeture] sur l'afficheur tactile. Débrancher la fiche du cordon d'alimentation de la prise secteur. Confirmer le nom de produit, puis contacter le revendeur agréé Canon local.
  • Page 106: Si La Machine Ne Peut Pas Être Mise Sous Tension

    Si la machine ne peut pas être mise sous tension Si la machine ne fonctionne pas après sa mise sous tension, vérifier le disjoncteur. Si le disjoncteur est en position d'arrêt, essayer de le placer vous-même en position de marche, puis contacter le revendeur agréé Canon local.
  • Page 107: Spécifications

    Module dos carré collé-E1 • Perfo Pro Multi-Fonction-A1 ▀ Machine proprement dite Rubrique Spécifications Canon imagePRESS C10000VP/C8000VP Type Lecteur et imprimante séparés, type de console Mode couleur pris en charge Quadrichromie Résolution d'écriture 2 400 ppp x 2 400 ppp...
  • Page 108 Rubrique Spécifications Cadence d'impression Direct (feuille/minute) (Papier ordinaire (80 g/m imagePRESS imagePRESS C10000VP C8000VP 330 mm x 483 mm 320 mm x 450 mm (SRA3) 305 mm x 457 mm La cadence d'impression peut varier en fonction du type de papier, du format de papier et de la méthode d'envoi définis.
  • Page 109: Lecteur Couleur Recto Verso-K1

    Spécifications ▀ Lecteur Couleur recto verso-K1 Rubrique Spécifications Type Imprimante séparée, alimentation continue (Chargeur), non continue (Chargeur) Résolution de lecture 600 ppp x 600 ppp Nombre de tonalités Originaux acceptés Feuille, livre, objets à trois dimensions (2 kg maximum) Format et grammage des originaux Format : A3, A4, A4R, A5 et A5R Grammage :...
  • Page 110: Magasin Grande Capacité

    ▀ Magasin grande capacité A3-C1 Rubrique Spécifications Format/Grammage/Type de papier Format : A3, A4R, A4, A5, 330 mm x 483 mm, 320 mm x 450 mm (SRA3), 305 mm x 457 mm, Format personnalisé (139,7 mm x 182,0 mm à 330,2 mm x 487,7 mm) Grammage : 60 g/m à...
  • Page 111: Module D'intercalaires À Onglet -E1

    Spécifications Rubrique Spécifications Surface nécessaire y compris la machine 4 378 mm x 1 152 mm (L x P) (Si les produits Lecteur Couleur recto verso-K1, Panneau de configuration-F1, et Module de Finition-AN1 (ou Module de Finition P.A.C.-AN2) sont installés) ▀...
  • Page 112: Module De Pli En C Et En Z-J1

    Rubrique Spécifications Capacité 200 feuilles x 2 (80 g/m Alimentation électrique/Consommation 100-240 V CA, 50/60 Hz, 1,0 A/120 W ou moins électrique maximale Dimensions (L x P x H) 746 mm x 793 mm x 1 407 mm (kit de contrôleur optionnel d'insertion A1 inclus) Poids Environ 61 kg Surface nécessaire y compris la machine...
  • Page 113: Module De Finition-An1

    Spécifications ▀ Module de Finition-AN1 Rubrique Spécifications Format/Grammage/Type de papier Format : <Réceptacle supérieur> A3, A4R, A4, A5, 330 mm x 483 mm, 320 mm x 450 mm (SRA3), 305 mm x 457 mm, Format personnalisé (148,0 mm x 182,0 mm à 330,2 mm x 762,0 mm) <Réceptacle inférieur>...
  • Page 114 Rubrique Spécifications Capacité par réceptacle <Réceptacle inférieur> Pas d'agrafage Pas de tri (Pile normale/Pile mixte) Si l'une des conditions ci-dessous est atteinte, le mouvement s'arrête ; Format A4 : 285 mm (2 000 feuilles) Format A4R/A3/330 mm x 483 mm/320 mm x 450 mm (SRA3) : 147 mm (1 000 feuilles) Pli en Z : A3 : 10 feuilles pour chaque jeu ou 30 feuilles Pli simple : A4 : 50 feuilles * En cas de mode Pile gros volume...
  • Page 115 Spécifications Rubrique Spécifications Capacité d'agrafage maximum/Taille Format A4 : d'agrafes disponible Papier ordinaire ; 60 g/m à 80 g/m : 100 feuilles 80,1 g/m à 81,4 g/m : 80 feuilles 81,5 g/m à 105 g/m : 60 feuilles 105,1 g/m à...
  • Page 116 ▀ Module de Finition P.A.C.-AN2 Rubrique Spécifications Format/Grammage/Type de papier Module de finition Format : <Réceptacle supérieur> A3, A4R, A4, A5, 330 mm x 483 mm, 320 mm x 450 mm (SRA3), 305 mm x 457 mm, Format personnalisé (148,0 mm x 182,0 mm à 330,2 mm x 762,0 mm) <Réceptacle inférieur>...
  • Page 117 Spécifications Rubrique Spécifications Capacité/taille disponible de la piqûre à Piqûre à cheval : cheval 25 feuilles (80 g/m ) (y compris une page de garde) Pli cavalier : 5 feuilles (80 g/m Format : 330 mm x 483 mm, 320 mm x 450 mm (SRA3), 305 mm x 457 mm, A3, A4R et Format personnalisé...
  • Page 118: Fonction D'envoi

    ▀ Fonction d'envoi Fonctions de lecture • Rubrique Spécifications Protocole de communication FTP (TCP/IP), SMB (TCP/IP), WebDAV Format de données TIFF, JPEG, PDF, XPS, OOXML (PowerPoint) Résolution 100 x 100 ppp, 150 x 150 ppp, 200 x 100 ppp, 200 x 200 ppp, 200 x 400 ppp, 300 x 300 ppp, 400 x 400 ppp, 600 x 600 ppp Environnement système Windows Server 2003 R2 SP2, Windows Vista SP2, Windows Server 2008 R2, Windows 7,...
  • Page 119: Environnement Réseau

    Spécifications Rubrique Spécifications Format original E-mail A3, A4, A4R, A5, A5R I-Fax A3, A4, A4R, A5* , A5R* Logiciel de serveur Microsoft Exchange 2003 SP2, Microsoft Exchange 2007 SP3, Sendmail 8.14.4, Microsoft Exchange 2010, Lotus Domino R7.0 Autres Recherche d'un destinataire au moyen du serveur LDAP, prévisualisation Fonctions PDF/XPS/OOXML en option (E-mail uniquement) Compact, Tracer &...
  • Page 120: Nom Du Produit

    Conformément aux règlements en matière de sécurité, le nom du produit doit être déposé. Dans certaines des zones de commercialisation du produit, il se peut que le nom déposé soit celui indiqué entre parenthèses ci-dessous. imagePRESS C10000VP/C8000VP (F164400) Exigences CEM de la directive européenne Cet équipement est conforme aux principales exigences CEM de la directive européenne.
  • Page 121 écrit préalable de la société Canon Inc. Ce produit comprend des logiciels et/ou des modules logiciels dont la licence appartient à Canon Inc. ou lui est cédée par un tiers. L'utilisation et la distribution de ces logiciels et/ou modules sont soumises aux dispositions (a) à...
  • Page 122: Restrictions À L'usage De Votre Produit Et À L'utilisation Des Images

    Restrictions à l'usage de votre produit et à l'utilisation des images L'utilisation de votre produit pour numériser, imprimer ou reproduire de quelque manière que ce soit certains documents, ainsi que l'utilisation des images numérisées, imprimées ou reproduites par votre produit, peuvent être interdites par la loi et peuvent engager votre responsabilité...
  • Page 123 Marques "MEAP", marque de commerce détenue par CANON Inc., désigne une "plate-forme applicative" destinée aux imprimantes multifonctions et monofonctions Canon. Ce produit contient la technologie Universal Font Scaling Technology ou UFST ® sous licence de Monotype Imaging, Inc. UFST ®...
  • Page 124 Le logo PDF est une marque ou une marque déposée d'Adobe Systems Incorporated aux Etats-Unis et dans d'autres pays. Copyright © 2008 Adobe Systems Incorporated. All rights reserved. Protected by U.S. Patents 6,185,684; 6,205,549; 7,213,269; 7,272,628; 7,278,168; Patents pending in the U.S. and other countries. All instances of the name PostScript in the text are references to the PostScript language as defined by Adobe Systems Incorporated unless otherwise stated.
  • Page 125 Logiciel Tiers Ce produit Canon (le « PRODUIT ») comprend des modules logiciels tiers. L’utilisation et la distribution de ces modules logiciels, y compris les mises à jour de ces modules logiciels (collectivement, le « LOGICIEL »), sont sujettes aux conditions de licence (1) à...
  • Page 126 C10000VP/C8000VP Praktische Merkmale Automatische Gradationsjustage für verschiedene Papiertypen Die Funktion Gradation automatisch justieren justiert die Gradation, Dichte und den Farbton von Bildern, und erfordert nur, dass die Testseite scannen. Diese Funktion kann für verschiedene Papiergewichte verwendet werden, so dass ein Druckergebnis mit hoher Qualität auf verschiedenen Papiertypen erzielt werden kann.
  • Page 127 Leichte Bedienung zum Justieren der Bildposition Sie können die Bildpositionen mit dieser Maschine leicht einstellen. Sie müssen dazu nur die Markierungen auf der Testseite messen und dann die gemessenen Werte auf der Touch-Panel-Anzeige eingeben. Danach stellt die Maschine die Bildpositionen automatisch ein. Sie können die gesamte Einstellung einfach vornehmen, indem Sie Werte für jede Kante an den Vorder- und Hinterseiten auf einem einzigen Bildschirm eingeben.
  • Page 128 Inhalt Herzlichen Glückwunsch zum Kauf dieses Canon-Produkts. Lesen Sie diese Anleitung sorgfältig durch, bevor Sie mit dem System arbeiten. So können Sie sich mit seinen Möglichkeiten vertraut machen und seine vielfältigen Funktionen optimal nutzen. Weitere Informationen zu den Einzelheiten der Einstellungen der Funktionen finden Sie in der Anwenderhandbuch.
  • Page 129: In Diesem Handbuch Verwendete Abbildungen

    In diesem Handbuch verwendete Abbildungen Die Illustrationen in diesem Handbuch sind diejenigen, die erscheinen, wenn an dem imagePRESS C10000VP die folgende Zusatzausstattung angeschlossen ist: Duplex Scanner + Originaleinzug D-ADF K1, Control Panel F1 und Finisher AN2 . Sie können auf die Website canon.com/oip-manual zugreifen,...
  • Page 130: Hinweise Zum Sicheren Betrieb

    Sie sofort den Hauptschalter auf AUS und ziehen den Netzstecker von der Netzsteckdose ab. Dann nehmen Sie bitte Kontakt zu Ihrem Canon-Vertriebspartner auf. VORSICHT Bitte vermeiden Sie die Installation unter instabilen Stellen Sie das System nicht in Höhenlagen ab ca.
  • Page 131 Hinweise zum sicheren Betrieb Bitte installieren Sie das System nicht in der Nähe von Fernsehgeräten, Radios oder anderen elektronischen Geräten. Das System kann den Empfang des Ton- und Bildsignals stören. Bitte schließen Sie die Einheit an eine separate Steckdose an und lassen so viel Abstand wie möglich zu anderen elektronischen Geräten.
  • Page 132: Der Platzbedarf Des Systems

    Der Platzbedarf des Systems Bitte lassen Sie an allen Seiten des Systems genügend Platz, um ausreichende Bewegungsfreiheit und Belüftung zur Wand hin zu gewährleisten. 800 mm oder mehr 500 mm oder mehr 500 mm 4,851 mm 500 mm oder mehr oder mehr Wenn der Finisher AN1, Duplex Scanner + Originaleinzug D-ADF K1, Control Panel F1 und POD Papiermagazin D1 angeschlossen sind.
  • Page 133: Stromversorgung

    Hinweise zum sicheren Betrieb ▀ Stromversorgung Schließen Sie die Maschine an eine Steckdose an, die 380 bis 415 V Wechselstrom mit 18 A oder mehr liefert. WARNUNG • Wählen Sie eine Stromverbindung, die den hier • Bitte schließen Sie das System nicht über eine genannten Spezifikationen entspricht;...
  • Page 134: Umgang

    Sprays in Kontakt mit den elektrischen Teilen im Sie den Netzstecker. Dann nehmen Sie bitte Kontakt zu System kommt, kann ein Brand oder ein elektrischer Ihrem Canon Servicepartner auf. Wenn Sie das System Schlag verursacht werden. in diesem Zustand weiter verwenden, können Sie einen •...
  • Page 135 Hinweise zum sicheren Betrieb Energiespartaste (nur bei Produkten mit einer • Es gibt im Inneren des Systems einige Bereiche, die Energiespartaste) unter Hochspannung stehen. Wenn Sie Papierstaus entfernen oder andere Arbeiten im Systeminneren • Wenn Sie längere Zeit nicht am System arbeiten (z. ausführen, berühren Sie die markierten B.
  • Page 136 Laserstrahl Der Laserstrahl ist schädlich für den menschlichen Körper. Da die Strahlung im System vollständig durch Schutzgehäuse und Abdeckungen abgeschirmt ist, kann er während der normalen Bedienung durch den Anwender in keiner Phase nach außen gelangen. Lesen Sie zu Ihrer Sicherheit folgende Informationen und Hinweise. •...
  • Page 137 Wenn Sie das System über eine große Entfernung transportieren wollen, benachrichtigen Sie Ihren • Schütteln Sie das System nicht und schützen Sie es autorisierten Canon Vertriebspartner. Versuchen Sie vor starken Stößen. nicht, das System selbst zu transportieren. • Öffnen Sie nicht gewaltsam Abdeckungen und andere Systemteile.
  • Page 138: Wartung Und Inspektion

    ▀ Wartung und Inspektion Reinigen Sie dieses System regelmäßig. Das System arbeitet möglicherweise nicht richtig, wenn sich Staub ansammelt. Vergewissern Sie sich, dass Sie Folgendes beim Reinigen des Systems beachten. WARNUNG • Wenn Sie die Einheit reinigen wollen, schalten Sie sie •...
  • Page 139: Verbrauchsmaterialien

    Hinweise zum sicheren Betrieb ▀ Verbrauchsmaterialien WARNUNG • Wischen Sie versehentlich verschütteten Toner mit • Bitte verbrennen Sie Tonerpatronen nicht in offenem einem feuchten, weichen Tuch auf. Vermeiden Sie Feuer. Lagern Sie Tonerpatronen nie in der Nähe von es, den Tonerstaub einzuatmen. Verwenden Sie zum offenen Flammen.
  • Page 140: Sicherheitsbedingte Symbole

    ▀ Sicherheitsbedingte Symbole Netzschalter: Position “EIN” Netzschalter: Position “AUS” Netzschalter: Position “STANDBY” Druckschalter ”EIN” ”AUS” Schutzerdungsschiene Gefährliche Spannung. Abdeckungen nur nach Anleitung entfernen. VORSICHT: Heiße Oberfläche. Nicht berühren. Gerät der Klasse II Bewegliche Teile: Halten Sie Körperteile von den beweglichen Teilen fern HINWEIS Einige der zuvor angeführten Symbole werden eventuell anhängig vom Produkt nicht angebracht sein.
  • Page 141: Teile Und Funktionen

    Teile und Funktionen In diesem Abschnitt werden die Namen und Funktionen der Teile des Systems beschrieben. Die Bedientasten und Anzeigen auf dem Bedienfeld werden ebenfalls beschrieben. Lesen Sie diesen Abschnitt gründlich durch, um problemlose Verwendung der verschiedenen Funktionen des Systems zu erlauben. "Zusatzprodukte"...
  • Page 142: Innenansicht (Kennzeichnungsmaschine)

    ▀ Innenansicht (Kennzeichnungsmaschine) Tonerpatrone Testknopf Öffnen Sie diese Abdeckung zum Austauschen von Befindet sich auf der Rückseite des Netzteils. Durch Tonerpatrone. Betätigen dieses Knopfes testen Sie in Abständen den Schutzschalter. ITB (Intermediate Transfer Belt) Schutzschalter Überträgt den Toner auf das Papier. Befindet sich auf der Rückseite des Netzteils.
  • Page 143: Innenansicht (Fixierstation)

    Teile und Funktionen ▀ Innenansicht (Fixierstation) Primäre Fixiervorrichtung Umlenkeinheit Fixiert Toner, der auf Papier übertragen wurde. Dreht Papier um und sendet es zurück an die Ziehen Sie die Fixiertransporteinheit heraus, um Kennzeichnungsmaschine für den beidseitigen einen Papierstau innerhalb der Vorrichtung zu Druck.
  • Page 144: Bedienfeld (Control Panel F1) Option

    Fehleranzeige blinkt, folgen Sie den Anleitungen eingegebene Werte oder Zeichen löschen. auf dem Sensordisplay. Wenn die Fehleranzeige ständig rot leuchtet, wenden Sie sich an Ihren Bereitschaftsanzeige Canon-Vertriebspartner. Diese Anzeige leuchtet, wenn das System Taste Einstellungen/Speicherung eingeschaltet ist. Zum Speichern und Festlegen von Einstellungen Editierstift drücken.
  • Page 145 Teile und Funktionen Rückstelltaste Taste Status Monitor/Abbruch Durch Betätigen dieser Taste kehren Sie zu den Mit dieser Taste können Sie den Jobstatus prüfen Grundeinstellungen zurück. oder Druckaufträge abbrechen. Drücken Sie diese Taste ebenfalls, um den Status des Systems zu ID-Taste (Log In/Out) überprüfen, wie beispielsweise den restlichen Zum Ein-/Ausloggen drücken, wenn ein Login Papiervorrat.
  • Page 146: Bildschirm Status Monitor/Abbruch

    Bildschirm Status Monitor/Abbruch Durch Betätigen der Taste rufen Sie das Display Status Monitor/Abbruch auf und können dort den Status von Aufträgen und Ressourcen auf diesem Bildschirm bestätigen. Indem Sie Informationen erhalten, wie die Fertigstellungszeit des aktuellen Auftrags oder die restliche Papiermenge, können Sie glatten Druckbetrieb ohne Unterbrechungen sicherstellen.
  • Page 147: Einschalten Des Systems Am Hauptschalter

    Einschalten des Systems am Hauptschalter Hier finden Sie Informationen zum Einschalten der Stromzufuhr für das System. ▀ Einschalten der Hauptstromversorgung Vergewissern Sie sich, dass der Netzstecker vollständig in der Netzsteckdose ist, und dass der Schutzschalter auf EIN gestellt ist. Öffnen Sie die Hauptschalterabdeckung. Kippen Sie den Hauptschalter in die Stellung "|".
  • Page 148: Das Ausschalten Der Einheit

    ▀ Das Ausschalten der Einheit Schalten Sie die Netzstromversorgung in den folgenden Situationen nicht AUS • Bei Verwendung der I-Fax-Funktion • Wenn die Meldung <Gespeicherte Daten über Remote UI wieder herstellen...> angezeigt wird • Bei der Verwendung der Scan- oder Druckfunktion Betätigen Sie die Taste Betätigen Sie die Taste [Abschalten].
  • Page 149: Einlegen Von Papier

    Einlegen von Papier Legen Sie Papier wie unten beschrieben ein. In diesem Abschnitt wird Papier des Formats A4 anwenderdefiniert als Beispiel genommen. Bestätigen Sie die Papiertypen, die eingelegt werden können. Bestätigung "Geeignetes Papier" auf S. 25 Speichern Sie alle Papiertypen, die verwendet werden sollen. Vorbereitung "Speichern von Papiertypen in der Datenbank Papier"...
  • Page 150 Papierfach der Haupteinheit Papier- Linke und rechte Fächer: Jeweils 1.000 Blatt (80 g/m Kapazität Papiertyp Dünn 1 bis 2, Normal, Schwer 1 bis 8, Farbig, Recycling 1 bis 3, Vorgelocht 1 bis 2, Transparent, Klarsichtfolie, durchscheinende Folie, Etiketten, Register 1 bis 2, Bond, einseitig dünn beschichtet, einseitig beschichtet 1 bis 9, zweiseitig dünn beschichtet, zweiseitig beschichtet 1 bis 9, Matt dünn beschichtet, Matt beschichtet 1 bis 9, Strukturiert 1 bis 7 und Pergament 1 bis 2 Papierformat...
  • Page 151: Speichern Von Papiertypen In Der Datenbank Papier

    Einlegen von Papier ▀ Speichern von Papiertypen in der Datenbank Papier Speichern Sie alle Papiertypen, die Sie mit diesem System verwenden möchten. Sie können Papiertypen speichern, indem Sie Papiertypen aus der Datenbank Papier wählen. HINWEIS Wenn Sie Papier einlegen, das bereits im System gespeichert ist, wie Normalpapier oder Recycling-Papier, ist dieser Schritt nicht erforderlich.
  • Page 152: Einlegen Von Papier In Das Papierfach

    ▀ Einlegen von Papier in das Papierfach Registrieren Sie die Papiergröße für das Papierfach unter [Einstellungen Papier] in [Präferenzen] (Einstell./ Speicherung). "Einstellungen/Speicherung" > "Präferenzen" > "Einstellungen Papier" > "Speicherung der Papiergröße und der Papierquelle" in der Anwenderhandbuch Öffnen Sie das Papierfach. Drücken Sie die Taste auf dem Papierfach.
  • Page 153 Einlegen von Papier Richten Sie die Position der Größenänderungsplatten passend zum Papier aus. Setzen Sie das Papier der Zielgröße auf ca. 10 mm Höhe ein. Schieben Sie die Größenänderungsplatten (vorne) und die Größenänderungsplatten (hinten) passend zur Papiergröße. WICHTIG • Drücken Sie nicht gewaltsam auf die Papierhalteplatte beim Laden des Papiers ins Papierfach.
  • Page 154 Ändern Sie die Größenplatte des Papierfachs passend zur neuen Papiergröße. Schieben Sie das Papierfach wieder vorsichtig in die Maschine, bis es mit einem Klicken einrastet. • Der innere Heber bewegt sich automatisch nach oben und bereitet das Papierfach zum Drucken vor. VORSICHT Wenn Sie das Papierfach in seine Originalposition zurückschieben, achten Sie darauf, sich nicht die Finger einzuklemmen, um sich...
  • Page 155: Wählen Von Papiertypen Aus Der Datenbank Papier

    Einlegen von Papier ▀ Wählen von Papiertypen aus der Datenbank Papier Wählen Sie den eingelegten Papiertyp aus der Datenbank Papier. Betätigen Sie die Taste Betätigen Sie die Taste [Präferenzen]  [Einstellungen Papier]  [Einstellungen Papier]. Wählen Sie das Papierfach, in das Sie Papier eingelegt haben ...
  • Page 156 Bestätigen Sie, dass der gewählte Papiertyp und die Größe in <Details des gewählten Papiers> erscheint  Berühren Sie die Taste [OK].
  • Page 157: Reinigung Und Wartung

    Reinigung und Wartung Für optimale Funktion des Systems empfehlen wir, das System regelmäßig zu reinigen und zu prüfen. ▀ Reinigung des Vorlagenglases Wenn Originale nicht richtig gescannt werden können, führen Sie das unten beschriebene Reinigungsverfahren aus. Reinigen Sie mit einem Tuch, das Sie vorher mit Wasser befeuchtet haben, und wischen Sie mit einem trockenen weichen Tuch nach.
  • Page 158: Reinigung Der Zufuhr

    ▀ Reinigung der Zufuhr Wenn von der Zufuhr zugeführte Originale verschmutzt werden, führen Sie das unten beschriebene Reinigungsverfahren aus. Reinigen Sie mit einem Tuch, das Sie vorher mit Wasser befeuchtet haben, und wischen Sie mit einem trockenen weichen Tuch nach. Verwenden Sie das mitgelieferte Glasreinigungstuch zur einfachen Reinigung.
  • Page 159: Automatisches Reinigen Des Einzugs

    Reinigung und Wartung ▀ Automatisches Reinigen des Einzugs Wenn von der Zufuhr zugeführte Originale verschmutzt werden, verfahren Sie wie folgt. Legen Sie 10 Blatt unbedrucktes Papier in die Zufuhr. • Verwenden Sie A4 Normalpapier. Betätigen Sie die Taste Berühren Sie nacheinander die Tasten [Justage/Wartung]  [Wartung]  [Zufuhr reinigen]. Betätigen Sie die Taste [Start].
  • Page 160: Auffrischen Des Fixierrollers

    Papier auftritt, verfahren Sie wie folgt. WICHTIG Diese Funktion wird nur dann angezeigt, wenn die Einstellungen von Ihrem lokalen Canon-Vertriebspartner zur Verfügung gestellt werden. Selbst wenn diese Funktion angezeigt wird, erlauben Sie niemandem außer dem Systemmanager, die Einstellungen zu ändern. Für weitere Informationen zum Ändern der Einstellungen kontaktieren Sie Ihren lokalen Canon-Vertriebspartner.
  • Page 161: Überprüfung Des Schutzschalters

    • Wenn der Schutzschalter nicht auf AUS gestellt ist, wiederholen Sie Schritt 2. Wenn der Schutzschalter nicht auf AUS gestellt wird, obwohl Sie das obige Verfahren zwei oder drei Mal ausgeführt haben, benachrichtigen Sie Ihren lokalen Canon- Vertriebspartner. Drehen Sie den Schutzschalter bis zum Anschlag heraus.
  • Page 162 Stellen Sie den Schutzschalter auf EIN (Seite "I"). Schalten Sie den Hauptschalter EIN.
  • Page 163: Verbrauchsmaterialien

    Canon imagePRESS Toner T02 Yellow (Gelb) Vorsicht vor gefälschten Tonern Wir weisen Sie darauf hin, dass gefälschte Canon-Toner auf dem Markt sind. Wenn Sie gefälschte Toner verwenden, können die Druckqualität und die Leistung des Systems darunter leiden. Canon ist nicht für Fehlfunktionen, Unfälle oder Schäden verantwortlich, die durch die Verwendung von gefälschten Tonern...
  • Page 164 Heftklammern P1 Original-Verbrauchsmaterialien Canon entwickelt fortlaufend technische Neuerungen für Toner, Patronen/Magazine und Teile, die von Canon gefertigt und genau auf die Verwendung in multifunktionalen Systemen von Canon abgestimmt sind. Nutzen Sie die Vorteile optimaler Druckleistungen, maximalen Druckvolumens und qualitativ hochwertiger Druckausgaben, wie sie mit Canons neuer zukunftsorientierter Technologie möglich werden.
  • Page 165: Fehlersuche

    Fehlersuche Dieser Abschnitt erläutert, wie Probleme gelöst werden, wenn häufig Papierstau auftritt oder Fehlermeldungen angezeigt werden. Weitere Informationen zu den Einzelheiten der Funktionen und Vorsichtsmaßregeln finden Sie in der Anwenderhandbuch. "Problemlösung" in der Anwenderhandbuch ▀ Beheben von Papierstaus und Heftklammernstaus Befolgen Sie beim Auftreten von Papierstaus oder Heftklammernstaus die Anleitungen auf dem Sensordisplay, um den Stau zu beseitigen.
  • Page 166: Wenn Eine Fehlermeldung Angezeigt Wird

    Display wie das rechts gezeigte. Wenn das System immer noch nicht normal funktioniert, nachdem der Hauptschalter AUS und dann EIN geschaltet wurde, wenden Sie sich an Ihren lokalen Canon- Vertriebspartner. "Kontaktaufnahme mit Ihrem Canon-Vertriebspartner" auf S.
  • Page 167: Kontaktaufnahme Mit Ihrem Canon-Vertriebspartner

    • Schreiben Sie den Fehlercode "EXXXXX-XXXX" auf. Schalten Sie den Hauptschalter AUS. • Drücken Sie [Abschalten] auf dem Sensordisplay. Ziehen Sie den Netzstecker aus der Steckdose. Bestätigen Sie den Produktnamen und nehmen Sie bitte Kontakt zu Ihrem lokalen Canon- Vertriebspartner auf.
  • Page 168: Wenn Die Hauptstromversorgung Nicht Einschaltet

    Wenn die Hauptstromversorgung nicht einschaltet Wenn das System nicht arbeiten kann, wenn die Hauptstromversorgung eingeschaltet ist, prüfen Sie den Schutzschalter. Wenn der Schutzschalter auf AUS-Stellung gestellt ist, versuchen Sie nicht, den Schutzschalter selber auf EIN zu stellen, sondern benachrichtigen Sie Ihren lokalen Canon-Vertriebspartner.
  • Page 169: Technische Daten

    Zwei-Seiten Trimmer A1 • Leim-Bindesystem E1 • Professioneller Multifunktions Puncher A1 ▀ Haupteinheit Punkt Technische Daten Name Canon imagePRESS C10000VP/C8000VP Scanner-Drucker getrennt, Konsolentyp Unterstützte Farbe Vollfarbe Auflösung zum Schreiben 2.400 dpi x 2.400 dpi Papiergewicht / Typ Rechtes/Linkes Papierfach: Gewicht: 60 g/m...
  • Page 170 Punkt Technische Daten Druckgeschwindigkeit Direkt (Blatt/Minute) (Normalpapier (80 g/m imagePRESS imagePRESS C10000VP C8000VP 330 mm x 483 mm 320 mm x 450 mm (SRA3) 305 mm x 457 mm Die Druckgeschwindigkeit kann unterschiedlich sein, je nach den Einstellungen für Papiertyp, Papierformat und dem Sendeverfahren. Beim fortlaufenden Drucken können Justierungen der Systemtemperatur oder Bildqualität bewirken, dass der Systembetrieb pausiert oder langsam wird.
  • Page 171 Technische Daten Punkt Technische Daten Größe und Gewicht der Originale Format: A3, A4, A4R, A5 und A5R Gewicht: Einseitiges Scannen: 38 g/m bis 220 g/m Doppelseitiges Scannen: 50 g/m bis 220 g/m (Schwarzweiß-Original) 64 g/m bis 220 g/m (Farb-Original) Vergrößerung Reguläres Papierformat: Gleicher Faktor: 1 : 1...
  • Page 172 ▀ POD Lite A3-Papiermagazin C1 Punkt Technische Daten Papierformat / Gewicht / Typ Format: A3, A4R, A4, A5, 330 mm x 483 mm, 320 mm x 450 mm (SRA3), 305 mm x 457 mm, anwenderdefiniertes Format (139,7 mm x 182,0 mm bis 330,2 mm x 487,7 mm) Gewicht: 60 g/m bis 350 g/m...
  • Page 173 Technische Daten Punkt Technische Daten Aufstellungsplatz einschließlich 4.378 mm x 1.152 mm Haupteinheit (B x T) (Wenn der Duplex Scanner + Originaleinzug D-ADF K1, das Control Panel F1 und der Finisher AN1 (oder der Finisher AN2) angebracht sind) ▀ Banner Tray A1 Punkt Technische Daten Papierformat / Gewicht / Typ...
  • Page 174 Punkt Technische Daten Stromversorgung / maximale 100-240 V AC, 50/60 Hz, 1,0 A/120 W oder weniger Leistungsaufnahme Abmessungen (B x T x H) 746 mm x 793 mm x 1.407 mm (Einschließlich Einsatzoptionscontroller Kit-A1) Gewicht Ca. 61 kg Aufstellungsplatz einschließlich 3.732 mm x 1.152 mm Haupteinheit (B x T) (Wenn der Duplex Scanner + Originaleinzug D-ADF K1, das Control Panel F1 und der...
  • Page 175 Technische Daten Punkt Technische Daten Aufstellungsplatz einschließlich 3.732 mm x 1.152 mm Haupteinheit (B x T) (Wenn der Duplex Scanner + Originaleinzug D-ADF K1, das Control Panel F1 und der Finisher AN1 (oder der Finisher AN2) angebracht sind) ▀ Finisher AN1 Punkt Technische Daten Papierformat / Gewicht / Typ...
  • Page 176 Punkt Technische Daten Kapazität pro Fach <Unteres Fach> Kein Heften Keine Sortierung (Normale Stapelung/gemischte Stapelung) Wenn einer der unteren Zustände erreicht wird, wird die Bewegung unterbrochen; A4 Format: 285 mm (2.000 Blatt) A4R/A3/330 mm x 483 mm/320 mm x 450 mm (SRA3) Format: 147 mm (1.000 Blatt) Z-Falz: A3: 10 Blatt pro 1 Satz oder 30 Blatt Halbfalz: A4: 50 Blatt * Im Falle eines hohen Volumenstapelmodus...
  • Page 177 Technische Daten Punkt Technische Daten Max. Heftkapazität / Verfügbare Heftgröße A4 Format: Normalpapier; 60 g/m bis 80 g/m : 100 Blatt 80,1 g/m bis 81,4 g/m : 80 Blatt 81,5 g/m bis 105 g/m : 60 Blatt 105,1 g/m bis 200 g/m : 20 Blatt Über 200 g/m : Nur Deckblatt vorne/hinten...
  • Page 178 ▀ Finisher AN2 Punkt Technische Daten Papierformat / Gewicht / Typ Finisher Format: <Oberes Fach> A3, A4R, A4, A5, 330 mm x 483 mm, 320 mm x 450 mm (SRA3), 305 mm x 457 mm, anwenderdefiniertes Format (148,0 mm x 182,0 mm bis 330,2 mm x 762,0 mm) <Unteres Fach>...
  • Page 179 Technische Daten Punkt Technische Daten Verfügbare Sattelheftungskapazität / Größe Sattelheftung: 25 Blatt (80 g/m ) (einschließlich 1 Deckblatt) Broschürenfalzung: 5 Blatt (80 g/m Format: 330 mm x 483 mm, 320 mm x 450 mm (SRA3), 305 mm x 457 mm, A3, A4R und anwenderdefiniertes Format (210,0 mm x 279,4 mm bis 330,2 mm x 487,7 mm) Deckblattgewicht: Erfordert das Papiergewicht des Hauptdokuments (mehr als 64 g/m...
  • Page 180 ▀ Sendefunktion Scanmöglichkeiten • Punkt Technische Daten Kommunikationsprotokoll FTP (TCP/IP), SMB (TCP/IP), WebDAV Datenformat TIFF, JPEG, PDF, XPS, OOXML (PowerPoint) Auflösung 100 x 100 dpi, 150 x 150 dpi, 200 x 100 dpi, 200 x 200 dpi, 200 x 400 dpi, 300 x 300 dpi, 400 x 400 dpi, 600 x 600 dpi Systemumgebung Windows Server 2003 R2 SP2, Windows Vista SP2, Windows Server 2008 R2, Windows 7,...
  • Page 181 Technische Daten Punkt Technische Daten Originalformat E-Mail A3, A4, A4R, A5, A5R I-Fax A3, A4, A4R, A5* , A5R* Server-Software Microsoft Exchange 2003 SP2, Microsoft Exchange 2007 SP3, Sendmail 8.14.4, Microsoft Exchange 2010, Lotus Domino R7.0 Andere Sucht einen Empfänger über LDAP-Server, Vorschau Optionale PDF/XPS/OOXML-Funktionen (nur E-Mail) Kompakt, Nachzeichnen und Glätten, Eingeschränkte Farbe, Verschlüsseln, OCR, Geräte-...
  • Page 182: Sicherheit Des Lasers

    Für die Sicherheitsregeln muss der Produktname registriert sein. In einigen Regionen, in denen dieses Produkt verkauft wird, können statt des hier verwendeten Namen der (die) folgende(n) Name(n) in Klammern gebräuchlich sein. imagePRESS C10000VP/C8000VP (F164400) EMV-Anforderungen der EC-Richtlinie Dieses Gerät inklusive Ausstattung erfüllt die wesentlichen EMV-Anforderungen der EC-Richtlinie. Wir erklären hiermit, dass dieses Produkt mit den EMV-Anforderungen der EC-Richtlinie zu Stromversorgungsnetzen von 400V, 50 Hz genügt, obwohl die...
  • Page 183 Umweltzeichen Blauer Engel - Information nur für Deutschland Wenn Sie mehr über Canon Produkte und den Blauen Engel erfahren wollen, gehen Sie bitte auf unsere Canon Home Page. Hier finden Sie mit dem Blauen Engel ausgezeichnete Canon Produkte und deren Nutzerinformationen.
  • Page 184 Aufzeichnen, oder durch ein System zum Speichern bzw. Abrufen von Informationen. Dieses Produkt enthält Software und/oder Softwaremodule, die von Canon Inc. lizenziert sind oder für die von Canon Inc. eine Lizenz bei Drittanbietern erworben wurde. Die Verwendung und Verteilung dieser Software und/oder Softwaremodule unterliegen den nachfolgenden Bestimmungen (a) bis (f ).
  • Page 185 Warenzeichen "MEAP" ist ein Warenzeichen der CANON Inc., das sich auf die "Anwendungsplattform" der Canon Multifunktions- und Einzelfunktionsdrucker bezieht. Dieses Produkt enthält Universal Font Scaling Technology (UFST®) unter Lizenz von Monotype Imaging, Inc. UFST® ist ein im United States Patent and Trademark Office eingetragenes Warenzeichen von Monotype Imaging, Inc., das auch in manchen Rechtsbereichen eingetragen sein kann.
  • Page 186 Das PDF-Logo ist ein Warenzeichen oder ein eingetragenes Warenzeichen von Adobe Systems Incorporated in den USA und anderen Ländern. Copyright © 2008 Adobe Systems Incorporated. All rights reserved. Protected by U.S. Patents 6,185,684; 6,205,549; 7,213,269; 7,272,628; 7,278,168; Patents pending in the U.S. and other countries. All instances of the name PostScript in the text are references to the PostScript language as defined by Adobe Systems Incorporated unless otherwise stated.
  • Page 187: Software Von Drittanbietern

    Lizenzbedingungen; und für diese Softwaremodule gelten diese separaten Lizenzbedingungen. Weitere Informationen zu den separaten Lizenzbedingungen der Softwaremodule Dritter finden Sie im Anhang des Handbuchs des jeweiligen PRODUKTS. Dieses Handbuch steht unter der folgenden URL zur Verfügung: http://canon. com/ oip-manual. Durch die Verwendung des PRODUKTS wird davon ausgegangen, dass Sie allen zutreffenden Lizenzbedingungen zustimmen.
  • Page 188 C10000VP/C8000VP Funzioni pratiche Regolazione automatica della gradazione per diversi tipi di carta La Funzione Regolazione automatica gradazione regola la gradazione, la densità e il tono di colore delle immagini e necessita solo la scansione della pagina di test. Questa funzione può essere utilizzata per diverse grammature di carta in modo da ottenere risultati di stampa di alta qualità...
  • Page 189 Funzionamento semplice per la regolazione della posizione dell’immagine In questa macchina è possibile regolare le posizioni dell’immagine facilmente. È sufficiente misurare i contrassegni sulla pagina di test e immettere i valori misurati nel pannello digitale. Quindi la macchina regola automaticamente le posizioni dell’immagine. È possibile anche eseguire con facilità...
  • Page 190: Simboli Utilizzati Nel Manuale

    Contenuto Grazie per aver acquistato questo prodotto Canon. Leggere attentamente il manuale prima di utilizzare la macchina, in modo da familiarizzare con l’apparecchiatura e poter sfruttare al meglio le sue molteplici funzioni. Per informazioni dettagliate sulle impostazioni relative alle funzioni, vedere la Guida per l'utente. Terminata la lettura, conservare il manuale per eventuali consultazioni future.
  • Page 191: Tasti E Pulsanti Utilizzati Nel Manuale

    [Nome pulsante] [OK], [Aggiungi], [Annulla] Illustrazioni utilizzate nel manuale Le illustrazioni utilizzate nel manuale sono quelle visualizzate quando l'imagePRESS C10000VP è corredata dei seguenti prodottiopzionali: Duplex Color Image Reader Unit-K1, Upright Control Panel-F1 e Saddle Finisher-AN2 con pinzatura a sella .
  • Page 192: Importanti Istruzioni Di Sicurezza

    Mettersi quindi in contatto con un rivenditore autorizzato Canon. ATTENZIONE Evitare di installare la macchina in luoghi instabili Evitare di installare la macchina ad altitudini elevate, quali 3.000 metri sul livello del mare o superiori.
  • Page 193 Importanti istruzioni di sicurezza Evitare di installare la macchina vicino a televisori, radio o apparecchiature elettroniche simili. La macchina potrebbe interferire con la buona ricezione del segnale audio-video. Collegare il cavo di alimentazione a una presa dedicata e lasciare più spazio possibile tra la macchina e altre apparecchiature elettroniche.
  • Page 194 Lasciare spazio sufficiente intorno alla macchina Lasciare spazio sufficiente sui lati della macchina in modo da poter accedere agevolmente alle varie parti. 800 mm o più 500 mm o più 500 mm 4,851 mm 500 mm o più o più Quando Finisher-AN1, Duplex Color Image Reader Unit-K1, Upright Control Panel-F1 e POD Deck-D1 sono installati.
  • Page 195: Alimentazione Elettrica

    Importanti istruzioni di sicurezza ▀ Alimentazione elettrica Collegare la macchina a una presa che sia da 380 a 415 V CA e 18 A o superiore. AVVERTENZA • Non utilizzare un’alimentazione con un voltaggio • Per evitare il rischio di scosse elettriche, non diverso da quello indicato, altrimenti si possono collegare o scollegare la spina di alimentazione verificare incendi o scosse elettriche.
  • Page 196: Precauzioni

    Mettersi quindi in della macchina, può causare incendi o scosse contatto con un rivenditore autorizzato Canon. L’uso elettriche. continuato della macchina in queste condizioni • Spegnere sempre la macchina con l’interruttore potrebbe causare incendi o scosse elettriche.
  • Page 197 Importanti istruzioni di sicurezza Cassetto della carta (solo per prodotti con cassetto Finisher (solo per prodotti con finisher) di carta) • Non mettere le mani nella parte del vassoio dove • Non infilare la mano nella macchina quando viene eseguita la pinzatura (vicino ai rulli) e prestare il cassetto carta viene rimosso, poiché...
  • Page 198 Raggio laser Il raggio laser può essere pericoloso. Dato che le radiazioni laser vengono generate all’interno di aree schermate e protette, il raggio laser non può filtrare all’esterno durante il funzionamento della macchina. Leggere le seguenti note e precauzioni. • Non aprire i pannelli non indicati nelle procedure illustrate nel manuale. Il controllo, la regolazione o il funzionamento della macchina in modi diversi da quelli indicati nei manuali di questa macchina potrebbero causare la fuoriuscita dalla macchina di radiazioni pericolose.
  • Page 199 Per spostare la macchina per una lunga distanza, mettersi in contatto con un rivenditore autorizzato • Non scuotere o urtare la macchina. Canon. Non tentare di spostare la macchina senza • Non forzare l’apertura o chiusura dei pannelli e procedere come indicato.
  • Page 200: Manutenzione E Controlli

    ▀ Manutenzione e controlli Pulire la macchina regolarmente. La macchina potrebbe non funzionare correttamente se si accumula della polvere. Assicurarsi di leggere quanto segue per la pulizia della macchina. AVVERTENZA • Prima di procedere alla pulizia, spegnere la macchina asciutto per rimuovere la polvere e lo sporco. Se il con l’interruttore principale, quindi scollegare il cavo di alimentazione rimane collegato a lungo in un cavo di alimentazione.
  • Page 201: Materiali Di Consumo

    Importanti istruzioni di sicurezza ▀ Materiali di consumo AVVERTENZA • Se accidentalmente si sparge del toner, pulire • Non bruciare i serbatoi del toner di scarto né gettarli attentamente il toner disperso con un panno in fiamme libere. Non conservare le cartucce di toner morbido e inumidito ed evitare di inalare la polvere in luoghi esposti a fiamme.
  • Page 202: Simboli Correlati Alla Sicurezza

    ▀ Simboli correlati alla sicurezza Interruttore di alimentazione: posizione “ACCESO” Interruttore di alimentazione: posizione “SPENTO” Interruttore di alimentazione: posizione “STAND-BY” Interruttore ”ACCESO” ”SPENTO” Terminale di messa a terra di protezione Tensione pericolosa all’interno. Non aprire i coperchi in modo difforme a quanto indicato nelle istruzioni.
  • Page 203: Parti E Relative Funzioni

    Parti e relative funzioni In questa parte del manuale vengono riportati i nomi e le funzioni di tutti i componenti della macchina. Vengono descritti anche i tasti e le schermate del pannello di controllo. Leggere questa sezione per utilizzare le diverse funzioni della macchina senza problemi.
  • Page 204: Vista Interna (Motore Di Stampa)

    ▀ Vista interna (motore di stampa) Cartuccia del toner Pulsante di test Aprire il pannello per sostituire la cartuccia del Situato sul retro dell’alimentatore. Premere questo toner. pulsante per testare periodicamente l’interruttore di circuito. ITB (Intermediate Transfer Belt - Nastro di Interruttore di sicurezza trasferimento intermedio) Situato sul retro dell’alimentatore.
  • Page 205: Vista Interna (Stazione Di Fissaggio)

    Parti e relative funzioni ▀ Vista interna (stazione di fissaggio) Gruppo di fissaggio primario Unità di inversione Fissa il toner trasferito alla carta. Per risolvere un Inverte la carta e la riporta al motore di stampa problema di inceppamento della carta estrarre il quando si esegue la stampa fronte-retro.
  • Page 206: Pannello Di Controllo (Upright Control Panel-F1)

    Quando l’indicatore di errore Indicatore di accensione si illumina in un colore rosso fisso, contattare il Si illumina quando la macchina è stata accesa con rivenditore autorizzato Canon. l’interruttore principale. Tasto Impostazioni/Registrazione Penna di modifica Premere per registrare e specificare le impostazioni.
  • Page 207 Parti e relative funzioni Tasto Ripristino Tasto Monitoraggio stato/Annulla Premere questo tasto per riattivare le impostazioni Premere per controllare lo stato dei lavori o per standard della macchina. annullare i lavori di stampa. Inoltre, premere per controllare lo stato della macchina, per esempio la Tasto ID (Log In/Out) quantità...
  • Page 208: Schermata Monitoraggio Stato/Annulla

    Schermata Monitoraggio stato/Annulla Se si preme , viene visualizzato lo schermo Monitoraggio stato/Annulla ed è possibile confermare lo stato dei lavori e dei consumabili. Grazie alle informazioni quali il tempo di completamento del lavoro attuale o la quantità di carta rimanente è possibile eseguire operazioni di stampa regolari senza interruzioni. Situazioni utili •...
  • Page 209: Come Accendere La Macchina Con

    Come accendere la macchina con l’interruttore principale Questa parte del manuale spiega come accendere la macchina con l’interruttore principale. ▀ Accendere la macchina con l’interruttore principale Assicurarsi che il cavo di alimentazione sia collegato a fondo nella presa di corrente e che l’interruttore di sicurezza sia acceso.
  • Page 210: Arresto Della Macchina

    ▀ Arresto della macchina Non spegnere la macchina con l’interruttore principale nelle seguenti situazioni • Durante l’utilizzo della funzione I-Fax • Quando viene visualizzato il messaggio <Backup dei dati memorizzati dall'IU remota...> • Quando si utilizza la funzione di scansione o stampa Premere Premere [Arresto].
  • Page 211: Caricamento Della Carta

    Caricamento della carta Caricare la carta come indicato nella procedura seguente. In questa sezione viene utilizzato come esempio carta di formato personalizzato A4. Verificare i tipi di carta che è possibile caricare. Conferma "Carta utilizzabile" a pag. 25 Registrare tutti i tipi di carta che si utilizzeranno. Preparazione "Registrazione dei tipi di carta nel Database carta"...
  • Page 212: Paper Deck Dell'unità Principale

    Paper deck dell’unità principale Capacità carta Deck sinistro e destro: 1.000 fogli (80 g/m ) ciascuno Tipo carta Sottile 1-2, Comune, Spessa 1-8, Colorata, Riciclata 1-3, Preforata 1-2, Lucidi, Pellicola trasparente, Pellicola traslucida, Etichette, Fogli rubrica 1-2, Alta qualità, Patinata sottile 1 lato, Patinata 1 lato 1-9, Patinata sottile 2 lati, Patinata 2 lati 1-9, Patinata sottile opaca, Patinata opaca 1-9, Tramata 1-7 e Pergamena 1-2 Formato carta 330 mm x 483 mm, 320 mm x 450 mm (SRA3), 305 mm x 457 mm, A3, A4, A4R e formato personalizzato (da...
  • Page 213: Registrazione Dei Tipi Di Carta Nel Database Carta

    Caricamento della carta ▀ Registrazione dei tipi di carta nel Database carta Registrare tutti i tipi di carta che si utilizzeranno con questa macchina. È possibile registrare i tipi di carta selezionandoli dal Database carta. NOTA Se si carica carta già registrata nella macchina, ad esempio carta comune o riciclata, questo passaggio non è necessario.
  • Page 214: Caricamento Della Carta Nel Paper Deck

    ▀ Caricamento della carta nel paper deck Registrare il formato carta per il paper deck su [Impostazioni carta] in [Preferenze] (Impostazioni/ Registraz.). "Impostazioni/Registrazione" > "Preferenze" > "Impostazioni carta" > "Registrazione del formato e tipo di carta per una fonte di alimentazione" nel Guida per l'utente Aprire il paper deck.
  • Page 215 Caricamento della carta Regolare la posizione delle piastre di cambio formato per allinearle con la carta. Impostare la carta del formato target ad un’altezza di circa 10 mm. Far scorrere le piastre di cambio formato (anteriori) e le piastre di cambio formato (posteriori) in modo che corrispondano al formato carta.
  • Page 216 Cambiare la piastra di cambio formato del paper deck in modo che corrisponda al nuovo formato carta. Spingere lentamente il paper deck all’interno della macchina, finché si chiude con uno scatto. • Il dispositivo di sollevamento interno si solleva automaticamente e prepara il paper deck per la stampa.
  • Page 217: Selezione Dei Tipi Di Carta Dal Database Carta

    Caricamento della carta ▀ Selezione dei tipi di carta dal Database carta Selezionare il tipo di carta caricato dal Database carta. Premere Premere [Preferenze]  [Impostazioni carta]  [Impostazioni carta]. Selezionare il paper deck in cui è stata caricata la carta ...
  • Page 218 Verificare che il tipo e il formato di carta selezionato sia visualizzato in <Dettagli carta selezionata>  premere [OK].
  • Page 219: Pulizia E Manutenzione

    Pulizia e manutenzione Per un funzionamento ottimale della macchina si consiglia di pulirla e controllarla regolarmente. ▀ Pulizia del vetro di lettura Se gli originali non possono essere acquisiti correttamente, attenersi alla procedura di pulizia seguente. Pulirlo con un panno inumidito e strizzato, quindi con un panno morbido e asciutto. Utilizzare il panno per la pulizia del vetro per semplificare la procedura.
  • Page 220: Pulizia Dell'alimentatore

    ▀ Pulizia dell’alimentatore Se gli originali alimentati dall’alimentatore sono sporchi, attenersi alla procedura di pulizia seguente. Pulirlo con un panno inumidito e strizzato, quindi con un panno morbido e asciutto. Utilizzare il panno per la pulizia del vetro per semplificare la procedura. Pulire l’area di scansione originali.
  • Page 221: Pulizia Automatica Dell'alimentatore

    Pulizia e manutenzione ▀ Pulizia automatica dell’alimentatore Se gli originali alimentati dall’alimentatore sono sporchi, osservare la procedura seguente. Posizionare 10 fogli bianchi nell’alimentatore. • Utilizzare carta comune A4. Premere Premere [Regolazione/Manutenzione]  [Manutenzione]  [Pulizia alimentatore]. Premere [Avvio]. ▀ Pulizia della parte interna dell’unità principale Se la carta stampata è...
  • Page 222: Pulizia Del Rullo Di Fissaggio

    IMPORTANTE Questa funzione viene visualizzata solo se le impostazioni sono rese disponibili dal rivenditore autorizzato Canon locale. Anche se viene visualizzata questa funzione, le impostazioni possono essere modificate solo dal gestore di sistema.
  • Page 223: Controllo Dell'interruttore Di Sicurezza

    2. Se ciò nonostante, pur avendo eseguito la procedura riportata sopra due o tre volte, il selettore non si sposta su OFF, rivolgersi al rivenditore autorizzato Canon locale. Spostare il selettore dell’interruttore di sicurezza completamente verso il basso fino a quando si arresta.
  • Page 224 Portare il selettore dell’interruttore di sicurezza su ON (lato "|"). Accendere la macchina con l’interruttore principale.
  • Page 225: Materiali Di Consumo

    Richiamiamo l'attenzione sulla presenza in commercio di toner Canon contraffatti. L'uso di toner contraffatti può causare un peggioramento della qualità di stampa o ridurre le prestazioni della macchina. Canon non è responsabile di difetti di funzionamento, incidenti o danni causati dall'uso di toner contraffatti. Per maggiori...
  • Page 226 Staple-P1 Consumabili originali Canon sviluppa costantemente innovazioni tecnologiche per i toner, tamburi e cartucce che produce, appositamente studiati per essere utilizzati nelle macchine multifunzione Canon. Assicuratevi i vantaggi di prestazioni, volume e qualità di stampa ottimali, resi possibili dalle nuove e avanzate...
  • Page 227: Risoluzione Dei Problemi

    Risoluzione dei problemi Questa sezione descrive come risolvere i problemi di inceppamento frequenti o dei messaggi di errore visualizzati. Per ulteriori informazioni sulle procedure e sulle precauzioni, vedere la Guida per l'utente. "Soluzione dei problemi" nella Guida per l'utente ▀ Rimozione di inceppamenti carta e punti Se si verifica un inceppamento di carta o punti, seguire le istruzioni visualizzate sul pannello digitale per rimuoverlo.
  • Page 228: Quando Viene Visualizzato Un Messaggio Di Errore

    Se la macchina non funziona normalmente dopo aver spento e riacceso l’interruttore principale, rivolgersi al rivenditore autorizzato Canon locale. "Come contattare il rivenditore autorizzato Canon locale" a pag. 43 Se viene visualizzato un tasto per il modo Funzioni limitate: Se viene visualizzato [Modo funzioni limitate], è...
  • Page 229: Come Contattare Il Rivenditore Autorizzato Canon Locale

    Prendere nota del codice di errore. • Annotare il codice di errore "EXXXXX-XXXX". Spegnere la macchina con l’interruttore principale. • Premere [Arresto] sul pannello digitale. Estrarre la spina dalla presa di corrente. Verificare il nome del prodotto e contattare il rivenditore autorizzato Canon locale.
  • Page 230: Se La Macchina Non Si Accende Con L'interruttore Principale

    Se la macchina non si accende con l’interruttore principale Se la macchina non funziona quando viene acceso l’interruttore principale, controllare l’interruttore di sicurezza. Se questo interruttore è in posizione OFF, non cercare di riaccenderlo di persona ma contattare il rivenditore autorizzato Canon locale.
  • Page 231: Specifiche

    Two-Knife Booklet Trimmer-A1 • Perfect Binder-E1 • Multi Function Professional Puncher-A1 ▀ Unità principale Voce Specifiche Nome Canon imagePRESS C10000VP/C8000VP Tipo Lettore-Stampante separati, tipo console Colore supportato Colore Risoluzione in scrittura 2.400 dpi x 2.400 dpi Grammatura/tipo carta Paper deck destro/sinistro: Grammatura:...
  • Page 232 Voce Specifiche Velocità di stampa Diretto (fogli/minuto) (Carta comune (80 g/m imagePRESS imagePRESS C10000VP C8000VP 330 mm x 483 mm 320 mm x 450 mm (SRA3) 305 mm x 457 mm La velocità di stampa può variare a seconda delle impostazioni del tipo e del formato di carta e del metodo di invio.
  • Page 233 Specifiche ▀ Duplex Color Image Reader Unit-K1 Voce Specifiche Tipo Stampate separata, alimentazione continua (Alimentatore), nessuna alimentazione continua (Lettore) Risoluzione in lettura 600 dpi x 600 dpi Numero di toni Originali accettabili Fogli, libri, oggetti tridimensionali (fino a 2 kg) Formato e grammatura degli originali Formato: A3, A4, A4R, A5 e A5R...
  • Page 234 ▀ POD Deck Lite-C1 Voce Specifiche Formato carta/grammatura/tipo Formato: A3, A4R, A4, A5, 330 mm x 483 mm, 320 mm x 450 mm (SRA3), 305 mm x 457 mm, formato personalizzato (da 139,7 mm x 182,0 mm a 330,2 mm x 487,7 mm) Grammatura: Da 60 g/m a 350 g/m...
  • Page 235 Specifiche Voce Specifiche Ingombro di installazione inclusa l’unità 4.378 mm x 1.152 mm principale (L x P) (Quando Duplex Color Image Reader Unit-K1, Upright Control Panel-F1 e Finisher-AN1 (o Saddle Finisher-AN2 con pinzatura a sella) sono installati) ▀ Vassoio per l'alimentazione del Banner-A1 Voce Specifiche Formato carta/grammatura/tipo...
  • Page 236 Voce Specifiche Fonte di alimentazione/Consumo di energia 100-240 V CA, 50/60 Hz, 1,0 A/120 W o meno massimo Dimensioni (L x P x H) 746 mm x 793 mm x 1.407 mm (Incluso il kit controller opzionale inseritore-A1) Peso Circa 61 kg Ingombro di installazione inclusa l’unità...
  • Page 237 Specifiche ▀ Finisher-AN1 Voce Specifiche Formato carta/grammatura/tipo Formato: <Vassoio superiore> A3, A4R, A4, A5, 330 mm x 483 mm, 320 mm x 450 mm (SRA3), 305 mm x 457 mm, formato personalizzato (da 148,0 mm x 182,0 mm a 330,2 x 762,0 mm) <Vassoio inferiore>...
  • Page 238 Voce Specifiche Capacità per vassoio <Vassoio inferiore> Senza pinzatura Senza ordinamento (impilatura normale/mista) Se raggiunge una delle condizioni di seguito, il movimento si arresta; Formato A4: 285 mm (2.000 fogli) Formato A4R/A3/330 mm x 483 mm/320 mm x 450 mm (SRA3): 147 mm (1.000 fogli) Piegatura a Z: A3: 10 fogli per 1 set o 30 fogli Piegatura a metà: A4: 50 fogli * In caso di Modo di impilatura grande capacità...
  • Page 239 Specifiche Voce Specifiche Capacità di pinzatura massima/Formato di Formato A4: pinzatura disponibile Comune; Da 60 g/m a 80 g/m : 100 fogli Da 80,1 g/m a 81,4 g/m : 80 fogli Da 81,5 g/m a 105 g/m : 60 fogli Da 105,1 g/m a 200 g/m : 20 fogli...
  • Page 240 ▀ Saddle Finisher-AN2 con pinzatura a sella Voce Specifiche Formato carta/grammatura/tipo Finisher Formato: <Vassoio superiore> A3, A4R, A4, A5, 330 mm x 483 mm, 320 mm x 450 mm (SRA3), 305 mm x 457 mm, formato personalizzato (da 148,0 mm x 182,0 mm a 330,2 mm x 762,0 mm) <Vassoio inferiore>...
  • Page 241 Specifiche Voce Specifiche Capacità pinzatura a sella disponibile/ Pinzatura a sella: formato 25 fogli (80 g/m ) (inclusa 1 copertina) Piegatura a sella: 5 fogli (80 g/m Formato: 330 mm x 483 mm, 320 mm x 450 mm (SRA3) , 305 mm x 457 mm, A3, A4R e formato personalizzato (da 210,0 mm x 279,4 mm a 330,2 mm x 487,7 mm) Grammatura copertina: Richiede la grammatura del documento principale (superiore a 64 g/m...
  • Page 242: Funzione Di Invio

    ▀ Funzione di invio Caratteristiche di scansione • Voce Specifiche Protocollo di comunicazione FTP (TCP/IP), SMB (TCP/IP), WebDAV Formato dati TIFF, JPEG, PDF, XPS, OOXML (PowerPoint) Risoluzione 100 x 100 dpi, 150 x 150 dpi, 200 x 100 dpi, 200 x 200 dpi, 200 x 400 dpi, 300 x 300 dpi, 400 x 400 dpi, 600 x 600 dpi Ambiente di sistema Windows Server 2003 R2 SP2, Windows Vista SP2, Windows Server 2008 R2, Windows 7,...
  • Page 243: Ambiente Di Rete

    Specifiche Voce Specifiche Formato originali E-mail A3, A4, A4R, A5, A5R I-Fax A3, A4, A4R, A5* , A5R* Software server Microsoft Exchange 2003 SP2, Microsoft Exchange 2007 SP3, Sendmail 8.14.4, Microsoft Exchange 2010, Lotus Domino R7.0 Altro Ricerca di una destinazione via server LDAP, Anteprima Funzioni PDF / XPS / OOXML opzionali (solo e-mail) Compresso, Traccia e smussa, Colori limitati, Crittografia, OCR, Firma periferica,...
  • Page 244 Le normative di sicurezza richiedono che il nome del prodotto sia registrato. In alcune regioni di vendita del prodotto potrebbero essere registrati i seguenti nomi in parentesi. imagePRESS C10000VP/C8000VP (F164400) Requisiti EMC della Direttiva CE Questa apparecchiatura è conforme ai requisiti essenziali sulle emissioni elettro-magnetiche della Direttiva CE. Si dichiara che il presente prodotto è...
  • Page 245 Canon Inc. Il presente prodotto include software e/o moduli software concessi in licenza da Canon Inc.
  • Page 246 Restrizioni legali relative all’utilizzo del prodotto e delle immagini L’utilizzo di questo prodotto per la scansione, la stampa o la riproduzione di determinati documenti e l’utilizzo di immagini acquisite, stampate o riprodotte in altro modo per mezzo di questo prodotto potrebbero essere proibiti per legge e potrebbero comportare una responsabilità...
  • Page 247 Marchi "MEAP" è un marchio di CANON Inc. che fa riferimento a una "piattaforma applicativa" per le stampanti e i dispositivi multifunzione Canon. Questo prodotto contiene la tecnologia di scalatura universale dei font (Universal Font Scaling Technology o UFST®) concessa in licenza da Monotype Imaging, Inc.
  • Page 248 Il logo PDF è un marchio registrato o marchio di fabbrica di Adobe Systems Incorporated negli Stati Uniti e in altri paesi. Copyright © 2008 Adobe Systems Incorporated. All rights reserved. Protected by U.S. Patents 6,185,684; 6,205,549; 7,213,269; 7,272,628; 7,278,168; Patents pending in the U.S. and other countries. All instances of the name PostScript in the text are references to the PostScript language as defined by Adobe Systems Incorporated unless otherwise stated.
  • Page 249 Software terze parti Questo prodotto Canon (il “PRODOTTO”) comprende i moduli software di terze parti. L'uso e la distribuzione di questi moduli software, inclusi eventuali aggiornamenti di questi ultimi (collettivamente definiti il “SOFTWARE”) sono soggetti alle condizioni di licenza da (1) a (9) sotto riportate.
  • Page 250: Funciones Prácticas

    C10000VP/C8000VP Funciones prácticas Ajuste automático de gradación para varios tipos de papel La función Ajuste automático de gradación ajusta la gradación, la densidad, y el tono de color de las imágenes, y solamente requiere que se lea la página de prueba. Esta función puede utilizarse para varios gramajes de papel a fin de obtener un resultado de impresión...
  • Page 251 Operación fácil para ajustar la posición de la imagen Puede ajustar las posiciones de las imágenes fácilmente con este equipo. Lo único que debe hacer es medir las marcas en la página de prueba y, a continuación, introducir los valores medidos en la pantalla táctil.
  • Page 252: Símbolos Utilizados En Este Manual

    Cómo encender la alimentación principal ..23 Consultar al distribuidor Canon autorizado ....43 Encendido de la alimentación principal .
  • Page 253: Teclas Y Botones Utilizados En Este Manual

    [Aceptar], [Agregar], [Cancelar] Ilustraciones utilizadas en este manual Las ilustraciones utilizadas en este manual son las mostradas cuando la imagePRESS C10000VP tiene el equipo opcional siguiente instalado en ella: Unidad Lectora Color Dúplex K1, Panel de Control Vertical F1y Unidad de Acabado de Cuadernillos AN2.
  • Page 254: Instrucciones Importantes De Seguridad

    A continuación, póngase en contacto con su distribuidor local de Canon autorizado. ATENCIÓN No instale el equipo en lugares inestables Evite instalar el equipo en altitudes elevadas de unos 3.000 metros o más por encima del nivel del mar.
  • Page 255 Instrucciones importantes de seguridad Evite instalar el equipo cerca de aparatos de televisión, radio u otros equipos electrónicos similares. El equipo puede producir interferencias en la recepción del sonido o de la imagen. Enchufe la clavija de alimentación en una toma eléctrica exclusiva y mantenga la máxima separación posible entre el equipo y cualquier otro dispositivo electrónico.
  • Page 256: Proporcione Suficiente Espacio De Instalación

    Proporcione suficiente espacio de instalación Deje suficiente espacio a ambos lados del equipo para poder manejarlo sin limitaciones. 800 mm o más 500 mm o más 500 mm 4,851 mm 500 mm o más o más Cuando las unidades Unidad de Acabado AN1, Unidad Lectora Color Dúplex K1, Panel de Control Vertical F1y Deposito POD D1 estén instaladas.
  • Page 257: Alimentación Eléctrica

    Instrucciones importantes de seguridad ▀ Alimentación eléctrica Enchufe el equipo a una toma que sea de 380 y 415 V CA, 18 A o más. ADVERTENCIA • No utilice alimentaciones de red con tensión distinta • No enchufe ni desenchufe la clavija de alimentación a las especificadas, ya que esto puede provocar un con las manos húmedas ya que puede recibir una incendio o descarga eléctrica.
  • Page 258: Manejo

    A internos de la copiadora, se puede producir un continuación, llame a su distribuidor local Canon. incendio o descarga eléctrica. El uso continuado de la copiadora en este estado •...
  • Page 259 Instrucciones importantes de seguridad Casete de papel (solo en productos con un casete de Unidad de acabado (solo en productos con una papel) unidad de acabado) • Para evitar lesiones personales, no ponga la mano • No coloque las manos en la parte de la bandeja dentro de la máquina mientras retira el casete de donde se realiza el grapado (cerca de los rodillos) y papel.
  • Page 260 Rayo láser El rayo láser puede ser perjudicial para las personas. Dado que la radiación emitida en el interior del producto queda completamente confinada en el alojamiento protector y por medio de las tapas exteriores, el rayo láser no puede salir al exterior del equipo durante ninguna de las fases del funcionamiento normal.
  • Page 261: Transporte Del Equipo

    • No sacuda el equipo ni lo someta a golpes. Canon autorizado. No intente trasladar el equipo usted. • No abra ni cierre por la fuerza las cubiertas y otras partes del equipo. Si lo hiciese, podría provocar daños al equipo.
  • Page 262: Mantenimiento E Inspecciones

    ▀ Mantenimiento e inspecciones Limpie el equipo con regularidad. El equipo no funcionará correctamente si se acumula polvo. Asegúrese de leer lo siguiente al limpiar el equipo. ADVERTENCIA • Para limpiar el equipo, en primer lugar apague el la suciedad. Si el cable de alimentación permanece interruptor de alimentación principal y desconecte enchufado durante mucho tiempo en un lugar el cable de alimentación.
  • Page 263: Consumibles

    Instrucciones importantes de seguridad ▀ Consumibles ADVERTENCIA • Si se derrama o se esparce el tóner, límpielo con • No queme ni arroje al fuego los cartuchos de tóner mucho cuidado con un paño suave y húmedo usados. No guarde cartuchos de tóner en lugares y procure no aspirar polvo de tóner.
  • Page 264: Símbolos Relacionados Con La Seguridad

    ▀ Símbolos relacionados con la seguridad Interruptor de alimentación: posición “ON” (encendido) Interruptor de alimentación: posición “OFF” (apagado) Interruptor de alimentación: posición “STAND-BY” (en espera) Interruptor pulsador ”ON” ”OFF” (encendido/apagado) Terminal de conexión a tierra de protección Tensión peligrosa en el interior. No abra las tapas a menos que así se le indique. ATENCIÓN: superficie caliente.
  • Page 265: Unidades Y Sus Funciones

    Unidades y sus funciones Esta sección le proporciona los nombres y las funciones de todas las partes del equipo. También se describen las teclas y la pantalla del panel de control. Lea esta sección para utilizar las diferentes funciones del equipo sin problemas. "Productos opcionales"...
  • Page 266: Vista Interior (Motor De Marcado)

    ▀ Vista interior (motor de marcado) Cartucho de tóner Botón de prueba Abra la tapa para cambiar el cartucho de tóner. Situado en la parte trasera de la unidad de alimentación eléctrica. Pulse este botón para CTI (Correa de transferencia intermedia) probar el interruptor diferencial periódicamente.
  • Page 267: Vista Interior (Estación De Fijación)

    Unidades y sus funciones ▀ Vista interior (estación de fijación) Unidad de fijación primaria Unidad de inversión Fija el tóner que se ha trasferido al papel. Extraiga la Invierte el papel y lo devuelve al motor de marcado unidad de fijación primaria para eliminar atascos de para realizar una impresión a doble cara.
  • Page 268 Cuando el indicador Error permanezca iluminado Indicador de alimentación principal en rojo, póngase en contacto con su distribuidor de Se ilumina cuando el equipo está encendido. Canon autorizado. Lápiz editor Tecla de configuración Se utiliza para realizar operaciones en la pantalla Se pulsa para registrar y especificar la configuración.
  • Page 269: Pantalla Táctil

    Unidades y sus funciones Tecla Reiniciar Tecla de monitor de estado/cancelar Se pulsa para restaurar las opciones estándar del Se pulsa para comprobar el estado de los trabajos equipo. o para cancelar trabajos de impresión. Se pulsa también para comprobar el estado del equipo, Tecla ID (Log In/Out) como la cantidad de papel restante.
  • Page 270: Pantalla Monitor Estado/Cancelar

    Pantalla Monitor estado/Cancelar Si pulsa , aparecerá la pantalla Monitor estado/Cancelar, y en ella podrá confirmar el estado de trabajos y productos consumibles. Con la obtención de la información, como el tiempo de finalización del trabajo actual o la cantidad de papel restante, se puede realizar la operación de impresión sin problemas y sin interrupciones. Situaciones útiles •...
  • Page 271: Cómo Encender La Alimentación Principal

    Cómo encender la alimentación principal Esta sección explica cómo encender la alimentación principal. ▀ Encendido de la alimentación principal Asegúrese de que la clavija del cable de alimentación esté correctamente introducida en la toma eléctrica, y que el interruptor diferencial esté en ON. Abra la tapa del interruptor de alimentación principal.
  • Page 272: Apagar El Equipo

    ▀ Apagar el equipo No apague la alimentación principal en las situaciones siguientes • Cuando utilice la función de I-Fax • Cuando se muestre el mensaje <Copia de seguridad de los datos del IU remota...> • Cuando utilice la función de lectura o impresión Pulse Pulse [Apagar].
  • Page 273: Cargar Papel

    Cargar papel Cargue papel siguiendo el procedimiento indicado a continuación. En esta sección se utiliza, a modo de ejemplo, papel de tamaño personalizado A4. Confirme los tipos de papel que pueden cargarse. Confirmación "Papel disponible", en la pág. 25 Guarde todos los tipos de papel que vaya a utilizar. Preparación "Tipos de papel guardados en la base de datos papel", en la pág.
  • Page 274 Depósito de papel de la unidad principal Capacidad de Depósitos izquierdo y derecho: 1.000 hojas (80 g/m ) cada uno papel Tipo de papel Fino 1 a 2, Normal, Grueso 1 a 8, Color, Reciclado 1 a 3, Pretaladrado 1 a 2, Transparencia, Película transparente, Película traslúcida, Etiquetas, Separadores 1 a 2, Opaco, Fino estucado a 1 cara, Estucado a 1 cara 1 a 9, Fino estucado a 2 caras, Estucado a 2 caras 1 a 9, Fino estucado mate, Estucado mate 1 a 9, Textura 1 a 7 y Vitela 1 a 2 Tamaño de...
  • Page 275: Tipos De Papel Guardados En La Base De Datos Papel

    Cargar papel ▀ Tipos de papel guardados en la base de datos papel Guarde todos los tipos de papel que vaya a utilizar con este equipo. Puede guardar tipos de papel seleccionándolos en la base de datos papel. NOTA Si carga papel que ya está guardado en el equipo, como papel normal o reciclado, este paso no será necesario. Vaya al paso siguiente "Einlegen von Papier in das Papierfach".
  • Page 276: Cargar Papel En El Depósito De Papel

    ▀ Cargar papel en el depósito de papel Guarde el tamaño del papel para el depósito de papel en [Opciones de papel] dentro de [Preferencias] (Configuración). "Configuración" > "Preferencias" > "Opciones de papel" > "Guardar tamaño y tipo de papel para origen del papel" en la Guía de usuario Abra el depósito de papel.
  • Page 277 Cargar papel Ajuste la posición de las placas de cambio de tamaño para alinearlas con el papel. Establezca el papel del tamaño deseado a aproximadamente 10 mm de alto. Deslice las placas de cambio de tamaño (delanteras y traseras) para que coincidan con el tamaño del papel. IMPORTANTE •...
  • Page 278 Cambie la placa de tamaño del depósito de papel para que coincida con el nuevo tamaño de papel. Introduzca con cuidado el depósito de papel hacia el interior del equipo hasta que encaje en su posición y quede cerrado. • El elevador interior se levanta automáticamente y prepara el depósito de papel para imprimir.
  • Page 279: Selección De Tipos De Papel De La Base De Datos Papel

    Cargar papel ▀ Selección de tipos de papel de la base de datos papel Seleccione el tipo de papel cargado de la base de datos papel. Pulse Pulse [Preferencias]  [Opciones de papel]  [Opciones de papel]. Seleccione el depósito de papel en el que haya cargado el papel ...
  • Page 280 Confirme que el tipo y el tamaño de papel seleccionado se haya mostrado en <Detalles del papel seleccionado>  pulse [Aceptar].
  • Page 281: Limpieza Y Mantenimiento

    Limpieza y mantenimiento Para lograr el funcionamiento óptimo del equipo, se recomienda para limpiar y revisarlo con regularidad. ▀ Limpieza del cristal de copia Si los originales no pueden leerse adecuadamente, realice el procedimiento de limpieza siguiente. Limpie con un paño escurrido después de haberlo humedecido en agua y, a continuación, frote con un paño suave y seco.
  • Page 282: Limpieza Del Alimentador

    ▀ Limpieza del alimentador Si los originales que se alimentan desde el alimentador se ensucian, realice el procedimiento de limpieza siguiente. Limpie con un paño escurrido después de haberlo humedecido en agua y, a continuación, frote con un paño suave y seco.
  • Page 283: Limpieza Automática Del Alimentador

    Limpieza y mantenimiento ▀ Limpieza automática del alimentador Si los originales que se alimentan desde el alimentador se ensucian, realice el procedimiento siguiente. Ponga en el alimentador 10 hojas de papel en blanco. • Use papel normal A4. Pulse Pulse [Ajuste/Mantenimiento]  [Mantenimiento]  [Limpiar alimentador]. Pulse [Inicio].
  • Page 284: Renovar El Rodillo De Fijación

    IMPORTANTE Esta función solo se muestra si su distribuidor local de Canon autorizado pone a su disponibilidad las opciones. Aunque se muestre esta función, no permita que nadie, a excepción del administrador del sistema, cambie las opciones.
  • Page 285: Inspección Del Interruptor Diferencial

    2. Si el selector del interruptor diferencial no se apaga a pesar de haber llevado a cabo el procedimiento anterior dos o tres veces, póngase en contacto con su distribuidor local de Canon autorizado. Gire el interruptor diferencial hacia abajo hasta que se detenga.
  • Page 286 Encienda el interruptor del diferencial (lado "|"). Encienda la alimentación principal.
  • Page 287: Consumibles

    Canon imagePRESS Toner T02 Yellow (Amarillo) Tenga cuidado con el tóner falsificado Le informamos que existe tóner Canon falsificado en el mercado. El uso de tóner falsificado puede producir mala calidad de impresión o un funcionamiento deficiente de la máquina. Canon no se hace responsable de posibles defectos de funcionamiento, accidentes o daños ocasionados por el uso de cartuchos de tóner...
  • Page 288 Experimente las ventajas de la velocidad y el volumen de impresión óptimos y de los impresos de alta calidad que se logran gracias a las nuevas y avanzadas tecnologías de Canon. Por ello se recomienda el uso de consumibles genuinos...
  • Page 289: Solución De Problemas

    Solución de problemas En esta sección se explica cómo solucionar problemas cuando el atasco de papel se produce con frecuencia o si se muestran mensajes de error. Para obtener información sobre los procedimientos detallados y precauciones, consulte la Guía de usuario. "Resolución de problemas"...
  • Page 290: Cuando Se Muestre Un Mensaje De Error

    Si el equipo no puede funcionar con normalidad después de apagar la alimentación principal y volver a encenderla, póngase en contacto con su distribuidor local de Canon autorizado. "Consultar al distribuidor Canon autorizado", en la pág. 43...
  • Page 291: Consultar Al Distribuidor Canon Autorizado

    Consultar al distribuidor Canon autorizado Si no puede utilizar normalmente el equipo después de apagar y volver a encender la alimentación principal, póngase en contacto con su distribuidor local de Canon autorizado. Anote el código de error. • Escriba el código de error "EXXXXX-XXXX".
  • Page 292: Si La Alimentación Principal No Se Enciende

    Si el equipo no puede funcionar cuando la alimentación principal esté encendida, compruebe el interruptor diferencial. Si el interruptor diferencial está apagado, no intente encenderlo por sí mismo, y asegúrese de ponerse en contacto con su distribuidor local de Canon autorizado.
  • Page 293: Especificaciones

    Encuadernadora Perfect Binder-E1 • Taladradora MultiFuncional Profesional A1 ▀ Unidad principal Elemento Especificaciones Nombre Canon imagePRESS C10000VP/C8000VP Tipo Lector-impresora separados, tipo consola Color compatible Todo color Resolución para escritura 2.400 ppp x 2.400 ppp Gramaje/tipo de papel Depósito de papel derecho/izquierdo:...
  • Page 294 Elemento Especificaciones Velocidad de impresión Directa (hojas/minuto) (Papel normal (80 g/m imagePRESS imagePRESS C10000VP C8000VP 330 mm x 483 mm 320 mm x 450 mm (SRA3) 305 mm x 457 mm La velocidad de impresión puede variar dependiendo de las opciones para el tipo de papel, el tamaño de papel, y el método de envío.
  • Page 295 Especificaciones ▀ Unidad Lectora Color Dúplex K1 Elemento Especificaciones Tipo Impresora separados, Alimentación de flujo (Alimentador), Sin flujo (Lector) Resolución para lectura 600 ppp x 600 ppp Número de tonos Originales aceptables Hojas, libros, objetos tridimensionales (hasta 2 kg) Tamaño y gramaje de los originales Tamaño: A3, A4, A4R, A5, y A5R Gramaje:...
  • Page 296 ▀ Depósito POD Sencillo C1 Elemento Especificaciones Tamaño/gramaje/tipo de papel Tamaño: A3, A4R, A4, A5, 330 mm x 483 mm, 320 mm x 450 mm (SRA3), 305 mm x 457 mm, Tamaño personalizado (139,7 mm x 182,0 mm a 330,2 mm x 487,7 mm) Gramaje: 60 g/m a 350 g/m...
  • Page 297 Especificaciones Elemento Especificaciones Peso Solo Deposito POD D1: Aproximadamente 250 kg Deposito POD D1 y Módulo de Alimentación Opcional Secundario POD Deck-D1: Aproximadamente 480 kg Espacio de instalación incluyendo la unidad 4.378 mm x 1.152 mm principal (An x Prf ) (Cuando haya instalado la Unidad Lectora Color Dúplex K1, el Panel de Control Vertical F1y la Unidad de Acabado AN1 (o la Unidad de Acabado de Cuadernillos AN2)) ▀...
  • Page 298 ▀ Unidad de Inserción N1 Elemento Especificaciones Tamaño/gramaje/tipo de papel Tamaño: Ruta de inserción: A3, A4R, A4, 330 mm x 483 mm, 320 mm x 450 mm (SRA3), 305 mm x 457 mm, Tamaño personalizado (182,0 mm x 182,0 mm a 330,2 mm x 487,7 mm) Ruta directa: Compatible con motores para todo tipo de papel Gramaje:...
  • Page 299 Especificaciones Elemento Especificaciones Fuente de alimentación/Consumo máximo Desde la unidad de acabado/150 W o menos de energía Dimensiones (An x Prf x Al) 336 mm x 793 mm x 1.190 mm Peso Aproximadamente 71 kg Espacio de instalación incluyendo la unidad 3.732 mm x 1.152 mm principal (An x Prf ) (Cuando haya instalado la Unidad Lectora Color Dúplex K1, el Panel de Control Vertical F1y la...
  • Page 300 Elemento Especificaciones Capacidad por bandeja de originales <Bandeja inferior> Sin grapar Sin ordenar (Apilamiento normal/Apilamiento variado) Si alcanza alguna de las condiciones siguientes, el movimiento se detiene; Tamaño A4: 285 mm (2.000 hojas) Tamaño A4R/A3/330 mm x 483 mm/320 mm x 450 mm (SRA3): 147 mm (1.000 hojas) Pliegue Z: A3: 10 hojas por 1 juego o 30 hojas Pliegue central: A4: 50 hojas * En caso de modo alto volumen de apilamiento...
  • Page 301 Especificaciones Elemento Especificaciones Capacidad máx. de grapado/Tamaño de Tamaño A4: grapas disponible Papel normal; 60 g/m a 80 g/m : 100 hojas 80,1 g/m a 81,4 g/m : 80 hojas 81,5 g/m a 105 g/m : 60 hojas 105,1 g/m a 200 g/m : 20 hojas Más de 200 g/m...
  • Page 302 ▀ Unidad de Acabado de Cuadernillos AN2 Elemento Especificaciones Tamaño/gramaje/tipo de papel Unidad de acabado Tamaño: <Bandeja superior> A3, A4R, A4, A5, 330 mm x 483 mm, 320 mm x 450 mm (SRA3), 305 mm x 457 mm, Tamaño personalizado (148,0 mm x 182,0 mm a 330,2 mm x 762,0 mm) <Bandeja inferior>...
  • Page 303 Especificaciones Elemento Especificaciones Capacidad/tamaño de grapado de Grapar cuadernillo: cuadernillo disponible 25 hojas (80 g/m ) (incluyendo 1 hoja de portada) Plegado de cuadernillo: 5 hojas (80 g/m Tamaño: 330 mm x 483 mm, 320 mm x 450 mm (SRA3), 305 mm x 457 mm, A3, A4R, y Tamaño personalizado (210,0 mm x 279,4 mm a 330,2 mm x 487,7 mm) Gramaje de portada: Requiere el gramaje de papel del documento principal (más de 64 g/m...
  • Page 304: Función De Envío

    ▀ Función de envío Funciones de lectura • Elemento Especificaciones Protocolo de comunicación FTP (TCP/IP), SMB (TCP/IP), WebDAV Formato de datos TIFF, JPEG, PDF, XPS, OOXML (PowerPoint) Resolución 100 x 100 ppp, 150 x 150 ppp, 200 x 100 ppp, 200 x 200 ppp, 200 x 400 ppp, 300 x 300 ppp, 400 x 400 ppp, 600 x 600 ppp Entorno del sistema Windows Server 2003 R2 SP2, Windows Vista SP2, Windows Server 2008 R2, Windows 7,...
  • Page 305: Entorno De Red

    Especificaciones Elemento Especificaciones Tamaño original E-mail A3, A4, A4R, A5, A5R I-Fax A3, A4, A4R, A5* , A5R* Software de servidor Microsoft Exchange 2003 SP2, Microsoft Exchange 2007 SP3, Sendmail 8.14.4, Microsoft Exchange 2010, Lotus Domino R7.0 Otros Busca un destino a través del servidor LDAP, Vista preliminar Funciones de PDF/XPS/OOXML opcionales (E-mail solamente) Compacto, Trazar y suavizar, Color limitado, Cifrado, OCR, Firma de dispositivo,...
  • Page 306: Nombre Del Producto

    Las regulaciones de seguridad requieren el registro del nombre del producto. En algunas regiones en las que se vende este producto, podrá registrar en su lugar el nombre o nombres siguientes. imagePRESS C10000VP/C8000VP (F164400) Requisitos EMC de la Directiva de la CE Este equipo cumple los requisitos EMC esenciales de la Directiva de la CE.
  • Page 307 Canon Inc. Este producto incluye software y/o módulos de software que están autorizados por Canon Inc. o sus licenciantes de terceros. El uso y la distribución de este software y/o módulos de software están sujetos a las condiciones (a) a (f ) siguientes.
  • Page 308: Descargo De Responsabilidad

    La información contenida en esta documentación está sujeta a cambios sin previo aviso. CANON INC. NO CONCEDE GARANTÍA ALGUNA SOBRE ESTE MATERIAL, NI DE FORMA EXPLÍCITA NI IMPLÍCITA, EXCEPTO LO ESTIPULADO EN ESTE CONTRATO, INCLUIDAS LAS GARANTÍAS DE COMERCIABILIDAD, IDONEIDAD PARA UN PROPÓSITO O USO CONCRETO O CONTRA EL INCUMPLIMIENTO DE PATENTES, AUNQUE NO LIMITADAS A ÉSTAS.
  • Page 309 Marcas comerciales y registradas "MEAP" es una marca comercial de CANON Inc., referida a una "plataforma de aplicación" para las impresoras multifunción y unifunción de Canon. Este producto contiene la tecnología Universal Font Scaling Technology o UFST® bajo licencia de Monotype Imaging, Inc. UFST® es una marca comercial de Monotype Imaging, Inc.
  • Page 310 El logotipo PDF es una marca comercial o marca comercial registrada de Adobe Systems Incorporated en Estados Unidos y otros países. Copyright © 2008 Adobe Systems Incorporated. All rights reserved. Protected by U.S. Patents 6,185,684; 6,205,549; 7,213,269; 7,272,628; 7,278,168; Patents pending in the U.S. and other countries. All instances of the name PostScript in the text are references to the PostScript language as defined by Adobe Systems Incorporated unless otherwise stated.
  • Page 311 Software de terceros Este producto Canon (en adelante, el “PRODUCTO”) incluye módulos de software de terceros. El uso y la distribución de estos módulos de software, incluida cualquiera de sus actualizaciones (en adelante, de forma conjunta, el “SOFTWARE”), están sujetos a las condiciones de licencia de (1) a (9) que se indican a continuación.
  • Page 316 8000 Mississauga Road Brampton ON L6Y 5Z7, Canada CANON EUROPA N.V. Bovenkerkerweg 59, 1185 XB Amstelveen, The Netherlands (See http://www.canon-europe.com/ for details on your regional dealer) CANON AUSTRALIA PTY. LTD Building A, The Park Estate, 5 Talavera Road, Macquarie Park, NSW 2113, Australia CANON CHINA CO., LTD...

Ce manuel est également adapté pour:

Imagepress c8000vp

Table des Matières