V2 GOLD230V-D Mode D'emploi
Table des Matières
Les langues disponibles
Les langues disponibles
Liens rapides
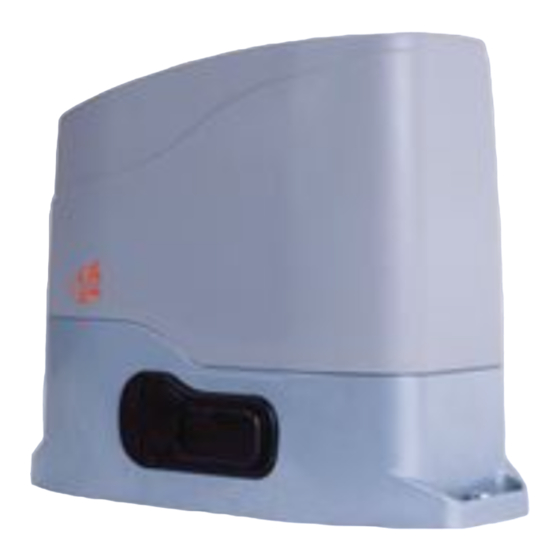
ATTUATORE ELETTROMECCANICO IRREVERSIBILE PER CANCELLI SCORREVOLI FINO A
I
600 KG DI PESO
ELECTRO-MECHANICAL IRREVERSIBLE ACTUATOR FOR SLIDING GATES UP TO 600 KG
GB
OF WEIGHT
OPÉRATEUR ÉLECTROMÉCANIQUE IRRÉVERSIBLE POUR PORTAILS COULISSANTS JUSQU'
F
À 600 KG
MOTORREDUCTOR ELECTROMECÁNICO IRREVERSIBLE PARA PUERTAS CORREDERAS
E
HASTA 600 KG DE PESO
All manuals and user guides at all-guides.com
V2 ELETTRONICA SPA
Corso Principi di Piemonte, 63
12035 RACCONIGI (CN) ITALY
tel. +39 01 72 81 24 11
fax +39 01 72 84 050
info@v2elettronica.com
www.v2elettronica.com
IL n. 174
EDIZ. 07/06/2004
GOLD230V-D / GOLD230V-DM
GOLD120V-D / GOLD120V-DM
COMPANY
WITH QUALITY SYSTEM
CERTIFIED BY QMSI
UNI EN ISO9001
Chapitres
Table des Matières

Manuels Connexes pour V2 GOLD230V-D


Sommaire des Matières pour V2 GOLD230V-D
- Page 47 All manuals and user guides at all-guides.com INDEX CONSEILS IMPORTANTS ..............46 CONFORMITÉ...
-
Page 48: Conseils Importants
CONSEILS IMPORTANTS CONFORMITÉ AUX NORMATIFS Pour tout précision technique ou problème d’installation V2 ELETTRONICA SPA déclare que les composants du kit sont V2 ELETTRONICA dispose d’un service d’assistance clients actif conformes aux qualités requises par les Directives: pendant les horaires de bureau TEL. (+39) 01 72 81 24 11. -
Page 49: Liste Composants
• Centrale de commande PD8 Plaque métallique de fixation Écrous à cage + Boulons M8 x 30 + Rondelles Clef pour déblocage moteur Étrier porte-aimants (seul GOLD230V-D et GOLD120V-D) Fin course magnetiques (seul GOLD230V-D et GOLD120V-D) Fin course mecaniques (seul GOLD230V-DM et GOLD120V-DM) -
Page 50: Opérations Préliminaires
All manuals and user guides at all-guides.com OPÉRATIONS PRÉLIMINAIRES INSTALLATION DES FINS DE COURSE S'EN TENIR SCRUPULEUSEMENT AUX DISPOSITIFS NORMATIFS GOLD230V-D EUROPEENS EN12445 ET EN12453 (REMPLAÇANT LES UNI 8612). Installer l'étrier porte-aimants fourni sur la crémaillère de manière que dans les positions d'ouverture maximale et de Il est en tout cas nécessaire de s'assurer que les points... -
Page 51: Deverrouillage Moteur
All manuals and user guides at all-guides.com DEVERROUILLAGE MOTEUR En cas de coupure du courant électrique, le portail peut être débloqué en agissant sur le moteur. Introduire la clef fournie dans la serrure 1 qui se trouve sur le côté avant du moteur, effectuer 1/4 de tour et ouvrir complètement le panneau en plastique. -
Page 52: Description De La Centrale
MOTEUR La centrale numérique Pd8 est un produit innovant L’armoire Pd8 gère un moteur asynchrone en courant alternatif. V2 ELETTRONICA, qui garantit sécurité et fiabilité pour La puissance maximum refoulé est de 700W. l'automation de portails coulissants. Le moteur est déjà branché sur les bornes 15, 16 et 17 avec La conception de projet de la Pd8 a visé... -
Page 53: Barres Palpeuses
En cas d’intervention des barres de type 1 pendant • Fin course magnétiques effets HALL (intégrés aux models l’ouverture du portail, l’armoire referme le portail pour 3 GOLD230V-D et GOLD120V-D). seconds, et puis se bloque; en cas d'intervention des • Fin course mécaniques avec interrupteur normalement fermé... -
Page 54: Stop
All manuals and user guides at all-guides.com STOP Brancher les câbles du dispositif que gère la première entrée entre les bornes 1 et 4 de l’armoire Pour une plus grande sécurité il est possible installer un Brancher les câbles du dispositif que gère la deuxième entrée interrupteur que s’on l’actionne va provoquer le bloque entre les bornes 2 et 4 de l’armoire immédiat du portail. -
Page 55: Antenne
All manuals and user guides at all-guides.com ANTENNE • La flèche plus en bas s'allume quand le portail est en phase de fermeture. Si elle clignote cela indique que la On conseille d'utiliser l'antenne externe model ANS433 pour fermeture a été causée par l'intervention d'un dispositif de pouvoir garantir la portée maximal. -
Page 56: Configuration Rapide
All manuals and user guides at all-guides.com Postage du menu de fonction 1. Rappeler le configuration de default (voix dEF.). Les menus de fonction permettent de choisir une fonction 2. Etablir les voix StoP, Fot1, Fot2, CoS1, CoS2 e FC.En en entre un group de possibles options. - Page 57 All manuals and user guides at all-guides.com Chargement des valeurs de default Il est possible reporter le valeur de toutes les voix du menu à un valeur standard (voir le tableau récapitulatif final) avec un seul commande. Sélectionner la voix Si pour charger les valeurs de default. Après avoir chargé...
-
Page 58: Temps Clignotement Préalable
All manuals and user guides at all-guides.com Temps clignotement préalable Avant de chaque mouvement du portail, le clignotant viens activé pour le temps t.PrE, pour signaler que commence le mouvement. Direction du Portail Ce menu permet de changer la direction d’ouverture du portail sans changer les fils du Moteur et des fin course. - Page 59 All manuals and user guides at all-guides.com Temps ralenti Si cette fonction est habilitée, pendant les derniers seconds de fonctionnement, l’armoire gère le moteur à vitesse redite, pour éviter un choc violent contre la butée. Le temps maximum à établr est t.AP. ATTENTION: •...
-
Page 60: Fermeture Automatique
All manuals and user guides at all-guides.com Start piétonne en ouverture partielle Ce menu permet d’établir le comportement de l’armoire s’il reçoit un commande de Start Piétonne pendant la phase d’ouverture partielle. PAUS Le portail s’arrete et entre en pause ChiU Le portail commence à... -
Page 61: Fonction Des Entrées De Start
All manuals and user guides at all-guides.com Fonction des entrées de Start Ce menu permet de choisir le mode de fonctionnement des entrées (voir paragraphe entrées de Activation) Les entrées de Start sur la borniere sont des-habilitées. Les entrées fonctionnent selon le mode StAn. StAn: Fonctionnement standard des entrées de Start et Start Piétonne, selon les postages des menus... - Page 62 5 sec. L'ensemble du cycle de test dure moins d'une seconde. la fonction test n'est pas activée la fonction test est activée IMPORTANT: V2 ELETTRONICA conseille de maintenir active le text des photocéllules avec le but de garantir une sécurite plus haute du systéme.
-
Page 63: Activation Du Capteur D'obstacles
All manuals and user guides at all-guides.com Anti-patinage Quand une manœuvre d’ouverture ou fermeture est empêchée par un commande ou par intervention de la photocellule, le temps établit pour la manœuvre opposée serait excessif ; pour cette raison l’armoire actionne les moteurs seulement pour le temps nécessaire à récupérer l’espace effectivement parcours. -
Page 64: Lecture Du Compteurs De Cycles
All manuals and user guides at all-guides.com Fin de programmation Ce menu permet de terminer la programmation (aussi bien prédéfinie que personnalisée) en mémorisant les données modifiées. modifications ultérieures à effectuer, ne pas sortir de la programmation. modifications terminées: fin de programmation. LES DONNEES PREREGLEES ONT ETE MEMORISEES: LA CENTRALE EST DESORMAIS PRETE POUR L'UTILISATION. -
Page 65: Fonctionnement Du Détecteur Obstacles
; établissant le valeur 0 on des-habilite la détection obstacles. Signifie que le test des triac a fallu. Avant de transmettre l’armoire a V2 Elettronica pour la réparation, s’assurer que les moteurs soient bien branchés. ATTENTION: n’import quelle sensibilité établit, le système détecte l’obstacle seulement si le portail est fermé... -
Page 66: Tableau Fonctions Pd8
All manuals and user guides at all-guides.com TABLEAU FONCTIONS Pd8 MEMO DISPLAY DONNES DESCRIPTION DEFAULT DONNES no / Si Sélectionner la voix Si pour charger les valeurs de default t.AP 0.0" ÷ 2.0' Durée ouverture portail 22.5" t.APP 0.0" ÷ t.AP1 Durée ouverture portail piéton 6.0"... - Page 67 All manuals and user guides at all-guides.com MEMO DISPLAY DONNES DESCRIPTION DEFAULT DONNES St.rt Fonctionnement StAn - Les entrées de Start sur la borniere sont des-habilitées StAn - Fonctionnement standard AP.CH - Commandes d'ouverture et fermeture séparées PrES - Fonctionnement homme présent oroL - Fonctionnement compteur de temps FrEn...