LAS SD260 Manuel De L'opérateur
Table des Matières
Les langues disponibles
Les langues disponibles
Art.-Nr.: 11596
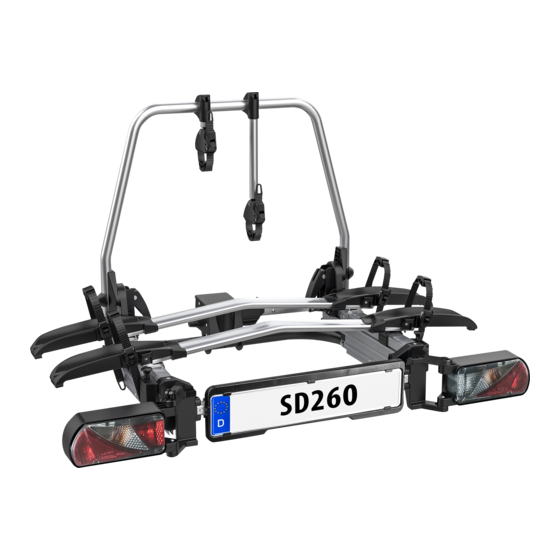
SD260
Fahrradträger für die Anhängerkupplung
Bedienungsanleitung ............... 3
Art. No. 11596
SD260
Cycle rack for the towbar
Operating instructions .............. 19
Réf. 11596
SD260
Porte-vélos pour l'accouplement de remorque
Manuel de l'opérateur .............. 35
Cod. art. 11596
SD260
Portabiciclette per gancio di traino
Istruzioni per l'uso ..................... 51
© EAL GmbH, 11596, 04.2022
Chapitres
Table des Matières

Manuels Connexes pour LAS SD260


Sommaire des Matières pour LAS SD260
- Page 1 © EAL GmbH, 11596, 04.2022 Art.-Nr.: 11596 Réf. 11596 SD260 SD260 Fahrradträger für die Anhängerkupplung Porte-vélos pour l‘accouplement de remorque Bedienungsanleitung ....3 Manuel de l‘opérateur ....35 Art. No. 11596 Cod. art. 11596 SD260 SD260 Cycle rack for the towbar Portabiciclette per gancio di traino Operating instructions ....
- Page 35 SD260 Porte-vélos pour l‘accouplement de remorque Sommaire Indications concernant les instructions d’utilisation _____________________________________________________36 Préface ________________________________________________________________________________36 Obligations relatives à ces instructions d’utilisation ______________________________________________________36 Utilisation conforme ________________________________________________________________________36 Consignes de sécurité – explication des catégories ______________________________________________________36 Etendue de la livraison _______________________________________________________________________37 Caractéristiques techniques ____________________________________________________________________37 Conditions pour l’accouplement _________________________________________________________________37...
-
Page 36: Indications Concernant Les Instructions D'utilisation
Si le danger n‘est pas évité, il peut entraîner des Le portevélo SD260 sert au transport de deux vélos max. Il dommages sur le produit ou des objets alentours. doit uniquement être monté sur des raccords de remorque qui satisfont aux exigences indiquées au chapitre Conditions de raccord. -
Page 37: Etendue De La Livraison
Etendue de la livraison Charge utile max. Poids propre du Charge utile max. attelage de porte-vélo remorque porte-vélo 50 kg 20,5 kg 29,5 kg 60 kg 20,5 kg 39,5 kg 75 kg 20,5 kg 54,5 kg 90 kg 20,5 kg max. -
Page 38: Consignes De Sécurité
Consignes de sécurité AVERTISSEMENT ! Dommages causés aux personnes ou dégâts Respectez impérativement les instructions de montage. Si vous matériels en raison de la perte des vélos. n‘exécutez pas les instructions, cela peut mener à des dommages Le déplacement sans les sangles de sécurité peut aux personnes et à... -
Page 39: Montage De La Plaque D'immatriculation Sur Le Porte-Vélos
Support du cadre AVERTISSEMENT ! Dommages causés aux personnes ou dégâts matériels en raison de la rupture du support. La conduite en tout-terrain avec le porte-vélo monté peut entraîner la rupture du support. N’utilisez pas le porte-vélo en tout-terrain. Conduire lentement sur les ralentisseurs: vitesse maximale 10 km/h. - Page 40 AVERTISSEMENT ! Dommages causés aux personnes ou dégâts matériels en raison du porte-vélo non correctement sécurisé. Si le levier n‘est pas bloqué par un système de fermeture, le porte-vélo pourrait se détacher pendant le déplacement du véhicule. Verrouillez toujours le porte-vélo. Vérifiez si vous avez bloqué...
- Page 41 AVERTISSEMENT ! Dommages causés aux personnes ou dégâts matériels en raison d’un en U déverrouillé ou des supports de roue pas complètement déployés. Si le support en U n‘est pas fixé avec les leviers à dégagement rapide, ce support, il pourrait se détacher pendant le voyage.
-
Page 42: Monter Le Porte-Vélos
AVERTISSEMENT ! Votre véhicule doit être vu par les autres usagers de la route. La conduite sans installation d‘éclairage en état de fonctionner peut entraîner des accidents. Rabattez le levier de dégagement rapide jusqu‘à ce que vous sentiez qu‘il s‘enclenche. Avant chaque départ, contrôlez la fonctionne- ment correct de l‘installation d‘éclairage. - Page 44 AVERTISSEMENT ! Dommages causés aux personnes ou dégâts matériels en raison de la perte des vélos. Le déplacement sans les sangles de sécurité peut entraîner des accidents. Avant chaque départ, contrôlez la fixation correcte et solide de la sangle autour des vélos et le support du porte-vélo (cf.
-
Page 45: Glisser Le Porte-Vélos, Acces Au Coffre A Bagages
Glisser le porte-vélos, acces au coffre a bagages ATTENTION ! Dommages matériels causés par l‘ouverture de la porte arrière, du hayon ou du coffre à bagages. La porte arrière ou le hayon arrière pourrait venir frapper le porte-vélo et être endommagé. Déconnectez les hayons électriques et actionnez les manuellement. -
Page 46: Demontage Du Porte-Vélos
AVERTISSEMENT ! Dommages causés aux personnes ou dégâts matériels en raison de la perte possible du porte-vélo durant le déplacement. Rouler avec un porte-vélos qui n‘a pas été repoussé peut entraîner la rupture du porte-vélos et/ou de l‘attelage. Avant le déplacement relevez le support (l‘image 5). -
Page 47: Nettoyage Et Entretien
Nettoyage et entretien formes de réutilisation des équipements usagés, vous contribuez de manière importante à la En cas de conditions normales d‘utilisation, le porte-vélo nécessite protection de notre environnement ! seulement d‘être nettoyé et n‘exige aucun entretien. Éliminez le porte-vélos conformément aux lois et Si le porte-vélos est utilisé... -
Page 48: 12 V Ampoule
Aff ectation de splots de connexion 13 broches Le porte-vélo est équipé d‘une installation d‘éclairage. Celle-ci sera connectée avec une prise à 13 broches à la prise de courant de l‘attelage de remorque. Si votre véhicule est équipé, non pas d‘une prise à 13 broches mais d‘une prise à 7 broches, les aff ectations correspondantes sont mentionnées ci-dessous. -
Page 49: Annexe -Aperçu Des Pièces De Rechange (Vue Éclatée)
Annexe -Aperçu des pièces de rechange... -
Page 50: Aperçu Des Pieces De Rechange (Tableau)
Aperçu des pieces de rechange (tableau) Pos n°. Description Nbr Mesure Pos n°. Description Nbr Mesure Support de roue en plastique à Boulon M5*45 droite Rondelle Écrou borgne Support de plaque Rondelle à ressort Arrière gauche Rondelle Protecteur de lampe en plastique Arrière droit de gauche Boulon à...