LAS 11807 Manuel De L'opérateur
Masquer les pouces
Voir aussi pour 11807:
- Manuel de l'opérateur (16 pages) ,
- Instructions de montage (40 pages)
Table des Matières
Les langues disponibles
Les langues disponibles
Art.-Nr.: 11807
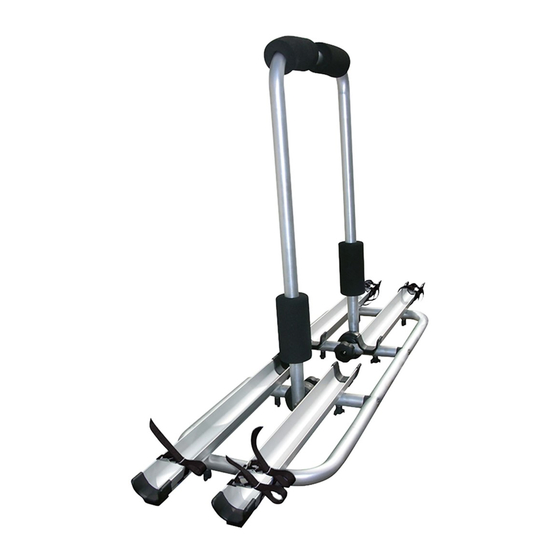
Deichselträger Alu
Bedienungsanleitung . . . . . . . . . . . . . . . . . . . . . . . . . . . . . . . 2
Article number 11807
Towbar rack
Operating instructions . . . . . . . . . . . . . . . . . . . . . . . . . . . . . . 8
Réf. 11807
Porte-velos sur timon
Manuel de l'opérateur . . . . . . . . . . . . . . . . . . . . . . . . 13
Cod. art. 11807
Portabiciclette da timone
Istruzioni per l'uso . . . . . . . . . . . . . . . . . . . . . . . . . . . . 18
1
Chapitres
Table des Matières

Manuels Connexes pour LAS 11807


Sommaire des Matières pour LAS 11807
- Page 1 Bedienungsanleitung ....... 2 Manuel de l‘opérateur ......13 Article number 11807 Cod. art. 11807...
- Page 2 Verpackungsinhalt Contenu du paquet Contents Contenuto dell’imballaggio Grundrahmen Basic frame Cadre de base Telaio di base U-Bügelbefestigung U-bolt fastenings Fixations pour l’ é trier en forme d’U Ferro di fissaggio a U Befestigungsgurte + Sicherheitsgurt Fastening straps + Safety straps Ceintures de fixation et ceinture de sécurité...
-
Page 13: Données Techniques
PORTE-VELOS SUR TIMON SOMMAIRE DONNÉES TECHNIQUES INSTRUCTIONS DE MONTAGE FIXATIONS POUR L’ÉTRIER EN FORME D’U COMMENT ATTACHER LES BICYCLETTES SUR LE PORTEUR POUR TIMON SCHÉMA ÉCLATÉ DONNÉES DE CONTACT AVERTISSEMENT Lisez attentivement la notice d‘utilisation avant la mise en service et respectez toutes les consignes de sécurité ! Conservez l‘emballage d‘origine, le justificatif d‘achat et la présente notice pour vous y référer ultérieurement ! Si vous transmettez cet attelage à... -
Page 14: Fixations Pour L'étrier En Forme D'u
Image no 2 ELÉMENTS NÉCESSAIRES ETRIER EN FORME D’U Taraudages FIXATIONS POUR L’ÉTRIER EN FORME D’U Montez l’ é trier en U comme décrit si-dessous: Les caoutchoucs de protection ont déjà été montés sur lui. Mettez d’abord les disques dentés de l’ e xtérieur dans les entretoises d’... -
Page 15: Comment Attacher Les Bicyclettes Sur Le Porteur Pour Timon
Image no 3 ELÉMENTS NÉCESSAIRES Ceintures de fixation et ceinture de sécurité Fixation pour le timon Vis d’arrêt Bloc en plastique LE MONTAGE: Le support pour timon fourni se monte sur le timon de votre caravane à l‘aide des fixations appropriées. Positionnez le support pour timon de sorte que les blocs en plastique soient entre le timon et le support proprement dit, ce qui laissera de l‘espace libre à... - Page 16 ATTENTION : Enfilez la sangle de sécurité dans le cadre du vélo et mettez-la autour de l‘étrier en U puis serrez la sangle de sécurité fermement. Sangle de sécurité Fixations des roues ATTENTION : VEUILLEZ ABSOLUMENT OBSERVER CES INSTRUCTIONS DE SÉCURITÉ SUIVANTES ! •...
-
Page 17: Schéma Éclaté
Ce porte vélos a été contrôlé et nous pouvons garatir qu’il est complet. Le porteur est fabriqué d’aluminium. Son poids propre s’ é lève à env. 4 kg sans éléments de fixation, et à env. 6 kg avec ces éléments. Ils consis-tent en acier inoxydable et en plastique. SCHÉMA ÉCLATÉ...