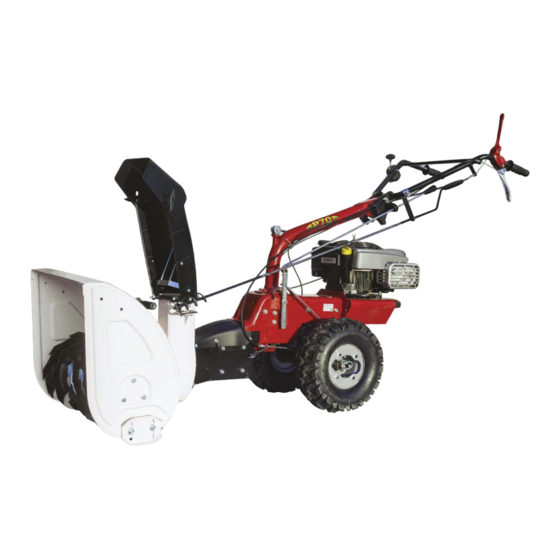
Publicité

Les langues disponibles
  • FR

Les langues disponibles

Liens rapides

Bedienungsanleitung
für M250 EVO Schneefräse
eurosystems Deutschland
Motorgeräte Handelsgesellschaft mbH
Im Fuchshau 14
D-73635 Rudersberg
Tel: +49 7183 / 30 590-0
Fax: +49 7183 / 30 590-20
info@eurosystems.info
www.eurosystems.info

Publicité

Table des Matières
loading

Sommaire des Matières pour Eurosystems M250 EVO

  • Page 1 Bedienungsanleitung für M250 EVO Schneefräse eurosystems Deutschland Motorgeräte Handelsgesellschaft mbH Im Fuchshau 14 D-73635 Rudersberg Tel: +49 7183 / 30 590-0 Fax: +49 7183 / 30 590-20 info@eurosystems.info www.eurosystems.info...
  • Page 2 Fig. 1 Fig. 2 Fig. 3...
  • Page 3 Fig. 4 Fig. 5 Fig. 6...
  • Page 4 Fig. 7 Fig. 8 Fig. 9...
  • Page 5 Istruzioni d’uso originali ATTENZIONE: la presente nota di utilizzo deve essere integrata dalla lettura e dall’osservanza delle norme di uso e di sicurezza prescritte nel manuale uso e manutenzione della macchina. Il turboneve è progettato per uso professionale e privato. ESEGUIRE QUALSIASI OPERAZIONE DI MANUTENZIONE E/O REGOLAZIONE SOLO E SEMPRE IN CONDIZIONE DI SICUREZZA A MOTORE SPENTO E CON IL CAPPUCCIO CANDELA STACCATO!
  • Page 6 SMONTAGGIO ACCESSORIO: Ripetere le suddette operazioni in senso inverso operando sempre in condizioni di sicurezza cioè a motore spento e cappuccio candela staccato. MONTAGGIO BOCCA SCARICO NEVE (Fig. 5): - Posizionare la bocca per lo scarico neve [8] sulla bocca del telaio turboneve [9]. - Posizionare la slitte nere [10] e [11] al disotto della bocca scarico neve [8] assicurandosi che la slitta [10] sia sopra alla slitta [11].
  • Page 7: Istruzioni Di Sicurezza

    ISTRUZIONI DI SICUREZZA: - E’ obbligatorio indossare scarpe resistenti durante l’uso della macchina . - Prima del trasporto della macchina, arrestare il motore e attendere l’arresto completo degli stadi del turboneve. Durante gli spostamenti della macchina al di fuori della zona di lavoro, l’elica anteriore deve essere disinnestata. - Prestare particolare attenzione utilizzando il turboneve su argini e pendii, lavorare sempre nel senso della pendenza, mai trasversalmente ed in ogni caso non lavorare mai su pendenze maggiori del 30%.
  • Page 8: Dati Tecnici

    DATI TECNICI : Superficie frontale di lavoro: 55x56 cm Scarico neve: regolabile manualmente Max gittata : 8-12 metri Regolazione camino manuale :190° verticale 70° orizzontale N° stadi del turboneve: 2 Altezza di lavoro regolabile: 2-3 cm. Dimensioni accessorio : 90x55x56 cm. Peso accessorio: 43 kg.
  • Page 9: Montage

    Übersetzung der originalen Betriebsanleitung ACHTUNG: Diese Betriebsanleitung muss im Zusammenhang mit der Betriebsanleitung der Grundmaschine gelesen und beachtet werden. Die Schneefräse eignet sich sowohl für den professionellen als auch für den privaten Gebrauch. ALLE WARTUNGS-, REINIGUNGS-, EINSTELL- UND MONTAGEARBEITEN AM GERÄT DÜRFEN NUR MIT GEEIGNETEM WERKZEUG UND BEI ABGESTELLTEM MOTOR UND ABGEZOGENEM ZÜNDKERZENSTECKER VORGENOMMEN WERDEN.
  • Page 10: Montage Des Schneeauswurfkanals (Abb. 5)

    drücken, so dass die Aussparungen (B) in die vorderen Schrauben (7) einrasten. Die Schrauben (7) anziehen und so die Riemenabdeckhaube (1) befestigen. DEMONTAGE: oben genannten Arbeitsschritte unter Einhaltung Sicherheitsvorschriften (mit abgestelltem Motor abgezogenem Zündkerzenstecker) in umgekehrter Reihenfolge wiederholen. MONTAGE DES SCHNEEAUSWURFKANALS (Abb. 5): Die untere mit dem Ring versehene Öffnung des Schneeauswurfkanals (8) auf die entsprechende Öffnung (9) am Gehäuse der Schneefräse aufsetzen.
  • Page 11: Sicherheitsvorschriften

    Anbaugerät die volle Arbeitsdrehzahl, ohne dass der Keilriemen schleift oder der Motor abgewürgt wird. Abb. 8) Wenn die Schneefräse die volle Arbeitsdrehzahl erreicht hat, den Radantrieb (C) zuschalten (Hebel nach oben ziehen). Die Maschine bewegt sich jetzt vorwärts. Wenn trotz aller Vorsichtsmaßnahmen auf ein Hindernis aufgefahren wird, sofort beide Hebel loslassen und den Motor mit Hilfe des Gashebels abstellen.
  • Page 12: Technische Daten

    Das Getriebe von der Nabe (24) abnehmen, den Verschluss auf der Rückseite öffnen und den Ölwechsel vornehmen. WICHTIG: Altöl nicht in das Kanalnetz oder Erdreich ablassen. Eine Verschmutzung des Grundwassers wird streng bestraft. Altöl-Annahmestellen sind alle Tankstellen und von den kommunalen Behörden benannte Sammelstellen (Deponien, etc.). Das Getriebe wieder in die Nabe einsetzen und das Schutzgehäuse (2) wieder montieren.
  • Page 13 Translation of original user instructions CAUTION: The use of this note is to be supplemented by reading and observance of the norms of use and safety regulations in the use and maintenance of the ma- chine. The snow thrower is designed for professional and private use. PERFORMING ANY MAINTENANCE AND / OR ADJUSTMENTS ONLY AND ALWAYS IN CONDITION OF SAFETY WITH THE ENGINE OFF AND THE SPARK PLUG CAP OFF.
  • Page 14 in safe conditions i.e. with the engine off and the spark plug disconnected . SNOW DISCHARGE SPOUT ASSEMBLY (Fig. 5) : - Position the mouth of the snow discharge [8] on the mouth of the snow plow frame [9] . - Place the black slides [ 10 ] and [11] below the discharge snow mouth [ 8] making sure the slide [ 10 ] to be above the slide [ 11] .
  • Page 15: Safety Instructions

    SAFETY INSTRUCTIONS: - It ‘compulsory to wear resistant shoes while using the equipment. - Before transporting the machine, stop the engine and wait for the complete shutdown of the stages of the snow thrower. When moving the machine to the outside of the work area, the front propeller must be disengaged.
  • Page 16: Technical Data

    TECHNICAL DATA : Frontal Area of work: 55x56 cm Discharge snow function: manually adjustable Max ejection range : 8-12 m. Adjustment of the snow ejection unit manual : 190° vertical, 70° horizontal Number of stages of the snow thrower : 2 Adjustable working height: yes 2- 3 cm.
  • Page 17: Montage Accessoire

    Traduction du mode d‘emploi original ATTENTION : la présente note d’utilisation doit être intégrée par la lecture et l’observation des normes prescrites dans le manuel d’utilisation et d’entretien de la machine. La fraise à neige est projeté par utilisation professionnel et privé. EFFECTUER LES OPERATIONS D’ENTRETIN ET/OU REGLAGE SEULEMENT EN CONDITIONS DE SECURITE AVEC MOTEUR ETEINT ET CAPUCHON DE LA BOUGIE DEBRANCHE.
  • Page 18: Montage Goulotte Decharge Neige (Fig. 5)

    DEMONTAGE ACCESSOIRE : répéter les mêmes opérations en sens contraire, toujours en conditions de sécurité avec le moteur éteint et capuchon de la bougie débranché. MONTAGE GOULOTTE DECHARGE NEIGE (Fig. 5) : - Positionner la goulotte pour le décharge neige (8) sur la goulotte du châssis fraise à...
  • Page 19: Mesures De Securite

    NB. UTILISER UNIQUEMENT DES PIECESE DETACHEES ORIGINALES ! MESURES DE SECURITE : • Pendant l’utilisation de la machine il est obligatoire porter des chaussures résistantes. • Avant le transport de la machine, il faut éteindre le moteur et attendre l’arrêt complet des phases de la fraise à...
  • Page 20: Donnees Techniques Accesssoire

    DONNEES TECHNIQUES ACCESSSOIRE : Espace frontale de travail : 55 x 56 cm Déchargement de la neige : réglable manuellement. Distance d’éjection : 8-12 mt. Regulation ejecteur et dèflecteur manuel : 190° vertical , 70° horizontal N° phases de la fraise à neige : 2 Hauteur de travail réglable : 2-3 cm Poids accessoire : 43 kg Poids machine + accessoire : 101 kg.
  • Page 21 Prevod izvirnih navodil za uporabo PREVIDNO: Ta varnostni zaznamek je potrebno dopolniti s poznavanjem in upoštevanjem določb o varnostnih ukrepih pri uporabi in vzdrževanju naprave. Snežna freza je namenjena poklicni in zasebni uporabi. VSA VZDRŽEVALNA IN / ALI PRILAGODITVENA DELA JE DOVOLJENO OPRAVLJATI ZGOLJ OB UGASNJENEM MOTORJU IN ODSTRANJENI KAPICI VŽIGALNE SVEČKE.
  • Page 22: Varnostna Navodila

    – Ponovite postopek z drugima dvema paroma drsnikov. - Privijte vijake. NAMESTITEV DROGA ZA NASTAVITEV ŠOBE ZA IZMET SNEGA (Sl. 6): - Vstavite drog [14] v odprtino [15]. Vstavite podložko [a], nato pa še razcepko [16] v odprtino na koncu droga, za pritrditev. - Vstavite drog [17] v pušo [14] ter nato vstavite razcepko [18], da pritrdite oba poldroga.
  • Page 23: Tehnični Podatki

    VZDRŽEVANJE: Po vsaki uporabi temeljito očistite napravo s krtačo ali krpo. Za čiščenje plastičnih delov ne uporabljajte kemičnih snovi, da ne bi prišlo do poškodb. V območju ob in okoli motorja ne uporabljajte vode. Zamenjajte olje v menjalniku. Za dostop do pokrova za nalivanje olja sledite navodilom v naslednjem razdelku.
  • Page 24 09/2018 cod. 401565211...

Table des Matières