Publicité

Les langues disponibles

Les langues disponibles

Liens rapides

KD-T92MBS / KD-T721BT / KD-TD72BT / KD-SR87BT
CD RECEIVER
Quick Start Guide
RÉCEPTEUR CD
Guide de démarrage rapide
RECEPTOR CON CD
Guía de inicio rápido
For detailed operations and information, refer to the INSTRUCTION MANUAL on the following
website:
Pour les opérations et les informations détaillées, reportez-vous au MANUEL D'INSTRUCTIONS sur
le site web suivant:
Para obtener más información y detalles sobre las operaciones, consulte el MANUAL DE
INSTRUCCIONES en el siguiente sitio web:
<https://www.jvc.net/cs/car/>
For customer Use:
Enter below the Model No. and Serial No. which are located on the top or bottom of the cabinet.
Retain this information for future reference.
Model No.
Serial No.
ENGLISH
FRANÇAIS
ESPAÑOL
B5K-0863-00 [K]

Publicité

Table des Matières
loading

Sommaire des Matières pour JVC KD-T92MBS

  • Page 1 ENGLISH FRANÇAIS ESPAÑOL KD-T92MBS / KD-T721BT / KD-TD72BT / KD-SR87BT CD RECEIVER For detailed operations and information, refer to the INSTRUCTION MANUAL on the following Quick Start Guide website: RÉCEPTEUR CD Pour les opérations et les informations détaillées, reportez-vous au MANUEL D’INSTRUCTIONS sur Guide de démarrage rapide...
  • Page 2 útil, deberán ser reciclados en instalaciones que puedan dar el tratamiento Products: CD RECEIVER adecuado a estos productos y a sus subproductos residuales correspondientes. Model Name: KD-T92MBS/KD-T721BT/KD-TD72BT/KD-SR87BT Póngase en contacto con su administración local para obtener información sobre el Responsible Party: JVCKENWOOD USA CORPORATION punto de recogida más cercano.
  • Page 3 SOFTWARE LICENSE AGREEMENT ISED Caution This device contains licence-exempt transmitter(s)/receiver(s) that comply with Innovation, Science The software embedded in the Product (hereinafter the "Licensed Software") provided by Licensor is and Economic Development Canada’s licence-exempt RSS(s). Operation is subject to the following two conditions: copyrighted to or sublicensable by the Licensor, and this Agreement provides for the terms and conditions 1.
  • Page 4 Article 4 Right pertaining to the Licensed Software Article 9 Destruction of the Licensed Software Any and all copyrights and other rights pertaining to the Licensed Software and related documents If this Agreement is terminated pursuant to the provision of Article 8, the User shall destroy the Licensed shall belong to the Licensor or the original holder of the right who granted to the Licensor the license or Software, any related documents and copies thereof within two (2) weeks from such date of termination.
  • Page 5 Important Notice concerning the Software -CMP The MIT License (MIT) Copyright (c) 2014 Charles Gunyon -jansson Permission is hereby granted, free of charge, to any person obtaining a copy of this software and associated Copyright (c) 2009-2012 Petri Lehtinen <petri@digip.org> documentation files (the "Software"), to deal in the Software without restriction, including without Permission is hereby granted, free of charge, to any person obtaining a copy of this software and associated limitation the rights to use, copy, modify, merge, publish, distribute, sublicense, and/or sell copies of the...
  • Page 6 sha2 Copyright (c) 1995, 1996 Carnegie-Mellon University. All rights reserved. AUTHOR: Aaron D. Gifford - http://www.aarongifford.com/ Author: Chris G. Demetriou Copyright (c) 2000-2001, Aaron D. Gifford Permission to use, copy, modify and distribute this software and its documentation is hereby granted, All rights reserved.
  • Page 7 T-Kernel 2.0 This product uses the source code of T-Kernel 2.0 under T-License 2.0 granted by T-Engine Forum (www.tron.org) BSD-3-Clause Copyright (c) 2000-2001, Aaron D. Gifford All rights reserved. You may obtain a copy of the license at https://opensource.org/licenses/BSD-3-Clause THE SOFTWARE IS PROVIDED “AS IS”, WITHOUT WARRANTY OF ANY KIND, EXPRESS OR IMPLIED, INCLUDING BUT NOT LIMITED TO THE WARRANTIES OF MERCHANTABILITY, FITNESS FOR A PARTICULAR PURPOSE AND NONINFRINGEMENT.
  • Page 8: Basic Procedure

    Installation/Connection Basic procedure Remove the key from the ignition switch, then disconnect the terminal of the car battery. This section is for the professional installer. Connect the wires properly. See “Wiring connection” on page 3. For safety’s sake, leave wiring and mounting to professionals. Consult the car audio dealer. Install the unit to your car.
  • Page 9: Wiring Connection

    Wiring connection Installing the unit (without mounting sleeve) Remove the mounting sleeve and trim plate from the unit. Vehicle dashboard Align the holes in the unit (on both sides) with the vehicle Antenna terminal mounting bracket and secure the unit with screws (commercially available).
  • Page 10: Before Use

    Before Use Basics (on faceplate) IMPORTANT *1 Only for illustration purpose. Display window*1 KD-T721BT/ • To ensure proper use, please read through this Guide before using KD-TD72BT/ this product. It is especially important that you read and observe KD-SR87BT Volume knob Loading slot Warnings and Cautions in this Guide.
  • Page 11: Getting Started

    Getting Started Set the basic settings Press and hold Acknowledge the crossover type and cancel the Turn the volume knob to select an item (see the following table), then demonstration press the knob. Repeat step until the desired item is selected or activated. When you turn on the power for the first time (or [FACTORY RESET] is set to Press to exit.
  • Page 12: Start Playback

    Radio CD/USB/iPod Selectable source: Search for a station • CD/USB/iPod USB or iPod BT Press B SRC repeatedly to select FM or AM. Press S / T to search for a station automatically. Start playback (or) Press and hold S / T until “M” flashes, then press repeatedly to The source changes automatically and playback starts when you load a disc search for a station manually.
  • Page 13: Menu Settings

    • Refer to the INSTRUCTION MANUAL on the following website for the detailed explanation of each item: <https://www.jvc.net/cs/car/> • The availability of each item vary depending on the model. Turn the volume knob clockwise to select [SUBWOOFER SET], then press the knob.
  • Page 14: Other Information

    [RELAX]/[SUNSET]: The selected color pattern is shown. (Selectable only when [ALL ZONE] is selected Illumination Color Setting in step 4.) For KD-T92MBS, you can set your preferred illumination color for each zone. Repeat step 4 and step 5 to set color for other zones. Press to exit.
  • Page 15: Bluetooth

    On the faceplate Press B SRC to turn on the unit. Play back/pause Press the volume knob. Search and select the name of your receiver (“KD-T92MBS”/ Select group or folder Press 2 J / 1 K. “KD-T721BT”/“KD-TD72BT”/“KD-SR87BT”) on the Bluetooth device.
  • Page 16: Procédure De Base

    Installation/Connexion Procédure de base Retirez la clé de contact, puis déconnectez la borne de la batterie de la voiture. Connectez les fils correctement. Voir “Connexions” à la page 3. Cette section est réservée aux installateurs professionnels. Installez l’appareil dans votre voiture. Reportez-vous à “Installation de Pour des raison de sécurité, laissez le travail de câblage et de montage des professionnels.
  • Page 17: Liste De Pièces (Fourni)

    Connexions Installation de l’appareil (sans le manchon de montage) Retirez le manchon de montage et la plaque de garniture de l’appareil. Tableau de bord Alignez les entailles de l’appareil (des deux côtés) avec le support de du véhicule Borne de l’antenne montage du véhicule et fixez l’appareil avec les vis (en vente dans le commerce).
  • Page 18: Avant L'utilisation

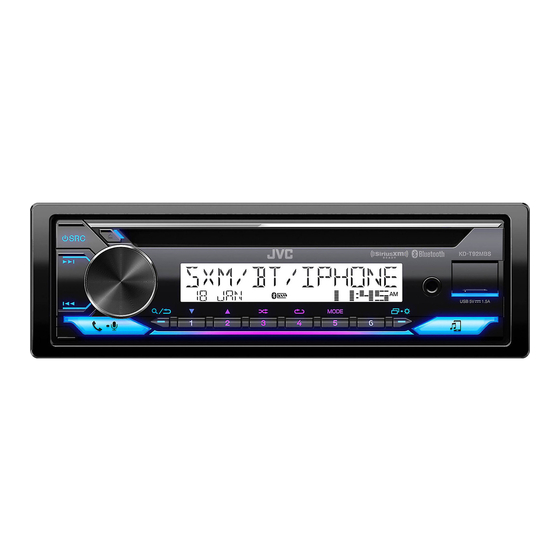
    Avant l’utilisation Fonctionnement de base (sur la façade) IMPORTANTES Fenêtre d’affichage*1 *1 Uniquement à des fins d’illustration. KD-T721BT/ • Pour utiliser correctement l’appareil, veuillez lire ce Guide complément KD-TD72BT/ avant de l’utiliser. Il est particulièrement important que vous lisiez et KD-SR87BT Bouton de volume Fente d’insertion...
  • Page 19: Prise En Main

    Prise en main Faites les réglages de base Maintenez enfoncée Vérifiez le type de transition et annulez la Tournez le bouton de volume pour sélectionner un élément (voir le tableau suivant), puis appuyez sur le bouton. démonstration Répétez l’étape jusqu’à ce que l’élément souhaité soit sélectionné ou activé.
  • Page 20: Réglages En Mémoire

    Radio CD/USB/iPod Source sélectionnable: Recherchez une station • CD/USB/iPod USB ou iPod BT Appuyez répétitivemenent sur SRC pour sélectionner FM ou AM. Appuyez sur pour rechercher une station automatiquement. Démarrez la lecture (ou) La source change automatiquement et la lecture démarre quand vous insérez un Maintenez en enfoncé...
  • Page 21: Réglages Du Menu

    Pour retourner à l’option de réglage précédente, appuyez sur • Reportez-vous au MANUEL D’INSTRUCTIONS sur les sites web suivant pour une Tournez le bouton de volume dans le sens des aiguilles d’une montre pour explication détaillée de chaque élément: <https://www.jvc.net/cs/car/> choisir , puis appuyez sur le bouton.
  • Page 22: Autres Informations

    Réglage de la couleur d’éclairage apparaît. (Sélectionnable uniquement quand [ALL ZONE] est choisi à l’étape 4.) Pour le KD-T92MBS, vous pouvez régler votre couleur d’éclairage préférée pour Répétez l’étape 4 et l’étape 5 pour régler la couleur pour les autres zones. chaque zone. Appuyez sur pour quitter.
  • Page 23 SRC pour mettre l’appareil sous tension. Choisissez un groupe ou Appuyez sur 2 Recherchez et sélectionnez le nom de votre récepteur (“KD-T92MBS”/ un dossier “KD-T721BT”/“KD-TD72BT”/“KD-SR87BT”) sur le périphérique Bluetooth. Réalisez (A) ou (B) en fonction de ce qui apparait sur l’affichage.
  • Page 24: Procedimiento Básico

    Instalación/Conexión Procedimiento básico Quite la llave del interruptor de encendido; después, desconecte el terminal de la batería del automóvil. Conecte los cables correctamente. Consulte “Conexión del cableado” en la Esta sección es para los instaladores profesionales. página 3. Para fines de seguridad, deje que un profesional realice el cableado y el montaje. Consulte con un Instale la unidad en su automóvil.
  • Page 25 Conexión del cableado Instalación de la unidad (sin manguito de montaje) Retire de la unidad, el manguito de montaje y la placa embellecedora. Salpicadero Alinee los orificios de la unidad (en ambos lados) con la ménsula de del vehículo Terminal de la antena montaje del vehículo y asegure la unidad con los tornillos (disponibles en el mercado).
  • Page 26: Antes Del Uso

    Antes del uso Puntos básicos (en la placa frontal) IMPORTANTE Ventanilla de visualización*1 *1 Solo para fines ilustrativos. KD-T721BT/ • Antes de utilizar este producto y para asegurar su uso correcto, lea KD-TD72BT/ esta guía por completo. En especial, lea y observe las Advertencias y KD-SR87BT Rueda de volumen Ranura de carga...
  • Page 27: Procedimientos Iniciales

    Procedimientos iniciales Realice los ajustes básicos Pulse y mantenga pulsado Confirmar el tipo de transición y cancelar la Gire la rueda de volumen para seleccionar un elemento (consulte la siguiente tabla) y, a continuación, pulse la rueda. demostración Repita el paso hasta que se seleccione o active el elemento deseado.
  • Page 28: Ajustes En La Memoria

    Radio CD/USB/iPod Fuente seleccionable: Búsqueda de una emisora • CD/USB/iPod USB o iPod BT Pulse SRC repetidamente para seleccionar FM o AM. Pulse para la búsqueda automática de emisoras. Inicie la reproducción La fuente cambia automáticamente y la reproducción se inicia al cargar un disco Pulse y mantenga pulsado hasta que parpadee “M”...
  • Page 29: Ajustes Del Menú

    Para volver al elemento de ajuste anterior, pulse • Para obtener más detalles sobre cada una de las opciones, consulte el MANUAL DE INSTRUCCIONES en el siguiente sitio web: <https://www.jvc.net/cs/car/> Gire la rueda de volumen en sentido horario para seleccionar •...
  • Page 30: Otras Informaciones

    : Se muestra el patrón del color [RELAX] [SUNSET] seleccionado. (Puede seleccionarse sólo si se selecciona Para KD-T92MBS, el color de iluminación preferido se puede ajustar para cada en el paso 4.) [ALL ZONE] zona. Repita los pasos 4 y 5 para definir el color para las otras zonas.
  • Page 31: Contestar Una Llamada

    Reproducción/pausa Pulse la rueda de volumen. Pulse SRC para encender la unidad. Busque y seleccione el nombre de su receptor (“KD-T92MBS”/“KD-T721BT”/ Seleccione un grupo o carpeta Pulse 2 “KD-TD72BT”/“KD-SR87BT”) en el dispositivo Bluetooth. Realice (A) o (B) dependiendo de los datos mostrados en la pantalla.
  • Page 32 • Windows Media is a registered trademark or trademark of Microsoft Corporation in the United States and/or other countries. This product is protected by certain intellectual property rights of Microsoft. Use or distribution of such technology outside of this product is prohibited without a license from Microsoft. •...

Ce manuel est également adapté pour:

Kd-t721btKd-td72btKd-sr87bt

Table des Matières