Table des Matières

Publicité

Les langues disponibles

Les langues disponibles

Liens rapides

STUFE A PELLET
MANUALE DI INSTALLAZIONE,
USO E MANUTENZIONE
POÊLES À PELLET
MANUEL D'INSTALLATION,
UTILISATION ET MAINTENACE
PELLET STOVES
INSTALLATION, USE AND
MAINTENANCE HANDBOOK
Pag. 2
Page 33
Page 62

Publicité

Table des Matières
loading

Sommaire des Matières pour Cadel Nice

  • Page 1 STUFE A PELLET Pag. 2 MANUALE DI INSTALLAZIONE, USO E MANUTENZIONE POÊLES À PELLET Page 33 MANUEL D'INSTALLATION, UTILISATION ET MAINTENACE PELLET STOVES Page 62 INSTALLATION, USE AND MAINTENANCE HANDBOOK...
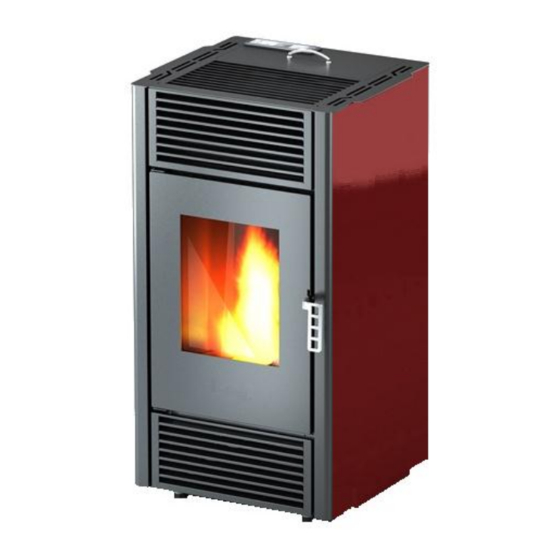
  • Page 2 Figura 1 Figura 2 Pag. 2 MIRIAM-NICE-DIANA-PRETTY-MARY...
  • Page 3: Table Des Matières

    9.2. INFORMAZIONI PER LE RIPARAZIONI ... 28 5.6. MANCATA ENERGIA ........16 9.3. RICAMBI ............29 5.7. SET TEMPERATURA ........16 9.4. CARATTERISTICHE ......... 30 5.8. TEMPERATURA FUMI ........17 9.5. MONTAGGIO FIANCHI ........32 5.9. SPEGNIMENTO ..........17 Pag. 3 MIRIAM-NICE-DIANA-PRETTY-MARY...
  • Page 4: Gentile Cliente

    Per ulteriori dettagli, contattare la propria autorità locale o il punto di raccolta più vicino. In caso di smaltimento errato di questo materiale di scarto, potrebbero venire applicate delle penali, in base alle leggi nazionali. Pag. 4 MIRIAM-NICE-DIANA-PRETTY-MARY...
  • Page 5: Imballo

    3) con tubi inox isolati (A) o su canna fumaria esistente (B). Entrambe le soluzioni devono avere un tappo di ispezione (AT) e/o portina di ispezione (AP). È vietato allacciare più apparecchiature a pellets o di qualsiasi altra tipologia nella stessa canna fumaria. Figura 3 Pag. 5 MIRIAM-NICE-DIANA-PRETTY-MARY...
  • Page 6: Caratteristiche Tecniche

    (è la migliore), quadra o rettangolare (il rapporto tra i lati interni deve essere ≤1,5) con i lati raccordati con raggio minimo 20 mm. La dimensione della sezione deve essere minimo Figura 4 Ø120mm, massimo Ø180mm. Pag. 6 MIRIAM-NICE-DIANA-PRETTY-MARY...
  • Page 7: Manutenzione

    Figura 5 2.8. COMPONENTI CAMINO LEGENDA: (1) Comignolo (2) Via di efflusso (3) Condotto fumario (4) Isolamento termico (5) Parete esterna (6) Raccordo del camino (7) Canale da fumo (8) Generatore calore (9) Portina ispezione Figura 6 Pag. 7 MIRIAM-NICE-DIANA-PRETTY-MARY...
  • Page 8: Presa D'aria Esterna

    La presa d’aria deve essere distante da: 1,5 m SOTTO Porte, finestre, scarichi fumi, intercapedini, … 1,5 m ORIZZONTALMENTE Porte, finestre, scarichi fumi, intercapedini, … 0,3 m SOPRA Porte, finestre, scarichi fumi, intercapedini, … 1,5 m LONTANO Da uscita fumi Pag. 8 MIRIAM-NICE-DIANA-PRETTY-MARY...
  • Page 9: Collegamento Alla Canna Fumaria

    È vietato collegare altri apparecchi di qualsiasi tipologia (stufe a legna, cappe, caldaie, ecc… ). Il canale da fumo deve essere distante minimo 400 mm da elementi costruttivi infiammabili o sensibili al calore (vedi Figura 9 a pag.10). Pag. 9 MIRIAM-NICE-DIANA-PRETTY-MARY...
  • Page 10: Esempi Di Installazione Corretta

    Ø120mm: tutto ancorato muro. comignolo antivento (vedi Figura 5 (tipo A) a pag.7). 4. Sistema di canalizzazione tramite raccordi a T che permette una facile pulizia senza lo smontaggio dei tubi. Figura 9 Pag. 10 MIRIAM-NICE-DIANA-PRETTY-MARY...
  • Page 11: Carburante

    300mm attorno al tubo (vedi paragrafo 2.12 a pag.10). In entrambi i casi, inserire fra la canna fumaria e il muro/solaio un adeguato isolante. Pag. 11 MIRIAM-NICE-DIANA-PRETTY-MARY...
  • Page 12: Installazione

    La stufa è già funzionante tramite una sonda termostato posizionata internamente alla stessa (vedi Figura 16 a pag.29, Particolare 10 - Sonda Ambiente). Se si desidera si può collegare la stufa ad un termostato esterno: si raccomanda di non fargli passare vicino alcuna fonte di calore. Pag. 12 MIRIAM-NICE-DIANA-PRETTY-MARY...
  • Page 13 Suddetta operazione va eseguita da un tecnico specializzato. Pag. 13 MIRIAM-NICE-DIANA-PRETTY-MARY...
  • Page 14: Ventilazione

    ATTENZIONE: i valori di programmazione da 1 a 5 sono preimpostati dalla ditta e possono essere variati solo da un tecnico autorizzato. Pag. 14 MIRIAM-NICE-DIANA-PRETTY-MARY...
  • Page 15: Pannello Di Controllo

    Label del parametro in modifica. Durante l’avvio riporta lo stato della scheda. Durante il lavoro Display B riporta la temperatura impostata dall’utente. Durante la modifica dei parametri riporta il valore del parametro in modifica. Figura 12 Pag. 15 MIRIAM-NICE-DIANA-PRETTY-MARY...
  • Page 16: Avviamento

    B. Se il valore della temperatura ambiente supera il limite stabilito da tastiera nel set di temperatura, la potenza calorica viene portata al minimo fino a quando la soglia rientra nel valore prefissato visualizzando la scritta “r IS”. Pag. 16 MIRIAM-NICE-DIANA-PRETTY-MARY...
  • Page 17: Temperatura Fumi

    5.13. IMPOSTARE OROLOGIO Per impostare l’orologio premere il tasto P3 più volte finché si accende il led verde con l’orologio segnalato e compare la scritta “UT02”: regolare l’ora tramite i tasti P1 e P2. Pag. 17 MIRIAM-NICE-DIANA-PRETTY-MARY...
  • Page 18: Programmazione Settimanale

    Per impostare premere il tasto P3 fino a trovare UT04, con il tasto P1 trovare il valore 99, premere P3 e impostare il delta dei gradi (consigliamo 3°C). Se il valore è 0°, la funzione è disattivata. Pag. 18 MIRIAM-NICE-DIANA-PRETTY-MARY...
  • Page 19: Telecomando (Optional)

    15 minuti fino al raffreddamento. Resettare l'errore tramite tasto ON/OFF. Verificare il tipo di guasto come da pag.25. Dopo aver rimosso la causa, pulire il braciere e avviare la stufa tramite tasto ON/OFF. Pag. 19 MIRIAM-NICE-DIANA-PRETTY-MARY...
  • Page 20: Allarme Sovratemperatura

    7.3. PULIZIA MAIOLICHE Alcuni modelli di stufe hanno un rivestimento esterno in maiolica. Esse sono di fattura artigianale e come tali possono presentare inevitabilmente cavillature, puntinature, ombreggiature. Per la pulizia delle Pag. 20 MIRIAM-NICE-DIANA-PRETTY-MARY...
  • Page 21: Pulizia Vetro

    Solo quando la cenere è spenta si può gettare nei rifiuti organici. Pulire e aspirare anche il vano braciere da eventuale  cenere accumulatasi al suo interno (particolare M). Pag. 21 MIRIAM-NICE-DIANA-PRETTY-MARY...
  • Page 22: Pulizia Mensile Canale Da Fumo

    7.7. PULIZIA MENSILE CAMERA FUMI Ogni mese si deve provvedere alla pulizia del vano fumi (vedi Figura 16 a pag.29). Ruotare la stufa per accedere nella parte  posteriore. Svitare le due viti del tappo (T) chiusura vano  fumi. Pag. 22 MIRIAM-NICE-DIANA-PRETTY-MARY...
  • Page 23 Pulire aspirando la cenere accumulatasi  all’interno. Dopo la pulizia ripetere l’operazione inversa  verificando l’integrità e l’efficienza della guarnizione e se necessario provvedere alla sua sostituzione. Pag. 23 MIRIAM-NICE-DIANA-PRETTY-MARY...
  • Page 24: Pulizia Annuale Canale Fumi

    Pulire annualmente dalla fuliggine, con l’utilizzo di spazzole. L’operazione di pulizia deve essere eseguita da un tecnico specializzato, il quale si occuperà della pulizia del canale dal fumo, della canna fumaria e del comignolo, verificando inoltre la loro efficienza. Tale operazione deve essere eseguita almeno una volta all’anno Pag. 24 MIRIAM-NICE-DIANA-PRETTY-MARY...
  • Page 25: Pulizia Dei Ventilatori

    Fare revisionare la stufa da un tecnico specializzato per allarme attivo (Alar dep, Alar Sond) localizzare le cause. La stufa a regime Pulizia braciere La stufa va al minimo, aspirazione fumi al massimo, Scritta display “Stop nessun problema. FirE” Pag. 25 MIRIAM-NICE-DIANA-PRETTY-MARY...
  • Page 26 Chiamare tecnico specializzato. Sonda temperatura fumi difettosa Sostituire la sonda fumi. Chiamare tecnico specializzato. Allarme display Aspiratore fumi rotto L'aspiratore fumi va sempre al massimo dei giri. “AlAr FAn FAil” Sostituire l'aspiratore fumi immediatamente. Chiamare tecnico specializzato. Pag. 26 MIRIAM-NICE-DIANA-PRETTY-MARY...
  • Page 27 Sostituire scheda elettronica. Chiamare tecnico specializzato. Il ventilatore scambiatore ambiente non Sostituire il ventilatore ambiente. funziona Chiamare tecnico specializzato. Valore impostato nella scheda alla fase 5 Fare regolare il carico di pellets da un tecnico troppo alto specializzato. Pag. 27 MIRIAM-NICE-DIANA-PRETTY-MARY...
  • Page 28: Dati Tecnici

    Per la sostituzione e/o pulizia della coclea di carico, è necessario svitare i tre bulloni del  motoriduttore (3) e sfilarlo, svitare le due viti sotto il motoriduttore della coclea, togliere protezione mani interna al serbatoio, poi svitare il bullone interno della coclea, per il rimontaggio procedere in senso contrario. Pag. 28 MIRIAM-NICE-DIANA-PRETTY-MARY...
  • Page 29: Ricambi

    ASPIRATORE EBM COM0268 VENTILATORE TGA60/300 COM0239 TERMOCOPPIA SONDA FUMI COM0238 TERMORESISTENZA AMBIENTE COM0401 TUBO SILICONICO 7x4x400 VAN0898 FIANCO METALLO CURVO NICE 387x912 VAN4422 MAIOLICA CURVA NICE 382x228 AID5415 FIANCO CON BUGNE CHANTAL/PRETTY 255x913 AID5210 VETRO CERAMICO 272x360 AID5690 BRACIERE+CASSETTO CENERE SLM0604...
  • Page 30: Caratteristiche

    9.4. CARATTERISTICHE DESCRIZIONE NICE MIRIAM 7 kW 7 kW LARGHEZZA 57,0 cm 48,6 cm PROFONDITÁ 46,6 cm 46,6 cm ALTEZZA 95,0 cm 95,0 cm PESO 80 kg 68 kg POTENZA TERMICA 4,4 - 8 KW 4,4 - 8 KW INTRODOTTA (Min/Max)
  • Page 31 230V - 50Hz 230V - 50Hz POTENZA ASSORBITA (Max) 360 W 360 W 360 W POTENZA ASSORBITA 300 W 300 W 300 W RESISTENZA ACCENDITORE PRESA D'ARIA ESTERNA MINIMA 80 cm 80 cm 80 cm (SEZIONE UTILE ULTIMA) Pag. 31 MIRIAM-NICE-DIANA-PRETTY-MARY...
  • Page 32: Montaggio Fianchi

    Il fianco stretto va agganciato sui fori quadri. e) Riposizionare il coperchio: avvitare le 2 viti superiori e le 3 viti posteriori. Pag. 32 MIRIAM-NICE-DIANA-PRETTY-MARY...
  • Page 33 Image 1 Image 2 Pag. 33 MIRIAM-NICE-DIANA-PRETTY-MARY...
  • Page 34 9.4. CARACTERISTIQUES ........59 5.7. RÉGLAGE DE TEMPÉRATURE ....... 47 9.5. MONTAGE DES COTES ......... 61 5.8. TEMPÉRATURE DE LA FUMÉE ..... 47 5.9. EXTINCTION ..........47 5.10. ATTENTION ..........47 5.11. ÉTEINDRE LE FEU ........47 Pag. 34 MIRIAM-NICE-DIANA-PRETTY-MARY...
  • Page 35: Pièces De Rechange

    Pour plus de détails, veuillez contacter les autorités locales ou le point de collecte le plus proche. Des amendes seront appliquées conformément aux lois nationales en vigueur en cas d’évacuation non correcte du produit. Pag. 35 MIRIAM-NICE-DIANA-PRETTY-MARY...
  • Page 36: Emballage

    (A) ou un conduit collecteur préexistant (B); les deux solutions doivent posséder un tampon de visite (AT) et/ou un clapet de visite (AP). Il est interdit de brancher plusieurs appareils à pellets ou de tout autre type dans le même conduit collecteur. Image 3 Pag. 36 MIRIAM-NICE-DIANA-PRETTY-MARY...
  • Page 37: Caractéristiques Techniques

    (le rapport entre les côtés internes doit être ≤1,5) avec les côtés raccordés avec rayon minimum de 20 mm. section peut varier entre diamètre minimum de 120 mm et un diamètre maximum de 180 mm. Image 4 Pag. 37 MIRIAM-NICE-DIANA-PRETTY-MARY...
  • Page 38: Maintenance

    LÉGENDE : (1) Pot de cheminée (2) Voie de efflux (3) Conduit de cheminée (4) Isolation thermique (5) Paroi extérieure (6) Raccordement de cheminée (7) Conduit de fumées (8) Générateur de chaleur (9) Clapet d’inspection Image 6 Pag. 38 MIRIAM-NICE-DIANA-PRETTY-MARY...
  • Page 39: Prise D'air Extérieur

    La prise d’air doit se trouver a: 1,5 mètres EN-DESSOUS Portes, fenêtres, dégagements, gaines… 1,5 mètres HORIZONTALEMENT Portes, fenêtres, dégagements, gaines… 0,3 mètres AU-DESSUS Portes, fenêtres, dégagements, gaines… 1,5 mètres LOIN Des sorties des fumée. Pag. 39 MIRIAM-NICE-DIANA-PRETTY-MARY...
  • Page 40: Connexion Au Conduit Collecteur

    Il est interdit de raccorder d’autres appareils, quels qu’ils soient (poêle à bois, hottes, chaudières, etc.). Le conduit de fumée doit se trouver à une distance minimale de 400 mm des éléments de construction inflammables ou sensibles à la chaleur (Image 9, page 41). Pag. 40 MIRIAM-NICE-DIANA-PRETTY-MARY...
  • Page 41: Exemples De Bonne Installation

    : le tout bien ancré dans le mur. Avec pot de cheminée anti-vent (voir Image 5-type page 38). 4. Système de canalisation au moyen de raccords en T pour nettoyer facilement sans devoir démonter les tuyaux. Image 9 Pag. 41 MIRIAM-NICE-DIANA-PRETTY-MARY...
  • Page 42: Combustible

    59-60), vérifier également que tout le parcours des fumées s'effectue en conditions de sécurité (éventuelles pertes de fumées et distances avec les matériaux inflammables, etc.). Si le conduit de fumées passe à travers un mur, faire un trou agrandi de minimum Pag. 42 MIRIAM-NICE-DIANA-PRETTY-MARY...
  • Page 43: Installation

    électrique dispose d’une mise à la terre en bon état ; si elle n’existe pas ou si elle ne fonctionne pas, il est nécessaire de la réaliser aux normes. Si le câble d’alimentation est endommagé, il devra être remplacé par un technicien spécialisé. Pag. 43 MIRIAM-NICE-DIANA-PRETTY-MARY...
  • Page 44: Branchement Du Thermostat Externe

    ATTENTION : les paramètres de programmation de 1 à 5 sont préprogrammés par l’entreprise et ne peuvent être modifiés que par un technicien autorisé. Pag. 44 MIRIAM-NICE-DIANA-PRETTY-MARY...
  • Page 45: Panneau De Contrôle

    Durant le démarrage il indique l’état de la carte. Durant le travail il Display B indique la température établie par l’utilisateur. Durant la modification des paramètres, il indique la valeur du paramètre en cours de modification. Image 12 Pag. 45 MIRIAM-NICE-DIANA-PRETTY-MARY...
  • Page 46: Mise En Marche

    éjectera les résidus de fumée pendant 15 minutes et la poêle s'éteint. Réinitialiser l'erreur à l’aide de la touche ON/OFF. Une fois que le refroidissement a eu lieu, enlever les accumulations de pellets dans le brasero et mettre en marche le poêle. Pag. 46 MIRIAM-NICE-DIANA-PRETTY-MARY...
  • Page 47: Réglage De Température

    5.13. PROGRAMMER L’HORLOGE Pour programmer l’horloge, presser la touche P3 plusieurs fois jusqu’à ce que la led verte avec l’horloge signalé s’allume et que l’indication "UT02" s’affiche en réglant l’heure à l’aide des touches P1 e P2. Pag. 47 MIRIAM-NICE-DIANA-PRETTY-MARY...
  • Page 48: Programmation Prog.sett (Hebdomadaire)

    2/4 C° le poêle se rallume automatiquement. Pour l’activer appuyer sur la touche P3 jusqu’à UT04, avec la touche P1 avancer à la valeur 99, appuyer sur la touche P3 pour régler le différentiel de température (ont conseille 3 C°) si la valeur est 0 C° la fonction est désactivée. Pag. 48 MIRIAM-NICE-DIANA-PRETTY-MARY...
  • Page 49: Telecommande (Option)

    15 minutes. Réinitialiser l'erreur à l’aide de la touche ON/OFF. Vérifier le type de panne selon la page 54. Après avoir éliminé la cause, nettoyer le braséro, et remettre le poêle en marche au moyen de la touche ON/OFF. Pag. 49 MIRIAM-NICE-DIANA-PRETTY-MARY...
  • Page 50: Alarme Surchauffe

    7.2. NETTOYAGE DES PARTIES EN METAL PEINT Pour le nettoyage des parties en métal peint, utiliser un chiffon souple. Ne jamais utiliser de substances dégraissantes, de l’alcool, des diluants, de l’acétone, et des essences, qui endommageraient irrémédiablement la peinture. Pag. 50 MIRIAM-NICE-DIANA-PRETTY-MARY...
  • Page 51: Nettoyage De La Faience

    S’il est usagé, il faudra remplacer les parties (voir paragraphe 9.3, page 58). Pag. 51 MIRIAM-NICE-DIANA-PRETTY-MARY...
  • Page 52: Mensuel Nettoyage Du Conduit De Fumee

    Dévisser les deux vis du bouchon (T) de  fermeture de l’espace fumée. Nettoyer en aspirant la cendre qui s’est  accumulée à l’intérieur. Après le nettoyage répéter l’opération  inverse vérifiant l’intégrité fonctionnement de la garniture, et si besoin est, la remplacer. Pag. 52 MIRIAM-NICE-DIANA-PRETTY-MARY...
  • Page 53: Nettoyage Annuel Du Canal

    7.9. NETTOYAGE DES TUYAUX DE FUMEE Chaque année faire enlever la suie du conduit de la fumée, le conduit collecteur et le pot de cheminée à l’aide de brosses par un technicien spécialisé, qui en vérifiera également le bon fonctionnement. Pag. 53 MIRIAM-NICE-DIANA-PRETTY-MARY...
  • Page 54: Nettoyage Des Ventilateurs

    Faire réviser le poêle par un technicien Sond" n’apparaisse à l’écran. expert pour repérer les causes. Poêle à plein régime, le Braséro encrassé Le poêle marche au ralenti, aspiration display affiche “Stop FirE” fumée au max., pas de problème. Pag. 54 MIRIAM-NICE-DIANA-PRETTY-MARY...
  • Page 55 Les pellets peuvent aussi brûler avec la Alerte display dépression du conduit de fumée, sans “Alar FAn FAil" l’aide de l’aspirateur. Remplacer l’aspirateur de fumée immédiatement ; faire marcher le poêle sans l’aspirateur peut être nuisible à la santé. Contacter un technicien expert. Pag. 55 MIRIAM-NICE-DIANA-PRETTY-MARY...
  • Page 56 Appeler un technicien expert. Le ventilateur échangeur ne marche Remplacer le ventilateur ambiant. Appeler un technicien expert. L’entrée paramétrée dans la carte Faire régler le chargement de pellets par pour la phase 5 est trop élevée un technicien spécialisé. Pag. 56 MIRIAM-NICE-DIANA-PRETTY-MARY...
  • Page 57: Donnes Techniques

    (3) et l'extraire, desserrer les deux vis sous le motoréducteur de la vis sans fin, enlever la protection des mains à l'intérieur du réservoir, puis dévisser le boulon à l'intérieur de la vis sans fin. Pour le démontage, effectuer les opérations en sens inverse. Pag. 57 MIRIAM-NICE-DIANA-PRETTY-MARY...
  • Page 58: Pièces De Rechange

    COM0268 VENTILATEUR TGA60/300 COM0239 THERMOCOUPLE SONDE FUMEES COM0238 THERMORÉSISTANCE AMBIANTE COM0401 TUYAU EN SILICONE 7x4x400 VAN0898 CÔTE METALLIQUE COURBÉ NICE 387x912 VAN4422 FAÏENCE COURBÉ NICE 382x228 AID5415 CÔTE GAUFRÉE CHANTAL/PRETTY 255x913 AID5210 VITRE CERAMIQUE 272x360 AID5690 BRASERO + CAISSON CENDRE...
  • Page 59: Caracteristiques

    9.4. CARACTERISTIQUES DESCRIPTION NICE MIRIAM 7 kW 7 kW LARGEUR 57,0 cm 48,6 cm PROFONDEUR 46,6 cm 46,6 cm HAUTEUR 95,0 cm 95,0 cm POIDS 80 kg 68 kg PUISSANCE THERMIQUE 4,4 - 8 KW 4,4 - 8 KW INTRODUITE (Min/Max)
  • Page 60 230V - 50Hz 230V - 50Hz PUISSANCE ABSORBÉE (Max) 360 W 360 W 360 W PUISSANCE ABSORBÉE 300 W 300 W 300 W RÉSISTANCE ALLUMEUR MINIMUM PRISE D'AIR EXTÉRIEUR 80 cm 80 cm 80 cm (DERNIERE SURFACE NETTE) Pag. 60 MIRIAM-NICE-DIANA-PRETTY-MARY...
  • Page 61: Montage Des Cotes

    Le côté étroit doit être accroché dans des trous carrés. e) Remettre le couvercle en place: serrer les 2 vis supérieures et les 3 vis postérieures. Pag. 61 MIRIAM-NICE-DIANA-PRETTY-MARY...
  • Page 62 Picture 1 Picture 2 Pag. 62 MIRIAM-NICE-DIANA-PRETTY-MARY...
  • Page 63 9.3. SPARE PARTS ..........87 5.5. FAILED IGNITION .......... 75 9.4. CHARACTERISTICS......... 88 5.6. POWER FAILURE ........... 75 9.5. SIDE PANELS MOUNTING ......90 5.7. TEMPERATURE SETTING ......75 5.8. FUMES TEMPERATURE ........ 76 5.9. TURNING OFF ..........76 Pag. 63 MIRIAM-NICE-DIANA-PRETTY-MARY...
  • Page 64: Spare Parts

    Further details can be obtained from your local authority or nearest collection center. You may be fined if this waste material is disposed of in an unauthorized way, according to national by-laws. Pag. 64 MIRIAM-NICE-DIANA-PRETTY-MARY...
  • Page 65: Packing

    3) with insulated stainless steel pipes (A) or fitted to an existing flue (B). Both solutions must have an inspection cover (AT) and/or flap (AP). Connection of several stoves of any type to the same flue is not allowed. Picture 3 Pag. 65 MIRIAM-NICE-DIANA-PRETTY-MARY...
  • Page 66: Technical Characteristics

    The internal section of the flue may be round (the best solution), square or rectangular (the ratio between internal sides must be ≤1.5) with filleted edges with minimum 20mm radius. Section size must minimum Ø120mm, maximum Ø180mm. Picture 4 Pag. 66 MIRIAM-NICE-DIANA-PRETTY-MARY...
  • Page 67: Maintenance

    Picture 4, page 66). 2.8. CHIMNEY COMPONENTS LEGEND: (1) Chimney (2) Outlet zone (3) Flue pipe (4) Insulation (5) External wall (6) Chimney connection (7) Fumes channel (8) Heat generator (9) Inspection flap Picture 6 Pag. 67 MIRIAM-NICE-DIANA-PRETTY-MARY...
  • Page 68: Fresh Air Inlet

    Air inlet must be away from: 1,5 m UNDER Doors, windows, fumes outlets, air space, … 1,5 m HORIZONTALLY Doors, windows, fumes outlets, air space, … 0,3 m ABOVE Doors, windows, fumes outlets, air space, … 1,5 m AWAY FROM Fumes outlets Pag. 68 MIRIAM-NICE-DIANA-PRETTY-MARY...
  • Page 69: Connecting To The Flue

    It is forbidden to connect other appliances of any type (wood stoves, extractor hoods, boilers, etc.). The stovepipe must be placed at a minimum distance of 400mm from construction elements that are inflammable or heat sensitive (see Picture 9, page 70). Pag. 69 MIRIAM-NICE-DIANA-PRETTY-MARY...
  • Page 70: Examples Of Correct Installation

    Ø120mm double wall, well anchored to the wall. With windproof chimney (see Picture 5- type A, page 67). 4. Channelling system using T connections that facilitate cleaning Picture 9 without removing the pipes. Pag. 70 MIRIAM-NICE-DIANA-PRETTY-MARY...
  • Page 71: Fuel

    Installation of the appliance must ensure easy access for cleaning the stove, exhaust pipes and flue. It is prohibited to install the stove in bedrooms, bathrooms, and fuel storage rooms. If more than one stove is installed the external air inlet must be of a suitable size (see paragraph 2.9, page 68). Pag. 71 MIRIAM-NICE-DIANA-PRETTY-MARY...
  • Page 72: Installation

    Picture 16, page 87, Detail 10 – Room Probe). If required, stove can be connected to an external thermostat. Make sure it is not near any heat sources. These operations must be performed by a specialized fitter. Pag. 72 MIRIAM-NICE-DIANA-PRETTY-MARY...
  • Page 73: Ventilation

    ATTENTION: the programming values from 1 to 5 are set by the manufacturer and can only be altered by an authorized fitter. Pag. 73 MIRIAM-NICE-DIANA-PRETTY-MARY...
  • Page 74: Control Panel

    When altering parameters shows the label for the parameter in question. During start-up shows the circuit board status. During operation Display B shows the temperature set by the user. When altering parameters shows the value of the parameter in question. Picture 12 Pag. 74 MIRIAM-NICE-DIANA-PRETTY-MARY...
  • Page 75: Start-Up

    P2. The temperature selected and ambient temperature will be shown on display B. If the value of ambient temperature exceeds the limit established by the temperature setting keypad, the power goes to minimum until the threshold is within the preset value, when “r IS” will appear on the display. Pag. 75 MIRIAM-NICE-DIANA-PRETTY-MARY...
  • Page 76: Fumes Temperature

    5.13. SETTING THE CLOCK To set the clock press button P3 many times until the green led illuminates on the clock and “UT02” appears on the display. Set the time by means of the P1 and P2 buttons. Pag. 76 MIRIAM-NICE-DIANA-PRETTY-MARY...
  • Page 77: Progr.sett (Weekly Setting)

    To set, press button P3 until you reach UT04, use P1 to find the value of 99, press P3 and set the degree delta (3°C degrees advisable); if the value is 0° the function is deactivated. Pag. 77 MIRIAM-NICE-DIANA-PRETTY-MARY...
  • Page 78: Remote Control (Optional)

    Reset the error pushing ON/OFF button. Check the cause of the fault, as shown on page 83. After removing the cause of the fault, clean the burn pot and start the stove with the ON/OFF button. Pag. 78 MIRIAM-NICE-DIANA-PRETTY-MARY...
  • Page 79: Overheating Alarm

    Some models have external ceramic cladding. Because these are hand crafted they will inevitably have crazing, popping or shading. Use a soft dry cloth to clean ceramics; if detergents are used they will filter into the crazing and highlight it. Pag. 79 MIRIAM-NICE-DIANA-PRETTY-MARY...
  • Page 80: Glass Cleaning

    Frequency of cleaning depends on the type of pellets. Take note if the flame becomes red, is weak, or releases black smoke because this means the burn pot is encrusted and needs cleaning. Replace when worn (see paragraph 9.3, page 87). Pag. 80 MIRIAM-NICE-DIANA-PRETTY-MARY...
  • Page 81: Monthly Cleaning Of Stovepipe

    Loosen the two screws on the smoke  chamber cover (T). Vacuum the accumulated ash inside.  After cleaning repeat the operation in reverse  order, checking the state and efficiency of the gasket: replace if necessary. Pag. 81 MIRIAM-NICE-DIANA-PRETTY-MARY...
  • Page 82: Annual Cleaning Of Fumes Channels

     temperature silicone. Replace cover and screws.  7.9. ANNUAL CLEANING OF STOVEPIPE Once a year have a specialist brush away the soot from the stovepipe, flue and chimney and check their efficiency. Pag. 82 MIRIAM-NICE-DIANA-PRETTY-MARY...
  • Page 83: Fans Cleaning

    Check for active alarm on the display Have an expert inspect stove to find the causes. (Alar dep, Alar Sond) Burn pot dirty stove operating minimum, fumes Stove working Display shows “Stop extraction on maximum, no problem. FirE” Pag. 83 MIRIAM-NICE-DIANA-PRETTY-MARY...
  • Page 84 Faulty fumes temperature probe Have an expert replace fumes probe. Fumes extractor broken Fumes extractor working at maximum rpm. Alarm on display “AlAr Fan Fail” Replace exhaust pipe immediately. Call an expert. Pag. 84 MIRIAM-NICE-DIANA-PRETTY-MARY...
  • Page 85 Faulty electronic circuit board Replace electronic circuit board. Call an expert. Room heat exchanger fan not Replace room fan. working Call an expert. Circuit board setting at stage 5 too Have an expert regulate pellet loading. high Pag. 85 MIRIAM-NICE-DIANA-PRETTY-MARY...
  • Page 86: Technical Data

    To clean and/or replace the auger, loosen the three bolts on the gear motor (3) and remove, loosen  the two screws under the auger gear motor, remove the internal hand protection, then loosen the bolt in the auger. To replace repeat the operations in reverse order. Pag. 86 MIRIAM-NICE-DIANA-PRETTY-MARY...
  • Page 87: Spare Parts

    FAN TGA60/300 COM0239 FUMES PROBE THERMOCOUPLE COM0238 ROOM HEATING ELEMENT COM0401 SILICONE PIPE 7x4x400 VAN0898 CURVED METAL SIDE NICE 387x912 VAN4422 CURVED CERAMIC SIDE NICE 382x228 AID5415 EMBOSSED SIDE CHANTAL/PRETTY 255x913 AID5210 VITROCERAMIC 272x360 AID5690 BURNING POT + ASH PAN...
  • Page 88: Characteristics

    9.4. CHARACTERISTICS DESCRIPTION NICE MIRIAM 7 kW 7 kW WIDTH 57,0 cm 48,6 cm DEPTH 46,6 cm 46,6 cm HEIGHT 95,0 cm 95,0 cm WEIGHT 80 kg 68 kg POWER INTRODUCED(Min/Max) 4,4 - 8 KW 4,4 - 8 KW NOMINAL POWER...
  • Page 89 230V - 50Hz 230V - 50Hz ABSORBED POWER (Max) 360 W 360 W 360 W ABSORBED POWER IGNITION 300 W 300 W 300 W HEATING ELEMENT MINIMUM OUTDOOR AIR INLET 80 cm 80 cm 80 cm (USEFUL FINAL SECTION) Pag. 89 MIRIAM-NICE-DIANA-PRETTY-MARY...
  • Page 90: Side Panels Mounting

    The short side panels must be hanged in square holes. e) Replace lid: screw the upper 2 and the back 3 screws. Pag. 90 MIRIAM-NICE-DIANA-PRETTY-MARY...
  • Page 91 NOTES Pag. 91 MIRIAM-NICE-DIANA-PRETTY-MARY...
  • Page 92 NOTES Pag. 92 MIRIAM-NICE-DIANA-PRETTY-MARY...
  • Page 93 Pag. 93 MIRIAM-NICE-DIANA-PRETTY-MARY...
  • Page 94 POÊLES À PELLET • POÊLES À BOIS • CUISINIÈRES À BOIS • THERMOPOÊLE PELLET STOVES • WOOD STOVES • WOOD COOKING STOVES • THERMOSTOVES FreePoint by CADEL srl • 31025 S. Lucia di Piave (TV) • Via Foresto Sud, 7 • ITALY Tel. +39 0438 738669 • Fax +39 0438 73343 e-mail: cadel@cadelsrl.com...

Ce manuel est également adapté pour:

PrettyMiriamDianaMary

Table des Matières