Chapitres
Table des Matières
Dépannage

Manuels Connexes pour Sportplus SP-HT-1300-B-iE


Sommaire des Matières pour Sportplus SP-HT-1300-B-iE
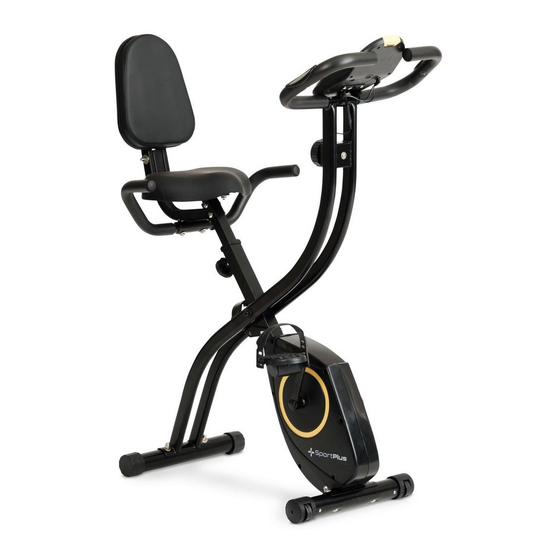
- Page 1 BEDIENUNGSANLEITUNG S-BIKE OPERATING INSTRUCTIONS S-BIKE INSTRUCTIONS D’UTILISATION VÉLO S MANUALE UTENTE S-BIKE MANUAL DE INSTRUCCIONES S-BIKE SP-HT-1300-B-iE / SP-HT-1300-W-iE...
-
Page 2: Table Des Matières
Sehr geehrte Kundin, sehr geehrter Kunde, Wir gratulieren Ihnen zu Ihrem neuen SportPlus Produkt und sind überzeugt, dass Sie mit diesem Produkt zufrieden sein werden. Um eine stets optimale Funktion und Leistungsbereitschaft Ihres Produktes zu gewährleisten, haben wir eine Bitte an Sie: Bevor Sie das Produkt das erste Mal benutzen, lesen Sie bitte die folgende Bedienungsanleitung sorgfältig durch! -
Page 3: Sicherheitshinweise
Computerinformationen Modell: YT6815 Batterieanzahl: Batterietyp: AA, 1,5 V Computerfunktionen: Zeit, Geschwindigkeit, Wegstrecke, Drehzahl, Kalorien, Puls. SICHERHEITSHINWEISE VERWENDUNGSZWECK • Das Produkt ist für die Nutzung im privaten Bereich konzipiert und nicht für medizinische, therapeutische oder gewerbliche Zwecke geeignet. • Das Produkt ist für die Nutzung im Innenbereich vorgesehen. •... - Page 4 VORSICHT – VERLETZUNGSGEFAHR • Benutzen Sie kein beschädigtes oder defektes Produkt. Wenden Sie sich in diesem Fall an eine Fachwerkstatt oder unseren Kundendienst. • Prüfen Sie das Produkt vor jeder Benutzung auf einwandfreien Zustand. Defekte Teile müssen sofort ausgetauscht werden, da sonst Funktion und Sicherheit beeinträchtigt werden.
-
Page 5: Explosionszeichnung
3. EXPLOSIONSZEICHNUNG... -
Page 6: Teileliste
4. TEILELISTE Teilenummer Beschreibung und Daten Anzahl Hauptrahmen 1 Vorderer Standfuß Hinterer Standfuß Sattelstange Handgriff vorne Schlossschraube M8x60L Gewölbte Unterlegscheibe φ8.3xφ22x1.5t Hutmutter M8x16t Nylonmutter M8x8t Unterlegscheibe φ8.3xφ17.5x1.0t Schraube M8 x 35L Handpuls Anschlusskabel Pedal L Pedal R Befestigungsschraube für Sattelstange Sitz Computer Widerstandseinstellknopf... - Page 7 Teilenummer Beschreibung und Daten Anzahl Sechskantmutter M10x8t Sechskantmutter M6x5t Riemenscheibe Flanschmutter M10x8tx1.25P Magnetarm Nylonmutter M10x8t Selbstschneidende Schraube ST4.2x20L Schwungrad Unterlegscheibe φ10.3xφ25x1.5t Platte Unterlegscheibe φ5.2xφ18x1.5t Achse für Spannrolle Achse für Hauptrahmen Inbusschraube M8x80L Schraube M6x10L C-Clip 17 C-Clip 15 Kugellager Sechskantschraube M6x30t Selbstsichernde Schraube ST4.2x15L Gewölbte Unterlegscheibe Feder...
- Page 8 Teilenummer Beschreibung und Daten Anzahl Abdeckkappe für Kurbel Magnethalter Schraube M5x20L Hülse für Sattelstange Stoßleiste Kabeldurchführung Endkappe für Handgriff Buchse φ16xφ22.3xφ30x12.5H Endkappe für hinteren Standfuß Endkappe für vorderen Standfuß Endkappe 1 Endkappe 2 Inbusschraube M5x10L Selbstschneidende Schraube ST4.2x12L Selbstschneidende Schraube ST4.2x20L Schraube M4x10L Magnet Selbstschneidende Schraube ST3.2x12L...
-
Page 9: Montagehinweise
5. MONTAGEHINWEISE Entnehmen Sie alle Teile vorsichtig aus der Verpackung und legen Sie diese auf eine flache Oberfläche. Benutzen Sie dabei eine schützende Bodenunterlage. Der Zusammenbau der Einzelteile sollte von 2 Personen durchgeführt werden! Überprüfen Sie vor dem Zusammenbau anhand der Teileliste die Vollständigkeit der gelieferten Einzelteile. - Page 10 SCHRITT 2: • Befestigen vorderen Standfuß (2A) Schlossschrauben (M8 x 60 mm) (5), der gewölbten Unterlegscheibe (6) und den M8-Sechskant- Hutmuttern (7) am Rahmen (1). Befestigen Sie anschließend den hinteren Standfuß (2B) mit 2 Schlossschrauben (M8 x 60 mm) (5), der gewölbten Unterlegscheibe (6) und den M8-Sechskant-Hutmuttern (7) am Rahmen (1).
- Page 11 SCHRITT 3: • Das linke und rechte Pedal (12L und 12R) sind mit „L“ und „R“ gekennzeichnet. Befestigen Sie die Pedale an den entsprechenden Tretkurbeln. Wenn Sie auf dem Trainingsgerät sitzen, befindet sich das rechte Pedal auf der rechten Seite. •...
- Page 12 SCHRITT 4: • Befestigen Sie den Sattel (14) mit Mutter (8) und Unterlegscheibe (9) an der Sattelstange (3) und schieben Sie diese anschließend in den Rahmen (1). Positionieren Sie die Bohrungen übereinander und sichern Sie den Sattel mit der Stellschraube (13) an der Stange. •...
- Page 13 SCHRITT 5: • Schieben Sie die untere Rückenlehnen-Halterung (24) auf die Sattelstange (3). Sichern Sie die Verbindung mit 2 Sätzen Schlossschrauben (23), Unterlegscheiben (25) und Sicherungsmuttern (26). Befestigen Sie die Rückenlehne (30) an der Rückenlehnen- Halterung (27). Sichern Sie die Verbindung mit 4 Sätzen Schrauben (28) und Federscheiben (29).
- Page 14 SCHRITT 6: • Befestigen Sie den Handgriff vorne (4) mit 2 Schrauben (M8 x 35 mm) (10) am Hauptrahmen (1). • Befestigen Sie den Computer (15) mit 2 Schrauben (M5 x 10 mm) (31) am Handgriff vorne (4). • Schließen Sie das Verbindungskabel (93) und das Handpuls Anschlusskabel (11) an den Computer (15) an.
-
Page 15: Bedienung Des Computers
6. BEDIENUNG DES COMPUTERS FUNKTION RPM (DREHZAHL): 0~999; SPEED (GESCHWINDIGKEIT): 0.0~99.9 KM/h; TIME (ZEIT): 0:00 ~ 00:59. Kann erhöht und verringert werden; DISTANCE (WEGSTRECKE): 0,0~99,9 KM. Kann erhöht und verringert werden; CALORIES (KALORIEN): 0~999. Kann erhöht und verringert werden; PULSE (PULS): P0~240. - Page 16 BEDIENUNG 1. GRUNDLEGENDE FUNKTION Im Standby-Modus kann der Nutzer entweder direkt in die Pedale treten, um mit dem Training zu beginnen, oder vor dem Training Funktionswerte einstellen und dann beginnen. Während der Durchführung des Trainings werden alle Funktionswerte hoch- bzw. heruntergezählt. Methode zum Einstellen von Funktionswerten: Drücken Sie im Standby-Modus die Taste „ENTER“, um in den Modus zum Einstellen des jeweiligen Funktionswerts zu gelangen.
- Page 17 (2) Der Erholungsgrad des Nutzers von F1 bis F6. Erholungsgrad Nutzerstatus Pulsdifferenzwert Super Durchschnittlich 50 40–49 Normal 30–39 Schwach 20–29 Mehr Training erforderlich 10–19 Training dringend erforderlich Unter 10 3. AUTOMATISCHER RUHEMODUS Wenn der Nutzer keine Bedienung vornimmt, geht die Konsole nach 4 Minuten automatisch in den Ruhezustand über.
-
Page 18: Training
7. TRAINING TRAININGSTIPPS Alle Empfehlungen innerhalb dieser Bedienungsanleitung richten sich ausschließlich an gesunde Personen und nicht an Personen mit Herz-/Herz-Kreislauf-Erkrankungen. Bei allen Tipps handelt es sich nur um grobe Vorschläge für ein Trainingsprogramm. Konsultieren Sie, falls notwendig, Ihren Arzt für Ratschläge entsprechend Ihrer persönlichen Bedürfnisse. - Page 19 AUF- UND ABSTEIGEN VOM PRODUKT 1. AUFSTEIGEN Nachdem die Sitzhöhe richtig eingestellt wurde, führen Sie das naheliegende Pedal zur untersten Position und schieben Sie den Fuß unter der Pedalschlaufe ein, sodass Sie einen sicheren Stand auf dem Pedal haben. Schwingen Sie nun das andere Bein zur gegenüberliegenden Pedalseite und setzen Sie sich dabei auf den Sattel.
- Page 20 2. REGELMÄSSIGKEIT Die meisten Experten empfehlen eine Kombination aus gesunder Ernährung, welche in Einklang mit dem Trainingsziel stehen muss, und körperlicher Ertüchtigung drei bis fünf Mal pro Woche. Ein normaler Erwachsener muss zweimal pro Woche trainieren, um sein/ihr aktuelles Fitnesslevel zu halten. Zur Konditionssteigerung und Körpergewichtsänderung muss eine Person mindestens 3 Trainingseinheiten pro Woche einlegen.
- Page 21 GRUNDLAGEN DES TRAININGS Hierbei handelt es sich um sehr generelle Trainingstipps. Diese verfügen über keinen medizinischen Wert und dienen lediglich der Informationsvergabe zu verschiedenen Trainingsarten. Zur Entwicklung eines persönlichen detaillierten Trainingsprogramms ziehen Sie einen Experten heran. Personen, welche an Herzproblemen oder anderen Krankheiten leiden, die durch ein ungewöhnliches oder nicht maßgerechtes Trainingsprogramm oder -aktivitäten verschlimmert werden könnten, MÜSSEN vor der Aufnahme jeglicher Art von Training ihren Arzt konsultieren.
-
Page 22: Problembehandlung - Probleme Mit Der Computeranzeige
8. PROBLEMBEHANDLUNG – PROBLEME MIT DER COMPUTERANZEIGE „Es werden keine Funktionswerte angezeigt. Nur die Pulsanzeige funktioniert“. Dies könnte darauf hinweisen, dass eine Übertragungsstörung zwischen dem Gerät und dem Computer vorliegt. Überprüfen Sie, ob alle Kabel korrekt miteinander verbunden sind und ob keines der Kabel beschädigt ist. -
Page 23: Wartung, Reinigung Und Pflege
9. WARTUNG, REINIGUNG UND PFLEGE • Überprüfen Sie nach dem Zusammenbau und vor dem Einsatz des Gerätes, ob alle Bolzen/Muttern vollständig und korrekt angezogen sind. • Reinigen Sie das Gerät regelmäßig mit einem leicht angefeuchteten Tuch unter Einsatz eines milden Reinigers. •... -
Page 24: Reklamationen & Gewährleistungen
Servicezeit: Montag bis Freitag von 9.00 bis 18.00 Uhr Servicehotline: +49 (0)40 - 780 896 – 35* E-Mail: service@sportplus.org URL: https://sportplus.de/ersatzteile Nationales Festnetz, Gesprächsgebühren sind von Ihrem Telefonanbieter / Ihrem Telefonvertrag abhängig. Bitte achten Sie darauf, dass Sie hierzu folgende Informationen zur Hand haben. -
Page 25: Gewährleistungsbestimmungen
12. GEWÄHRLEISTUNGSBESTIMMUNGEN SportPlus versichert, dass das Produkt, auf das sich die Gewährleistung bezieht, aus qualitativ hochwertigen Materialien hergestellt und mit äußerster Sorgfalt überprüft wurde. Voraussetzung für die Gewährleistung ist die Bedienung und der ordentliche Aufbau gemäß Bedienungsanleitung. Durch unsachgemäße Nutzung und / oder unsachgemäßen Transport kann die Gewährleistung entfallen. -
Page 26: Technical Data
Dear Customer, Congratulations for choosing a SportPlus product. We have every expectation that you will be fully satisfied with your new purchase. To guarantee optimal function of this product, please adhere to the following instructions: Before using this product for the first time, please read the manual carefully! The product has been designed with safety features. -
Page 27: Safety Instructions
Computer information Model: YT6815 Number of batteries: Type of batteries: AA, 1.5 V Computer functions: Time, speed, distance, RPM, calories, pulse. SAFETY INSTRUCTIONS INTENDED USE • This product is intended for private use and is not suitable for medicinal, therapeutic or commercial purposes. - Page 28 CAUTION – RISK OF INJURY • Do not use the product if it is damaged or defective. In this case, contact a professional workshop or our customer service. • Always verify that the product is in impeccable condition before use. Defective components must be replaced immediately as failure to do so may impair the functioning and safety of the product.
-
Page 29: Explosion View
3. EXPLOSION VIEW... -
Page 30: Parts List
4. PARTS LIST Parts number Description and information Quantity Frame 1 Front stabilizer Rear stabilizer Seat post Handlebar Carriage bolt M8 x 60L Curved washer φ8.3 x φ22 x 1.5t Cap nut M8 x 16t Nylon nut M8 x 8t Washer φ8.3 x φ17.5 x 1.0t Screw M8 x 35L Hand pulse wire... - Page 31 Parts number Description and information Quantity Hex nut M10 x 8t Hex nut M6 x 5t Belt wheel Flange nut M10 x 8t x 1.25P Magnetic arm Nylon nut M10 x 8t Self-tapping screw ST4.2 x 20L Flywheel Washer φ10.3 x φ25 x 1.5t Plate Washer φ5.2 x φ18 x 1.5t Tension pulley axle...
- Page 32 Parts number Description and information Quantity Cover cap for crank Magnet holder Screw M5 x 20L Sleeve for seat post Impact strip Cable gland End cap for handle Socket φ16 x φ22.3 x φ30 x 12.5H End cap for rear stabilizer End cap for front stabilizer End cap 1 End cap 2...
-
Page 33: Assembly Instructions
5. ASSEMBLY INSTRUCTIONS Take all parts out of the packaging carefully and place them on a flat surface. When doing this, use suitable padding to protect the working surface. Assembly of the individual parts should be carried out by 2 people! Before assembly, check the parts list to verify that all parts are present. - Page 34 STEP 2: • Fasten the front stabilizer (2A) to the frame (1) using 2 carriage bolts (M8 x 60 mm) (5), the curved washer (6), and the M8 cap nuts (7). Then fasten the rear stabilizer (2B) to the frame (1) using 2 carriage bolts (M8 x 60 mm) (5), the curved washer (6), and the M8 cap nuts (7).
- Page 35 STEP 3: • The left and right pedals (12L and 12R) are marked “L” for left and “R” for right. Mount the pedals to the corresponding treadles. When you are sitting on the home trainer, the right pedal is on your right. •...
- Page 36 STEP 4: • Fasten the seat (14) to the seat post (3) using a nut (8) and washer (9) and then slide the assembly into the frame (1). Align the holes and then fasten the saddle to the seat post using the set screw (13). •...
- Page 37 STEP 5: • Slide the backrest lower frame (24) onto the seat post (3). Secure the connection using 2 sets of carriage bolts (23), washers (25) and lock nuts (26). Fasten the backrest (30) to the backrest upper frame (27). Secure the connection with 4 sets of screws (28) and spring washers (29).
- Page 38 STEP 6: • Fasten the handlebar (4) to the upper part of the frame (1) with 2 screws (M8 x 35 mm) (10). • Fasten the computer (15) to the handlebar (4) with 2 screws (M5 x 10 mm) (31). •...
-
Page 39: Using The Computer
6. USING THE COMPUTER FUNCTION RPM: 0~999; SPEED: 0.0~99.9 KM/h; TIME: 0:00~00:59, Can be switch up and down; DISTANCE: 0.0~99.9 KM, Can be switch up and down; CALORIES: 0~999, Can be switch up and down; PULSE: P0~240, Can be switch up and down;... - Page 40 OPERATION 1. BASIC FUNCTION In the standby interface, the user can directly pedal to start the workout; Or set the function value before exercise, and then work out; When doing exercises, all function values start to count. Function value setting method: in the standby interface, press “Enter” key to ENTER the function value setting interface.When setting, the corresponding function display window will flash.
-
Page 41: Auto Sleep
3. AUTO SLEEP When the user does not have any operation, four minutes later, the console will automatically enter the sleep state.Users can wake up by pressing any button or by pressing the pedal directly. CONTROL VIA APP You can connect the computer via Bluetooth 4.0 to your smartphone/tablet. Please download a compatible app (e.g. -
Page 42: Training
7. TRAINING TRAINING TIPS All recommendations in this manual are intended exclusively for healthy persons and not for persons with heart/cardiovascular problems. All tips are intended only as rough suggestions for a training program. If necessary, consult your physician for tips that meet your personal requirements. The following pages will explain exactly how to operate your new training device and will illustrate the fundamentals of fitness training. - Page 43 GETTING ON AND OFF THE PRODUCT 1. GETTING ON After setting the correct seat height, put the nearest pedal in the lowest position and slide your foot into the pedal straps for a secure footing on the pedal. Now swing your other leg to the pedal on the other side, sitting down on the seat as you do so.
- Page 44 2. FREQUENCY Most experts recommend a combination of health-conscious nutrition, which must be adapted according to the training goal, and physical exercise three to five times per week. A normal adult should train twice per week to retain his/her current level of fitness. In order to improve his/her condition and to change body weight, a person requires a minimum of 3 training sessions per week.
- Page 45 TRAINING BASICS All tips are intended only as general training tips. The tips listed here have no medicinal value and are intended solely as a source of information on various types of training. For a personal detailed training program, please consult a specialist.
-
Page 46: Troubleshooting - Problems With The Computer Display
8. TROUBLESHOOTING – PROBLEMS WITH THE COMPUTER DISPLAY “No function values are displayed. Only the pulse display is working”. This could mean there is transmission interference between the home trainer and the computer. Check to see that all cables are properly connected to one another and that none of the cables is damaged. -
Page 47: Maintenance, Cleaning And Care
9. MAINTENANCE, CLEANING AND CARE • After the assembly and before using the home trainer, always make sure that all bolts/nuts are fully and correctly tightened. • Clean the unit regularly with a slightly damp cloth and a mild cleaning agent. •... -
Page 48: Complaints & Warranties
Service time: Monday to Friday from 9:00 am to 6:00 pm Service hotline: +44 - 203 318 4415* Email: service@sportplus.org URL: https://sportplus.de National fixed-line network, call charges depend on your phone company/your phone contract. Please have the following information at hand when you call. -
Page 49: Warranty Terms
12. WARRANTY TERMS SportPlus guarantees that the product under warranty has been manufactured from the highest quality materials and has been checked with the utmost care. The operation and assembly of the product according to the operating instructions is a precondition of this warranty. -
Page 50: Indications Techniques
Chère cliente, Cher client, Nous vous félicitons pour l'achat de votre nouveau produit SportPlus et sommes convaincus que vous en serez satisfait. Afin de garantir un fonctionnement parfait et un rendement toujours plus optimal de votre produit, nous vous prions de suivre les consignes suivantes : Avant d’utiliser le produit pour la première fois, veuillez lire attentivement les instructions... -
Page 51: Consignes De Sécurité
Informations de l'ordinateur Modèle : YT6815 Nombre de piles : Type de piles : AA, 1,5 V Fonctions de l’ordinateur : Temps, vitesse, distance, vitesse de rotation, calories, pouls. CONSIGNES DE SÉCURITÉ USAGE PRÉVU • Le produit est conçu pour une utilisation dans le domaine privé, et non pas dans un but médical et thérapeutique, ni à... -
Page 52: Attention - Risque De Blessures
ATTENTION - RISQUE DE BLESSURES • N'utilisez jamais le produit lorsqu’il est endommagé ou défectueux. Dans ce cas, adressez-vous à un service technique ou à notre service après-vente. • Avant chaque utilisation, contrôlez le produit afin de vérifier son parfait état. Les pièces défectueuses doivent être remplacées immédiatement, car le fonctionnement et la sécurité... -
Page 53: Vue Éclatée
3. VUE ÉCLATÉE... -
Page 54: Liste Des Pièces
4. LISTE DES PIÈCES Numéro des Description et données Quantité pièces Cadre principal 1 Pied avant Pied arrière Tige de selle Poignée avant Vis à tête bombée M8 x 60L Rondelle incurvée φ8,3 x φ22 x 1,5t Écrou borgne M8 x 16t Écrou en nylon M8 x 8t Rondelle plate φ8,3 x φ17,5 x 1,0t Vis M8 x 35L... - Page 55 Numéro des Description et données Quantité pièces Écrou hexagonal M10 x 8t Écrou hexagonal M6 x 5t Poulie d'entraînement Écrou de bride M10 x 8t x 1,25P Bride aimantée Écrou nylon M10 x 8t Vis autotaraudeuse ST4,2 x 20L Volant Rondelle plate φ10,3 x φ25 x 1,5t Plaque Rondelle plate φ5,2 x φ18 x 1,5t...
- Page 56 Numéro des Description et données Quantité pièces Capuchon d'extrémité pour manivelle Porte-aimant Vis M5 x 20L Manchon pour tige de selle Pièce antichoc Passe-câble Capuchon d'extrémité de la poignée Douille φ16 x φ22,3 x φ30 x 12,5H Capuchon d'extrémité pour pied arrière Capuchon d'extrémité...
-
Page 57: Notices Explicatives De Montage
5. NOTICES EXPLICATIVES DE MONTAGE Enlevez prudemment toutes les pièces de l'emballage et mettez celles-ci sur une surface plane. Utilisez pour cela un revêtement protégeant le sol. L’assemblage des pièces doit être effectué par 2 personnes. Avant l'assemblage, contrôlez l'exhaustivité des pièces livrés au moyen de la liste des pièces. - Page 58 ÉTAPE : • Fixez le pied avant (2A) avec 2 vis à tête bombée (M8 x 60 mm) (5), la rondelle bombée (6) et les écrous borgne hexagonaux M8 (7) sur le cadre (1). Fixez ensuite le pied arrière (2B) avec 2 vis à tête bombée (M8 x 60 mm) (5), la rondelle bombée (6) et les écrous borgne hexagonaux M8 (7) sur le cadre (1).
- Page 59 ÉTAPE : • La pédale gauche et la pédale droite (12G et 12D) sont marquées avec « L » et « R ». Fixez les pédales sur le côté du pédalier correspondant. Si vous êtes assis sur l'appareil d'entraînement, la pédale de droite se trouve du côté droit. •...
- Page 60 ÉTAPE : • Fixez la selle (14) avec l’écrou (8) et la rondelle (9) sur le tube de selle (3) et glissez- la ensuite sans le cadre (1). Positionnez les trous l'un sur l'autre et sécurisez la selle sur le tube avec la vis de réglage (13) sur le tube. •...
- Page 61 ÉTAPE : • Glissez le support du dossier inférieur (24) sur le tube de selle (3). Sécurisez le raccordement avec 2 jeux de vis à tête bombée (23), des rondelles (25) et des boulons de sécurité (26). Fixez le dossier (30) sur le support du dossier (27). Sécurisez le raccordement avec 4 jeux de vis (28) et des rondelles élastiques (29).
- Page 62 ÉTAPE : • Fixez le guidon (4) à la partie supérieure du cadre principal (1) avec 2 vis (M8 x 35 mm) (10). • Fixez l’ordinateur (15) au guidon (4) à l’aide de 2 vis (M5 x 10 mm) (31). •...
-
Page 63: Utilisation De L'ordinateur
6. UTILISATION DE L'ORDINATEUR FONCTION RPM (TR/MIN) : 0~999 ; SPEED (VITESSE) : 0.0~99.9 KM/h ; 0:00~00:59, Peut être changé vers le haut et vers le bas ; DISTANCE (DISTANCE) : 0,0~99,9 KM, Peut être changé vers le haut et vers le bas ;... - Page 64 FONCTIONNEMENT 1. FONCTION DE BASE En mode veille, l’utilisateur peut directement pédaler pour commencer la séance d’entraînement ou régler les valeurs des fonctions avant l’exercice, puis commencer l’entraînement. Pendant l’entraînement, les valeurs de chaque fonction commencent à être calculées. Méthode de réglage des valeurs des fonctions : en mode veille, pressez la touche « ENTER »...
-
Page 65: Veille Auto
(2) Le niveau de récupération de l’utilisateur de F1 à F6. Niveau de Statut de l‘utilisateur Valeur de la différence de récupération fréquence cardiaque Super Moyenne de 50 40–49 Normal 30–39 Faible 20–29 Besoin de plus d‘exercice 10–19 Besoin urgent d‘exercice En dessous de 10 3. -
Page 66: Entrainement
7. ENTRAINEMENT CONSEILS D'ENTRAÎNEMENT Toutes les recommandations incluses dans ce mode d'emploi s'adressent exclusivement à des personnes en bonne santé et non pas à des personnes souffrant de maladies cardiovasculaires. Ces conseils sont surtout donnés à titre indicatif et il ne s'agit que de propositions informatives pour un programme d'entraînement. -
Page 67: Organisation D'un Programme D'entraînement
MONTER ET DESCENDRE DU PRODUIT 1. MONTER Une fois la hauteur d’assise correctement réglée, amenez la pédale la plus proche en position la plus basse et glissez le pied sous la sangle de la pédale de manière à avoir une bonne stabilité sur la pédale. Balancez maintenant l’autre jambe vers le côté... -
Page 68: Régularité
2. RÉGULARITÉ La plupart des experts recommandent la combinaison d'une alimentation saine, qui doit être en accord avec l'objectif de l'entraînement, et de l'exercice physique trois à cinq fois par semaine. Un adulte normal doit s'entraîner deux fois par semaine, pour conserver son niveau de fitness actuel. -
Page 69: Principes De L'entraînement
PRINCIPES DE L'ENTRAÎNEMENT Ici, il s'agit de conseils très généraux sur l'entraînement. Ceux-ci n'ont pas de valeur médicale et servent seulement à vous donner quelques informations sur les différents types d'entraînement. Pour le développement d'un programme d'entraînement détaillé et personnel, veuillez consulter un expert. Les personnes qui souffrent de problèmes cardiaques ou d'autres maladies, qui pourraient être aggravés par un programme d'entraînement ou des activités sportives normatifs, DOIVENT consulter leur médecin avant de commencer tout type d'entraînement. -
Page 70: Dépannage - Problèmes Avec L'affichage De L'ordinateur
8. DÉPANNAGE – PROBLÈMES AVEC L'AFFICHAGE DE L'ORDINATEUR « Aucune valeur des fonctions n'est indiquée. Seulement l'affichage du pouls fonctionne ». Cela pourrait indiquer qu'il existe un dérangement dans la transmission entre l'appareil et l'ordinateur. Contrôlez si tous les câbles sont correctement raccordés et si aucun des câbles n'est endommagé. -
Page 71: Maintenance, Nettoyage Et Entretien
9. MAINTENANCE, NETTOYAGE ET ENTRETIEN • Contrôlez après l'assemblage et avant l'utilisation de l'appareil si tous les boulons/ écrous sont complètement et correctement serrés. • Nettoyez régulièrement l’appareil avec un chiffon légèrement humidifié en utilisant un détergent doux. • C'est particulièrement important pour la selle et les poignées car ces éléments sont constamment en contact avec les parties de votre corps durant tout l'entraînement. -
Page 72: Réclamations Et Garanties
Heures d’ouverture : du lundi au vendredi de 9 h 00 à 18 h 00 Service hotline : +33 - 176 361 493* Adresse électronique : service@sportplus.org Site Internet : https://sportplus.de Réseau national, les frais d’appel dépendent de votre opérateur/votre abonnement téléphonique. -
Page 73: Dispositions De La Garantie
12. DISPOSITIONS DE LA GARANTIE SportPlus certifie que le produit, auquel se réfère la garantie, a été fabriqué avec des matériaux d’excellente qualité et vérifié avec le plus grand soin. Les conditions indispensables pour le recours à la garantie sont une utilisation et un assemblage corrects selon le mode d'emploi. -
Page 74: Dati Tecnici
Gentile Cliente, congratulazioni per l'acquisto del Suo nuovo prodotto SportPlus, che siamo certi Le garantirà la massima soddisfazione. Per garantire funzionamento e prestazioni sempre ottimali del Suo prodotto, La preghiamo di rispettare le condizioni che seguono: Prima del primo utilizzo del prodotto, leggere con attenzione e integralmente questo manuale utente! Il prodotto è... -
Page 75: Avvertenze Per La Sicurezza
Informazioni sul computer Modello: YT6815 Numero di batterie: Tipo di batterie: AA, 1,5 V Funzioni del computer: Tempo, velocità, distanza, giri al minuto, calorie, battito. AVVERTENZE PER LA SICUREZZA UTILIZZO • Il prodotto è progettato per uso privato e non a scopi clinici, terapeutici o commerciali. •... - Page 76 ATTENZIONE - PERICOLO DI LESIONI • Non utilizzare un prodotto danneggiato o difettoso. In tal caso, rivolgersi a un'officina specializzata o al servizio clienti della Società. • Prima di ogni utilizzo, esaminare il prodotto per verificare l’assenza di danni. Sostituire immediatamente le parti difettose, così...
-
Page 77: Disegno Esploso
3. DISEGNO ESPLOSO... -
Page 78: Elenco Delle Parti
4. ELENCO DELLE PARTI Numero parte Descrizione e dati Quantità Telaio principale 1 Piede anteriore Piede posteriore Reggisella Impugnatura anteriore Vite con quadro sottotesta M8 x 60L Rondella curva φ8,3 x φ22 x 1,5t Dado cieco M8 x 16t Dado in nylon M8 x 8t Rondella φ8,3 x φ17,5 x 1,0t Vite M8 x 35L Filo per polso a mano... - Page 79 Numero parte Descrizione e dati Quantità Dado esagonale M10 x 8t Dado esagonale M6 x 5t Puleggia Dado flangiato M10 x 8t x 1,25P Braccio magnetico Dado in nylon M10 x 8t Vite autofilettante ST4,2 x 20L Volano Rondella φ10,3 x φ25 x 1,5t Piastra Rondella φ5,2 x φ18 x 1,5t Asse per rullo tenditore...
- Page 80 Numero parte Descrizione e dati Quantità Tappo di chiusura per pedivella Supporto magnetico Vite M5 x 20L Manicotto per reggisella Paraurti Passacavi Terminale per impugnatura Boccola φ16 x φ22,3 x φ30 x 12,5H Terminale per piede posteriore Terminale per piede anteriore Terminale 1 Terminale 2 Vite a brugola M5 x 10L...
-
Page 81: Note Per Il Montaggio
5. NOTE PER IL MONTAGGIO Estrarre con cautela tutte le parti dalla confezione e disporle su una superficie piana. A tal fine, stendere sul pavimento un rivestimento protettivo. L’assemblaggio delle singole parti dovrebbe essere eseguito da 2 persone! Usando come riferimento l'elenco delle parti, verificare che non vi siano pezzi mancanti prima di procedere al montaggio. - Page 82 PASSAGGIO 2: • Fissare il piede anteriore (2A) con 2 viti con quadro sottotesta (M8 x 60 mm) (5), la rondella curva (6) e i dadi ciechi M8 (7) al telaio (1). Fissare successivamente il piede posteriore (2B) con 2 viti con quadro sottotesta (M8 x 60 mm) (5), la rondella curva (6) e i dadi ciechi M8 (7) al telaio (1).
- Page 83 PASSAGGIO 3: • I pedali sinistro e destro (12S e 12D) sono contrassegnati da “L” e “R”. Fissare i pedali alla pedivella corrispondente. In posizione seduta sull'attrezzo da fitness, il pedale destro deve trovarsi a destra. • Assicurarsi di avvitare il pedale destro in senso orario e il sinistro in senso antiorario.
- Page 84 PASSAGGIO 4: • Fissare la sella (14) con il dado (8) e la rondella (9) al reggisella (3) e poi spingerla nel telaio (1). Posizionare i fori uno sopra l'altro e fissare il sedile con la vite di fissaggio per barra sella (13) al reggisella. •...
- Page 85 PASSAGGIO 5: • Far scorrere il supporto inferiore dello schienale (24) sul reggisella (3). Fissare con 2 set di viti con quadro sottotesta (23), rondelle (25) e controdadi (26). Fissare lo schienale (30) al supporto dello schienale (27). Fissare con 4 set di viti (28) e rondelle elastiche (29).
- Page 86 PASSAGGIO 6: • Fissare il manubrio (4) alla parte superiore del telaio (1) con 2 viti (M8 x 35 mm) (10). • Fissare il computer (15) al manubrio (4) con 2 viti (M5 x 10 mm) (31). • Collegare il filo di collegamento (93) e il filo per polso a mano (11) al computer (15).
-
Page 87: Utilizzo Del Computer
6. UTILIZZO DEL COMPUTER FUNZIONE RPM (GIRI AL MINUTO): 0~999; SPEED (VELOCITÀ): 0.0~99.9 KM/h; TIME (TEMPO): 0:00~00:59, Può essere aumentato o ridotto; DISTANCE (DISTANZA): 0,0~99,9 KM, Può essere aumentata o ridotta; CALORIES (CALORIE): 0~999, Possono essere aumentate o ridotte; PULSE (BATTITO): P0~240, Può... - Page 88 FUNZIONAMENTO 1. FUNZIONE BASE Nell’interfaccia stand-by, l’utente può iniziare direttamente a pedalare per dare il via all’allentamento oppure impostare il valore della funzione prima dell’esercizio fisico e procedere all’allenamento. Durante l’attività fisica, tutti i valori della funzione avviano il conteggio. Modalità...
-
Page 89: Controllo Tramite App
(2) Livello di recupero dell’utente da F1 a F6. Livello di Condizione utente Valore di differenza della recupero frequenza cardiaca Super Medio 50 Buono 40–49 Normale 30–39 Debole 20–29 Necessità di maggiore attività fisica 10–19 Necessità urgente di attività fisica Inferiore a 10 3. -
Page 90: Suggerimenti Per L'allenamento
7. ALLENAMENTO SUGGERIMENTI PER L'ALLENAMENTO Tutte le raccomandazioni contenute in questo manuale utente si riferiscono esclusivamente a soggetti sani e non a persone affette da problemi cardiovascolari. Tutti i suggerimenti sono da intendersi come indicazioni generiche per un programma di allenamento. - Page 91 SALITA E DISCESA SUL/DAL PRODOTTO 1. SALITA Dopo aver regolato correttamente l’altezza del sedile, portare il vicino pedale nella posizione più bassa e fare scorrere il piede sotto la relativa cinghia in modo da avere un appoggio sicuro sul pedale. A questo punto, far oscillare l'altra gamba sul lato opposto del pedale e sedersi sul sedile.
-
Page 92: Fasi Di Allenamento
2. REGOLARITÀ La maggior parte degli esperti raccomanda di combinare un'alimentazione sana, in linea con il proprio obiettivo di allenamento, ad attività fisica dalle tre alle cinque volte alla settimana. Un adulto, in media, deve allenarsi due volte alla settimana per mantenere il proprio livello di preparazione fisica. - Page 93 PRINCIPI DI ALLENAMENTO In questa sezione sono forniti suggerimenti di allenamento estremamente generali. Non si basano su valori medici e sono da intendersi a solo scopo informativo. Per lo sviluppo di un programma di allenamento dettagliato e personalizzato, rivolgersi a un esperto. Le persone affette da problemi cardiaci o altre patologie che potrebbero essere aggravate da programmi di allenamento/esercizi fisici occasionali o irregolari DEVONO consultare un medico prima di qualsiasi attività.
-
Page 94: Risoluzione Dei Problemi - Problemi Con Il Display Del Computer
8. RISOLUZIONE DEI PROBLEMI – PROBLEMI CON IL DISPLAY DEL COMPUTER “Nessun valore di funzione visualizzato. Funziona solo il display delle pulsazioni”. Ciò potrebbe indicare un problema di trasmissione fra attrezzo e computer. Verificare che tutti i cavi siano collegati correttamente e che nessuno di essi sia danneggiato. „Il display delle pulsazioni non funziona più... -
Page 95: Manutenzione, Pulizia E Cura
9. MANUTENZIONE, PULIZIA E CURA • Dopo il montaggio e prima di ogni utilizzo, verificare il prodotto controllando che tutti i dadi/le viti siano inseriti e serrati correttamente. • Pulire il prodotto regolarmente con un panno leggermente inumidito con del detergente delicato. -
Page 96: Reclami E Garanzia
Dal lunedì al venerdì dalle 9.00 alle 18.00 Linea diretta per +39 - 069 480 1459* l'assistenza: E-mail: service@sportplus.org URL: https://sportplus.de Rete fissa nazionale, le tariffe di chiamata dipendono dal proprio gestore telefonico / contratto di telefonia. Assicurarsi di avere a disposizione le informazioni seguenti. -
Page 97: Disposizioni Di Garanzia
12. DISPOSIZIONI DI GARANZIA SportPlus assicura che il prodotto coperto da tale garanzia è stato fabbricato con materiali di alta qualità ed è stato controllato con la massima cura. Affinché la garanzia non sia invalidata, è necessario utilizzare e montare il prodotto in accordo a questo manuale utente. -
Page 98: Datos Técnicos
Estimada cliente, estimado cliente, Le felicitamos por su nuevo producto SportPlus, y estamos convencidos de que quedará completamente satisfecho con él. Para garantizar un funcionamiento y capacidad de rendimiento óptimos de su producto, le pedimos que: ¡Antes de usar el producto por primera vez, lea con atención el siguiente manual de instrucciones! El producto está... -
Page 99: Indicaciones De Seguridad
Información del ordenador Modelo: YT6815 Número de pilas: Tipo de pilas: AA, 1,5 V Funciones del ordenador: Tiempo, velocidad, distancia, rpm, calorías, pulso. INDICACIONES DE SEGURIDAD FINALIDAD DE USO • El producto está diseñado para uso privado y no es adecuado para fines médicos, terapéuticos o comerciales. - Page 100 PRECAUCIÓN - RIESGO DE LESIONES • No utilice un producto dañado o defectuoso. En ese caso, diríjase a un taller especializado o a nuestro servicio de atención al cliente. • Compruebe que el producto está en perfectas condiciones antes de cada uso. Las piezas defectuosas se deberán cambiar de inmediato, ya que pueden afectar a su funcionalidad y seguridad.
-
Page 101: Plano Detallado
3. PLANO DETALLADO... -
Page 102: Lista De Piezas
4. LISTA DE PIEZAS Número de pieza Descripción y datos Cantidad Cuadro principal 1 Pata de apoyo delantera Pata de apoyo trasera Tija de sillín Mango delantero Tornillo carrocero M8 x 60L Arandela curva φ8,3 x φ22 x 1,5t Tuerca de sombrerete M8 x 16t Tuerca de nylon M8 x 8t Arandela φ8,3 x φ17,5 x 1,0t Tornillo M8 x 35L... - Page 103 Número de pieza Descripción y datos Cantidad Tuerca M10 x 8t Tuerca hexagonal M10 x 8t Tuerca hexagonal M6 x 5t Polea Tuerca de brida M10 x 8t x 1,25P Brazo magnético Tuerca de nylon M10 x 8t Tornillo autorroscante ST4,2 x 20L Volante Arandela φ10,3 x φ25 x 1,5t Placa...
- Page 104 Número de pieza Descripción y datos Cantidad Tapa de carcasa Caperuza para biela Soporte de imán Tornillo M5 x 20L Casquillo para tija de sillín Tope Paso del cable Tapa final para mango Casquillo φ16 x φ22,3 x φ30 x 12,5H Tapa final para pata de apoyo trasera Tapa final para pata de apoyo delantera Tapa final 1...
-
Page 105: Instrucciones De Montaje
5. INSTRUCCIONES DE MONTAJE Retire cuidadosamente todas las piezas del embalaje y colóquelas en una superficie plana. Para ello utilice una esterilla protectora del suelo. ¡El montaje de las piezas individuales lo deberán realizar 2 personas! Compruebe la integridad de los elementos suministrados antes del montaje, verificándolos con la lista de piezas. - Page 106 PASO 2: • Fije la pata delantera (2A) al cuadro (1) con 2 tornillos carroceros (M8 x 60 mm) (5), la arandela curva (6) y las tuercas de sombrerete hexagonales M8 (7). Fije la pata trasera (2B) al cuadro (1) con 2 tornillos carroceros (M8 x 60 mm) (5), la arandela curva (6) y las tuercas de sombrerete hexagonales M8 (7).
- Page 107 PASO 3: • El pedal izquierdo y derecho (12I y 12D) están marcados con una "L" y una "R". Fije los pedales en las bielas correspondientes. Cuando se siente en la bicicleta estática, deberá encontrar el pedal derecho en la parte derecha. •...
- Page 108 PASO 4: • Fije el sillín (14) con la tuerca (8) y la arandela (9) en la tija de sillín (3) y, a continuación, introduzca esta en el cuadro (1). Coloque los orificios superpuestos y asegure el sillín en la tija con el tornillo de ajuste (13). •...
- Page 109 PASO 5: • Introduzca el soporte inferior del respaldo (24) en la tija de sillín (3). Asegure la unión con 2 juegos de tornillos carroceros (23), arandelas (25) y tuercas de seguridad (26). Fije el respaldo (30) en el soporte del respaldo (27). Asegure la unión con 4 juegos de tornillos (28) y arandelas de resorte (29).
- Page 110 PASO 6: • Fije el manillar (4) a la parte superior del cuadro principal (1) con 2 tornillos (M8 x 35 mm) (10). • Fije el ordenador (15) al manillar (4) con 2 tornillos (M5 x 10 mm) (31). • Conecte el cable de conexión (93) y el cable del sensor de pulso (11) al ordenador (15).
-
Page 111: Funcionamiento Del Ordenador
6. FUNCIONAMIENTO DEL ORDENADOR FUNCIÓN RPM (RPM): 0~999; SPEED (VELOCIDAD): 0.0~99.9 KM/h; TIME (TIEMPO): 0:00~00:59, Se puede cambiar hacia arriba y hacia abajo; DISTANCE (DISTANCIA): 0,0~99,9 KM, Se puede cambiar hacia arriba y hacia abajo; CALORIES (CALORÍAS): 0~999, Se puede cambiar hacia arriba y hacia abajo;... -
Page 112: Función Básica
1. FUNCIÓN BÁSICA En la interfaz de espera, el usuario puede pedalear directamente para iniciar el entrenamiento; O establecer el valor de la función antes del ejercicio, y luego realizar el entrenamiento; Al hacer ejercicios, todos los valores de la función comienzan a contar. Método de ajuste del valor de la función: en la interfaz de espera, pulse la tecla “ENTER”... -
Page 113: Reposo Automático
(2) El nivel de recuperación del usuario de F1 a F6. Nivel de Estado del usuario Valor diferencia de recuperación ritmo cardíaco Muy bien Media 50 Bien 40–49 Normal 30–39 Débil 20–29 Necesita más ejercicio 10–19 Necesita ejercicio urgentemente Por debajo de 10 3. -
Page 114: Entrenamiento
7. ENTRENAMIENTO CONSEJOS DE EJERCICIOS Todas las recomendaciones en este manual de instrucciones van dirigidas exclusivamente a personas saludables y no a personas con enfermedades del corazón o cardiovasculares. Todos los consejos son solamente propuestas generales para un programa de entrenamiento. - Page 115 SUBIR Y BAJAR DEL PRODUCTO 1. SUBIR Una vez ajustada la altura correcta del sillín, lleve el pedal cercano a la posición más baja y deslice el pie por debajo de la correa del pedal para tener un apoyo seguro en el mismo. Ahora gire la otra pierna hacia el lado opuesto del pedal y siéntese en el sillín.
- Page 116 2. REGULARIDAD La mayoría de los expertos recomiendan una combinación de alimentación sana, acorde con el objetivo del entrenamiento, y una actividad física de entre tres y cinco veces por semana. Un adulto normal deberá entrenar dos veces por semana para mantener su actual nivel de fitness.
- Page 117 BASES DEL ENTRENAMIENTO En este caso, tratamos algunos consejos generales de entrenamiento. Estos no disponen de valores médicos, y sirven únicamente de información de los diferentes tipos de entrenamiento. Para desarrollar un programa de entrenamiento personal detallado, consulte con un experto. Las personas, que padezcan problemas cardíacos u otras enfermedades coronarias, y puedan agravar su enfermedad por un programa de entrenamiento incorrecto o inapropiado, deberán consultar con su médico antes de realizar cualquier tipo de entrenamiento.
-
Page 118: Solución De Problemas - Problemas Con La Pantalla Del Ordenador
8. SOLUCIÓN DE PROBLEMAS – PROBLEMAS CON LA PANTALLA DEL ORDENADOR "No se muestran valores de función. Solo funciona el indicador de pulso". Esto puede advertir que hay una avería de transmisión entre el aparato y el ordenador. Compruebe que todos los cables estén correctamente conectados entre sí y que no haya ninguno dañado. -
Page 119: Limpieza, Cuidado Y Mantenimiento
9. LIMPIEZA, CUIDADO Y MANTENIMIENTO • Compruebe después del montaje y antes de cada uso del aparato si están todos los pernos/tuercas y si están correctamente apretados. • Limpie el aparato regularmente con un paño ligeramente humedecido en un detergente suave. •... -
Page 120: Reclamaciones Y Garantías
Lunes a viernes, de 9:00 h a 18:00 h Línea telefónica: +34 - 932 204 048* Correo electrónico: service@sportplus.org URL: https://sportplus.de Llamadas a teléfonos fijos nacionales, las tasas de llamada serán sufragadas por su compañía telefónica / su contrato de teléfono. -
Page 121: Términos De Garantía
12. TÉRMINOS DE GARANTÍA SportPlus garantiza que el producto, en lo que se refiere a la garantía, ha sido fabricado con materiales de alta calidad y comprobado con la máxima atención. Para que la garantía tenga validez, resulta esencial que el uso y montaje se realice conforme al manual de instrucciones. - Page 122 Servicehotline: +49 (0) 40 - 780 896 – 35 (Nationales Festnetz, Gesprächsgebühren sind von Ihrem Telefonanbieter / Ihrem Telefonvertrag abhängig.) E-Mail: service@sportplus.org URL: https://sportplus.de/ersatzteile Servicehotline: +44 - 203 318 4415 (Call charges depend on your phone company / your phone contract.) E-Mail: service@sportplus.org...