Table des Matières
Publicité
Les langues disponibles
Les langues disponibles
Liens rapides
Operating Instruction I
nAll translation of German original
Authorised electrician
Important safety instructions
These instructions form part of the product and must be carefully read, observed and stored in a place which is freely accessible at all
times.
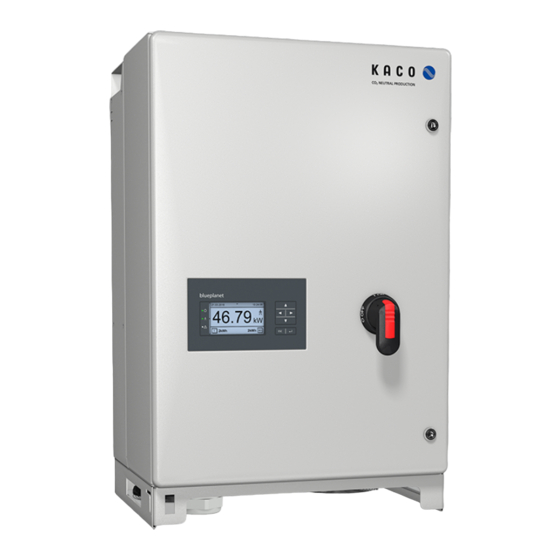
KACO blueplanet 50.0 TL3
S, Basic, M, L, XL, XL-FR
Publicité
Chapitres
Table des Matières
Dépannage

Manuels Connexes pour Kaco blueplanet 50.0 TL3 M1 WM OD IIGS


Sommaire des Matières pour Kaco blueplanet 50.0 TL3 M1 WM OD IIGS
-
Page 59: Dispositions Légales
Dispositions légales Les informations contenues dans le présent règlement sont la propriété de KACO new energy GmbH. Leur publication en tout ou en partie nécessite l’accord écrit de KACO new energy GmbH. Garantie KACO Vous pouvez télécharger les conditions actuelles de garanties sur Internet à l’adresse http://www.kaco-newenergy.com. - Page 60 Raccordement de l’appareil au réseau d’alimenta- tion ............... 76 Raccordement du générateur PV à l’appareil .. 78 Établir une liaison équipotentielle...... 80 Fermeture du compartiment de raccordement ... 81 Maintenance et élimination des défauts .... 81 KACO blueplanet 50.0 TL3 Page lx...
-
Page 61: Informations Générales
Conseil d’utilisation Protocole RS485 Reactive-Power-Control Fichiers Excel relatifs à la version logicielle avec Application SunSpec Information Model Reference Note « Modbus-Protocol » https://kaco-newenergy.com/ SunSpec Information Model Reference KACO downloads/ Suite logicielle Fichiers ZIP/KUF relatifs au logiciel actuel Déclaration de conformité UE Certificats nationaux Certificats Certifications de modules spécifiques... -
Page 62: Représentation Des Consignes De Sécurité
ž Formation en installation et mise en service d’appareils et de dispositifs électriques. ž Connaissances des normes et directives en vigueur. ž Connaissance et respect du présent document et de toutes ses instructions de sécurité. Page 62 KACO blueplanet 50.0 TL3... -
Page 63: Sécurité
L’appareil est conçu pour un usage en extérieur et en intérieur et ne peut être utilisé que dans les pays pour lesquels il a été autorisé ou validé par KACO new energy et l’opérateur du réseau. Pays Norme Document harmonisé... -
Page 64: Fonctions De Protection
IEC 60364-6 6.4.3.3 décrit deux possibilités pour ce cas. Il faut débrancher les appareils à coupe-circuit de surtension intégrés, ou si cela n’est pas praticable, il convient d’abaisser la tension de contrôle à 250V. Page 64 KACO blueplanet 50.0 TL3... -
Page 65: Description De L'appareil
Compteur de consommation Le compteur de consommation est prescrit et installé par le fournisseur d’électricité. Celui-ci mesure l’électricité consommée. Version d’appareil S : un sectionneur CC externe est nécessaire en dehors des appareils. KACO blueplanet 50.0 TL3 Page 65... -
Page 66: Caractéristiques Techniques
240 / 415 V [3/N/PE] ; Tension nominale 230 / 400 V [3/N/PE] ; 220 / 380 V [3/N/PE] Plage de tensions : fonctionne- 176 V - 276 V [Ph-N] ; ment durable 305 V - 480 V [Ph-Ph] Page 66 KACO blueplanet 50.0 TL3... -
Page 67: Caractéristiques Générales
TL3 M1 WM OD WM OD WM OD WM OD WM OD WM OD WM OD IIGS IIGB IIGM HUGM HUGX IIGX FRGX Caractéristiques générales Affichage écran graphique 240 x 128 points + LED KACO blueplanet 50.0 TL3 Page 67... -
Page 68: Données Environnementales
Plage d’humidité de l’air (sans 100 % condensation) [%] En cas d’installation dans des conditions ambiantes agressives (p. ex. possibilité de corrosion), il est nécessaire de se mettre en relation avec notre équipe de vente KACO (pv-projects@kaco-newenergy.de). Page 68 KACO blueplanet 50.0 TL3... -
Page 69: Livraison Et Transport
Un incendie causé par des matériaux inflammables ou explosifs à proximité de l’appareil peut occasionner des blessures graves. › Ne pas poser l’appareil dans des zones explosives ou à proximité de substances facilement inflam- mables. KACO blueplanet 50.0 TL3 Page 69... - Page 70 ž en matériaux résistants à la chaleur (jusqu’à 90 °C) ; ž difficilement inflammable ž Distances minimales pour la pose : [Voir illustration 8] [} Page 72] <20° Ill. 3: Appareil en installation extérieure Ill. 4: Lieu de montage autorisé Page 70 KACO blueplanet 50.0 TL3...
-
Page 71: Déballage De L'appareil
Utiliser uniquement le matériel de fixation correspondant à la base de montage. Le matériel de fixation ci-joint convient uniquement pour les ouvrages de maçonnerie et le béton. › Monter l’appareil uniquement en position droite. KACO blueplanet 50.0 TL3 Page 71... -
Page 72: Poser Et Fixer L'appareil
› Porter des gants de protection et des chaussures de sécurité lors du levage et de la pose de l’appareil. › Ne pas accrocher l’appareil à la traverse de la partie supérieure du boîtier. Page 72 KACO blueplanet 50.0 TL3... -
Page 73: Lever Et Monter L'appareil
Capsuler tous les connecteurs à fiche et les vissages par des chapeaux d’étanchéité. › Contrôler la présence possible d’eau condensée à l’intérieur avant l’installation électrique et laisser suffisamment sécher le cas échéant. › Enlever immédiatement toute humidité sur le boîtier. KACO blueplanet 50.0 TL3 Page 73... -
Page 74: Installation
Le point de raccordement pour l’alimentation en CA se trouve à l’intérieur du boîtier. Selon la version d’appareil (S, Base, M ou XL), la source d’entrée de CC est raccordée à l’intérieur ou à l’extérieur du boîtier. Page 74 KACO blueplanet 50.0 TL3... -
Page 75: Procéder Au Raccordement Électrique
Diamètre du câble 15 - 21 (M32) mm 1,8-2,75 (2mm²-6mm²) mm pour le passe-câble à Vissage pour raccor- SW15 dement CC Couple du passe- 4 Nm 1,8 Nm câble à vis KACO blueplanet 50.0 TL3 Page 75... -
Page 76: Raccordement De L'appareil Au Réseau D'alimentation
RJ45 Couple du passe-câble à vis 4 (M25) 1,5 (M16) Nm Protection anti-surtension Type [réf. art. KACO] Protection anti-surtension CC (montée dans la version XL) VAL-MS-T1/T2 1000DC-PV-ST - 2801162 [3010608] - SPD I + II VAL-MS 1000DC-PV-ST – 2800624 [ ] - SPD II Connecteur CC protection anti-surtension (en option) 7P.10.8.275.0012 [3010610] –... - Page 77 » Procéder au raccordement au réseau. Ill. 18: blueplanet 50.0TL3 version XL Légende Borne de raccordement CA Point de raccordement CC Protection CA contre la surtension Protection CC (SPD) contre la surtension de type 1+2 Sectionneur CC Porte-fusible CC KACO blueplanet 50.0 TL3 Page 77...
-
Page 78: Procéder Au Raccordement Au Réseau
Ill. 20: Insérer les fils Ill. 22: Contrôler la fixation Légende Fils pour raccordement CC Passe-câble à vis Ressort Connecteur Insert Couplage Manchon ↻ Compartiment de raccordement ouvert. ↻ REMARQUE : Avant de dénuder, veillez à ne pas couper de câbles. Page 78 KACO blueplanet 50.0 TL3... -
Page 79: Contrôler Le Contact À La Terre Du Générateur Pv
ð De plus, noter que le générateur PV affiche une résistance d’isolement de plus de 2,0 M ohms, étant donné que l’appareil n’alimente pas à une résistance d’isolement trop faible. 6 Remédier aux éventuels défauts avant de raccorder le générateur CC. KACO blueplanet 50.0 TL3 Page 79... -
Page 80: Dimensionnement Du Générateur Pv
Ill. 23: Point de mise à la terre sup- plémentaire 4 Vérifier si la ligne branchée est bien fixée. 1 Boulon de mise à la terre » Le boîtier est compris dans la liaison équipotentielle. Page 80 KACO blueplanet 50.0 TL3... -
Page 81: Fermeture Du Compartiment De Raccordement
DANGER Danger de mort par la pénétration de liquides L’infiltration d’humidité peut entraîner des blessures graves, voire la mort. › Utiliser uniquement des objets secs pour nettoyer l’appareil. › Nettoyer uniquement l’extérieur de l’appareil. KACO blueplanet 50.0 TL3 Page 81... -
Page 82: Nettoyage Du Refroidisseur
» Installer le ventilateur de rechange. Ill. 25: Retirer le connecteur de ven- tilateur Ventilateur Grille protectrice du ventila- teur Fixation pour grille protec- trice Fixation pour ventilateur Tôle de fond Connecteur de branchement Prise de branchement Page 82 KACO blueplanet 50.0 TL3... -
Page 83: Remplacer Le Fusible De String
1 Couper la tension du réseau en désactivant les fusibles externes. 2 Déconnecter le côté CC selon la version de l’appareil : - XL : version d’appareil : déconnecter l’alimentation CC à l’aide du sectionneur CC. KACO blueplanet 50.0 TL3 Page 83... -
Page 84: Protection Anti-Surtension
1 À l’aide d’un tournevis (largeur 3 mm) appuyer sur le clip de pression du cou- plage. Ill. 27: Détacher le connecteur à 2 Laisser le tournevis introduit. fiche 3 Détacher le connecteur CC de la prise CC. Tournevis Trame Page 84 KACO blueplanet 50.0 TL3... -
Page 85: Mise Hors Service Et Démontage
↻ L’appareil est éteint et désinstallé. 1 Retirer la vis de sécurisation contre le soulèvement et la sortie du support. 2 Utiliser les poignées latérales et retirer l’appareil du support en le soulevant. » Appareil démonté. Procéder à l’emballage. KACO blueplanet 50.0 TL3 Page 85... -
Page 86: Emballer L'appareil
Emballage : Veillez à ce que l’emballage de transport soit éliminé en bonne et due forme. Service et garantie Si vous rencontrez un problème technique avec les produits KACO, veuillez vous adresser aux centres d’appel de notre service après-vente. Nous vous prions d’avoir les informations suivantes à portée de main afin que nous puissions vous aider rapidement et de façon ciblée :...