
Manuels Connexes pour Rohde & Schwarz Hameg HM400


Sommaire des Matières pour Rohde & Schwarz Hameg HM400
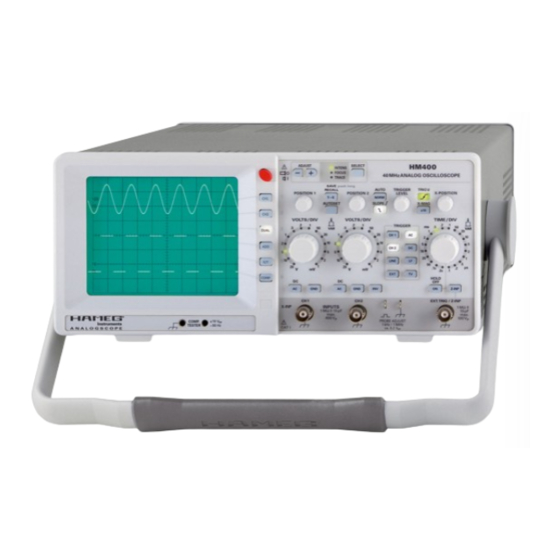
- Page 1 4 0 M H z A n a l o g O s c i l l o s c o p e H M 4 0 0 Handbuch / Manual / Manual / Manuel Deutsch / English / Español / Français...
-
Page 2: Allgemeine Hinweise Zur Ce-Kennzeichnung
Hersteller HAMEG Instruments GmbH KONFORMITÄTSERKLÄRUNG Manufacturer Industriestraße 6 DECLARATION OF CONFORMITY Fabricant D-63533 Mainhausen DECLARATION DE CONFORMITE Die HAMEG Instruments GmbH bescheinigt die Konformität für das Produkt Sicherheit / Safety / Sécurité: EN 61010-1:2001 (IEC 61010-1:2001) The HAMEG Instruments GmbH herewith declares conformity of the product Überspannungskategorie / Overvoltage category / Catégorie de surtension: II HAMEG Instruments GmbH déclare la conformite du produit Verschmutzungsgrad / Degree of pollution / Degré... -
Page 3: Table Des Matières
I n h a l t s v e r z e i c h n i s English Externe Triggerung Español Triggeranzeige TRIG’d Français Holdoff-Zeiteinstellung AUTOSET Deutsch Komponenten-Test Tests direkt in der Schaltung Konformitätserklärung Bedienelemente POWER Allgemeine Hinweise zur CE-Kennzeichnung ADJUST –... - Page 4 H M 4 0 0 4 0 M H z A n a l o g - O s z i l l o s k o p H M 4 0 0 Keine Signalverfälschung durch Überschwingen Eingangsempfindlichkeit und Eingangsspannungsbereich in dieser Preisklasse unerreicht 2 Kanäle mit Ablenkkoeffizienten 1 mV/Div…20 V/Div, variabel bis 50 V/Div...
-
Page 5: Technische Daten
T e c h n i s c h e D a t e n 40 MHz Analog-Oszilloskop HM400 Wichtige Hinweise Alle Angaben bei 23 °C nach einer Aufwärmzeit von 30 Minuten. Vertikalablenkung Betriebsarten: Kanal 1 (CH1) oder Kanal 2 (CH2) einzeln Sofort nach dem Auspacken sollte das Gerät auf mechanische Be- Kanal 1 und 2 (alternierend oder chopped) schädigungen und lose Teile im Inneren überprüft werden. -
Page 6: Sicherheit
W i c h t i g e H i n w e i s e Um eine Änderung der Griffposition vorzunehmen, muss Messobjekt über einen Schutz-Trenntransformator der Schutzklasse das Oszilloskop so aufgestellt sein, dass es nicht herun- II betrieben wird. Es ist auch möglich mit Hilfe geeigneter Wandler terfallen kann, also z.B. -
Page 7: Gewährleistung Und Reparatur
K u r z b e s c h r e i b u n g d e r B e d i e n e l e m e n t e Nach der Reinigung sollte sie mit einer handelsüblichen antistatischen Kurzbeschreibung der Bedienelemente Lösung, geeignet für Kunststoffe, behandelt werden. - Page 8 K u r z b e s c h r e i b u n g d e r B e d i e n e l e m e n t e Drücken des Drehknopfs. Bei Fein-Einstellung blinkt die Y- TV (Taste mit LED-Anzeige) Ablenkkoeffi...
-
Page 9: Allgemeine Grundlagen
A l l g e m e i n e G r u n d l a g e n Modus-Wahltasten mit LED-Anzeige Die zeitliche Aufl ösung ist unproblematisch. Beispielsweise wird bei CH1: Aktivieren des Signaleingangs Kanal 1 (CH1) oder Zugriff 40 MHz und der kürzesten einstellbaren Ablenkzeit mit Dehnung x10 auf den Setup-Speicher 1 für Geräteeinstellungen. -
Page 10: Zeitwerte Der Signalspannung
A l l g e m e i n e G r u n d l a g e n Beim Messen mit Tastteilern sind deren möglicherweise Vorsicht beim Anlegen unbekannter Signale an den Verti- höheren Grenzwerte nur dann maßgebend, wenn DC- kaleingang! Eingangskop plung am Oszilloskop vorliegt. -
Page 11: Inbetriebnahme Und Voreinstellungen
I n b e t r i e b n a h m e u n d V o r e i n s t e l l u n g e n Wiedergabetreue der Signalform u.U. sogar noch verbessert. Auf diese beleuchtung gerade erfordern. -
Page 12: Abgleich 1 Mhz
B e t r i e b s a r t e n d e r V e r t i k a l v e r s t ä r k e r Mit dem beigegebenen Isolierschraubendreher ist der Trimmer so Betriebsarten der Vertikalverstärker abzugleichen, bis die oberen Dächer des Rechtecksignals exakt parallel zu den horizontalen Rasterlinien stehen (siehe Bild 1 kHz). -
Page 13: Phasendifferenz-Messung Im Zweikanal-Betrieb (Yt)
T r i g g e r u n g u n d Z e i t a b l e n k u n g In dieser Betriebsart ist die Zeitbasis abgeschaltet. Die X-Ablenkung Spannungsverläufe mit sich repitierend wiederholender Zeitablenkung wird mit dem über den Eingang von Kanal 1 (INPUT CH1 (X) = Horizontal- dargestellt. -
Page 14: Flankenrichtung
T r i g g e r u n g u n d Z e i t a b l e n k u n g TV (Videosignal-Triggerung) Mit Normaltriggerung und passender Trigger-LEVEL- Einstellung kann die Auslösung bzw. Triggerung der Zeitablenkung an jeder Stelle einer Signalfl... -
Page 15: Zeilensynchronimpuls-Triggerung
T r i g g e r u n g u n d Z e i t a b l e n k u n g Zeilensynchronimpuls-Triggerung aus, dass trotz positiver (Trigger) Flankenwahl die Darstellung des Messsignals mit einer negativen Flanke beginnt. Die Zeilensynchronimpuls-Triggerung kann durch jeden Synchronim- puls erfolgen. -
Page 16: Autoset
A U T O S E T ermöglicht die Einzeldar stel lung. Der Gebrauch des TIME/DIV-Dreh- – Zeitbasis-Ablenkkoeffi zient kalibriert knopfes vereinfacht auch hier die richtige Einstellung. – AC- oder DC-Triggerkopplung unverändert – keine X-Dehnung x10 Nach Beendigung dieser Arbeit sollte die HOLD-OFF-Zeit unbedingt –... -
Page 17: Tests Direkt In Der Schaltung
B e d i e n e l e m e n t e Tests direkt in der Schaltung auch der Netzstecker des Testobjektes zu ziehen. Damit wird sichergestellt, dass eine Verbindung zwischen Oszil- loskop und Testobjekt über den Schutzleiter vermieden Sie sind in vielen Fällen möglich, aber nicht so eindeutig. -
Page 18: Select (Taste)
B e d i e n e l e m e n t e Mode Taste wird der Speicherplatz gewählt und die vorher gespeicher- ten Geräteeinstellungen werden von diesem Speicherplatz abgerufen ADJUST SELECT POWER POWER HM400 und vom Oszilloskop übernommen. Danach leuchten die Mode Tasten INTENS FOCUS 40 MHz ANALOG OSCILLOSCOPE... -
Page 19: Trig'd (Led)
B e d i e n e l e m e n t e Messraster verlassen hat, kann durch Drücken der AUTOSET-Taste Drehknopfs . Bei Zeit-Fein-Einstellung blinkt die X-Ablenkkoeffi zienten- eine getriggerte Signaldarstellung erreicht werden. Anzeige (um den Drehknopf befi ndliche Leuchtdioden). TRIG’d –... -
Page 20: Ac (Taste)
POWER B e d i e n e l e m e n t e EXT – Taste mit LED-Anzeige Im Einkanalbetrieb, sowie im DUAL- oder Additionsbetrieb (CH1 oder CH2, DUAL oder ADD) kann durch einen kurzen Tastendruck VOLTS / DIV VOLTS / DIV TIME / DIV TRIGGER... -
Page 21: Ext. Trig / Z-Inp (Bnc-Buchse)
B e d i e n e l e m e n t e und Voreinstellungen“ beschreibt der Abschnitt „Tastkopf-Abgleich und koeffi zienten mit dem TIME/DIV-Drehknopf wird automatisch wieder Anwendung“ die wichtigste Anwendung dieses Signals. die zuvor eingestellte Kanalumschaltung bestimmt. PROBE ADJUST : An diesen Anschlusskontakt des Signalausgangs wird der Massering des Tastkopfs angeschlossen. - Page 22 Hersteller HAMEG Instruments GmbH KONFORMITÄTSERKLÄRUNG Manufacturer Industriestraße 6 DECLARATION OF CONFORMITY Fabricant D-63533 Mainhausen DECLARATION DE CONFORMITE Die HAMEG Instruments GmbH bescheinigt die Konformität für das Produkt Sicherheit / Safety / Sécurité: EN 61010-1:2001 (IEC 61010-1:2001) The HAMEG Instruments GmbH herewith declares conformity of the product Überspannungskategorie / Overvoltage category / Catégorie de surtension: II HAMEG Instruments GmbH déclare la conformite du produit Verschmutzungsgrad / Degree of pollution / Degré...
- Page 23 C o n t e n t Deutsch External triggering Español Triggered state indicator LED TRIG’d Français Hold-off time adjustment AUTOSET English Component test In-circuit tests Declaration of Conformity Function of the controls POWER General information regarding the CE marking ADJUST –...
- Page 24 H M 4 0 0 4 0 M H z A n a l o g O s c i l l o s c o p e H M 4 0 0 No signal distortion resulting from overshoot Reference-Class in sensitivity and input voltage range 2 Channels with deflection coefficients 1 mV/div.…20 V/div., variable up to 50 V/div.
-
Page 25: Specifi Cations
S p e c i f i c a t i o n s Miscellaneous CRT: D14-363GY, 8 x 10 div. with internal graticule 40 MHz Analog Oscilloscope HM400 Acceleration Voltage: approx. 2 kV All data valid at 23 °C after 30 minute warm-up Trace Rotation: adjustable on front panel Z-Input (Intens. -
Page 26: Important Hints
I m p o r t a n t h i n t s Important hints Immediately after unpacking check the instrument for any mechanical damage and loose parts inside. In case of transport damage inform the supplier. Do not operate the instrument. Symbols Consult the manual High voltage... -
Page 27: Areas Of Use Of The Instrument
I m p o r t a n t h i n t s mains if the measuring object is operated via an isolation transformer Following the burn-in, each instrument is tested for function and quality, of safety class II. Indirect measurements on the mains are also possible the specifi... -
Page 28: Overview Of The Controls
O v e r v i e w o f t h e c o n t r o l s SLOPE (LED button) Overview of the controls Selects either the positive or the negative signal slope. The LED will light up if the negative slope was selected. TRIGGER LEVEL (knob) POWER (button): Mains on/off Changes the trigger level of the time base. -
Page 29: Basic Signal Measurement
B a s i c s i g n a l m e a s u r e m e n t LINE (LED button) COMP: Activates the COMPONENT tester or selects access to Selects the mains as the trigger source as indicated by the LED. the settings memory 6 as indicated by the LED. -
Page 30: Amplitude Of Signals
B a s i c s i g n a l m e a s u r e m e n t Amplitude of signals. Be careful when applying unknown signals to the vertical amplifi er. In electrical engineering, ac voltages are given in rms units. Oscilloscopes show the actual peak-to-peak voltages, hence they are calibrated in V Without a probe set the VOLTS/DIV switch to 20 V/DIV and use AC coup- In order to arrive at the RMS value of a sine wave, its pp –... -
Page 31: First Time Operation And Initial Settings
F i r s t t i m e o p e r a t i o n a n d i n i t i a l s e t t i n g s If a probe is to be used to contact a BNC connecto, a probe to high frequencies. -
Page 32: Operating Modes Of The Vertical Amplifi Er
O p e r a t i n g m o d e s o f t h e v e r t i c a l a m p l i f i e r Measurement of phase differences in dual channel Operating modes of the vertical amplifi... -
Page 33: Normal Trigger
T r i g g e r i n g a n d t i m e b a s e it becomes hence independent of the amplitude and the shape of the jitter resp, multiple displays, especially with small input voltages. signal. -
Page 34: Line Triggering
T r i g g e r i n g a n d t i m e b a s e otherwise the display will shift vertically depending on the video content. If these conditions are fulfi lled, the trigger comparator will deliver Use the POSITION control to keep the display within the screen area. -
Page 35: Autoset
C o m p o n e n t t e s t Component test AUTOSET See also the information given under AUTOSET in the chapter The oscilloscope HM400 has a built-in component tester which is Controls activated by pressing the mode button COMP . The unit under test is connected to the two contacts right and left below the screen. -
Page 36: In-Circuit Tests
F u n c t i o n o f t h e c o n t r o l s note that most bipolar transistors can only take an E-B voltage of appr. higher than needed for easy viewing, this depends on signal parameters, 5 V and may be damaged if this is exceeded, sensitive HF transistors oscilloscope settings and the ambient light conditions. -
Page 37: Save/Recall
F u n c t i o n o f t h e c o n t r o l s SAVE / RECALL TRIGGER LEVEL – Knob This button allows access to the settings memories in conjunction With this control the level of the triggering signal is determined at which with the MODE buttons . -
Page 38: Ch 1 - Led Button
POWER F u n c t i o n o f t h e c o n t r o l s e.g. 10 μs (/DIV). By activating the X-MAG / x10 , the speed can be further increased by a factor of 10 up to the maximum of 10 ns/DIV. VOLTS / DIV VOLTS / DIV TIME / DIV... -
Page 39: Probe Adjust - Contacts
F u n c t i o n o f t h e c o n t r o l s PROBE ADJUST – Contact For a correct result the settings of the two VOLTS/DIV selectors must At this contact a square wave signal of 1 kHz or 1 MHz with a rise time be identical. -
Page 40: Indicaciones Generales En Relación Al Marcado Ce
I n d i c a c i o n e s g e n e r a l e s e n r e l a c i ó n a l m a r c a d o C E Indicaciones generales en relación al marcado CE Los instrumentos de medida HAMEG cumplen las prescripciones técnicas de la compatibilidad electromagnética (CE). -
Page 41: Component Tester
I n d i c e AUTOSET Deutsch English Tester de Componentes Français Comprobaciones directamente en el circuito Mandos de Control Español POWER ADJUST – / + LEDs de indicación Indicaciones generales en relación al marcado CE 40 SELECT POSITION 1 + POSITION 2 – mandos gritarios Analog Oscilloscopio de 40 MHz SAVE/RECALL AUTOSET... - Page 42 H M 4 0 0 O s c i l o s c o p i o a n a l ó g i c o d e 4 0 M H z H M 4 0 0 Nuevo Ninguna deformación de la señal a causa de sobreoscilaciones Sensibilidad de entrada y márgenes de tensión de entrada,...
-
Page 43: Osciloscopio Analógico De 40 Mhz Hm400
D a t o s t e c n i c o s Varios TRC: D14-363GY, 8 x 10 Div, reticulación int. Osciloscopio analógico de 40 MHz HM400 Tensión de aceleración: aprox. 2 kV Todos los valores con 23º C, en base a un precalentamiento de 30 minutos Rotación del trazo: Ajustable desde el frontal Entrada Z (Modulac. -
Page 44: Información General
I n f o r m a c i ó n g e n e r a l Información general Después de desembalar el aparato, compruebe primero que éste no tenga daños externos ni piezas sueltas en su interior. Si muestra daños de transporte, hay que avisar inmedi atamente al suministrador y al transpor tista. -
Page 45: Garantía Y Reparaciones
I n f o r m a c i ó n g e n e r a l Margen de temperatura ambiental admisible durante el funcionamien- Categoría de medida IV: Mediciones en la fuente de la instalaciónde to: +5 °C ... +40 °C. Temperatura permitida durante el almacenaje y el tensión baja (p. -
Page 46: Descripción Abreviada De Los Elementos De Mando
D e s c r i p c i ó n a b r e v i a d a d e l o s e l e m e n t o s d e m a n d o tivamente y ajuste fi... - Page 47 D e s c r i p c i ó n a b r e v i a d a d e l o s e l e m e n t o s d e m a n d o 29 INPUT CH1 + CH2 (Bornes BNC) XY: Activa el modo de presentación en pantalla XY o permite Entrada para señales por el canal 1 o canal 2 respectivamente...
-
Page 48: Principios Básicos
P r i n c i p i o s b á s i c o s Magnitud de la tensión de la señal Principios básicos En la electrónica, generalmente los datos de corriente alterna se re- fi eren a valores efi caces. Sin embargo, al utilizar un osciloscopio para las magnitudes de las señales y los datos de las tensiones se utiliza en Formas de tensión de señal valor V... -
Page 49: Periodos De Una Señal
P r i n c i p i o s b á s i c o s elevadas (ver los datos técnicos de la sonda HZ53). Si se utiliza una mayores la fuente de la señal debe ser de baja resistencia, es decir, sonda convencional con tensiones elevadas, se corre el riesgo que debe estar adaptada a la impedancia característica del cable coaxial los componentes incorporados en la sonda sean destruidos y que se... -
Page 50: Puesta En Marcha Y Ajustes Previos
P u e s t a e n m a r c h a y a j u s t e s p r e v i o s En todas las sondas, la tensión de entrada está limitada a partir de trazo algunos grados respecto a la línea de retícula (ver: Mandos de 20 kHz, por razones de frecuencia. -
Page 51: Modos De Funcionamiento De Los Amplifi Cadores Verticales
M o d o s d e f u n c i o n a m i e n t o d e l o s a m p l i f i c a d o r e s v e r t i c a l e s al límite del margen. -
Page 52: Medidas De Diferencia De Fase En Modo Dual (Yt)
D i s p a r o y d e s v í o d e t i e m p o dancia de entrada son idénticas en ambas direcciones de desvío (en con la señal de medida (disparo externo). La señal mínima precisada X y en Y). -
Page 53: Acoplamientos De Disparo
D i s p a r o y d e s v í o d e t i e m p o s La pantalla permanecerá oscura por un ajuste del nivel de disparo inicializa entonces el disparo. Es aconsejable realizar el disparo con incorrecto y/o por omisión de una señal de disparo. -
Page 54: Disparo De Red
D i s p a r o y d e s v í o d e t i e m p o Indicación de disparo TRIG‘d de imagen. Mediante el botón de posicionamiento vertical Y, es posible compensar la porción de tensión continua, para mantener la imagen sobre la mitad de la retícula de la pantalla. -
Page 55: Autoset
T e s t e r d e C o m p o n e n t e s Las señales con mucho zumbido o interferidas por una frecuencia supe- – Permanece el fl anco de disparo rior, en ocasiones, se presentan con una doble imagen. En determinadas –... -
Page 56: Comprobaciones Directamente En El Circuito
M a n d o s d e C o n t r o l Comprobaciones directamente en el circuito red, debe desconectarse incluso el cable de red. Así se evita una conexión entre el osciloscopio y el componente a verifi... -
Page 57: Select
M a n d o s d e C o n t r o l sobre la pantalla. Una nitidez óptima en el centro de la pantalla, decae iluminan las teclas Mode . Al pulsar la tecla Mode correspondiente, levemente hacia los márgenes laterales. La nitidez del trazo deberá se selecciona la memoria y su contenido es volcado al osciloscopio, ajustarse de forma óptima, para visualizar la presentación de la señal ajustando los mandos correspondientemente. -
Page 58: Position
POWER M a n d o s d e C o n t r o l precisa para la base de tiempos, que una señal de disparo debe sobre- pasar (por arriba o por abajo y dependiente de la dirección de la pen- diente), para iniciar un proceso de desvío de tiempo. - Page 59 M a n d o s d e C o n t r o l CH1 (Tecla con indicación LED) Para seleccionar el disparo sobre impulsos de sincronismo sobre Al pulsar la tecla de canal 1 (CH1), se selecciona este canal como fuente cuadro/imagen, se deben seleccionar con el mando de la base de de disparo interno, en modo de funcionamiento Mono, DUAL y SUMA tiempos TIME/DIV, tiempos comprendidos en el margen entre 0,2 s/DIV...
- Page 60 POWER M a n d o s d e C o n t r o l PROBE ADJUST (Lengüeta de contacto) Esta salida proporciona una señal con forma de onda rectangular de 1 kHz/1 MHz, útil para la compensación de frecuencia de sondas que VOLTS / DIV VOLTS / DIV TIME / DIV...
- Page 61 M a n d o s d e C o n t r o l con el conducto de protección de red (masa). Este borne izquierdo se utiliza como conexión de potencial de referencia en modo de funciona- POWER POWER miento de „Tester de Componentes“, pero puede ser utilizado también como conexión de potencial de referencia de medida, al medir tensiones continuas o al medir tensiones alternas de baja frecuencia.
-
Page 62: Information Générale Concernant Le Marquage Ce
Hersteller HAMEG Instruments GmbH KONFORMITÄTSERKLÄRUNG Manufacturer Industriestraße 6 DECLARATION OF CONFORMITY Fabricant D-63533 Mainhausen DECLARATION DE CONFORMITE Die HAMEG Instruments GmbH bescheinigt die Konformität für das Produkt Sicherheit / Safety / Sécurité: EN 61010-1:2001 (IEC 61010-1:2001) The HAMEG Instruments GmbH herewith declares conformity of the product Überspannungskategorie / Overvoltage category / Catégorie de surtension: II HAMEG Instruments GmbH déclare la conformite du produit Verschmutzungsgrad / Degree of pollution / Degré... - Page 63 S o m m a i r e Deutsch Déclenchement externe English Indicateur de déclenchement Español Réglage de la durée d’inhibition (HOLD OFF) AUTOSET Français Testeur de composants Tests sur circuit Information générale concernant le marquage CE Description des éléments de commande POWER ADJUST –...
- Page 64 H M 4 0 0 O s c i l l o s c o p e a n a l o g i q u e 4 0 M H z H M 4 0 0 Aucun phénomène impulsionnel La référence dans sa catégorie pour la gamme de tension d’entrée et la sensibilité...
-
Page 65: Oscilloscope Analogique 40 Mhz Hm400
C a r a c t é r i s t i q u e s t e c h n i q u e s Divers Tube cathodique : D14-363GY, 8 x 10 div., graticule interne Oscilloscope analogique 40 MHz HM400 Tension d'accélération : env. -
Page 66: Remarques Importantes
R e m a r q u e s i m p o r t a n t e s Remarques importantes Examiner l’instrument immédiatement après l’avoir déballé afi n d’y déceler d’éventuels dommages mécaniques ou des pièces qui se seraient détachées à... -
Page 67: Garantie Et Réparation
R e m a r q u e s i m p o r t a n t e s Garantie et réparation +70 °C pendant le stockage et le transport. Si de la condensation s’est formée pendant le transport ou le stockage, il faut laisser l’appareil Les instruments HAMEG sont soumis à... -
Page 68: Description Sommaire Des Éléments De Commande
D e s c r i p t i o n s o m m a i r e d e s é l é m e n t s d e c o m m a n d e AUTO/NORM (touche avec LED) Description sommaire des éléments Sélection du déclenchement automatique (AUTO) ou normal... - Page 69 D e s c r i p t i o n s o m m a i r e d e s é l é m e n t s d e c o m m a n d e CH1 (touche avec LED) CH2: Active la voie 2 ou sélectionne l’accès à...
-
Page 70: Principes Généraux
P r i n c i p e s g é n é r a u x calibrée. Le réglage fi n doit se trouver en position calibrée pour les Principes généraux mesures d’amplitude. Des signaux plus petits peuvent cependant encore être représentés. -
Page 71: Mise En Route Et Préréglages
M i s e e n r o u t e e t p r é r é g l a g e s du signal, il est possible que l’amplitude du signal soit nettement trop particulièrement nécessaire avec une sonde atténuatrice 100:1, qui a la grande et que l’amplifi... -
Page 72: Rotation De Trace
M o d e d e f o n c t i o n n e m e n t d e s a m p l i f i c a t e u r s v e r t i c a u x Rotation de trace Pour faire ce réglage HF il faut au préalable disposer d’un générateur de <... -
Page 73: Mode Xy
D é c l e n c h e m e n t e t b a l a y a g e intérêt pour les signaux ayant une fréquence de récurrence élevée et Déclenchement et balayage qui sont observés aux calibres inférieurs de la base de temps. Le mode addition réalise la somme algébrique des signaux des deux voies (CHI + CHII) ou la différence (CHI –... -
Page 74: Déclenchement Normal
D é c l e n c h e m e n t e t b a l a y a g e également approprié pour aborder des problèmes de mesure diffi ciles, phénomènes de gigue ou de doublon, notamment avec des notamment lorsque l’amplitude, la fréquence ou la forme du signal à... -
Page 75: Déclenchement Secteur
D é c l e n c h e m e n t e t b a l a y a g e l’image changera de position à l’écran avec chaque changement d’image. 2. La tension de référence sur le comparateur (niveau de déc- Le bouton POSITION permet de compenser la composante continue lenchement) doit être réglée de manière à... -
Page 76: Autoset
A U T O S E T Testeur de composants AUTOSET Voir les informations spécifi ques dans le chapitre «Eléments de com- L’oscilloscope HM400 est équipé d’un testeur électronique de compo- mande» sous la rubrique AUTOSET sants qui est activé en appuyant sur la touche COMP. Le composant à... -
Page 77: Tests Sur Circuit
D e s c r i p t i o n d e s é l é m e n t s d e c o m m a n d e sans dommage. C’est pourquoi le test de la tension de blocage ou de Description des éléments de commande la tension inverse des semiconducteurs haute tension n’est pas pos- sible. -
Page 78: Save / Recall
D e s c r i p t i o n d e s é l é m e n t s d e c o m m a n d e AUTO: Le déclenchement automatique peut avoir lieu avec ou sans détection POWER POWER ADJUST... -
Page 79: Time/Div - Bouton
POWER D e s c r i p t i o n d e s é l é m e n t s d e c o m m a n d e Sélection de la sensibilité (atténuateur d’entrée) Si la LED ne clignote pas, Ce bouton permet de régler le calibre de la VOLTS / DIV VOLTS / DIV TIME / DIV... -
Page 80: Gnd - Touche Avec Led Pour La Voie 1 Et
POWER D e s c r i p t i o n d e s é l é m e n t s d e c o m m a n d e GND – touches avec LED pour la voie 1 et 2 Par une brève pression sur ces touches, l‘entrée du préamplifi... -
Page 81: Component Tester
D e s c r i p t i o n d e s é l é m e n t s d e c o m m a n d e derniers paramètres de déclenchement sont conservés mais peuvent COMPONENT TESTER –... - Page 82 Sous réserve de modifi cations...
- Page 83 Sous réserve de modifi cations...
- Page 84 Oscilloscopes Spectrum Analyzer Power Supplies Modular System Series 8000 Programmable Instruments Series 8100 authorized dealer w w w . h a m e g . c o m Subject to change without notice HAMEG Instruments GmbH 41-0400-0040 (5) 14052009-gw Industriestraße 6 ©...