Table des Matières
Publicité
Les langues disponibles
Les langues disponibles
Liens rapides
Publicité
Table des Matières

Manuels Connexes pour Oase ProfiLux LED 350/01


Sommaire des Matières pour Oase ProfiLux LED 350/01
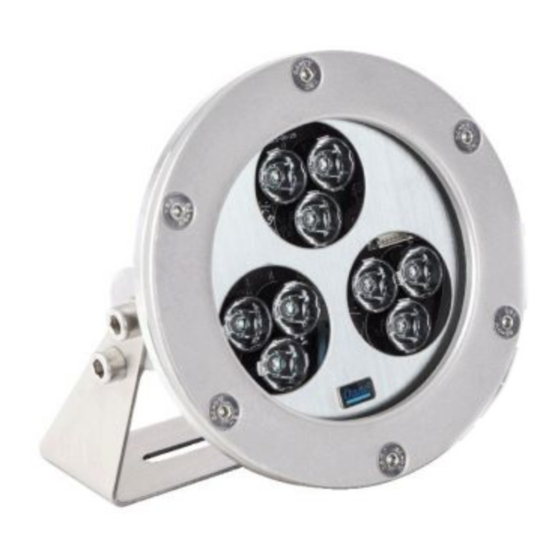
- Page 1 Gebrauchsanleitung Operating instructions Notice d'emploi Instrucciones de uso ProfiLux LED 350/01 (56331) ProfiLux LED 1100/01 (51296) ProfiLux LED Spot 2200/01 (56401) ProfiLux LED Flood 2200/01 (56402)
- Page 2 24 V DC Underwater Power Supply 250/24V/01 230 V AC PLX0005...
- Page 3 ProfiLux LED 350/01 PLX0007 PLX0009 PLX0021...
- Page 4 ProfiLux LED 1100/01 PLX0002 PLX0003 ProfiLux LED Spot 2200/01, ProfiLux LED Flood 2200/01 PLX0006 PLX0008 PLX0004...
-
Page 5: Lieferumfang
Hinweise zu dieser Gebrauchsanleitung Willkommen bei OASE Living Water. Mit dem Kauf des Produkts ProfiLux LED haben Sie eine gute Wahl getroffen. Lesen Sie vor der ersten Benutzung des Gerätes die Anleitung sorgfältig und machen Sie sich mit dem Gerät vertraut. -
Page 6: Sicherheitshinweise
- DE - Sicherheitshinweise Von diesem Gerät können Gefahren für Personen und Sachwerte ausgehen, wenn das Gerät unsachgemäß bzw. nicht dem Verwendungszweck entsprechend eingesetzt wird oder wenn die Sicherheitshinweise nicht beachtet werden. Dieses Gerät kann von Kindern ab 8 Jahren und darüber sowie von Personen mit verringerten physischen, sensorischen oder mentalen Fähigkeiten oder Mangel an Erfahrung und Wissen benutzt werden, wenn sie beaufsichtigt oder bezüglich des sicheren Gebrauchs des... -
Page 7: Gerät Aufstellen
1. Den Scheinwerfer mit der Montageschelle an der Muffe für Komet 10-12 oder Komet 10-14 festschrauben. − Verwenden Sie für einen optimalen Sitz die Oase-Muffe 10 (Artikelnummer: 51018). 2. Die Innensechskantschrauben an beiden Seiten des Scheinwerfers lösen, den Scheinwerfer ausrichten und beide Innensechskantschrauben festziehen. - Page 8 ßen − Schaltnetzteil tauschen Leuchtstärke des Scheinwerfers zu gering Betriebstemperatur ist zu hoch, Leuchtstärke Kein Eingriff notwendig wurde automatisch reduziert Scheinwerferglas verschmutzt Scheinwerferglas reinigen Reparatur Das Gerät kann nur durch OASE repariert werden. Senden Sie das Gerät an Ihren OASE-Stützpunkt.
-
Page 9: Entsorgung
Verluste gleich welcher Art, die durch das Gerät oder seinen Gebrauch verursacht wurden. Die Garantie gilt nur für das Land, in dem das Gerät bei einem OASE-Fachhändler gekauft wurde. Für diese Garantie gilt deutsches Recht unter Ausschluss des Übereinkommens der Vereinten Nationen über Verträge über den interna- tionalen Warenkauf (CISG). -
Page 10: Technische Daten
- DE - Technische Daten ProfiLux LED 350/01 1100/01 Spot 2200/01 Flood 2200/01 Nennspannung 24 V DC 24 V DC 24 V DC 24 V DC Leistungsaufnahme 7.5 W 23 W 55 W 55 W Lichtstrom 340 lm 918 lm 2683 lm 2683 lm (bei Betrieb im Wasser) -
Page 11: Symbols Used In These Instructions
Information about these operating instructions Welcome to OASE Living Water. You made a good choice with the purchase of this product ProfiLux LED. Prior to commissioning the unit, please read the instructions of use carefully and fully familiarise yourself with the unit. -
Page 12: Safety Information
- GB - Safety information Hazards to persons and assets may emanate from this unit if it is used in an improper manner or not in accordance with its intended use, or if the safety instructions are ignored. This unit can be used by children from the age of 8 and by persons with physical, sensory or mental impairments or lack of experience and knowledge, as long as they are supervised or instructed on how to use the unit safely and are able to understand the potential haz-... -
Page 13: Protective Measures
1. Using the mounting clamp, screw the spotlight firmly to the sleeve for Komet 10-12 or Komet 10-14. − To ensure optimum fitting, use the Oase sleeve 10 (article number: 51018). 2. Loosen the Allen screws on both sides of the spotlight, align the spotlight and tighten both Allen screws. -
Page 14: Remedy Of Faults
Insufficient luminous intensity of the spotlight Operating temperature too high, luminous No measure necessary intensity automatically reduced. Spotlight glass soiled Clean spotlight glass. Repair The unit can only be repaired by OASE. Please send the unit to your OASE dealer. -
Page 15: Maintenance And Cleaning
The guarantee period starts with the first purchase from an OASE specialist dealer. In other words, in the event of a resale, the guarantee period will not start again. If services are provided under the terms of this guarantee, this does not lead to extension or renewal of the guarantee period. -
Page 16: Technical Data
- GB - Technical data ProfiLux LED 350/01 1100/01 Spot 2200/01 Flood 2200/01 Rated voltage 24 V DC 24 V DC 24 V DC 24 V DC Power consumption 7.5 W 23 W 55 W 55 W Light flux 340 lm 918 lm 2683 lm 2683 lm... -
Page 17: Pièces Faisant Partie De La Livraison
Remarques relatives à cette notice d'emploi Bienvenue chez OASE Living Water. Avec l'acquisition du produit, ProfiLux LED vous avez fait le bon choix. Avant la première utilisation de l'appareil, lire attentivement cette notice d'emploi et se familiariser avec l'appareil. Tous les travaux effectués avec et sur cet appareil devront être exécutés conformément aux directives ci-jointes. -
Page 18: Consignes De Sécurité
- FR - Consignes de sécurité Toutefois des situations à risque pour les personnes ou les biens peuvent survenir avec cet appareil lorsque celui-ci est utilisé de manière non appropriée, voire non conforme à sa finalité ou lorsque les informations de sécurité ne sont pas respectées. -
Page 19: Mis En Place Et Raccordement
1. Visser le projecteur avec le collier de montage sur le manchon pour Komet de type 10-12 ou de type 10-14. − Pour un serrage optimal, utiliser le manchon Oase 10 (référence : 51018). 2. Desserrer les vis à six pans creux de part et d'autre du projecteur, aligner le projecteur et serrer au moyen des deux vis à... -
Page 20: Élimination Des Dérangements
La température de service est excessive, Aucune intervention nécessaire l'intensité lumineuse s'est réduite automati- quement Verre du projecteur encrassé Nettoyer le verre du projecteur Réparation La réparation de l'appareil est exclusivement réservée à OASE. Envoyer l'appareil à votre base OASE. -
Page 21: Entretien De L'appareil
Le délai de garantie entre en vigueur dès la première acquisition chez le distributeur OASE. De ce fait, il ne se recalcule pas à partir de toute date de vente ultérieure éven- tuelle. -
Page 22: Caractéristiques Techniques
- FR - Caractéristiques techniques ProfiLux LED 350/01 1100/01 Spot 2200/01 Flood 2200/01 Tension nominale 24 V CC 24 V CC 24 V CC 24 V CC Puissance absorbée 7.5 W 23 W 55 W 55 W Flux lumineux 340 lm 918 lm 2683 lm 2683 lm... -
Page 23: Volumen De Suministro
Indicaciones sobre estas instrucciones de uso Bienvenido a OASE Living Water. La compra del producto ProfiLux LED es una buena decisión. Lea minuciosamente las instrucciones y familiarícese con el equipo antes de usar el mismo por primera vez. Todos los trabajos en y con este equipo sólo se deben ejecutar conforme a estas instrucciones. -
Page 24: Indicaciones De Seguridad
- ES - Indicaciones de seguridad El equipo puede ser una fuente de peligro para las personas y los valores materiales, si no se emplea adecuadamente y conforme al uso previsto o si no se observan las indicaciones de seguridad. Este equipo se puede usar por niños a partir de 8 años así... -
Page 25: Emplazamiento Del Equipo
1. Atornille el proyector de luz con la abrazadera de montaje en el manguito para la Komet 10-12 o Komet 10-14. − Emplee para un asiento óptimo el manguito de Oase 10 (número de artículo: 51018). 2. Suelte los tornillos de cabeza con hexágono interior a ambos lados del proyector de luz, alinee el proyector de luz y apriete los dos tornillos de cabeza con hexágono interior. -
Page 26: Eliminación De Fallos
No es necesario ninguna intervención luminosa se redució automáticamente El cristal del proyector de luz está sucio. Limpiar el cristal del proyector de luz. Reparación Sólo OASE puede reparar el equipo. Envíe el equipo a su punto de apoyo OASE. -
Page 27: Limpieza Y Mantenimiento
El plazo de garantía comienza con la adquisición del equipo en los centros de distribución de OASE. En caso de una reventa, el plazo de garantía no se reinicia. El plazo de garantía no se prolonga ni se renueva por el hecho de recibir prestaciones de garantía. Sus derechos legales como comprador, especialmente los derechos resultantes de la garantía legal, se mantienen válidos y no sufren ninguna restricción por... -
Page 28: Datos Técnicos
- ES - Datos técnicos ProfiLux LED 350/01 1100/01 Spot 2200/01 Flood 2200/01 Tensión nominal 24 V CC 24 V CC 24 V CC 24 V CC Consumo de potencia 7.5 W 23 W 55 W 55 W Flujo luminoso 340 lm 918 lm 2683 lm... - Page 29 Types Freshwater Poolwater Saltwater pH-Wert 7.2 … 7.6 7.2 … 7.6 pH value Valeur pH Valor pH Härte 8 … 15 DH 8 … 15 DH 20 … 30 DH Hardness Dureté Cloro libre Freies Chlor < 0.3 mg/l 0.3 … 0.6 mg/l <...
- Page 30 OASE GmbH · www.oase-livingwater.com Tecklenburger Straße 161 · 48477 Hörstel · Germany...