Table des Matières

Publicité

Les langues disponibles
  • FR

Les langues disponibles

Liens rapides

BUTLER 5750
User guide / Handleiding / Manuel d'utilisateur /
Bedienungsanleitung / Manual de usuario /
v 1.0

Publicité

Table des Matières
loading

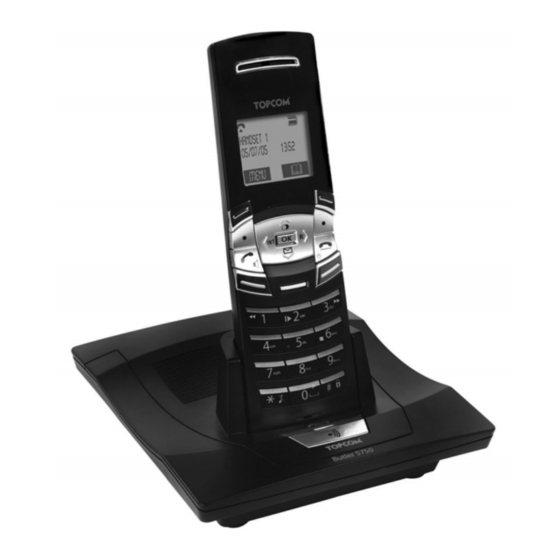
Sommaire des Matières pour Topcom BUTLER 5750

  • Page 1 BUTLER 5750 User guide / Handleiding / Manuel d’utilisateur / Bedienungsanleitung / Manual de usuario / v 1.0...
  • Page 2 Important To use ‘Caller ID’ (display caller), this service has to be activated on your phone line. Normally you need a separate subscription from your telephone company to activate this function. If you don’t have the Caller ID function on your phone line, the incoming telephone numbers will NOT be shown on the display of your telephone.
  • Page 3 This product is in compliance with the essential requirements and other relevant provisions of the R&TTE directive 1999/5/EC. The Declaration of conformity can be found on: http://www.topcom.net/support/cedeclarations.php UK The CE symbol indicates that the unit complies with the essential requirements of the R&TTE directive.
  • Page 4: Table Des Matières

    English ..............1 Safety instructions .........................1 Getting started ........................1 How to use this user guide....................... 1 Installing the base ..........................1 Installing the handset........................2 Keys/Led............................3 Symbols ............................3 Display keys ............................ 4 Base LED............................4 Navigating the menu........................4 Menu overview..........................
  • Page 5 Appointment ..........................15 Stopwatch ............................16 Additional handsets and base stations ................16 Adding a new handset ........................16 Removing a handset ........................16 Select a base ..........................17 Using the intercom feature ......................17 10 Answering machine ......................18 10.1 Display............................18 10.2 Outgoing Messages ........................
  • Page 6 Geheimhoudingsfunctie (Microfoon uit-functie) ................33 Een handset vinden (Paging-functie)..................... 33 Toetsenbordvergrendeling......................33 3.10 Het alfanumerieke toetsenbord gebruiken..................33 Telefoonboek ........................34 Een invoer toevoegen ........................34 Een invoer kiezen .......................... 34 Details tonen..........................34 Eén of alle ingevoerde items wissen ..................... 35 Naam en nummer bewerken......................
  • Page 7 10.13 Antwoordapparaat op afstand inschakelen..................50 11 Probleemoplossing .......................51 12 Technische gegevens ......................51 13 Garantie ..........................52 13.1 Garantieperiode ..........................52 13.2 Afwikkeling van garantieclaims....................52 13.3 Garantiebeperkingen........................52 14 Afvoeren van het toestel (milieu)..................53 15 Reinigen ..........................53 16 ECO-modus (lage straling) ....................53 Français ..............
  • Page 8 Réglage du temps d'éclairage de l'écran ..................66 Code de préfixe..........................66 Fonction d'alarme .......................... 66 Réglage de la date et de l'heure ..................... 67 6.10 Réglage du format horaire ......................67 Réglage Base.........................67 Sonnerie............................67 Vol. Sonnerie..........................67 Mode de numérotation........................68 Rappel (Flash) ..........................
  • Page 9 Symbole............................83 Displaytasten ..........................84 LED der Basisstation........................84 Durch das Menü navigieren......................84 Menü-Übersicht..........................84 Telefon benutzen ........................85 Mobilteil ein-/ausschalten ......................85 Menüsprache ändern........................85 Telefonieren........................... 86 Einen Anruf annehmen........................86 Freisprechmodus..........................87 Lautstärke Hörmuschel / Freisprechmodus anpassen..............87 Stummschaltung (Mute) ........................
  • Page 10 10.1 Display............................99 10.2 Ansagetexte ..........................100 10.3 Anrufbeantworter ein- und ausschalten..................101 10.4 Anzahl Klingelzeichen einstellen (Antw. Verz.)................. 101 10.5 VIP-Code programmieren ......................101 10.6 Betrieb ............................102 10.7 Anrufüberprüfung........................102 10.8 Ein Memo aufnehmen ......................... 102 10.9 Gespeicherte Nachrichten und Memos abspielen................ 103 10.10 Ansagetexte löschen ........................
  • Page 11 Eliminar una entrada o todas las entradas ................... 117 Editar un nombre y un número....................117 Copiar una entrada de la agenda en otro terminal ............... 117 Copiar todas las entradas de la agenda en otro terminal ............. 118 Identificación de llamadas ....................118 Llamadas RTPC entrantes normales ...................
  • Page 12 14 Eliminación del dispositivo (medio ambiente) ..............134 15 Limpieza ..........................134 16 Modo ECO (radiación baja) .....................134 ............135 ......................135 .........................135 .................... 135 ......................135 ....................136 ......................137 µ ............................137 .......................... 138 ......................138 µ ........................138 µ ....................... 138 .......................139 ................
  • Page 13 µ ......................149 ........................149 (Flash) ........................149 µ ........................150 ..........................150 ........................... 150 µ ..........................150 µ ................151 ......................151 ......................151 ..........................152 ................... 152 µ ....................153 10.1 ............................154 10.2 µ µ µ ......................... 154 10.3 ................155 10.4 µ...
  • Page 14: English

    Safety instructions E n g l i s h Safety instructions • Only use the charger plug supplied. Do not use other chargers as this may damage the battery cells. • Only insert rechargeable batteries of the same type. Never use ordinary, non-rechargeable batteries.
  • Page 15: Installing The Handset

    Getting started - 2A Back view of base - A. Telephone wall outlet B. Power cable C. Telephone cord Installing the handset 1 Open the battery compartment as shown on picture 2B. 2 Insert the batteries respecting the polarity (+ and -). 3 Close the battery compartment.
  • Page 16: Keys/Led

    15. Left soft menu key 16. Left/INT key 17. OK key - 2C Handset - Base 18. In use/Power/Handset on base LED 19. Paging key Butler 5750 - 2D Base - Symbols Off hook Keypad lock On hook Alarm set...
  • Page 17: Display Keys

    • Blinking rapidly: during registration Navigating the menu The Butler 5750 has a menu system which is easy to use. Each menu leads to a list of options. The menu map is shown on the following paragraph. 1 When the handset is switched on and in standby, press the left soft menu to open the main menu.
  • Page 18: Using The Telephone

    Using the telephone Menu Submenu items Ringtone Ringer Volume Handset Name Keypad Beep Contrast Handset Auto Talk Backlight Time Prefix Select Base Language Registration Ringtone Ringer volume Base settings Dial mode Recall System PIN Set Alarm Time Date and Time Set Time Format Appointment Tools...
  • Page 19: Making A Normal Telephone Call

    Using the telephone Making a normal telephone call Direct dialling 1 Press the off-hook key to start the call. 2 Dial the telephone number. g h i j k l m n o 3 Press the on-hook key to hang up or put the handset back on the base. Pre-dialling With the pre-dialling feature, you can enter and modify a number before making the call.
  • Page 20: Handsfree Mode

    Using the telephone Handsfree mode Handsfree lets you talk to your caller without holding the handset. It also enables other people in the room to listen to both sides of your conversation. 1 To switch any call to handsfree, press the handsfree key during the call. Adjust earpiece/handsfree volume 1 Press up or down to select volume 1-5 during a normal or handsfree call.
  • Page 21: Phonebook

    Phonebook You can change the input character set from English (abc) to Latin (aàá), Greek ( ) or Russian ) by pressing and holding the #-key for 2 seconds. Press ‘0’ to select a space. Press the *-key to switch between small letters and capitals. Press and hold the #-key for 2 seconds to change the input character set.
  • Page 22: Delete An Entry Or All Entries

    Phonebook Delete an entry or all entries 1 Press the soft menu key. 2 Select the desired name or use the keypad to enter the first letter of the name. 3 Select “Option”. To delete one entry: 4 Select “Delete Entry” and confirm. To delete all entries: 4 Select “Delete All”...
  • Page 23: Copy All Phonebook Entries To Another Handset

    Caller Identification Copy all phonebook entries to another handset By copying all entries from one handset to another, you will erase all existing records at the destination handset. 1 Press the soft menu key. 2 Select the desired name or use the keypad to enter the first letter of the name.
  • Page 24: Personalise The Handset

    Personalise the handset 4 Select “Delete Call” and confirm. 5 Return to standby. To delete all entries: 5 Select “Delete All” and confirm. 6 Return to standby. To add the number to the phonebook: 5 Select “Save Number” and confirm. 6 Use the keypad to enter the name, then select “Save”.
  • Page 25: Keypad Beeps

    Personalise the handset 3 Select “Handset name” and confirm. 4 Enter the name you want. g h i j k l m n o 5 Press the soft menu key to correct. 6 Select “Save” to confirm. 7 Return to standby. Keypad beeps 1 Enter the menu.
  • Page 26: Prefix Code

    Personalise the handset Prefix code It is possible to use your telephone with a prefix number. When dialling telephone numbers, you can add automatically the prefix code before the number. 1 Enter the menu. 2 Select “Handset” and confirm. 3 Select “Prefix” and confirm. 4 Select “Edit”...
  • Page 27: Base Settings

    Base settings 3 Select “Time format” and confirm. 4 Select “12Hrs” or “24Hrs” and confirm. 5 Return to the previous menu. Base settings Ringtone You can choose from 9 different ringer melodies. 1 Enter the menu. 2 Select “Base Settings” and confirm. 3 Select “Ringtone”...
  • Page 28: System Pin

    Tools telephone exchange (PABX). The Flash key “R” is a brief interruption of the line. You can set the flash time to 100ms or 250ms. 1 Enter the menu. 2 Select “Base Settings” and confirm. 3 Select “Recall” and confirm. 4 Select short flash time (100ms) or long flash time (250ms) and select “Save”.
  • Page 29: Stopwatch

    Additional handsets and base stations Stopwatch 1 Enter the menu. 2 Select “Tools” and confirm. 3 Select “Stopwatch” and confirm. 4 Select “Start” to start the stopwatch. 5 Select “Stop” to stop the stopwatch. Select “Start” again to restart. Select “Reset” to reset the counter. 6 Return to standby.
  • Page 30: Select A Base

    Additional handsets and base stations Select a base You can switch your handset between bases. You can also set it to automatically base select with the strongest signal. The handset must first be registered with each base individually. 1 Enter the menu. 2 Select “Handset”...
  • Page 31: Answering Machine

    10 Answering machine The Butler 5750 has a built-in digital answering machine with a recording capacity of 11 min. The answering machine can be operated by the handset and remotely. It has the possibility of recording two outgoing messages (OGM 1 and OGM 2) (maximum of 2 min).
  • Page 32 Answering machine 2 Select “Ans Machine” and confirm. 3 Select “Outgoing Msg” and confirm. 4 Select “Record Message” and confirm. 5 Select ‘Answer & Record’ for OGM1 or ‘Answer Only’ for OGM2. 6 Start speaking after the beep and press ‘Save’ to confirm. The recorded message will be played back.
  • Page 33: Turning Answering Machine On/Off

    Answering machine 10.3 Turning Answering Machine On/Off If the answering machine is switched Off, the -icon is shown. If it’s turn On the -icon will be shown and the machine will automatically pick up the line after a number of rings (see “10.4 Setting number of Rings (Answer delay)”...
  • Page 34: Operation

    If you have a second handset registered on the same base of your Butler 5750, you can stop the answering machine by pressing the ‘#’-key during call screening.
  • Page 35: Erasing Messages

    Answering machine Go to the next message when you select ‘Next’ or press the skip forward button Go back to the begining of the current message press the skip backwards key ones, to jump back to the previous message press the backwards key twice. Pause the message playback by pressing the pause key.
  • Page 36: Turning Answering Machine On Remotely

    Answering machine 5 Press ‘3’ to go to the Next Message. 5 Press ‘1’ ‘1’ to go to the Previous Message. 5 Press ‘1’ to Repeat the current message. 5 Press ‘6’ to stop playback. 5 Press ‘7’ to erase the current message. Erasing All Old Messages 6 After listening to all messages, press ‘0’...
  • Page 37: Troubleshooting

    Troubleshooting 11 Troubleshooting Symptom Possible cause Solution No display Batteries uncharged Check the position of the batteries Recharge the batteries Handset turned OFF Turn ON the handset No tone Telephone cord badly connected Check the telephone cord connection The line is occupied by another Wait until the other handset handset hangs up...
  • Page 38: Technical Datatechnical Characteristics

    13.1 Warranty period The Topcom units have a 24-month warranty period. The warranty period starts on the day the new unit is purchased. The warranty on batteries is limited to 6 months after purchase. Consumables or defects causing a negligible effect on operation or value of the equipment are not covered.
  • Page 39: Disposal Of The Device (Environment)

    Any warranty claims will be invalid if the unit has been repaired, altered or modified by the buyer or by unqualified, non-officially appointed Topcom service centres. 14 Disposal of the device (environment) At the end of the product lifecycle, you should not throw this product into the normal household garbage but bring the product to a collection point for the recycling of electrical and electronic equipments.
  • Page 40: Nederlands

    Veiligheidsinstructies N e d e r l a n d s Veiligheidsinstructies • Gebruik alleen de bijgeleverde stekker van de lader. Gebruik geen andere laders, omdat dit de batterijcellen kan beschadigen. • Plaats alleen oplaadbare batterijen van hetzelfde type. Gebruik nooit gewone, niet-oplaadbare batterijen.
  • Page 41: De Handset Installeren

    Beginnen - 2A Achteraanzicht van basis - A. Telefoonwandcontactdoos B. Stroomkabel C. Telefoonkabel De handset installeren 1 Open het batterijgedeelte zoals weergegeven in afb. 2B. 2 Plaats de batterijen volgens de polariteit (+ en -). 3 Sluit het batterijgedeelte. 4 Laat de handset 20 uur op het basisstation staan. De lijn/laad-indicator op de basis zal gaan branden.
  • Page 42: Toetsen/Led

    14. Opnemen-toets/handenvrij/Aan-toets 15. Linker soft menu key 16. Links/INT-toets 17. OK-toets - 2C Handset - Basis 18. In gebruik/Aan-Uit/handset op basis- 19. Paging-toets Butler 5750 - 2D Basis - Symbolen Opnemen Toetsvergrendeling Opleggen Alarmset Handset niet geregistreerd of buiten Gemiste oproepen in oproeplijst*...
  • Page 43: Displaytoetsen

    • Snel knipperen: tijdens de registratie Door het menu bladeren De Butler 5750 heeft een gebruiksvriendelijk menusysteem. Elk menu geeft een lijst met opties. De menukaart staat in de volgende paragraaf. 1 Wanneer de handset wordt ingeschakeld en in standby staat, drukt u op de linker soft menu key om het hoofdmenu te openen.
  • Page 44: De Telefoon Gebruiken

    De telefoon gebruiken Menu Submenu-items Beltoon Belvolume Handset naam Toetstoon Contrast Handset Autom. Aanne. Verlichtingstijd Prefix Kies basis Taal Registratie Beltoon Belvolume Basisinstellingen Kiesmodus Recall Systeem PIN Alarm instellen Tijd Dag & Tijd Tijdformaat Afspraak Hulpmiddelen Stopwatch De telefoon gebruiken De handset in- en uitschakelen 1 De UIT-toets ingedrukt houden om de handset uit te schakelen.
  • Page 45: Een Normaal Telefoongesprek Voeren

    De telefoon gebruiken Een normaal telefoongesprek voeren Direct kiezen 1 Druk op de opnemen-toets om het nummer te bellen. 2 Voer het telefoonnummer in. g h i j k l m n o 3 Druk op de opleggen-toets om op te hangen of zet de handset terug op de basis.
  • Page 46: Handenvrij-Modus

    De telefoon gebruiken U kunt het belvolume uitzetten tijdens inkomende oproep door "Stil" te selecteren. Handenvrij-modus Met handenvrij kunt u met uw oproeper praten zonder de handset vast te houden. Andere mensen in de kamer kunnen ook meeluisteren naar beide sprekers tijdens uw gesprek. 1 Druk op de handenvrij-toets tijdens een oproep om naar handenvrij over te schakelen.
  • Page 47: Telefoonboek

    Telefoonboek Druk eenmaal op "2" en wacht totdat de aanwijzer naar het volgende teken gaat en druk tweemaal op "2" om eerst "A" en vervolgens "B" te selecteren. Tijdens het invoeren van tekst verschijnt het beschikbare teken onder elke toets onder in de display.
  • Page 48: Eén Of Alle Ingevoerde Items Wissen

    Telefoonboek De naam, het nummer en de toegewezen belmelodie verschijnen in de display. 5 Terug naar standby. Eén of alle ingevoerde items wissen 1 Druk op de soft menu key. 2 Selecteer de gewenste naam of gebruik het toetsenbord om de eerste letter van de naam in te voeren.
  • Page 49: Alle Nummers In Het Telefoonboek Naar Een Andere Handset Kopiëren

    Nummerweergave oproeper 6 Druk op de bestemmingshandset op de rechter menutoets om te bevestigen of op de linker menutoets om de overdracht te annuleren. 7 Terug naar standby. Alle nummers in het telefoonboek naar een andere handset kopiëren Door alle ingevoerde items van een handset naar een andere te kopiëren, wist u alle bestaande records in de bestemmingshandset.
  • Page 50: De Handset Naar Eigen Wens Instellen

    De handset naar eigen wens instellen De ontvangen oproepen lezen 1 Druk op de omlaag-toets. De lijst met ontvangen oproepen verschijnt op de display. Dit is een combinatie van ontvangen en gemiste oproepen. 2 Selecteer de/het gewenste naam of nummer. 3 Druk op de opnemen-toets om het nummer te bellen.
  • Page 51: Handset Naam

    De handset naar eigen wens instellen De huidige instelling wordt weergegeven. 4 Druk op de toets omhoog om het volume te verhogen. 5 Druk op de toets omlaag om het volume te verlagen. 6 Selecteer "Opsl." (Opslaan) om te bevestigen. 7 Terug naar standby.
  • Page 52: De Verlichtingstijd Van De Display Instellen

    De handset naar eigen wens instellen De verlichtingstijd van de display instellen U kunt het aantal seconden dat de display verlicht blijft nadat u voor het laatst een toets hebt ingedrukt, aanpassen. 1 Selecteer het menu. 2 Selecteer "Handset" en bevestig. 3 Selecteer "Verlichtingstijd"...
  • Page 53: Datum En Tijd Instellen

    Basisinstellingen Datum en tijd instellen 1 Selecteer het menu. 2 Selecteer "Alarm/Klok" en bevestig. 3 Selecteer "Dag & Tijd" en bevestig. 4 Voer het jaar, de maand, dag, tijd en minuten in en selecteer "Opsl." g h i j k l m n o (Opslaan) om te bevestigen.
  • Page 54: Recall (Flash)

    Hulpmiddelen De kiesmodus veranderen: 1 Selecteer het menu. 2 Selecteer "Basis inst." en bevestig. 3 Selecteer "Kiesmodus" en bevestig. 4 Selecteer "Toon" of "Puls" en selecteer "Opsl." (Opslaan). 5 Terug naar standby. Recall (Flash) Druk op de flashtoets "R" (toets 4 – afb. 2C) om bepaalde diensten op uw externe lijn te gebruiken, zoals "oproep in de wacht"...
  • Page 55: Stopwatch

    Extra handsets en basisstations 7 Bewerk de dag van de afspraak en selecteer "Opsl.". g h i j k l m n o 8 Bewerk de tijd en selecteer "Opsl.". g h i j k l m n o 9 Selecteer de gewenste alarmmelodie en selecteer "Opsl.". 10 Terug naar standby.
  • Page 56: Een Handset Verwijderen

    Extra handsets en basisstations Een handset verwijderen Deze procedure moet worden uitgevoerd op een andere handset dan die die u wilt verwijderen. 1 Selecteer het menu. 2 Selecteer "Handset" en bevestig. 3 Selecteer "Aanmelden" en bevestig. 4 Selecteer "Handset Afm." en bevestig. 5 Voer de systeem-PIN in (standaard 0000) en bevestig.
  • Page 57: Beantwoorder

    10 Beantwoorder De Butler 5750 heeft een ingebouwd digitaal antwoordapparaat met een opnamecapaciteit van 11 min. Dit antwoordapparaat kan vanaf de handset en op afstand worden bediend. Het antwoordapparaat kan twee uitgaande berichten (OGM 1 en OGM 2) opnemen (maximaal 2 min.).
  • Page 58: Display

    Beantwoorder Alle boodschappen worden afgespeeld in de luidsprekermodus, om te wisselen tussen oorstuk en luidspreker drukt u op de opnemen -toets 10.1 Display De display van de handset geeft aan hoeveel berichten u hebt ontvangen. Als het antwoordapparaat uitgeschakeld is, verschijnt het -pictogram.
  • Page 59: Het Antwoordapparaat In-/Uitschakelen

    Beantwoorder 5 Selecteer "Beantw.+Opname" voor OGM1 of "Enkel Beantw." voor OGM2 en bevestig. 6 Het bericht zal worden afgespeeld. Druk op "Wis" om te wissen of op "Stop" om het afspelen te onderbreken. Een uitgaande boodschap selecteren (antwoordmodus) 1 Selecteer het menu. 2 Selecteer "Beantwoorder"...
  • Page 60: De Vip-Code Programmeren

    "#’-toets te drukken tijdens het meeluisteren. 10.8 Een memo opnemen Met de Butler 5750 kunt u memo's opnemen. Een memo wordt gezien als een inkomend bericht dat later kan worden opgehaald door de gebruiker. De max. opnameduur voor een memo is 3 minuten.
  • Page 61: Inkomende Berichten En Memo's Afspelen

    Beantwoorder 1 Selecteer het menu. 2 Selecteer "Beantwoorder" en bevestig. 3 Selecteer "Memo Opnemen" en bevestig. 4 Spreek uw bericht na de pieptoon in en druk op "Opsl." (Opslaan) om te stoppen met opnemen. 10.9 Inkomende berichten en memo's afspelen Als er nieuwe berichten zijn, kunt u alle nieuwe berichten afspelen met de soft key: 1 Druk op de rechter soft menu key.
  • Page 62: Geheugen Vol

    Beantwoorder 10.11 Geheugen vol Als het geheugen vol is, verschijnt "GEHEUGEN VOL" op de display. Als het antwoordapparaat is ingeschakeld en er een oproep binnenkomt, zal het apparaat automatisch OGM 2 afspelen (antwoordfunctie zonder opgenomen bericht van beller). Bij het beluisteren van de berichten, zal de interne stem zeggen dat het geheugen vol is en zullen vervolgens de berichten worden afgespeeld.
  • Page 63: Antwoordapparaat Op Afstand Inschakelen

    Beantwoorder 6 Spreek uw bericht in. 7 Druk op "6" om te stoppen met opnemen. De opname stopt automatisch na 2 minuten. Het antwoordapparaat in-/uitschakelen 4 Druk op "9" om het antwoordapparaat in te schakelen. 5 Druk op "9" om te wisselen tussen OGM1 en OGM2 6 Druk op de "8"-toets om het antwoordapparaat uit te schakelen.
  • Page 64: Probleemoplossing

    Probleemoplossing 11 Probleemoplossing Symptoom Mogelijke oorzaak Oplossing Geen weergave Batterijen zijn leeg Controleer de plaatsing van de batterijen Laad de batterijen op Handset UITGESCHAKELD Schakel de handset IN Geen toon Telefoonkabel is slecht Controleer de aansluiting van aangesloten de telefoonkabel De lijn is bezet door een andere Wacht totdat de andere handset...
  • Page 65: Garantie

    Een defect toestel moet worden geretourneerd aan het onderhoudscentrum van Topcom samen met de aankoopbon. Als het toestel defect raakt tijdens de garantieperiode, zal Topcom of een van haar bevoegde onderhoudscentra de defecten ingevolge materiaal- of fabricagefouten kostenloos repareren. Topcom zal naar eigen inzicht voldoen aan haar garantieverplichtingen door de defecte toestellen, of onderdelen ervan, te repareren of te vervangen.
  • Page 66: Afvoeren Van Het Toestel (Milieu)

    Afvoeren van het toestel (milieu) 14 Afvoeren van het toestel (milieu) Op het einde van de levenscyclus van het product mag u dit product niet met het normale huishoudelijke afval weggooien, maar moet u het naar een inzamelpunt brengen voor de recyclage van elektrische en elektronische apparatuur. Dit wordt aangeduid door het symbool op het product, in de handleiding en/of op de verpakking.
  • Page 67: Français

    Instructions de sécurité F r a n ç a i s Instructions de sécurité • Utilisez uniquement la fiche du chargeur fournie. N'utilisez pas d'autres chargeurs, au risque d'abîmer les éléments de batterie. • Insérez uniquement des batteries rechargeables du même type. N'utilisez jamais de batteries ordinaires non-rechargeables.
  • Page 68: Installation Du Combiné

    Pour commencer - 2A Vue arrière de la base - b :A. Prise murale du téléphone b :B.Câble d'alimentation b :C.Câble téléphonique Installation du combiné 1 Ouvrez le compartiment à batteries comme illustré sur la figure 2B. 2 Insérez les batteries en respectant les polarités (+ et -). 3 Fermez le compartiment à...
  • Page 69: Touches/Led

    16. Touche gauche/INT 17. Touche OK - 2C Combiné - Base 18. LED en service/sous tension/combiné sur la base 19. Touche paging Butler 5750 - 2D Base - Symboles Prise d'appel Verrouillage du clavier Fin d'appel Réglage d'alarme Combiné non associé à la base ou hors Appels manqués dans la liste d'appels*...
  • Page 70: Touches D'écran

    • Clignotement rapide : enregistrement en cours. Navigation dans les menus Le Butler 5750 intègre un système de menus très convivial. Chaque menu aboutit à une série d'options. L'arborescence des menus est illustrée au paragraphe suivant. 1 Le combiné étant allumé et en mode de veille, appuyez sur la touche de menu contextuel gauche pour accéder au menu principal.
  • Page 71: Utilisation Du Téléphone

    Utilisation du téléphone Menu Sous-menus Sonnerie Vol. Sonnerie Nom Combiné Bip Touche Contraste Combiné Autotalk Tps éclairage Prefix Choix Base Langue Enregistrer Sonnerie Vol. Sonnerie Réglage Base Mode Compos. Rappel PIN Système Régler Alarme Heure Jour & Heure Format Temps Rendez-Vous Outils Chronomètre...
  • Page 72: Passer Un Appel Ordinaire

    Utilisation du téléphone Passer un appel ordinaire Composition directe 1 Appuyez sur la touche Prise d'appel pour lancer l'appel. 2 Composez le numéro de téléphone. g h i j k l m n o 3 Appuyez sur la touche fin d'appel pour raccrocher ou replacez le combiné sur sa base.
  • Page 73: Mode Mains-Libres

    Utilisation du téléphone 2 Appuyez sur la touche fin d'appel pour raccrocher ou replacez le combiné sur sa base. Vous pouvez désactiver le volume de la sonnerie lors d'un appel entrant en sélectionnant Silence. Mode mains-libres Le mode mains-libres vous permet de parler à votre interlocuteur sans tenir le combiné. Il permet aussi à...
  • Page 74: Utilisation Du Clavier Alphanumérique

    Répertoire 3.10 Utilisation du clavier alphanumérique Avec votre téléphone, vous pouvez également saisir des caractères alphanumériques. Cette fonction peut vous servir pour saisir un nom dans le répertoire, attribuer un nom au combiné, etc. Pour sélectionner une lettre, appuyez sur la touche correspondante autant de fois que nécessaire. Par exemple, pour sélectionner A, appuyez sur 2 une seule fois.
  • Page 75: Montre Détail

    Répertoire Montre Détail 1 Appuyez sur la touche contextuelle. 2 Sélectionnez le nom souhaité ou utilisez le clavier pour saisir la première lettre du nom. 3 Sélectionnez Option. 4 Sélectionnez Montre Détail et validez. Le nom, le numéro et la mélodie de sonnerie associée à l'entrée s'affichent sur l'écran.
  • Page 76: Copie De Toutes Les Entrées Du Répertoire Vers Un Autre Combiné

    Identification de l'appelant 4 Sélectionnez Copie Entrée et validez. Les combinés disponibles (tous les combinés qui sont enregistrés sur la base) sont mentionnés. 5 Sélectionnez le combiné souhaité et validez. Copie vers Combiné x s'affiche à l'écran. Recevoir Entrée Répertoire? apparaît sur l'écran du combiné de destination. 6 Sur le combiné...
  • Page 77: Personnalisation Du Combiné

    Personnalisation du combiné Le téléphone peut mémoriser 30 appels dans la liste d'appels (reçus et manqués) que vous pouvez consulter ultérieurement. Quand la mémoire est pleine, les nouveaux appels remplacent automatiquement les plus anciens appels conservés en mémoire. Les appels manqués sont signalés par une icône clignotante sur l'écran. Le nom du combiné...
  • Page 78: Nom Du Combiné

    Personnalisation du combiné Vol. Sonnerie Vous pouvez choisir parmi 5 niveaux de volume de sonnerie du combiné, voire même couper totalement le volume. 1 Accédez au menu. 2 Sélectionnez Combiné et validez. 3 Sélectionnez Vol. Sonnerie et validez. La valeur en cours est affichée. 4 Appuyez sur la touche haut pour augmenter le volume.
  • Page 79: Autotalk

    Personnalisation du combiné Autotalk Lorsque vous recevez un appel entrant et que le combiné est sur la base, le téléphone prend automatiquement la ligne dès qu'il est retiré de la base. Cette fonction peut être activée ou désactivée. 1 Accédez au menu. 2 Sélectionnez Combiné...
  • Page 80: Réglage De La Date Et De L'heure

    Réglage Base 4 Sélectionnez Une Fois, Quotidienne, Lun à Ven ou Arrêt et validez. Si vous avez sélectionné Une Fois, Quotidienne ou Lun à Ven, l'écran affiche ensuite : Temps (24h) : 00:00 5 Spécifiez l'heure à laquelle vous voulez que le téléphone sonne et validez g h i j k l m n o...
  • Page 81: Mode De Numérotation

    Réglage Base 3 Sélectionnez Vol. Sonnerie et validez. La valeur en cours est affichée. 4 Appuyez sur la touche haut pour augmenter le volume. 5 Appuyez sur la touche bas pour diminuer le volume. 6 Sélectionnez Mémor. pour valider. 7 Revenez au mode veille. Mode de numérotation Il existe 2 modes de numérotation : •...
  • Page 82: Outils

    Outils Outils Rendez-Vous Vous pouvez définir 5 rappels ou rendez-vous auxquels vous pouvez associer un nom et une alarme à déclencher à une date et une heure données. 1 Accédez au menu. 2 Sélectionnez Outils et validez. 3 Sélectionnez Rendez-Vous et validez. 4 Sélectionnez l'un des 5 rendez-vous et sélectionnez Option.
  • Page 83: Suppression D'un Combiné

    Combinés et stations de base supplémentaires Pour placer la base en mode d'enregistrement : 1 Maintenez enfoncée la touche paging de la base. La LED sur la base se met à clignoter pendant 90 secondes. Pendant cette période, la base est prête à enregistrer un combiné. Sur le combiné...
  • Page 84: Fonction D'intercom

    Combinés et stations de base supplémentaires Fonction d'intercom Appel vers un combiné interne 1 Appuyez sur la touche gauche INT. L'écran affiche Combiné _. 2 Saisissez le numéro interne du combiné que vous souhaitez joindre. g h i j k l m n o 3 Appuyez sur la touche fin d'appel pour raccrocher ou replacez le combiné...
  • Page 85: Répondeur

    10 Répondeur Le Butler 5750 dispose d'un répondeur numérique intégré d'une capacité d'enregistrement de 11 minutes. Ce répondeur peut être commandé depuis le combiné et à distance. Il offre la possibilité d'enregistrer deux messages sortants (annonce 1 et annonce 2) de 2 minutes maximum.
  • Page 86: Allumer/Éteindre Le Répondeur

    Répondeur 6 Commencez à parler après le bip sonore, puis appuyez sur Mémor. pour valider. Le message enregistré est lu. 7 Pendant la lecture, appuyez sur Efface pour effacer ou sur Arrêt pour interrompre la lecture. L'enregistrement ne peut pas dépasser 2 minutes. Si aucun message sortant n'est enregistré, c'est l'annonce pré-enregistrée qui est utilisée.
  • Page 87: Régler Le Nombre De Sonneries (Délai Du Répondeur)

    Répondeur 10.4 Régler le nombre de sonneries (délai du répondeur) Le nombre de sonneries avant le déclenchement du répondeur en cas d'appel peut être réglé de 2 à 9 et sur TS (Eco. taxes). Le réglage standard est de 5 sonneries. En mode éco. taxes, le répondeur se déclenche après 5 sonneries s'il n'y a pas de nouveau message et après 2 sonneries en cas de nouveaux messages.
  • Page 88: Filtrer Les Appels

    Filtrage de l'appel et vous pouvez appuyer sur la touche contextuelle droite pour arrêter le répondeur et dialoguer avec l'appelant. Si vous avez un deuxième combiné enregistré sur la même base du Butler 5750, vous pouvez arrêter le répondeur en appuyant sur la touche # pendant le filtrage des appels.
  • Page 89: Effacer Des Messages

    Répondeur 10.10 Effacer des messages Pendant la lecture des messages, vous pouvez effacer les messages un par un comme indiqué ci- avant. Vous pouvez également effacer tous les messages lus : 1 Accédez au menu. 2 Sélectionnez Répondeur et validez. 3 Sélectionnez Effacer mess.
  • Page 90: Allumer Le Répondeur À Distance

    Répondeur Effacer tous les anciens messages 6 Après avoir écouté tous les messages, appuyez sur 0 pour effacer l'ensemble des messages. Lire le message sortant 4 Appuyez sur 4 pour lire le message sortant actuel. Enregistrer le message sortant 4 Appuyez sur 9 pour sélectionner l'annonce 1 ou l'annonce 2. 5 Appuyez sur 5 pour commencer l'enregistrement.
  • Page 91: Dépannage

    Dépannage 11 Dépannage Symptôme Cause possible Solution Aucun affichage Batteries déchargées Vérifiez la position des batteries Rechargez les batteries Combiné désactivé Activez le combiné Pas de tonalité Câble téléphonique mal raccordé Vérifiez la connexion du câble téléphonique La ligne est occupée par un autre Attendez que l'autre combiné...
  • Page 92: Garantie

    être différents de ceux de l'appareil acheté initialement. La date d'achat initiale détermine le début de la période de garantie. La période de garantie n'est pas prolongée si l'appareil est remplacé ou réparé par Topcom ou par l'un de ses centres de service après-vente officiels.
  • Page 93: Mise Au Rebut De L'appareil (Environnement)

    Mise au rebut de l'appareil (environnement) 14 Mise au rebut de l'appareil (environnement) Au terme du cycle de vie de ce produit, ne le jetez pas avec les déchets ménagers ordinaires mais déposez-le dans un point de collecte pour le recyclage des équipements électriques et électroniques.
  • Page 94: Deutsch

    Sicherheitshinweise D e u t s c h Sicherheitshinweise • Verwenden Sie nur den mitgelieferten Netzadapter. Verwenden Sie keine fremden Adapter, da die Batteriezellen beschädigt werden könnten. • Verwenden Sie nur aufladbare Batterien des gleichen Typs. Verwenden Sie niemals normale, nicht-aufladbare Batterien.
  • Page 95: Mobilteil Installieren

    Erste Schritte - 2A Rückseite der Basisstation - A. Telefonwandanschluss B. Netzkabel C. Telefonkabel Mobilteil installieren 1 Öffnen Sie das Batteriefach wie in Abbildung 2B dargestellt. 2 Legen Sie die Batterien ein. Achten Sie dabei auf die Polarität (+ und -). 3 Schließen Sie das Batteriefach.
  • Page 96: Tasten / Anzeigen

    16. Nach-links-Taste / Interner Anruf INT - 2C Mobilteil - 17. OK-Taste Basisstation 18. LED-Anzeige: In Betrieb / Strom / Mobilteil auf Basisstation 19. Paging-Taste Butler 5750 - 2D Basisstation - Symbole Gespräch angenommen Tastatursperre Aufgelegt Wecker eingeschaltet Mobilteil nicht angemeldet oder außer...
  • Page 97: Displaytasten

    • Schnelles Blinken: während der Anmeldung Durch das Menü navigieren Das Butler 5750 verfügt über ein leicht zu bedienendes Menü-System. Jedes Menü besteht aus einer Reihe von Unterpunkten. Die Menü-Übersicht finden Sie im folgenden Abschnitt. 1 Um das Hauptmenü aufzurufen, drücken Sie die linke Menütaste eingeschaltetem Mobilteil im Standby-Modus.
  • Page 98: Telefon Benutzen

    Telefon benutzen Menü Untermenüpunkte Rufton Ruftonlautstärke Mobilteil Name Tastenton Kontrast Mobilteil Automatische Annahme Länge Hintergrundbeleuchtung Automatische Vorwahl Basis auswählen Sprache Anmelden Rufton Ruftonlautstärke Basis Einstellungen Wahlverfahren Flash PIN-Nummer Wecker einstellen Uhrzeit Datum und Uhr Zeitformat einstellen Termin Extras Stoppuhr Telefon benutzen Mobilteil ein-/ausschalten 1 Halten Sie die AUS-Taste gedrückt, um das Mobilteil auszuschalten.
  • Page 99: Telefonieren

    Telefon benutzen Telefonieren Direkt wählen 1 Drücken Sie die Taste Gespräch annehmen, um das Gespräch zu beginnen. 2 Geben Sie die Telefonnummer ein. g h i j k l m n o 3 Drücken Sie die Auflegen-Taste oder stellen Sie das Mobilteil auf die Basisstation, um das Gespräch zu beenden.
  • Page 100: Freisprechmodus

    Telefon benutzen Das Symbol Gespräch angenommen erscheint im Display. Die Gesprächsdauer wird nach 15 Sekunden angezeigt. 2 Drücken Sie die Auflegen-Taste oder stellen Sie das Mobilteil auf die Basisstation, um das Gespräch zu beenden. Sie können die Ruftonlautstärke während eines eingehenden Anrufs mit "Leise" ausschalten.
  • Page 101: Die Alphanumerischen Tasten Verwenden

    Telefonbuch 3.10 Die alphanumerischen Tasten verwenden Sie können mit Ihrem Telefon auch alphanumerische Zeichen eingeben. Das ist notwendig, um Namen in das Telefonbuch einzugeben, zum Benennen des Mobilteils, ... Zur Auswahl eines Buchstabens, drücken Sie die entsprechende Taste so oft wie notwendig. Drücken Sie z.
  • Page 102: Einen Telefonbucheintrag Anzeigen

    Telefonbuch Einen Telefonbucheintrag anzeigen 1 Drücken Sie die Menütaste. 2 Suchen Sie den gewünschten Namen oder geben Sie über die Tastatur den ersten Buchstaben des Namens ein. 3 Wählen Sie "Option". 4 Wählen Sie "Eintrag anz." und bestätigen Sie. Der Name, die Telefonnummer und die Ruftonmelodie, die Sie dem Eintrag zugeordnet haben, erscheinen im Display.
  • Page 103: Alle Telefonbucheinträge Auf Ein Anderes Mobilteil Kopieren

    Anruferkennung 4 Wählen Sie "Eintr. Kop." und bestätigen Sie. Die verfügbaren Mobilteile werden angezeigt (alle Mobilteile, die an der Basisstation angemeldet sind). 5 Wählen Sie das gewünschte Mobilteil aus und bestätigen Sie. "Kopiere nach Mobilteil x" erscheint im Display. "Telefonbucheintrag empfangen?" erscheint im Display des ausgewählten Mobilteils.
  • Page 104: Mobilteil Individuell Anpassen

    Mobilteil individuell anpassen Das Telefon kann 30 Anrufe in der Anrufliste (entgegengenommene und entgangene Anrufe) speichern, die Sie später anzeigen lassen können. Wenn der Speicher voll ist, überschreiben neue Anrufe automatisch die ältesten Einträge im Speicher. Entgangene Anrufe werden mit einem blinkenden Symbol im Display angezeigt.
  • Page 105: Mobilteil-Name

    Mobilteil individuell anpassen Ruftonlautstärke Sie können 5 Ruftonlautstärken am Mobilteil einstellen und den Rufton ausschalten. 1 Rufen Sie das Menü auf. 2 Wählen Sie "Mobilteil" und bestätigen Sie. 3 Wählen Sie "Rufton Laut." und bestätigen Sie. Die aktuelle Einstellung erscheint im Display. 4 Drücken Sie die Nach-oben-Taste, um die Lautstärke zu erhöhen.
  • Page 106: Automatische Anrufannahme

    Mobilteil individuell anpassen Automatische Anrufannahme Steht das Mobilteil bei einem ankommenden Anruf auf der Basisstation, so wird das Gespräch automatisch angenommen, sobald das Mobilteil von der Basisstation abgehoben wird. Diese Funktion kann ein- oder ausgeschaltet werden. 1 Rufen Sie das Menü auf. 2 Wählen Sie "Mobilteil"...
  • Page 107: Datum Und Uhrzeit Einstellen

    Basis Einstellungen 4 Wählen Sie "Einmal", "Täglich", "Mon - Fr" oder "Aus" und bestätigen Sie. Wenn Sie "Einmal", "Täglich" oder "Mon - Fr" gewählt haben, zeigt das Display folgendes an: Zeit (24 Std): 00:00 5 Geben Sie die gewünschte Weckzeit ein und bestätigen Sie mit "Speich". g h i j k l m n o...
  • Page 108: Ruftonlautstärke

    Basis Einstellungen Ruftonlautstärke Sie können 5 Ruftonlautstärken an der Basisstation einstellen. 1 Rufen Sie das Menü auf. 2 Wählen Sie "Basis Einst." und bestätigen Sie. 3 Wählen Sie "Rufton Laut." und bestätigen Sie. Die aktuelle Einstellung erscheint im Display. 4 Drücken Sie die Nach-oben-Taste, um die Lautstärke zu erhöhen. 5 Drücken Sie die Nach-unten-Taste, um die Lautstärke leiser zu stellen.
  • Page 109: Extras

    Extras 4 Geben Sie die alte PIN-Nummer (voreingestellt 0000) ein und wählen Sie g h i j k l m n o "Speich". 5 Geben Sie die neue PIN-Nummer ein, wählen Sie "Speich". Wiederholen g h i j k l m n o Sie diesen Schritt.
  • Page 110: Zusätzliche Mobilteile Und Basisstationen

    Zusätzliche Mobilteile und Basisstationen Zusätzliche Mobilteile und Basisstationen Sie können bis zu 4 Mobilteile an der Basisstation anmelden. Jedes Mobilteil kann an bis zu 4 Basisstationen angemeldet werden und der Benutzer kann die jeweilige Basisstation wählen. Ein neues Mobilteil hinzufügen Diese Funktion brauchen Sie nur, wenn Sie ein Mobilteil abgemeldet haben oder ein neues gekauft haben.
  • Page 111: Interner Anruf Verwenden

    Zusätzliche Mobilteile und Basisstationen 4 Wählen Sie "Manuell" oder "Automatisch" und bestätigen Sie. Wenn Sie "Manuell" ausgewählt haben: 5 Wählen Sie die gewünschte Basisstation für Ihr Mobilteil und bestätigen Sie. Wenn Sie die Basisstation automatisch auswählen lassen und das Mobilteil außer Reichweite der derzeitigen Basisstation gelangt, sucht das Mobilteil nur nach der stärksten Basisstation im Standby-Modus (nicht während eines Gesprächs).
  • Page 112: Anrufbeantworter

    Gespräch angenommen. 10 Anrufbeantworter Das Butler 5750 verfügt über einen integrierten Anrufbeantworter mit einer Aufnahmekapazität von 11 Minuten. Dieser Anrufbeantworter kann über die Basisstation und mit einer Fernbedienung bedient werden. Sie können zwei Ansagetexte aufnehmen (Ansagetext 1 und Ansagetext 2) (maximum 2 Minuten).
  • Page 113: Ansagetexte

    Anrufbeantworter 10.2 Ansagetexte Sie können zwei Ansagetexte von 2 Minuten Länge aufnehmen (Ansagetext 1 und Ansagetext 2). • Ansagetext 1 ist für die Anrufbeantworterfunktion mit der Möglichkeit für den Anrufer, eine Nachricht zu hinterlassen. • Ansagetext 2 ist für die Anrufbeantworterfunktion ohne die Möglichkeit für den Anrufer, eine Nachricht zu hinterlassen.
  • Page 114: Anrufbeantworter Ein- Und Ausschalten

    Anrufbeantworter Ansagetext löschen Wenn Sie den Ansagetext löschen, wird der voreingestellte Ansagetext abgespielt. Sie können während des Abspielens des Ansagetextes (siehe oben) den Text löschen, indem Sie auf ‘Löschen’ drücken. 10.3 Anrufbeantworter ein- und ausschalten Falls der Anrufbeantworter ausgeschaltet ist, wird das -Symbol angezeigt.
  • Page 115: Betrieb

    Anrufüberprüfung auf die Taste ‘#’ drücken. 10.8 Ein Memo aufnehmen Mit dem Butler 5750 können Sie Memos aufnehmen. Diese Memos werden wie eine eingehende Nachricht behandelt, die später vom Benutzer abgehört werden kann. Die maximale Aufnahmezeit eines Memo beträgt 3 Minuten.
  • Page 116: Gespeicherte Nachrichten Und Memos Abspielen

    Anrufbeantworter 10.9 Gespeicherte Nachrichten und Memos abspielen Wenn neue Nachrichten gespeichert wurden, können Sie alle neue Nachrichten mit der Menütaste abspielen: 1 Drücken Sie die rechte Menütaste. Oder über das Menü: 1 Rufen Sie das Menü auf. 2 Wählen Sie "AB" und bestätigen Sie. 3 Wählen Sie "Nachr.
  • Page 117: Fernbetätigung

    Anrufbeantworter 10.12 Fernbetätigung Der Anrufbeantworter kann nur mit einem Touch-Tone-Telefon (DTMF Tonauswahlsystem) fernbedient werden. 1 Rufen Sie Ihr Gerät an. g h i j k l m n o Der Anrufbeantworter nimmt den Anruf entgegen. Sie hören den Ansagetext und einen Signalton. 2 Wählen Sie langsam den VIP-Code (voreingestellt 321) g h i j k l...
  • Page 118: Anrufbeantworter Per Fernbetätigung Einschalten

    Problemlösung Anrufbeantworter ein- und ausschalten 4 Drücken Sie auf '9', um den Anrufbeantworter einzuschalten. 5 Drücken Sie auf ‘9’, um zwischen Ansagetext 1 und Ansagetext 2 zu schalten. 6 Drücken Sie auf '8', um den Anrufbeantworter auszuschalten. Fernbetätigung beenden Auf ‘6’ drücken, um die Fernbetätigung zu beenden. 10.13 Anrufbeantworter per Fernbetätigung einschalten Falls der Anrufbeantworter ausgeschaltet ist, können Sie ihn per Fernbetätigung einschalten: 1 Rufen Sie Ihr Gerät an.
  • Page 119: Technische Daten

    Technische Daten Störung Mögliche Ursache Lösung Es ist nicht möglich, einen Die Flashzeit ist zu kurz oder zu Ändern Sie die Flashzeit Anruf auf PABX lang weiterzuleiten Telefon reagiert nicht auf Bedienfehler Entfernen Sie die Batterien Tastendrücke und legen Sie sie erneut ein 12 Technische Daten Standard DECT(Digital Enhanced Cordless Telecommunications)
  • Page 120: Garantie

    13.1 Garantiezeit Topcom Geräte haben eine 24-monatige Garantiezeit. Die Garantiezeit beginnt an dem Tag, an dem das neue Gerät erworben wurde. Die Garantie für Batterien ist auf 6 Monate nach Erwerb begrenzt. Verschleißteile oder Mängel, die den Wert oder die Gebrauchstauglichkeit des Geräts nur unerheblich beeinflussen, sind von der Garantie ausgeschlossen.
  • Page 121: Entsorgung Des Geräts (Umweltschutz)

    Entsorgung des Geräts (Umweltschutz) 14 Entsorgung des Geräts (Umweltschutz) Am Ende der Lebensdauer des Produkts darf das Gerät nicht im normalen Hausmüll entsorgt werden. Bringen Sie es zu einer Sammelstelle zur Aufbereitung elektrischer und elektronischer Geräte. Das Symbol am Produkt, in der Bedienungsanleitung und/oder Verpackung zeigt dies an.
  • Page 122: Español

    Instrucciones de seguridad E s p a ñ o l Instrucciones de seguridad • Usar sólo el cargador suministrado. El uso de otros cargadores podría dañar las baterías. • Insertar sólo baterías recargables del mismo tipo. No usar nunca baterías normales no recargables.
  • Page 123: Instalación Del Terminal

    Introducción - 2A Vista posterior de la base - A. Toma de teléfono B. Cable de alimentación C. Cable telefónico Instalación del terminal 1 Abra el compartimiento de las baterías tal y como se muestra en la imagen 2 Inserte las baterías respetando la polaridad (+ y -). 3 Cierre el compartimiento de las pilas.
  • Page 124: Teclas / Led

    16. Tecla Izquierda / INT - 2C Terminal - 17. Tecla OK Base 18. LED En uso / Alimentación / Terminal en la base 19. Tecla de búsqueda Butler 5750 - 2D Base - Símbolos Descolgar Bloqueo del teclado Colgar Alarma activada...
  • Page 125: Teclas De Pantalla

    • Parpadeo rápido: durante el registro. Navegación por el menú El teléfono Butler 5750 cuenta con un sistema de menús muy fácil de usar. Cada uno de los menús lleva a una lista de opciones. El mapa de menús se muestra a continuación.
  • Page 126: Uso Del Teléfono

    Uso del teléfono Menú Opciones del submenú Timbre Volumen del timbre Nombre term. Tono tecla Contraste Microteléfono Descuelgue aut. Tiempo ilum. Prefijo Selec. base Idioma Registro Timbre Volumen del timbre Configurar la base Marcación Rellamada PIN del sistema Config. alarma Hora Fecha y hora Formato hora...
  • Page 127: Realizar Una Llamada Telefónica Normal

    Uso del teléfono Realizar una llamada telefónica normal Marcación directa 1 Pulse la tecla Descolgar para iniciar la llamada. 2 Marque el número de teléfono. g h i j k l m n o 3 Pulse la tecla Colgar para finalizar la llamada o coloque el terminal otra vez en la base.
  • Page 128: Modo Manos Libres

    Uso del teléfono Puede desactivar el volumen del timbre durante una llamada entrante seleccionando “Silenc.”. Modo manos libres El modo manos libres le permite hablar con su interlocutor sin sujetar el terminal. También permite a otras personas de la habitación escuchar a ambas partes de la conversación. 1 Para pasar cualquier llamada al modo manos libres, pulse la tecla Manos libres durante la llamada.
  • Page 129: Agenda

    Agenda Para seleccionar la "A" y la "B" consecutivamente, pulse "2" una vez, espere a que el cursor se desplace al siguiente carácter y pulse "2" dos veces. Durante la introducción de texto, el carácter disponible debajo de cada tecla aparece en la parte inferior de la pantalla.
  • Page 130: Eliminar Una Entrada O Todas Las Entradas

    Agenda Eliminar una entrada o todas las entradas 1 Pulse la tecla de menú. 2 Seleccione el nombre deseado o utilice el teclado para introducir la primera letra del nombre. 3 Seleccione “Opción”. Para eliminar una entrada: 4 Seleccione “Borrar entrada” y confirme la selección. Para eliminar todas las entradas: 4 Seleccione “Borrar todo”...
  • Page 131: Copiar Todas Las Entradas De La Agenda En Otro Terminal

    Identificación de llamadas Copiar todas las entradas de la agenda en otro terminal Al copiar todas las entradas de un terminal a otro, borrará los registros existentes en el terminal de destino. 1 Pulse la tecla de menú. 2 Seleccione el nombre deseado o utilice el teclado para introducir la primera letra del nombre.
  • Page 132: Personalizar El Terminal

    Personalizar el terminal 3 Pulse la tecla Descolgar para iniciar la llamada. Seleccione “Opción”. Para eliminar una entrada: 4 Seleccione “Borrar llamada” y confirme la selección. 5 Regrese al modo de espera. Para eliminar todas las entradas: 5 Seleccione “Borrar todo” y confirme la selección. 6 Regrese al modo de espera.
  • Page 133: Nombre Del Terminal

    Personalizar el terminal Nombre del terminal Puede cambiar el nombre que se muestra en la pantalla del terminal cuando se encuentra en modo de espera (máx. 9 caracteres). 1 Acceda al menú. 2 Seleccione “Terminal” y confirme la selección. 3 Seleccione “Nombre term.” y confirme la selección. 4 Escriba el nombre que desee.
  • Page 134: Código De Prefijo

    Personalizar el terminal 3 Seleccione "Tiempo ilum." y confirme la selección. 4 Seleccione “10”, “20”, “30” o “40” segundos y confirme la selección. 5 Regrese al modo de espera. Código de prefijo Es posible utilizar el teléfono con un número de prefijo. Al marcar los números de teléfono, puede añadir de forma automática el código de prefijo antes del número.
  • Page 135: Ajustar El Formato De Hora

    Configurar la base 4 Introduzca el año, el mes, el día, la hora y los minutos y seleccione g h i j k l m n o “Guardar” para confirmar los datos. 5 Regrese al menú anterior. 6.10 Ajustar el formato de hora 1 Acceda al menú.
  • Page 136: Rellamada (Flash)

    Herramientas 4 Seleccione “Tonos” o “Pulsos” y haga clic en “Guardar”. 5 Regrese al modo de espera. Rellamada (Flash) Pulse la tecla Flash “R” (tecla 4 - Imagen 2C) para utilizar determinados servicios de su línea externa como “llamada en espera” (si su compañía telefónica ofrece esta opción) o para transferir llamadas si utiliza una centralita telefónica (PABX).
  • Page 137: Cronómetro

    Terminales y bases adicionales 10 Regrese al modo de espera. Para eliminar la cita: 5 Seleccione “Borrar” y confirme la selección. 6 Pulse la tecla de menú derecha para confirmar la operación. 7 Pulse la tecla de menú izquierda para volver atrás. 8 Regrese al modo de espera.
  • Page 138: Eliminar Un Terminal

    Terminales y bases adicionales Eliminar un terminal Este procedimiento debe llevarse a cabo desde un terminal diferente al que desea eliminar. 1 Acceda al menú. 2 Seleccione “Terminal” y confirme la selección. 3 Seleccione “Registro” y confirme la selección. 4 Seleccione “Dar de baja” y confirme la selección. 5 Introduzca el PIN del sistema (0000 de forma predeterminada) y g h i j k l...
  • Page 139: Contestador

    10 Contestador El teléfono Butler 5750 incorpora un contestador digital con una capacidad de grabación de 11 minutos. Puede manipularse bien desde el terminal, o bien de forma remota. Además, podrá...
  • Page 140: Pantalla

    Contestador 10.1 Pantalla En la pantalla del terminal, aparecerá el número de mensajes que ha recibido. Si el contestador está Desact., se mostrará el icono . Si está Act., se mostrará Se mostrará en pantalla el mensaje "Memoria llena" cuando la memoria interna esté llena y no puedan grabarse mensajes nuevos.
  • Page 141: Activar / Desactivar Contestador

    Contestador Seleccionar mensaje saliente (modo Respuesta) 1 Acceda al menú. 2 Seleccione “Contestador” y confirme la selección. 3 Seleccione “Config. cont.” y confirme la selección. 4 Seleccione “Modo resp.” y confirme la selección. 5 Seleccione "Cont. & Grabar" para OGM1 y "Sólo contestar" para OGM2 y confirme la selección.
  • Page 142: Programación Del Código Vip

    10.8 Grabar un memo Con el teléfono Butler 5750, puede grabar memos. Estos memos se consideran mensajes entrantes que el usuario puede escuchar más tarde. El tiempo de grabación máx. de un memo es 3 minutos. 1 Acceda al menú.
  • Page 143: Reproducción De Los Mensajes Entrantes Y Memos

    Contestador 10.9 Reproducción de los mensajes entrantes y memos Cuando haya mensajes nuevos, puede reproducir todos los mensajes nuevos con la tecla de menú: 1 Pulse la tecla de menú derecha. O desde el menú: 1 Acceda al menú. 2 Seleccione “Contestador” y confirme la selección. 3 Seleccione “Rep.
  • Page 144 Contestador 1 Llame a su contestador. g h i j k l m n o El contestador descuelga la línea, se oye el mensaje saliente y una señal. 2 Marque despacio el código VIP (el predeterminado es 321). g h i j k l m n o Oirá...
  • Page 145: Activar El Contestador Remotamente

    Resolución de problemas 10.13 Activar el contestador remotamente Si está desactivado el contestador, puede encenderlo de forma remota: 1 Llame a su contestador. g h i j k l m n o El contestador descolgará automáticamente transcurridos 10 tonos y se reproducirá...
  • Page 146: Datos Técnicos Características Técnicas

    La unidad defectuosa deberá devolverse al centro de servicio de Topcom junto con un comprobante de compra válido. Si la unidad tiene una avería durante el periodo de garantía, Topcom o su centro de servicio oficial repararán sin cargo alguno cualquier avería causada por defectos de material o fabricación.
  • Page 147: Limitaciones De La Garantía

    Limitaciones de la garantía Los daños o defectos causados por el tratamiento o manejo incorrectos y los daños resultantes del uso de piezas o accesorios no originales no recomendados por Topcom no están cubiertos por la garantía. Los teléfonos inalámbricos Topcom están diseñados para funcionar sólo con baterías recargables.
  • Page 148 • µ µ µ µ µ µ µ • µ µ µ µ µ , µ - µ µ µ µ µ µ • µ µ µ µ µ • µ • µ • µ µ µ 1,5m • µ •...
  • Page 149 - 2A µ µ µ µ µµ / - 2B µµ µ µ µ µ...
  • Page 150 µ /Flash µ µ µ µ µ µ µ PQRS WXYZ µ µ µ /INT µ Butler 5750 µ µ µ µ µ µ µ µ µ µ µ µ µ µ µ µ µ µ µµ µ µµ .
  • Page 151 µ µ µ µ µ µ (14) • µ µ µ µ • µ • µ µ • µ Butler 5750 µ µ µ µ µ µ µ µ µ µ µ µ µ µ µ µ µ µ µ...
  • Page 152 µ µ µ µ µ µ µ µ µ µ µ µ µ µ µ µ µ µ µ µ µ “ ” “ ” µ µ µ µ “ ”. µ µ µ µ...
  • Page 153: 10 Μ

    µ µ µ µ g h i j k l m n o µ µ µ µ µ µ µ g h i j k l m n o µ µ µ “P”. µ µ . µ µ µ µ µ...
  • Page 154: Μ ( )

    µ µ µ µ µ “ ”. µ µ “ ” ”6.5 µ ”) µ µ µ µ µ µ µ µ “ ”. µ µ µ µ µ µ µ µ µ µ µ µ µ µ µ µ µ...
  • Page 155 µ µ µ µ µ µ µ 2 ) µ µ µ µ “ ” µ “ ” µ 3.10 µ µ µ µ µ µ , ... µµ , µ , µµ ‘A’, ‘2’ µ µµ ‘B’, ‘2’ µµ ‘A’ µµ...
  • Page 156: Μ Μ

    µ µ g h i j k l m n o “ ”. µ µ µ “ ”. µ µ µ µ µ µ µµ µ µ µ µ µ µ µ µ µ µµ µ “ ”. “ ” µ...
  • Page 157 µ µ µ . “ ”. µ “ ”. µ µ µ “ ”. µ µ µ µ µ µµ µ “ ”. “ ” µ µ µ µ µ “ ”. µ µ µ µ “ ”. µ µ µ...
  • Page 158 µ PSTN µ µ µ µ µ µ µµ , µ µ µ µ FSK DTMF. µ µ µ µ , µ µ µ µ µ µ µ µ µ µ . µ µ µ µ µ µ µ µ µ...
  • Page 159 µ µ µ µ µ µ “ ” “ ” “ ” “ ” µ µ µ µ µ µ µ “ ” “ ” µ µ µ “ ” µ µ µ µ µ (µ µ “ ” “ ”...
  • Page 160 µ “ ” “ ” µ µ µ “ ” “ ” µ (1-8) µ µ µ µ µ µ µ µ “ ” “ ” “ ” “ ” µ µ µ µ µ µ µ µµ µ µ “...
  • Page 161 µ µ µ µ µ µ “ ” “ ” “ ”, “ ”, “ ” “ ” “ ”, “ ” “ ”, µ 00:00 “ ”. g h i j k l m n o µ µ “ ”.
  • Page 162: Flash)

    µ “ ” “ ” µ µ µ µ µ µ µ “ ” “ .” µ µ µ “ ” µ • DTMF/ • µ µ “ ” “ ” “ ” “ ” “ ”. µ (Flash) flash “R” ( µ...
  • Page 163 µ µ µ µ µ µ 0000. µ “ ” “ ” (0000 g h i j k l m n o “ ”. “ ” g h i j k l m n o µ µ µ µ µ µ...
  • Page 164 µ “ ” µ µ µ µ µ µ µ µ µ µ µ µ µ µ µ “ ” “ ” “ ” µ (1-4) µ (0000 g h i j k l m n o µ µ “ ”...
  • Page 165 µ µ µ µ µ µ . µ “ ” “ ” “ ” “ ” “ ”: µ µ µ µ µ µ INT. µ µ µ “ _”. µ g h i j k l m n o µ...
  • Page 166 µ µ “ .”. µ µ µ µ µ µ µ µ µ µ µ µ µ Butler 5750 µ µ µ µ µ µ µ µ µ (OGM 1 OGM 2) (2 µ • OGM 1, µ µ •...
  • Page 167 µ 10.1 µ µ µ µ , µ µ µ µ µ µ " " µ µ µ µ µ µ µ LCD. 10.2 µ µ µ µ µ µ (OGM1 OGM2). • µ µ µ 1 µ µ . •...
  • Page 168: Μ Μ Μ ( )

    µ µ µ µ µ “ ” “ ” “ ” ‘ & ’ µ µ OGM1 ‘ ’ µ µ OGM2 µ µ µ µ µ µ , µ µ µ . µ µ µ ) µ µ µ ‘...
  • Page 169: Μµ Μ Vip

    µ 10.7 µ µ µ µ µ µ , µ µµ µ µ µ ‘ ’ µ µ µ Butler 5750 µ , µ µ ‘#’ 10.8 µ µ Butler 5750 µ µ µ µ µ µ µ µ µ...
  • Page 170: Μ Μ Μ Μ Μ

    µ “ ” µ µ µ ‘ ’ µ 10.9 µ µ µ µ µ µ µ , µ µ µ µ µ “ ” “ ” “ ” µ µ µ “ ” µ µ µ µ µ µ µ...
  • Page 171 µ 10.12 µ µ µ µ µ µ DTMF). g h i j k l m n o µ µ µ µ VIP ( 321) g h i j k l m n o µ µ µ µ g h i j k l m n o µ...
  • Page 172 µ '9 ' ‘9’ µ OGM1 OGM2 µ µ µ µ ‘6’ µ 10.13 µ , µ g h i j k l m n o µ µ µ µ µ µ 2. VIP ( 321) g h i j k l m n o µ...
  • Page 173 µ µ µ µ µ µ µ . µ µ µ µ µ 13.2 µ µ Topcom µ µ , Topcom µ µ µ µ µ . Topcom µ µ µ µ µ µ µ µ µ µ µ µ...
  • Page 174: Eco ( Μ )

    µ Topcom µ µ µ µ µ µ µ µ µ µ µ µ µ µ µ µ µ µ µ Topcom. , µ µµ µ µ µ µ µ µ µ µ µ µ µ µ µ µ µ...
  • Page 175 SERVICE RETURN CARD - RÜCKSENDEKARTE - CARTE DE RETOUR SERVICE - RETOURFICHE RETURN WITH YOUR DEFECT PRODUCT Name/Vorname/Prénom/Naam: Surname/Familienname/Nom/Familienaam: Street/Straße/Rue/Straat: Nr./N°: Box/Postfach/Boîte/Postbus: Location/Ort./Lieu/Plaats: Post code/Postleitzahl/Code Postal/Postcode: Country/Land/Pays/Land: Tel./Tél.: E-mail: Model name/Modellbezeichnung/Nom du modèle/Modelnaam: Serial Nr/Seriennummer/N° série/Serienummer: Purchase date/Kaufdatum/Date d’achat/Aankoopdatum: (DD/MM/YYYY) - (TT/MM/JJJJ) Fault description/Beschreibung des Defekts/Description de la panne/Beschrijving defect: (Original Proof of Purchase has to be attached to this return card to be valid for warranty) Model name/Modellbezeichnung/Nom du modèle/Modelnaam:...
  • Page 176 BUTLER 5750 visit our website www.topcom.net MD4300089...

Table des Matières