Table des Matières

Publicité

Les langues disponibles

Les langues disponibles

Liens rapides

Version 2 b
07/2016
Version 1
07/2014

Publicité

Table des Matières
loading

Sommaire des Matières pour Cassese MACH 1CART

  • Page 1 Version 2 b 07/2016 Version 1 07/2014...
  • Page 2: Table Des Matières

    USER MANUAL MACH 1 CART INDEX I. USER MANUAL / ENGLISH .................... 4 PRESENTATION ..............................5 WORK TABLE ..................................5 INTRODUCTION ................................7 ACCESSORIES SUPPLIED WITH THE MACHINE ........................7 TECHNICAL SPECIFICATIONS OF MACH 1 CART ......................9 OPTIONS ..................................9 GUARANTEE ...................................9 SETUP ................................10 2.A.
  • Page 3 USER MANUAL MACH 1 CART PRESENTATION ..............................29 TABLE D’ASSEMBLAGE ..............................29 INTRODUCTION ................................31 ACCESSOIRES FOURNIS AVEC LA MACHINE ........................31 SPECIFICATIONS TECHNIQUES ............................33 OPTIONS ..................................33 GARANTIE ..................................33 MISE EN ROUTE ..............................34 DEBALLAGE DE LA MACHINE ............................34 RACCORDS ..................................35 RACCORDEMENT A L’AIR COMPRIMÉ ..........................35 RACCORDEMENT ELECTRIQUE DE LA MACHINE ......................36 REGLAGES ................................
  • Page 4: User Manual / English

    USER MANUAL MACH 1 CART I. USER MANUAL / ENGLISH Your safety is our priority This symbol on the machine reminds the This symbol on the machine reminds the operator to wear acoustic protections before operator to read this manual before operating operating this joiner.
  • Page 5: Presentation

    USER MANUAL MACH 1 CART 1 PRESENTATION WORK TABLE Rebate clamp Keyboard Magnetic adjustable rod clamp assembly Crossbar Sliding table handle Sliding table back fence Angle adjusting screw back fence Wedge distributor Air pressure gauge Air valve...
  • Page 6 USER MANUAL MACH 1 CART Loading button Pre-clamp button Stapling button Emergency/stop & start button...
  • Page 7: Introduction

    MACH 1 CART INTRODUCTION Thanks for having purchased the MACH 1 CART underpinner and for your trust in Cassese® products. The MACH 1 CART benefits from Cassese’s experience since 1976 in designing and manufacturing highest quality underpinners, for which we are world- famous.
  • Page 8 USER MANUAL MACH 1 CART Z1791: Z18065: Z21524: Z1783: Green round clamp Round clamp holder 1 x Chevron rubber Yellow round clamp Z1343 (x4): Z749: Z556: Z701: Quick coupling Grooved connector Male US connector F1/4 Z1612 (x4): Washer Z25780 (x4): Levelling feet...
  • Page 9: Technical Specifications Of Mach 1 Cart

    Maximum stroke between first and last wedge (at 45°) : 190 mm (7 31/64”) 3 wedge types : Softwood, Hardwood & MDF. Use only Cassese® Genuine Cartridge Wedges. Cassese® Genuine Cartridge Wedges sizes: 5, 7, 10, 12 and 15 mm. Machine gross weight : 93 kg .
  • Page 10: Setup

    USER MANUAL MACH 1 CART 2 SETUP 2.A. UNPACKING THE MACHINE Bubble level Cutter Phillips screw driver Flat span N.13 & N.17 Allen key N.5 Cut both plastic strips Using 13mm in order to free the span, remove the 4 box and lift up the bolts free...
  • Page 11: Aair Line Fittings

    USER MANUAL MACH 1 CART When installing the machine, make sure the floor will be flat and strong enough to support its weight. It should be installed in a dry environment providing temperate temperature. The floor should be flat and clean.
  • Page 12: Cconnecting To The Electrical Source

    USER MANUAL MACH 1 CART Allen key N.3 Pull Unscrew both pressure regulator screws knob and turn it drawer panel with a (clockwise = more 3mm Allen key. pressure) until the Then open needle of the air drawer have pressure gauge access to the air reaches...
  • Page 13: Adjustments

    USER MANUAL MACH 1 CART 3 ADJUSTMENTS DESCRIPTION OF THE DISPLAY: Position in mm P-Number of the position Number favorite Q-Quantity Parameters P and Q for wedges position 2 to 5 positon N.1 SELECTING A MEMORY ALLOCATION (FAVORITE) The machine is able Prior to perform any to store up to 9...
  • Page 14: Cspecific Use Of The Spacer Bars

    USER MANUAL MACH 1 CART SPECIFIC USE OF THE SPACER BARS When joining small This is an example of a bad setting, the spacer mouldings (lower bar not being used will than the height of cause the top clamp to the back fences), it touch the fences and is necessary to use...
  • Page 15: Eproper Adjustment Of Magnetic Adjustable Rod Clamp

    USER MANUAL MACH 1 CART Switch back off the Pre-Clamp button in order to release the mouldings remove moulding that was against back fence. Figure 3-12 PROPER ADJUSTMENT OF MAGNETIC ADJUSTABLE ROD CLAMP Pull the black knob magnetic to be able to adjust adjustable the space between clamp comes with...
  • Page 16: Fselecting The Wedges Positions

    USER MANUAL MACH 1 CART with quick- change magnetic clamps, it is easy to change from chevron to a round clamp. Simply pull down the Z24703 to change of clamp support. Figure 3-17 SELECTING THE WEDGES POSITIONS The MACH 1 CART is designed to join mouldings in 1 to 9 positions. You can stack up to 9 wedges in each position. The selection depends on the width and thickness of the moulding to join.
  • Page 17: Imeans Of Joining

    A white pusher will indicate soft wood wedges. See color chart bellow for identification. Cassese wedges can also be supplied in MDF type dedicated to MDF or very hard wood use. They are identified by a red pusher ine the cartridge.Please contact your local agent to try them.
  • Page 18: Loading Of Cartridge Wedges

    USER MANUAL MACH 1 CART LOADING OF CARTRIDGE WEDGES Load the cartridge To load the machine, and turn back the rotate loading loading button to off. button in the load position. The wedge pusher will move back to allow introduce cartridge.
  • Page 19: Programming The Machine

    USER MANUAL MACH 1 CART PROGRAMMING THE MACHINE After performing the adjustments of chapter 3 (ADJUSTMENTS). Perform the following procedure: Put on the table only Touch button POSITION NUMBER chop several times to achieve moulding against the the position you wish to fence.
  • Page 20: Auto Mode

    USER MANUAL MACH 1 CART Once the parameters are set you can then configure the execution. Select the mode you would like to use for stapling. Press AUTO/ MANU the green LED will show what mode is engaged. MANUAL MODE : this mode will require two actions to get the corner done. Pressing the pedal will engage the front clamps to keep both mouldings together.
  • Page 21: Maintenance

    USER MANUAL MACH 1 CART 5 MAINTENANCE SAFETY INSTRUCTIONS The MACH 1 CART is using two types of power sources: electric and pneumatic. It is essential for your safety to make sure that both of them are disconnected prior to make any maintenance. Please refer to instructions below prior to perform any maintenance.
  • Page 22: Every 6 Months

    USER MANUAL MACH 1 CART 5.B.c Every 6 months: Every 6 months a maintenance should be performed to ensure proper function of the machine, perform the following procedure to do it: 5.A SAFETY INSTRUCTIONS (page 21) 5.C REMOVING THE DISTRIBUTOR HEAD (page 22) 5.D LUBRICATING THE DISTRIBUTOR HEAD (page 23) 5.F RESETTING THE MAINTENANCE ALARM (page 24) 5.G REMOVING THE SIDE PANEL (page 24)
  • Page 23: Dlubricating The Distributor Head

    USER MANUAL MACH 1 CART LUBRICATING THE DISTRIBUTOR HEAD Allen key N.5 Lubricant spray, for example WD40. Grease tube, Cassese reference Z1896 Remove Separate screws distributor plates distributor head. and clean them using a clean cloth and lubricant spray. Figure 5-8...
  • Page 24: Fresetting The Maintenance Alarm

    USER MANUAL MACH 1 CART If you can’t push down the protruding Wedge/driver blade, then put your hands on top of the vertical column and give a shock down. An audible “clack” sound should confirm the hammer is unlocked. Try to apply procedure I.5.C REMOVING THE DISTRIBUTOR HEAD (page 22) to remove the distributor and be able to remove the jammed hammer.
  • Page 25: Hlubricating The Horizontal Columns

    USER MANUAL MACH 1 CART LUBRICATING THE HORIZONTAL COLUMNS Allen Key N.3 Clean cloth with lubricant spray such as WD40 Engine car oil Refer to chapter I.5.A SAFETY INSTRUCTIONS(page 21) for safety instructions. Remove the side panel as explained in the chapter I.5.G REMOVING THE SIDE PANEL (page 24).
  • Page 26: Jtrouble Shooting

    FAQ bellow, if the solution of your trouble is not in this secton, please contact your local distributor or contact us on our web site: www.cassese.com. Nothing lights up, the screen is off even when the emergency button is released: >...
  • Page 27 USER MANUAL MACH 1 CART > The table has moved back (handle not tightened enough) and proper clamping of the mouldings is not possible. Repeat the pre-clamping procedure, see chapter I.3.D ADJUSTMENT OF THE SLIDING TABLE (page 14). > The pre-clamping procedure was not performed correctly. Try again, following the instructions in chapter I.3.D ADJUSTMENT OF THE SLIDING TABLE (page 14).
  • Page 28: Manuel D'utilisation / Francais

    USER MANUAL MACH 1 CART II. MANUEL D’UTILISATION / FRANCAIS VERSION ORIGINALE Votre sécurité est notre priorité marquage machine vous marquage machine vous recommande le port de protections auditives. recommande de lire le manuel avant toute utilisation. Cette icône dans le manuel met l’accent sur un Cette icône dans le manuel vous signale une point important relatif à...
  • Page 29: Presentation

    USER MANUAL MACH 1 CART 1 PRESENTATION TABLE D’ASSEMBLAGE Griffes Clavier Presseur règlable Potence Manette de verrouillage de la table coulissante Table coulissante butée Vis d’ajustage de l’angle d’assemblage butée Distributeur Manomètre Sectionneur d’alimentation en air...
  • Page 30 USER MANUAL MACH 1 CART Bouton de chargement des agrafes Bouton de pre-serrage Bouton d’agrafage Bouton d’arrêt machine...
  • Page 31: Introduction

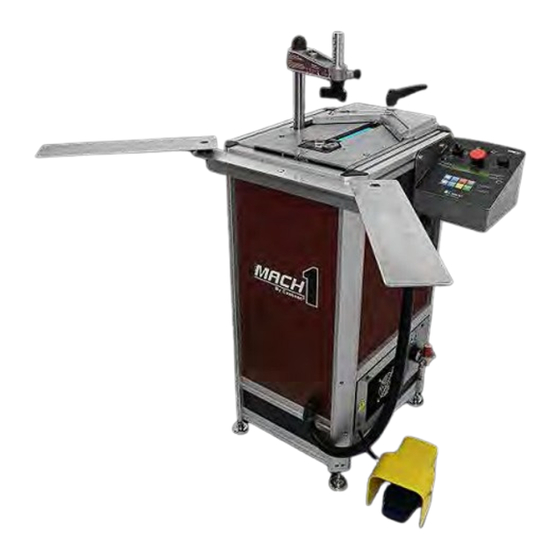
    Nous vous remercions d’avoir choisi l’assembleuse MACH 1 CART et pour votre confiance ; La MACH 1 CART bénéficie de tout le savoir faire de la Société Cassese. Etablie en 1976 La société Cassese est aujourd’hui reconnue dans le monde entier pour la qualité...
  • Page 32 USER MANUAL MACH 1 CART Z1791: Z18065: Z21524: Z1783: Elastomère vert Support élastomère 1 x Chevron Elastomère jaune Z1343 (x4): Z749: Z556: Z701: Ecrou Raccord rapide Embout cannelé Embout rapide US F1/4 Z1612 (x4): Rondelle Z25780 (x4): Pied réglable...
  • Page 33: Specifications Techniques

    Course maximum entre position d’agrafage (à 45°) : 190 mm (7 31/64”) 3 types d’agrafes : Bois tendre, bois dur & MDF. N’utilisez que des agrafes originales Cassese®. Tailles des agrafes Cassese® en chargeur: 5, 7, 10, 12 and 15 mm. Poids machine: 93 kg.
  • Page 34: Mise En Route

    USER MANUAL MACH 1 CART 2 MISE EN ROUTE DEBALLAGE DE LA MACHINE Niveau à bulle Cutter Tournevis crussiforme Clef plate N.13 & N.17 Clef Allen N.5 Couper deux A l’aide de la clef Allen bandes de transport N.5, otez les 4 vis afin libérer pour...
  • Page 35: Braccords

    USER MANUAL MACH 1 CART Lors de l’installation de la machine, assurez vous que le sol est plan et pourra supporter le poids de la machine. La machine doit être installée dans un endroit sec et tempéré. Choisir un endroit où l’éclairage sera suffisant pour assurer une utilisation confortable du matériel.
  • Page 36: Draccordement Electrique De La Machine

    USER MANUAL MACH 1 CART Clef Allen N.3 Soulever le bouton Dévisser ces deux réglage vis du tiroir de la régulateur puis le machine à l’aide de tourner pour clef Allen adjuster la pression 3mm. à 6 bars (85p.s.i.). Ouvrir le tiroir pour Pour augmenter la avoir accès...
  • Page 37: Reglages

    USER MANUAL MACH 1 CART 3 REGLAGES DESCRIPTION DE L’ECRAN LCD Position en mm P-Numéro de la position Numéro du favori Q-Quantité Parametres P et Q pour les d’agrafes pour la positions 2 et 5 positon N.1 SELECTION D’UN ESPACE MEMOIRE (FAVORIT) machine peut Avant de proceder à...
  • Page 38: Cutilisation Du Jeu De Barrettes

    USER MANUAL MACH 1 CART UTILISATION DU JEU DE BARRETTES Lorsque l’on Exemple de mauvaise utilisation, sans assemble barrettes, le presseur moulures don’t va alors toucher les hauteur butées. La moulure ne infèrieure sera alors butées, il est parfois correctement nécessaire d’utiliser maintenue et risque de...
  • Page 39: Ereglage Du Presseur Vertical

    USER MANUAL MACH 1 CART Tourner le bouton de pré-serrage sur OFF et oter les moulures de la table. Figure 3-12 REGLAGE DU PRESSEUR VERTICAL Tirer sur le bouton presseur noir afin d’ajuster la vertical doit être distance entre ajusté à l’aide du partie la plus haute doigt indexable, il de la moulure et le...
  • Page 40: Fselection Des Positions D'agrafage

    USER MANUAL MACH 1 CART Grâce au nouveau système aimanté, il est facile de changer de type de presseur, tirer la pièce Z24703 vers remplacer. Figure 3-17 SELECTION DES POSITIONS D’AGRAFAGE La MACH 1 CART permet l’assemblage en utilisant de 1 à 9 positions d’agrafage. Vous pouvez empiler au maximum 9 agrafes par position.
  • Page 41: Imoyen D'assemblage

    Des agrafes spéciales pour le MDF (ou les bois très durs) sont également disponibles, elles sont identifiées par un poussoir rouge dans le chargeur. Contactez votre distributeur Cassese pour les obtenir. Figure 3-24...
  • Page 42: Jchargement Des Agrafes

    USER MANUAL MACH 1 CART Il est recommandé d’utiliser les agrafes adaptées au bois à assembler, l’utilisation d’agrafes bois dur dans un bois tendre engendrera un moindre rapprochement des moulures. Une première indication consiste à tenter de griffer le dessous de la moulure avec les ongles, si c’est impossible, on utilisera alors les agrafes bois dur, sinon on utilisera des agrafes bois normal.
  • Page 43: Programmation

    Ceci permettra une à programmer. bonne visualization La position N.1 sera la de la position de première exécutée, la l’agrafage. position N.5 la dernière. La MACH 1CART peut indifféremment commencer l’intèrieur ou l’extèrieur du cadre. Figure 4-2 Figure 4-1 Utiliser les flèches...
  • Page 44 USER MANUAL MACH 1 CART Une fois tous les paramètres sélectionnés, vous pouvez alors configurer le mode d’exécution. Appuyer sur AUTO/ MANU, la LED verte vous indique le mode sélectionné: MANUAL MODE : ce mode va nécessiter deux actions pour lancer l’agrafage. Un appui sur la pedale va déclencher le serrage des moulures, ensuite, l’appui sur le bouton d’agrafage va lancer la séquence d’agrafage.
  • Page 45: Maintenance

    USER MANUAL MACH 1 CART 5 MAINTENANCE INSTRUCTIONS RELATIVES A LA SECURITE La Mach 1 cart utilise deux sources d’alimentation: électrique et pneumatique. Il est essentiel de s’assurer qu’elle est bien déconnectée de ces deux alimentations avant d’effectuer toute maintenance. Suivre les instructions ci-dessous afin de garantir votre sécurité.
  • Page 46: Tous Les Six Mois

    USER MANUAL MACH 1 CART 5.B.c Tous les six mois: Tous les six mois, une maintenance plus approfondie doit être effectuée, procédez aux opérations suivantes afin de garantir un bon fonctionnement de la machine II.5.A INSTRUCTIONS RELATIVES A LA SECURITE (page 45) II.5.C DEMONTAGE DE LA TETE DE DISTRIBUTION...
  • Page 47: Dlubrication De La Tete De Distribution

    Figure 5-8 Figure 5-7 Insérer l’équivalent d’une noisette graisse. Figure 5-9 DEBLOCAGE DE LA MACHINE Outils ôte agrafe référence Cassese : Z535 Utiliser l’outils fourni agrafe peut dans boîte parfois rester d’accessoires afin de coincée en position dégager cette agrafe.
  • Page 48: Feffacement De L'alarme Maintenance

    USER MANUAL MACH 1 CART S’il n’est pas possible de pousser l’agrafe vers le bas, celle-ci est sans doute tordue ou coincée. Poser vos deux mains à plat sur la potence et donner un choc vers le bas. Un claquement doit se faire entendre indiquant que le marteau est maintenant déccroché.
  • Page 49: Hlubrification Des Colonnes Horizontales

    Oter les moulures de la table et appuyer sur la pédale. Ne mettez pas vos mains sur la table. La machine ne doit pas tirer des agrafes et le message “ALARM: READJUST THE TABLE” doit s’afficher. Si le message ne s’affiche pas, contacter votre distributeur Cassese pour qu’il contrôle la sécurité d’agrafage. Figure 5-18...
  • Page 50 Allumer la machine et debrancher l’air de celle-ci. Le message “ALARM: AIR PRESSURE” doit apparaitre sur l’écran, si ce n’est pas le cas, contacter votre revendeur Cassese. Figure 5-20 Assurez-vous que la machine est complète, tous les panneaux latéraux doivent être en place et leurs vis verrouillées.
  • Page 51: Jguide De Depannage

    Si votre machine ne semble pas fonctionner correctement, se reporter à la rubrique ci-dessous. Si le problème ne peut être corrigé, contacter votre distributeur Cassese ou vous rendre sur le site: www.cassese.com. Rien ne s’allume, l’écran reste éteint lorsque l’on libère l’arrêt d’urgence : >Vérifier, par exemple en branchant un autre appareil à...
  • Page 52 USER MANUAL MACH 1 CART >La distance entre le presseur et la moulure est trop importante, ajuster la hauteur du support presseur réglable à l’aide de la goupille, elle doit être inférieure à 5 centimètres. La machine se bloque et affiche le message « ALARM : PEDAL RELEASED » : >La pédale a été...
  • Page 53: Ce Certificate / Declaration De Conformite

    USER MANUAL MACH 1 CART VI. CE CERTIFICATE / DECLARATION DE CONFORMITE...
  • Page 54 USER MANUAL MACH 1 CART...

Table des Matières