DURAVIT SensoWash Slim Notice D'utilisation
Masquer les pouces
Voir aussi pour SensoWash Slim:
- Notice d'utilisation (110 pages) ,
- Notice de montage (16 pages) ,
- Notice d'utilisation (96 pages)
Table des Matières
Les langues disponibles
Les langues disponibles
Liens rapides
Duravit AG
P.O. Box 240
Werderstr. 36
78132 Hornberg
Germany
Phone +49 78 33 70 0
Fax
+49 78 33 70 289
info@duravit.com
www.duravit.com
Kleben Sie das beiliegende Produkt-Etikett mit der Seriennummer in dieses Feld.
Affix the enclosed product label with serial number in this area.
Collez l'étiquette de produit ci-jointe avec le numéro de série dans ce champ.
Plak het bijgevoegde product-etiket met het serienummer in dit veld.
Pegue la etiqueta de producto suministrada con el número de serie en esta casilla.
Incollare in questo spazio l'etichetta del prodotto in dotazione con il numero di serie.
Leben im Bad
Living bathrooms
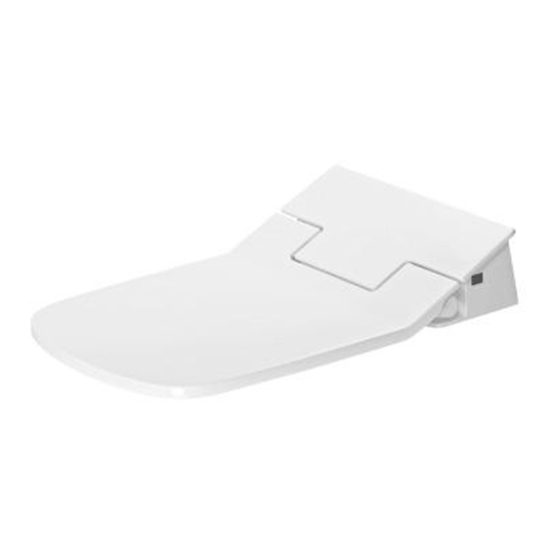
SensoWash
Slim
®
Bedienungsanleitung
Dusch-WC-Aufsatz
Operating instructions
Shower toilet unit
Notice d'utilisation
Abattant WC douche
Gebruikshandleiding
Douche-WC-opzetstuk
Manual de instrucciones
Accesorio para el WC con ducha
Istruzioni d'uso
Set per WC con doccetta
1.
3.
2.
Chapitres
Table des Matières
Dépannage

Manuels Connexes pour DURAVIT SensoWash Slim


Sommaire des Matières pour DURAVIT SensoWash Slim
- Page 1 Leben im Bad Duravit AG Living bathrooms P.O. Box 240 Werderstr. 36 78132 Hornberg Germany Phone +49 78 33 70 0 +49 78 33 70 289 info@duravit.com www.duravit.com SensoWash Slim ® Bedienungsanleitung Dusch-WC-Aufsatz Operating instructions Shower toilet unit Notice d’utilisation Abattant WC douche Kleben Sie das beiliegende Produkt-Etikett mit der Seriennummer in dieses Feld.
- Page 2 www.sensowash.com...
- Page 48 Sommaire 1. Bref aperçu ............... 47 1.1 Toilette ..............47 1.2 Télécommande ............47 2. Description des symboles ..........47 3. Pour votre sécurité............48 3.1 utilisation normale ............ 48 3.2 Instructions de sécurité ..........48 4. opérations de base ............51 4.1 Télécommande ............
-
Page 49: Bref Aperçu
1. Bref aperçu 1.1 Toilette 1.2 Télécommande Puissance Transmetteur à infrarouge LED d'état Douche rectale Douche rectale Douche féminine Capteur d'éclairage am- Douche confort biant Position de la douche Douche féminine Température de l'eau Récepteur infrarouge Arrêt Éclairage de nuit Logement des piles Mécanisme de fermeture en douceur... -
Page 50: Pour Votre Sécurité
Ces instructions d'utilisation correspondent à l'état technologique du dispositif au moment de l'impression. Duravit se réserve le droit d'effectuer des changements en vue de développements futurs. 3.1 utilisation normale SensoWash Slim est un siège de WC avec douche avec un dis-... - Page 51 • NE PAS utiliser le produit s'il ne fonctionne pas correctement. Débrancher immédiatement. Fermer la vanne d'arrêt pour arrê- ter l'arrivée d'eau. Contacter help@duravit.com. Éviter tout dysfonctionnement ou tout endommagement du produit résultant d'un défaut d'utilisation. Risques pour la santé et endommage- ATTENTIoN ment potentiel du produit !
- Page 52 • Les travaux de réparation doivent être effectués par des électri- ciens ou des techniciens qualifiés. • Des réparations mal effectuées peuvent occasionner des acci- dents, des dommages ou des dysfonctionnements. • Ne PAS utiliser d'accessoires non recommandés par Duravit. utilisation de piles ATTENTIoN Risques pour la santé ! >...
-
Page 53: Opérations De Base
4. opérations de base 4.1 Télécommande Le SensoWash est commandé à partir de la télécommande. Les ® réglages sont également modifiés à partir de la télécommande. Appuyer sur la touche correspondante de la télécommande pour activer une fonction. La touche s'allume brièvement en blanc. Pour arrêter la fonction de la douche, appuyer sur la touche « Arrêt »... -
Page 54: Mise En Service
Clignotement Le SensoWash est en « Mode d'évacuation ® orange : interne ». Clignotement Dysfonctionnement. Couper l'alimentation rouge : principale et continuer avec le chapitre 9. 5. Mise en service Télécommande > Appuyer sur le verrou du « compartiment des piles » pour l'ouvrir. > Enlever l'étiquette de sécurité qui se trouve sur le compartiment à... -
Page 55: Utilisation
6. utilisation 6.1 Mise sous/hors tension du SensoWash ® > Appuyer sur la touche « Puissance » de la lunette pour acti- ver le SensoWash ® La LED d'état verte indique « Mode actif ». > Appuyer à nouveau sur la touche « Puissance » de la lunette pour arrêter le SensoWash ®... -
Page 56: Activation/Désactivation De La « Douche Féminine
Activation/désactivation de la « Douche féminine » Buse supplémentaire pour les soins intimes féminins. > Appuyer La douche > Appuyer sur Arrêt sur Plus ou féminine est pour terminer la Moins pour active. douche féminine. activer la Elle s'arrête auto- douche fémi- matiquement au nine. -
Page 57: Réglage De L'intensité De Pulvérisation D'eau
> Appuyer La douche > Appuyer sur Moins pour sur Plus confort est arrêter la douche confort. Les pour activer active. fonctions sont désactivées, la douche la fonction (douche rectale confort. ou douche féminine) préala- blement définie est toujours active. Elle s'arrête automati- quement au bout de 2 min. -
Page 58: Réglage De La Position De La Douche
Réglage de la position de la douche La position de la douche peut être réglée sur 5 positions indivi- duelles: Avant <–––––––––––––––––––––––––––––> Arrière > Appuyer sur > Appuyer sur la touche la touche flé- fléchée chée gauche droite pour pour extraire rétracter la la douche. -
Page 59: Réglages
6.3 Réglages Réglage de l'éclairage de nuit Intérieur de la cuvette éclairé pour l'orientation de nuit. L'éclairage de nuit peut être réglé en 3 modes: > Auto > Appuyer sur la combinaison de touches Arrêt et Douche fémi- nine Moins pour faire défiler les paramètres de l'éclairage de nuit : >... -
Page 60: Verrouiller / Déverrouiller La Télécommande
> Appuyer > Appuyer sur sur Douche la touche féminine Arrêt et la Plus. maintenir enfoncée. Bip de confirmation bref : On Bip de confirmation long : Off Verrouiller / déverrouiller la télécommande Fonction de blocage via la télécommande. Aucune fonction ne peut être utilisée si cette fonction est activée. -
Page 61: Nettoyage Et Entretien
> Appuyer sur > Appuyer sur > Appuyer sur > Appuyer sur la touche la touche flé- la touche flé- Température Arrêt et la chée gauche chée droite de Moins. maintenir de position de position de la enfoncée. la douche. douche. -
Page 62: Douche Et Buse
Décoloration jaune due à un mauvais AVIS détergent ! > Ne pas utiliser de détergent abrasif ou de produits de nettoyage contenant du chlore ou des acides. > N'utiliser que des produits de nettoyage et des équipements prévus pour ce type d'application. >... -
Page 63: Auto-Nettoyage De La Douche Et De La Buse
> Appuyer sur > Appuyer sur > Nettoyer la > Appuyer sur la touche Douche rec- buse à l'aide Arrêt pour Arrêt et la tale Plus. d'un chif- terminer le maintenir fon, d'une nettoyage. enfoncée. éponge ou Il s'arrête d'une brosse automati- et d'un dé- quement... -
Page 64: Télécommande
7.3 Télécommande > Nettoyer la télécommande et le support mural à l'aide d'un chif- fon humide doux. 7.4 Non utilisation prolongée Si vous n'utilisez pas le SensoWash pendant deux semaines ou ® plus, évacuer l'eau dans le produit. Exigence : Le SensoWash est en mode « Actif », la « LED d'état »... -
Page 65: Aide Au Dépannage
à fusibles pendant au moins 3 heures puis le reconnecter. Si l'appareil ne fonctionne pas correctement alors que vous avez suivi les instructions ci-dessous, contacter help@duravit.com. Tenir le numéro d'appareil et le numéro de série prêts. Ceux-ci se trouvent sur la plaque signalétique à l'arrière des instructions... - Page 66 > Couper l'alimenta- tion électrique. > La rebrancher au bout de 30 se- condes. La « LED Dysfonctionnement. > Contacter d'état » help@duravit.com la lunette cli- gnote en rouge trois fois toutes les 3 secondes. La « LED Dysfonctionnement. > Désactiver d'état » « Température de sur la lunette l'eau »...
- Page 67 Problème cause potentielle Solution Fonctionnement général Le SensoWash Le SensoWash > Mettre sous tension. ® ® ne fonctionne n'est pas sous pas. tension. (La « LED d'état » ne brille pas) Le SensoWash > Régler sur « Actif ». 6.1 ® en mode standby. (La « LED d'état »...
- Page 68 Problème cause potentielle Solution La télécom- Absence de piles. > Insérer des piles. mande ne fonc- Les piles sont vides. > Remplacer les piles. 4.1 tionne pas. Les connexions des > Réinstaller piles sont inversées. correctement les piles. La télécommande >...
- Page 69 Problème cause potentielle Solution L'eau n'est pas La température de > Régler la « tempé- assez chaude. l'eau a été réglée rature de l'eau » sur Off ou Low. sur Medium ou High. La pulvérisa- La fonction s'arrête Ceci est normal. tion d'eau de la automatiquement douche s'arrête après 2 minutes.
- Page 70 Problème cause potentielle Solution L'éclairage de L'éclairage de nuit Ceci est normal. nuit est allumé a été réglé sur On. > Placer l'éclairage de en continu. nuit en mode Auto ou Off. L'éclairage de nuit Ceci est normal. est en mode Auto avec une faible lu- minosité...
-
Page 71: Données Techniques
Degré de protection IP X4 Protection contre les pulvé- risations d'eau de tous côtés Dispositif de sécurité intégré EN13077 - type AB Conditions de garantie Vous trouverez nos conditions de garantie dans nos conditions générales de vente (CGV) sur www.pro.duravit.com/gtc.