
Manuels Connexes pour Cameo ZENIT P100 DTW


Sommaire des Matières pour Cameo ZENIT P100 DTW
- Page 1 USER´S MANUAL BEDIENUNGSANLEITUNG MANUEL D´UTILISATION MANUAL DE USUARIO INSTRUKCJA OBSŁUGI MANUALE D´USO OUTDOOR ZENIT P100 DTW CLZP100DTW OUTDOOR ZENIT P200 DTW CLZP200DTW...
-
Page 2: Table Des Matières
CONTENTS / INHALTSVERZEICHNIS / CONTENU / CONTENIDO / TREŚĆ / CONTENUTO ENGLISH ESPAÑOL PREVENTIVE MEASURES MEDIDAS DE SEGURIDAD 42-43 INTRODUCTION INTRODUCCIÓN CONNECTIONS, CONTROLS, AND DISPLAY ELEMENTS CONEXIONES, ELEMENTOS DE MANEJO Y ELEMENTOS OPERATION 7-11 DE VISUALIZACIÓN 44-45 SETUP AND INSTALLATION MANEJO 46-50 DMX TECHNOLOGY... -
Page 3: English
We have designed this product to operate reliably over many years. Please read this User‘s Manual carefully, so that you can begin making optimum use of your Cameo Light product quickly. Learn more about Cameo Light on our website WWW.CAMEOLIGHT.COM. - Page 4 CAUTION: To reduce the risk of electric shock, do not remove cover (or back). There are no user serviceable parts inside. Maintenance and repairs should be exclusively carried out by qualified service personnel. The warning triangle with lightning symbol indicates dangerous uninsulated voltage inside the unit, which may cause an electrical shock.
-
Page 5: Introduction
POWER OUT IP65 Power Twist power output connector with rubber sealing cap. Provides power to additional CAMEO spotlights. Ensure that the total power consumption of all devices connected to the device does not exceed the given Ampere (A) value (when not in use, always close with rubber sealing cap). -
Page 6: Oled Display
OLED DISPLAY Displays the current operating mode and other system settings. TOUCH-SENSITIVE CONTROLS WITH BACKLIGHTING MODE You can access the options menu by pressing MODE. Pressing it again will return you to the main screen. If you press MODE without having first pressed ENTER to confirm a value or status change, the previously confirmed value or status shall be restored. -
Page 7: Operation
(Settings: Red Shift = On). • As soon as the spotlight is correctly connected to the power mains, “Update Wait...” (only for servicing purposes), “Welcome to Cameo”, the model name, and then the software version are displayed in sequence on the display as part of the startup process. Once the process is complete, the spotlight is ready for use and resumes whichever mode was most recently activated. -
Page 8: Mode Auto
SETTING STAND ALONE MODE (Stand Alone) You can access the options menu by pressing MODE. Using the UP and DOWN control keys, now select the “Stand Alone” menu option (note arrow) and confirm with ENTER. In the submenu, you can now select between the standalone modes “Auto” and “Static” by using UP and DOWN. - Page 9 SLAVE MODE (Slave) You can access the options menu by pressing MODE. Using the UP and DOWN control keys, now select the “Slave” menu option (note arrow) and confirm with ENTER. Connect the slave and master units (same model) using a DMX cable, and activate one of the standalone modes (Auto, Static) on the master unit.
-
Page 10: Dmx Address
Blinder The blinder mode allows brief maximum brightness Operation Operation mode Normal Normal operation (automatic fan control) Mode Silent Extra quiet operation with reduced brightness, if required 800 Hz / 1200 Hz / PWM Fre- 2000 Hz / LED PWM Frequency Sets the LED PWM frequency quency 3600 Hz / 12 kHz /... - Page 11 MANUAL LOCK FUNCTION As well as the option to have the spotlight lock itself automatically against unintentional or unauthorized use (see "Settings" - "Autolock"), it is also possible to lock the controls manually. Hold the UP and DOWN control keys at the same time for approx. 5 seconds. "LOCKED" will be shown on the display, and you will not be able to make any changes to the spotlight settings via the control fields.
-
Page 12: Setup And Installation
SETUP AND INSTALLATION Thanks to the double bracket and integrated plastic feet, the spotlight can be placed in a suitable location on a level surface. When installing on a crossbeam, use either the folding 0.6” TV spigot (A, suitable for the Adam Hall Super clamp) or an omega bracket that is attached to the device bracket (B). -
Page 13: Dmx Technology
DMX TECHNOLOGY DMX-512 DMX (Digital Multiplex) is the designation for a universal transmission protocol for communications between corresponding devices and controllers. A DMX controller sends DMX data to the connected DMX device(s). The DMX data is always transmitted as a serial data stream that is forwarded from one connected device to the next via the "DMX IN"... -
Page 14: Technical Specifications
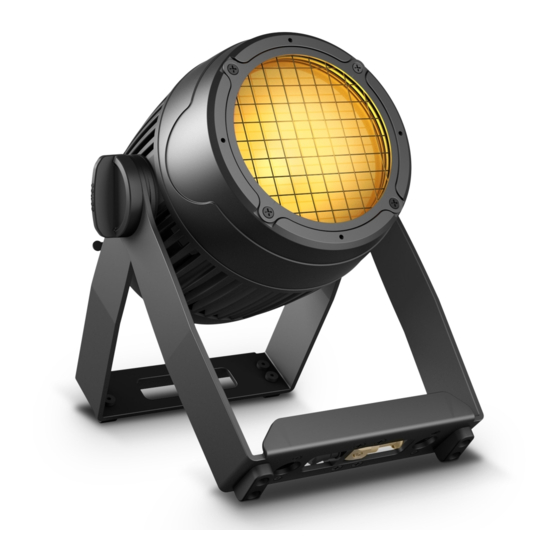
TECHNICAL SPECIFICATIONS Article number: CLZP100DTW CLZP200DTW Product type: LED wash light Type: Outdoor spotlight LED color spectrum: Warm white, amber Number of LEDs: LED type: 125 W COB 240 W COB LED PWM frequency: 800 Hz, 1200 Hz, 2000 Hz, 3600 Hz, 12 kHz, 25 kHz (adjustable) Half peak angle (one-tenth peak Lens 1: 42°... -
Page 15: Manufacturer's Declarations
MANUFACTURER´S DECLARATIONS MANUFACTURER‘S WARRANTY & LIMITATIONS OF LIABILITY You can find our current warranty conditions and limitations of liability at: https://cdn-shop.adamhall.com/media/pdf/MANUFACTU- RERS-DECLARATIONS_CAMEO.pdf. To request warranty service for a product, please contact Adam Hall GmbH, Adam-Hall-Str. 1, 61267 Neu Anspach / Email: Info@adamhall.com / +49 (0)6081 / 9419-0. CORRECT DISPOSAL OF THIS PRODUCT (valid in the European Union and other European countries with a differentiated waste collection system) This symbol on the product, or on its documents indicates that the device may not be treated as household waste. -
Page 16: Deutsch
Dieses Gerät wurde unter hohen Qualitätsanforderungen entwickelt und gefertigt, um viele Jahre einen reibungslosen Betrieb zu gewähr- leisten. Bitte lesen Sie diese Bedienungsanleitung sorgfältig, damit Sie Ihr neues Produkt von Cameo Light schnell und optimal einsetzen können. Weitere Informationen über Cameo Light erhalten Sie auf unserer Website WWW.CAMEOLIGHT.COM. - Page 17 33. Staub und andere Ablagerungen im Inneren des Geräts können es beschädigen. Das Gerät sollte je nach Umgebungsbedingungen (Staub, Nikotin, Nebel etc.) regelmäßig von qualifiziertem Fachpersonal gewartet bzw. gesäubert werden (keine Garantieleistung), um Überhitzung und Fehlfunktionen zu vermeiden. 34. Der Abstand zu brennbaren Materialien muss mindestens 0,5 m betragen. 35.
-
Page 18: Einführung
Netzkabels (bei Nichtgebrauch stets mit der Gummidichtkappe verschließen). POWER OUT IP65 Power Twist Netzausgangsbuchse mit Gummidichtkappe. Dient der Netzversorgung weiterer CAMEO Scheinwerfer. Achten Sie darauf, dass die gesamte Stromaufnahme aller angeschlossenen Geräte den auf dem Gerät in Ampere (A) angegebenen Wert nicht überschreitet (bei Nichtgebrauch stets mit der Gummidichtkappe verschließen). - Page 19 DMX OUT Weibliche IP65 5-Pol XLR-Buchse zum Weiterleiten des DMX-Steuersignals (bei Nichtgebrauch stets mit der Gummidichtkappe verschließen). OLED DISPLAY Zeigt den aktuellen Betriebsmodus und weitere Systemeinstellungen an. BERÜHRUNGSEMPFINDLICHE BEDIENFELDER MIT HINTERLEUCHTUNG MODE Durch Drücken auf MODE gelangen Sie in das Auswahlmenü. Durch wiederholtes Drücken gelangen Sie zurück zur Hauptanzeige. Wenn Sie auf MODE drücken, ohne eine Wert- bzw.
-
Page 20: Bedienung
• Sobald der Scheinwerfer korrekt am Stromnetz angeschlossen ist, werden während des Startvorgangs nacheinander „Update Wait...“ (nur für Servicezwecke), „Welcome to Cameo“, die Modellbezeichnung und die Software Version im Display angezeigt. Nach diesem Vorgang ist der Scheinwerfer betriebsbereit und startet in der Betriebsart, die zuvor angewählt war. -
Page 21: Mode Auto
STAND-ALONE-BETRIEBSART EINSTELLEN (Stand Alone) Durch Drücken auf MODE gelangen Sie in das Auswahlmenü. Mit Hilfe der Bedienfelder UP und DOWN wählen Sie nun den Menu-Punkt „Stand Alone“ aus (Pfeil beachten) und bestätigen mit ENTER. Im Untermenü können Sie nun unter den Stand-Alone-Betriebsarten „Auto“ und „Static“... - Page 22 SLAVE BETRIEBSART (Slave) Durch Drücken auf MODE gelangen Sie in das Auswahlmenü. Mit Hilfe der Bedienfelder UP und DOWN wählen Sie nun den Menüpunkt „Slave“ aus (Pfeil beachten) und bestätigen mit ENTER. Verbinden Sie die Slave- und die Master-Einheit (gleiches Modell) mit Hilfe eines DMX-Kabels und aktivieren in der Master-Einheit eine der Stand-Alone Betriebsarten (Auto, Static).
-
Page 23: Dmx Address
Der Strahler reagiert abrupt auf Änderungen des DMX-Werts Dimmer Dimmverhalten Der Strahler verhält sich ähnlich einem Halogenstrahler mit Response Halogen sanften Helligkeitsänderungen Blinder Der Blinder-Modus erlaubt eine kurzzeitige Maximalhelligkeit Operation Betriebsmodus Normal Normalbetrieb (automatische Lüftersteuerung) Mode Silent Extra leiser Betrieb bei reduzierter Helligkeit, falls erforderlich 800Hz / 1200Hz / PWM- LED PWM Frequenz... - Page 24 MANUELLE SPERR-FUNKTION Neben der Möglichkeit, den Scheinwerfer automatisch vor versehentlicher und unbefugter Bedienung zu schützen (siehe „Settings“ - „Autolock“), kann die Sperrung der Bedienelemente auch manuell erfolgen. Halten Sie für ca. 5 Sekunden die Bedienfelder UP und DOWN gleichzeitig gedrückt. Nun wird dauerhaft „LOCKED“ im Display angezeigt und eine Änderung der Einstellungen des Scheinwerfers über die Bedienfelder ist nicht mehr möglich.
-
Page 25: Aufstellung Und Montage
AUFSTELLUNG UND MONTAGE Dank des Doppelbügels und der integrierten Kunststofffüße kann der Scheinwerfer an einer geeigneten Stelle auf eine ebene Fläche gestellt werden. Die Montage an einer Traverse erfolgt entweder mit Hilfe des ausklappbaren 16mm TV-Zapfens (A, geeignet für Adam Hall Super Clamp) oder eines Omega-Bügels, der an dem Gerätebügel befestigt wird (B). -
Page 26: Dmx Technik
DMX TECHNIK DMX-512 DMX (Digital Multiplex) ist die Bezeichnung für ein universelles Übertragungsprotokoll für die Kommunikation zwischen entsprechenden Geräten und Controllern. Ein DMX-Controller sendet DMX-Daten an das/die angeschlossene(n) DMX-Gerät(e). Die DMX-Datenübertragung erfolgt stets als serieller Datenstrom, der über die an jedem DMX-fähigen Gerät vorhandenen DMX IN- und DMX OUT-Anschlüsse (XLR-Steckverbinder) von einem angeschlossenen Gerät an das nächste weitergeleitet wird, wobei die maximale Anzahl der Geräte 32 nicht überschreiten darf. -
Page 27: Technische Daten
TECHNISCHE DATEN Artikelnummer: CLZP100DTW CLZP200DTW Produktart: LED Wash Light Typ: Outdoor Scheinwerfer Farbspektrum LED: Warm White, Amber LED Anzahl: LED Typ: 125 W COB 240 W COB LED PWM Frequenz: 800 Hz, 1200 Hz, 2000 Hz, 3600 Hz, 12 kHz, 25 kHz (einstellbar) Halbstreuwinkel (Zehntelstreu- Lens 1: 42°... -
Page 28: Herstellererklärungen
HERSTELLERERKLÄRUNGEN HERSTELLERGARANTIE & HAFTUNGSBESCHRÄNKUNG Unsere aktuellen Garantiebedingungen und Haftungsbeschränkung finden Sie unter: https://cdn-shop.adamhall.com/media/pdf/MANUFAC- TURERS-DECLARATIONS_CAMEO.pdf. Im Service Fall wenden Sie sich bitte an Adam Hall GmbH, Adam-Hall-Str. 1, 61267 Neu Anspach / E-Mail Info@adamhall.com / +49 (0)6081 / 9419-0. KORREKTE ENTSORGUNG DIESES PRODUKTS (Gültig in der Europäischen Union und anderen europäischen Ländern mit Mülltrennung) Dieses Symbol auf dem Produkt oder dazugehörigen Dokumenten weist darauf hin, dass das Gerät am Ende der Produktlebenszeit nicht zusammen mit dem normalen Hausmüll entsorgt werden darf, um Umwelt- oder Personenschäden durch unkontrollierte Abfallentsorgung zu vermeiden. -
Page 29: Français
Cet appareil a été développé et fabriqué en appliquant des exigences de qualité très élevées: il garantit des années de fonctionnement sans problème.Veuillez lire attentivement ce Manuel Utilisateur : vous apprendrez rapidement à utiliser votre appareil Cameo Light de façon optimale. - Page 30 35. Si vous désirez alimenter plusieurs projecteurs simultanément, les conducteurs du câble secteur doivent posséder une section minimale de 1,5 mm². Dans l’Union Européenne, les câbles électriques doivent être de type H05VV-F ou équivalent. Adam Hall propose des câbles secteur adaptés. De tels câbles permettent d’alimenter plusieurs appareils par renvoi secteur de l’un à l’autre, Power Out vers Power In. As- surez-vous que la consommation totale de tous les appareils connectés ne dépasse pas la valeur correspondante en ampères (A) indiquée sur l’appareil.
-
Page 31: Introduction
POWER OUT (SORTIE D’ALIMENTATION) Embase de sortie d’alimentation IP65 Power Twist avec cache étanche en caoutchouc. Permet d’alimenter d’autres projecteurs CAMEO. S’assurer que la consommation totale de tous les appareils connectés ne dépasse pas la valeur en ampères (A) indiquée sur l’appareil (mettre systématiquement le cache étanche en caoutchouc si raccord non utilisé). - Page 32 DMX OUT (SORTIE DMX) Embase XLR 5 broches femelle en IP65 pour le renvoi du signal de pilotage DMX entrant (mettre systématiquement le cache étanche en caoutchouc si raccord non utilisé). ÉCRAN OLED Indique le mode de fonctionnement actuel et divers paramètres du système. TOUCHES DE COMMANDE TACTILES RÉTROÉCLAIRÉES MODE Appuyer sur MODE pour accéder au menu de sélection.
-
Page 33: Utilisation
• Si le projecteur est correctement raccordé à l’alimentation secteur, s’affichent alors successivement à l’écran pendant la phase de démarrage les mentions : « Update Wait... » (uniquement à des fins de maintenance), un message de bienvenue (« Welcome to Cameo »), la désignation du modèle et la version du logiciel. À l’issue de cette phase, le projecteur est opérationnel et active le mode de fonctionnement précédemment sélectionné. -
Page 34: Mode Auto
RÉGLAGE DU MODE DE FONCTIONNEMENT STAND ALONE (Stand Alone) Appuyer sur MODE pour accéder au menu de sélection. Utiliser ensuite les touches UP et DOWN pour sélectionner l’option de menu « Stand Alone » (voir flèche), puis confirmer en appuyant sur ENTER. Dans le sous-menu, il est à présent possible de sélectionner « Auto » ou « Stat- ic »... - Page 35 MODE DE FONCTIONNEMENT SLAVE (Slave) Appuyer sur MODE pour accéder au menu de sélection. Utiliser ensuite les touches UP et DOWN pour sélectionner l’option de menu « Slave » (voir flèche) et confirmer en appuyant sur ENTER. Relier les unités Slave et Master (même modèle) à l’aide d’un câble DMX. Sur le Master, activer l’un des modes de fonctionnement Stand Alone (Auto, Static).
-
Page 36: Dmx Address
Le projecteur réagit de façon brutale aux modifications de la valeur Dimmer Comportement de gradation Response La réaction du projecteur est comparable à celle d’un projecteur Halogen halogène, caractérisé par des variations douces de la luminosité Blinder Le mode Blinder permet une luminosité maximale de courte durée Operation Normal Fonctionnement normal (pilotage automatique du ventilateur) -
Page 37: Fonction De Verrouillage Manuelle
FONCTION DE VERROUILLAGE MANUELLE En plus de la fonction de verrouillage automatique, qui permet de protéger le projecteur contre toute utilisation par une personne non autorisée (voir « Settings » - « Autolock »), l’appareil offre également la possibilité de verrouiller manuellement les éléments de commande. Pour cela, appuyer simultanément sur les touches de fonction UP et DOWN pendant env. -
Page 38: Installation Et Montage
INSTALLATION ET MONTAGE Grâce à l’étrier double et aux pieds en plastique intégrés, le projecteur peut être placé à un endroit approprié sur une surface plane. Le montage sur traverse s’effectue soit à l’aide du goujon adaptateur TV rabattable de 16 mm (A, adapté à la bride Super Clamp d’Adam Hall), soit à... -
Page 39: Technique Dmx
TECHNIQUE DMX DMX-512 Le terme DMX (Digital Multiplex) désigne un protocole de transport universel permettant la communication entre des appareils et des contrôleurs à ce format. Un contrôleur DMX envoie des données DMX aux appareils DMX qui lui sont connectés. Les données DMX sont transportées sous forme d'un flux série, renvoyé... -
Page 40: Caractéristiques Techniques
CARACTÉRISTIQUES TECHNIQUES Référence : CLZP100DTW CLZP200DTW Type de produit : Projecteur wash à LED Type : Projecteur d’extérieur Spectre de couleurs des LED : Warm White, Amber Nombre de LED : Type de LED : COB 125 W COB 240 W Fréquence du signal PWM des 800 Hz, 1200 Hz, 2000 Hz, 3600 Hz, 12 kHz, 25 kHz (réglable) LED : Largeur angulaire de faisceau à... -
Page 41: Garantie Fabricant & Limitation De Responsabilité
DECLARATIONS GARANTIE FABRICANT & LIMITATION DE RESPONSABILITÉ Nos conditions actuelles de garantie et de limitation de responsabilité sont disponibles à l‘adresse suivante : https://cdn-shop.adamhall.com/ media/pdf/MANUFACTURERS-DECLARATIONS_CAMEO.pdf. Pour les réparations, veuillez contacter Adam Hall GmbH, Adam-Hall-Str. 1, 61267 Neu Anspach / E-Mail Info@adamhall.com / +49 (0)6081 / 9419-0. TRI ET MISE AUX DÉCHETS CORRECTE DE CE PRODUIT (Valid in the European Union and other European countries with waste separation) (Applicable dans l‘Union Européenne et les autres pays européens pratiquant le tri des déchets) La présence de ce symbole sur le... -
Page 42: Español
Este equipo está diseñado y fabricado con los estándares de calidad más exigentes, para garantizar un correcto funcionamiento durante muchos años.Lea atentamente este manual de usuario para poder aprovechar rápidamente toda la funcionalidad de su nuevo producto de Cameo Light. Más información sobre Cameo Light en la web WWW.CAMEOLIGHT.COM. MEDIDAS DE SEGURIDAD 1. - Page 43 34. Asimismo, deberá dejarse una distancia mínima de 0,5 metros con cualquier material inflamable. 35. Los cables eléctricos que sirven para alimentar a varios equipos deben tener una sección mínima de 1,5 mm². En la Unión Europa debe emplearse un cable de tipo H05VV-F, o similar. Adam Hall dispone de cables adecuados. Con estos cables podrá alimentar eléctricamente varios equipos conectando el enchufe de salida POWER OUT de un equipo al de entrada POWER IN de otro equipo.
-
Page 44: Introducción
Toma de salida de alimentación Power Twist con clase de protección IP65 y tapa de sellado de goma. Sirve para alimentar otros focos CAMEO. Asegúrese de que el consumo de corriente total de todos los dispositivos conectados no supere el valor indicado en amperios (A) - Page 45 DMX IN Conector XLR macho de 5 pines con protección IP65 para conectar un equipo de control DMX (por ejemplo, una mesa DMX. Mientras no se vaya a usar, mantenerlo siempre cerrado con la tapa de sellado de goma). DMX OUT Conector XLR hembra de 5 pines con protección IP65 para transmitir la señal de control DMX (mientras no se vaya a usar, mantenerlo siempre cerrado con la tapa de sellado de goma).
-
Page 46: Manejo
«Update Wait...» (Actualización del software, espere) (solo con fines de servicio técnico) y «Welcome to Cameo» (Bienvenidos a Cameo), así como la denominación del modelo y de la versión del software. Tras este procedimiento, el foco estará listo para funcionar y se activará... -
Page 47: Mode Auto
CONFIGURAR MODO OPERATIVO AUTÓNOMO (Stand Alone) Pulsando MODE accederá al menú de selección. Ahora, utilice los botones UP y DOWN para seleccionar la opción de menú «Stand Alone» (indicada por la flecha) y confirme la selección con ENTER. A continuación, en el submenú podrá seleccionar con los botones UP y DOWN entre los modos operativos «Auto»... - Page 48 MODO ESCLAVO (Slave) Pulsando MODE accederá al menú de selección. Ahora, utilice los botones UP y DOWN para seleccionar la opción del menú «Slave» (indica- da por la flecha) y confirme la selección con ENTER. Conecte las unidades esclava y maestra (del mismo modelo) mediante un cable DMX y active en la unidad maestra uno de los modos autónomos (Auto, Static).
-
Page 49: Dmx Address
El proyector reaccionará de forma abrupta a las modificaciones del valor DMX Dimmer Respuesta de atenuación El proyector se comportará de manera parecida a Response Halogen un proyector halógeno con modificaciones suaves del brillo Blinder El modo Blinder activa el brillo máximo brevemente Funcionamiento normal (control automático del Operation Normal... - Page 50 FUNCIÓN DE BLOQUEO MANUAL Además de existir la posibilidad de proteger el foco automáticamente frente a usos accidentales y no autorizados (véase «Settings» - «Au- tolock»), también pueden bloquearse manualmente los elementos de manejo. Mantenga pulsados a la vez los botones UP y DOWN durante unos 5 segundos.
-
Page 51: Instalación Y Montaje
INSTALACIÓN Y MONTAJE Gracias al soporte doble y las patas de plástico integradas, el foco puede instalarse en un lugar adecuado sobre una superficie nivelada. El montaje en travesaño se realiza mediante el adaptador de espiga abatible de 16 mm (A), adecuado para la abrazadera Super Clamp de Adam Hall, o un soporte Omega que se fija en el soporte del equipo (B). -
Page 52: Tecnología Dmx
TECNOLOGÍA DMX DMX512 DMX (Digital Multiplex) es el nombre de un protocolo universal utilizado como medio de comunicación entre dispositivos y controladores. El controlador DMX envía datos DMX a los equipos DMX conectados. Los datos DMX se envían como datos serie que se transmiten de equipo a equipo a través de los conectores XLR «DMX IN»... -
Page 53: Datos Técnicos
DATOS TÉCNICOS Número de artículo: CLZP100DTW CLZP200DTW Clase de producto: Washer LED Tipo: Focos para exteriores Espectro cromático de los LED: Blanco cálido, ámbar Cantidad de LED: Tipo de LED: COB de 125 W COB de 240 W Frecuencia de la modulación por 800 Hz, 1200 Hz, 2000 Hz, 3600 Hz, 12 kHz, 25 kHz (ajustable) ancho de pulsos (PWM) del LED: Ángulo del haz de luz (ángulo de... -
Page 54: Declaraciones Del Fabricante
DECLARACIÓN DEL FABRICANTE GARANTÍA DEL FABRICANTE Y LIMITACIÓN DE RESPONSABILIDAD Consulte nuestras condiciones de garantía y limitaciones de responsabilidad en: https://cdn-shop.adamhall.com/media/pdf/MANUFACTU- RERS-DECLARATIONS_CAMEO.pdf. En caso de necesitar servicio técnico, póngase en contacto con Adam Hall GmbH, Adam-Hall-Str. 1, 61267 Neu Anspach (Alemania); correo electrónico Info@adamhall.com; +49 (0)6081 / 9419-0. ELIMINACIÓN CORRECTA DE ESTE PRODUCTO (Aplicable en la Unión Europea y en los países europeos que dispongan de un sistema de recogida selectiva) El símbolo que aparece sobre el producto o en la documentación adjunta indica que al final de la vida útil del equipo, no deberá... -
Page 55: Środki Ostrożności
To urządzenie zostało zaprojektowane i wyprodukowane przy zastosowaniu najwyższych kryteriów jakościowych w celu zapewnienia wieloletniej bezawaryjnej eksploatacji. Proszę starannie przeczytać niniejszą instrukcję obsługi, aby móc jak najszybciej zacząć użytkować ten produkt marki Cameo Light. Więcej informacji na temat Cameo Light znajdą Państwo na naszej stronie internetowej pod adresem WWW.CAMEOLIGHT.COM. - Page 56 32. Instalacja urządzenia powinna odbywać się, gdy urządzenie nie jest podłączone do źródła zasilania (należy wyjąć wtyczkę z gniazda). 33. Kurz i inne osady wewnątrz urządzenia mogą je uszkodzić. W zależności od warunków otoczenia (kurz, nikotyna, opary itp.) urządzenie powinno być konserwowane lub czyszczone przez wykwalifikowanego specjalistę (usługa nieobjęta gwarancją), aby zapobiec przegrzaniu i nieprawidłowemu działaniu.
-
Page 57: Wprowadzenie
(nieużywane gniazdo zawsze należy zabezpieczać gumową zaślepką). POWER OUT Gniazdo wyjściowe zasilania sieciowego Power Twist IP65 z gumową zaślepką. Źródło zasilania dla dodatkowych reflektorów CAMEO. Cał- kowity pobór prądu wszystkich podłączonych urządzeń nie może przekroczyć wartości w amperach (A) podanej na urządzeniu (nieużywane gniazdo zawsze zabezpieczaj gumową... - Page 58 DMX OUT Żeńskie 5-pinowe złącze XLR IP65 do przekazywania sygnału sterującego DMX (nieużywane gniazdo zawsze należy zabezpieczać gumową zaślepką). OLED DISPLAY Wyświetla bieżący tryb pracy oraz inne ustawienia systemowe. PODŚWIETLANE PRZYCISKI DOTYKOWE MODE Naciśnij przycisk MODE, by przejść do menu wyboru. Ponowne naciśnięcie przycisku spowoduje powrót do widoku głównego. Naciśnięcie przycisku MODE bez zatwierdzenia wprowadzonej zmiany przyciskiem ENTER spowoduje przywrócenie wcześniej ustawionej wartości lub statusu.
-
Page 59: Obsługa
• Po prawidłowym podłączeniu reflektora do sieci zasilania podczas uruchamiania wyświetla się następująca sekwencja komunikatów: „Update Wait...” (tylko do celów serwisowych), „Welcome to Cameo”, a także nazwa modelu i wersji oprogramowania. Po tej procedurze reflektor jest gotowy do pracy i przełącza się na ostatnio wybrany tryb. -
Page 60: Mode Auto
USTAWIANIE TRYBU PRACY STANDALONE (Stand Alone) Naciśnij przycisk MODE, by przejść do menu wyboru. Przyciskami UP i DOWN wybierz pozycję menu „Stand Alone” (zwróć uwagę na strzałkę) i potwierdź przyciskiem ENTER. Następnie przyciskami UP i DOWN w podmenu można wybrać jeden z następujących trybów pracy standalone: „Auto”... - Page 61 TRYB PRACY SLAVE (Slave) Naciśnij przycisk MODE, by przejść do menu wyboru. Przyciskami UP i DOWN wybierz opcję „Slave” (zgodnie ze strzałką) i potwierdź wybór przyciskiem ENTER. Połącz urządzenia slave i master (ten sam model) kablem DMX i włącz w urządzeniu master jeden z trybów standalone (Auto, Static).
-
Page 62: Dmx Address
Reflektor reaguje gwałtownie na zmianę wartości DMX Dimmer Charakterystyka ściemniania Zmiana jasności reflektora następuje łagodnie, podobnie jak Response Halogen w przypadku reflektora halogenowego Tryb oślepiacza umożliwia wytworzenie krótkotrwałej maksy- Oślepiacz malnej jasności Operating Tryb pracy Normal Tryb normalny (automatyczne sterowanie wentylatorem) Mode Bardzo cichy tryb pracy przy zredukowanej jasności, jeśli jest Silent... - Page 63 RĘCZNA FUNKCJA BLOKOWANIA Oprócz automatycznego zabezpieczenia reflektora przed omyłkowym wprowadzeniem zmian lub nieuprawnionym dostępem (patrz „Set- tings” – „Autolock”) możliwe jest także ręczne zablokowanie elementów obsługi. Równocześnie naciśnij przyciski UP i DOWN i przytrzymaj je naciśnięte przez ok. 5 sekund. Teraz wyświetli się w sposób ciągły komunikat „LOCKED” i zmiana ustawień reflektora przy użyciu przycisków będzie niemożliwa.
-
Page 64: Ustawianie I Montaż
USTAWIANIE I MONTAŻ Do ustawienia reflektora w odpowiednim miejscu na płaskiej powierzchni służy podwójny uchwyt i zamontowane na stałe nóżki z tworzywa sztucznego. Montaż na kratownicy odbywa się albo za pomocą rozkładanego adaptera gwintowego 16 mm (A, nadaje się do Adam Hall Super Clamp), albo uchwytu Omega, który mocuje się... -
Page 65: Technika Dmx
TECHNIKA DMX DMX-512 DMX (Digital Multiplex) to nazwa uniwersalnego protokołu transmisji do komunikacji między odpowiednimi urządzeniami a kontrolerami. Kontroler DMX wysyła dane DMX do podłączonych urządzeń DMX. Transmisja danych DMX następuje zawsze w formie szeregowego strumienia danych, który jest przekazywany z jednego urządzenia do następnego przez znajdujące się... -
Page 66: Dane Techniczne
DANE TECHNICZNE Numer artykułu: CLZP100DTW CLZP200DTW Rodzaj produktu: Naświetlacz LED Wash Light Typ: Reflektory zewnętrzne Widmo kolorów LED: Warm White, Amber Liczba diod LED: Typ diod LED: 125 W COB 240 W COB Częstotliwość PWM lampy LED: 800 Hz, 1200 Hz, 2000 Hz, 3600 Hz, 12 kHz, 25 kHz (regulowana) Kąt półrozproszenia (dziesiąta Soczewka 1: 42°... -
Page 67: Deklaracje Producenta
DEKLARACJE PRODUCENTA GWARANCJA PRODUCENTA I OGRANICZENIE ODPOWIEDZIALNOŚCI Nasze aktualne warunki gwarancji i informacje dotyczące ograniczenia odpowiedzialności znajdą Państwo na stronie: https://cdn-shop. adamhall.com/media/pdf/MANUFACTURERS-DECLARATIONS_CAMEO.pdf. W razie konieczności skorzystania z serwisu proszę skontaktować się z firmą Adam Hall GmbH, Adam-Hall-Str. 1, 61267 Neu Anspach / e-mail Info@adamhall.com / +49 (0)6081 / 9419-0. PRAWIDŁOWA UTYLIZACJA NINIEJSZEGO PRODUKTU (Obowiązuje w Unii Europejskiej i innych krajach europejskich stosujących system sortowania odpadów) Niniejszy symbol na produk- cie lub związanych z nim dokumentach wskazuje, iż... -
Page 68: Italiano
Questo dispositivo è stato sviluppato e prodotto in conformità con elevati standard qualitativi che ne garantiscono il regolare funzionamento per molti anni. Leggete attentamente questo manuale d‘uso per utilizzare al meglio il vostro nuovo prodotto Cameo Light. Per maggiori informazioni su Cameo Light consultare la nostra pagina Web WWW.CAMEOLIGHT.COM. - Page 69 34. La distanza dai materiali infiammabili deve essere di almeno 0,5 m 35. I cavi di rete utilizzati per l’alimentazione elettrica di più dispositivi devono avere una sezione di almeno 1,5 mm². I cavi impiegati nell’Unione Europea devono essere di tipo H05VV-F o simile. Adam Hall offre cavi idonei. Tali cavi consentono di collegare più dispositivi dalla presa di uscita POWER OUT di un apparecchio alla presa POWER IN di un altro dispositivo.
-
Page 70: Introduzione
POWER OUT Presa di uscita Power Twist IP65 con tappo ermetico in gomma. Serve per l'alimentazione di altri proiettori CAMEO. Tenere presente che la corrente assorbita complessiva di tutti i dispositivi collegati non deve superare il valore riportato in ampere (A) sul dispositivo (in caso di mancato utilizzo, chiudere sempre con tappo ermetico in gomma). - Page 71 DMX OUT Connettore XLR IP65 femmina a 5 poli per il reindirizzamento del segnale di controllo DMX (in caso di mancato utilizzo, chiudere sempre con il tappo ermetico in gomma). OLED DISPLAY Indica la modalità di funzionamento attuale e altre impostazioni di sistema. TASTI TATTILI RETROILLUMINATI MODE Premendo MODE si accede al menu di selezione.
-
Page 72: Utilizzo
• Non appena il proiettore è correttamente allacciato alla rete elettrica, durante il processo di avvio sul display vengono visualizzati in successione i messaggi “Update Wait...” (solo per manutenzione) e “Welcome to Cameo”, seguiti dall’indicazione del modello e della versione del software. Al termine della procedura il proiettore è pronto per l’uso e si avvia nella modalità di funzionamento selezionata in precedenza. - Page 73 IMPOSTAZIONE DELLA MODALITÀ DI FUNZIONAMENTO STAND-ALONE (Stand Alone) Premendo MODE si accede al menu di selezione. Con i tasti UP e DOWN, selezionare la voce di menu “Stand-Alone” (prestare attenzione alla freccia) e confermare con ENTER. Sempre con i tasti UP e DOWN, nel sottomenu è possibile selezionare “Auto” e “Static” fra le modalità di funzionamento Stand-Alone.
- Page 74 MODALITÀ DI FUNZIONAMENTO SLAVE (Slave) Premendo MODE si accede al menu di selezione. Con i tasti UP e DOWN, selezionare la voce di menu “Slave” (prestare attenzione alla freccia) e confermare con ENTER. Collegare l'unità slave e master (stesso modello) utilizzando un cavo DMX; sull'unità master attivare una delle modalità...
- Page 75 Il proiettore reagisce in maniera repentina alle modi- fiche del valore DMX Dimmer Comportamento dimmer Response Il proiettore si comporta in maniera analoga a un Halogen proiettore alogeno con lievi modifiche della luminosità La modalità blinder consente di ottenere la massima Blinder luminosità...
- Page 76 FUNZIONE DI BLOCCO MANUALE L’opzione manuale che consente di evitare l’utilizzo non autorizzato o l’attivazione involontaria del proiettore (vedi “Settings” -> “Autolock”) può essere applicata anche automaticamente. Tenere premuti contemporaneamente i tasti UP e DOWN per circa 5 secondi. Verrà quindi visualizzata sul display la scritta “LOCEKD”...
-
Page 77: Installazione E Montaggio
INSTALLAZIONE E MONTAGGIO Grazie alla staffa doppia e ai piedini in plastica integrati, il proiettore può essere collocato in un punto adatto su una superficie piana. Il mon- taggio a una traversa viene effettuato o tramite il codolo TV da 16 mm a incasso (A, adatto per Adam Hall Super Clamp) o tramite una staffa omega da fissare alla staffa del dispositivo (B). -
Page 78: Tecnologia Dmx
TECNOLOGIA DMX DMX512 DMX (Digital Multiplex) è la sigla di un protocollo di trasmissione universale per la comunicazione tra dispositivi e controller. Un controller DMX invia dati DMX ai dispositivi DMX collegati. I dati DMX vengono sempre trasmessi come flusso di dati seriale, che viene inoltrato da un dispositivo collegato al successivo attraverso le connessioni (connettori XLR) DMX IN e DMX OUT presenti per ogni dispositivo DMX compatibile, per un massimo di 32 dispositivi. -
Page 79: Dati Tecnici
DATI TECNICI Numero articolo: CLZP100DTW CLZP200DTW Tipologia di prodotto: Wash Light a LED Tipo: Proiettori da esterni Spettro cromatico LED: Bianco caldo, ambra Numero di LED: Tipo di LED: COB da 125 W COB da 240 W Frequenza LED PWM: 800Hz, 1200Hz, 2000Hz, 3600Hz, 12kHz, 25kHz (regolabile) Semi-apertura del fascio (apertura Lente 1: 42°... -
Page 80: Dichiarazioni Del Produttore
DICHIARAZIONI DEL PRODUTTORE MANUFACTURER’S WARRANTY & LIMITATION OF LIABILITY Le nostre attuali condizioni di garanzia e la limitazione di responsabilità sono consultabili alla pagina: https://cdn-shop.adamhall.com/media/ pdf/MANUFACTURERS-DECLARATIONS_CAMEO.pdf. In caso di assistenza, rivolgersi a Adam Hall GmbH, Adam-Hall-Str. 1, 61267 Neu Anspach / E-mail Info@adamhall.com / +49 (0)6081 / 9419-0. CORRETTO SMALTIMENTO DEL PRODOTTO (In vigore nell‘Unione Europea e in altri Paesi europei in cui si attui la raccolta differenziata) Questo simbolo apposto sul prodotto o sui relativi documenti indica che, per evitare danni all‘ambiente e alle persone causati da uno smaltimento incontrollato dei rifiuti,... -
Page 81: Controllo Dmx
DMX CONTROL / DMX STEUERUNG / PILOTAGE DMX / CONTROL DMX / STEROWANIE DMX / CONTROLLO DMX 1 CH Mode Function Values Sub-Group 0% to 100% Dimmer Dimmer 2 CH Mode 1 Function Values Sub-Group Dimmer 0% to 100% Dimmer Dimmer Fine 0% to 100% 2 CH Mode 2... - Page 82 no function Dimmer Reponse LED (Hold 3s) Dimmer Response Halogen (Hold 5s) DTW (Redshift) on (Hold 3s) DTW (Redshift) off (Hold 5s) Display Backlight on (Hold 3s) Display Backlight off (Hold 5s) Dimmer Curve Linear (Hold 5s) Dimmer Curve Exp (Hold 5s) Dimmer Curve Log (Hold 5s) Device Settings (please read...
- Page 84 CAMEOLIGHT.COM Adam Hall GmbH | Adam-Hall-Str. 1 | 61267 Neu-Anspach | Germany Phone: +49 6081 9419-0 | adamhall.com REV: 01...