Table des Matières

Publicité

Les langues disponibles
  • FR

Les langues disponibles

  • FRANÇAIS, page 32

Liens rapides

USER´S MANUAL
BEDIENUNGSANLEITUNG
MANUEL D`UTILISATION
MANUAL DE USUARIO
INSTRUKCJA OBSŁUGI
MANUALE D' USO
ZENIT B60
LED BATTERY OUTDOOR PAR WITH W-DMX™
CLZB60BLSD / CLZB60CLSD

Publicité

Table des Matières
loading

Sommaire des Matières pour Cameo ZENIT B60

  • Page 1 USER´S MANUAL BEDIENUNGSANLEITUNG MANUEL D`UTILISATION MANUAL DE USUARIO INSTRUKCJA OBSŁUGI MANUALE D‘ USO ZENIT B60 LED BATTERY OUTDOOR PAR WITH W-DMX™ CLZB60BLSD / CLZB60CLSD...
  • Page 2: Table Des Matières

    CONTENTS / INHALTSVERZEICHNIS / CONTENU / CONTENIDO / TREŚĆ / CONTENUTO ENGLISH ESPAÑOL PREVENTIVE MEASURES MEDIDAS DE SEGURIDAD 47-48 INTRODUCTION INTRODUCCIÓN CONNECTIONS, OPERATING AND DISPLAY ELEMENTS CONEXIONES, ELEMENTOS DE MANEJO Y ELEMENTOS OPERATION 7-12 DE VISUALIZACIÓN 49-50 IR REMOTE CONTROL FUNCIONAMIENTO 51-57 DIFFUSERS...
  • Page 3: English

    We have designed this product to operate reliably over many years. Please read this User‘s Manual carefully, so that you can begin making optimum use of your Cameo Light product quickly. Learn more about Cameo Light on our website WWW.CAMEOLIGHT.COM.
  • Page 4: Battery Safety

    CAUTION: To reduce the risk of electric shock, do not remove cover (or back). There are no user serviceable parts inside. Maintenance and repairs should be exclusively carried out by qualified service personnel. The warning triangle with lightning symbol indicates dangerous uninsulated voltage inside the unit, which may cause an electrical shock.
  • Page 5: Introduction

    OPERATION: The Cameo ZENIT B60B and B60C are DMX-512-controllable outdoor floodlights and can also be installed as standalone units, in master/ slave mode and operated via IR remote control. In addition, the floodlight features RDM-standard (remote device management). Remote device management allows the user to view status and configuration of RDM terminals via an RDM-capable controller.
  • Page 6: Standby Switch

    POWER OUT IP65 power output socket with rubber sealing cap. Facilitates power supply to other CAMEO lights. Ensure that the total current consumption of all connected devices does not exceed the value specified on the device in amperes (A) (when not in use, always close with the rubber sealing cap).
  • Page 7: Operation

    PLEASE NOTE: • When the lamp is correctly connected to the mains supply and the standby switch is in the down position, "Welcome to Cameo", the model name and the software version are shown on the display consecutively during start-up. After this process, the lamp is ready for operation and starts in the previously enabled mode.
  • Page 8: W-Dmx™ Status

    BATTERY CHARGE STATUS IN STANDBY MODE To recharge the internal battery, connect the lamp to the mains with the supplied power cable. The battery charge status is indicated by the battery symbol on the display. W-DMX™ To pair with W-DMX™ compatible transmitters, enable W-DMX™ in the device settings (Settings -> Wireless Setting -> Receive -> On) and reset the W-DMX™...
  • Page 9: Dmx Mode

    DMX MODE Seven different DMX operating modes are available for selection: 2CH, 3CH, 4CH, 8CH 1, 8CH 2, 10CH and 15CH. Select DMX mode as previously described in SETTING OPERATION MODE and confirm with ENTER. Using the UP and DOWN controls, select the desired DMX mode (observe arrow), confirm again with ENTER and press MODE twice to return to the main display.
  • Page 10 COLOUR MACROS (Color Macro) 15 different preset colour macros are available. Select colour macro mode as per the procedure previously described in SETTING OPERATION MODE and confirm with ENTER. Using the UP and DOWN controls, now select the desired colour preset (observe arrow) and confirm with ENTER (Color Off = blackout).
  • Page 11: Battery Runtime

    AC Failure Operating status with mains fault No Action Lamp switches to battery operation in the same operating mode Blackout Lamp changes to blackout Emergency Light Lamp changes to colour macro "Cold White" with battery operation Dimmer Curve Dimmer curve Linear Light intensity increases linearly with DMX value...
  • Page 12: Ir Remote Control

    SYSTEM INFORMATION (System Info) Press MODE to access the device settings selection menu (--- Menu ---). Using the arrow keys, select the menu item "System Info" (observe arrow) and confirm with ENTER. ------------------- Menu ------------------- Mode Settings System Info Use the UP and DOWN controls to select the desired sub-menu item, and press ENTER to display the corresponding information. System Info Firmware Displays device firmware...
  • Page 13: Diffusers

    Fade programmes Auto 1 - Auto 5. Programme selection with . Programme run speed with Fade programmes . Brightness setting with Direct selection of colour presets 0 to 9. Colour preset DIFFUSERS Two diffusers are supplied with the lamp, each with a different beam angle (1 x 25° with notched edge for identification, and 1 x 40°). The beam angle of the lamp can be adjusted to 11°...
  • Page 14: Dmx Technology

    DMX TECHNOLOGY DMX-512 DMX (Digital Multiplex) is the designation for a universal transmission protocol for communications between corresponding devices and controllers. A DMX controller sends DMX data to the connected DMX device(s). The DMX data is always transmitted as a serial data stream that is forwarded from one connected device to the next via the "DMX IN"...
  • Page 15: Technical Data

    TECHNICAL DATA Model designation: CLZB60BLSD CLZB60CLSD Product type: LED battery PAR LED battery PAR Type: Outdoor light Outdoor light LED colour spectrum: RGBW RGBW No. of LEDs: LED type: 15 W CREE 15 W CREE Refresh rate: 3600 Hz 3600 Hz Dispersion: 11°...
  • Page 16: Manufacturer's Declarations

    Dimensions (W x H x D, 187 x 187 x 164 mm 187 x 187 x 164 mm not including mounting bracket): Weight: 5.4 kg 5.4 kg Other features: 1 m mains cable with special IP65 socket, stand/ 1 m mains cable with special IP65 socket, stand/ mounting bracket, 25°...
  • Page 17: Deutsch

    Dieses Gerät wurde unter hohen Qualitätsanforderungen entwickelt und gefertigt, um viele Jahre einen reibungslosen Betrieb zu gewähr- leisten. Bitte lesen Sie diese Bedienungsanleitung sorgfältig, damit Sie Ihr neues Produkt von Cameo Light schnell und optimal einsetzen können. Weitere Informationen über Cameo Light erhalten Sie auf unserer Website WWW.CAMEOLIGHT.COM.
  • Page 18 die Leitungen H05VV-F, oder gleichartig, entsprechen. Geeignete Leitungen werden von Adam Hall angeboten. Mit diesen Leitungen können Sie mehrere Geräte über den Power out Anschluss mit dem Power IN Anschluss eines weiteren Gerätes verbinden. Beachten Sie, dass die gesamte Stromaufnahme aller angeschlossenen Geräte den vorgegebenen Wert nicht überschreitet (Aufdruck auf dem Gerät). Achten Sie darauf, Netzleitungen so kurz wie möglich zu halten.
  • Page 19: Einführung

    Betriebsspannung 100-240V AC, Leistungsaufnahme 100W BEDIENUNG: Die Cameo ZENIT B60B und B60C sind DMX-512-steuerbare Outdoor-Scheinwerfer und lassen sich ebenso als Standalone-Gerät, im Master/ Slave-Modus und per IR Fernbdienung betreiben. Weiterhin verfügen die Scheinwerfer über den RDM-Standard (Remote Device Management). Diese Gerätefernverwaltung ermöglicht die Statusabfrage und Konfiguration von RDM-Endgeräten über einen RDM-fähigen Controller.
  • Page 20 Scheinwerfer nun betriebsbereit, indem Sie den Schalter in die heruntergedrückte Position bringen. Während des Startvorgangs werden nacheinander „Welcome to Cameo“, die Modellbezeichnung und die Software Version im Display angezeigt. In der nicht heruntergedrückten Position des Schalters befindet sich der Scheinwerfer im Standby-Modus. Während beider Betriebszustände wird stets der Akku geladen, sobald der Scheinwerfer korrekt am Stromnetz angeschlossen ist.
  • Page 21: Bedienung

    • Sobald der Scheinwerfer korrekt am Stromnetz angeschlossen und der Standby-Schalter in die heruntergedrückte Position gebracht ist, werden während des Startvorgangs nacheinander „Welcome to Cameo“, die Modellbezeichnung und die Software Version im Display angezeigt. Nach diesem Vorgang ist der Scheinwerfer betriebsbereit und startet in der Betriebsart, die zuvor aktiviert war.
  • Page 22 AKKU-LADESTATUS IM STANDBY-MODUS Zum Laden des internen Akkus schließen Sie den Scheinwerfer mit Hilfe des mitgelieferten Netzkabels am Stromnetz an. Der Akku-Ladestatus wird dabei durch das Batterie-Symbol im Display angezeigt. W-DMX™ Zum Koppeln mit W-DMX™ kompatiblen Transmittern aktivieren Sie W-DMX™ in den Geräteeinstellungen (Settings -> Wireless Setting -> Receive ->...
  • Page 23 DMX-BETRIEBSART (DMX Mode) Sieben verschiedene DMX-Betriebsarten stehen zur Auswahl: 2CH, 3CH, 4CH, 8CH 1, 8CH 2, 10CH und 15CH. Wählen Sie, wie zuvor unter Punkt BETRIEBSART EINSTELLEN beschrieben, die DMX-Betriebsart aus und bestätigen mit ENTER. Den gewünschten DMX-Modus wählen Sie nun mit Hilfe der Bedienfelder UP und DOWN aus (Pfeil beachten), bestätigen wiederum mit ENTER und drücken 2x auf MODE, um zur Hauptanzeige zurückzugelangen.
  • Page 24 ---------------- Mode ---------------- ---------------- Static ---------------- Slave Dimmer <255> Mode Auto Strobe <255> Static Static <255> Green <255> Blue <255> White <255> Color Temp <255> FARBMAKROS (Color Macro) 15 verschiedene Farbmakros stehen als Preset zur Verfügung. Wählen Sie, wie zuvor unter Punkt BETRIEBSART EINSTELLEN beschrieben, den Menüpunkt „Color Macro“...
  • Page 25 Settings Runtime Akkulaufzeit auf bis zu 24 Stunden verlängern, Funktion deaktiviert bei entsprechend reduzierter Helligkeit 4 hours - Einstellen der Akkulaufzeit von 4 (kalkuliert auf Full On und 100% Akku) 24 hours Stunden auf bis zu 24 Stunden in 1 Stunden Schritten.
  • Page 26 Factory Reset Zurücksetzen auf Werkseinstellung Zurücksetzen auf Werkseinstellungen: ENTER -> „Reset Now!“ -> ENTER Bestätigen Sie alle Eingaben mit ENTER. AKKULAUFZEIT (Runtime) Die Akkulaufzeit kann, bei entsprechend reduzierter Helligkeit, auf bis zu 24 Stunden verlängert werden (siehe Tabelle Settings). Die Laufzeit ist dabei auf Full On und 100% Akkuladestatus berechnet.
  • Page 27: Ir Fernbedienung

    IR FERNBEDIENUNG Richten Sie die Infrarot-Fernbedienung in Sichtverbindung direkt auf den auf der Vorderseite des Strahlers verbauten Infrarot-Sensor. Die maximale Reichweite beträgt ca. 8 Meter. In der DMX- und der Slave-Betriebsart sind die Funktionen der Fernbedienung deaktiviert. Batterie für die IR Fernbedienung BLAC K SOUN D AU TO...
  • Page 28: Streuscheiben

    STREUSCHEIBEN Im Lieferumfang des Strahlers befinden sich zwei Streuscheiben, die über ein unterschiedliches Abstrahlverhalten verfügen (1x 25° zur Identifizierung mit Kerbe am Rand, 1x 40°). Der Abstrahlwinkel des Strahlers kann somit individuell auf 11° (ohne Streuscheibe), 25°, oder 40° verändert werden. Legen Sie die gewünschte Streuscheibe (raue Seite Richtung Frontglas) in den dafür vorgesehenen Gummirahmen, entriegeln den gefederten Sicherungsstift (am Griff ca.
  • Page 29: Dmx Technik

    DMX TECHNIK DMX-512 DMX (Digital Multiplex) ist die Bezeichnung für ein universelles Übertragungsprotokoll für die Kommunikation zwischen entsprechenden Geräten und Controllern. Ein DMX-Controller sendet DMX-Daten an das/die angeschlossene(n) DMX-Gerät(e). Die DMX-Datenübertragung erfolgt stets als serieller Datenstrom, der über die an jedem DMX-fähigen Gerät vorhandenen DMX IN- und DMX OUT-Anschlüsse (XLR-Steckverbinder) von einem angeschlossenen Gerät an das nächste weitergeleitet wird, wobei die maximale Anzahl der Geräte 32 nicht überschreiten darf.
  • Page 30: Technische Daten

    TECHNISCHE DATEN Modellbezeichnung: CLZB60BLSD CLZB60CLSD Produktart: LED Akku PAR LED Akku PAR Typ: Outdoor Scheinwerfer Outdoor Scheinwerfer Farbspektrum LED: RGBW RGBW LED Anzahl: LED Typ: 15W CREE 15W CREE Wiederholrate: 3600 Hz 3600 Hz Abstrahlwinkel: 11° 11° DMX-Eingang: 5-Pol XLR männlich, IP65 5-Pol XLR männlich, IP65 DMX-Ausgang: 5-Pol XLR weiblich, IP65...
  • Page 31: Herstellererklärungen

    Abmessungen (B x H x T, 187 x 187 x 164mm 187 x 187 x 164mm ohne Montagebügel): Gewicht: 5,4kg 5,4kg Weitere Eigenschaften: 1 m Netzkabel mit speziellem IP65 Stecker, Stand-/ 1 m Netzkabel mit speziellem IP65 Stecker, Stand-/ Montagebügel, 25° und 40° Streuscheibe und IR Montagebügel, 25°...
  • Page 32: Francais

    Cet appareil a été développé et fabriqué en appliquant des exigences de qualité très élevées: il garantit des années de fonctionnement sans problème.Veuillez lire attentivement ce Manuel Utilisateur : vous apprendrez rapidement à utiliser votre appareil Cameo Light de façon optimale.
  • Page 33: Sécurité De La Batterie

    34. Respectez une distance minimale de 0,5m par rapport à des matériaux inflammables. 35. Si vous désirez alimenter plusieurs projecteurs simultanément, les conducteurs du câble secteur doivent posséder une section minimale de 1,5 mm². Dans l’Union Européenne, les câbles électriques doivent être de type H05VV-F ou équivalent. Adam Hall propose des câbles secteur adaptés.
  • Page 34: Introduction

    100-240 V CA, consommation électrique : 100 W UTILISATION : Les modèles Cameo ZENIT B60B et B60C sont des projecteurs d’extérieur pilotables en mode DMX-512 ; ils s’utilisent également en mode autonome (Standalone), maître (Master) ou esclave (Slave) ; enfin ils peuvent être pilotés par une télécommande infrarouge. Les projecteurs intègrent par ailleurs la technologie standard RDM (Remote Device Management).
  • Page 35: Interrupteur Standby

    Assurer un niveau de charge suffisant de la batterie ou brancher le projecteur sur le réseau d’alimentation. Pousser l’interrupteur vers le bas pour que le projecteur soit opérationnel. Pendant la phase de démarrage, un message de bienvenue (« Welcome to Cameo »), la référence du modèle et la version du logiciel s’affichent successivement à...
  • Page 36: Mode D'emploi

    • À condition que le projecteur soit correctement branché sur le secteur et que l’interrupteur Standby soit poussé vers le bas, pendant la phase de démarrage, un message de bienvenue (« Welcome to Cameo »), la référence du modèle et la version du logiciel s’affichent successivement à...
  • Page 37: Niveau De Charge De La Batterie En Mode Standby

    NIVEAU DE CHARGE DE LA BATTERIE EN MODE STANDBY Pour charger la batterie interne, brancher le projecteur sur le secteur en utilisant le câble d’alimentation fourni. Le niveau de charge de la batterie est indiqué à l’écran par le pictogramme de la batterie. W-DMX™...
  • Page 38 MODE DMX (DMX Mode) Sept modes DMX différents sont proposés : 2CH, 3CH, 4CH, 8CH 1, 8CH 2, 10CH et 15CH. Conformément à la procédure décrite à la section RÉGLAGE DU MODE DE FONCTIONNEMENT, sélectionner le mode DMX. Pour valider la sélection, appuyer sur ENTER. Le mode DMX voulu est sélectionné...
  • Page 39 MODE STATIQUE (Static) Le mode statique permet de régler plusieurs fonctions (variateur [Dimmer], stroboscope [Strobe], R, G, B, W et la température des couleurs [Color Temp]) directement sur l’appareil à des valeurs comprises entre 000 et 255. Cela permet de créer une scène individuelle sans recourir à...
  • Page 40 Settings Runtime Prolonger l’autonomie de la batterie jusqu’à 24 Fonction désactivée heures en réduisant la luminosité 4 hours - Réglage de l’autonomie de la batterie (calcul basé sur Full On et batterie à 100 %) 24 hours entre 4 et 24 heures, par pas de 1 heure.
  • Page 41: Courbes De Dimmer

    IR Remote Activation / désactivation de la fonction de Fonctionnalité activée pilotage par télécommande infrarouge Fonctionnalité désactivée Wireless Setting Paramètres W-DMX Receive On/Off On = W-DMX activé (Wireless-DMX) Off = W-DMX désactivé Receive Reset No = Ne pas interrompre la connexion avec le transmetteur Yes = Interrompre la connexion avec le transmetteur...
  • Page 42: Pilotage Par Télécommande Infrarouge

    PILOTAGE PAR TÉLÉCOMMANDE INFRAROUGE Diriger la télécommande infrarouge, en contact visuel direct, vers le capteur infrarouge situé en face avant du projecteur. Sa portée maximale est d’environ 8 mètres. En mode DMX et Slave, les fonctions de pilotage par télécommande infrarouge sont désactivées. Pile de la télécommande infrarouge = BLAC K AU TO SOUN D...
  • Page 43: Diffuseurs

    DIFFUSEURS L’équipement livré avec le projecteur comprend deux diffuseurs avec différents angles de départ (1x 25° pour identification, encoche au bord, et 1x 40°). L’angle de départ du projecteur peut ainsi être modifié et réglé sur 11° (sans diffuseur), 25° ou 40°. Insérer le diffuseur voulu (côté non lisse vers la vitre) dans le cadre en caoutchouc prévu à...
  • Page 44: Technique Dmx

    TECHNIQUE DMX DMX-512 Le terme DMX (Digital Multiplex) désigne un protocole de transport universel permettant la communication entre des appareils et des contrôleurs à ce format. Un contrôleur DMX envoie des données DMX aux appareils DMX qui lui sont connectés. Les données DMX sont transportées sous forme d'un flux série, renvoyé...
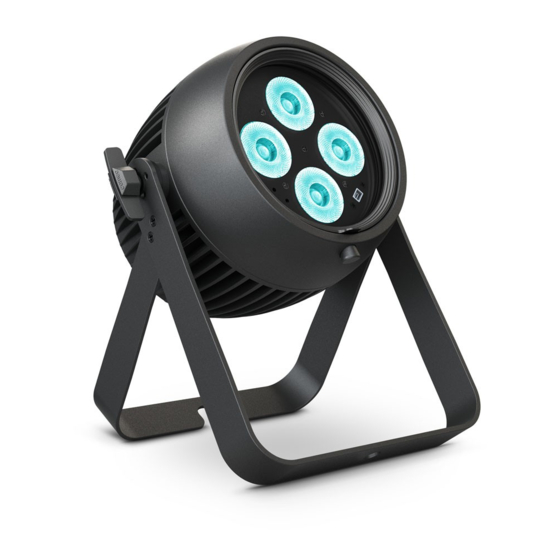
  • Page 45: Caractéristiques Techniques

    CARACTÉRISTIQUES TECHNIQUES Désignation du modèle : CLZB60BLSD CLZB60CLSD Type de produit : Projecteur PAR à LED fonctionnant sur batterie Projecteur PAR à LED fonctionnant sur batterie Type : Projecteur à usage extérieur Projecteur à usage extérieur Spectre de couleurs des RGBW RGBW LED : Nombre de LED : Type de LED : 15 W CREE...
  • Page 46: Garantie Fabricant & Limitation De Responsabilité

    Température ambiante -15 °C - +40 °C -15 °C - +40 °C (pendant le fonctionne- ment) : Matériau du boîtier : Aluminium moulé sous pression Aluminium moulé sous pression Couleur du boîtier : Noir Chromé Refroidissement du boîtier : Par convection Par convection Classe de protection : IP65 IP65 Dimensions (L x H x P, sans 187 x 187 x 164 mm 187 x 187 x 164 mm...
  • Page 47: Español

    Este equipo está diseñado y fabricado con los estándares de calidad más exigentes, para garantizar un correcto funcionamiento durante muchos años.Lea atentamente este manual de usuario para poder aprovechar rápidamente toda la funcionalidad de su nuevo producto de Cameo Light. Más información sobre Cameo Light en la web WWW.CAMEOLIGHT.COM. MEDIDAS DE SEGURIDAD 1.
  • Page 48: Seguridad De La Batería

    (polvo, nicotina, niebla, etc.), deberá realizarse periódicamente el mantenimiento o la limpieza del equipo por personal especializado, para evitar cualquier sobrecalentamiento o fallo de funcionamiento (mantenimiento y limpieza no cubiertos por la garantía). 34. Asimismo, deberá dejarse una distancia mínima de 0,5 metros con cualquier material inflamable. 35.
  • Page 49: Introducción

    FUNCIONAMIENTO: Los Cameo ZENIT B60B y B60C son focos para exteriores con control DMX-512 que también pueden usarse como dispositivos autónomos en modo maestro/esclavo y mediante el mando a distancia por infrarrojos. Además, los focos están dotados del protocolo RDM (Remote Device Management, administración remota de dispositivos).
  • Page 50 POWER OUT Toma de salida de alimentación IP65 con tapa de sellado de goma. Sirve para suministrar corriente eléctrica a otros focos Cameo. Asegúrese de que el consumo de corriente total de todos los dispositivos conectados no supere el valor indicado en amperios (A) sobre el dispositivo (mientras no se vaya a usar, guardarlo siempre cerrado con la tapa de sellado de goma).
  • Page 51: Funcionamiento

    • En cuanto el foco esté correctamente conectado a la red eléctrica y el interruptor de standby esté pulsado, durante el proceso de arranque se mostrarán en la pantalla sucesivamente «Welcome to Cameo», la denominación del modelo y la versión del software. Tras este procedimiento, el foco estará...
  • Page 52: Estado W-Dmx

    ESTADO DE CARGA DE LA BATERÍA EN EL MODO STANDBY Para cargar la batería interna, conecte el foco a la toma de corriente mediante el cable de alimentación suministrado. De esa forma, el estado de carga de la batería se mostrará en la pantalla mediante el símbolo de la batería. W-DMX™...
  • Page 53 MODO OPERATIVO DMX (DMX Mode) Se pueden seleccionar siete modos operativos DMX distintos: 2CH, 3CH, 4CH, 8CH 1, 8CH 2, 10CH y 15CH. Tal como se describe en el apartado CONFIGURAR EL MODO OPERATIVO anterior, seleccione el modo operativo DMX y confirme con ENTER. Ahora podrá seleccionar el modo DMX deseado mediante los botones UP y DOWN (opción marcada más abajo);...
  • Page 54 MODO ESTÁTICO (Static) De forma similar a la configuración con un equipo de control DMX el modo estático permite configurar las funciones Dimmer, Estrobo (Strobe), R, G, B, W y temperatura del color (Color Temp) directamente en el dispositivo, seleccionando valores entre 000 y 255. De esa forma, se podrá...
  • Page 55 Settings Runtime Ampliar la autonomía de la batería hasta 24 Función desactivada horas con la consiguiente reducción del brillo 4 hours - Configuración de la autonomía de la (calculado en base a Full On y batería al 24 hours batería entre 4 y 24 horas, por tramos 100 %) de 1 hora Display Reverse...
  • Page 56: Curvas De Atenuación

    Autolock Bloqueo automático de los elementos de Bloqueo automático de los elementos manejo de manejo tras aproximadamente 1 minuto sin actividad En la pantalla aparecerá después de la prueba de funcionamiento: «Locked!» Para desbloquear el dispositivo: pulsar simultáneamente UP y DOWN durante unos 5 segundos Bloqueo automático de los elementos de manejo desactivado...
  • Page 57: Mando A Distancia Por Infrarrojos

    FUNCIÓN DE BLOQUEO MANUAL Además de existir la posibilidad de proteger el foco automáticamente frente a usos accidentales y no autorizados (véase «Settings» - «Autolock»), también pueden bloquearse manualmente los elementos de manejo. Mantenga pulsados a la vez los botones UP y DOWN durante unos 5 segundos.
  • Page 58: Placas Difusoras

    PLACAS DIFUSORAS Entre los contenidos del proyector suministrados, se encuentran dos placas difusoras que presentan distintos comportamientos de dispersión (una placa de 25° para una identificación con una muesca en el borde, y otra de 40°). De esa forma, el ángulo de dispersión del proyector puede modificarse de forma individualizada para ajustarlo a 11°...
  • Page 59: Tecnología Dmx

    TECNOLOGÍA DMX DMX512 DMX (Digital Multiplex) es el nombre de un protocolo universal utilizado como medio de comunicación entre dispositivos y controladores. El controlador DMX envía datos DMX a los equipos DMX conectados. Los datos DMX se envían como datos serie que se transmiten de equipo a equipo a través de los conectores XLR «DMX IN»...
  • Page 60: Datos Técnicos

    DATOS TÉCNICOS Denominación de CLZB60BLSD CLZB60CLSD modelo: Tipo de producto: Reflector PAR LED con batería Reflector PAR LED con batería Tipo: Foco para exteriores Foco para exteriores Espectro cromático de RGBW RGBW los LED: Número de LED: Tipo de LED: CREE de 15 W CREE de 15 W Frecuencia de refresco:...
  • Page 61: Declaraciones Del Fabricante

    Temperatura ambiente (en de –15 °C a +40 °C de –15 °C a +40 °C funcionamiento): Material de la carcasa: aluminio fundido a presión aluminio fundido a presión Color de la carcasa: negro cromado Refrigeración de la convección convección carcasa: Clase de protección: IP65 IP65...
  • Page 62: Polski

    To urządzenie zostało zaprojektowane i wyprodukowane przy zastosowaniu najwyższych kryteriów jakościowych w celu zapewnienia wieloletniej bezawaryjnej eksploatacji. Proszę starannie przeczytać niniejszą instrukcję obsługi, aby móc jak najszybciej zacząć użytkować ten produkt marki Cameo Light. Więcej informacji na temat Cameo Light znajdą Państwo na naszej stronie internetowej pod adresem WWW.CAMEOLIGHT.COM.
  • Page 63 32. Instalacja urządzenia powinna odbywać się, gdy urządzenie nie jest podłączone do źródła zasilania (należy wyjąć wtyczkę z gniazda). 33. Kurz i inne osady wewnątrz urządzenia mogą je uszkodzić. W zależności od warunków otoczenia (kurz, nikotyna, opary itp.) urządzenie powinno być konserwowane lub czyszczone przez wykwalifikowanego specjalistę (usługa nieobjęta gwarancją), aby zapobiec przegrzaniu i nieprawidłowemu działaniu.
  • Page 64: Wprowadzenie

    240 V AC, pobór mocy 100 W OBSŁUGA: ZENIT B60B i B60C marki Cameo to reflektory zewnętrzne, sterowane w systemie DMX-512, z możliwością pracy w trybie standalone, master/slave oraz sterowania pilotem na podczerwień. Mogą również pracować w standardzie RDM (Remote Device Management). Jest to system zdalnego sterowania urządzeniem, który umożliwia sprawdzanie statusu i konfigurowanie urządzeń...
  • Page 65 Upewnij się, że akumulator jest dostatecznie naładowany lub prawidłowo podłącz reflektor do sieci. Teraz przełącz reflektor w tryb pracy, wciskając włącznik. Podczas uruchamiania urządzenia na wyświetlaczu pojawi się napis „Welcome to Cameo”, a następnie nazwa modelu i wersja oprogramowania. Jeśli włącznik nie jest wciśnięty, reflektor znajduje się w trybie standby. W obu trybach prawidłowe podłączenie reflektora do zasilania rozpocznie ładowanie akumulatora.
  • Page 66: Obsługa

    • Po prawidłowym podłączeniu reflektora do zasilania i wciśnięciu włącznika trybu standby, podczas uruchamiania urządzenia na wyświetlaczu pojawi się napis „Welcome to Cameo”, a następnie nazwa modelu i wersja oprogramowania. Po tej procedurze reflektor jest gotowy do pracy i przełącza się na ostatnio wybrany tryb.
  • Page 67: Status W-Dmx

    POZIOM NAŁADOWANIA AKUMULATORA W TRYBIE STANDBY Aby rozpocząć ładowanie akumulatora wewnętrznego, podłącz reflektor do sieci elektrycznej przy pomocy zawartego w zestawie kabla. O poziomie naładowania akumulatora informuje widoczny na wyświetlaczu symbol baterii. W-DMX™ Aby skojarzyć urządzenie z transmiterami obsługującymi standard W-DMX™, aktywuj tryb W-DMX™ w ustawieniach urządzenia (Settings -> Wireless Setting ->...
  • Page 68 TRYB DMX (DMX Mode) Możesz wybrać spośród siedmiu różnych trybów DMX: 2CH, 3CH, 4CH, 8CH 1, 8CH 2, 10CH i 15CH. Najpierw wybierz tryb pracy DMX i potwierdź przyciskiem ENTER, zgodnie z opisem w punkcie WYBÓR TRYBU PRACY. Teraz wybierz żądany tryb DMX przyciskami UP i DOWN (zgodnie ze strzałką), ponownie potwierdź...
  • Page 69 MAKRA KOLORÓW (Color Macro) Możesz wybrać spośród 15 predefiniowanych makr kolorów. Najpierw wybierz tryb „Color Macro” w menu i potwierdź przyciskiem ENTER, zgodnie z opisem w punkcie WYBÓR TRYBU PRACY. Przyciskami UP i DOWN wybierz żądany kolor jako preset (zgodnie ze strzałką) i potwierdź przyciskiem ENTER (Color Off = Blackout).
  • Page 70 Settings Runtime przedłużenie pracy akumulatora maks. do 24 funkcja wyłączona godzin przez redukcję jasności (obliczone dla 4 hours - ustawienie czasu pracy akumula- Full On i akumulatora naładowanego na 100%) 24 hours tora od 4 do 24 godzin w krokach 1-godzinnych Display Reverse Flip Display...
  • Page 71: Krzywe Ściemniania

    Wireless Setting ustawienia W-DMX Receive On/Off On = W-DMX włączone (Wireless-DMX) On = W-DMX wyłączone Receive Reset No = nie resetuj skojarzenia z trans- miterem Yes = resetuj skojarzenie z trans- miterem Factory Reset przywracanie ustawień fabrycznych przywracanie ustawień fabrycznych: ENTER ->...
  • Page 72: Pilot Na Podczerwień

    PILOT NA PODCZERWIEŃ Skieruj pilot na podczerwień bezpośrednio na czujnik podczerwieni wbudowany we front reflektora. Maksymalny zasięg wynosi ok. 8 metrów. W trybie pracy DMX oraz slave sterowanie pilotem jest nieaktywne. Typ baterii do pilota na podczerwień: CR2025. BLAC K SOUN D AU TO Przycisk Blackout służy do wyłączenia wszystkich diod...
  • Page 73: Dyfuzory

    DYFUZORY W zestawie reflektora znajdują się dwa dyfuzory o różnym kącie rozwarcia wiązki świetlnej (1x 25° oznaczony wyżłobieniem na krawędzi, 1x 40°). A zatem kąt rozwarcia wiązki świetlnej reflektora może wynosić 11° (bez dyfuzora), 25° lub 40°. Umieść wybrany dyfuzor w gumowej oprawce (szorstką...
  • Page 74: Technika Dmx

    TECHNIKA DMX DMX-512 DMX (Digital Multiplex) to nazwa uniwersalnego protokołu transmisji do komunikacji między odpowiednimi urządzeniami a kontrolerami. Kontroler DMX wysyła dane DMX do podłączonych urządzeń DMX. Transmisja danych DMX następuje zawsze w formie szeregowego strumienia danych, który jest przekazywany z jednego urządzenia do następnego przez znajdujące się...
  • Page 75: Dane Techniczne

    DANE TECHNICZNE Nazwa modelu CLZB60BLSD CLZB60CLSD Rodzaj produktu: Reflektor LED PAR z zasilaniem akumulatorowym Reflektor LED PAR z zasilaniem akumulatorowym Typ: Reflektor zewnętrzny Reflektor zewnętrzny Widmo kolorów LED: RGBW RGBW Liczba diod LED: Typ diod LED: 15W CREE 15W CREE Częstotliwość...
  • Page 76: Deklaracje Producenta

    Pozostałe cechy: W komplecie kabel sieciowy 1 m ze specjalną wty- W komplecie kabel sieciowy 1 m ze specjalną wty- czką IP65, pałąk do ustawiania/montażu, dyfuzory czką IP65, pałąk do ustawiania/montażu, dyfuzory 25° i 40°, pilot na podczerwień 25° i 40°, pilot na podczerwień DEKLARACJE PRODUCENTA GWARANCJA PRODUCENTA I OGRANICZENIE ODPOWIEDZIALNOŚCI Nasze aktualne warunki gwarancji i informacje dotyczące ograniczenia odpowiedzialności znajdą...
  • Page 77: Italiano

    Questo dispositivo è stato sviluppato e prodotto in conformità con elevati standard qualitativi che ne garantiscono il regolare funzionamento per molti anni. Leggete attentamente questo manuale d‘uso per utilizzare al meglio il vostro nuovo prodotto Cameo Light. Per maggiori informazioni su Cameo Light consultare la nostra pagina Web WWW.CAMEOLIGHT.COM.
  • Page 78: Sicurezza Della Batteria

    (senza garanzia, interventi a carico del proprietario) per evitare surriscaldamento e malfunzionamenti. 34. La distanza dai materiali infiammabili deve essere di almeno 0,5 m 35. I cavi di rete utilizzati per l’alimentazione elettrica di più dispositivi devono avere una sezione di almeno 1,5 mm². I cavi impiegati nell’Unione Europea devono essere di tipo H05VV-F o simile.
  • Page 79: Introduzione

    COMANDO: I Cameo ZENIT B60B e B60C sono proiettori da esterni controllati da DMX-512, che possono essere utilizzati anche come dispositivi stand-alone in modalità master/slave e con telecomando a infrarossi. Inoltre, i proiettori dispongono dello standard RDM (Remote Device Management).
  • Page 80: Interruttore Standby

    POWER OUT Presa di uscita IP65 con tappo ermetico in gomma. Serve per l’alimentazione di altri proiettori Cameo. Tenere presente che la corrente assorbita complessiva di tutti i dispositivi collegati non deve superare il valore riportato in ampere (A) sul dispositivo (in caso di mancato utilizzato, chiudere sempre con tappo ermetico in gomma).
  • Page 81: Comando

    • Non appena il proiettore viene correttamente collegato alla rete elettrica e l'interruttore di standby viene abbassato, durante il processo di avvio, in seguito alla scritta "Welcome to Cameo", verranno visualizzate sul display la denominazione del modello e la versione del software.
  • Page 82 LIVELLO DI CARICA DELLA BATTERIA IN MODALITÀ STANDBY Per ricaricare la batteria interna, collegare il proiettore alla rete elettrica utilizzando il cavo di alimentazione in dotazione. Verrà quindi visualizza- to sul display il livello di carica della batteria tramite l'apposito simbolo. W-DMX™...
  • Page 83 MODALITÀ DI FUNZIONAMENTO DMX (DMX Mode). È possibile scegliere una delle sette modalità di funzionamento DMX: 2CH, 3CH, 4CH, 8CH 1, 8CH 2, 10CH e 15CH. Selezionare la modalità di funzionamento DMX seguendo la procedura descritta prima al punto IMPOSTAZIONE DELLA MODALITÀ DI FUNZIONAMENTO, quindi confermare con ENTER.
  • Page 84 ---------------- Mode ---------------- ---------------- Static ---------------- Slave Dimmer <255> Mode Auto Strobe <255> Static Static <255> Green <255> Blue <255> White <255> Color Temp <255> MACRO COLORI (Color Macro) Per impostazione predefinita sono disponibili 15 macro colori diverse. Selezionare la voce di menu “Color Macro” seguendo la procedura descritta prima al punto IMPOSTAZIONE DELLA MODALITÀ...
  • Page 85 Curva dimmer curva del dimmer Linear L'intensità della luce cresce in maniera lineare con il valore DMX Exponential L'intensità della luce può essere im- postata grossolanamente nell'intervallo di valori DMX più basso e in quello superiore Logarithmic L'intensità della luce può essere im- postata grossolanamente nell'intervallo di valori DMX più...
  • Page 86: Telecomando A Infrarossi

    INFORMAZIONI DI SISTEMA (System Info) Premendo MODE, si accede al menu di selezione delle impostazioni del dispositivo (--- Menu ---). Con i tasti freccia, selezionare la voce di menu "System Info" (prestare attenzione alla freccia) e confermare con ENTER. ---------------- Menu ---------------- Mode Settings System Info...
  • Page 87: Cristalli

    Mix cromatico manuale premendo Mix cromatico manuale . Impostazione dell'intensità con Programmi di dissolvenza Auto 1 - Auto 5 Selezione dei programmi con . Programma velocità di Programmi di dissol- venza esecuzione con . Impostazione della luminosità con Selezione diretta dei preset colori da 0 a 9. Preset colori CRISTALLI In dotazione con il proiettore vengono forniti due cristalli con diversi comportamenti di emissione luminosa (1 da 25°, che può...
  • Page 88: Tecnologia Dmx

    TECNOLOGIA DMX DMX512 DMX (Digital Multiplex) è la sigla di un protocollo di trasmissione universale per la comunicazione tra dispositivi e controller. Un controller DMX invia dati DMX ai dispositivi DMX collegati. I dati DMX vengono sempre trasmessi come flusso di dati seriale, che viene inoltrato da un dispositivo collegato al successivo attraverso le connessioni (connettori XLR) DMX IN e DMX OUT presenti per ogni dispositivo DMX compatibile, per un massimo di 32 dispositivi.
  • Page 89: Dati Tecnici

    DATI TECNICI Denominazione modello: CLZB60BLSD CLZB60CLSD Tipologia di prodotto: PAR LED a batteria PAR LED a batteria Tipo: proiettore da esterni proiettore da esterni Spettro cromatico LED: RGBW RGBW Numero di LED: Tipo di LED: 15W CREE 15W CREE Frequenza di aggiorna- 3600 Hz 3600 Hz mento:...
  • Page 90: Dichiarazioni Del Produttore

    Colore cassa: nero cromato Raffreddamento della convezione convezione cassa: Classe di protezione: IP65 IP65 Ingombro (L x H x P, senza 187 x 187 x 164mm 187 x 187 x 164mm staffe di montaggio): Peso: 5,4kg 5,4kg Altre caratteristiche: cavo di alimentazione da 1 m con spina speciale cavo di alimentazione da 1 m con spina speciale IP65, staffe di montaggio/sostegno, cristalli da 25°...
  • Page 91: Controllo Dmx

    DMX CONTROL / DMX STEUERUNG / PILOTAGE DMX / CONTROL DMX / STEROWANIE DMX / CONTROLLO DMX 2 CH Mode Function Values Sub-Group Dimmer 0% to 100% Dimmer Full White RGBW 7200K - 3200K @ Full on 3 CH Mode Function Values Sub-Group...
  • Page 92 8 CH Mode 1 Function Values Sub-Group 0% to 100% Red fine 0% to 100% Green 0% to 100% Green Green fine 0% to 100% Blue 0% to 100% Blue Blue fine 0% to 100% White 0% to 100% White White fine 0% to 100% 8 CH Mode 2...
  • Page 93 no function Dimmer Response LED (hold 5s) Dimmer Response Halogen (hold 5s) no Runtime / Full LED Power (hold 5s) Device Settings Control Set Runtime 8h (hold 5s) Set Runtime 12h (hold 5s) Set Runtime 16h (hold 5s) Set Runtime 20h (hold 5s) 10 CH Mode Function Values...
  • Page 94 no function Linear Dimmer Curve Set dimmer curve Exponential Dimmer Curve Set dimmer curve Logarithmic Dimmer Curve S-Curve Dimmer Curve no function Dimmer Response LED (hold 5s) Dimmer Response Halogen (hold 5s) no Runtime / Full LED Power (hold 5s) Device Settings Control Set Runtime 8h (hold 5s)
  • Page 95 15 CH Mode Function Values Sub-Group Dimmer 0% to 100% Dimmer Dimmer fine 0% to 100% Strobe open Strobe closed Puls Random, slow -> fast Ramp up Random, slow -> fast Ramp down Random, slow -> fast Strobe functions multifunctional-strobe Random Strobe Effect, slow ->...
  • Page 96 Colour Tempera- ture Colour Temperature 7200K - 3200K @ Full on (affects RGBW and Correction affects colours too Colour Macros) no function Linear Dimmer Curve Set dimmer curve Exponential Dimmer Curve Set dimmer curve Logarithmic Dimmer Curve S-Curve Dimmer Curve no function Dimmer Response LED (hold 5s) Dimmer Response Halogen (hold 5s)
  • Page 100 WWW.CAMEOLIGHT.COM Adam Hall GmbH | Daimlerstrasse 9 | 61267 Neu-Anspach | Germany Tel. +49(0)6081/9419-0 | Fax +49(0)6081/9419-1000 web : www.adamhall.com | e-mail : mail@adamhall.com REV: 02...

Ce manuel est également adapté pour:

Clzb60blsdClzb60clsd

Table des Matières