Table des Matières

Publicité

Les langues disponibles

Les langues disponibles

Liens rapides

WTF 728
Bedienungsanleitung
Mode d'emploi
Istruzioni per l'uso
Operating Instructions

Publicité

Table des Matières
loading

Sommaire des Matières pour switel WTF 728

  • Page 1 WTF 728 Bedienungsanleitung Mode d’emploi Istruzioni per l’uso Operating Instructions...
  • Page 2 Bedienungsanleitung ... Mode d’emploi ....Istruzioni per l’uso ... . Operating Instructions .
  • Page 3: Table Des Matières

    Inhaltsverzeichnis Sicherheitshinweise ... Funkgeräte in Betrieb nehmen ..Bedienelemente ....Menüstruktur ....Wie bediene ich meine Funkgeräte? Wie bediene ich mein FM Radio? Falls es Probleme gibt...
  • Page 4: Sicherheitshinweise

    Sicherheitshinweise 1 Sicherheitshinweise Lesen Sie diese Bedienungsanleitung sorgfältig durch. Bestimmungsgemäße Verwendung Diese Funkgeräte sind geeignet für die Kommunikation mit ande- ren Funkgeräten gleichen Standards. Jede andere Verwendung gilt als nicht bestimmungsgemäß. Eigenmächtige Veränderungen oder Umbauten sind nicht zulässig. Öffnen Sie die Geräte in kei- nem Fall selbst und führen Sie keine eigenen Reparaturversuche durch.
  • Page 5: Entsorgung

    Sicherheitshinweise Medizinische Geräte Achtung: Benutzen Sie die Funkgeräte nicht in der Nähe von medizinischen Geräten. Eine Beeinflussung kann nicht völlig ausgeschlossen werden. Funkgeräte können in Hörgeräten einen unangenehmen Brumm- ton verursachen. Entsorgung Wollen Sie Ihr Gerät entsorgen, bringen Sie es zur Sammelstelle Ihres kommunalen Entsorgungsträgers (z.
  • Page 6: Funkgeräte In Betrieb Nehmen

    Funkgeräte in Betrieb nehmen 2 Funkgeräte in Betrieb nehmen Sicherheitshinweise Achtung: Lesen Sie vor der Inbetriebnahme unbe- dingt die Sicherheitshinweise in Kapitel 1. Verpackungsinhalt prüfen Zum Lieferumfang gehören: − zwei Funkgeräte − zwei Headsets − ein Netzteil − zwei Gürtelclips −...
  • Page 7 Funkgeräte in Betrieb nehmen Netzsteckdose Hinweis: Nur dieses Netzteil verwenden KG3B−065−0150D+065−0150D Laden Sie die Funkgeräte nicht mit fremden Auflade− geräten. Für eine optimale Lebensdauer des Akku- packs beenden Sie den Ladevorgang, wenn Ihr Funk- gerät vollständig geladen ist. Der aktuelle Akkuladezustand wird im Display angezeigt: voll halb schwach...
  • Page 8: Bedienelemente

    Bedienelemente 3 Bedienelemente Die Merkmale und Funktionen Ihres Funkgeräts sind in den un- tenstehenden Abbildungen dargestellt. Mobilteil Antenne LED Betriebsanzeige Display Headset−/Ladebuchse Tastensperre / Menü / FM Radio Lautstärke − / Einstellung abwärts Rufton senden / FM Sender wechseln Lautsprecher Mikrofon 10 Kanalsuche / Monitor 11 Lautstärke + /...
  • Page 9 Bedienelemente Display FM Radio−Modus Kanal−Modus / FM Radiosender−Modus CTCSS−Modus Bestätigungston aktiviert Antenne und Empfangssignal Indikator 12 11 Gruppensuche aktiviert iVOX−Mode / VOX−Mode Kanalsuche CTCSS−Code oder FM Frequenz 10 Tastensperre aktiviert 11 Tastenton aktiviert 12 Monitor aktiviert 13 Akkukapazität 14 Kanal oder FM Frequenz...
  • Page 10: Menüstruktur

    Menüstruktur 4 Menüstruktur Menü In den Einstellungsmodus gelangen Sie, wenn Sie die Taste M drücken. Danach wählen Sie mit den Tasten X/Y, einen Eintrag aus und bestätigen Ihre Auswahl mit der Taste 1 x M Kanal einstellen 2 x M CTCSS −Code einstellen 3 x M VOX / iVOX−Empfind-...
  • Page 11: Wie Bediene Ich Meine Funkgeräte

    Wie bediene ich meine Funkgeräte? 5 Wie bediene ich meine Funkgeräte? Darstellungsweise in der Bedienungsanleitung Abgebildete Taste drücken Abgebildete Taste lange drücken Abgebildete Taste loslassen [ y ] Displayanzeige ð In das Mikrofon sprechen Funkgeräte ein− / ausschalten Funkgerät einschalten Im Display werden alle zur Verfügung stehenden Dis- playsymbole kurz angezeigt.
  • Page 12 Wie bediene ich meine Funkgeräte? Sie können keine Funksignale empfangen, wenn Sie die Taste P gedrückt halten. Kanalwahl PMR446 (Private Mobil Radio) Funkgeräte können überall in Europa anmelde− und gebührenfrei benutzt werden. Es sind 8 Funkkanäle im Frequenzbereich von 446.000 MHz bis 446.100 MHz freigegeben.
  • Page 13 Wie bediene ich meine Funkgeräte? Eine Ausnahme ist die Rufcodierung 0 (Null). Bei dieser Einstellung können alle Gespräche auf dem ein- gestellten Kanal gehört werden. Um am Funkverkehr teilnehmen zu können, müssen Sie dann die entspre- chende Rufcodierung einstellen. Kanalsuche In einer Endlosschleife wird auf den acht Kanälen nach Signalen gesucht.
  • Page 14 Wie bediene ich meine Funkgeräte? Kanal der Kanalgruppe hinzufügen / ausschließen 8 x M X/Y, P Ausgangskanal der Kanalgruppe durch ON / OFF hinzufügen oder ausschließen und bestätigen Kanalsuche starten / beenden Die Menüposition steht nur zur Verfügung, wenn Gezielte Kanalsuche: ON" ausgewählt ist. .
  • Page 15 Wie bediene ich meine Funkgeräte? 8 x M Einstellungsmodus aktivieren oder 9 x M Einstellungsmodus aktivieren X oder Y, P Rufton auswählen und bestätigen Monitor Die Monitor−Funktion ermöglicht es Ihnen, auf dem aktuell einge- stellten Kanal nach schwachen Signalen zu suchen. Wenn Sie ein fremdes Signal empfangen, wechseln Sie auf einen freien Kanal.
  • Page 16: Displaybeleuchtung

    Wie bediene ich meine Funkgeräte? Bestätigungston ein−/ausschalten 5 x M X/Y, P ON / OFF auswählen und bestätigen Bei eingeschaltetem Bestätigungston wird das Symbol Display angezeigt. Displaybeleuchtung Aktivieren Beleuchtung aktivieren Die Beleuchtung leuchtet für ca. 10 Sekunden. Deaktivieren Beleuchtung deaktivieren Headset Benutzen Sie das in der Verpackung enthaltene Headset.
  • Page 17 Wie bediene ich meine Funkgeräte? VOX−Modus aktivieren Beim Freisprechen im VOX−Modus wird über ein Headset ge− sprochen. Benutzen Sie ein handelsübliches Headset ohne PTT−Taste mit einem 3−poligen 2,5 mm Stereoklinkenste− cker. Steckerbelegung: 1 = Lautsprecher, 2 = Mikrofon, 3 = Masse Schalten Sie das Funkgerät aus, bevor Sie ein Headset anschließen.
  • Page 18 Wie bediene ich meine Funkgeräte? VOX / iVOX−Empfindlichkeit wählen Für den Betrieb im VOX / iVOX−Modus können 3 Empfindlich- keitsstufen entsprechend der Umgebungsgeräusche gewählt werden. laute Umgebungs- normale Umgebungs- leise Umgebungs- geräusche geräusche geräusche 3 x M X oder Y, P Empfindlichkeit auswählen und bestätigen iVOX−Modus deaktivieren...
  • Page 19: Wie Bediene Ich Mein Fm Radio

    Wie bediene ich mein FM Radio? 6 Wie bediene ich mein FM Radio? FM Radio ein− / ausschalten 3 Sek. a M FM Radio einschalten 3 Sek. a M FM Radio ausschalten Sender auswählen X/Y, Sender auswählen oder 3 Sek. a X/Y, Sendersuchlauf starten (0,1 MHz) Sendersuchlauf stoppen Sender programmieren...
  • Page 20 Wie bediene ich mein FM Radio? FM Unterbrechungsmodus aktivieren / deaktivieren Der FM Unterbrechungsmodus ermöglicht die automatische Un- terbrechung des Radioempfangs bei Funkbetrieb. br wird im Display angezeigt Mehrfach M X/Y, P ON / OFF auswählen und bestätigen Der FM Unterbrechungsmodus muss aktiviert sein (ON), um manuell zwischen Radio−...
  • Page 21: Falls Es Probleme Gibt

    Falls es Probleme gibt 7 Falls es Probleme gibt Haben Sie Probleme mit Ihrem Funkgerät, kontrollieren Sie zu- erst die folgenden Hinweise. Bei technischen Problemen können Sie sich an unsere Service−Hotline unter Tel. 0900 00 1675 in- nerhalb der Schweiz (Kosten Swisscom bei Drucklegung: CHF 2.00/min) wenden.
  • Page 22: Technische Eigenschaften

    Technische Eigenschaften 8 Technische Eigenschaften Technische Daten Merkmal Wert Ausgangsleistung 0.5 W Reichweite ca. 8 km − bei freier Sichtlinie Stand−by−Zeit Bis zu 20 Std. Max. Gesprächs- Bis zu 16 Std. (Ni−MH) dauer Bis zu 30 Std. (Alkaline) Ladezeit bei Min.
  • Page 23: Pflegehinweise / Garantie

    Sollte Ihr Gerät dennoch einen Defekt innerhalb der Garantiezeit aufweisen, wenden Sie sich bitte unter Vorlage Ihrer Kaufquit- tung ausschließlich an das Geschäft, in dem Sie Ihr SWITEL − Gerät gekauft haben. Alle Gewährleistungsansprüche nach die- sen Bestimmungen sind ausschließlich gegenüber Ihrem Fach- händler geltend zu machen.
  • Page 24: Stichwortverzeichnis

    Stichwortverzeichnis 10 Stichwortverzeichnis Akkupack einlegen, 6 Kanal ausschließen, 14 Aufladen, 6 Kanal hinzufügen / ausschließen, 14 Ausschalten, 11, 19 Kanalsuche, 13 Kanalwahl, 12 Konformitätserklärung, 22 Bedienelemente, 8 Bedienung, 11, 19 Bestätigungston, 15 Laden, 6 Lautstärkeregelung, 11, 19 CTCSS−Code, 12 Menüstruktur, 10 Monitor, 15 Display, 9 Displaybeleuchtung, 16...
  • Page 25 Table des matières Consignes de sécurité ..Mettre les émetteurs−récepteurs en service ....Éléments de manipulation .
  • Page 26: Consignes De Sécurité

    Consignes de sécurité 1 Consignes de sécurité Lisez très attentivement ce mode d’emploi. Utilisation conforme aux prescriptions Ces émetteurs−récepteurs conviennent pour la communication avec d’autres émetteurs−récepteurs de même standard. Toute autre utilisation est considérée comme non conforme à l’usage. Des modifications ou changements effectués d’un propre gré ne sont pas autorisés.
  • Page 27: Appareils Médicaux

    Consignes de sécurité Appareils médicaux Attention : N’utilisez pas ces émetteurs−récepteurs à proximité d’appareils médicaux. Une influence ne peut être totalement exclue. Les émetteurs−récepteurs peu- vent causer un bourdonnement désagréable dans les prothèses auditives. Élimination Si vous ne voulez plus vous servir de votre appareil, veuillez l’apporter au centre de collecte de l’organisme d’élimination des déchets de votre commune (par ex.
  • Page 28: Mettre Les Émetteurs−Récepteurs En Service

    Mettre les émetteurs−récepteurs en service 2 Mettre les émetteurs−récepteurs en service Remarques concernant la sécurité Attention : Avant de mettre votre appareil en service, lisez impérativement les consignes de sécurité men- tionnées au chapitre 1. Contrôler le contenu de l’emballage Les éléments suivants font partie de la livraison : −...
  • Page 29 Mettre les émetteurs−récepteurs en service Avant la première mise en service, chargez les émet- teurs−récepteurs pendant un minimum de 14 heures. Votre émetteur−récepteur ne peut ni émettre ni recevoir pendant le chargement. Prise réseau Remarque : N’utiliser que ce bloc secteur KG3B−065−0150D+065−0150D Ne chargez pas les émetteurs−récepteurs avec des chargeurs d’un autre fabricant.
  • Page 30 Mettre les émetteurs−récepteurs en service Fixer / enlever le clip de ceinture Introduisez le clip de ceinture dans l’ouverture prévue à cet effet jusqu’à ce que vous ent- endiez son enclenchement. Pour le retirer, appuyez sur le clip de ceinture et retirez−le de l’ouverture.
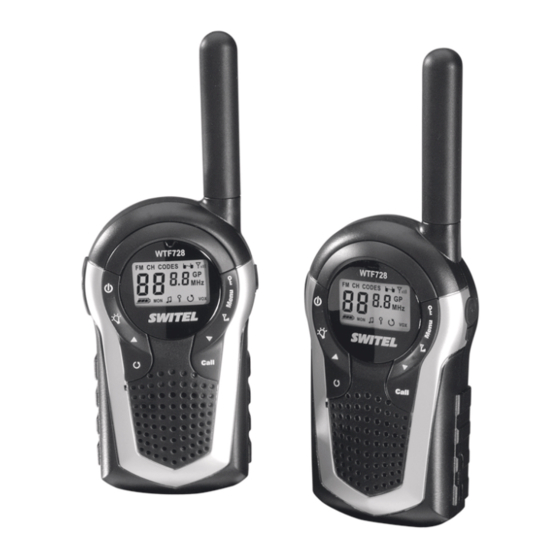
  • Page 31: Éléments De Manipulation

    Éléments de manipulation 3 Éléments de manipulation Les caractéristiques et les fonctions de votre émetteur−récepteur sont représentées par les illustrations ci−dessous. Combiné Antenne DEL Affichage de fonctionnement Écran Prise de kit d’oreilles /de chargement Verrouillage du clavier / Menu / Radio MF Réglage du volume sonore −...
  • Page 32 Éléments de manipulation Écran Mode radio MF Mode canal / Mode émetteur radio MF Mode CTCSS Signal de confirmation activé Antenne et indicateur de signal de réception 12 11 Recherche de groupe activée Mode iVOX / Mode VOX Recherche du canal Code CTCSS ou fréquence MF 10 Verrouillage du clavier activé...
  • Page 33: Structure De Menu

    Structure de menu 4 Structure de menu Menu Vous parvenez au mode de réglage en appuyant sur la touche M. Ensuite, sélectionnez un enregistrement avec les touches X/Y, et confirmez votre sélection avec la touche P. 1 x M Régler le canal 2 x M Régler le code CTCSS 3 x M Régler la sensibilité...
  • Page 34: Comment Utiliser L'émetteur−Récepteur

    Comment utiliser l’émetteur−récepteur ? 5 Comment utiliser l’émetteur−récepteur ? Mode de représentation dans le mode d’emploi Appuyer sur la touche représentée Appuyer longtemps sur la touche représentée Relâcher la touche représentée [ y ] Affichage ð Parler dans le microphone Allumer / éteindre les émetteurs−récepteurs Allumer l’émetteur−récepteur Toutes les icônes d’écran disponibles sont rapidement...
  • Page 35 Comment utiliser l’émetteur−récepteur ? Tenez l’émetteur−récepteur à environ 5 à 7 cm de votre bouche et parlez avec un volume sonore normal. Pour parler avec d’autres correspondants, il faut que tous les appareils soient réglés sur le même canal et sur le même code d’appel.
  • Page 36 Comment utiliser l’émetteur−récepteur ? Le canal et le code d’appel sont émis avec le message vocal normal sous la forme d’un signal non audible. Chez le récepteur, la langue n’est transmise au haut− parleur que si le canal paramétré et le code d’appel sont identiques à...
  • Page 37 Comment utiliser l’émetteur−récepteur ? Recherche ciblée de canal (groupe de canaux) La recherche de canal s’arrête seulement quand un signal est reçu sur un canal dans le groupe de canaux que vous avez déterminé auparavant. Si aucun canal n’a été attribué au groupe de canaux ou si le seul canal déterminé...
  • Page 38 Comment utiliser l’émetteur−récepteur ? Émettre un signal d’appel Le signal d’appel fait remarquer à d’autres correspondants que vous désirez entamer une conversation. À condition que les au- tres correspondants utilisent le même canal et le même code d’appel. Émettre un signal d’appel Le signal d’appel est émis 10 x max.
  • Page 39: Verrouillage Du Clavier

    Comment utiliser l’émetteur−récepteur ? Verrouillage du clavier Le verrouillage du clavier empêche la modification involontaire de paramétrages. Si le verrouillage du clavier est activé, le sym- bole apparaît à l’écran. Activer 6 x M X/Y, P Sélectionner ON et confirmer Désactiver a 3 sec.
  • Page 40 Comment utiliser l’émetteur−récepteur ? supplémentaire, vous pouvez émettre via celle−ci au niveau du kit d’oreilles. Débranchez l’émetteur−récepteur avant de raccorder votre kit d’oreilles. 1. Débranchez l’émetteur−récepteur. 2. Introduisez la fiche du kit d’oreilles dans la prise de raccordement. 3. Branchez l’émetteur−récepteur. / iVOX (mode mains−libres) Avec ces fonctions, l’émetteur−récepteur commence automati-...
  • Page 41 Comment utiliser l’émetteur−récepteur ? VOX" s’affiche à l’écran. Désactiver le mode VOX Pour désactiver le mode VOX, tirez la fiche du kit d’oreilles hors de la prise de raccordement ou appuyez sur la touche P. Activer le mode iVOX En parlant mains−libres en mode iVOX, vous parlez via l’émet- teur−récepteur.
  • Page 42: Comment Utiliser La Radio Mf

    Comment utiliser la radio MF ? 6 Comment utiliser la radio MF ? Allumer/éteindre la radio MF 3 sec. a M Allumer la radio MF 3 sec. a M Éteindre la radio MF Sélectionner l’émetteur X/Y, Sélectionner l’émetteur ou 3 sec. a X/Y, Démarrer la recherche automatique de fréquence (0,1 MHz)
  • Page 43: Plusieurs Fois M

    Comment utiliser la radio MF ? Activer / désactiver le mode d’interruption MF Le mode d’interruption MF permet d’interrompre automatique- ment la radio en cas d’émission−réception. br s’affiche à l’écran Plusieurs fois M X/Y, P Sélectionner ON/OFF et confirmer Le mode d’interruption MF doit être activé (ON) pour pouvoir passer de la radio à...
  • Page 44: En Cas De Problèmes

    En cas de problèmes 7 En cas de problèmes Si vous avez des problèmes avec votre émetteur−récepteur, contrôlez d’abord les points suivants. S’il s’agit de problèmes techniques, vous pouvez vous adresser à notre hotline de ser- vice en Suisse en appelant le numéro 0900 00 1675 (frais Swis- scom à...
  • Page 45: Caractéristiques Techniques

    Caractéristiques techniques 8 Caractéristiques techniques Caractéristiques techniques Caractéristique Valeur Puissance de 0.5 W sortie Portée Env. 8 km − si ligne visuelle libre Autonomie en Jusqu’à 20 h veille Durée max. de Jusqu’à 16 h (Ni−MH) communication Jusqu’à 30 h (alcaline) Temps de charge- Min.
  • Page 46: Remarques D'entretien / Garantie

    SWITEL. Tous les droits de garantie basés sur ces dispositions ne peuvent être revendiqués qu’auprès de votre revendeur. Deux ans après l’achat et la remise de nos pro-...
  • Page 47: Index

    Index 10 Index Affectation des plots de Manipulation, 34, 42 connexion, 40 Mettre en place le pack de piles Ajouter / exclure un canal, 37 rechargeables, 28 Allumer, 34, 42 Mise en service, 28 Mode d’interruption MF, 43 Moniteur, 38 Bruits ambiants, 41 Programmer l’émetteur, 42 Caractéristiques techniques, 45...
  • Page 48 Contenuto Indicazioni di sicurezza ..Mettere in funzione i radiotrasmettitori ... . Elementi di comando ... Struttura dei menu .
  • Page 49: Indicazioni Di Sicurezza

    Indicazioni di sicurezza 1 Indicazioni di sicurezza Leggere attentamente le presenti istruzioni per l’uso. Impiego conforme agli usi previsti Questi radiotrasmettitori si prestano alla comunicazione con altri apparecchi radiotrasmettitori aventi lo stesso standard. Qualsiasi altro impiego è considerato come non conforme agli usi previsti. Non sono consentite modifiche o trasformazioni non autorizzate.
  • Page 50: Smaltimento

    Indicazioni di sicurezza Apparecchiature mediche Attenzione: Evitare di utilizzare i radiotrasmettitori in vicinanza di apparecchiature mediche. Non è infatti possibile escludere il rischio di possibili interferenze. Radiotrasmettitori possono causare un fastidioso ron- zio in apparecchi acustici. Smaltimento Procedere allo smaltimento dell’apparecchio esaurito consegnandolo presso uno dei punti di raccolta istituiti dalla propria società...
  • Page 51: Mettere In Funzione I Radiotrasmettitori

    Mettere in funzione i radiotrasmettitori 2 Mettere in funzione i radiotrasmettitori Indicazioni di sicurezza Attenzione: Prima della messa in funzione, leggere at- tentamente le indicazioni di sicurezza riportate al capi- tolo 1. Verificare il contenuto della confezione La confezione contiene: −...
  • Page 52 Mettere in funzione i radiotrasmettitori Presa elettrica Nota: Utilizzare soltanto l’alimentatore di rete KG3B−065−0150D+065−0150D Evitare di caricare i radiotrasmettitori con dispositivi di carica differenti o estranei. Per una migliore durata utile dell’accumulatore ricaricabile, interrompere la proce- dura di carica non appena il radiotrasmettitore risulta completamente caricato.
  • Page 53: Elementi Di Comando

    Elementi di comando 3 Elementi di comando Le caratteristiche e funzioni del radiotrasmettitore sono raffigu- rate qui di seguito. Unità portatile Antenna LED indicazione di stato Display Presa per auricolare/di carica Blocco tastiera / Menu / Radio FM Volume − / Navigare verso sotto Invio segnale di chiamata /...
  • Page 54 Elementi di comando Display Modalità radio FM Modalità canale / Modalità stazione radio FM Modalità CTCSS Segnale acustico di conferma attivato Antenna e indicatore del segnale di ricezione 12 11 Ricerca gruppo di canali attivata Modo iVOX/Modo VOX Funzione ricerca di canale Codice CTCSS o frequenza FM 10 Blocco tastiera attivato...
  • Page 55: Struttura Dei Menu

    Struttura dei menu 4 Struttura dei menu Menu Per passare alla modalità di impostazione, premere il tasto M. Selezionare quindi una voce con i tasti X/Y, e confermare la scelta con il tasto P. 1 x M Impostare il canale 2 x M Impostare il codice CTCSS 3 x M Impostare la sensibilità...
  • Page 56: Come Funzionano I Miei Radiotrasmettitori

    Come funzionano i miei radiotrasmettitori? 5 Come funzionano i miei radiotrasmettitori? Modi di rappresentazione nelle istruzioni per l’uso Premere il tasto raffigurato Premere il tasto raffigurato a lungo Rilasciare il tasto raffigurato [ y ] Visualizzazione di display ð Parlare rivolti verso il microfono Attivare / Disattivare i radiotrasmettitori Inserire il radiotrasmettitore Sul display sono brevemente visualizzati tutti i simboli...
  • Page 57 Come funzionano i miei radiotrasmettitori? Ricevere Ricevere Non è possibile ricevere alcun segnale radio se si tiene premuto il tasto P. Selezione del canale Radiotrasmettitori PMR446 (Private Mobil Radio) possono es- sere utilizzati ovunque in Europa gratuitamente e senza bisogno di precedente registrazione.
  • Page 58 Come funzionano i miei radiotrasmettitori? Il canale e la codifica di chiamata sono trasmessi as- sieme al normale messaggio vocale sotto forma di segnale non udibile. Il parlato è trasferito sull’altopar- lante del ricevitore solo se codifica di chiamata e canale ricevuti e trasmessi risultano identici.
  • Page 59 Come funzionano i miei radiotrasmettitori? Il canale di uscita indica il canale selezionato al mo- mento dell’attivazione della ricerca di canale. Ricerca di canale mirata (gruppo di canali) La ricerca di canale si ferma nel momento in cui si riceve un se- gnale su un canale parte del gruppo di canali precedentemente definito.
  • Page 60 Come funzionano i miei radiotrasmettitori? a 3 sec. Il canale è escluso e la X oppure Y ricerca di canale prosegue automaticamente Trasmettere il segnale di chiamata Il segnale di chiamata richiama l’attenzione degli altri interlocutori indicando che il chiamante desidera avviare una conversazione. A tal fine è...
  • Page 61 Come funzionano i miei radiotrasmettitori? Suono tasti 4 x M X/Y, P Selezionare ON / OFF e confermare Blocco tastiera Il blocco tastiera impedisce di compiere modifiche non intenzio- nali alle impostazioni. Con blocco tastiera inserito il simbolo appare sul display. Attivare 6 x M X/Y, P...
  • Page 62 Come funzionano i miei radiotrasmettitori? Auricolare Si prega di utilizzare la cuffia auricolare fornita in dotazione all’in- terno della confezione. Infilare per esempio il radiotrasmettitore nel taschino in modo da avere libere entrambe le mani. La cuffia auricolare fornita è do- tata di tasto PTT supplementare che consente appunto la tra- smissione all’auricolare.
  • Page 63 Come funzionano i miei radiotrasmettitori? 1. Disattivare il radiotrasmettitore. 2. Inserire il connettore di un auricolare nell’adattatore di connessione. 3. Attivare il radiotrasmettitore. 4. Sul display è visualizzato VOX". Disattivare la modalità VOX Per disattivare la modalità VOX, tirare il connettore della cuffia auricolare dalla presa di connessione o premere il tasto P.
  • Page 64: Come Funziona La Mia Radio Fm

    Come funziona la mia radio FM? 6 Come funziona la mia radio FM? Inserimento / Disinserimento della radio FM 3 sec. a M Inserire la radio FM 3 sec. a M Disinserire la radio FM Selezionare le stazioni X/Y, Selezionare la stazione oppure 3 sec.
  • Page 65 Come funziona la mia radio FM? Attivare / Disattivare la modalità di interruzione FM La modalità di interruzione FM consente l’interruzione automa- tica della ricezione radio in caso di radiotrasmissione. br è visualizzato sul display più volte M X/Y, P Selezionare ON / OFF e confermare La modalità...
  • Page 66: In Presenza Di Problemi

    In presenza di problemi 7 In presenza di problemi In presenza di problemi con il radiotrasmettitore, seguire le indicazioni riportate qui di seguito. In caso di problemi tecnici è possibile rivolgersi alla nostra hotline di assistenza tecnica chia- mando al numero 0900 00 1675 valido per la Svizzera (spese da rete Swisscom alla data di stampa: CHF 2.00 / min).
  • Page 67: Specifiche Tecniche

    Specifiche tecniche 8 Specifiche tecniche Specifiche tecniche Caratteristica Valore Potenza di uscita 0.5 W Portata ca. 8 km − con linea di mira libera Durata di stand−by Fino a 20 ore Max. durata di con- Fino a 16 ore (Ni−MH) versazione Fino a 30 ore (alcaline) Durata di carica...
  • Page 68: Consigli Per La Cura / Garanzia

    SWITEL assieme al relativo scontrino di acquisto. In base alle presenti disposizioni, tutti i diritti di garanzia dovranno essere fatti valere esclusivamente nei confronti del rivenditore autorizzato.
  • Page 69: Indice Alfabetico

    Indice alfabetico 10 Indice alfabetico Aggiungere / Escludere un Illuminazione di display, 61 canale, 59 Indicazioni di sicurezza, 49 Attivare, 56 Inserire, 64 Auricolare, 62 Inserire l’accumulatore ricaricabile, 51 iVOX (funzione vivavoce), 62 Blocco tastiera, 61 Messa in funzione, 51 Cambiare le stazioni Modalità...
  • Page 70 Contents Safety Information ... . . Putting the Walkie−Talkies into Operation ....Operating Elements ... . Menu Structure .
  • Page 71: Safety Information

    Safety Information 1 Safety Information Please read this operating instruction manual thoroughly. Intended use These walkie−talkies have been conceived for communication with other walkie−talkies complying to the same standards. Any other use is considered unintended use. Unauthorised modifica- tion or reconstruction is not permitted. Under no circumstances open the devices or complete any repair work yourself.
  • Page 72: Medical Equipment

    Safety Information Medical equipment Attention: Never use the walkie−talkies in the vicinity of medical equipment. Effects on such equipment can- not be fully ruled out. Walkie−talkies can cause an un- pleasant humming sound in hearing aids. Disposal In order to dispose of your device, take it to a collection point provided by your local public waste authorities (e.g.
  • Page 73: Putting The Walkie−Talkies Into Operation

    Putting the Walkie−Talkies into Operation 2 Putting the Walkie−Talkies into Operation Safety information Attention: It is essential to read the Safety Information in Chapter 1 before starting up. Checking the package contents The package contains: − two walkie−talkies − two headsets −...
  • Page 74 Putting the Walkie−Talkies into Operation Mains power outlet Note: Only use the power adapter plug with no. KG3B−065−0150D+065−0150D Do not charge the walkie−talkies with charging units from other manufacturers. To ensure an optimal service life of the battery pack, only stop the charging process when the walkie−talkie is fully charged.
  • Page 75: Operating Elements

    Operating Elements 3 Operating Elements The features and functions available on the walkie−talkies are explained in the diagrams below. Handset Antenna LED, operating indicator Display Headset / Charging socket Key lock / Menu / FM radio Volume − / Decrease setting Send ringing tone / FM change station Loudspeaker...
  • Page 76 Operating Elements Display FM radio mode Channel mode / Radio station mode CTCSS mode Confirmation signal activated Antenna and receive signal indicator 12 11 Group search activated iVOX mode / VOX mode Channel scanning CTCSS code or FM frequency 10 Key lock activated 11 Key tone activated 12 Monitor activated 13 Battery capacity...
  • Page 77: Menu Structure

    Menu Structure 4 Menu Structure Menu Open the main menu by pressing the M button. Then press the X/Y, buttons to select an option and confirm the selection by pressing the P button. 1 x M Set the channel 2 x M Set the CTCSS code 3 x M Set the VOX / iVOX sensitivity...
  • Page 78: Operating The Walkie−Talkies

    Operating the Walkie−Talkies 5 Operating the Walkie−Talkies Description of operating sequences in the manual Press the button depicted Press and hold the button depicted Release the button depicted [ y ] Display indicator ð Speak into the microphone Switching the walkie−talkie on/off Switch the walkie−talkie on All the icons available appear briefly in the display.
  • Page 79: Selecting A Channel

    Operating the Walkie−Talkies Radio signals cannot be received when the P but- ton is being pressed. Selecting a channel PMR446 (Private Mobile Radio) walkie−talkies can be used throughout Europe free of registration and call charges. There are 8 radio channels available within the frequency range 446.000 MHz to 446.100 MHz.
  • Page 80 Operating the Walkie−Talkies An exception here is CTCSS code 0 (zero). When this setting is set, all calls made on the channel set can be heard. In order to participate in the radio communica- tion, you must set the corresponding CTCSS code. Scanning for a channel Signals are searched for in the eight channels in a continuous cy- cle.
  • Page 81 Operating the Walkie−Talkies Adding/Excluding a channel in the channel group 8 x M X/Y, P Add or exclude the output channel for the channel group using ON / OFF and confirm it Start/End channel scanning The menu item is only available when ON" is selected for specific channel scanning.
  • Page 82 Operating the Walkie−Talkies 8 x M Activate programming mode 9 x M Activate programming mode X or Y, P Select the ringing tone and confirm it Monitor The Monitor function enables the search for weak signals on the channel currently set. If you receive an external signal, switch to a free channel.
  • Page 83: Display Illumination

    Operating the Walkie−Talkies Display illumination Activating Activate the lighting The lighting illuminates for approx. 10 seconds. Deactivating Deactivate the lighting Headset Use the headset enclosed in the walkie−talkie packaging. You can put the walkie−talkie in your breast pocket, for example, so that both hands are free.
  • Page 84 Operating the Walkie−Talkies Switch the walkie−talkie off before connecting a head- set. The headset supplied with the walkie−talkie is not designed for the Handsfree" function because it is equipped with a PTT button. Further information is provided on Page 83. 1.
  • Page 85: Using The Fm Radio

    Using the FM Radio 6 Using the FM Radio Switching the FM radio on/off 3 sec. a M Switch the FM radio on 3 sec. a M Switch the FM radio off Selecting a radio station X/Y, Select a radio station or 3 sec.
  • Page 86 Using the FM Radio Activating/Deactivating FM interrupt mode FM interrupt mode enables the receipt of a radio station to be in- terrupted automatically when a signal is received from a walkie− talkie. br appears in the display Press M repeatedly X/Y, P Select ON / OFF and confirm FM interrupt mode must be activated (ON) in order to...
  • Page 87: In Case Of Problems

    In Case of Problems 7 In Case of Problems Should problems arise with the walkie−talkies, please refer to the following information first. In the event of technical problems, you can contact our hotline service, Tel. 0900 00 1675 within Switzerland (cost via Swisscom at time of going to print: CHF 2.00/min).
  • Page 88: Technical Properties

    Technical Properties 8 Technical Properties Technical data Feature Value Output power 0.5 W Range Approx. 8 km in open space Standby time Up to 20 hours Max. talk time Up to 16 hours (NiMH) Up to 30 hours (alkaline) Charging time for Min.
  • Page 89: Maintenance / Guarantee

    Clean the housing surfaces with a soft, fluff−free cloth. Never use cleaning agents or solvents. Guarantee SWITEL equipment is produced and tested according to the la- test production methods. The implementation of carefully chosen materials and highly developed technologies ensure trouble−free functioning and a long service life.
  • Page 90: Index

    Index 10 Index Adding/Excluding a channel, 81 Operating elements, 75 Ambient noise, 84 Operation, 78, 85 Belt clip, 74 Package contents, 73 Pin assignment, 83 Programming radio stations, 85 Changing the programmed station, 85 Charge, 73 Questions, 87 Charging, 73 Confirmation signal, 82 Receiving, 78 CTCSS code, 79...
  • Page 91 Notes Notes...
  • Page 92: Declaration Of Conformity

    Cet équipement est conforme à la directive européenne R&TTE. Pour obtenir la déclaration de conformité intégrale, veuillez vous servir du téléchargement gratuit de notre site Internet www.switel.com. Quest’apparecchiatura è conforme alla direttiva europea R&TTE. Per la dichiarazione di conformità completa si prega di voler usufruire del servizio gratuito di download dal nostro sito Internet www.switel.com.

Table des Matières