Table des Matières
Publicité
Les langues disponibles
Les langues disponibles
Liens rapides
CAMI
C
IP6
RE
EAL PLU
G AND P
RE
EAL PLU
G-AND-P
CA
AMÉRA D
DÔME CO
CÁ
ÁMARA C
COLOR I
RE
EAL PLU
G-AND-P
U
USER MAN
NUAL
G
GEBRUIKE
ERSHAND
N
NOTICE D
'EMPLOI
M
MANUAL D
DEL USUA
BEDIENUN
B
NGSANLEI
PLAY IP C
COLOUR
PLAY IP
KLEURE
OULEUR
IP REAL
P REAL P
PLUG-AN
PLAY IP-
-FARBKA
3
LEIDING
25
47
ARIO
69
ITUNG
91
R DOME C
CAMERA
N DOME
CAMERA
PLUG-A
AND-PLAY
ND-PLAY
Y
AMERA
A
Y
Publicité
Table des Matières

Manuels Connexes pour Velleman Real Plug-and-Play CAMIP6


Sommaire des Matières pour Velleman Real Plug-and-Play CAMIP6
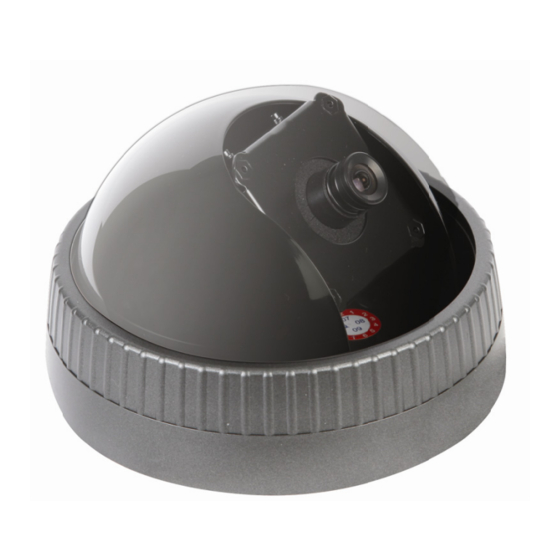
- Page 1 CAMI EAL PLU G AND P PLAY IP C COLOUR R DOME C CAMERA EAL PLU G-AND-P PLAY IP KLEURE N DOME CAMERA AMÉRA D DÔME CO OULEUR IP REAL PLUG-A AND-PLAY CÁ ÁMARA C COLOR I P REAL P PLUG-AN ND-PLAY EAL PLU...
- Page 2 B BNC -stekker fiche B conecto or BNC BNC-Ste ecker C 12VDC in 12VD DC-ingang entrée 12 VCC entrada a de 12 VCC C 12 VDC- -Eingang D reset rese tschakelaa réinitia alisation reinicia lización Rückset tzung /09/2010 n nv ©Velleman...
- Page 3 Velleman! Please read d the manua al thorough hly before b bringing this s device int rvice. If the e device wa...
- Page 4 , select whe ether to ma ake shortcu uts availabl for all users s or not and d click Nex xt >. The R Ready to I Install win dow appea ars. /09/2010 n nv ©Velleman...
- Page 5 • Click < Back to change settings or Next > to start the installation. • If Framework 2.0 (or higher) was already installed, a message is displayed. Click OK to continue installation of the CamView software. • The Installation Finished window appears. Click on Finish. 15/09/2010 ©Velleman nv...
-
Page 6: Software Configuration
Display modes: the layout can be changed and set to 1, 4, 6, 9, 13, 16 or 21 display areas by clicking on the desired icon. The content (displayed camera) of each area can be set individually. 15/09/2010 ©Velleman nv... -
Page 7: Auto Search
• The browser requires a username and password to set-up the camera. The default user name is admin, no password required. • When user name and password are validated, the information page is shown. 15/09/2010 ©Velleman nv... - Page 8 (Dynamic Host Configuration Protocol), which will obtain an IP-address automatically. If DHCP is not available, refer to your network administrator for correct settings. • Select Advanced Network to configure the camera for PPPoE connection (ADSL service). Enter PPPoE user name and password. 15/09/2010 ©Velleman nv...
- Page 9 - refer to the user manual that came with the 3G phone for more information. Note: the last part of the URL is composed of the cameras’ ID followed by the video playback password. This is unique for each camera. 15/09/2010 ©Velleman nv...
- Page 10 • When motion is detected, the IP-camera can send snapshots to an e-mail account or FTP server. Use the Schedule – Email/ftp Alarm page to set up the e-mail account and/or FTP site. • To configure a NAS (Network Attached Storage) system, go to the NAS Settings page. 15/09/2010 ©Velleman nv...
- Page 11 Never powe er off the ca amera duri ng upgrade he manufa cturer or de ealer will n not accept r responsibilit ty for any e ensuing def fects or roblems. /09/2010 n nv ©Velleman...
- Page 12 GREEN: camera is online and responding (but image might still be blocked by firewall settings) • The status refreshes automatically every 30s. Click on Refresh status to update the camera list manually. • When right-clicking on a camera under the Camera List directory, following options are available: 15/09/2010 ©Velleman nv...
- Page 13 Microphone: enable or disable microphone higher the frame rate, the smoother the image input becomes. Higher frame rates require more bandwidth. Video flip: allow image flip-over (only for Preference pan/tilt cameras) Set preference to image quality or to video motion. 15/09/2010 ©Velleman nv...
-
Page 14: Display Control
Pause: temporarily halt video display DI counter*: starts counting as soon as a digital input signal is received Motion recording: enable recording triggered by motion Properties: show current settings for the camera (frame rate, bandwidth, time) * only for Pan/Tilt cameras 15/09/2010 ©Velleman nv... - Page 15 • Check the upper box to start CamView automatically when Windows starts. • Check the lower box to return to the last playing or running state when CamView restarts. • Press OK to apply the new settings. 15/09/2010 ©Velleman nv...
- Page 16 16 channels can be played back simultaneously. Configure directory settings. Use the same settings as in CamView to facilitate the looking up of recorded videos and snapshots. Click to select preferred language (v2.1 only English or Traditional Chinese) 15/09/2010 ©Velleman nv...
-
Page 17: Video Playback
Select recording date and all cameras that have recordings on that date are shown. Recorded files tree: year Month date: YYYY/MM/DD Camera list Cam Name = name of camera that has recordings on the selected day. Video playback Select camera than click on ‘Play’. 15/09/2010 ©Velleman nv... - Page 18 Open Snapshot • The files are ordered in a tree-structure: Snapshot files: name-camera ID date: YYYY/MM/DD time: hh/mm/ss d) Convert to AVI • Select a camera. • Select Start Time and End Time, than click convert. 15/09/2010 ©Velleman nv...
- Page 19 Note: maximum zoom-in resolution is 640x480; maximal zoom-out is the original video resolution. • Playback time bar: drag the pointer to select start of play-back point. 7.6.3 Scheduling • Click a camera in the camera list and click on the scheduling button ( ) to enter the scheduling menu: 15/09/2010 ©Velleman nv...
- Page 20 When selecting ‘Record/Play as scheduled’, at the scheduled time the scheduled camera will start playing or recording. Select ‘Give up that scheduled recording/playing’ to ignore the schedule and keep playing/recording the current camera. 7.6.4 Language • Click on the language button ( ) to set the language: 15/09/2010 ©Velleman nv...
- Page 21 There are two ways to uninstall the CamView software. Uninstall from the start menu .Start → CamView →Uninstall CamView Uninstall from the control panel .Start → Settings → Control Panel → Add or Remove Programs .Select CamView program and click “Change/Remove”. 15/09/2010 ©Velleman nv...
- Page 22 • Verify whether your Windows mobile device is supported by selecting 7. Symbian phones list on that website. • Follow the instructions on that website to download and install the .sisx-file. iPhone • search "mCamView" on App store on iPhone and install the software. 15/09/2010 ©Velleman nv...
- Page 23 A: The maximum allowed video users for a camera at the same time depends on the video settings including “Internet speed” and resolution. See below for a summary of the maximum allowed video users: bandwidth (5 ~30fps) Resolution 256K 512K 768K 1.5M 176x120 - 176x144 352x240 - 352x288 720x480 - 720x576 15/09/2010 ©Velleman nv...
-
Page 24: Technical Specifications
430g Use this device with original accessories only. Velleman nv cannot be held responsible in the event of damage or injury resulted from (incorrect) use of this device. For more info concerning this product, please visit our website www.velleman.eu. The information in this manual is subject to change without prior notice. - Page 25 Bestel eventuele reserveond derdelen bij j uw dealer . Algeme ene richt lijnen ® aadpleeg de e Velleman service - en kwali iteitsgaran ntie achter raan deze h handleiding • B Bescherm d de camera tegen scho okken. Verm...
-
Page 26: Software-Installatie
• Selecteer de doelmap met Change… en klik daarna op Next >. Het venster Shortcut Folder verschijnt op uw scherm. • Selecteer de doelmap uit het uitrolmenu. Kies of u de shortcut voor iedereen toegankelijk wilt maken en klik op Next >. Het venster Ready to Install verschijnt op uw scherm. 15/09/2010 ©Velleman nv... - Page 27 • Indien Framework 2.0 (of hoger) al op de computer geïnstalleerd was, krijgt u volgend bericht. Klik op OK om CamView verder te installeren. • Het venster Installation Successful verschijnt op uw scherm. Klik op Finish om de installatie te voltooien. 15/09/2010 ©Velleman nv...
- Page 28 1-, 4-, 6-, 9-, 13-, 16- of 21-delige display (elke cameradisplay is afzonderlijk instelbaar) 15/09/2010 ©Velleman nv...
-
Page 29: Auto Search
Typ het IP-adres in de adresbalk van de webbrowser en geef gebruikersnaam en paswoord in. • Met de standaard gebruikersnaam admin hebt u geen paswoord nodig. • Bij een geldig ingegeven gebruikersnaam en paswoord verschijnt de informatiepagina hieronder. 15/09/2010 ©Velleman nv... - Page 30 • Network: configuratie van het netwerk. De standaard instelling is DHCP (Dynamic Host Configuration Protocol) en krijgt automatisch een IP-adres. Neem contact op met uw netwerkprovider indien DHCP niet beschikbaar is. • Advanced Network: configuratie van de PPPoE-aansluiting (ADSL). Geef gebruikersnaam en paswoord in. 15/09/2010 ©Velleman nv...
- Page 31 Deze cijfers zijn uniek voor elke camera. Opmerking: Evenals 3GPP/ISMA maakt deze camera gebruik van het RTSP-protocol en de video- /audiocodec om de beelden te streamen. U hoeft dus enkel het adres rtsp://ip_cam_address/CAM_ID.password in de 3G-telefoon te geven. De IP- 15/09/2010 ©Velleman nv...
- Page 32 • Programmeer de camera voor nachtzicht (zwart-witbeeld) via Night Mode. • Bij een bewegingswaarneming zendt de IP-camera snapshots naar een e-mailadres of FTP-server. Configureer het e-mail- en/of FTP-adres onder Schedule – Email/ftp Alarm. • Ga naar NAS Settings om het NAS-systeem (Network Attached Storage) te configureren. 15/09/2010 ©Velleman nv...
- Page 33 • Een IP-camera die is aangesloten op het internet kan haar interne klok synchroniseren via een NTP-server (bv. ntp.asql.co.uk – raadpleeg www.ntp.org voor een overzicht). Stel in onder Date/Time. • Upgrade de firmware van de camera onder Upgrade. De upgrade gebeurt vanaf een lokaal bestand of vanaf een FTP-server. 15/09/2010 ©Velleman nv...
- Page 34 Cam L List. pmerking: De icoon v voor de cam meranaam geeft de st tatus weer. ROOD: de camera a is offline e en niet op h het internet t aangeslot /09/2010 n nv ©Velleman...
- Page 35 Play on selected window. De beelden worden in het geselecteerde scherm weergegeven. • Klik op ID/Password settings om de cameranaam te wijzigen. • Klik op Video settings om de video-instellingen van de camera te wijzigen. 15/09/2010 ©Velleman nv...
-
Page 36: Weergavefuncties
• Dubbelklik op de titelbalk om een enkel scherm weer te geven. • De titelbalk bevat volgende iconen: snapshot: Stilstaand beeld. opname: Opnamestatus. zwart geen opname rood opname groen opname na beweging 15/09/2010 ©Velleman nv... - Page 37 • Selecteer de directory waar u de bestanden wenst te bewaren. • Geef de minimale schijfruimte in. • Kies de opnamemodus bij vol geheugen: overschrijven (Circular recording) of stoppen. Snapshot • Selecteer de directory waar u de snapshots wenst te bewaren. 15/09/2010 ©Velleman nv...
- Page 38 Klik op Start Time en End time om een het videobestand te verknippen. Klik daarna op Convert om het bestand naar het .avi-formaat te converteren. Klik om de beeldweergave (1, 4, 6, 9, 13, 16, full screen) te selecteren. U kunt tot 16 kanalen simultaan laten afspelen. 15/09/2010 ©Velleman nv...
- Page 39 Selecteer een opnamedatum. Alle camera’s die op die datum een opname hebben gemaakt, zullen worden weergegeven. Boomstructuur: jaar maand datum: JJJJ/MM/DD Cameralijst Cam Name = naam van de camera die op die dag opgenomen heeft. Afspelen van het bestand Selecteer de camera en klik op Play. 15/09/2010 ©Velleman nv...
- Page 40 • Selecteer WORKGROUP (bv. NAS) en dubbelklik om het netwerk af te scannen. • Selecteer het netwerktoestel (e.g. NAS910) en dubbelklik om de folders af te scannen. c) Openen snapshot • De bestanden staan in een boomstructuur: 15/09/2010 ©Velleman nv...
- Page 41 Snapshot: snapshot maken geluid in- en uitschakelen Opmerking: De maximale beeldresolutie bij het inzoomen is 640x480, bij het uitzoomen is de originele beeldresolutie. • Tijdsbalk: Verschuif de pointer indien gewenst. 15/09/2010 ©Velleman nv...
-
Page 42: Taalinstellingen
Record/Play as scheduled: De camera start de opname of het afspelen op het geprogrammeerde tijdstip. Give up that scheduled recording/playing: De camera blijft afspelen/opnemen ongeacht de programmering. 7.6.4 Taalinstellingen • Klik op de taalinstelknop ( ) om de taal te selecteren: 15/09/2010 ©Velleman nv... - Page 43 7.7 CamView de-installeren • U kunt CamView op twee manieren de-installeren: Klik op Start → CamView → Uninstall CamView. Klik op Start → Settings → Control Panel → Add or Remove Programs. Selecteer CamView en klik op Change/Remove. 15/09/2010 ©Velleman nv...
- Page 44 • Selecteer 7. Symbian phones list en ga na of uw toestel wordt ondersteund. • Volg de instructies om het .sisx-bestand te downloaden en te installeren. iPhone • Open mCamView op App Store van uw iPhone en installeer de software. 15/09/2010 ©Velleman nv...
- Page 45 Hoeveel gebruikers krijgen simultaan toegang tot de camera? Het aantal gebruikers is afhankelijk van de video-instellingen, netwerksnelheid en resolutie. Raadpleeg de tabel hieronder: Bandbreedte (5 ~ 30 fps) Resolutie 256k 512k 768k 1,5M 176x120 - 176x144 352x240 - 352x288 720x480 - 720x576 15/09/2010 ©Velleman nv...
-
Page 46: Technische Specificaties
430g Gebruik dit toestel enkel met originele accessoires. Velleman nv is niet aansprakelijk voor schade of kwetsuren bij (verkeerd) gebruik van dit toestel. Voor meer informatie over dit product, zie www.velleman.eu. De informatie in deze handleiding kan te allen tijde worden gewijzigd zonder voorafgaande kennisgeving. - Page 47 30 0 mm pour le câble. • I Insérer le c âble dans l e grand ori fice et fixer r la base. • P Pointer la ca améra vers s la zone de e surveillanc /09/2010 n nv ©Velleman...
-
Page 48: Installation Du Logiciel
• Sélectionner le dossier d’installation. Cliquer sur Change… et ensuite sur Next >. La fenêtre Shortcut Folder s’affiche. • Sélectionner le dossier d’installation dans le menu à déroulement. Sélectionner le niveau d’accessibilité du raccourci et cliquer sur Next >. La fenêtre Ready to Install s’affiche. 15/09/2010 ©Velleman nv... -
Page 49: Configuration Du Logiciel
• La fenêtre Installation Finished s’affiche. Cliquer sur Finish. 7. Configuration du logiciel 7.1 En général • Ouvrir CamView en cliquant sur le raccourci sur le bureau de votre ordinateur ou en cliquant sur Start → Programs → CamView. 15/09/2010 ©Velleman nv... -
Page 50: Auto Search
Remarque : Une caméra correctement configurée sera accessible depuis n’importe quel ordinateur/navigateur web dans le monde. Il suffit de taper l’adresse IP dans la barre d’adresse du navigateur web et de saisir le nom d’utilisateur et le mot de passe. 15/09/2010 ©Velleman nv... - Page 51 • Video -> Display : Affichage des images en direct dans une fenêtre de navigation. Remarque : Cette fonction nécessite ActiveX. Ce composant logiciel est automatiquement téléchargé lors de la connexion à Internet. Configurer la taille de l’image sous Video Settings. 15/09/2010 ©Velleman nv...
- Page 52 à la notice d’emploi du téléphone 3G pour plus d’information. Remarque : Les derniers chiffres de l’adresse URL sont composés du numéro d’identification de la caméra et du mot de passe. Ces chiffres sont uniques pour chaque caméra. 15/09/2010 ©Velleman nv...
- Page 53 • Configurer le mode de vision nocturne (image en noir et blanc) sous Night Mode. • La caméra transmet des captures d’image vers le compte de messagerie électronique ou le serveur FTP dès la détection d’un mouvement. Configurer le compte et/ou l’adresse FTP sous Schedule – Email/ftp Alarm. 15/09/2010 ©Velleman nv...
- Page 54 Ne pas oublier de reprogrammer un nouveau mot de passe (via webconfig – Video settings). • L’horloge interne d’une caméra IP connectée à Internet peut être synchronisée depuis un serveur NTP (p.ex. ntp.asql.co.uk – consulter le site www.ntp.org pour un aperçu). La configuration s’effectue sous Date/Time. 15/09/2010 ©Velleman nv...
- Page 55 Déro uler la liste e et choisir la version c correcte. Le e nom doit commencer r par VS31 16-gen. • C Cliquer sur reboot so us reboot pour redém marrer l’ord dinateur. /09/2010 n nv ©Velleman...
- Page 56 Cliquer ensuite sur Play on selected window. Les images sont affichées dans l’écran sélectionné. • Cliquer sur ID/Password settings pour éditer le nom d’une caméra. • Cliquer sur Video settings pour modifier la configuration vidéo d’une caméra. 15/09/2010 ©Velleman nv...
- Page 57 Sélectionner votre préférence : qualité ou fluidité de Cocher la case pour afficher le menu à l’image. l’écran. Microphone Activation/désactivation du microphone. Video flip Inversion de l’image (pour caméras pan/tilt uniquement). • Cliquer sur 3GPP settings pour modifier la configuration 3GPP. 15/09/2010 ©Velleman nv...
-
Page 58: Fonctions D'affichage
DI counter* : Comptage dès la réception d’un signal d’entrée numérique. Motion recording : Activation de l’enregistrement après détection de mouvement. Properties : Affichage de la configuration de la caméra (vitesse de l’image, larguer de bande, heure). * uniquement pour caméras pan/tilt 15/09/2010 ©Velleman nv... -
Page 59: Options Dans Camview
• Cocher la case supérieure pour lancer automatiquement CamView lors du lancement de Windows. • Cocher la case inférieure pour revenir aux configurations avant la désactivation lors du lancement de CamView. • Cliquer OK pour confirmer les configurations. 15/09/2010 ©Velleman nv... - Page 60 Cliquer pour sélectionner le mode d’affichage (1, 4, 6, 9, 13, 16, plein écran). Il est possible d’afficher jusqu’à canaux simultanément. Configuration du répertoire. Il est conseillé d’utiliser les noms sous CamView pour faciliter la recherche de fichiers. Cliquer pour sélectionner la langue (v2.1 uniquement en anglais et en chinois). 15/09/2010 ©Velleman nv...
- Page 61 Sélectionner la date d’enregistrement. Toutes les caméras ayant enregistré à cette date seront affichées. Arborescence : année mois date : AAAA/MM/JJ Liste des caméras Cam Name = nom de la caméra ayant enregistré à la date sélectionnée. Lecture d’un fichier vidéo Sélectionner la caméra et cliquer sur Play. 15/09/2010 ©Velleman nv...
- Page 62 Les fichiers sont structurés dans une arborescence : Snapshot files: nom-ID de la caméra date : AAAA/MM/JJ heure : hh/mm/ss d) Conversion vers le format AVI • Sélectionner une caméra. • Sélectionner Start Time et End Time. 15/09/2010 ©Velleman nv...
- Page 63 • Barre d’avancement : Déplacer le curseur si nécessaire. 7.6.3 Scheduling • Sélectionner une caméra dans la liste et cliquer sur le bouton de programmation ( ) pour afficher le menu : 15/09/2010 ©Velleman nv...
-
Page 64: Sélection De La Langue
Record/Play as scheduled : La caméra commence l’enregistrement à l’horaire programmée. Give up that scheduled recording/playing : La caméra continue la lecture/l’enregistrement quel que soit le mode programmé. 7.6.4 Sélection de la Langue • Cliquer sur le bouton de sélection de la langue ( 15/09/2010 ©Velleman nv... -
Page 65: Désinstaller Le Logiciel Camview
Cliquer sur Start → CamView → Uninstall CamView. Cliquer sur Start → Settings → Control Panel → Add or Remove Programs. Sélectionner CamView et cliquer sur Change/Remove. • Cliquer sur Next >. Cocher l’option souhaitée et cliquer sur Next >. 15/09/2010 ©Velleman nv... -
Page 66: Installation Du Logiciel 3Ggp
• Sélectionner 7. Symbian phones list et vérifier si votre appareil Windows est compatible. • Suivre les instructions pour télécharger et installer le fichier .sisx. iPhone • Ouvrir mCamView sur l’App Store de votre iPhone et installer le logiciel. 15/09/2010 ©Velleman nv... -
Page 67: Problèmes Et Solutions Remarque Importante
R : Le nombre d’utilisateurs dépend de la configuration vidéo, de la vitesse de connexion Internet et de la résolution. Se référer à la table ci-dessous : Largeur de bande (5 ~ 30 IPS) Résolution 256K 512K 768K 1.5M 176x120 - 176x144 352x240 - 352x288 720x480 - 720x576 15/09/2010 ©Velleman nv... -
Page 68: Spécifications Techniques
430g N’employer cet appareil qu’avec des accessoires d’origine. SA Velleman ne sera aucunement responsable de dommages ou lésions survenus à un usage (incorrect) de cet appareil. Pour plus d’information concernant cet article, visitez notre site web www.velleman.eu. Toutes les informations présentées dans cette notice peuvent être modifiées sans notification préalable. - Page 69 Ha aga un agujero con n un diámet tro de mín. 30 mm pa ra el cable. • I Introduzca el cable en el orificio g grande y fij e la base. /09/2010 n nv ©Velleman...
-
Page 70: Instalar El Software
• Seleccione la carpeta de destino. Haga clic en Change… y luego en Next >. Se visualiza la pantalla Shortcut Folder. • Seleccione la carpeta de destino en el menú desplegable. Seleccione el nivel de accesibilidad del atajo y haga clic en Next >. Se visualiza la pantalla Ready to Install. 15/09/2010 ©Velleman nv... - Page 71 • Se visualiza la pantalla Installation Finished. Haga clic en Finish. 7. Configurar el software 7.1 En general • Abra CamView al hacer clic en el atajo del escritorio de su ordenador o al hacer clic en Start → Programs → CamView. 15/09/2010 ©Velleman nv...
- Page 72 Modos de visualización: Seleccione el modo de visualización 1, 4, 6, 9, 13, 16 ó 21 pantallas al hacer clic en el icono correspondiente. Es posible ajustar cada pantalla por separado. 15/09/2010 ©Velleman nv...
-
Page 73: Auto Search
• El nombre de usuario por defecto admin no necesita una contraseña. • La página de información se visualiza después de haber introducido un nombre de usuario y una contraseña válidos. 15/09/2010 ©Velleman nv... - Page 74 • Video Settings: Configuración vídeo. Esta página permite configurar y reinicializar la contraseña que le da acceso a las imágenes de vídeo. Nota: La contraseña original está incluida con la cámara. Por razones de seguridad modifique la contraseña de la cámara. 15/09/2010 ©Velleman nv...
- Page 75 Porque la anchura de banda del servicio 3G es inferior a 256k bps, utilice una velocidad de conexión de 128k o 64k bps para la cámara. • Ajuste el modo de visualización para una visión nocturna (imagen blanco & negro) con Night Mode. 15/09/2010 ©Velleman nv...
- Page 76 • Entre en la página NAS Settings para configurar el sistema NAS (Network Attached Storage). • Entre en la página Scheduling para activar las funciones Email/ftp y NAS. • Modifique la configuración del administrador bajo Admin - Admin login. Modifique la contraseña del administrador regularmente. 15/09/2010 ©Velleman nv...
- Page 77 Asegúrese de que el n nombre em piece por V VS316-gen • H Haga clic en n reboot b bajo reboot t para reini iciar el orde enador. /09/2010 n nv ©Velleman...
- Page 78 • Primero, haga clic en la pantalla deseada y haga clic en la cámara con el botón derecho del ratón. Luego, haga clic en Play on selected window. Las imágenes se visualizan en la pantalla seleccionada. • Haga clic en ID/Password settings para editar el nombre de una cámara. 15/09/2010 ©Velleman nv...
- Page 79 Seleccione su preferencia: calidad o nitidez de la Marque la casilla para visualizar el menú en imagen. la pantalla. Microphone Activar/desactivar el micrófono. Video flip Inversión de la imagen (sólo para cámaras pan/tilt). • Haga clic en 3GPP settings para modificar la configuración 3GPP. 15/09/2010 ©Velleman nv...
-
Page 80: Funciones De Visualización
DI counter*: empieza a contar en cuanto reciba una señal de entrada Motion recording: Activar la grabación después de la detección de movimientos. Properties: Visualización de la configuración de la cámara (velocidad de la imagen, anchura de banda, hora). * sólo para cámaras pan/tilt 15/09/2010 ©Velleman nv... - Page 81 Start up options • Marque la casilla superior para activar CamView automáticamente al activar Windows. • Marque la casilla inferior para volver de CamView a los ajustes anteriores. • Haga clic en OK para confirmar las configuraciones. 15/09/2010 ©Velleman nv...
- Page 82 Haga clic para seleccionar el modo de visualización (1, 4, 6, 9, 13, 16, pantalla completa). Es posible visualizar hasta 16 canales simultáneamente. Configurar el directorio. Utilice los nombres bajo CamView para facilitar la búsqueda de ficheros. Haga clic para seleccionar el idioma (v2.1 sólo en inglés y el chino). 15/09/2010 ©Velleman nv...
- Page 83 AAAA/MM/DD Lista de las cámaras Cam Name = nombre de la cámara que ha efectuado una grabación en la fecha seleccionada. Reproducción de un fichero de vídeo Seleccione la cámara y haga clic en Play. 15/09/2010 ©Velleman nv...
- Page 84 Abrir una captura de imagen • Árbol de directorios: Snapshot files: nombre-ID de la cámara fecha: AAAA/MM/DD hora: hh/mm/ss d) Convertir en el formato AVI • Seleccione una cámara. • Seleccione Start Time y End Time. 15/09/2010 ©Velleman nv...
- Page 85 ‘alejar’ es la resolución original de la imagen. • Barra de tiempo Desplace el cursor si fuera necesario. 7.6.3 Scheduling • Seleccione una cámara de la lista y haga clic en el botón de programación ( ) para visualizar el menú: 15/09/2010 ©Velleman nv...
-
Page 86: Seleccionar El Idioma
Record/Play as scheduled: La cámara empieza la grabación a la hora programada. Give up that scheduled recording/playing: La cámara continúa la reproducción/ grabación sea cual sea el modo programado. 7.6.4 Seleccionar el idioma • Haga clic en el botón de selección del idioma ( 15/09/2010 ©Velleman nv... - Page 87 Haga clic en Start → Settings → Control Panel → Add or Remove Programs. Seleccione CamView y haga clic en Change/Remove. • Haga clic en Next >. Marque la opción deseada y haga clic en Next >. 15/09/2010 ©Velleman nv...
- Page 88 • Seleccione 7. Symbian phones list y controle si el aparato Windows es compatible. • Siga las instrucciones para descargar e instalar el fichero .sisx. iPhone • Abra mCamView en App Store del iPhone e instale el software. 15/09/2010 ©Velleman nv...
- Page 89 R : El nombre de usuarios depende de la configuración vídeo, la velocidad de conexión Internet y la resolución. Véase la lista a continuación: Anchura de banda (5 ~ 30 IPS) Resolución 256K 512K 768K 1.5M 176x120 - 176x144 352x240 - 352x288 720x480 - 720x576 15/09/2010 ©Velleman nv...
- Page 90 430g Utilice este aparato sólo con los accesorios originales. Velleman NV no será responsable de daños ni lesiones causados por un uso (indebido) de este aparato. Para más información sobre este producto, visite nuestra página web www.velleman.eu. Se pueden modificar las especificaciones y el contenido de este manual sin previo aviso.
- Page 91 Vibrationen ausgesetzt werden. Montieren n Sie die Ka amera nie in n der Nähe von elektro omagnetisc hen Feldern Richten S ie die Kame era nie auf die Sonne oder ander re reflektier ende Gegen nstände. /09/2010 n nv ©Velleman...
-
Page 92: Die Software Installieren
Verknüpfung Folder erscheint auf dem Bildschirm. • Wählen Sie den Zielordner aus dem Aufklappmenü aus. Wählen Sie, ob Sie die Verknüpfung für jedermann verfügbar machen möchten und klicken Sie auf Next >. Das Fenster Ready to Install erscheint auf dem Bildschirm. 15/09/2010 ©Velleman nv... - Page 93 • Wenn Framework 2.0 (oder höher) schon installiert ist, erscheint folgende Nachricht. Klicken Sie auf OK um CamView weiter zu installieren. • Das Fenster Installation Successful erscheint auf dem Bildschirm. Klicken Sie auf Finish um die Installation zu beenden. 15/09/2010 ©Velleman nv...
- Page 94 Die Titelleiste zeigt die Softwareversion, das Datum, die Uhrzeit und den verfügbaren Speicherplatz Liste mit verfügbaren Kameras mit Statusanzeige Display Liste mit Kameras, gefunden über die Auto Search- Suchfunktion Einstellungen Bedienungen für Dome- Camplay Kameras (nur für Anwendung mit Dome- Programmierte Aufnahme Kameras) Sprache simultane Bedienung aller Kameras 15/09/2010 ©Velleman nv...
- Page 95 Sie die IP-Adresse in der Adressleiste des Webbrowsers ein und geben Sie den Benutzername und das Passwort ein. • Mit dem Standard Benutzername admin brauchen Sie kein Passwort. • Bei einer gültigen Eingabe des Benutzernamen und des Passworts erscheint folgende Informationsseite. 15/09/2010 ©Velleman nv...
- Page 96 Stellen Sie die Bildgröße über Video Settings ein. • Network: Konfiguration des Netzwerks. Die Standard Einstellung ist DHCP (Dynamic Host Configuration Protokoll) und bekommt automatisch eine IP-Adresse. Stellen Sie sich mit Ihrem Netzanbieter in Verbindung wenn DHCP nicht verfügbar ist. 15/09/2010 ©Velleman nv...
- Page 97 URL-Format. Für mehr Informationen, ziehen Sie die Bedienungsanleitung des 3G- Mobiltelefons zu Rate. Bemerkung: Die letzten Ziffern der URL bestehen aus der ID-Nummer der Kamera und danach dem Passwort. Diese Ziffern sind für jede Kamera einzigartig. 15/09/2010 ©Velleman nv...
- Page 98 Sie die Internetgeschwindigkeit der IP-Kamera am besten auf 128k oder 64k ein. • Programmieren Sie die Kamera über Night Mode für Nachtsicht (schwarz-weiß). • Bei einer Bewegungserfassung sendet die IP-Kamera Schnappschüsse nach einer E-Mail-Adresse oder einem FTP-Server. Konfigurieren Sie die E-Mail- und/oder FTP-Adresse unter Schedule – Email/ftp Alarm. 15/09/2010 ©Velleman nv...
- Page 99 Ändern Sie das Passwort der Kamera danach auf jeden Fall wieder (über webconfig – Video settings) • Eine IP-Kamera, die mit dem Internet verbunden ist, kann die interne Uhr über einen NTP-Server synchronisieren (z.B. ntp.asql.co.uk – siehe www.ntp.org für einen Überblick). Stellen Sie unter Date/Time ein. 15/09/2010 ©Velleman nv...
- Page 100 Informa atiker durch hführen. Schal ten Sie die Kamera ni ie aus wäh rend des U Upgrades. Wede er Velleman n NV noch d der Händler r übernehm men Haftung g für Proble eme oder Folges schäden ein nes Upgrad des.
- Page 101 • Klicken Sie zuerst auf das gewünschte Wiedergabefenster, klicken Sie danach mit der rechten Maustaste auf die gewünschte Kamera und klicken Sie schließlich auf Play on selected window. Die Bilder werden im ausgewählten Fenster angezeigt. • Klicken Sie auf ID/Password settings um den Kameranamen zu ändern. 15/09/2010 ©Velleman nv...
- Page 102 Stellen Sie Ihre Präferenz ein: Bildqualität oder Kippen Sie das Bild (nur für Schärfe. Schwenk/Neigekameras). Video color Wählen Sie Farb- oder Schwarz/Weiß-Bild. Brightness Stellen Sie die Helligkeit ein von 1 bis 8. • Klicken Sie auf 3GPP settings um die 3GPP-Einstellungen zu ändern. 15/09/2010 ©Velleman nv...
-
Page 103: Anzeigefunktionen
Sie die Einstellungen geändert haben oder nach Verlust der Verbindung. Stop: Ausschaltung. Pause: pausieren. DI counter*: Zählt sobald ein digitales Eingangssignal empfangen wird Motion recording: die Aufnahme nach einer Bewegung einschalten. Properties…: Kamera-Einstellungen (Bildgeschwindigkeit, Bandbreite, Uhr). * nur für Pan/Tilt-Kameras 7.6 Optionen in CamView 15/09/2010 ©Velleman nv... - Page 104 • Kreuzen Sie das obere Kästchen an, um CamView automatisch beim Starten von Windows zu starten. • Kreuzen Sie das untere Kästchen an, um von CamView zu den letzten Einstellungen zurückzukehren. • Klicken Sie OK um die neuen Einstellungen zu bestätigen. 15/09/2010 ©Velleman nv...
- Page 105 Klicken Sie, um die Bildanzeige (1, 4, 6, 9, 13, 16, Vollbild) zu wählen. Sie können bis zu 16 Kanäle simultan abspielen. Datenverzeichnis-Einstellungen. Verwenden Sie die Nameneinstellungen unter CamView um die Dateisuche zu vereinfachen. Klicken Sie, um Ihre Sprache auszuwählen (v2.1 nur in Englisch und Chinesisch). 15/09/2010 ©Velleman nv...
- Page 106 Baumstruktur: Jahr Monath Datum: YYYY/MM/DD Camera list Cam Name = Name der Kamera, die am ausgewählten Tag die Aufnahme gemacht hat. Eine Datei abspielen Wählen Sie die Kamera und klicken Sie dann auf ‘Play’. 15/09/2010 ©Velleman nv...
- Page 107 Einen Schnappschuss öffnen • Die Ordner befinden sich in einer Baumstruktur: Snapshot files: Name-Kamera ID Datum: JJJJ/MM/DD Uhrzeit: hh/mm/ss d) Umwandeln in AVI • Wählen Sie eine Kamera aus. • Wählen Sie Start Time und End Time aus. 15/09/2010 ©Velleman nv...
- Page 108 Note: Die max. Bildauflösung beim heranzoomen ist 640x480, Die max. Bildauflösung beim herauszoomen ist. • Zeitbalken: Verschieben Sie den Cursor wenn nötig. 7.6.3 Schedulig • Klicken Sie eine Kamera der Liste an und danach die Programmiertaste ( ) um das Menü anzuzeigen: 15/09/2010 ©Velleman nv...
- Page 109 Record/Play as scheduled: Die Kamera startet die Aufnahme oder die Wiedergabe am programmierten Zeitpunkt. Give up that scheduled recording/playing: Die Kamera bleibt abspielen/aufnehmen ungeachtet der Programmierung. 7.6.4 Sprache • Klicken Sie auf die Sprachtaste ( ) um die Sprache auszuwählen: 15/09/2010 ©Velleman nv...
- Page 110 Sie können CamView auf zwei Weisen deinstallieren: Klicken Sie auf Start → CamView → Uninstall CamView. Klicken Sie auf Start → Settings → Control Panel → Add or Remove Programs. Wählen Sie CamView aus und klicken Sie auf Change/Remove. 15/09/2010 ©Velleman nv...
- Page 111 • Wählen Sie 7. Symbian phones list aus und überprüfen Sie, ob das Gerät unterstützt wird. • Befolgen Sie die Hinweise, um die .sisx-Datei herunterzuladen und zu installieren. iPhone • Öffnen Sie mCamView auf App Store Ihres iPhone und installieren Sie die Software. 15/09/2010 ©Velleman nv...
- Page 112 Wie viel Benutzer bekommen simultan Zutritt zur Kamera? Die Anzahl Benutzer hängt von den Video-Einstellungen, der Netzwerkgeschwindigkeit und der Auflösung ab. Siehe nachfolgende Liste: Bandbreite (5 ~ 30 fps) Auflösung 256k 512k 768k 1,5M 176x120 - 176x144 352x240 - 352x288 720x480 - 720x576 15/09/2010 ©Velleman nv...
-
Page 113: Technische Daten
Ø117,5 x 82,6mm Gewicht 430g Verwenden Sie dieses Gerät nur mit originellen Zubehörteilen. Velleman NV übernimmt keine Haftung für Schaden oder Verletzungen bei (falscher) Anwendung dieses Gerätes. Für mehr Informationen zu diesem Produkt, siehe www.velleman.eu. Alle Änderungen ohne vorherige Ankündigung vorbehalten. - Page 114 Velleman®. Afin de garantir la qualité, nous soumettons régulièrement nos • Articles to be repaired must be delivered to your Velleman® dealer, produits à des contrôles de qualité supplémentaires, tant par solidly packed (preferably in the original packaging), and be notre propre service qualité...
- Page 115 - Verbrauchsgüter, Teile oder Zubehörteile, die regelmäßig Velleman®; ausgewechselt werden, wie z.B. Batterien, Lampen, Gummiteile, - se calcula gastos de transporte de y a Velleman® si el aparato Treibriemen, usw. (unbeschränkte Liste). ya no está cubierto por la garantía. - Schäden verursacht durch Brandschaden, Wasserschaden, Blitz, •...