Thermaltake LEVEL 10 TITANIUM EDITION Mode D'emploi
Masquer les pouces
Voir aussi pour LEVEL 10 TITANIUM EDITION:
- Mode d'emploi (20 pages) ,
- Mode d'emploi (22 pages)
Table des Matières
Liens rapides
©2014 Thermaltake Technology Co., Ltd. All Rights Reserved. 2014.06
All other registered trademarks belong to their respective companies.
Tested To Comply
With FCC Standards
FOR HOME OR OFFICE USE
www.thermaltake.com
Titanium
User's Manual
Benutzerhandbuch
Mode d'emploi
Manual del usuario
Manuale dell'utente
安裝說明書
用戶手冊
ユーザーズマニュアル
Руководство пользователя
kullanıcı elkitabı
(EEE Yönetmeliğine Uygundur)
Table des Matières

Manuels Connexes pour Thermaltake LEVEL 10 TITANIUM EDITION


Sommaire des Matières pour Thermaltake LEVEL 10 TITANIUM EDITION
- Page 1 Manuale dell’utente 安裝說明書 用戶手冊 ユーザーズマニュアル Руководство пользователя kullanıcı elkitabı ©2014 Thermaltake Technology Co., Ltd. All Rights Reserved. 2014.06 (EEE Yönetmeliğine Uygundur) www.thermaltake.com All other registered trademarks belong to their respective companies. Tested To Comply With FCC Standards FOR HOME OR OFFICE USE...
-
Page 2: Table Des Matières
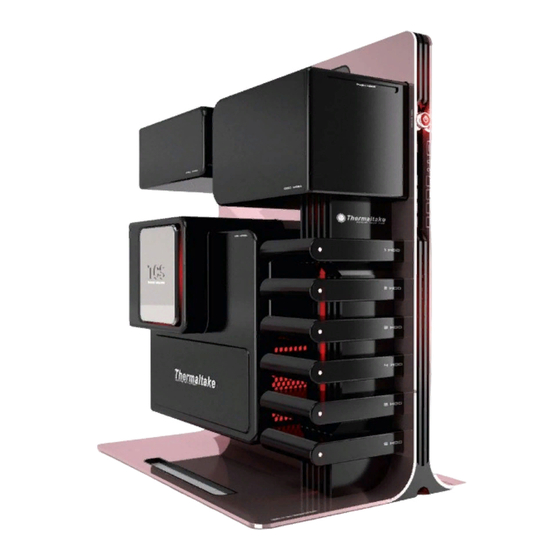
Chapter 1. Product Introduction Contents 1.1 Specification Chapter 1. Product Introduction Product Name Level 10 Titanium Edition Model VL300A9N1N Specification Case Type Full Tower Accessory Chassis Dimension (H*W*D) 666 x 318 x 614 mm (26.2 x 12.5 x 24.2 inch) Net Weight 21.37 kg / 47.11 lb... -
Page 3: Cpu Cooler Height
1.3 CPU Cooler Height.VGA (Add-on card) & PSU Length Limitation Attenzione! Limitazione altezza dissipatore CPU: Assicurarsi che l’altezza del dissipatore CPU NON superi 160 mm (6,3 pollici). Limitazione lunghezza VGA (scheda aggiuntiva): CPU Cooler Height Limitation VGA (Add-on card) Length Limitation PSU Length Limitation Assicurarsi che la lunghezza del VGA (scheda aggiuntiva) NON superi 310 mm (12,20 pollici). -
Page 4: Chapter 2. Installation Guide
Chapter 2. Installation Guide 日本語 / Italiano / 2.1 Side Panel Disassembly 1. Ruotare l'incavo per la chiavetta del 1. キーを使って、側面パネルのPSU/MB/SIDE PANELのキー穴を「開放」位置まで回します. pannello laterale PSU/MB/SIDE PANEL in 2. キーを使って、側面パネルのODD/HDDのキー posizione OPEN (APERTO) usando la 穴を「ロック」位置まで戻します. chiave. 2. Ruotare di nuovo l'incavo per la chiavetta 3. -
Page 5: Motherboard Installation
2.2 Motherboard Installation Español / 1. Gire la cerradura del panel lateral PSU/MB/ SIDE PANEL a la posición OPEN utilizando la llave. 2. Abra la cubierta de la placa madre. Italiano / 1. Ruotare l'incavo per la chiavetta del pannello laterale PSU/MB/SIDE PANEL in posizione OPEN (APERTO) usando la chiave. - Page 6 Italiano / Italiano / 6. Posizionare il coperchio della scheda 4. Mettere la scheda madre in posizione e madre. fissarla con le viti e i cilindri in rame. 7. Ruotare di nuovo l'incavo per la 5. Posizionare il vano della scheda madre chiavetta del pannello laterale PSU/ all’interno e avvitare le quattro viti MB/SIDE PANEL in posizione LOCK...
-
Page 7: Power Supply Installation
2.3 Power Supply Installation Italiano / Italiano / 1. Ruotare l'incavo per la chiavetta del 3. Svitare le due viti dal supporto pannello laterale PSU/MB/SIDE PANEL dell’alimentatore utilizzando il in posizione OPEN (APERTO) usando la cacciavite. chiave. 4. Rimuovere il supporto lungo i ganci. 2. - Page 8 Italiano / 8. Fissare correttamente l’alimentatore. 9. Posizionare il coperchio dell’alimentatore. 10. Ruotare di nuovo l'incavo per la chiavetta del pannello laterale PSU/MB/SIDE PANEL in posizione LOCK (BLOCCO) usando la chiave. Italiano / 6. Posizionare l’alimentatore e fissarlo 繁體中文 / con le viti.
-
Page 9: Device Installation
2.4 5.25” Device Installation Italiano / 1. Ruotare l'incavo per la chiavetta del pannello laterale ODD/HDD in posizione OPEN (APERTO) usando la chiave. 2. Aprire il coperchio del dispositivo da 5,25” e rimuoverlo. 繁體中文 / 1. 用鑰匙將側板ODD/HDD鎖孔轉開至 OPEN位置. 2. 轉開5.25”裝置外蓋並取下5.25”裝置外蓋. 简体中文... - Page 10 Device Group 1 (Please screw it at rear screw hole) 繁體中文 / 繁體中文 / English / English / 4. 將5.25”裝置插入插槽並用螺絲鎖上. 4. Insert the 5.25” device into the slot and 5. Put back the 5.25” device cover. 將5.25”裝置外蓋放回. screw the device. 简体中文...
- Page 11 Device Group 2 and 3 (Please screw it at front screw hole) Italiano / 6. Dallo slot 2 o 3, svitare le viti dei fermi del dispositvo da 5,25” usando il cacciavite, quindi rimuovere i fermi. 繁體中文 / 用螺絲起子取下2或3槽的5.25”裝置檔片 螺絲並移除檔片. 简体中文...
- Page 12 English / 繁體中文 / 9. Place the side panel back and lock it. 9. 將側板裝回並鎖上. 10.Turn the keyhole of the side panel ODD/ 10. 用鑰匙將側板ODD/HDD鎖孔轉開至 HDD into the OPEN position using the key. 繁體中文 / English / OPEN位置. 8. Put back the 5.25” device cover. 將5.25”裝置外蓋放回.
-
Page 13: 2.5" Hdd Installation
2.5 3.5" & 2.5" HDD Installation Italiano / 1. Ruotare l'incavo per la chiavetta del Italiano / pannello laterale ODD/HDD in posizione 11. Posizionare il coperchio del dispositivo OPEN (APERTO) usando la chiave. da 5,25”. 2. Estrarre il vano HDD e rimuoverlo. 12. - Page 14 Italiano / 3. HDD 3,5”: Posizionarlo nel vano e Italiano / 4. HDD 2,5”: Posizionarlo nel vano e bloccare l’incavo della chiavetta bloccare l’incavo della chiavetta inferiore laterale utilizzando le viti. utilizzando le viti. 繁體中文 / 繁體中文 / 3.5”硬碟:硬碟放置拖盤上並用螺絲鎖上 2.5”硬碟:硬碟放置拖盤上並用螺絲鎖固底 側邊鎖孔.
-
Page 15: Easyswap Hdd Installation
2.6 EasySwap HDD Installation Italiano / 5. Fare scorrere di nuovo il vano nel supporto HDD. 6. Ruotare di nuovo l'incavo per la chiavetta del pannello laterale Anschluss auf dem Mainboard oder der SATA Controller- ODD/HDD in posizione LOCK Karte. (BLOCCATO) usando la chiave. - Page 16 Español / 繁體中文 / La ranura de intercambio sencillo se aloja para facilitar la 內建EasySwap硬碟基座插槽,無需使用外接式儲存機殼,支援大 6. Güç kablosunu güç kaynağına bağlayın. ドまたはSATAコントローラカードに付属する取扱説明書を参照して transferencia ultra rápida (hasta 6,0 Gbps) de muchos datos a 型資料像 SATA 硬碟超快速傳輸 (可支援最高 6.0Gbps)。為保證正 7. Ana kartta veya SATA denetleyici kartında AHCI’nin ください。...
-
Page 17: Pci Slot Installation
2.7 PCI Slot Installation 2.8 Installation of Red LED Light Italiano / 1. Svitare le viti e rimuovere i fermi PCI. 2. Inserire il dispositivo PCI nell’apposito slot. Italiano / 3. Per terminare l’installazione, avvitare Inserire la spina da 4 pin dell’alimentatore il dispositivo. -
Page 18: Chapter 3. Leads Installation Guide
Chapter 3. Leads Installation Guide Leads Installation Guide Guide d'installation des fils Case LED Connection / On the front of the case, you can find some LEDs and switch leads. Please consult your user Connexion des voyants du boîtier / Sur la face avant du boîtier, vous trouverez plusieurs voyants et les fils des manual of your motherboard manufacturer, then connect these leads to the panel header on the motherboard. - Page 19 Guida di installazione dei contatti 线材安装说明 Connessione del LED del case / Nella parte anteriore del case, sono presenti alcuni contatti per interruttori e LED. 机壳LED连接方式 / 在机壳前方的面板后面,可以找到一些LED与开关线材(POWER Switch….),请参考主板使用说明 Consultare il manuale utente del produttore della scheda madre, quindi connettere i contatti alla parte superiore del 书,并将机壳上的线材正确地连接到主板上,这些线材通常都会印有标签在上面,如果没有的话,请找出机壳前方面板上线...
-
Page 20: Chapter 4. Other
Why Choose Thermaltake Power Supply? Quality From Within Every power supply units from Thermaltake should pass a very strict quality control before sent to customers, including BIT(Burn-in-test) for over 8 continuous hour in a 45℃ room to test if a unit can run normally under usual scene, and Hipot test to ensure the power supply unit can survive and protect both Ara Kablo Kurulum Kılavuzu...