Thermaltake Element V Create for eSports Mode D'emploi
Table des Matières
Liens rapides
©2009 Thermaltake Technology Co., Ltd. All Rights Reserved. 2009.08
All other registered trademarks belong to their respective companies.
Tested To Comply
With FCC Standards
FOR HOME OR OFFICE USE
www.thermaltake.com
Create for eSports
User's Manual
安裝說明書
Benutzerhandbuch
用戶手冊
Mode d'emploi
ユーザーズマニュアル
Manual del usuario
Руководство пользователя
Manuale dell'utente
kullanıcı elkitabı
VL20001W2Z
Table des Matières

Manuels Connexes pour Thermaltake Element V Create for eSports


Sommaire des Matières pour Thermaltake Element V Create for eSports
- Page 1 ユーザーズマニュアル Manual del usuario Руководство пользователя Manuale dell’utente kullanıcı elkitabı ©2009 Thermaltake Technology Co., Ltd. All Rights Reserved. 2009.08 All other registered trademarks belong to their respective companies. www.thermaltake.com Tested To Comply With FCC Standards FOR HOME OR OFFICE USE...
-
Page 2: Table Des Matières
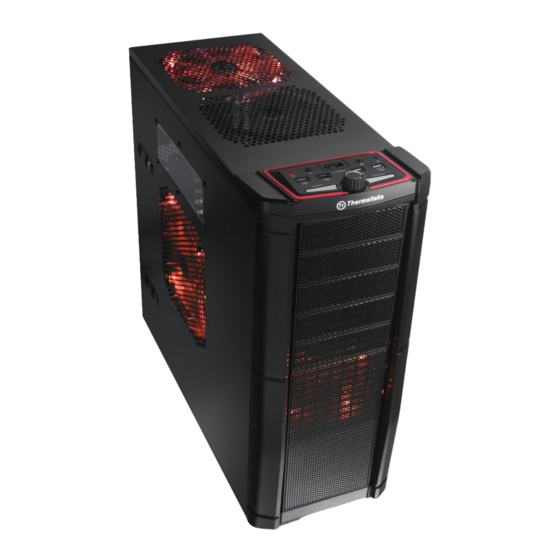
1.0 Specification Model VL20001W2Z Contents Case Type Full Tower Net Weight 14.13 kg / 31.15 lb Dimension 532 x 220 x 537 mm (H*W*D) (20.9 x 8.7 x 21.1 inch) Chapter 1. Product Introduction Side Panel Open Window Black Color Specification Material SECC... -
Page 3: Cpu Cooler Height & Vga (Add-On Card) Length Limitation
1.1 CPU Cooler Height & VGA (Add-on card) Length Limitation Attenzione! Limitazione altezza dissipatore CPU: Assicurarsi che l’altezza del dissipatore CPU NON superi 165 mm (6,1 pollici). Limitazione lunghezza VGA (scheda aggiuntiva): Assicurarsi che la lunghezza del VGA (scheda aggiuntiva) NON superi 335 mm (13,2 pollici). <165 mm 警告!!... -
Page 4: Side Panels Disassembly
2.0 Side Panels Disassembly Español / 日本語 / 日本語 / 1. Para extraer el panel lateral izquierdo, 1. 左側の側面パネルを取り外すには、ケース背 extraiga los tornillos de mano de la parte 面の蝶ねじを外してください。 2. ボタンを押して、側面パネルを取り外しま trasera de la caja. す。 2. Empuje los botones y a continuación tire 3. -
Page 5: Motherboard Installation
2.1 Motherboard Installation 2.2 5.25” Drives Installation English / 繁體中文 / 1. Lay down the chassis. 1. 放平機殼。 2. Install the motherboard in proper 2. 將主機板安裝在適當位置,然後用螺絲固定。 English / Français / location and secure it with screws. 1. Pull the bottom of the front panel to 1. -
Page 6: Hdd Installation
2.3 3.5” HDD Installation Italiano / 1. Tirare il pulsante del pannello anteriore Русский / Русский / per sganciarlo dallo chassis. 1. Потяните за нижнюю часть передней 2. Rimuovere il coperchio in plastica панели, чтобы отсоединить ее от кор dell’alloggiamento dell’unità da 5,25”. пуса. -
Page 7: Hdd Installation
2.4 2.5" HDD Installation Italiano / 1. Premere ed estrarre il fermaglio ad Русский / Русский / 1. Сожмите и вытяните наружу зажим. incastro. 2. Вставьте жесткий диск, задвинув ег 2. Inserire l'unità HDD facendo scorrere о в корзину iCage. l'unità... -
Page 8: Power Supply Unit (Psu) Installation
2.5 Power Supply Unit (PSU) Installation 2.6 PCI Card Installation ubicación adecuada y asegúrela con tornillos. Italiano / 1. Installare l'unità dell’alimentatore in modo appropriato e fissarla utilizzando le viti. 2. Regolare la PSU nella posizione appropriata e fissarla con la vite. 繁體中文... -
Page 9: Keyboard & Mouse Security Lock Usage
2.7 Keyboard & Mouse Security Lock Usage 2.8 Fan Speed & Light Control Operation English / dall’interno dello chassis con la relativa vite. English / Français / Place the keyboard or mouse cables through 1. LED Light Control – Press to switch 1. -
Page 10: Water Bottle Cage Installation
Fan Speed & Light Controller Connector Descriptions ① 4-pin peripheral connector ②,③,④ Fan power & signal connector (Front & Top) Italiano / Русский / Русский / ⑤,⑥ Plug & Play fan power & signal connector (Side) 1. Controllo luce LED – Premere per Note: Please ensure the Plug &... -
Page 11: Leads Installation Guide
3.0 Leads Installation Guide English Français Leads Installation Guide Guide d'installation des fils Case LED connection / On the front of the case, you can find some LEDs and switch leads. Please consult your Connexion des voyants du boîtier / Sur la face avant du boîtier, vous trouverez plusieurs voyants et les fils des user manual of your motherboard manufacturer, then connect these leads to the panel header on the motherboard. - Page 12 Italiano 简体中文 Guida di installazione dei contatti 线材安装说明 线材安装说明 Connessione del LED del case / Nella parte anteriore del case, sono presenti alcuni contatti per interruttori e LED. 机壳LED连接方式 机壳LED连接方式 / 在机壳前方的面板后面,可以找到一些LED与开关线材(POWER Switch….),请参考主板 / 在机壳前方的面板后面,可以找到一些LED与开关线材(POWER Switch….),请参考主板 Consultare il manuale utente del produttore della scheda madre, quindi connettere i contatti alla parte superiore del 使用说明书,并将机壳上的线材正确地连接到主板上,这些线材通常都会印有标签在上面,如果没有的话,请找...
-
Page 13: Esata Connection
3.1 eSATA Connection Русский Указания по прокладке кабелей Указания по прокладке кабелей Подключение индикаторов корпуса Подключение индикаторов корпуса / В передней части корпуса расположены индикаторы и провода выключателей. Перед подсоединением этих проводов к монтажной колодке панели на материнской плате изучите руководство пользователя производителя материнской платы. Подключение... -
Page 14: Toughpower/ Purepower/Tr2 Power Supply Series (Optional)
4. Dedicated Graphic Card Power: reduce the loading on current PSU and no need to upgrade current PSU while running multi graphic cards mode. The functions can assure all Thermaltake Power Supply meets the balance in noise control and heat exhausted. All power supply provides complete protection function as follow: 1.