Table des Matières
Publicité
Liens rapides
©2009 Thermaltake Technology Co., Ltd. All Rights Reserved. 2009.08
All other registered trademarks belong to their respective companies.
Tested To Comply
With FCC Standards
FOR HOME OR OFFICE USE
www.thermaltake.com
Create for eSports
User's Manual
安裝說明書
Benutzerhandbuch
用戶手冊
Mode d'emploi
ユーザーズマニュアル
Manual del usuario
Руководство пользователя
Manuale dell'utente
kullanıcı elkitabı
Q
VL5000 Series
Publicité
Table des Matières

Manuels Connexes pour Thermaltake Element Q VL5000 Série


Sommaire des Matières pour Thermaltake Element Q VL5000 Série
- Page 1 ユーザーズマニュアル Manual del usuario Руководство пользователя Manuale dell’utente kullanıcı elkitabı ©2009 Thermaltake Technology Co., Ltd. All Rights Reserved. 2009.08 All other registered trademarks belong to their respective companies. www.thermaltake.com Tested To Comply With FCC Standards FOR HOME OR OFFICE USE...
-
Page 2: Table Des Matières
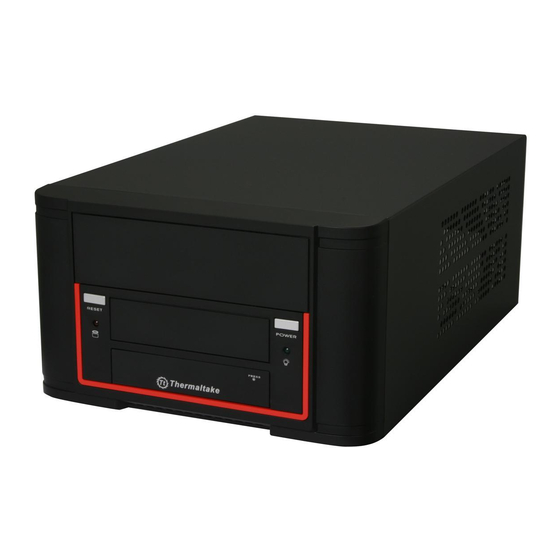
Chapter 1. Product Introduction 1.1 Specification Contents Model VL52021N2U VL52021N2E Case Type Mini Case Chapter 1. Product Introduction Net Weight 2.7 kg / 5.95 lb Dimension Specification 330 x 220 x 130 mm / 13 x 8.66 x 5.12 inch (H*W*D) Accessory Drive Bays... -
Page 3: Cpu Cooler Height & Vga
Chapter 2. Installation Guide CPU Cooler Height & VGA (Add-on card) Length Limitation 2.1 Top Panel Disassembly Warning!! CPU 冷卻器的高度限制: CPU Cooler Height Limitation: 請確保 CPU 冷卻器的高度不超過 45 mm (1.77 Please ensure that your CPU cooler does NOT 英吋)。 exceed 45mm (1.77 inches) height. VGA (附加介面卡) 的長度限制:... -
Page 4: Motherboard Installation
2.2 Motherboard Installation 2.3 5.25” Device Installation gancho situados en la parte posterior del panel frontal. 2. Retire el soporte de 5,25” del panel frontal. Italiano / 1. Staccare il pannello anteriore dopo aver premuto e rilasciato le quattro clip cpn gancio nella parte posteriore del pannello anteriore. -
Page 5: Fdd Device Installation
2.4 FDD Device Installation gancho situados en la parte posterior del panel frontal. 2. Retire el soporte de 3.5” del panel frontal. Italiano / 1. Staccare il pannello anteriore dopo aver premuto e rilasciato le quattro clip cpn gancio nella parte posteriore del pannello anteriore. - Page 6 注意 Note 如果要安裝3.5” HDD There is no need to remove the front 則不需拆下前面版,但 panel when installing the 3.5” HDD, 須注意3.5” 的長度是否會與散熱器干涉. but please be sure to check if the 注意 length of the 3.5” HDD will interfere 如果要安装3.5” HDD则不需拆下前面 with the cooler. 版,但须注意3.5”...
-
Page 7: Hdd Device Installation
2.5 HDD Device Installation 2.6 PCI Slot Installation 2. Deslice la unidad de disco duro por el raíl deslizante situado en la parte Italiano / posterior de la caja y apriétela con los 1. Svitare le viti e rimuovere i fermi PCI. tornillos. - Page 8 Chapter 3. Leads Installation Guide Français Guide d'installation des fils English Connexion des voyants du boîtier / Sur la face avant du boîtier, vous trouverez plusieurs voyants et les fils des boutons. S'il vous plaît consultez le guide d'utilisateur du fabricant de votre carte mère, puis connectez ces fils aux Leads Installation Guide connecteurs sur la carte mère.
- Page 9 Italiano 简体中文 Guida di installazione dei contatti 线材安装说明 线材安装说明 Connessione del LED del case / Nella parte anteriore del case, sono presenti alcuni contatti per interruttori e LED. 机壳LED连接方式 机壳LED连接方式 / 在机壳前方的面板后面,可以找到一些LED与开关线材(POWER Switch….),请参考主板 / 在机壳前方的面板后面,可以找到一些LED与开关线材(POWER Switch….),请参考主板 Consultare il manuale utente del produttore della scheda madre, quindi connettere i contatti alla parte superiore del 使用说明书,并将机壳上的线材正确地连接到主板上,这些线材通常都会印有标签在上面,如果没有的话,请找...
- Page 10 Memo Русский Указания по прокладке кабелей Указания по прокладке кабелей Подключение индикаторов корпуса Подключение индикаторов корпуса / В передней части корпуса расположены индикаторы и провода выключателей. Перед подсоединением этих проводов к монтажной колодке панели на материнской плате изучите руководство пользователя производителя материнской платы. Подключение...