GE GUD27GSPMDG Instructions D'utilisation
Table des Matières
Les langues disponibles
Les langues disponibles
Installation
Instructions
Questions? Call GE Appliances at 800.GE.CARES (800.432.2737) or visit our Web site at: GEAppliances.com
In Canada, call 1.800.561.3344 or visit www.GEAppliances.ca
BEFORE YOU BEGIN
Read these instructions completely and carefully.
IMPORTANT
– Save these instructions for local electrical
inspector's use.
IMPORTANT
–
Observe all governing codes and
ordinances.
• Install the appliance according to the manufacturer's
instructions and local codes.
• Note to Installer – Be sure to leave these instructions
with the Consumer.
• Note to Consumer – Keep these instructions for future
reference.
• Appliance installation must be performed by a qualified
installer.
• This dryer must be exhausted to the outdoors.
• Before the old appliance is removed from service or
discarded, remove the washer and dryer doors.
• Do not allow children on or in the appliance. Close
supervision of children is necessary when the appliance
is used near children.
• Proper installation is the responsibility of the installer.
• Product failure due to improper installation is not
covered under the Warranty.
• Install the appliance where the temperature is above 50°F
for satisfactory operation of the appliance control system.
• Remove and discard existing plastic or metal foil duct
and replace with UL-listed duct.
• Service information and the wiring diagram are located
at the access panel.
FOR GAS DRYERS ONLY
State of California Proposition 65 Warnings
This product contains one or more chemicals known to the State of California to cause cancer, and birth
WARNING
defects or other reproductive harm.
Gas appliances can cause low-level exposure to some of these substances, including benzene, carbon monoxide,
formaldehyde and soot, caused primarily by the incomplete combustion of natural gas or LP fuels. Exposure to these
substances can be minimized by properly venting the dryer to the outdoors.
PARTS SUPPLIED
1 Cable Tie
2 Washer Hoses
2 Strainer Screens/
Rubber Washers
NOTE: The Rubber
Washers may be in
the water hoses
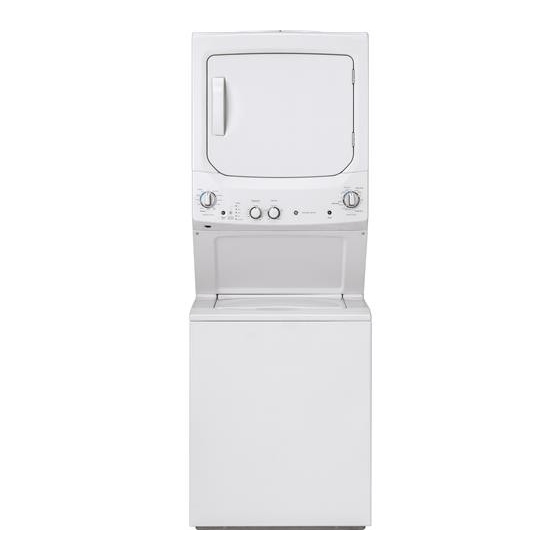
Unitized Washer/Dryer
WARNING
• Appliance installation must be performed by a qualified
installer.
• Install the appliance according to these instructions
and local codes.
• DO NOT install a clothes dryer with flexible plastic venting
materials. If flexible metal (semi-rigid or foil-type) duct is
installed, it must be UL-listed and installed in accordance
with the instructions found in "Connecting the Dryer
to House Vent" later in this manual. Flexible venting
materials are known to collapse, be easily crushed and
trap lint. These conditions will obstruct dryer airflow and
increase the risk of fire.
• DO NOT install or store this appliance in any location
where it could be exposed to water or weather.
• To reduce the risk of severe injury or death, follow all
installation instructions.
• Save these instructions. (Installers: Be sure to leave
these instructions with the customer.)
FOR GAS DRYERS ONLY
In the Commonwealth of Massachusetts,
the following installation instructions apply:
• Installation must be performed by a qualified or
licensed contractor, plumber, or gasfitter qualified
or licensed by the State.
• If using a ball valve, it shall be a T-handle type.
• A flexible gas connector, when used, must not
exceed 3 feet.
- Fire Hazard
234D2665P001
31-16781-1
09-17 GEA
01
Table des Matières

Manuels Connexes pour GE GUD27GSPMDG


Sommaire des Matières pour GE GUD27GSPMDG
- Page 18 Notes...
- Page 19 Notes...
- Page 20 Printed in Mexico...
-
Page 21: Avant De Commencer
Instructions Laveuse/Sécheuse Unifiées D’Installation Si vous avez des questions, appelez GE Appliances 800.GE.CARES ou visitez notre site web: www.GEAppliances.com Au Canada, appelez le 1.800.561.3344 ou visitez www.electromenagersge.ca AVANT DE COMMENCER - Risque AVERTISSEMENT d’incendie Lisez attentivement ces instructions dans leur intégralité. -
Page 22: Déballage De Votre Appareil
Instructions d’installation DÉBALLAGE DE VOTRE APPAREIL Inclinez la appareil latéralement et enlevez Enlevez le sac contenant les tuyaux de jonction et les pièces du les coussinets d’expédition en mousse en les bac. poussant sur les côtés et en les détachant des pattes de la appareil. -
Page 23: Exigences Relatives À Une Installation Encastrée
Instructions d’installation CONDITIONS D’INSTALLATION EXIGENCES RELATIVES À UNE DEL’EMPLACEMENT INSTALLATION ENCASTRÉE Cet appareil doit être installé sur un sol solide pour - Risque minimiser les vibrations durant le cycle d’essorage. Le sol AVERTISSEMENT d’explosion en béton est meilleur, mais une base en bois est suffisante. Cet appareil ne devrait pas être installé... -
Page 24: Raccordement D'une Sécheuse À Gaz
Instructions d’installation RACCORDEMENT D’UNE SÉCHEUSE À GAZ (non applicable aux sécheuses à électriques) OUTILS NÉCESSAIRES • Avant de démarrer l’installation, déclenchez le disjoncteur ou enlevez le fusible de la sécheuse au Clés à molette Tournevis à tête plate panneau de distribution électrique. Assurez-vous (2) 10 po que le cordon d’alimentation de la sécheuse est débranché... -
Page 25: Exigences Relatives Au Gaz
Instructions d’installation EXIGENCES RELATIVES AU GAZ ALIMENTATION EN GAZ • Un robinet de raccordement à filetage National - Risque AVERTISSEMENT Pipe Taper 3,2 mm (1/8 po), accessible pour le d’explosion raccordement d’un manomètre, doit être installé • Utilisez une conduite de gaz flexible neuve, immédiatement en amont du raccord d’alimentation homologuée CSA International. -
Page 26: Raccordement D'une Sécheuse À Gaz (Suite)
Instructions d’installation RACCORDEMENT D’UNE SÉCHEUSE À GAZ (suite) 24” RACCORDEMENT DE LA SÉCHEUSE À L’ALIMENTATION EN GAZ 24” & 27” Retour de Appliquez le compose L‘Appareil d’ étanchéité des tuyauteriesà l’ entrée a gaz de la secheuse 24” 3/8” NPT entree de l‘appareil 27”... -
Page 27: Détection Des Fuites
Instructions d’installation INFORMATIONS DE BRANCHEMENT DÉTECTION DES FUITES ÉLECTRIQUE POUR LES N’utilisez jamais une flamme nue pour vérifier la SÉCHEUSES À GAZ (suite) présence de fuites de gaz. Contrôlez la présence de fuites sur tous les • Appareil doit être mise à la terre conformément aux raccordements avec une solution savonneuse ou codes locaux et ordonnances, ou, en l’absence de similaire. -
Page 28: Raccordement D'une Sécheuse Électrique
CORDONS D’ALIMENTATION avec l’appareil) Lunettes de protection Conforme à la norme GE Appliances recommande vivement l’utilisation de UL 120/240 V, 30 A pièces spécifiées par le fabricant. Choisissez un cordon avec 3 ou 4 broches. d’alimentation qui correspond aux exigences de votre Identifiez le type de installation. -
Page 29: Renseignements Sur Les Raccords Électriques Pour Sécheuses Électriques
Instructions d’installation RENSEIGNEMENTS SUR LES RENSEIGNEMENTS SUR LES RACCORDS ÉLECTRIQUES POUR RACCORDS ÉLECTRIQUES POUR SÉCHEUSES ÉLECTRIQUES SÉCHEUSES ÉLECTRIQUES Pour les branchements électriques Pour les connexions de fil directes : utilisant un cordon d’alimentation : - Risque AVERTISSEMENT d’incendie - Risque AVERTISSEMENT d’incendie Utilisez un fil de cuivre de calibre 10. -
Page 30: Raccordement De La Sécheuseà L'aide D'un Câble À 3 Fils
Instructions d’installation MODÈLES 24” - RACCORDEMENT SÉCHEUSE ÉLECTRIQUE BRANCHEMENT DE LA SÉCHEUSE À RACCORDEMENT DE LA SÉCHEUSE L’AIDE D’UN CÂBLE À 4 FILS À L’AIDE D’UN CÂBLE À 3 FILS (À UTILISER POUR L’INSTALLATION DANS UNE MAISON MOBILE) FIXATION VIS VERTE DE A LA MASSE MISE A SUPPORT DU... - Page 31 Instructions d’installation MODÈLES 27” - RACCORDEMENT SÉCHEUSE ÉLECTRIQUE BRANCHEMENT DE LA SÉCHEUSE À RACCORDEMENT DE LA SÉCHEUSE L’AIDE D’UN CÂBLE À 4 FILS À L’AIDE D’UN CÂBLE À 3 FILS (À UTILISER POUR L’INSTALLATION 3 # 10 AWG MINIMUM DANS UNE MAISON MOBILE) VIS VERTE DE MISE A LA CONDUCTEURS DE TERRE ET FIXATION A LA...
-
Page 32: Évacuation De La Sécheuse
à l’aide d’un conduit métallique flexible L’INSTALLATION DU CONDUIT D’ÉVACUATION (type en feuille). Le conduit de transition flexible pour sécheuses approuvé par UL (pièce de GE Appliances Tournevis cruciforme Percez à l’aide - PM8X73 ou WX8X73) peut être utilisé seulement d’un foret de 1/8... -
Page 33: Évacuation De La Sécheuse (Suite)
Instructions d’installation ÉVACUATION DE LA SÉCHEUSE (suite) • UTILISEZ des coudes lorsque des • COUPEZ le conduit aussi court changements de direction sont nécessaires. que possible et installez-le droit vers le mur. Coudes • N’ÉCRASEZ • N’UTILISEZ • N’ÉCRASEZ • N’INSTALLEZ PAS ou ne pliez PAS une PAS le... -
Page 34: Liste De Controle Du Systeme D'echappement
Instructions d’installation ÉVACUATION DE LA SÉCHEUSE (suite) LISTE DE CONTROLE DU ÉVACUATION ARRIÈRE STANDARD SYSTEME D’ECHAPPEMENT L’echappement arriere fait partie de cette secheuse. Si votre espace est limite, utilisez les CAPUCHON OU GRILLE DU MUR instructions de avoir un systeme d’echappement •... - Page 35 Débranchez la sécheuse de l’alimentation Débranchez la sécheuse de l’alimentation électrique. électrique. Portez des gants et des protège-bras. Portez des gants et des protège-bras. L’omission de prendre ces précautions peut L’omission de prendre ces précautions peut causer des incendie, chocs électriques ou des causer des incendie, chocs électriques ou des...
- Page 36 Instructions d’installation CONNEXION DE LA LAVEUSE INFORMATION SUR LA BRANCHER LA PLOMBERIE PLOMBERIE CONDITIONS DE L’APPROVISIONEMENT EN • ROBINETS D’EAU CHAUDE ET FROIDE – Ils doivent être à moins de 42” des branchements de l’appareil pour l’arrivée d’eau. Les robinets doivent être ¾”...
-
Page 37: Installation Finale
Instructions d’installation INSTALLATION FINALE METTRE A NIVEAU ET STABILISER DÉMARRAGE DE L’APPAREIL VOTRE APPAREIL La laveuse et la sécheuse sont maintenant prêtes à être utilisées. Voir le Manuel du Propriétaire pour une utilisation et des soins appropriés. Niveau d’un cote a l’autre ENREGISTREZ VOTRE NOUVEL Niveau de APPAREIL POUR QUE VOUS... - Page 38 Notes...
- Page 39 Notes...
- Page 40 Imprimé au Mexique...
- Page 58 Notas...
- Page 59 Notas...