
Manuels Connexes pour Thermor SSC NF 3 Etoiles Oeil


Sommaire des Matières pour Thermor SSC NF 3 Etoiles Oeil
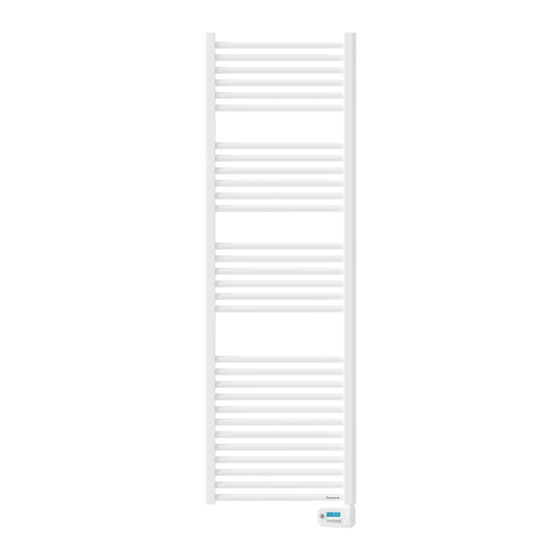
- Page 1 RADIATEUR SECHE-SERVIETTES SSC NF 3 Etoiles Oeil Notice d’utilisation A conserver...
-
Page 3: Table Des Matières
Sommaire (ORION - ORION ETROIT) Mise en garde..........................Installation............................Préparer l’installation de l’appareil................... Raccorder l’appareil........................Entretien............................Utilisation............................Le boîtier de commande......................Première mise en marche......................Réglage du jour et de l’heure......................Les différents modes de fonctionnement................Fonctionnement du dispositif....................Mode Fil Pilote..........................Mode Confort.......................... -
Page 4: Mise En Garde
Mise en garde Attention surface très chaude. Caution hot surface. ATTENTION : Certaines parties de ce produit peuvent devenir très chaudes et provoquer des brûlures. Il faut prêter une attention particulière en présence d’enfants et de personnes vulnérables. - Il convient de maintenir à distance de cet appareil les enfants de moins de 3 ans, à... - Page 5 - La notice d’utilisation de cet appareil est disponible en vous connectant sur le site Internet du fabricant indiqué sur le bon de garantie présent dans cette notice. - Un système de gestion d’énergie ou de délestage par coupure d’alimentation est incompatible avec nos appareils. Il détériore le thermostat.
-
Page 6: Installation
Installation PREPARER L’INSTALLATION DE L’APPAREIL Règles d’installation - Cet appareil a été conçu pour être installé dans un local résidentiel. Dans tout autre cas,veuillez consulter votre distributeur. - L’installation doit être faite dans les règles de l’art et conforme aux normes en vigueur dans le pays d’installation (NFC 15-100 pour la France). -
Page 7: Raccorder L'appareil
RACCORDER L’APPAREIL Règles de raccordement - L’appareil doit être alimenté en 230 V Monophasé 50Hz. - L’alimentation de l’appareil doit être directement raccordée au réseau après le disjoncteur et sans interrupteur intermédiaire. - Le raccordement au secteur se fera à l’aide du câble de l’appareil par l’intermédiaire d’un boîtier de raccordement. -
Page 8: Entretien
- Pour vérifier la bonne transmission des ordres de programmatio, procédez aux vérifications suivantes : Ordres reçus Oscilloscope Réf/Neutre Mode obtenu 0 volt CONFORT 230 V 3 s/5 min CONFORT – 1° C 230V 7 s/5 min CONFORT – 2° C 230 V –... -
Page 9: Utilisation
Utilisation LE BOITIER DE COMMANDE Visualisation des Detecteur de Diminuer information présence Allumer / Eteindre Indicateur de consommation Timer/Prog Accéder aux modes Augmenter PREMIERE MISE EN MARCHE Appuyez sur la touche pour allumer l’appareil ou le mettre en mode Veille. Une fois activé, l’heure actuelle s’affiche à... -
Page 10: Les Différents Modes De Fonctionnement
LES DIFFERENTS MODES DE FONCTIONNEMENT 1. FONCTIONNEMENT DU DISPOSITIF Appuyez sur la touche pour sélectionner le mode de fonctionnement souhaité. Une icône à l’écran indique le mode de fonctionnement sélectionné, selon le tableau suivant : R ƒ T ¾ Allumer/ Fil pilote Confort Hors gel... -
Page 11: Mode Eco/Nuit
MODE ECO/NUIT - Le mode « Eco/Nuit » définit une valeur de température inférieure à la valeur de température de « Confort ». La température ECO/NUIT maximun est de 19°C ou 0,5°C inférieur à la température de confort. Nous recommandons de sélectionner ce mode de fonctionnement pendant la nuit ou lorsque la pièce est inoccupée pendant 2 heures ou plus. -
Page 12: Réglage Du Programme P3
Réglage du programme P3 en mode PROG Entrez dans le mode « Veille » avec le bouton , ensuite appuyez sur le ¾ bouton au moins 3 secondes. -tEd (time End date) s’affiche à l’écran. -Appuyez sur [+], « Pro9 » s’affiche à l’écran, validez avec le bouton -A l’écran s’affiche l’heure 00:00 et le jour 1. -
Page 13: Fonctions Avancées
FONCTIONS AVANCEES Détection de fenêtre ouverte Cette fonction permet à l’appareil de détecter si une fenêtre est ouverte et passe en mode Hors Gel (7°C). A la fermeture de la fenêtre, vous devez appuyer sur le bouton pour que l’appareil se mette à chauffer et remonte à... -
Page 14: La Fonction Bip
Activer / Désactiver la fonction Détection de présence -Mettre l’appareil en veille en appuyant sur le bouton . ¾ -Appuyez sur le bouton quelques secondes. A l’écran s’affiche tEd. -Appuyez sur [+] jusqu’à atteindre Fun puis validez avec le bouton -Passez les fonctions fenêtre ouverte, anticipation de chauffe en validant avec le bouton -A l’écran s’affiche ON + «oeil», validez avec le bouton... -
Page 15: L'indicateur De Consommation
Indicateur de consommation Utilisez l’indicateur de consommation pour optimiser votre réglage. Quand l’indicateur de consommation se trouve au niveau du symbole vert, vous êtes à un niveau de température inférieur ou égal à la température conseillée. Par défaut, la température de consigne est réglée à 19°C (température conseillée) et est modifiable de 7°C à... -
Page 16: Le Menu Expert
MENU EXPERT Pour accèder aux fonctions avancées de l’appareil, appuyez sur les ¾ boutons et + pendant quelques secondes. Ensuite saisir le mot de passe «3106» avec les boutons + et - en validant avec à chaque digite. A l’écran s’affichera : OFSt qui vous permet d’ajuster votre température de consigne par rapport à... -
Page 17: En Cas De Problème
EN CAS DE PROBLEME Problème rencontré Vérifications à faire L’écran du boîtier Vérifiez que l’appareil est bien alimenté électriquement. de commande ne s’allume pas. La température Il est nécessaire d’attendre 6 heures au minimum pour que la d’ambiance est température se stabilise. différente de celle Il est possible, en fonction de votre installation, que vous rele affichée sur l’appareil. - Page 18 Problème rencontré Vérifications à faire L’appareil est très Il est normal que l’appareil soit chaud lorsqu’il fonctionne, la tem- chaud en surface. pérature maximale de surface étant limitée conformément à la norme NF Electricité Performance. Si toutefois vous jugez que votre appareil est toujours trop chaud, vérifiez que la puissance est adaptée à...
-
Page 19: Caractéristiques
Caractéristiques Référence du modèle ORION - ORION ETROIT Caractéristique Symbole Valeur Unité Puissance thermique Puissance thermique nominale P nom 0,5 à 0,75 Puissance thermique minimale Pmin Puissance thermique maximale continue P max.c 0,75 Consommation d’électricité auxiliaire A la puissance thermique nominale el max 0,00 A la puissance thermique minimale... -
Page 20: Conditions De Garantie
état de cause dans les conditions des articles 1641 et suivants du code civil. THERMOR ZA CHARLES BEAUHAIRE 17, rue Croix Fauchet - BP 46 45141 SAINT JEAN DE LA RUELLE www.thermor.fr... - Page 21 Contents (ORION - ORION ETROIT) Caution............................Installation............................Preparing the appliance's installation..................Connecting the appliance......................Maintenance........................... Use..............................Control unit........................... Switching the appliance on for the first time................. Setting the day and time....................The different operating modes....................Operation of the device......................Pilot Wire mode........................... Comfort mode..........................
-
Page 22: Caution
Caution Warning - very hot surface. CAUTION: Some parts of this product could beco- me very hot and cause burns. Special care should be taken when children and other vulnerable people are near. - Children under the age of 3 should be kept away from this appliance, unless they are permanently supervised. - Page 23 -incompatible with our appliances. This damages the thermostat. - For safety reasons, it is strictly forbidden to refill the devices. Contact a qualified professional if this should be necessary. Appliances marked with this symbol must not be discarded with household waste, but must be separately collected and recycled.
-
Page 24: Installation
Installation PREPARING THE APPLIANCE'S INSTALLATION Installation rules - This device has been designed for installation in the home; please consult your distributor for all other uses. - It must be installed in accordance with accepted trade practices and the standards in force in the country of installation (NFC 15-100 for France). -
Page 25: Connecting The Appliance
CONNECTING THE APPLIANCE Connection rules - The appliance must be powered with a 230 V single phase 50Hz supply. - The appliance's power supply must be connected directly to the network after the circuit breaker, with no intermediary switch. - The appliance is connected to the mains by its power cable which passes through a connection box. -
Page 26: Maintenance
- Perform the following checks to ensure that the programming commands are correctly transmitted: Received Oscilloscope Ref/ Mode obtained commands Neutral 0 volt COMFORT 230 V 3 s/5 min COMFORT - 1° C 230V 7 s/5 min COMFORT – 2° C 230 V - 115 V negative FROST PROTECTION... -
Page 27: Use
CONTROL UNIT [Timer/Prog] SWITCHING THE APPLIANCE ON FOR THE FIRST TIME Press the button to switch on the appliance or put it in Standby mode. Once activated, the current time, the operating mode, and temperature are displayed on the screen. In Standby mode, the current time, the day of the week, and the "Stb"... -
Page 28: The Different Operating Modes
THE DIFFERENT OPERATING MODES 1. OPERATION OF THE DEVICE Press the button to select the desired operating mode. An icon is displayed indicating the selected operating mode, as per the following table: R ƒ T ¾ Switch on/ Frost pro- Pilot wire Comfort Timer/Prog... -
Page 29: Eco/Night Mode
ECO/NIGHT MODE - The "Eco/Night" mode defines a temperature that is lower than the "Comfort" temperature value. The maximum ECO/NIGHT temperature is 19° C or 0.5° C below the comfort temperature. We recommend that this operating mode is selected for the night or when the room is empty for more than 2 hours. -
Page 30: Boost Mode
00:00 Enter "Standby" mode with the button , then press ¾ the button for at least 3 seconds. -tEd (time End date) is displayed on the screen. 0h. . 3. . 6. . 9. . 12. . 15. . 18. . 21. . 24 -Press [+], "Pro9"... -
Page 31: Advanced Functions
ADVANCED FUNCTIONS Open window detection With this function the appliance can detect if a window is open and switch to Frost Protection mode (7° C). After the window is closed, you will have to press the button so that the appliance heats back up to the previously selected temperature. -
Page 32: The Beep Function
Activate/Deactivate the Presence Detection function -Switch the appliance to standby by pressing the button . ¾ -Press the button for a few seconds. tEd is displayed. -Press [+] until reaching Fun then confirm with the button -Pass the window open function, then the anticipated heating function, by confirming with the button -ON + "eye"... -
Page 33: Consumption Indicator
Consumption indicator The consumption indicator can be used to optimise your settings. When the consumption indicator is level with the green symbol the temperature is equal to or lower than the recommended temperature. The default setpoint for the temperature is 19° C (recommended temperature) but can be modified from 7°... - Page 34 EXPERT MENU ¾ To access the appliances' advanced functions, press the buttons + for a few seconds. Then enter the password "3106" with the + and - buttons, confirming each digit with The screen will display: OFSt allows you to adjust your setpoint temperature in relation to the temperature recorded in the room if you notice a difference.
-
Page 35: Troubleshooting
TROUBLESHOOTING Problem encounte- Checks to perform The control unit's Check that the appliance is correctly powered. screen does not light up. The room You will have to wait at least 6 hours for the temperature to stabilise. temperature is Depending on your installation, it is possible that different from the your room temperature is slightly different from temperature t e m p e r a t u r e... - Page 36 Problem encounte- Checks to perform The surface of the It is normal for the appliance to be hot when operating, with a appliance maximum surface temperature within the limits of the is very hot. NF Electrical Performance standard. If, however, you think that your appliance is still too hot, check that its power rating is suitable for the volume of your room (we recommend 100 W/m 2 for a ceiling height of 2.50 m or 40W/m 3)
-
Page 37: Specifications
Specifications Model reference ORION - ORION ETROIT Specification Symbol Value Unit Heat output Rated heat output P nom 0.5 to 0.75 Minimum heat output Pmin Maximum continuous heat output P max.c 0.75 Auxiliary electricity consumption At rated heat output el max 0.00 At minimum heat output el min... -
Page 38: Warranty Conditions
1641 and in accordance with the civil code. THERMOR ZA CHARLES BEAUHAIRE 17, rue Croix Fauchet - BP 46 45141 SAINT JEAN DE LA RUELLE www.thermor.fr...