AEG FFB41600ZM Notice D'utilisation
Masquer les pouces Voir aussi pour FFB41600ZM:
Table des Matières

Publicité

Les langues disponibles

Les langues disponibles

Liens rapides

FFB41600ZM
USER
MANUAL
EN
User Manual
Dishwasher
FR
Notice d'utilisation
Lave-vaisselle
DE
Benutzerinformation
Geschirrspüler
2
25
48

Publicité

Table des Matières
loading

Sommaire des Matières pour AEG FFB41600ZM

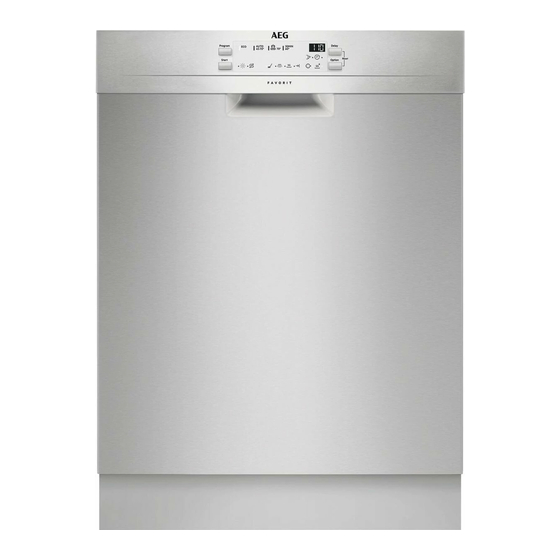
  • Page 1 FFB41600ZM User Manual Dishwasher Notice d'utilisation Lave-vaisselle Benutzerinformation Geschirrspüler USER MANUAL...
  • Page 2: Table Des Matières

    14. ELECTROLUX / AEG MAJOR APPLIANCES - WARRANTY CONDITIONS..22 FOR PERFECT RESULTS Thank you for choosing this AEG product. We have created it to give you impeccable performance for many years, with innovative technologies that help make life simpler features you might not find on ordinary appliances. Please spend a few minutes reading to get the very best from it.
  • Page 3: Children And Vulnerable People Safety

    ENGLISH manufacturer is not responsible for any injuries or damages that are the result of incorrect installation or usage. Always keep the instructions in a safe and accessible location for future reference. 1.1 Children and vulnerable people safety This appliance can be used by children aged from 8 •...
  • Page 4: Safety Instructions

    Do not leave the appliance with the open door • unattended to avoid stepping accidentally onto it. Before any maintenance operation, deactivate the • appliance and disconnect the mains plug from the socket. Do not use high pressure water sprays and/or steam •...
  • Page 5 ENGLISH • Do not remove the dishes from the appliance until the programme is complete. Some detergent may remain on the dishes. • The appliance can release hot steam if you open the door while a programme operates. • Do not put flammable products or items that are wet with flammable products in, near or on the appliance.
  • Page 6: Product Description

    3. PRODUCT DESCRIPTION Worktop Rinse aid dispenser Upper spray arm Detergent dispenser Lower spray arm Cutlery basket Filters Lower basket Rating plate Upper basket Salt container Air vent...
  • Page 7: Control Panel

    ENGLISH 4. CONTROL PANEL On/off button Option button Program button Indicators Programme indicators Start button Display Delay button 4.1 Indicators Indicator Description Washing phase. It comes on when the washing phase operates. Rinsing phase. It comes on when the rinsing phase operates. Drying phase.
  • Page 8: Programmes

    Indicator Description ExtraHygiene indicator. Door indicator. It comes on when the appliance door is open or is not cor- rectly closed. 5. PROGRAMMES Programme Degree of soil Programme phases Options Type of load • Normal soil • Prewash • ExtraHygiene •...
  • Page 9: Information For Test Institutes

    ENGLISH 5.2 Information for test info.test@dishwasher-production.com institutes Write down the product number (PNC) that is on the rating plate. For all the necessary information for test performance, send an email to: 6. SETTINGS 6.1 Programme selection How to enter user mode mode and user mode Make sure the appliance is in programme selection mode.
  • Page 10 German de- French degrees mmol/l Clarke de- Water softener lev- grees (°dH) (°fH) grees 19 - 22 33 - 39 3.3 - 3.9 23 - 27 15 - 18 26 - 32 2.6 - 3.2 18 - 22 11 - 14 19 - 25 1.9 - 2.5...
  • Page 11: Options

    ENGLISH To improve the drying performance refer to the XtraDry option or activate AirDry. CAUTION! If children have access to the appliance, it is advised to deactivate AirDry as opening the door may pose a danger. How to deactivate AirDry Make sure the appliance is in user mode.
  • Page 12: Before First Use

    7.2 ExtraHygiene If the option is not applicable to the programme, the related indicator is off This option provides better hygiene or it flashes quickly for a few seconds and results by keeping the temperature at 70 then goes out.
  • Page 13: Daily Use

    ENGLISH 8.2 How to fill the rinse aid CAUTION! dispenser Only use rinse aid specifically designed for dishwashers. 1. Press the release button (D) to open the lid (C). 2. Fill the dispenser (A) until the rinse aid reaches the marking ''MAX''. 3.
  • Page 14: Starting A Programme

    3. Set the applicable options. 4. Press Start to start the programme. • The indicator of the running phase is on. • The programme duration starts to decrease with steps of 1 minute. Starting a programme with delay start 1.
  • Page 15: Hints And Tips

    ENGLISH Cancelling the delay start while End of the programme the countdown operates All buttons are inactive except for the on/off button. When you cancel the delay start you have to set the programme and options 1. Press the on/off button or wait for again.
  • Page 16: Loading The Baskets

    1. Set the highest level of the water • Put light items in the upper basket. softener. Make sure that the items do not 2. Make sure that the salt and rinse aid move. containers are full. • Make sure that the spray arm can 3.
  • Page 17 ENGLISH 5. Make sure that there are no residues of food or soil in or around the edge 1. Turn the filter (B) counterclockwise of the sump. and remove it. 6. Put back in place the flat filter (A). Make sure that it is correctly positioned under the 2 guides.
  • Page 18: Cleaning The Spray Arms

    11.2 Cleaning the spray arms • If you regularly use short duration programmes, these can leave Do not remove the spray arms. If the deposits of grease and limescale holes in the spray arms are clogged, inside the appliance. To prevent this,...
  • Page 19 ENGLISH Problem and alarm code Possible cause and solution The appliance does not fill • Make sure that the water tap is open. with water. • Make sure that the pressure of the water supply is not too low. For this information, contact your local water The display shows authority.
  • Page 20 Refer to "Before first use", Authorised Service Centre. "Daily use", or "Hints and For alarm codes not described in the tips" for other possible table, contact an Authorised Service causes. Centre. Once you have checked the appliance, deactivate and activate the appliance.
  • Page 21: Technical Information

    ENGLISH Problem Possible cause and solution Traces of rust on cutlery. • There is too much salt in the water used for washing. Refer to "The water softener". • Silver and stainless steel cutlery were placed together. Avoid to put silver and stainless steel items close to- gether.
  • Page 22: Electrolux / Aeg Major Appliances - Warranty Conditions

    1) Refer to the rating plate for other values. 2) If the hot water comes from alternative source of energy, (e.g. solar panels, aeolian energy), use the hot water supply to decrease energy consumption. 14. ELECTROLUX / AEG MAJOR APPLIANCES - WARRANTY CONDITIONS For domestic use only.
  • Page 23 • Model and serial number of the appliance • Clear and concise details of the fault Customer Care For general enquiries or information regarding Electrolux / AEG appliances contact: Customer Care Department Electrolux South Africa (Pty) Ltd. P.O. Box 50 Paarden Eiland, 7420...
  • Page 24: Environmental Concerns

    Telephone 00800 222 825 E-mail service@electrolux.co.za Website www.electrolux.co.za www.aeg.co.za 15. ENVIRONMENTAL CONCERNS appliances marked with the symbol Recycle materials with the symbol with the household waste. Return the Put the packaging in relevant containers product to your local recycling facility or to recycle it.
  • Page 25: Service Après-Vente

    13. CARACTÉRISTIQUES TECHNIQUES..............46 POUR DES RÉSULTATS PARFAITS Merci d'avoir choisi ce produit AEG. Nous l'avons conçu pour qu'il vous offre des performances irréprochables pour longtemps, en intégrant des technologies innovantes qui vous simplifient la vie grâce à des caractéristiques que vous ne trouverez pas forcément sur des appareils ordinaires.
  • Page 26: Sécurité Des Enfants Et Des Personnes Vulnérables

    être tenu pour responsable des blessures et dégâts résultant d'une mauvaise installation ou utilisation. Conservez toujours les instructions dans un lieu sûr et accessible pour vous y référer ultérieurement. 1.1 Sécurité des enfants et des personnes vulnérables Cet appareil peut être utilisé par des enfants âgés •...
  • Page 27: Consignes De Sécurité

    FRANÇAIS agréé ou un technicien qualifié afin d'éviter tout danger. Placez les couverts dans le panier à couverts, avec les • extrémités pointues vers le bas, ou placez-les dans le bac à couverts en position horizontale, bords tranchants vers le bas. Ne laissez pas la porte de l'appareil ouverte sans •...
  • Page 28: Raccordement À L'arrivée D'eau

    Contactez le fois l'appareil installé. service après-vente pour remplacer le • Ne tirez jamais sur le câble tuyau d'arrivée d'eau. d'alimentation pour débrancher 2.4 Utilisation l'appareil. Tirez toujours sur la fiche.
  • Page 29: Description De L'appareil

    FRANÇAIS 3. DESCRIPTION DE L'APPAREIL Plan de travail Distributeur de liquide de rinçage Bras d'aspersion intermédiaire Distributeur de produit de lavage Bras d'aspersion inférieur Panier à couverts Filtres Panier du bas Plaque de calibrage Panier du haut Réservoir de sel régénérant Fente d'aération...
  • Page 30: Bandeau De Commande

    4. BANDEAU DE COMMANDE Touche Marche/Arrêt Touche Option Touche Program Voyants Voyants de programme Touche Start Affichage Touche Delay 4.1 Voyants Indicateur Description Phase de lavage. Il s'allume au cours de la phase de lavage. Phase de rinçage. Il s'allume au cours de la phase de rinçage.
  • Page 31: Programmes

    FRANÇAIS Indicateur Description Voyant ExtraHygiene. Voyant de porte. Il s'allume lorsque la porte de l'appareil est ouverte ou mal fermée. 5. PROGRAMMES Programme Degré de salissure Phases du programme Options Type de vaisselle • Normalement • Prélavage • ExtraHygiene sale •...
  • Page 32: Informations Pour Les Instituts De Test

    Consommation Durée Programme électrique (min) (kWh) 1) Les valeurs de consommation peuvent changer en fonction de la pression et de la température de l'eau, des variations de l'alimentation électrique, de la quantité de vaisselle chargée ainsi que des op- tions sélectionnées.
  • Page 33: Comment Régler Le Niveau De L'adoucisseur D'eau

    FRANÇAIS Dureté eau Degrés alle- Degrés français mmol/l Degrés Niveau de l'adou- mands (°dH) (°fH) Clarke cisseur d'eau 47 - 50 84 - 90 8.4 - 9.0 58 - 63 43 - 46 76 - 83 7.6 - 8.3 53 - 57 37 - 42 65 - 75 6.5 - 7.5...
  • Page 34: Comment Désactiver La Notification Du Distributeur De Liquide De Rinçage Vide

    Durant la phase de séchage, performances du séchage. la porte s'ouvre Si vous utilisez un détergent standard ou automatiquement et reste des pastilles tout-en-1 sans agent de ouverte. rinçage, activez la notification pour que...
  • Page 35: Options

    FRANÇAIS 7. OPTIONS Les options souhaitées À chaque fois que vous doivent être activées à sélectionnez le programme chaque fois, avant de lancer , l'option XtraDry est un programme. désactivée et doit être Vous ne pouvez pas activer sélectionnée manuellement. ni désactiver ces options pendant le déroulement Comment activer l'option...
  • Page 36: Réservoir De Sel Régénérant

    Lorsque vous démarrez un programme, l'appareil peut prendre 5 minutes pour recharger la résine dans l'adoucisseur d'eau. Pendant ce temps, l'appareil semble ne pas fonctionner. La phase de lavage ne démarre qu'une fois cette procédure achevée. La procédure sera répétée régulièrement.
  • Page 37: Utilisation Quotidienne

    FRANÇAIS absorbant pour éviter tout excès de ATTENTION! mousse. Utilisez uniquement du 4. Fermez le couvercle. Assurez-vous liquide de rinçage que le bouton d'ouverture se spécialement conçu pour les verrouille correctement. lave-vaisselle. Vous pouvez tourner le 1. Appuyez sur le bouton d'ouverture sélecteur de quantité...
  • Page 38: Réglage Et Départ D'un Programme

    9.2 Réglage et départ d'un Lorsque le décompte est terminé, le programme démarre et le voyant de la programme phase en cours s'allume. L'indicateur de délai est éteint. Fonction Auto Off Ouverture de la porte au cours Cette fonction réduit la consommation du fonctionnement de d'énergie en éteignant...
  • Page 39: Fin Du Programme

    FRANÇAIS Assurez-vous que le distributeur de 1. Pour éteindre l'appareil, appuyez sur produit de lavage n'est pas vide avant de la touche marche/arrêt ou attendez démarrer un nouveau programme de que la fonction Auto Off l'éteigne lavage. automatiquement. Si vous ouvrez la porte avant Fin du programme l'activation de Auto Off, l'appareil est automatiquement éteint.
  • Page 40: Avant Le Démarrage D'un Programme

    • Placez les petits articles dans le panier procédure suivante. à couverts. • Placez les objets légers dans le panier 1. Réglez l'adoucisseur d'eau sur le supérieur. Disposez-les de façon à ce niveau maximal.
  • Page 41: Nettoyage Des Filtres

    FRANÇAIS 11.1 Nettoyage des filtres Le système de filtres est composé de 3 parties. 5. Assurez-vous qu'il ne reste aucun résidu alimentaire ni salissure à l'intérieur ou autour du bord du collecteur d'eau. 6. Remettez le filtre plat (A) en place. Assurez-vous qu'il est correctement 1.
  • Page 42: Nettoyage Intérieur

    11.4 Nettoyage intérieur ATTENTION! Une position incorrecte des • Nettoyez soigneusement l'appareil, y filtres peut donner de compris le joint en caoutchouc de la mauvais résultats de lavage porte, avec un chiffon doux humide. et endommager l'appareil. • Si vous utilisez régulièrement des programmes de courte durée, des...
  • Page 43 FRANÇAIS Problème et code d'alarme Cause et solution possibles Le programme ne démarre • Vérifiez que le hublot de l'appareil est fermé. pas. • Appuyez sur Start. • Si vous avez sélectionné un départ différé, annulez-le ou attendez la fin du décompte. •...
  • Page 44: Les Résultats De Lavage Et De Séchage Ne Sont Pas Satisfaisants

    Problème et code d'alarme Cause et solution possibles Bruit de cliquetis ou de bat- • La vaisselle n'est pas correctement rangée dans les pa- tement à l'intérieur de l'ap- niers. Reportez-vous au manuel de chargement du pa- pareil. nier.
  • Page 45 FRANÇAIS Problème Cause et solution possibles Il y a des traînées blanchâtres • La quantité de liquide de rinçage libérée est trop im- ou pellicules bleuâtres sur les portante. Placez le sélecteur de dosage du liquide de verres et la vaisselle. rinçage sur un niveau plus faible.
  • Page 46: Caractéristiques Techniques

    Problème Cause et solution possibles Dépôts calcaires sur la vaissel- • Le niveau de sel régénérant est bas, vérifiez le voyant le, dans la cuve et à l'intérieur de remplissage. de la porte. • Le bouchon du réservoir de sel régénérant est dévissé.
  • Page 47: En Matière De Protection De L'environnement

    FRANÇAIS 14. EN MATIÈRE DE PROTECTION DE L'ENVIRONNEMENT Recyclez les matériaux portant le électroniques. Ne jetez pas les appareils portant le symbole avec les ordures symbole . Déposez les emballages ménagères. Emmenez un tel produit dans les conteneurs prévus à cet effet. dans votre centre local de recyclage ou Contribuez à...
  • Page 48: Reparatur- Und Kundendienst

    12. FEHLERSUCHE......................65 13. TECHNISCHE DATEN.....................69 FÜR PERFEKTE ERGEBNISSE Danke, dass Sie sich für dieses AEG Produkt entschieden haben. Wir haben es geschaffen, damit Sie viele Jahre von seiner ausgezeichneten Leistung und den innovativen Technologien, die Ihnen das Leben erleichtern, profitieren können.
  • Page 49: Sicherheitshinweise

    DEUTSCH SICHERHEITSHINWEISE Lesen Sie vor der Montage und dem Gebrauch des Geräts zuerst die Gebrauchsanleitung. Bei Verletzungen oder Schäden infolge nicht ordnungsgemäßer Montage oder Verwendung des Geräts übernimmt der Hersteller keine Haftung. Bewahren Sie die Anleitung immer an einem sicheren und zugänglichen Ort zum späteren Nachschlagen auf.
  • Page 50: Sicherheitsanweisungen

    Der Betriebswasserdruck (Mindest- und Höchstdruck) • muss zwischen 0.5 (0.05) / 8 (0.8) bar (MPa) liegen Beachten Sie, dass die Höchstzahl an Maßgedecken • 13 beträgt. Wenn das Netzkabel beschädigt ist, muss es vom • Hersteller, seinem autorisierten Kundenservice oder einer gleichermaßen qualifizierten Person...
  • Page 51: Elektrischer Anschluss

    DEUTSCH Tragen Sie stets • Stellen Sie sicher, dass es keine Sicherheitshandschuhe und festes sichtbaren Wasserlecks während und Schuhwerk. nach dem ersten Gebrauch des Gerätes gibt. 2.2 Elektrischer Anschluss • Der Wasserzulaufschlauch verfügt über ein Sicherheitsventil und eine WARNUNG! Ummantelung mit einem Brand- und innenliegenden Netzkabel.
  • Page 52: Entsorgung

    2.5 Service • Trennen Sie das Gerät von der Stromversorgung. • Wenden Sie sich zur Reparatur des • Schneiden Sie das Netzkabel ab, und Geräts an einen autorisierten entsorgen Sie es. Kundendienst. • Entfernen Sie das Türschloss, um zu •...
  • Page 53: Bedienfeld

    DEUTSCH 4. BEDIENFELD Taste „Ein/Aus“ Taste Option Taste Program Kontrolllampen Programmkontrolllampen Taste Start Display Taste Delay 4.1 Kontrolllampen Kontrolllam- Beschreibung Hauptspülgang. Leuchtet während des Hauptspülgangs auf. Spülgang. Leuchtet während der Spülphase auf. Trockenphase. Leuchtet während der Trocknungsphase auf. Kontrolllampe Programmende. Kontrolllampe XtraDry.
  • Page 54: Programme

    Kontrolllam- Beschreibung Kontrolllampe ExtraHygiene. Kontrolllampe Tür. Leuchtet, wenn die Tür des Geräts offen oder nicht richtig geschlossen ist. 5. PROGRAMME Programm Verschmutzungs- Programmphasen Optionen grad Beladung • Normaler Ver- • Vorspülen • ExtraHygiene schmutzungs- • Hauptspülgang 50 °C • XtraDry grad •...
  • Page 55: Informationen Für

    DEUTSCH Wasserverbrauch Energieverbrauch Dauer Programm (kWh) (min.) 7 - 12 0.7 - 1.4 45 - 156 14-15 1.5 - 1.7 155 - 170 1) Druck und Temperatur des Wassers, die Schwankungen in der Stromversorgung, die ausgewählten Optionen und die Geschirrmenge können die Werte verändern. 5.2 Informationen für info.test@dishwasher-production.com Prüfinstitute...
  • Page 56: Einstellen Des Wasserenthärters

    Stufe eingestellt werden, um gute Spülergebnisse zu garantieren. Wasserhärte Deutsche Was- Französische mmol/l Clarke Was- Einstellung für den serhärtegrade Wasserhärte- serhärtegra- Wasserenthärter (°dH) grade (°fH) 47 - 50 84 - 90 8.4 - 9.0 58 - 63...
  • Page 57 DEUTSCH Ist das Klarspülmittelfach leer, wird die Klarspülmittelnachfüllanzeige eingeschaltet und weist darauf hin, dass Klarspülmittel nachgefüllt werden sollte. Wenn Sie Multi-Reinigungstabletten verwenden, und die Reinigungsergebnisse zufriedenstellend sind, können Sie die Klarspülmittelnachfüllanzeige ausschalten. Für eine bessere Trocknungsleistung empfehlen wir jedoch stets Klarspülmittel zu verwenden.
  • Page 58: Optionen

    • Im Display wird die aktuelle 3. Drücken Sie Ein/Aus zum Bestätigen der Einstellung. Einstellung angezeigt: AirDry eingeschaltet. 2. Drücken Sie Delay zur Änderung der Einstellung: = AirDry ausgeschaltet. 7. OPTIONEN So schalten Sie XtraDry ein Sie müssen die gewünschten Optionen vor dem Drücken Sie Option, bis die Anzeige...
  • Page 59: Vor Der Ersten Inbetriebnahme

    DEUTSCH 8. VOR DER ERSTEN INBETRIEBNAHME 1. Prüfen Sie, ob die Einstellung des Wasserenthärters der Wasserhärte in Ihrem Gebiet entspricht. Wenn nicht, stellen Sie die Wasserenthärterstufe ein. 2. Füllen Sie den Salzbehälter. 3. Füllen Sie den Klarspülmittel- Dosierer. 4. Öffnen Sie den Wasserhahn. 5.
  • Page 60: Täglicher Gebrauch

    8.2 Füllen des Klarspülmittel- VORSICHT! Dosierers Verwenden Sie ausschließlich Klarspülmittel für Geschirrspüler. 1. Drücken Sie die Entriegelungstaste (D), um den Deckel (C) zu öffnen. 2. Füllen Sie den Dosierer (A) mit Klarspülmittel bis zur Marke „MAX“. 3. Wischen Sie verschüttetes Klarspülmittel mit einem saugfähigen...
  • Page 61 DEUTSCH 2. Drücken Sie Program wiederholt, bis die Kontrolllampe des gewünschten Programms leuchtet. Im Display wird die Programmdauer angezeigt. 3. Stellen Sie die verfügbaren Optionen ein. 4. Drücken Sie Start, um das Programm zu starten. • Die Kontrolllampe für das laufende Programm leuchtet.
  • Page 62: Tipps Und Hinweise

    Drücken Sie Delay und Option Wenn die Tür während der gleichzeitig, bis sich das Gerät im Trockenphase länger als 30 Programmwahlmodus befindet. Sekunden geöffnet wird, wird das laufende Programm Beenden des Programms beendet. Dies geschieht nicht, wenn die Tür durch Halten Sie Delay und Option gleichzeitig die Funktion AirDry geöffnet...
  • Page 63: Beladen Der Körbe

    DEUTSCH Reinigungsmittel ohne Zusätze • Spülen Sie in diesem Gerät keine (Pulver, Gel oder Tabs ohne Zusätze), Gegenstände, die Wasser aufnehmen Klarspülmittel und Salz getrennt zu können (Schwämme, Geschirrtücher verwenden, um optimale Reinigungs- usw.). und Trocknungsergebnisse zu • Entfernen Sie Speisereste vom erzielen.
  • Page 64: Reinigung Und Pflege

    Am Programmende kann sich noch Wasser an den Seitenwänden und der Gerätetür befinden. 11. REINIGUNG UND PFLEGE WARNUNG! Schalten Sie das Gerät immer aus und ziehen Sie den Netzstecker aus der Steckdose, bevor Reinigungsarbeiten durchgeführt werden. Verschmutzte Filter und 2.
  • Page 65: Reinigen Der Außenseiten

    DEUTSCH sind, reinigen Sie sie mit einem dünnen spitzen Gegenstand. 11.3 Reinigen der Außenseiten • Reinigen Sie das Gerät mit einem weichen, feuchten Tuch. • Verwenden Sie ausschließlich Neutralreiniger. • Benutzen Sie keine Scheuermittel, scheuernde Reinigungsschwämmchen oder Lösungsmittel. 11.4 Reinigung des 7.
  • Page 66 Bei manchen Störungen zeigt das der autorisierte Kundendienst gerufen Display einen Alarmcode an. werden muss. Die meisten Störungen, die auftreten, können behoben werden, ohne dass Störung und Alarmcode Mögliche Ursache und Abhilfe Das Gerät lässt sich nicht • Vergewissern Sie sich, dass der Netzstecker in die Netz- einschalten.
  • Page 67: Die Spül- Und Trocknungsergebnisse Sind Nicht Zufriedenstellend

    DEUTSCH Störung und Alarmcode Mögliche Ursache und Abhilfe Die verbleibende Zeit im • Dies ist keine Störung. Das Gerät arbeitet ordnungsge- Display erhöht sich und mäß. springt bis kurz vor die Pro- grammende-Zeit. Aus der Gerätetür tritt ein • Das Gerät ist nicht ausgerichtet. Schrauben Sie die wenig Wasser aus.
  • Page 68 Störung Mögliche Ursache und Abhilfe Nicht zufriedenstellende • Das Geschirr stand zu lange im geschlossenen Gerät. Trocknungsergebnisse. • Es ist kein Klarspülmittel vorhanden oder die Klarspül- mittelmenge ist nicht ausreichend. Stellen Sie den Klarspülmittel-Dosierer auf eine höhere Einstellung. • Kunststoffteile müssen eventuell mit einem Tuch ab- getrocknet werden.
  • Page 69: Technische Daten

    DEUTSCH Störung Mögliche Ursache und Abhilfe Am Ende des Programms be- • Das Reinigungsmittel-Tab blieb im Behälter stecken finden sich Reinigungsmittel- und wurde daher nicht vollständig vom Wasser mitge- reste im Behälter. nommen. • Das Wasser kann das Reinigungsmittel nicht aus dem Behälter ausspülen.
  • Page 70 Wasserversorgung max. 60 °C Kalt- oder Warmwasser Fassungsvermögen Maßgedecke Leistungsaufnahme Ein-Zustand (W) Leistungsaufnahme Aus-Zustand (W) 0.50 1) Weitere Angaben finden Sie auf dem Typenschild. 2) Wenn Sie Heißwasser mit umweltfreundlichen, alternativen Energiequellen (z. B. Solaranlagen oder Windkraft) aufbereiten, können Sie durch den Anschluss des Geräts an die Heißwasserversorgung Ener- gie sparen.
  • Page 71 DEUTSCH...
  • Page 72 www.aeg.com/shop...

Table des Matières