Table des Matières

Manuels Connexes pour DT SWISS R 232 ONE


Sommaire des Matières pour DT SWISS R 232 ONE
- Page 1 R 232 ONE BEDIENUNGSANLEITUNG USER MANUAL MANUEL D’UTILISATION ISTRUZIONI PER L‘USO MANUAL DE INSTRUCCIONES GEBRUIKERSHANDLEIDING MANUAL DE INSTRUÇÕES INSTRUKCJA OBSŁUGI 用户手册 V2021.10...
- Page 2 DEUTSCH ........4 ENGLISH ........12 FRANÇAIS ........20 ITALIANO ........28 ESPAÑOL ........36 NEDERLANDS ......44 PORTUGUÊS ....... 52 POLSKI ........60 ........... 67 中文...
- Page 3 88041_01 064 P1538383 123 R232 ONE 165/40 S IC R LN MM S A individual serial number shock model length / stroke shock mount damping technology actuation spring technology factory tuning color product range...
- Page 4 Wir gratulieren Ihnen zum Kauf Ihres neuen DT Swiss Dämpfers! Sie haben sich für ein Qualitätsprodukt made by DT Swiss entschieden. 1. ALLGEMEINES Dieses Handbuch richtet sich an den Anwender des Dämpfers. Es beinhaltet Montage, Einstellung, Wartung und Pflege des Dämpfers.
-
Page 5: Montage
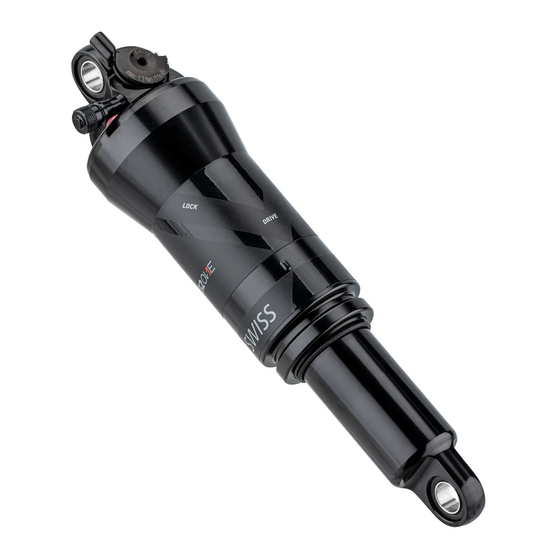
3. MONTAGE Die folgenden Informationen sind wichtig, wenn der Dämpfer in einem Fahrrad verwendet wird, bei dem er keine Originalausstattung war. DT Swiss Dämpfer ab Modelljahr 2023 unterscheiden sich aufgrund der verwendeten Lager in der Art und Weise der zulässigen Montage. - Page 6 3.2 MONTAGE VON DÄMPFERN MIT KUGELGELENKEN Das abgebildete Kugelgelenk ist bei diesen Dämpfern bereits montiert. Die für Ihren Fahrradrahmen passende Befestigungs-Hardware (Pin, Sleeves, O-Ringe) ist seperat erhätlich. Wenden Sie sich für die richtigen Dimensionen der Hardware an den Hersteller Ihres Fahradrahmens.
-
Page 7: Montage Des Dämpfers
5. Über den Remote-Hebel in den «DRIVE» Modus wechseln und Kabelzug einstellen. → Standard Mount-Dämpfer: Die «DRIVE» - Markierung (5) am Remote-Rad muss in Richtung der Anschlagschraube (6) zeigen. → Trunnion Mount-Dämpfer: Die «DRIVE» - Markierung (7) am Remote-Rad muss in Richtung des Ventils zeigen. R 232 ONE - Bedienungsanleitung V2021.10... - Page 8 4. SETUP 4.1 SAG EINSTELLEN Der SAG (Negativ-Federweg) ist das Mass, um welches der Dämpfer durch das Eigengewicht des Fahrers einfedert. Für ein straffes Fahrwerk sollte ein niedrigerer SAG (20% bis 25% des Dämpferhubs) gewählt werden. Für optimale Abfahrtseigenschaften sollte hingegen ein grösserer SAG (25% bis 35% des Dämpferhubs) gewählt werden.
- Page 9 Dämpferpumpe aufschrauben und Luftdruck LANGSAM durch drücken des Ablass-Ventils an der Dämpferpumpe reduzieren. → Der Dämpfer kann bis zu dem Punkt komprimieren, an dem der Ausgleich der positiven und negativen Luftkammer stattfindet. R 232 ONE - Bedienungsanleitung V2021.10...
- Page 10 4.5 DRUCKSTUFE EINSTELLEN Die Druckstufe regelt die Einfedergeschwindigkeit des Dämpfers und kann über den Hebel am Dämpfer oder über den Remote-Hebel am Lenker in drei Stufen eingestellt werden: OPEN: Im Modus «OPEN» befindet sich die Druckstufe des Dämpfers in der sensibelsten, von Werk abgestimmten Einstellung.
-
Page 11: Wartung Und Pflege
Tätigkeit Intervall Service durch ein DT Swiss Service Center Jährlich oder nach 200 Betriebsstunden Kleiner Service (bei Bedarf durch ein DT Swiss Service Center) 50 Betriebsstunden siehe Technical Manual unter www.dtswiss.com bei extremen Einsatzbedingungen häufiger! Dämpfer auf Beschädigungen und Risse prüfen. -
Page 12: General Information
Congratulations on the purchase of your new DT Swiss shock! You have purchased a quality product made by DT Swiss. 1. GENERAL INFORMATION This user manual is intended for the user of the shock. It includes information on the assembly, adjustment, maintenance and care of the shock. - Page 13 The following information is important when the shock is used in a bicycle where it was not original equipment. DT Swiss shocks from model year 2023 differ in the way they are allowed to be mounted due to the bearings used.
- Page 14 3.2 MOUNTING SHOCKS WITH SPHERICAL BEARINGS The spherical bearings shown are already fitted to these shocks. The mounting hardware (pin, sleeves, O-rings) suitable for your bike frame is available separately. Consult the manufacturer of your bicycle frame for the correct dimensions of the hardware.
- Page 15 → Shock with standard mount: The “DRIVE” marking (5) on the remote wheel must face the stop screw (6). → Shock with trunnion mount: The “DRIVE” marking (7) on the remote wheel must face the valve. R 232 ONE - User Manual V2021.10...
- Page 16 4. SETUP 4.1 SETTING THE SAG The SAG (negative spring deflection) is the degree by which the shock compresses under the weight of the rider. For a firmer ride quality (cross country), a lower SAG (20% to 25% of the shock stroke) should be selected.
- Page 17 Screw on the shock pump and GRADUALLY reduce the air pressure by pressing the release valve on the shock pump. → The shock can compress up to the point at which the equalization of the positive and negative air chambers occurs. R 232 ONE - User Manual V2021.10...
- Page 18 4.5 ADJUSTING THE COMPRESSION The compression damping regulates the compression speed of the shock and can be adjusted in three stages via the lever on the shock or using the remote lever on the handlebars: OPEN: In “OPEN” mode, the compression of the shock is in the most sensitive, factory-set setting. The shock responds sensitively to small bumps in the terrain.
-
Page 19: Maintenance And Care
Service completed by a DT Swiss Service Center Annually or after 200 operating hours Small service (to be completed by a DT Swiss Service Center 50 operating hours if necessary): refer to the Technical Manual available at www. more frequently in case of extreme dtswiss.com... -
Page 20: Généralités
Toutes nos félicitations pour l'achat de votre nouvel amortisseur DT Swiss ! Vous avez choisi un produit de qualité « Made by DT Swiss ». 1. GÉNÉRALITÉS Ce manuel est destiné à l'utilisateur de l'amortisseur. Il concerne le montage, le réglage, la maintenance et l'entretien de l'amortisseur. -
Page 21: Utilisation Conforme Et Poids Total Maximal
3. MONTAGE Les informations suivantes sont importantes lorsque l'amortisseur ne fait pas partie de l'équipement d'origine du vélo. Les amortisseurs DT Swiss à compter de l'année du modèle 2023 diffèrent dans leur montage en raison des roulements utilisés. 3.1 MONTAGE DES AMORTISSEURS AVEC DOUILLES DU Entretoise latérale... -
Page 22: Montage D'amortisseurs Avec Rotules
3.2 MONTAGE D'AMORTISSEURS AVEC ROTULES La rotule représentée est déjà montée sur ces amortisseurs. Le matériel de fixation (axe, entretoises, joints toriques) adapté au cadre de votre vélo est disponible séparément. Consultez le fabricant du cadre de votre bicyclette pour connaître les dimensions des pièces nécessaires. Un guide d’assemblage du matériel de fixation est disponible dans le Manuel Technique de cet amortisseur à... -
Page 23: Montage De L'amortisseur
→ Amortisseur Standard Mount : le marquage « DRIVE » (5) sur la roue Remote doit être orienté vers la vis de butée (6). → Amortisseur Trunnion Mount : le marquage « DRIVE » (7) sur la roue Remote doit être orienté vers la valve. R 232 ONE - Manuel d’utilisation V2021.10... -
Page 24: Réglage Du Sag
4. RÉGLAGE 4.1 RÉGLAGE DU SAG Le SAG (débattement négatif) est la valeur qui correspond à l'enfoncement de l'amortisseur en fonction du poids du cycliste. Dans le cas d'un châssis rigide, opter pour un SAG peu élevé (20 % à 25 % d'enfoncement de la tige d'amortisseur). -
Page 25: Adaptation De La Pression Pneumatique De L'amortisseur
Visser la pompe pour amortisseur et réduire LENTEMENT la pression pneumatique en appuyant sur la valve d’évacuation de la pompe pour amortisseur. → L'amortisseur peut se comprimer jusqu'au point d'équilibre entre les chambres d'air positive et négative. R 232 ONE - Manuel d’utilisation V2021.10... -
Page 26: Réglage De La Compression
4.5 RÉGLAGE DE LA COMPRESSION La compression définit la vitesse d'enfoncement de l'amortisseur et peut être réglée sur trois niveaux avec le levier de l'amortisseur ou avec le levier Remote du guidon : OPEN : En mode « OPEN », la compression de l'amortisseur correspond au réglage d'usine le plus sensible. L'amortisseur réagit avec sensibilité... -
Page 27: Maintenance Et Entretien
Révision dans un centre SAV DT Swiss Tous les ans ou au bout de 200 heures de service Petite révision (au besoin dans un centre SAV DT Swiss), cf. 50 heures de service Manuel technique sur www.dtswiss.com Plus souvent en cas de conditions d'utilisation extrêmes ! -
Page 28: Aspetti Generali
Congratulazioni per l'acquisto del suo nuovo ammortizzatore DT Swiss! Ha scelto un prodotto di qualità made by DT Swiss. 1. ASPETTI GENERALI Questo manuale si rivolge all'utilizzatore dell'ammortizzatore. Include indicazioni relative a montaggio, regolazione, manutenzione e cura dell'ammortizzatore. Per ulteriori informazioni e attività, consultare il sito www.dtswiss.com. - Page 29 Le seguenti informazioni sono importanti, nel caso in cui l'ammortizzatore venga utilizzato in una bicicletta che non presenta tale ammortizzatore nella sua dotazione originale. Gli ammortizzatori DT Swiss dell'anno di modello 2023 differiscono nel modo in cui possono essere montati a causa dei cuscinetti utilizzati.
- Page 30 3.2 MONTAGGIO DI AMMORTIZZATORI CON GIUNTI A SFERA Il giunto a sfera qui raffigurato è già montato su questi ammortizzatori. La ferramenta di montaggio (perno, manicotti, O-ring) adatta al telaio della bicicletta è disponibile separatamente. Contattate il produttore del telaio della bicicletta per le dimensioni corrette della ferramenta.
-
Page 31: Montaggio Dell'ammortizzatore
→ Ammortizzatore Standard Mount: Il contrassegno «DRIVE» (5) sulla ruota remota deve indicare nella direzione della vite di battuta (6). → Ammortizzatore Trunnion Mount: Il contrassegno «DRIVE» (7) sulla ruota remota deve indicare nella direzione della valvola. R 232 ONE - Istruzioni per l’uso V2021.10... - Page 32 4. SETUP 4.1 IMPOSTAZIONE SAG Il SAG (affondamento statico della sospensione) è la misura di cui l'ammortizzatore rientra a causa del peso del ciclista. Per un telaio molto rigido è necessario scegliere un SAG inferiore (20%-25% della corsa dell'ammortizzatore). Per una migliore performance nel downhill un SAG superiore deve essere settato(25%-35% della corsa dell'ammortizzatore).
-
Page 33: Aumentare La Pressione Dell'aria
LENTAMENTEla pressione dell'aria premendo la valvola di scarico sulla pompa dell’ammortizzatore. → L'ammortizzatore può comprimersi fino al punto in cui si verifica la compensazione della camera d'aria positiva e negativa. R 232 ONE - Istruzioni per l’uso V2021.10... - Page 34 4.5 REGOLARE IL LIVELLO DI PRESSIONE La compressione regola la velocità di ritorno dell’ammortizzatore e può essere impostata su tre livelli agendo sulla leva sull’ammortizzatore oppure sulla leva remota sul manubrio: OPEN: Nella modalità «OPEN» la compressione dell' ammortizzatore presenta la regolazione più sensibile impostata in fabbrica.
-
Page 35: Manutenzione E Cura
Service a cura di un DT Swiss Service Center Ogni anno o dopo 200 ore di servizio Piccolo service (in caso di necessità a cura di un DT Swiss 50 ore di servizio Service Center), vedere Manuale tecnico al sito www.dtswiss. -
Page 36: Aspectos Generales
Le felicitamos por adquirir su nuevo amortiguador DT Swiss. Ha adquirido un producto de alta calidad made by DT Swiss. 1. ASPECTOS GENERALES El presente manual de instrucciones está destinado a los usuarios del amortiguador. El manual contiene información sobre la instalación, el ajuste, el mantenimiento y los cuidados del amortiguador. - Page 37 La información siguiente solo es relevante si el amortiguador se utiliza en una bicicleta de cuyo equipamiento original no formaba parte. Los modelos de amortiguadores DT Swiss a partir de 2023 se distinguen en la forma de montarlos por los cojinetes utilizados.
- Page 38 3.2 MONTAJE DE AMORTIGUADORES CON RÓTULAS En estos amortiguadores, la rótula que se muestra en la figura ya está montada. Los accesorios de montaje (pasador, manguitos, juntas tóricas) adecuados para el cuadro de la bicicleta los puedes adquirir aparte. Pregunte al fabricante del cuadro de la bicicleta las dimensiones correctas de los accesorios.
- Page 39 → Amortiguador de anclaje estándar: La marca «DRIVE» (5) en la ruedecilla remota debe apuntar en dirección al tornillo de tope (6). → Amortiguador de anclaje Trunnion: La marca «DRIVE» (7) en la ruedecilla remota debe apuntar en dirección a la válvula. R 232 ONE - Manual de instrucciones V2021.10...
- Page 40 4. SETUP 4.1 AJUSTAR EL SAG El SAG (recorrido negativo) es la medida en la cual se comprime el amortiguador bajo el peso propio del conductor. Para una suspensión dura se debería elegir un SAG reducido (del 20% al 25% de la carrera del amortiguador).
-
Page 41: Aumentar La Presión De Aire
→ El amortiguador se puede comprimir hasta el punto en el cual se produzca el equilibrado entre las cámaras de aire positiva y negativa. R 232 ONE - Manual de instrucciones V2021.10... -
Page 42: Ajuste De La Extensión
4.5 AJUSTAR EL NIVEL DE PRESIÓN El nivel de presión regula la velocidad de compresión del amortiguador y se puede ajustar en tres niveles a través de la palanca en el amortiguador o la palanca remota en el manillar: OPEN: En el modo «OPEN», el nivel de presión del amortiguador corresponde al ajuste más sensible, adaptado desde la fábrica. -
Page 43: Mantenimiento Y Cuidados
5. MANTENIMIENTO Y CUIDADOS Actividad Intervalo Revisión en un centro de servicio técnico DT Swiss Anualmente o tras 200 horas de Revisión pequeña (en caso necesario, en un centro de servicio 50 horas de uso técnico DT Swiss); consulte el manual técnico en www. - Page 44 Gefeliciteerd met de aankoop van uw nieuwe demper van DT Swiss! U heeft gekozen voor een kwaliteitsproduct made by DT Swiss. 1. ALGEMEEN Deze gebruikershandleiding is bedoeld voor de gebruiker van de demper. Ze behandelt de montage, de instelling en het onderhoud van de demper.
- Page 45 De volgende informatie is belangrijk wanneer de demper op een fiets wordt gebruikt waarbij de demper niet tot de originele uitrusting behoorde. Dempers van DT Swiss van modeljaar 2023 verschillen in de manier waarop ze gemonteerd kunnen worden, vanwege de gebruikte kogellagers.
- Page 46 3.2 MONTAGE VAN DEMPERS MET KOGELGEWRICHTEN Het afgebeelde kogelgewricht is reeds op deze dempers gemonteerd. De bevestigingsmiddelen (pin, sleeves, O-ringen) die geschikt zijn voor uw fietsframe zijn apart verkrijgbaar. Raadpleeg de fabrikant van uw fietsframe voor de juiste afmetingen van de middelen. Zie de technische handleiding voor deze demper op www.dtswiss.com voor instructies over de installatie van de bevestigingsmiddelen.
- Page 47 → Standard Mount-demper: De 'DRIVE'-markering (5) op het remote-wiel moet in de richting van de aanslagbout (6) wijzen. → Trunnion Mount-demper: De 'DRIVE'-markering (7) op het remote-wiel moet in de richting van het ventiel wijzen. R 232 ONE- Gebruiksaanwijzing V2021.10...
- Page 48 4. SETUP 4.1 SAG INSTELLEN De SAG (negatieve veerweg) is de mate waarin de demper door het eigengewicht van de bestuurder inveert. Voor een stuggere vering moet een lagere SAG (20% tot 25% van de demperkarakteristiek) worden geselecteerd. Voor optimale afdaaleigenschappen moet daarentegen een grotere SAG (25% tot 35% van de demperkarakteristiek) worden geselecteerd.
- Page 49 LANGZAAM door het aflaatventiel op de demperpomp in te drukken. → De demper kan comprimeren tot op het punt waarop een evenwicht tussen de positieve en de negatieve luchtkamer ontstaat. R 232 ONE- Gebruiksaanwijzing V2021.10...
- Page 50 4.5 INVEERDEMPING INSTELLEN Het drukniveau regelt de inveersnelheid van de demper en kan met een hendel op de demper of met de afstandsbedieningshendel op het stuur in drie standen worden ingesteld: OPEN: In de modus 'OPEN' bevindt het ingaande demping van de demper zich in de meest gevoelige fabrieksinstelling.
-
Page 51: Onderhoud En Zorg
5. ONDERHOUD EN ZORG Actie Interval Onderhoud door een DT Swiss Service Center Jaarlijks of na 200 bedrijfsuren Klein onderhoud (indien nodig door een DT Swiss Service 50 bedrijfsuren Center) zie 'Technische handleiding’ op www.dtswiss.com vaker in geval van extreme gebruiksomstandigheden! Controleer de demper op beschadigingen en scheuren. - Page 52 Parabéns pela aquisição do seu novo amortecedor DT Swiss! Optou por um produto de qualidade fabricado pela DT Swiss. 1. GERAL O presente manual destina-se aos utilizadores do amortecedor. É constituído pelas secções montagem, regulação, manutenção e limpeza do amortecedor.
- Page 53 As informações seguintes são importantes se o amortecedor for usado numa bicicleta em que o amortecedor não fazia parte do equipamento original. Os amortecedores DT Swiss do ano modelo 2023 diferem nas opções de montagem permitidas, devido aos rolamentos utilizados.
- Page 54 3.2 MONTAGEM DE AMORTECEDORES COM ARTICULAÇÕES ESFÉRICAS A junta esférica mostrada já está encaixada nestes amortecedores. As ferragens de montagem (pino, mangas, anel de vedação) adequadas para o quadro da sua bicicleta estão disponíveis separadamente. Consulte o fabricante do quadro da sua bicicleta para obter as dimensões corretas das ferragens.
- Page 55 → Amortecedor com Standard Mount: A marca «DRIVE» (5) na roda de comando deve apontar na direção do parafuso limitador (6). → Amortecedor com Trunnion Mount: A marca «DRIVE» (7) na roda de comando deve apontar na direção da válvula. R 232 ONE – Manual de instruções V2021.10...
- Page 56 4. CONFIGURAÇÃO 4.1 REGULAR O SAG O SAG (curso negativo de suspensão) é a medida de compressão do amortecedor atendendo ao peso do próprio ciclista. Para um quadro rígido deverá ser escolhido um SAG baixo (de 20% a 25% do curso do amortecedor).
- Page 57 Desenrosque a bomba de amortecedor e reduza LENTAMENTE a pressão de ar pressionando a válvula de descompressão na bomba de amortecedor. → O amortecedor pode ser comprimido, até que a câmara de ar positiva e negativa estejam equilibradas. R 232 ONE – Manual de instruções V2021.10...
- Page 58 4.5 DEFINIR O NÍVEL DE PRESSÃO O nível de pressão regula a velocidade de suspensão do amortecedor e pode ser regulado para três níveis através da alavanca no amortecedor ou através da alavanca no guiador: OPEN (aberto): No modo «OPEN» (aberto), o nível de pressão do amortecedor é o mais sensível, correspondendo à configuração de fábrica.
-
Page 59: Manutenção E Limpeza
6. GARANTIA (EUROPA) As condições de garantia podem ser consultadas em www.dtswiss.com R 232 ONE – Manual de instruções V2021.10... -
Page 60: Informacje Ogólne
Gratulujemy zakupu nowego dampera marki DT Swiss! Wybrali Państwo wysokiej jakości produkt wykonany przez DT Swiss. 1. INFORMACJE OGÓLNE Niniejsza instrukcja przeznaczona jest dla użytkownika dampera. Zawiera informacje dotyczące montażu, użytkowania, konserwacji oraz pielęgnacji dampera. Dalsze informacje dostępne są na stronie internetowej www.dtswiss.com. -
Page 61: Montaż Damperów Z Du Bushings
3. MONTAŻ Poniższe informacje są istotne w przypadku zastosowania dampera w rowerze, w którym nie stanowił on oryginalnego wyposażenia. Dampery DT Swiss od roku modelowego 2023 różnią się sposobem montażu ze względu na zastosowanie łożyska. 3.1 MONTAŻ DAMPERÓW Z DU BUSHINGS... - Page 62 3.2 MONTAŻ DAMPERÓW Z ŁOŻYSKAMI SFERYCZNYMI Przedstawione łożysko sferyczne jest już zamontowane w damperach. Tulejki montażowe odpowiednie do ramy rowru dostępne są oddzielnie. W celu uzyskania prawidłowych wymiarów elementów montażowych należy skontaktować się z producentem ramy roweru. Instrukcja montażu elementów mocowania znajduje się w Technical Manual tego dampera na stronie www.dtswiss.com.
- Page 63 → Damper z mocowaniem standardowym: Oznaczenie trybu „DRIVE” (5) na pokrętle manetki zdalnego sterowania musi wskazywać w kierunku śruby montażowej (6). → Damper z mocowaniem Trunnion: Oznaczenie trybu „DRIVE” (7) na pokrętle manetki zdalnego sterowania musi wskazywać w kierunku wentyla. R 232 ONE – Instrukcja obsługi V2021.10...
- Page 64 4. USTAWIENIA 4.1 USTAWIENIE SAG SAG (Skok negatywny) to odległość, o jaką skróci się damper pod ciężarem rowerzysty. Dla ram o mniejszym skoku należy wybrać niższy SAG (20% do 25% skoku amortyzatora). Aby otrzymać mżliwie najlepsze właściwości podczas zjazdów, należy wybrać wyższy SAG (od 25% do 35% skoku amortyzatora).
- Page 65 3. Tyłem nakrętki POWOLI wcisnąć wkład wentyla lub przykręcić pompkę i zmniejszyć ciśnienie poprzez POWOLNE naciskanie zaworu spustowego na pompce. → Damper można ugiąć do momentu wyrównania ciśnienia w pozytywnej i negatywnej komorze powietrza. R 232 ONE – Instrukcja obsługi V2021.10...
- Page 66 4.5 USTAWIENIE TŁUMIENIA KOMPRESJI Tłumienie kompresji reguluje prędkość kompresji dampera i może być ustawione w jednej z trzech pozycji za pomocą dźwigni na damperze lub manetki zdalnego sterowania na kierownicy: OPEN: Tryb „OPEN” to najbardziej czułe ustawienie fabryczne. Amortyzator reaguje na małe nierówności na drodze.
-
Page 67: Konserwacja I Pielęgnacja
Serwis w centrum serwisowym DT Swiss co roku lub po 200 godzinach pracy Mały serwis (w razie potrzeby wykonywany przez centrum co 50 godziny pracy, częściej serwisowe DT Swiss) – patrz instrukcja dostępna na stronie w przypadku ekstremalnych www.dtswiss.com warunków użytkowania! Sprawdzenie uszkodzeń... - Page 68 欢迎您购买新的 DT Swiss 减震器!您选择了 DT Swiss 制造的高品质产品。 概要 本手册适用于减震器用户。包括减震器的安装、调整、保养和维护以及保修规定。 更多信息和活动参见 www.dtswiss.com。 用户必须在使用前阅读并理解本手册。第三方用户也必须了解下列规定。保存手册,以供日后使用。 安全 危险 操作不当以及保养或维护错误或不足会导致重伤甚至死亡! • 遵守下列规定是确保无事故使用和功能正常的前提。 • 减震器的安装和保养需要具备自行车零件方面的基本知识。如有疑问,请联系您的经销商。 • 只能按照规定的用途来使用减震器。否则用户须承担责任。 • 减震器必须与自行车的所有部件相兼容。 • 减震器的保养和修理只能由经过培训的专业技术人员执行。 • 仅使用原装 DT Swiss 附件和备件。 • 减震器不允许进行改动或改装。 • 如存在损坏或损坏的迹象,不允许再使用减震器。如有疑问,请联系您的经销商。 危险 减震器安装错误会导致严重伤害事故甚至是死亡! • 减震器的安装长度必须经车框架制造商批准。 • 只能使用车框架制造商规定的固定螺栓。...
- Page 69 装配 如果减震器为自行车的非原始装备,需注意以下重要说明。自 2023 年的型号起,由于使用的轴承不 同,DT Swiss 减震器的安装方式也有所不同。 用 DU 衬套装配减震器 轴套 DU 销钉 DU 衬套 减震器眼 DU 衬套 (3) 已安装在减震器上。可单独提供适合您自行车车架的紧固硬件,如 DU 销钉 (2) 和轴套 (1) 。有关硬件的正确尺寸,请咨询您的自行车架制造商。有关如何安装紧固硬件的说明,请参阅网站上提 供的减震器技术手册:www.dtswiss.com。 对于此类轴承类型,在安装位置上的没有限制。 R 232 ONE - 使用手册 V2021.10...
- Page 70 用球形接头装配减震器 图中所示的球形接头已安装在减震器上。可单独提供适合您自行车车架的紧固硬件(如销钉、轴套和 O 形环)。有关硬件的正确尺寸,请咨询您的自行车架制造商。 有关如何安装紧固硬件的说明,请参阅网站上提供的减震器技术 手册:www.dtswiss.com。 球形件 塑料环 减震器眼 对于此类轴承类型,有一些安装位置上的限制: → 装配减震器时,两个轴承纵轴必须水平于行 进方向。 → 不得使用垂直竖立并直接靠在减震器上的减 震器接头。 → 自行车架上的减震器接头必须使球面轴承 (1)能够自由移动。...
- Page 71 3. 将气压升高到所需压力(见 第第 4.3 章,第 73页页)。 安装远程牵引线 1. 安装引线外壳(1)和牵引线调节器(8)。 → 仅使用外径为 4,2 mm 的引线外壳。 → 引线外壳必须足够长,使把手能够完全自由偏转。减震器和其他部件的功能不得受到影响。 → 在牵引线调节器(8)前后必须至少留有一小段引线外壳。 2. 将远程杠杆切换到“开”的位置,然后将牵引线(2)插入引线外壳(1)。 3. 将牵引线(2)围绕减震器上的远程轮,并借助于夹紧螺钉(3)将其夹紧。以不超过 1.3 Nm 的拧 紧扭矩拧紧夹紧螺钉。 4. 缩短牵引线(2)并压装端盖(4)。 5. 通过远程杠杆切换到“DRIVE”模式并调节牵引线。 → 安装标准减震器:远程轮上的“ DRIVE”标记(5)必须指向限位螺钉(6)的方向。 → 安装 Trunnion 接口减震器:远程轮上的“DRIVE”标记(7)必须指向阀门的方向。 R 232 ONE - 使用手册 V2021.10...
- Page 72 设置 调整 SAG SAG(压缩弹簧行程)是减震器由于骑乘者体重而被压缩的比例。为了张紧底盘,应选择较小的 SAG(减震器行程的 20% 至 25%)。反之,为实现最优的下坡行驶性能,应选择较大的 SAG(减震 器行程的 25% 至 35%)。 1. 将减震器调至“开启”(OPEN)模式并将 O 形环移动至刮环。 shock length / stroke [mm] 185/55 / 210/55 185/50 / 210/50 165/45 / 190/45 165/40 / 190/40 20 - 35 % SAG [mm] 9 10 11 12 13 14 15 16 17 18 19 20 2.
- Page 73 2. 拧开减震器阀套。 3. 拧接减震器泵并将减震器充气到所需压力。 → 注意减震器泵制造商的提示! 4. 将已拧接减震器泵的减震器缓慢地分十次压缩其行程的约 25% 。 → 这使正负气室得到平衡。 → 只有当减震器上所示压力在压缩后不再变化时,两端气室才平衡。 5. 重复该过程,直到压缩后在减震器泵上显示所需压力。 6. 拧开减震器并将阀套拧接到阀门上。 降低气压 1. 将减震器调至“开启”(OPEN)模式(见 第第 4.5 章,第 74页 页)。 2. 拧开减震器阀套。 3. 缓慢按下阀门芯以及阀套背面。 或 拧接减震器泵并通过按下减震器泵上的排气阀缓慢降低气压。 → 减震器可以压缩至正负气室的平衡点。 R 232 ONE - 使用手册 V2021.10...
- Page 74 调整压缩设定 压力等级调节减震器的压缩速度,并且可以通过减震器上的杠杆或者通过把手上的远程杠杆调节为三 个等级: 开启(OPEN): “开启”(OPEN)模式中的减震器压力等级最为敏感,是在出厂时经过调整的设定。减震器可对地形的 微小不平整情况作出灵敏反应。 行驶(DRIVE): 若将减震器上的杠杆或把手上的远程杠杆调到中心位置,压力等级会 部分关闭。这使后部板件明显更加张紧,并且在不需要减震器发挥全 部功能(在公路或者容易行驶的小道上坡行驶、平地上行驶)的情况 下提高踩踏效率。 锁定(LOCK): OPEN LOCK 若将减震器上的杠杆或把手上的远程杠杆调到“锁定”(LOCK)位置, 减震器活塞上的机油循环会被堵塞。严重堵塞时,排放阀会打开机油 DRIVE 循环,并由此防止减震器损坏。 调整回弹等级 回弹等级调节减震器的回弹速度,并且可以通过旋转红色回弹等级旋钮 已大约 40 次咔哒声(标准减震器)或 22 次咔哒声(Trunnion 接口减 震器)进行调节。 → 顺时针时,减震器回弹等级升高。 → 逆时针时,减震器回弹等级降低。 若减震器回弹等级过低,则后轮回弹将过快。调整得过弱的回 弹等级在骑乘过程中表现为底盘跳跃。 若减震器回弹等级过强,后轮可能无法再跟上快速连续的冲击,且使 弹簧硬化。 调整回弹等级的目的在于,在回弹过程中尽可能地减震,使其 – 可以适应各种地形的要求。例如在迅速、颠簸的下坡行驶中, 相比无严重障碍情况下的平顺下坡行驶,应选择更低的减震器 回弹等级(= 回弹速度更快)。...
- Page 75 通过 DT Swiss 服务中心维修 每年或 200 个工作小时后 小规模维修(由 DT Swiss 服务中心按需提供)参见 www. 50 个工作小时 dtswiss.com 上的技术手册 在极端使用条件下更为频繁! 检查减震器有无损坏和裂纹。 每次骑行前后和跌倒后 如有损坏,联系 DT Swiss 服务中心。 检查固定/拧紧扭矩是否符合规定 每次行驶前 检查功能 每次行驶前 用软海绵和合适清洁剂清洁,特别是刮环区域 每次行驶后 不得使用高压清洁设备和腐蚀性清洁剂! 废弃物处理和环境保护 法定废弃物处理条例适用。原则上要避免各种类型的材料废弃,或者必须进行材料回收再利用。废弃 物、碳、清洁剂和各种液体必须环保地废弃处置。 保修(欧洲) 保修条款参见 www.dtswiss.com R 232 ONE - 使用手册 V2021.10...
- Page 76 USA - Grand Junction, CO 81505 59302 Oelde info.us@dtswiss.com Germany info.de@dtswiss.com DT SWISS (FRANCE) S.A.S. DT SWISS POLSKA Sp. z o.o. Parc d‘Activites de la Sarrée ul. Towarowa 36 Route de Gourdon PL-64-600 Oborniki F - 06620 Le Bar sur Loup Poland info.fr@dtswiss.com...