AEG BEB231011M Notice D'utilisation
Masquer les pouces
Voir aussi pour BEB231011M:
- Notice d'utilisation (56 pages) ,
- Notice d'utilisation (56 pages)
Table des Matières
Publicité
Les langues disponibles
Les langues disponibles
Liens rapides
Publicité
Chapitres
Table des Matières
Dépannage

Manuels Connexes pour AEG BEB231011M


Sommaire des Matières pour AEG BEB231011M
- Page 1 BEB231011M User Manual Oven Notice d'utilisation Four USER MANUAL...
-
Page 28: Service Et Assistance À La Clientèle
14. RENDEMENT ÉNERGÉTIQUE................54 POUR DES RÉSULTATS PARFAITS Merci d'avoir choisi ce produit AEG. Nous l'avons conçu pour vous offrir des performances irréprochables pendant longtemps, avec des technologies innovantes qui simplifient la vie : autant de caractéristiques que vous ne trouverez peut-être pas sur des appareils ordinaires. -
Page 29: Information Sur La Sécurité
FRANÇAIS INFORMATION SUR LA SÉCURITÉ Avant d'installer et d'utiliser cet appareil, lisez soigneusement les instructions fournies. Le fabricant ne pourra être tenu pour responsable des blessures et dégâts résultant d'une mauvaise installation ou utilisation. Conservez toujours les instructions dans un lieu sûr et accessible pour vous y référer ultérieurement. -
Page 30: Consignes Générales De Sécurité
1.2 Consignes générales de sécurité L'appareil doit être installé et le câble remplacé • uniquement par un professionnel qualifié. AVERTISSEMENT : L'appareil et ses parties • accessibles deviennent chauds pendant son fonctionnement. Veillez à ne pas toucher les éléments chauffants. -
Page 31: Consignes De Sécurité
FRANÇAIS 2. CONSIGNES DE SÉCURITÉ 2.1 Installation Profondeur de l'ap- 569 mm AVERTISSEMENT! pareil L'appareil doit être installé uniquement par un Profondeur d’encas- 548 mm professionnel qualifié. trement de l’appareil • Retirez l'intégralité de l'emballage. Profondeur avec por- 1022 mm •... -
Page 32: Utilisation
être fixée de telle manière qu'elle ne Types de câbles compatibles pour puisse pas être enlevée sans outils. l'installation ou le remplacement • Ne branchez la fiche secteur dans la uniquement pour le Royaume-Uni prise secteur qu'à la fin de Raccorde- Diamètre... -
Page 33: Éclairage Intérieur
FRANÇAIS 2.4 Entretien et Nettoyage l'appareil lorsque vous ouvrez la porte. • Ne placez pas de produits AVERTISSEMENT! inflammables ou d'éléments imbibés Risque de blessure, de produits inflammables à l'intérieur d'incendie ou de dommages ou à proximité de l'appareil, ni sur matériels sur l'appareil. -
Page 34: Mise Au Rebut
2.7 Mise au rebut • Coupez le câble d'alimentation au ras de l'appareil et mettez-le au rebut. AVERTISSEMENT! • Retirez le dispositif de verrouillage du Risque de blessure ou hublot pour empêcher les enfants et d'asphyxie. les animaux de s'enfermer dans l'appareil. -
Page 35: Fixation Du Four Au Meuble
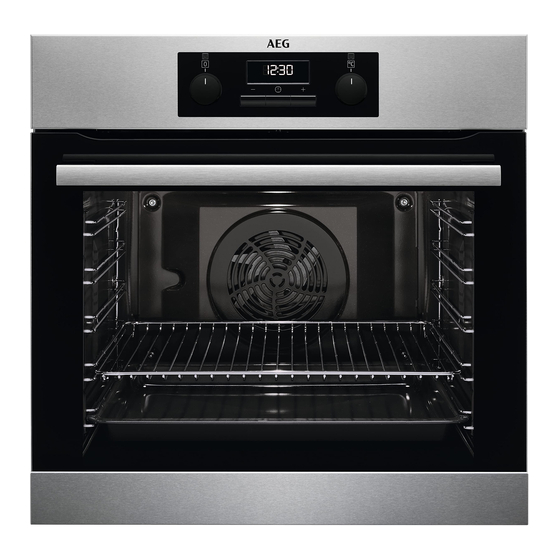
FRANÇAIS 3.2 Fixation du four au meuble 4. DESCRIPTION DE L'APPAREIL 4.1 Présentation générale Bandeau de commande Manette de sélection des modes de cuisson Voyant / symbole de mise sous tension Affichage Thermostat Indicateur / symbole de température Élément chauffant Éclairage Ventilateur Support de grille, amovible... -
Page 36: Bandeau De Commande
5. BANDEAU DE COMMANDE 5.1 Touches Touche sensitive du cycle Pour régler l'heure. Pour régler une fonction de l'horloge. Pour régler l'heure. 5.2 Affichage A. Fonctions de l’horloge B. Minuteur 6. AVANT LA PREMIÈRE UTILISATION AVERTISSEMENT! Reportez-vous aux chapitres concernant la sécurité. -
Page 37: Utilisation Quotidienne
FRANÇAIS Éteignez le four et attendez qu’il soit froid. Placez les accessoires et les supports de grille amovibles dans le four. 7. UTILISATION QUOTIDIENNE AVERTISSEMENT! Fonction du Application Reportez-vous aux chapitres four concernant la sécurité. Cette fonction est con- 7.1 Comment régler : Mode de çue pour économiser de cuisson l'énergie en cours de... -
Page 38: Fonctions De L'horloge
énergétique et aux exigences d’éco- Pour obtenir des instructions de cuisson, conception selon les normes EU 65/2014 reportez-vous au chapitre « Conseils », et EU 66/2014. Tests conformément à la paragraphe Chaleur tournante humide. norme EN 60350-1. Pour obtenir des recommandations générales sur les économies d'énergie,... -
Page 39: Utilisation Des Accessoires
FRANÇAIS Comment régler : Durée Étape 4 Appuyez sur n'importe quelle touche pour arrêter le signal sonore. Étape 5 Tournez la manette sur la position Arrêt. Comment régler : Minuteur Étape 1 - appuyez à plusieurs reprises. - commence à clignoter. Étape 2 - appuyez pour régler l’heure. -
Page 40: Trépied Et Plat À Rôtir/Gril
Plat à rôtir: Poussez le plateau entre les rails du sup- port de grille. Grille métallique, Plat à rôtir: Poussez le plateau entre les rails du sup- port de grille et glissez la grille métalli- que entre les rails se trouvant juste au- dessus. -
Page 41: Thermostat De Sécurité
FRANÇAIS 10.2 Thermostat de sécurité thermostat de sécurité interrompant l'alimentation électrique. Le four se Un mauvais fonctionnement du four ou remet automatiquement en des composants défectueux peuvent fonctionnement lorsque la température causer une surchauffe dangereuse. Pour baisse. éviter cela, le four dispose d'un 11. - Page 42 GÂTEAUX (°C) (min) Recettes avec un fouet 3 (2 et 4) 45 - 60 Moule à gâteau Pâte sablée 3 (2 et 4) 20 - 30 Moule à gâteau Cheesecake au babeurre 60 - 80 Moule à gâteau, Ø 26 cm...
- Page 43 FRANÇAIS PAIN ET PIZZA (°C) (min) Pizza 230 - 10 - 20 Plateau de cuis- son / Plat à rôtir Scones 10 - 20 Plateau de cuis- Faites préchauffer votre four vide, sauf indication contraire. Utilisez le moule à gâteaux. PRÉPARATIONS À...
-
Page 44: Turbo Gril
VIANDE POISSON (°C) (min) (min) Faisan entier 90 - 120 Thon / Saumon, 4 - 6 filets 35 - 60 Utilisez le deuxième niveau de la grille. Réglez la température sur 175 °C. POISSON (min) Truite / Dorade, 3 - 4 pois-... - Page 45 FRANÇAIS tableau ci-dessous par l'épaisseur de la viande en cm. AGNEAU (°C) (min) BŒUF Gigot d’agneau / 150 - 170 100 - 120 (°C) (min) Rôti d’agneau, 1 - Rôti ou filet de 190 - 200 5 - 6 1,5 kg bœuf, saignant Selle d’agneau, 1 160 - 180...
-
Page 46: Décongélation
11.6 Décongélation (kg) Durée de dé- Décongélation congélation complémentaire (min) (min) Poulet 100 - 140 20 - 30 Placez le poulet sur une sous-tasse re- tournée, posée sur une grande assiette. Retournez à la moitié du temps. Viande 100 - 140 20 - 30 Retournez à... -
Page 47: Chaleur Tournante Humide - Accessoires Recommandés
FRANÇAIS 11.8 Chaleur tournante humide - accessoires recommandés FRUITS Utilisez les moules et récipients foncés et non réfléchissants. Ils offrent une Tranches de pommes 6 - 8 meilleure absorption de la chaleur que Poires 6 - 9 les plats réfléchissants de couleur claire. Ramequins Moule pour fond de Plaque à... - Page 48 (°C) (min) Fond de tarte en moule à tarte sur une 35 - 45 génoise grille métallique Génoise Victoria Plat de cuisson sur la 35 - 50 grille métallique Poisson poché, Plateau de cuisson ou 35 - 45 0,3 kg plat à...
-
Page 49: Informations Pour Les Instituts De Test
FRANÇAIS 11.10 Informations pour les instituts de test Tests conformément à la norme IEC 60350-1. (°C) (min) Petits gâ- Chaleur Plateau 150 - 20 - 35 teaux, 20 tournante de cuis- par pla- teau Petits gâ- Chaleur Plateau 2 et 4 150 - 20 - 35 teaux, 20... -
Page 50: Entretien Et Nettoyage
(°C) (min) Steak ha- Gril Grille mé- max. 20 - 30 Placez la grille ché, tallique métallique sur le 6 pièces, et lèchef- quatrième niveau 0,6 kg rite et la lèchefrite sur le troisième ni- veau du four. Tournez les ali- ments à... -
Page 51: Comment Enlever : Supports De Grille
FRANÇAIS 12.2 Comment enlever : Supports de grille Retirez les supports de grille pour nettoyer le four. Étape 1 Éteignez le four et attendez qu’il soit froid. Étape 2 Écartez l'avant du support de grille de la paroi latérale. Étape 3 Écartez l'arrière du support de grille de la paroi latérale et retirez le support. -
Page 52: Comment Remplacer : Éclairage
Étape 5 Tenez la garniture de porte (B) sur le bord supérieur de la porte des deux côtés et poussez vers l'inté- rieur pour libérer le joint du clip. Étape 6 Tirez la garniture de porte vers l'avant pour la déposer. -
Page 53: Dépannage
FRANÇAIS Avant de remplacer l'éclairage : Éteignez le four. Attendez Débranchez le four de l'ali- Placez un chiffon au fond de que le four ait refroidi. mentation secteur. la cavité. Lampe arrière Étape 1 Tournez le diffuseur en verre pour le retirer. Étape 2 Nettoyez le diffuseur en verre. -
Page 54: Rendement Énergétique
14. RENDEMENT ÉNERGÉTIQUE 14.1 Informations produit et Fiche d’informations produit* Nom du fournisseur Identification du modèle BEB231011M 949496152 Index d'efficacité énergétique 95.3 Classe d’efficacité énergétique Consommation d'énergie avec charge standard et 0.81 kWh/cycle mode air pulsé Nombre de cavités Source de chaleur Électricité... -
Page 55: En Matière De Protection De L'environnement
FRANÇAIS 15. EN MATIÈRE DE PROTECTION DE L'ENVIRONNEMENT Recyclez les matériaux portant le électroniques. Ne jetez pas les appareils portant le symbole avec les ordures symbole . Déposez les emballages ménagères. Emmenez un tel produit dans les conteneurs prévus à cet effet. dans votre centre local de recyclage ou Contribuez à... - Page 56 www.aeg.com/shop...