Table des Matières
Publicité
Les langues disponibles
Les langues disponibles
Liens rapides
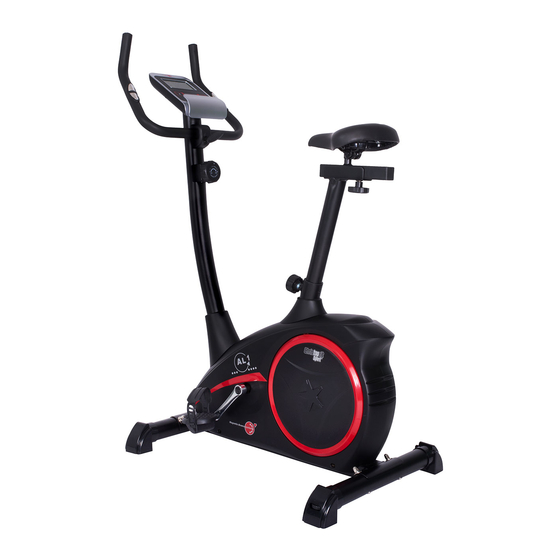
11062 - (Schwarz)
Montage- und Bedienungsanleitung
für Bestell-Nr. 1106(A)/11062/11061(A)
Montage- en bedieningshandleiding voor
Bestellnummer 1106(A)/11062/11061(A)
Инструкция по монтажу и эксплуатации
№ заказа 1106(A)/11062/11061(A)
Heimsport-Trainingsgerät
AL 1
D
NL
RU
11061(A) - (Weiß)
GB
Assembly and exercise instructions
for Order No. 1106(A)/11062/11061(A)
F
Notice de montage et d'utilisation du
No. de commande 1106(A)/11062/11061(A)
CZ
Návod k montáži a použití pro
objednací číslo 1106(A)/11062/11061(A)
1
1106(A) - (Silber)
Publicité
Chapitres
Table des Matières

Manuels Connexes pour Christopeit Sport AL 1


Sommaire des Matières pour Christopeit Sport AL 1
- Page 1 Heimsport-Trainingsgerät AL 1 11061(A) - (Weiß) 11062 - (Schwarz) 1106(A) - (Silber) Montage- und Bedienungsanleitung Assembly and exercise instructions für Bestell-Nr. 1106(A)/11062/11061(A) for Order No. 1106(A)/11062/11061(A) Montage- en bedieningshandleiding voor Notice de montage et d’utilisation du Bestellnummer 1106(A)/11062/11061(A) No. de commande 1106(A)/11062/11061(A) Инструкция...
-
Page 2: Table Des Matières
Inhaltsübersicht Contents Page 1. Wichtige Empfehlungen und Sicherheitshinweise Seite 2 2. Einzelteileübersicht Seite 3 - 4 3. Stückliste Seite 5 - 6 Sommaire Page 4. Montageanleitung mit Explosionsdarstellungen Seite 7 - 9 Garantiebestimmungen 5. Benutzung des Gerätes Seite 10 6. Computeranleitung Seite 11 Inhoudsopgave Pagina 34 7. Reinigung, Lagerung, Wartung, Störungsbeseitigung Aufwärmübungen (Warm Up) Seite 12 8. Trainingsanleitung... - Page 3 Montageübersicht: Assembly overview: Aperçu de l‘Assemblée: Montage overzicht: Обзор Ассамблея:...
-
Page 5: Stückliste
Stückliste - Ersatzteilliste Wenn ein Bauteil nicht in Ordnung ist oder fehlt, oder wenn Sie in Zukunft ein Ersatzteil benötigen, wenden Sie sich bitte an uns. AL 1 Best.-Nr. 1106(A), 11062, 11061(A) Technische Daten: Stand: 01. 06. 2018 Internet Service- und Ersatzteilportal: •... - Page 6 Abbs- Bezeichnung Abmessung Menge Montiert an ET-Nummer ET-Nummer ET-Nummer Stück Abb. Nr. 1106(A) 11062 11061(A) Lenkerüberzug 36-9211-22-BT 36-9211-22-BT 36-9211-22-BT Federring für M8 14+28 39-9864-VC 39-9864-VC 39-9864-VC Lenkerstützrohrverkleidung 36-1107-04-BT 36-1107204-BT 36-1107-04-BT Befestigungsteil 29+33 33-9211-08-SI 33-9211-08-SI 33-9211-08-SI Vierkantstopfen 36-9211-23-BT 36-9211-23-BT 36-9211-23-BT Tretkurbelachse 42+82 33-9211-09-SI 33-9211-09-SI...
- Page 7 Montageanleitung Entnehmen Sie alle Einzelteile der Verpackung, legen diese auf den Bo- den und kontrollieren grob die Vollzähligkeit anhand der Montageschrit- te. Zu beachten ist dabei, dass einige Teile direkt mit dem Grundgestell verbunden sind und vormontiert wurden. Des Weiteren sind auch einige andere Einzelteile schon zu Einheiten zusammengefügt worden.
- Page 8 Schritt 3: Montage des Lenkerstützrohres (12) am Grundrahmen (1). 1. Schieben Sie die Stützrohrverkleidung (38) auf das Stützrohr (12) auf. Legen Sie die Schrauben (14), Unterlegscheiben (13) und Federringe (37) griffbereit auf den Boden. 2. Nehmen Sie das Lenkerstützrohr (12) mit dem bereits eingelegten Computerkabelstrang (3) zur Hand.
-
Page 9: Garantiebestimmungen
Schritt 5: Montage des Lenkers (7) und des Computers (17) am Stützrohr (12). 1. Führen Sie den Lenker (7) zur geöffneten Lenkeraufnahme am Stützrohr (12) und fädeln Sie die beiden Pulskabel durch die Öffnungen am Stützrohr nach oben heraus und schließen Sie dann die Lenkeraufnahme über den Lenker (7). -
Page 10: Benutzung Des Gerätes
Benutzung des Gerätes Transport des Gerätes: Es befinden sich 2 Transportrollen im vorderen Fuß. Um das Gerät an einen anderen Ort zu stellen oder zu lagern, fassen sie den Lenker und kippen Sie das Gerät auf den vorderen Fuß so weit, sodass sich das Gerät leicht auf den Transportrollen bewegen lässt und schieben Sie es zum gewünschten Ort. -
Page 11: Computeranleitung
Tasten: Computeranleitung 1. „F“-Taste (Funktion): Durch ein kurzes, einmaliges Drücken der Taste kann von einer zur anderen Der mitgelieferte Computer bietet den größten Trainingskomfort. Jeder Funktion gewechselt werden; d.h. die jeweilige Funktion ausgewählt werden trainingsrelevante Wert wird in einem entsprechenden Sichtfenster in der mittels der „E“-Taste Eingaben vorgenommen werden sollen. - Page 12 Trainingsfläche in mm Freifläche in mm (für Gerät und Benutzer) (Trainingsfläche und Sicherheitsfläche (umlaufend 60cm)) Reinigung, Wartung und Lagerung des Heimtrainers: Störungsbeseitigung: Wenn Sie die Funktionsstörung nicht anhand der aufgeführten 1. Reinigung Informationen beheben können, so kontaktieren Sie Ihren Händler Benutzen Sie nur ein leicht angefeuchtetes Tuch zur Reinigung.
-
Page 13: Trainingsanleitung
Trainingsanleitung Um spürbare körperliche und gesundheitliche Verbesserungen zu erreichen, Weitere Informationen zum Thema Aufwärmübungen, Dehnungsübungen müssen für die Bestimmung des erforderlichen Trainingsaufwandes die oder allgemeine Gymnastikübungen finden Sie in unserem Downloadbereich folgenden Faktoren beachtet werden: unter www.christopeit-sport.com 1. Intensität: 4. Motivation Die Stufe der körperlichen Belastung beim Training muß den Punkt der Der Schlüssel für ein erfolgreiches Programm ist ein regelmäßiges Training. Sie sollten sich einen festen Zeitpunkt und Platz pro Trainingstag einrichten normalen Belastung überschreiten, ohne dabei den Punkt der Atemlosigkeit und /oder der Erschöpfung zu erreichen. Ein geeigneter Richtwert für ein und sich auch geistig auf das Training vorbereiten. Trainieren Sie nur gut effektives Training kann dabei der Puls sein. Dieser sollte sich während gelaunt und halten Sie sich stets Ihr Ziel vor Augen. Bei kontinuierlichem des Trainings in dem Bereich zwischen 70% und 85% des Maximalpulses Training werden Sie Tag für Tag feststellen, wie Sie sich weiterentwickeln... -
Page 14: Important Recommendations And Safety Instructions
Dear customer, Contents We congratulate you on your purchase of this home training sports unit and hope that we will have a great deal of pleasure with it. Please take heed 1. Summary of Parts Page 3 - 4 of the enclosed notes and instructions and follow them closely concerning 2. Important Recommendations and Safety Information Page 14 assembly and use. 3. Parts List Page 15 - 16 Please do not hesitate to contact us at any time if you should have any questions. 4. Assembly Instructions With Exploded Diagrams Page 17 - 19 5. Mount, Use & Dismount Page 20 Top-Sports Gilles GmbH 6. Computer instructions Page 21 Friedrichstr. 55 7. Cleaning, Storage, Checks, Troubleshooting, Page 22 42551 Velbert Warm up exercises (Warm Up) 8. Training Instructions... -
Page 15: Friedrichstr. 55
Parts List – Spare Parts List Please contact us if any components are defective or missing, or if you need any spare parts or replacements in future. AL 1 Order No. 1106(A), 11062, 11061(A) Technical data: Issue: 01. 06. 2018 Internet service- and spare parts data base: www.christopeit-service.de • Magnetic brake system • Aprox. 9 kg flywheel mass • 8-gears manual resistance •... - Page 16 Illus. Designation Dimensions Quantity Attached to ET number ET number ET number illustr. No. 1106(A) 11062 11061(A) Foam grip 36-9211-22-BT 36-9211-22-BT 36-9211-22-BT Spring washer for M8 14+28 39-9864-VC 39-9864-VC 39-9864-VC Handlebar support cover 36-1107-04-BT 36-1107204-BT 36-1107-04-BT Fixed bracket 29+33 33-9211-08-SI 33-9211-08-SI 33-9211-08-SI Square end cap...
- Page 17 Assembly Instructions Remove all the separate parts from the packaging, lay them on the floor and check roughly that all are there on the base of the assembly steps. Please note that a number of parts have been connected directly to the main frame and preassembled.
- Page 18 Step 3: Attach the front post (12) at main frame (1). 1. Slide the handlebar support cover (38) onto the handlebar support (12). Place the screws (14), washers (13) and sprig washers (37) on the floor. 2. Hold the handlebar support (12) with the computer cable (3) against the main frame holder.
- Page 19 Step 5: Attach the handlebar (7) and computer (17) at handlebar support (12). 1. Guide the preassembled handlebar unit (7) through the upper part of the handlebar post (12) and push the pulse cable (4) through the holes at handlebar support into top position and close the bracket of handlebar holder.
-
Page 20: Important
Mount, Use & Dismount Transportation of Equipment: There are two rollers equipped on the front foot. For moving, you can lift up the rear foot and drive it to where you would like to locate or store it. Adjustment – Seat Position For an effective workout, the seat must be adjusted properly. -
Page 21: Computer Instructions
Computer instructions Keys: 1. „F“ key (Fuction): Pressing this key once briefly makes it possible to change from one function The supplied computer allows the most convenient training. Every value to another, i.e. the respective functions can be selected for which entries relevant to training is displayed in a corresponding window. - Page 22 Training area in mm Free area in mm (for home trainer and user) (Training area and security area (rotating 60cm)) Cleaning, Checks and Storage of the home bike: Troubleshooting If you cannot solve the problem with the following information, 1. Cleaning please contact the authorized service center.
-
Page 23: Warm Up Exercises (Warm Up)
Training instructions You find further information on the subject warm-up exercises, stretch exer- cises or general gymnastics exercises in our download area under www. christopeit-sport.com You must consider the following factors in determining the amount of training effort required in order to attain tangible physical and health benefits: 4. Motivation The key to a successful program is regular training. You should set a fixed 1. Intensity: time and place for each day of training and prepare yourself mentally for the The level of physical exertion in training must exceed the level of normal training. Only train when you are in the mood for it and always have your goal exertion without reaching the point of breathlessness and / or exhaustion. in view. With continuous training you will be able to see how you are progres- A suitable guideline for effective training can be taken from the pulse rate. sing day by day and are approaching your personal training goal bit by bit. During training this should rise to the region of between 70% to 85% of the maximum pulse rate (see the table and formular for determination and calculation of this). During the first weeks, the pulse rate should remain at the lower end of this region, at around 70% of the maximum pulse rate. In the course of the follo- wing weeks and months, the pulse rate should be slowly raised to the upper limit of 85% of the maximum pulse rate. The better the physical condition of the person doing the exercise, the more the level of training should be encreased to remain in the region of between 70% to 85% of the maximum pulse rate. This should be done by lengthening the time for the training and / or encreasing the level of difficulty. -
Page 24: Recommandations Importantes Et Consignes De Sécurité
Sommaire Chère cliente, cher client, Nous vous félicitons pour l’achat de ce cycle d’entraînement intérieur et 1. Aperçu des pièces Page nous vous souhaitons beaucoup de plaisir avec. 2. Recommandations importantes et règles Veuillez respecter et suivre les indications et les instructions de montage de sécurité... -
Page 25: Friedrichstr. 55
Liste des pièces- Liste des pièces de rechange Si une pièce n’est pas correcte, s’il manque une pièce ou si vous avez besoin d’une pièce de rechange à l’avenir, veuillez vous adres- AL 1 N° de commande 1106(A), 11062, 11061(A) ser à : Caractéristiques techniques : Version du : 01/ 06/ 2018 Service- Internet et les pièces de rechange base de données... -
Page 26: Sché-Désignation
Sché- Désignation Dimensions Quantité Monté sur Numéro ET Numéro ET Numéro ET ma n° en mm Unités schéma n° 1106(A) 11062 11061(A) Bouchon rond 36-9211-21-BT 36-9211-21-BT 36-9211-21-BT Revêtement de guidon 36-9211-22-BT 36-9211-22-BT 36-9211-22-BT Bague ressort pour M8 14+28 39-9864-VC 39-9864-VC 39-9864-VC Revêtement tube d`appui du guidon 36-1107-04-BT... - Page 27 Instructions de montage Sortez toutes les pièces de l’emballage, posez-les sur le sol et contrôlez si rien ne manque en vous basant grossièrement sur la étapes de montage. Il faut tenir compte du fait que certaines pièces ont été reliées au cadre et prémontrés.
- Page 28 Etape n° 3: Montage de tube d’appui du guidon (12) 1. Glissez le revêtement (38) sur le tube d’appui du guidon (12). Placez les vis (14), les rondelles (13) et rondelles (37) à la main sur le sol. 2. Prenez le tube d’appui du guidon (12) avec le câble (3) de l’ordinateur déjà...
-
Page 29: Remarques
Etape n° 5: Montage de l’ordinateur (17) et de guidon (7) sur d’appui du guidon (12). 1. Dirigez le guidon (7) vers le logement ouvert du guidon, au niveau du tube support (12) et fermez-le au-dessus du guidon (12). Mettez les deux câbles de pouls par les ouvertures à... -
Page 30: Monter, Utiliser & Descendre
Monter, utiliser & descendre Transport de la machine: La machine est équipée de 2 rouleaux sur le pied avant. Si vous voulez transporter la machine, soulevez le pied postérieur et roulez la machine vers la destination désirée. Réglage de la position de la selle Un entraînement efficace demande un correct réglage de la selle. - Page 31 Mode d’emploi de l’ordinateur L’ordinateur livré vous offre le plus grand confort d‘entraînement. Chaque Touches : valeur importante pour l’entraînement est affichée dans une fenêtre. Le temps nécessaire, la vitesse actuelle, la consommation de calories 1. Touche „F“ (Fonction): approximative, la distance parcourue et le pouls actuel sont affichés dès le Pour passer d’une fonction à...
-
Page 32: Nettoyage, Entretien Et Stockage De L'exercice
Centre d‘entraînement en mm Surface libre en mm (Pour appareil et l‘utilisateur) (Zone de la formation et de la zone de sécurité (60cm rotation)) Nettoyage, Entretien et stockage de l‘exercice: Corrections: Si vous ne pouvez pas résoudre en utilisant les informations 1. -
Page 33: Recommandations Pour L'entraînement
Recommandations pour l’entraînement Vous trouvez les autres informations au sujet exercices pour réchauffer, aux exercices de distension ou les exercices de gymnastique généraux dans notre domaine de téléchargement sous le www.christopeit-sport.com Les facteurs ci-après doivent être pris en compte pour la détermination de l’entraînement indispensable afin d’améliorer concrètement son physique 4. -
Page 34: Belangrijke Aanbevelingen En Veiligheids Instructies
Inhoudsopgave Geachte klant Wij willen u van harte gelukwensen met de aanschaf van uw hometrainer en 1. Overzicht van de losse delen pagina 3 - 4 hopen dat u hier veel plezier aan zult beleven. Neem a.u.b. de instructies 2. Belangrijke aanbevelingen en veiligheidsinstructies pagina 34 en aanwijzingen uit deze montage- en bedieningshandleiding in acht en 3. - Page 35 Stuklijst - reserveonderdelenlijst Wanneer een bepaald onderdeel niet in orde is of ontbreekt, of wanneer u in de toekomst een reserveronderdeel nodig heeft, kunt AL 1 best.nr. 1106(A), 11062, 11061(A) u zich wenden tot: Technische specificatie: Stand: 01. 06. 2018 •...
- Page 36 Afbe- Beschrijving Afmetingen Aantal Gemonteerd ET-nummer ET-nummer ET-nummer stuks aan afb.-snr. 1106(A) 11062 11061(A) Grep overtrek 36-9211-22-BT 36-9211-22-BT 36-9211-22-BT Veerring voor M8 14+28 39-9864-VC 39-9864-VC 39-9864-VC Stuurbuisbekleding 36-1107-04-BT 36-1107204-BT 36-1107-04-BT Zadelglijderschroef 29+33 33-9211-08-SI 33-9211-08-SI 33-9211-08-SI Vierkante stop 36-9211-23-BT 36-9211-23-BT 36-9211-23-BT Pedaalas 42+82 33-9211-09-SI...
- Page 37 Montagehandleiding Neem alle losse onderdelen uit de verpakking, leg deze op de grond en bruto controleer aan de hand van de montageen staps of alle onderdelen aanwezig zijn. Hierbij moet er op worden gelet dat een aantal onderdelen rechtstreeks met het onderstel zijn verbonden en voorgemonteerd zijn.
- Page 38 Stap 3: Montage van de stuurbuis (12) aan het onderstel (1). 1. Plaats de stuurbuis bekleiding (38) aan het stuurbuis (12). Plaatz de schroeven (14), ringen (13) en veerringen (37) op de vloer. 2. Pak de stuurbuis (12) waarin de computerkabel (3) al geplaatst is. Verbind de stekker voor de computerkabel (3) die uit de onderkant van de stuurbuis (12) steekt met de bijbehorende stekker voor de computerkabel (16) die uit het onderstel (1) steekt.
- Page 39 Stap 5: Montage van de computer (17) en de stuur (7) aan de stuurbuis (12). 1. Voer het stuur (7) door de geopende stuurhouder op de stuurframe (12) en sluit u deze over het stuur (7). Voer het pols kabel (4) door de opening van de steunbuis (12) aan de bovenzijde uit de stuurbuis (12).
-
Page 40: Opstappen, Gebruiken & Afstappen
Opstappen, Gebruiken & Afstappen Transport van Apparaat: Aan de voorzijde bevinden zich twee rollers. Om het apparaat te verplaatsen kunt u de achterzijde van het apparaat optillen en sturen naar waar u wilt om het te plaatsen of te stallen. Aanpassen –... - Page 41 Computerhandleiding De bijgeleverde computer zorgt voor een uitstekend trainingscomfort. Elke Toetsen: trainingsrelevante waarde wordt in het venster weergegeven. Vanaf het begin van de training worden de benodigde tijd, de actuele snelheid, het 1. „F“-toets (Functie): verbruikte aantal calorieën, de afgelegde afstand en de actuele hartslag Door één keer kort op deze toets te drukken kan tussen functies worden weergegeven.
-
Page 42: Reiniging, Onderhoud En Opslag Van De Hometrainer
Oefenterrein in mm Oefenterrein in mm (Voor de apparaat-en (Voor de apparaat-en gebruikers) gebruikers) Reiniging, onderhoud en opslag van de hometrainer: Fixes: Als u niet kunt oplossen met behulp van de genoemde storing 1. Reiniging informatie, kunt u contact opnemen met uw dealer of Fabrikant. Gebruik alleen een vochtige doek voor het reinigen. - Page 43 Trainingshandleiding Voor meer informatie over uitoefening van warme up, oefening te rekken of algemene gymnastische oefenen in onze downloadarea onder www. christopeit-sport.com De onderstaande factoren moeten in acht worden genomen bij het bepalen van de benodigde training voor het bereiken van een merkbare verbetering 4.
- Page 44 Обзор содержания Уважаемые покупательницы и покупатели! Поздравляем Вас с покупкой тренировочного снаряда для домашних Важные рекомендации и указания занятий спортом и желаем Вам самых приятных впечатлений. по безопасности ctp. Следуйте, пожалуйста, указаниям и инструкциям нашего руководства 2. Обзор отдельных деталей стр.
- Page 45 Спецификация - Список запасных частей Сняв упаковку, проверьте по списку, все ли детали на месте. AL 1 № заказа 1106(A), 11062, 11061(A) Если все в порядке, то можно начинать сборку. Если какой- нибудь агрегат не в порядке или отсутствует, обращайтесь к...
- Page 46 № Наименование Размеры Кол-во Монтир. ЕТ-№ ЕТ-№ ЕТ-№ карт. в мм штук на № 1106(A) 11062 11061(A) Пружинящее кольцо для M8 на № 39-9864-VC 39-9864-VC 39-9864-VC Оболочка Опорная труба руля 36-1107-04-BT 36-1107204-BT 36-1107-04-BT Крепление позуна седла 29+33 33-9211-08-SI 33-9211-08-SI 33-9211-08-SI Четырехгранная...
-
Page 47: Руководство По Монтажу
Руководство по монтажу Пожалуйста, выньте все отдельные части из коробки и проверьте их на комплектность в соответствии со спецификацией. Примите во внимание, что некоторые части предварительно смонтированы. Время установки 30-40мин. Шаг 1: Монтаж ножек (20+27) на основную раму (1) 1. Смонтируйте Колпачки ножек с транспортировочными роликами (18) посредством... - Page 48 Шаг 3: Монтаж опорной трубы руля (12) на основную раму (1) 1. Вставьте манжету Обшивка опорной трубы (38) на опорную трубу седла (12). Вставьте винты (14), шайбы (13) с пружинными шайбами (37) руку на полу. 2. Возьмите опорную трубу руля (12) с предварительно смонтированным соединительным...
- Page 49 Шаг 5: Монтаж руля (7) и компьютера (17) на опорную трубу руля (12) 1. Подведите руль (7) к открытому креплению руля на опорной трубу руля (12) и закройте его над рулем (7). 2. Вставьте оболочки рукоятки (10) на руль (7). 3.
- Page 50 Область обучения в мм Бесплатный поверхность в мм (Для устройства и пользователя) (Площадь Обучение и зоны безопасности (вращающиеся 60см)) Пользование тренажером Пользование тренажером Для любых проблем, таких как боль назад / колена или онемение в На передней ножке находятся два транспортировочных ролика. Для ногах...
- Page 51 Руководство по использованию Кнопки: 1. Кнопка „F“ (Функция): компьютера Коротким однократным нажатием клавиши можно переходить от одной функции к другой, то есть выбирается соответствующая функция, в которую с помощью кнопки „Е“ вводятся желаемые Входящий в комплект оборудования снаряда компьютер обеспечит Вам...
- Page 52 ИНСТРУКЦИЯ ПО ТРЕНИРОВКЕ Вы должны учитывать следующие факторы, чтобы определить верные параметры тренировок для достижения ощутимых физических результатов и пользы для здоровья. Интенсивность Уровень физических нагрузок при тренировках должен превышать уровень нормальных физических нагрузок, но вы не должны задыхаться и сильно переутомляться. Удобной мерой эффективности тренировки...
- Page 53 Vážená zákaznice, vážený zákazníku, Obsah Blahopřejeme vám k vašemu nákupu této domácí tréninkové 1. Důležitá doporučení a bezpečnostní opatření strana 53 sportovní jednotky a doufáme, že si s ní užijete spoustu potěšení. 2. Přehled jednotlivých dílů strana 3 - 4 3.
- Page 54 Seznam dílů – seznam náhradních dílů Po otevření balení zkontrolujte, prosím, zda byly dodány všechny díly podle následujícího seznamu dílů. Pokud tomu tak je a díly jsou AL 1 Best.-Nr. 1106(A), 11062, 11061(A) v pořádku, můžete začít s montáží. Technické údaje: Stav k 01.07.2018...
- Page 55 obr. název dílu rozměry mm počet namontovat íslo dílu íslo dílu íslo dílu na obr. Číslo 1106(A) 11062 11061(A) Sedlo 36-9211-20-BT 36-9211-20-BT 36-9211-20-BT Krytka Úchytka na nohu 36-9211-21-BT 36-9211-21-BT 36-9211-21-BT Pěnový potah řídítek 36-9211-22-BT 36-9211-22-BT 36-9211-22-BT Kroužek für M8 14+28 39-9864-VC 39-9864-VC 39-9864-VC...
-
Page 56: Pokyny K Montáži
Pokyny k montáži Vyjměte všechny samostatné díly z balení, položte je na podlahu a zkontrolujte, že máte všechny podle balicího seznamu v těchto pokynech k montáži a použití. Vezměte prosím na vědomí, že některé díly byly přímo připojeny k hlavnímu rámu a předem namontovány. Navíc je zde několik dalších jednotlivých dílů, které... - Page 57 Krok 3: Montáž podpěrné trubky řidítek (12) na základní rám (1). 1. Obložení opěrné trubice (38) nasuňte na opěrnou trubici (12). 2. Vezměte si k ruce podpěrnou trubku řidítek (12) s již vloženým počítačovým kabelem (3). Spojte konektor počítačového kabelu (3) vyčnívající...
- Page 58 Krok 5: Montáž řídítek (7) a počítače (17) na opěrnou trubici (12) 1. Řídítka (7) provlečte otevřeným uchycením řídítek na opěrné trubici (12) a oba kladné kabely provlékněte otvory na opěrné trubici směrem nahoru a uchycení řídítek následně uzavřete na řídítky (7). 2.
-
Page 59: Používání Přístroje
Používání přístroje Důležité: Ujistěte se, aby došlo ke správnému zajištění rychloupínače a jeho pevnému zašroubování. Sedlovou trubici nevytahujte na maximální polohu a při sezení Přeprava přístroje: na tréninkovém přístroji neměňte její polohu. V přední patce se nacházejí 2 přepravní kolečka. Aby bylo možné přístroj postavit nebo uskladnit na jiném místě, uchopte řídítka a přístroj naklopte na Optimální... - Page 60 Návod na obsluhu počítače hodnoty do jednotlivých funkcí. K tomu musí být nejprve vybrána požadovaná funkce pomocí tlačítka „F“. Delší stisknutí aktivuje rychlou sekvenci. Od začátku tréninku se potom daná Počítač, který je součástí tohoto balení, nabízí nejvyšší možný tréninkový funkce odpočítává...
- Page 61 Oblast cvičení v mm Volná oblast v mm (pro domácího trenéra a (Oblast cvičení a bezpečnostní oblast uživatele) (60cm otáčení)) Čistění, kontrola a skladování domácího kola Er- Řešení potíží gometer: Pokud nedokážete problém vyřešit pomocí následujících informací, obraťte se prosím na autorizované servisní středisko. 1.
-
Page 62: Návod K Tréninku
Návod k tréninku 4. Motivace Abyste dosáhli znatelného tělesného a zdravotního zlepšení, musíte při určování potřebného tréninku dbát následujících faktorů: Klíčem k úspěšnému programu je pravidelný trénink. Na každý tréninkový den byste si měli stanovit přesný čas a místo a připravovat se na něj i duševně. 1. - Page 64 Service / Hersteller Bei Reklamationen, notwendigen Ersatzteilbestellungen oder Reparaturen wenden Sie sich bitte an unsere Service Abteilung. Internet Service- und Ersatzteilportal: © by Top-Sports Gilles GmbH www.christopeit-service.de D-42551 Velbert (Germany) Service: Top-Sports Gilles GmbH info@christopeit-sport.com Tel.: +49 (0)2051/6067-0 Friedrichstrasse 55 http://www.christopeit-sport.com Fax: +49 (0)2051/6067-44 D - 42551 Velbert...