Table des Matières
Publicité
Les langues disponibles
Les langues disponibles
Liens rapides
Lovibond
Tintometer
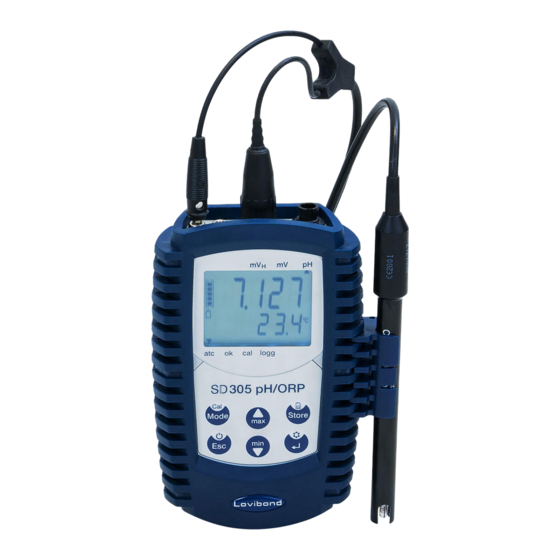
SD 305 pH/ORP
pH - ORP
Bedienungsanleitung
DE
Seite 1 - 29
Instruction Manual
GB
Page 30 - 57
Mode d'emploi
FR
Page 58 - 85
Instrucciones
ES
Página 86 - 113
www.lovibond.com
www.lovibond.com
Water Testing
®
Group
®
Istruzioni d'uso
IT
Pagina 114 - 141
Gebruiksaanwijzing
NL
Blz. 142 - 169
Instruções de Serviço
PT
Página 170 - 196
CN
操作说明
第 197 - 224 页
Publicité
Chapitres
Table des Matières
Dépannage

Manuels Connexes pour Lovibond Tintometer SD 305 pH/ORP


Sommaire des Matières pour Lovibond Tintometer SD 305 pH/ORP
- Page 1 Lovibond Water Testing ® Tintometer Group ® SD 305 pH/ORP pH - ORP Bedienungsanleitung Istruzioni d‘uso Seite 1 - 29 Pagina 114 - 141 Gebruiksaanwijzing Instruction Manual Page 30 - 57 Blz. 142 - 169 Mode d‘emploi Instruções de Serviço Page 58 - 85 Página 170 - 196...
-
Page 3: Wichtige Information
Wichtiger Entsorgungshinweis zu Batterien und Akkus Jeder Verbraucher ist aufgrund der Batterieverordnung (Richtlinie 2006/66/EG) gesetzlich zur Rückgabe aller ge- und verbrauchten Batterien bzw. Akkus verpflichtet. Die Entsorgung über den Hausmüll ist verboten. Da auch bei Produkten aus unserem Sortiment Batterien und Akkus im Lieferumgang enthalten sind, weisen wir Sie auf folgendes hin: Verbrauchte Batterien und Akkus gehören nicht in den Hausmüll, sondern können unentgeltlich bei den öffentlichen Sammelstellen Ihrer Gemeinde und überall dort... -
Page 4: Table Des Matières
Inhaltsverzeichnis 1 Sicherheit ............6 1.1 Allgemeiner Hinweis . - Page 5 6 Datenlogger ............23 6.1.
-
Page 6: Sicherheit
1 Sicherheit 1.1 Allgemeiner Hinweis Die Haftung und Gewährleistung des Herstellers für Schäden und Folgeschäden erlischt bei bestimmungswidriger Verwendung, Nichtbeachten dieser Betriebsanleitung, Einsatz ungenügend qualifizierten Fachpersonals sowie eigenmächtiger Veränderung am Gerät. Der Hersteller haftet nicht für Kosten oder Schäden, die dem Benutzer oder Dritten durch den Einsatz dieses Geräts, vor allem bei unsachgemäßem Gebrauch des Gerä- tes oder Missbrauch oder Störungen des Anschlusses oder des Gerätes, entstehen. -
Page 7: Übersicht
2 Übersicht Universalausgang: USB-Schnittstelle, Stromversor- 2.1 Anschlüsse gung, Analogausgang BNC-Buchse: Anschluss für pH- bzw. Redox-Elekt- rode Bananen-Buchsen: Anschluss für Pt1000 oder NTC 30 kΩ Temperaturfühler • Für pH-Elektroden mit integriertem Temperatur- fühler (NTC 30 kΩ) wird der Bananenstecker außen angeschlossen. •... -
Page 8: Displayanzeige
Tastenkombination langer Tastendruck Erweitertes Konfigurationsmenü öffnen Werkseinstellungen wiederherstellen 2.3 Displayanzeige Symbol Bedeutung Anzeigepfeile zur Kennzeichnung eines ausgewählten oder Parameters Hauptanzeige zur Darstellung des ausgewählten Messparameters ( ) • pH-Wert (pH) • Oxidations-/Reduktionspotential ORP (mV, mV -> Mit der <Mode>-Taste zwischen pH & ORP wechseln Nebenanzeige zur Darstellung von •... -
Page 9: Batteriewechsel
2.4 Batteriewechsel Wird in der unteren Anzeige >bAt< angezeigt, so sind die Batterien verbraucht und müssen erneuert werden. Die Gerätefunktion ist jedoch noch für eine gewisse Zeit gewährleistet. Wird in der oberen Anzeige >bAt< angezeigt, so reicht die Batteriespannung für den Geräte- betrieb nicht mehr aus, die Batterie ist nun ganz verbraucht. -
Page 10: Aufsteller
2.6 Aufsteller Ziehen Aufsteller zugeklappt. Zum Ausklappen 1 x ziehen: 2 x ziehen: Gerät kann an einem ziehen Gerat am Tisch Gerät an Gürtel aufgehängt aufstellen Schraube werden aufhängen 3. Inbetriebnahme 3.1 Lieferumfang SD 305 pH/ORP (Set-1) SD 305 pH/ORP (Set-2) SD 305 pH/ORP (Set-3) •... -
Page 11: Einstellungen
4 Einstellungen 4.1 Konfigurationsmenü 4.1.1 Aufbau und Navigation Betriebs- Menü Parameter Wert modus Option Option Funktion 1. Öffnen des Konfigurationsmenüs durch langen Tastendruck (ca. 3 s) 2. Option auswählen (Menü, Parameter) 3. Wert speichern Navigation (Hoch/Runter) Zur vorherigen Option oder in den Betriebsmodus zurückkehren * Wird im Konfigurationsmenü... -
Page 12: Funktionsbeschreibung
4.1.2 Funktionsbeschreibung Menü Parameter Werte Bedeutung Set Parameter: Einstellung der Messparameter Auswahl der angezeigten Aufl ösung 0.01 z.B. pH 7.01 0.001 z.B. pH 7.001 Kalibrierung: Auswahl der Anzahl an Kalibrier- punkten 1-Pt 1-Punkt Kalibrierung (Offset-Kalib- rierung, Steigung - 59.2 mV/pH) 2-Pt 2-Punkt Kalibrierung (neutraler &... - Page 13 Temperaturkompensation (nur verfügbar, wenn kein Temperaturfühler angeschlossen ist) -5 … 150 °C Temperaturangabe bei manueller (23 … 302 °F) Temperaturkompensation Set Instrument: Geräte-Einstellungen Auto Hold: Automatische Messwertermittlung Automatisches Festhalten des Messwertes Festhalten des Messwertes per Tastendruck Auto Power-Off: Automatische Geräteabschaltung 1 …...
-
Page 14: Erweitertes Konfigurationsmenü
4.2 Erweitertes Konfigurationsmenü 4.2.1 Aufbau und Navigation Betriebs- Menü Parameter Wert modus Option Option Funktion Öffnen des erweiterten Konfigurationsmenüs durch langen Tasten- druck (ca. 3 s) 1. Option auswählen (Menü, Parameter) 2. Wert speichern Navigation (Hoch/Runter) Zur vorherigen Option oder in den Betriebsmodus zurückkehren * Wird im Konfigurationsmenü... -
Page 15: Funktionsbeschreibung
4.2.2 Funktionsbeschreibung Menü Parameter Werte Bedeutung Set Alarm: Einstellung der Alarmfunktion pH/mV-Überwachung: Alarm an mit Ton No.So pH/mV-Überwachung: Alarm an ohne Ton Kein Alarm zur pH/mV-Überwachung z.B. pH 1.00 Min-Alarm Grenzwert für pH/mV (AL.1 = On/ No.So) z.B. Max-Alarm Grenzwert für pH/mV pH 13.00 (AL.1 = On/ No.So) - Page 16 Set Output: Einstellung universeller Ausgang Universeller Ausgang Schnittstelle und Analogausgang aus (minimalster Stromverbrauch) Serielle Schnittstelle aktiviert Analogausgang aktiviert 01,11 ... 91 Basisadresse des Gerätes für serielle Schnittstellenkommuni- kation (Out = SEr) z.B. pH 1.00 Eingabe der Messwertes bei welchem der Analogausgang 0V ausgeben soll (Out = dAC) z.B.
-
Page 17: Datenarchiv
4.3 Datenarchiv 4.3.1 Aufbau und Navigation Betriebs- Menü Auswahl Wert modus Option Datensatz Funktion Öffnen des Datenarchivs durch langen Tastendruck (ca. 3 s) Option/ Datensatz auswählen Navigation (Hoch/Runter) Zur vorherigen Option oder in den Betriebsmodus zurückkehren SD_305_pH/ORP_1 04/2021... -
Page 18: Funktionsbeschreibung
4.3.2 Funktionsbeschreibung Menü Optionen Werte Bedeutung Logger starten (Rückkehr in den Betriebsmodus) Logger stoppen (Rückkehr in den Betriebsmodus) Auslesen manuell gespeicherter Messdaten Datensatz = St. X Auslesen von bis zu 1000 Datensätzen (X = 1 bis 1000) Messwert Anzeige pH oder mV Temperatur Anzeige °C oder °F L-Id... -
Page 19: Ph- Und Redox-Messung
5 pH- und Redox-Messung 5.1 Vorbereitung der pH-/Redox-Elektrode Entfernen Sie die Aufbewahrungsfla- sche. Überprüfen Sie den Zustand der Elektrode. Falls der Sensor trocken ist, legen Sie die Elektrode für min. 5 h in frische Aufbewahrungslösung (3 M KCl). dry? Überprüfen Sie die Sensorspitze auf Luft- blasen. - Page 20 Tauchen Sie die pH-Elektrode (inkl. Temperaturfühler) in die Kalibrierlösung ein. Sorgen Sie für genügend Anströmung, dazu z.B. a) einen Magnetrührer mit Rührfisch verwenden (empfohlen) oder b) die pH-Elektrode in der Lösung schwenken. Unterbrechen Sie das Rühren und starten Sie die Kali- brierung, indem Sie die <CAL>-Taste gedrückt halten (ca.
-
Page 21: Kalibriererinnerung
Hinweis: Die automatische Temperaturkompensation bei der Kalibrierung Sowohl das Signal der pH-Elektrode als auch der pH-Wert der Kalibrierlösungen hängen von der Temperatur ab. Falls ein Temperaturfühler angeschlossen ist, wird der Temperatureinfluss der Elektrode sowohl bei der Messung als auch bei der Kalibrierung automatisch kompensiert. -
Page 22: Kalibrierung Der Redox-Elektrode
5.6 Kalibrierung der Redox-Elektrode Eine Kalibrierung für Redox-Elektroden ist nicht möglich, da der Redox-Wert anders als der pH-Wert unspezifisch und von allen gelösten Stoffen in einer Probe abhängig ist. Um den Sensorzustand einer Redox-Elektrode dennoch zu überprüfen, kann diese in eine Kontrolllösung mit bekanntem Redox-Wert eingetaucht werden. -
Page 23: Datenlogger
6 Datenlogger Das Gerät besitzt zwei verschiedene Loggerfunktionen, um Daten aufzuzeichnen: • „Func-Stor“: manuelle Messwertaufzeichnung per Tastendruck. Zusätzlich wird eine Messstelleneingabe (L-Id) gefordert. • „Func-CYCL“: automatische Messwertaufzeichnung im Abstand der eingestellten Zykluszeit. Der Logger zeichnet jeweils 2 Messergebnisse pro Datensatz auf. Ein Datensatz besteht aus: •... -
Page 24: Func-Cycl
6.2 Func-CYCL Automatische Messwertaufzeichnung In diesem Modus können bis zu 10000 Datensätze abgespeichert werden. Wählen Sie dazu im Konfigurationsmenü <SEt LoGG> den Punkt Func = CYCL aus. Auf dem Display erscheint nun über logg ein Anzeigepfeil ( ). Die automatische Datenaufzeichnung im Abstand der eingestellten Zykluszeit kann per Knopfdruck gestartet werden. -
Page 25: Analogausgang
7.2 Analogausgang Um den Universalausgang als Analogausgang zu nutzen, stellen sie im erweiterten Konfigu- rationsmenü den Ausgang <SEt Out> auf Out = dAC ein. An der Universal-Ausgangsbuchse kann eine Analogspannung von 0 – 1 V abgegriffen werden. Mit dAC.0 und dAC.1 kann der Analogausgang sehr einfach skaliert werden. -
Page 26: Fehlerursachen Und -Behebung
9 Fehlerursachen und -behebung Fehler Ursache Behebung Batterie ist leer Neue Batterie einsetzen Keine Anzeige oder wirre Netzteilbetrieb: Anzeige der ausgewählten Zeichen falsche Spannung/Polung Messstelle Systemfehler Batterie und Netzgerät abklemmen, Gerät reagiert kurz warten, wieder anstecken nicht auf Tas- tendruck Gerät defekt Zur Reparatur einschicken Menüpunkte... -
Page 27: Zubehör
10 Zubehör Elektroden Beschreibung Bestell-Nr. pH-Elektrode Typ 231 inkl. Temperaturfühler 721231 (NTC 30 k), Doppeldiaphragma, Kunststoff, Gelelektrolyt, Ag/AgCl Single Junction pH-Elektrode Typ 226, Doppeldiaphragma Kunst- 721226 stoff, Gelelektrolyt, Ag/AgCl Single Junction pH-Elektrode Typ 330, Einfachdiaphragma, 721330 Kunststoff, Gelelektrolyt, Ag/AgCl Single Junction pH-Elektrode Typ 235, Einfachdiaphragma 721235BNC Glas, Gelelektrolyt, Ag/AgCl Double Junction... -
Page 28: Technische Daten
0,1 °C Genauigkeit ± 0,005 pH ± 0,05 % FS ± 0,2 °C pH-Kalibrie- • Lovibond Standardpuffer (pH: 4,01 / 7,00 / 10,01) ® automatisch rung • DIN 19266 (pH: 1,68 / 4,01 / 6,87 / 9,18 / 12,45) (1 bis •... -
Page 29: Allgemeine Gerätedaten
11.2 Allgemeine Gerätedaten Display LCD, 4 ½ stellig 7-Segment inkl. Hintergrundbeleuchtung, 52 x 40 mm (Breite x Höhe) Gehäuse Bruchfestes ABS-Gehäuse inkl. Schutzarmierung Abmessungen 164 x 100 x 37 mm inkl. Schutzarmierung (Breite x Höhe x Tiefe) Gewicht 302 g inkl. Batterie und Schutzarmierung Schutzart Gehäuse IP 67 Prüfzeichen CE Zulässige Umge-... - Page 31 Important information regarding the disposal of batteries Under the Battery Ordinance (Directive 2006/66/EC), every consumer is obliged by law to return all used and depleted batteries. Disposal via domestic waste is prohibited. Since batteries are also included in the scope of delivery of products from our range, we would like to point out the following: spent batteries must not be put in domestic waste and can instead be handed in free of charge at public collecting points in your community and anywhere selling batteries of...
- Page 32 Table of Contents 1 Safety ............34 1.1.
- Page 33 6 Data logger ............51 6.1.
-
Page 34: Safety
1 Safety 1.1. General notes Any use other than the intended use, non-compliance with these operating instructions, deploy- ment of insufficiently qualified personnel, and unauthorised modifications to the instrument will void the manufacturer's liability and warranty for damages and subsequent damages. The manufacturer is not liable for costs or damages incurred by the user or third par- ty resulting from the use of this instrument, specifically in the event of unintended use of the instrument, or misuse or malfunctions of the connection or the instrument. -
Page 35: Connections
2 Summary Universal output: USB interface, power supply, 2.1 Connections analogue output BNC socket: Connection for pH and/or redox electrode Banana sockets: connection for Pt1000 or NTC 30 kΩ temperature sensor • For pH electrodes with an integrated tempe- rature sensor (NTC 30 kΩ), the outer banana plug is connected. -
Page 36: Display
Button combination Long button press Open extended configuration menu Restore factory settings 2.3 Display Symbol Meaning Display arrows for identifying a selected parameter Main display for showing the selected measuring para- meter ( ) • pH value (pH) • ORP oxidation / reduction potential (mV, mV ->... -
Page 37: Battery Change
2.4 Battery change If >bAt< appears in the lower display, the batteries are spent and must be replaced. However, instrument function is still ensured for a certain amount of time. If >bAt< appears in the upper display, the battery voltage is no longer sufficient for the instrument's operation and the battery is now completely drained. -
Page 38: Stand
2.6 Stand Pull Stand folded shut. The Pull to expand 1 x pull: 2 x pull: instrument can be hung Set up the instru- Hang the up on a strap ment on a table instrument on a screw 3. Commissioning 3.1 Scope of delivery SD 305 pH/ORP (Set 1) SD 305 pH/ORP (Set 2) -
Page 39: Settings
4 Settings 4.1 Configuration menu 4.1.1 Structure and navigation Operating Menu Parameter Value mode option option Function 1. Open the Configuration menu with a long button press (approx. 3 s) 2. Select the option (menu, parameter) 3. Save the value Navigation (up/down) Return to the previous option or to operating mode * If no button is pressed in the Configuration menu for more than 2 minutes, the configuration process is aborted and... -
Page 40: Description Of Functions
4.1.2 Description of functions Menu Parameter Values Meaning Set parameter: Setting of the measuring parameter Selection of the displayed resolution 0.01 e.g. pH 7.01 0.001 e.g. pH 7.001 Calibration: Selection of the number of calibration points 1 pt 1-point calibration (offset calibration, slope - 59.2 mV/pH) 2 pt 2-point calibration (neutral &... -
Page 41: Background Lighting
Temperature compensation (only available if no temperature sensor is connected) -5 … 150°C Temperature specifi cation with manual (23 … 302°F) temperature compensation Set instrument: Instrument settings Auto hold: Automatic determination of measurement value Automatic defi nition of the measurement value Defi nition of the measurement value by button press Auto Power-Off: Automatic instrument... -
Page 42: Extended Configuration Menu
4.2 Extended configuration menu 4.2.1 Structure and navigation Operating Menu Parameter Value mode option option Function Open the extended configuration menu with a long button press (approx. 3 s) 1. Select the option (menu, parameter) 2. Save the value Navigation (up/down) Return to the previous option or to operating mode * If no button is pressed in the Configuration menu for more than 2 minutes, the configuration process is aborted and the instrument returns to operating mode. -
Page 43: Description Of Functions
4.2.2 Description of functions Menu Parameter Values Meaning Set alarm: Setting of the alarm function pH/mV monitoring: Alarm on with sound No.So pH/mV monitoring: Alarm on without sound No alarm for pH/mV monitoring e.g. pH 1.00 Min. alarm limit value for pH/mV (AL.1 = On/ No.So) e.g. - Page 44 Set output: Setting of universal output Universal output Interface and analogue output off (lowest possible power consumption) Serial interface activated Analogue output activated 01.11 ... 91 Base address of the instrument for serial interface communication (Out = SEr) e.g. pH 1.00 Entry of the measurement value at which the analogue output must output 0V...
-
Page 45: Data Archive
4.3 Data archive 4.3.1 Structure and navigation Operating Menu Selection Value mode option of record Function Open the data archive with a long button press (approx. 3 s) Select option/record Navigation (up/down) Return to the previous option or to operating mode SD_305_pH/ORP_1 04/2021... -
Page 46: Description Of Functions
4.3.2 Description of functions Menu Options Values Meaning Start the logger (Return to opera- ting mode) Stop the logger (Return to opera- ting mode) Read manually stored measurement data Read up to 1000 records (X = 1 to 1000) Record = St. X Measurement Display pH or mV value... -
Page 47: Ph And Redox Measurement
5 pH and redox measurement 5.1 Preparation of the pH / redox electrode Remove the storage flask. Check the condition of the electrode. If the sensor is dry, place the electrode in fresh storage solution (3 M KCl) for at least 5 hours. dry? Check the sensor tip for air bubbles. - Page 48 Immerse the pH electrode (temperature probe incl.) in the calibration solution. Ensure sufficient flow, e.g. by a) using a magnetic stirrer with agitator (recommended) b) swirl the pH electrode in the solution. Stop stirring and start the calibration process by holding the <CAL>...
-
Page 49: Calibration Reminder
Note: Automatic temperature compensation during calibration Both the signal of the pH electrode and the pH value of the calibration solutions depend on the temperature. If a temperature sensor is connected, the tempe- rature influence of the electrode is automatically compensated both during measurement and during calibration. -
Page 50: Calibration Of The Redox Electrode
5.6 Calibration of the redox electrode It is not possible to calibrate redox electrodes, since the redox value, unlike the pH value, is non-specific and depends on all the dissolved substances in a sample. In order to check the sensor state of a redox electrode anyway, it can be immersed in a control solution with a known redox value. -
Page 51: Data Logger
6 Data logger The instrument has two different logger functions for recording data: • “Func-Stor": manual recording of measurement values by button press. A measuring location entry (L ID) is also required. • “Func-CYCL": automatic recording of measurement values at intervals of the set cycle time. -
Page 52: Func-Cycl
6.2 Func-CYCL Automatic recording of measurement values In this mode, up to 10,000 records can be saved. To do this, select the item Func = CYCL in the Configuration menu <SEt LoGG>. An indicator arrow ( ) now appears on the display above logg. -
Page 53: Usb Interface
7.1 USB interface To use the universal output as a USB interface, set the output <SEt Out> in the extended con- figuration menu to Out = SEr. With a USB 300 galvanically separate interface converter (acces- sory), the instrument can be connected directly to the USB interface of a PC. If the instrument is operated with the USB 300 interface adapter, the instrument draws its power from this interface. -
Page 54: Problems And Troubleshooting
9 Problems and troubleshooting Problem Cause Remedy Battery is flat Insert a new battery No display or distorted Mains adapter operation: Display of the selected measuring characters Incorrect voltage / polarity location System error Disconnect the battery and mains Instrument adapter, wait a while, does not then reconnect... -
Page 55: Accessories
10 Accessories Electrodes Description Order No. pH electrode type 231 incl. temperature sensor 721231 (NTC 30 k), double diaphragm, plastic, gel electrolyte, Ag/AgCl single junction pH electrode type 226, plastic, double dia- 721226 phragm, gel electrolyte, Ag/AgCl single junction pH electrode type 330, single diaphragm, plastic, 721330 gel electrolyte, Ag/AgCl single junction pH electrode type 235, glass, single diaphragm,... -
Page 56: Technical Data
0.1°C Accuracy ± 0.005 pH ± 0.05% FS ± 0.2°C pH calibrat- • Lovibond standard buffer (pH: 4.01 / 7.00 / 10.01) ® Automatic • DIN 19266 (pH: 1.68 / 4.01 / 6.87 / 9.18 / 12.45) (1- to 3-point •... -
Page 57: General Instrument Data
11.2 General instrument data Display LCD, 4 ½ digit, 7 segment incl. background illumination, 52 x 40 mm (width x height) Housing Shatter-proof ABS housing incl. protective armour Dimensions 164 x 100 x 37 mm incl. protective armour (width x height x depth) Weight 302 g incl. - Page 59 Indications importantes concernant l’élimination des piles et batteries En raison de la Directive 2006/66/CE relative aux piles et accumulateurs, le consommateur est légalement tenu de retourner les piles et accumulateurs utilisés et usagés. L'élimination des piles avec les déchets ménagers est interdite. Comme certains produits de notre catalogue sont aussi livrés avec des piles ou des batteries, veuillez noter les points suivants : Ne jetez pas les piles et batteries usagées avec les déchets ménagers.
- Page 60 Table des matières 1 Sécurité ............62 1.1 Remarque générale .
- Page 61 6 Journalisation des données ......... . 79 6.1.
-
Page 62: Sécurité
1 Sécurité 1.1 Remarque générale La responsabilité du fabricant et la garantie qu'il accorde pour les dommages primaires et secondaires expirent en cas d'utilisation non conforme, de non-respect de ce mode d’emploi, d'utilisation de l'appareil par des personnes insuffisamment qualifiées ainsi qu'en cas de modification volontaire de l'appareil. -
Page 63: Présentation
2 Présentation Sortie universelle : Prise USB, alimentation 2.1 Raccordements électrique, sortie analogique Prise BNC Raccord pour électrode pH et Redox Prises bananes : Raccord pour sonde de température Pt1000 ou NTC 30 kΩ • La fiche banane pour les électrodes pH avec sonde de température intégrée (NTC 30 kΩ) est raccordé... -
Page 64: Affichage
Combinaison de touches Appui long sur la touche Afficher le menu de configuration étendu Réinitialiser à la configuration d’usine 2.3 Affichage Symbole Signification Flèche de marquage d’un paramètre sélectionné Affichage du paramètre de mesure sélectionné ( ) • Valeur du pH (pH) •... -
Page 65: Remplacement Des Piles
2.4 Remplacement des piles Si le système affiche >bAt< dans la partie basse, les piles sont usées et doivent être remplacées. L’appareil peut cependant encore fonctionner quelques temps. Si le système affiche >bAt< dans la partie haute, la tension des piles n’est plus suffisante pour faire fonctionner l’appareil, elles sont pratiquement vides. -
Page 66: Attache
2.6 Attache Tirer Attache repliée. L’appareil Tirer pour déplier Tirer 1 fois : Tirer 2 fois : peut être accroché à une Pour poser l’appa- Pour accrocher ceinture reil sur la table l’appareil à une vis 3. Mise en service 3.1 Livraison SD 305 pH/ORP (Set-1) SD 305 pH/ORP (Set-2) -
Page 67: Paramètres
4 Paramètres 4.1 Menu de configuration 4.1.1 Structure et navigation Mode Option Option Valeur Exploitation Menu Paramètres Fonction 1. Appuyer longuement sur la touche (env. 3 s) pour afficher le menu de configuration 2. Sélectionner une option (Menu, Paramètres) 3. Enregistrer une valeur Navigation (vers le haut/bas) Revenir à... -
Page 68: Description Du Fonctionnement
4.1.2 Description du fonctionnement Menu Paramètres Valeurs Signifi cation Set Parameter : Confi guration des paramètres de mesure Sélection de la résolution affi chée 0.01 p.e. pH 7.01 0.001 p.e. pH 7.001 Calibrage : Sélection du nombre de points de calibrage 1-Pt Calibrage 1 point (calibrage d’offset, pente - 59,2 mV/pH) -
Page 69: Auto Hold : Détermination Automatique
Compensation de température (disponible seule- ment en absence de sonde de température) -5 ... 150°C Températures en cas de compensation (23 ... 302 °F) de température manuelle Set Instrument : Confi guration de l’appareil Auto Hold : Détermination automatique des valeurs de mesure Enregistrement automatique de la valeur de mesure Enregistrement de la valeur de mesure... -
Page 70: Menu De Configuration Étendue
4.2 Menu de configuration étendue 4.2.1 Structure et navigation Mode Option Option Valeur Exploitation Menu Paramètres Fonction Appuyer longuement sur la touche (env. 3 s) pour afficher le menu de configuration étendu 1. Sélectionner une option (Menu, Paramètres) 2. Enregistrer une valeur Navigation (vers le haut/bas) Revenir à... -
Page 71: Description Du Fonctionnement
4.2.2 Description du fonctionnement Menu Paramètres Valeurs Signifi cation Set Alarm : Confi guration de la fonction d’alarme Surveillance pH/mV Alarme activée avec alerte sonore No.So Surveillance pH/mV Alarme activée sans alerte sonore Pas d’alarme de surveillance pH/mV Par ex. pH Seuil d’alarme minimal pour 1,00 pH/mV... -
Page 72: Sortie Universelle
Set Output : Configuration de la sortie universelle Sortie universelle Interface et sortie analogique dé- sactivées (consommation électrique minimale) Interface série activée Sortie analogique activée 01,11 … 91 Adresse de base de l’appareil pour la communication par interface série (Out = SEr) Par ex. -
Page 73: Archive Des Données
4.3 Archive des données 4.3.1 Structure et navigation Sélection Mode Option Enregistre- Valeur Exploitation Menu ment Fonction Appuyez longuement sur la touche (env. 3 s) pour afficher l’archive des données Sélectionner Option/Enregistrement Navigation (vers le haut/bas) Revenir à l’option précédente ou en mode Exploitation SD_305_pH/ORP_1 04/2021... -
Page 74: Description Du Fonctionnement
4.3.2 Description du fonctionnement Menu Options Valeurs Signifi cation Lancer la jour- nalisation des données (Retour au mode Exploitation) Arrêter la jour- nalisation des données (Retour au mode Exploitation) Lecture manuelle des données de mesure enregistrées Enregistrement = Lecture de jusqu’à 1000 enregistrements (X = 1 à... -
Page 75: Mesure Ph Et Redox
5 Mesure pH et Redox 5.1 Préparation de l’électrode pH/Redox Retirez la bouteille de conservation. Vérifiez l’état de l’électrode. Si le capteur est sec, plongez l’électrode pendant 5 h dans une solution de conservation fraiche (3 M KCl). sec ? Vérifiez l’absence de bulles sur la pointe du capteur. - Page 76 Plongez l’électrode pH (incl. sonde de température) dans la solution de calibrage. Veillez à ce qu’il y ait suffisamment de flux : a) En utilisant un agitateur avec barreau magnétique (méthode conseillée) b) En agitant l’électrode pH dans la solution Cessez d’agiter et lancez le calibrage en appuyant env.
-
Page 77: Rappel De Calibrage
Remarque : Compensation automatique de la température pendant le calibrage La température influence le signal de l’électrode pH et le pH de la solution de calibrage. Si une sonde de température est raccordée, l’influence de la température de l’électrode est automatiquement compensée pendant la mesure et pendant le calibrage. Sinon, veillez à... -
Page 78: Calibrage De L'électrode Redox
5.6 Calibrage de l’électrode Redox Il est impossible de calibrer les électrodes Redox car le Redox, à la différence du pH, est non spécifique et dépend de toutes les substances dissoutes dans l’échantillon. Pour contrôler l’état du capteur d’une électrode Redox, plongez-la dans solution de contrôle dont vous connaissez la valeur Redox. -
Page 79: Journalisation Des Données
6 Journalisation des données L’appareil est doté de deux fonctions de journalisation des données : • « Func-Stor » : Enregistrement manuel par appui sur une touche des valeurs mesurées. Le système requiert en plus la saisie du point de mesure (L-Id). •... -
Page 80: Entrée Universelle
6.2 Func-CYCL Enregistrement automatique des valeurs mesurées Ce mode permet de conserver jusqu’à 10000 enregistrements. Sélectionnez dans le menu de configuration <SEt LoGG> l’option Func = CYCL. Une flèche apparait au-dessus de « logg » ( ). L’enregistrement automatique des valeurs mesurées selon la durée de cycle réglée est démarré... -
Page 81: Sortie Analogique
7.2 Sortie analogique Pour utiliser la sortie universelle comme sortie analogique, mettez, dans le menu de configu- ration étendu, la sortie <SEt Out> sur Out = dAC. Sur la prise de sortie universelle, le système peut lire une tension analogique de 0 - 1 V. Avec dAC.0 et dAC.1, la sortie analogique peut très facilement être redimensionnée. -
Page 82: Origines Des Erreurs Et Dépannage
9 Origines des erreurs et dépannage Erreur Origine Solution La pile est vide Installer une nouvelle pile Affichage con- Mode Bloc d’alimentation : Affichage du point de mesure fus ou absent Tension/Polarité erronée sélectionné Erreur du système Retirer la pile, débrancher le bloc L'appareil ne d’alimentation, attendre un court réagit pas aux... -
Page 83: Accessoire
10 Accessoire Électrodes Description Réf. Électrode pH Type 231 avec sonde de tempéra- 721231 ture (NTC 30 k), double diaphragme, plastique, électrolyte gélifié, Ag/AgCl Single Junction Électrode pH Type 226, double diaphragme, plas- 721226 tique, électrolyte gélifié, Ag/AgCl Single Junction Électrode pH Type 330, diaphragme simple, plas- 721330 tique, électrolyte gélifié, Ag/AgCl Single Junction... -
Page 84: Caractéristiques Techniques
0,001 pH 0,1 mV 0,1°C Précision pH ±0,005 ±0,05% FS ±0,2°C • Solution tampon standard Lovibond (pH : 4,01 / 7,00 ® automati- / 10,01) Calibrage pH • DIN 19266 (pH : 1,68 / 4,01 / 6,87 / 9,18 / 12,45) -
Page 85: Données Générales De L'appareil
11.2 Données générales de l'appareil Écran LCD, 4½, segment 7 positions avec rétroéclairage, 52 x 40 mm (LxH) Boîtier Boîtier ABS incassable avec enveloppe protectrice Dimensions 164 x 100 x 37 mm avec enveloppe protectrice (LxHxP) Poids 302 g avec pile et enveloppe protectrice Indice de protec- IP 67 tion boîtier... - Page 87 Nota importante sobre eliminación de pilas y baterías Según la directiva de pilas (2006/66/CE), los consumidores están obligados legalmente a devolver todas las pilas y baterías usadas y agotadas. Queda prohibida la eliminación en la basura doméstica. Dado que ciertos productos de nuestra gama incluyen pilas y baterías, le indicamos lo siguiente: las pilas y baterías usadas no se pueden depositar en la basura doméstica, se pueden entregar gratuitamente en los puntos de recogida públicos de su municipio...
- Page 88 Tabla de contenido 1 Seguridad ............90 1.1.
- Page 89 6 Registrador de datos ..........107 6.1.
-
Page 90: Seguridad
1 Seguridad 1.1. Observación general La responsabilidad y la garantía del fabricante por daños directos e indirectos quedan anuladas en caso de uso incorrecto, de inobservancia de este manual de instrucciones, de uso de personal técnico sin la debida formación, así como de modificaciones no autorizadas en el aparato. El fabricante no se hace responsable de los gastos ni de los daños causados al usuario o a terceros como consecuencia del uso de este aparato, en particular en caso de uso indebido o inadecuado del aparato o de fallos de la conexión o del aparato. -
Page 91: Vista General
2 Vista general Salida universal: interfaz USB, suministro de corrien- 2.1 Conexiones te, salida analógica Conector BNC: conexión para electrodos para pH o Redox Conector banana: conexión para sonda de tempera- tura Pt1000 o NTC 30 kΩ • Para electrodos para pH con sonda de t e m p e r a t u r a i n t e g r a d a ( N T C 3 0 k Ω) , el conector banana se conecta por fuera. -
Page 92: Pantalla
Combinación de teclas Pulsación larga de la tecla Abrir el menú de configuración ampliado Restablecer los ajustes de fábrica 2.3 Pantalla Símbolo Significado Flecha para identificar un parámetro seleccionado o bien, Indicación principal para mostrar el parámetro de medición seleccionado ( ) •... -
Page 93: Cambio De Pilas
2.4 Cambio de pilas Si aparece >bAt< en la parte inferior, las pilas están gastadas y es necesario cambiarlas. Sin embargo, la funcionalidad del dispositivo está garantizada durante cierto tiempo. Si aparece >bAt< en la parte superior, la tensión de las pilas ya no es suficiente para que el dispositivo funcione, las pilas están totalmente agotadas. -
Page 94: Soporte
2.6 Soporte Tirar Soporte plegado. El dis- Tirar para desplegar Tirar 1 vez: Tirar 2 veces: positivo se puede colgar colocar el disposi- colgar el dispo- del cinturón tivo sobre la mesa sitivo con un tornillo 3. Puesta en funcionamiento 3.1 Contenido SD 305 pH/ORP (juego -1) SD 305 pH/ORP (juego -2) SD 305 pH/ORP (juego -3) •... -
Page 95: Ajustes
4 Ajustes 4.1 Menú de configuración 4.1.1 Estructura y navegación Modo de Menú Parámetros funciona- Valor Opciones Opciones miento Función 1. Abrir el menú de configuración con una pulsación larga (aprox. 3 s) 2. Seleccionar opción (Menú, Parámetros) 3. Guardar valor Navegación (arriba/abajo) Volver a la opción anterior o al modo de funcionamiento * Si no se pulsa ninguna tecla durante más de 2 minutos en el menú... -
Page 96: Descripción De Funciones
4.1.2 Descripción de funciones Menú Parámetros Valores Signifi cado Set Parameter: Ajuste de los parámetros de medición Selección de la resolución mostrada 0.01 p.e. pH 7.01 0.001 p.e. pH 7.001 Calibración: selección del número de puntos de calibración 1-Pt Calibración de 1 punto (calibración offset, pendiente - 59,2 mV/pH) 2-Pt Calibración de 2 puntos... - Page 97 Compensación de la temperatura (solo disponib- le cuando no hay ninguna sonda de temperatura conectada) -5 … 150 °C Indicación de temperatura con com- (23 … 302 pensación de temperatura manual °F) Set Instrument: ajustes del dispositivo Auto Hold: determinación automática del valor de medición Retención automática del valor de medición...
-
Page 98: Menú De Configuración Ampliado
4.2 Menú de configuración ampliado 4.2.1 Estructura y navegación Modo de Menú Parámetros funciona- Valor Opciones Opciones miento Función Abrir el menú de configuración ampliado con una pulsación larga (aprox. 3 s) 1. Seleccionar opción (Menú, Parámetros) 2. Guardar valor Navegación (arriba/abajo) Volver a la opción anterior o al modo de funcionamiento * Si no se pulsa ninguna tecla durante más de 2 minutos en el menú... -
Page 99: Descripción De Funciones
4.2.2 Descripción de funciones Menú Parámetros Valores Signifi cado Set Alarm: ajustes de la función de alarma Control de pH/mV: alarma activada con sonido No.So Control de pH/mV: alarma activada sin sonido Sin alarma para el control de pH/mV P. ej., pH Valor límite mín. - Page 100 Set Output: ajustes de la salida universal Salida universal Interfaz y salida analógica apagadas (consumo de corriente mínimo) Interfaz en serie activada Salida analógica activada 01,11 ... 91 Dirección básica del dispositivo para la comunicación de interfaz en serie (Out = SEr) P.
-
Page 101: Archivo De Datos
4.3 Archivo de datos 4.3.1 Estructura y navegación Modo de Selección de Menú funciona- conjunto de Valor Opciones miento datos Función Abrir el archivo de datos con una pulsación larga (aprox. 3 s) Seleccionar Opción/Conjunto de datos Navegación (arriba/abajo) Volver a la opción anterior o al modo de funcionamiento SD_305_pH/ORP_1 04/2021... -
Page 102: Descripción De Funciones
4.3.2 Descripción de funciones Menú Opciones Valores Signifi cado Iniciar registra- (retorno al modo de funcionamiento) Detener regis- trador (retorno al modo de funcionamiento) Leer datos de medición guardados manualmente Leer hasta 1000 juegos de datos (X = 1 Conjunto de hasta 1000) datos: St. -
Page 103: Medición De Ph Y Redox
5 Medición de pH y Redox 5.1 Preparación del electrodo para pH/Redox Retire el cilindro de almacenaje. Compruebe el estado del electrodo. Si el sensor está seco, ponga el electrodo en solución de almacenaje (3 M KCl) recién preparada durante al menos 5 h. dry? Compruebe si la punta del sensor tiene burbujas de aire. - Page 104 Sumerja el electrodo para pH (incl. sensor de temperatura) en la solución de calibración. Procure que haya suficiente flujo, por ejemplo, a) usando un agitador magnético con barra deagitación (recomendado) o b) agitando el electrodo para pH en la solución. Deje de agitar y comience la calibración manteniendo pulsada la tecla <CAL>...
-
Page 105: Recordatorio De Calibración
Indicación: Compensación automática de la temperatura durante la calibración Tanto la señal del electrodo para pH como el valor de pH de las soluciones de calibración dependen de la temperatura. En caso de que haya una sonda de temperatura conectada, la influencia de temperatura del electrodo se compensa automáticamente tanto en la medición como en la calibración. -
Page 106: Calibración Del Electrodo Para Redox
En el modo de funcionamiento, se puede leer el valor de pH. Para ello, deje de agitar. El valor de medición estable se indica con una flecha sobre "ok". 5.6 Calibración del electrodo para Redox No es posible calibrar los electrodos para Redox porque, al contrario de lo que ocurre con el valor de pH, el valor de Redox no es específico y depende de todas las sustancias disueltas en la muestra. -
Page 107: Registrador De Datos
No almacenar nunca los electrodos para pH y para ORP en agua destilada o soluciones con un pH > 8. Esto provocaría una drástica reducción de la vida útil. Para ralentizar el proceso de envejecimiento de los electrodos para pH y ORP, se recomienda almacenarlos en una solución de almacenaje adecuada cuando no se estén usando. -
Page 108: Salida Universal
6.2 Func-CYCL Registro automático de datos de medición En este modo se pueden guardar hasta 10000 conjuntos de datos. Para ello, seleccione el punto Func = CYCL en el menú de configuración <SEt LoGG>. En la pantalla aparecerá una flecha ( ) sobre "logg". El registro automático de datos a intervalos del tiempo de ciclo configurado se puede iniciar pulsando el botón. -
Page 109: Interfaz Usb
7.1 Interfaz USB Para utilizar la salida universal como interfaz USB, ajuste la salida <SEt Out> en Out = SEr en el menú de configuración. El dispositivo puede conectarse directamente a la interfaz USB de un PC usando un convertidor de interfaz con aislamiento galvánico USB 300 (accesorios). Si el disposi- tivo se utiliza con el adaptador de interfaz USB 300, recibe suministro eléctrico de esa interfaz. -
Page 110: Causas De Errores Y Soluciones
9 Causas de errores y soluciones Error Causa probable Solución del problema Ninguna La pila está agotada Colocar pila nueva indicación Funcionamiento con fuente de alimen- Indicación del lugar de medición o caracteres tación: tensión/polaridad incorrecta seleccionado confusos El dispositivo Error del sistema Retirar la pila y el adaptador de red, no reacciona... -
Page 111: Accesorios
10 Accesorios Electrodos Descripción N.º de pedido pH Electrodo de pH tipo 231 incl. sonda de temperatura 721231 (NTC 30 k), diafragma doble, plástico, electrolito de gel, Ag/AgCl Single Junction Electrodo de pH tipo 226, diafragma doble de plástico, 721226 electrolito de gel, Ag/AgCl Single Junction Electrodo de pH tipo 330, diafragma simple, plástico, 721330... -
Page 112: Datos Técnicos
0,1 mV 0,1 °C Exactitud ± 0,005 pH ± 0,05 % FS ± 0,2 °C Calibración automática- • Lovibond Tampón estándar (pH: 4,01/7,00/10,01) ® de pH mente • DIN 19266 (pH: 1,68/4,01/6,87/9,18/12,45) (Calibración • Soluciones de tampón pH individuales entre 1 y 3 manual (introducción de datos) -
Page 113: Datos Generales Del Dispositivo
11.2 Datos generales del dispositivo Pantalla LCD, de 4 ½ caracteres y 7 segmentos, retroiluminada, 52 x 40 mm (anchura x altura) Carcasa Carcasa ABS resistente con funda protectora Dimensiones 164 x 100 x 37 mm con funda protectora (ancho x alto x profundidad) Peso 302 g con pila y funda protectora Tipo de protección IP 67... - Page 115 Informazioni importanti sullo smaltimento di batterie e accumulatori A causa del regolamento sulle batterie (direttiva 2006/66/CE) ogni consumatore è legalmente obbligato a restituire tutte le batterie o accumulatori usati. È vietato lo smaltimento nei rifiuti domestici. Poiché le batterie e gli accumulatori sono incluse nella consegna per i prodotti della nostra gamma, desideriamo attirare la vostra attenzione su quanto segue: Le batterie e gli accumulatori usati non appartengono ai rifiuti domestici, ma possono...
- Page 116 Indice 1 Sicurezza ............117 1.1.
- Page 117 6 Data logger ............134 6.1.
-
Page 118: Sicurezza
1 Sicurezza 1.1. Indicazioni di carattere generale La responsabilità e la garanzia del produttore relativamente a danneggiamenti e danni conseguenti decade in caso di uso improprio, mancata osservanza del presente manuale operativo, ricorso a per- sonale tecnico non sufficientemente qualificato e apporto autonomo di modifiche allo strumento. Il produttore non si ritiene responsabile per quanto attiene a costi o danneggiamenti cagionati all'uti- lizzatore o a terzi a seguito dell'utilizzo del presente strumento, in particolar modo in caso di uso improprio dell'utilizzo o di abuso, oppure di anomalie del collegamento o dello strumento stesso. -
Page 119: Panoramica
2 Panoramica Uscita universale: Interfaccia USB, alimentatore, 2.1 Collegamenti uscita analogica Presa BNC: Collegamento per elettrodo pH o redox Martinetti a banana: Collegamento per sensore di temperatura Pt1000 o NTC 30 kΩ • Per elettrodi pH con sensore di temperatura integrato (NTC 30 kΩ), la spina a banana è... -
Page 120: Display
Combinazione di tasti Pressione tasti lunga Apri il menu di configurazione estesa Ripristina le impostazioni di fabbrica 2.3 Display Simbolo Significato Visualizza le frecce per identificare un parametro selezio- nato Display principale per mostrare il parametro di misurazione selezionato ( ) •... -
Page 121: Sostituzione Della Batteria
2.4 Sostituzione della batteria Se >bAt< viene visualizzato sul display inferiore, le batterie sono esaurite e devono essere sostituite. Tuttavia, la funzione del dispositivo è ancora garantita per un certo tempo. Se >bAt< viene visualizzato sul display superiore, la tensione della batteria non è più sufficiente per il funzionamento del dispositivo, la batteria è... -
Page 122: Versione
2.6 Versione Tirare Supporto chiuso. Il dispo- Tirare per aprire 1 x tirare: 2 x tirare: sitivo può essere appeso Posizionare il Appendere il a una cintura dispositivo sul dispositivo alla tavolo vite 3. Messa in funzione 3.1 Fornitura SD 305 pH/ORP (Set 1) SD 305 pH/ORP (Set 2) SD 305 pH/ORP (Set 3) •... -
Page 123: Impostazioni
4 Impostazioni 4.1 Menu di configurazione 4.1.1 Struttura e navigazione Modalità Opzione Opzione Valore operativa menu parametro Funzione 1. Aprire il menu di configurazione premendo a lungo il tasto (circa 3 s) 2. Selezionare opzione (menu, parametri) 3. Salvare valore Navigazione (su/giù) Tornare all'opzione precedente o tornare alla modalità... -
Page 124: Descrizione Del Funzionamento
4.1.2 Descrizione del funzionamento Menu Parametri Valori Signifi cato Set Parameter: Impostazione dei parametri di misurazione Selezione della risoluzione visualizzata 0.01 a.e. pH 7.01 0.001 a.e. pH 7.001 Calibrazione: Selezione del numero di punti di calibrazione 1-Pt Calibrazione a 1 punto (calibrazione offset, Inclinazione - 59.2 mV/pH) 2-Pt Calibrazione a 2 punti... -
Page 125: Impostazione Dell'orologio
Compensazione della temperatura (disponibile solo se non è collegato alcun sensore di tempe- ratura) -5 … 150 °C Specifi che di temperatura (23 … 302 °F) con compensazione manuale della temperatura Set Instrument: Impostazioni del dispositivo Auto Hold: Determinazione automatica della misura Registrazione automatica del valore misurato... -
Page 126: Menu Di Configurazione Esteso
4.2 Menu di configurazione esteso 4.2.1 Struttura e navigazione Modalità Opzione Opzione Valore operativa menu parametro Funzione Aprire il menu di configurazione esteso premendo a lungo il tasto (circa 3 s) 1. Selezionare opzione (menu, parametri) 2. Salvare valore Navigazione (su/giù) Tornare all'opzione precedente o tornare alla modalità... -
Page 127: Descrizione Del Funzionamento
4.2.2 Descrizione del funzionamento Menu Parametri Valori Signifi cato Set Alarm: Impostazione della funzione di allarme Monitoraggio pH/mV: Allarme attivo con suono No.So Monitoraggio pH/mV: Allarme attivo senza suono Nessun allarme per il monitoraggio pH/mV ad es. pH Limite minimo 1.00 di allarme per pH/mV (AL.1 = On/... - Page 128 Set Output: Impostazione dell'uscita universale Uscita universale Interfaccia e uscita analogica disatti- vate (consumo minimo di energia) Interfaccia seriale attivata Interfaccia analogica attivata 01,11 ... 91 Indirizzo di base del dispositivo per la comunicazione dell'interfaccia seriale (Out = SEr) ad es.
-
Page 129: Archivio Dati
4.3 Archivio dati 4.3.1 Struttura e navigazione Modalità Opzione Selezione set Valore operativa menu di dati Funzione Aprire l'archivio dati premendo a lungo (circa 3 s) Selezionare opzione / set di dati Navigazione (su/giù) Tornare all'opzione precedente o tornare alla modalità operativa SD_305_pH/ORP_1 04/2021... -
Page 130: Descrizione Del Funzionamento
4.3.2 Descrizione del funzionamento Menu Opzione Valori Signifi cato Avviare il logger (Ritorno alla mo- dalità operativa) Arrestare il logger (Ritorno alla mo- dalità operativa) Lettura manuale dei dati di misurazione salvati Lettura di un massimo di 1000 set di dati Set di dati = St. -
Page 131: Misure Di Ph E Redox
5 misure di pH e redox 5.1 Preparazione dell'elettrodo pH/redox Rimuovere la bottiglia di conservazione. Verificare le condizioni dell'elettrodo. Se il sensore è asciutto, posizionare l'elet- trodo per min. 5 ore in soluzione di conservazione fresca (3 M KCl). dry? Controllare la punta del sensore per bolle d'aria. - Page 132 Immergere l'elettrodo pH (incl. sensore di temperatura) nella soluzione di calibrazione. Assicurarsi che vi sia flusso sufficiente, ad es. a) utilizzare un agitatore magnetico con ancoretta (consigliato) o b) orientare l'elettrodo pH nella soluzione. Interrompere l'agitazione e avviare la calibrazione tenendo premuto il tasto <CAL>...
-
Page 133: Promemoria Di Calibrazione
Nota: Compensazione automatica della temperatura durante la calibrazione Sia il segnale dell'elettrodo pH che il pH delle soluzioni di calibrazione dipendono dalla temperatura. Se è collegato un sensore di temperatura, l'influenza della temperatura dell'elettrodo viene automaticamente compensata sia durante la misurazione che durante la calibrazione. -
Page 134: Calibrazione Dell'elettrodo A Redox
5.6 Calibrazione dell'elettrodo a redox La calibrazione per elettrodi redox non è possibile perché il valore redox, a differenza del valore pH, non è specifico e dipende da tutte le sostanze disciolte in un campione. Per controllare ancora lo stato del sensore di un elettrodo redox, può essere immerso in una soluzione di controllo con un valore redox noto. -
Page 135: Data Logger
6 Data logger Il dispositivo ha due diverse funzioni di registrazione per registrare i dati: • "Func-Stor": registrazione manuale dei valori misurati con la semplice pressione di un pulsante. Inoltre, è richiesta un'immissione del punto di misurazione (L-Id). • "Func-CYCL": registrazione automatica del valore misurato ad intervalli del tempo di ciclo impostato. -
Page 136: Func-Cycl
6.2 Func-CYCL Registrazione automatica del valore misurato In questa modalità è possibile salvare fino a 10000 record di dati. Per fare ciò, nel menu di configurazione <SEt LoGG> selezionare la voce Func = CYCL. Una freccia ora appare sul display sopra il registro logg ( ). La registrazione automatica dei dati a intervalli del tempo di ciclo impostato può... -
Page 137: Uscita Analogica
7.2 Uscita analogica Per utilizzare l'uscita universale come uscita analogica USB, impostare l'uscita <SEt Out> su Out = dAC nel menu di configurazione estesa. Una tensione analogica di 0 - 1 V può essere collegata alla presa di uscita universale. Con dAC.0 e dAC.1, l'uscita analogica può essere ridimensionata molto facilmente. -
Page 138: Cause E Rimedi Di Errore
9 Cause e rimedi di errore Errore Causa Rimedio Batteria scarica Inserire le batterie nuove Nessuna visu- alizzazione o In caso di funzionamento a rete: Visualizzazione del punto caratteri confusi tensione/polarità errata di misurazione selezionato Errore sistema Scollegare la batteria e l'alimen- Lo strumento tazione, attendere brevemente, non reagisce se... -
Page 139: Accessori
10 Accessori Elettrodi Descrizione N. ordine Elettrodo pH tipo 231 incl. sensore di tempe- 721231 ratura (NTC 30 k), doppio diaframma, plastica, elettrolita in gel, giunzione singola Ag/AgCl Elettrodo pH tipo 226, diaframma doppio in plas- 721226 tica, elettrolita in gel, giunzione singola Ag/AgCl Elettrodo pH tipo 330, diaframma singolo in plas- 721330 tica, elettrolita in gel, giunzione singola Ag/AgCl... -
Page 140: Dati Tecnici
0,1 mV 0,1 °C Precisione ± 0,005 pH ± 0,05 % FS ± 0,2 °C • Tampone standard Lovibond (pH: 4,01 / 7,00 / 10,01) ® Calibrazione automatica • DIN 19266 (pH: 1,68 / 4,01 / 6,87 / 9,18 / 12,45) (Calibrazione •... -
Page 141: Dati Generali Del Dispositivo
11.2 Dati generali del dispositivo Display LCD, 7 segmenti e 4 ½ cifre con retroilluminazione, 52 x 40 mm (larghezza x altezza) Involucro Custodia in ABS infrangibile con rivestimento protettivo Dimensioni 164 x 100 x 37 mm incluso rivestimento protettivo (larghezza x altezza x profondità) Peso 302 g inclusa batteria e rivestimento protettivo Grado di protezio-... -
Page 143: Belangrijke Informatie
Belangrijke instructie betreffende het verwijderen van batterijen en accu'sElke verbruiker is conform de batterijen/accu-verordening (Richtlijn 2006/66/EG) wettelijk verplicht alle gebruikte en verbruikte batterijen resp. accu's in te leveren. Verwijdering via het huishoudelijke afval is verboden. Omdat ook in producten uit ons assortiment batterijen en accu's zijn begrepen in de omvang van de levering, maken wij u op het volgende attent: Verbruikte batterijen en accu's behoren niet bij het huishoudelijke afval maar moeten... - Page 144 Inhoudsopgave 1 Veiligheid ............146 1.1 Algemene aanwijzing.
- Page 145 6 Datalogger ............163 6.1.
-
Page 146: Veiligheid
1 Veiligheid 1.1 Algemene aanwijzing De aansprakelijkheid en garantie van de fabrikant voor schade en gevolgschade vervalt bij ondeskundig gebruik, het niet in acht nemen van deze gebruiksaanwijzing, het gebruik van onvoldoende gekwalificeerd personeel en eigenmachtige wijzigingen aan het apparaat. De fabrikant is niet aansprakelijk voor kosten of schade die de gebruiker of derden oplo- pen als gevolg van het gebruik van dit apparaat, met name in het geval van onbeoogd gebruik van het apparaat of misbruik of storingen van de aansluiting of het apparaat. -
Page 147: Overzicht
2 Overzicht Universele uitgang: USB-poort, stroomvoorziening, 2.1 Aansluitingen analoge uitgang BNC-bus: Aansluiting voor pH- resp. Redox-elektrode Bananenbussen: Aansluiting voor Pt1000 of NTC 30 kΩ temperatuursensor • Voor pH-elektroden met geïntegreerde tem- peratuursensor (NTC 30 kΩ) is de banaanstek- ker uitwendig aangesloten. •... -
Page 148: Displayweergave
Toetsencombinatie lange druk op de toets Uitgebreide configuratiemenu openen Fabrieksinstellingen herstellen 2.3 Displayweergave Symbool Betekenis Indicatiepijlen om een geselecteerde parameter aan te duiden Primaire uitlezing voor het weergeven van de geselecteerde meetparameter ( ) • pH-waarde (pH) • Oxidatie-/reductiepotentieel ORP (mV, mV ->... -
Page 149: Vervangen Van De Batterijen
2.4 Vervangen van de batterijen Toont onderste indicatie >bAt< ? Dan zijn de batterijen vrijwel leeg en moet u die vervangen. De werking van het meetinstrument is echter nog voor een bepaalde tijd mogelijk. Toont de bovenste indicatie >bAt<? Dan is de spanning van de batterij onvoldoende om het meetins- trument te laten werken. -
Page 150: Staander
2.6 Staander Trekken Staander dichtgeklapt. U Trek om uit te 1 x trekken 2 x trekken kunt het meetinstrument klappen Meetinstrument Meetinstru- aan uw gordel hangen op tafel plaatsen ment aan een schroef hangen 3. Inbedrijfstelling 3.1 Omvang van de levering SD 305 pH/ORP (Set-1) SD 305 pH/ORP (Set-2) SD 305 pH/ORP (Set-3) -
Page 151: Instellingen
4 Instellingen 4.1 Configureermenu 4.1.1 Structuur en navigatie Bedrijfsmo- Menu Parameters Waarde Optie Optie Functie 1. Roep het configureermenu op door lang (ca. 3 s) op de toets te drukken 2. Selecteer een optie (menu, parameter) 3. Opslaan van waarden Navigeren (omlaag resp. -
Page 152: Beschrijving Van De Werking
4.1.2 Beschrijving van de werking Menu Parameter Waarde Betekenis Set Parameter: Instellen van de meetparameters Selectie van de weergegeven resolutie 0.01 b.v. pH 7.01 0.001 b.v. pH 7.001 Kalibreren: Selectie van het aantal kalibreerpunten 1-Pt Eénpuntskalibratie (kalibratie met nulpuntverplaatsing, stijging: 59,2 mV/pH) 2-Pt Tweepuntskalibratie (neutrale buffer... -
Page 153: Achtergrondverlichting
Temperatuurcompensatie (uitsluitend beschik- baar als geen temperatuursonde is aangesloten) -5 … 150 °C Vermelding van temperatuur in geval van (23 … 302 °F) handmatige temperatuurcompensatie Set Instrument: Instellingen van het meetinstrument Auto Hold: Automatisch bepalen van meetwaarden Automatisch vasthouden van de meetwaarde Vasthouden van de meetwaarde met een druk-op-de-knop Auto Power-Off: Automatisch afschakelen van... -
Page 154: Uitgebreid Configureermenu
4.2 Uitgebreid configureermenu 4.2.1 Structuur en navigatie Bedrijfsmo- Menu Parameters Waarde Optie Optie Functie Roep het uitgebreide configureermenu op door lang (ca. 3 s) op de toets te drukken 1. Selecteer een optie (menu, parameter) 2. Opslaan van waarden Navigeren (omlaag resp. omlaag) Terugkeren naar de vorige optie of bedrijfsmodus * Drukt u in het configureermenu langer dan twee minuten op geen enkele toets? Dan wordt de configureergang afge- broken. -
Page 155: Beschrijving Van De Werking
4.2.2 Beschrijving van de werking Menu Parameter Waarde Betekenis Set Alarm: Confi gureren van de alarmeerfunctie pH/mV-toezicht: Alarmeren met ingeschakeld geluid No.So pH/mV-toezicht: Alarmeren zonder ingeschakeld geluid Geen alarmering bij pH/mV-toezicht bijvoorbeeld Onderste alarmgrens voor pH/mV pH 1,00 (AL.1 = On/ No.So) bijvoorbeeld Bovenste alarmgrens voor pH/mV... - Page 156 Set Output: Configureren van de universele uitgang Universele uitgang Interface en analoge uitgang uitgeschakeld (laagst mogelijke ener- gieverbruik) Seriële interface werkzaam gemaakt Analoge uitgang werkzaam gemaakt 01,11 ... 91 Basisadres van het meetinstrument voor communicatie via de seriële interface (Out = SEr) bijvoorbeeld Invoer van de meetwaarde waarbij de...
-
Page 157: Data-Archief
4.3 Data-archief 4.3.1 Structuur en navigatie Bedrijfsmo- Menu Selectie Waarde Optie datarecord Functie Roep het data-archief op door langer dan 3 s op de toets te drukken Selecteer de optie 'Datarecord' Navigeren (omlaag resp. omlaag) Terugkeren naar de vorige optie of bedrijfsmodus SD_305_pH/ORP_1 04/2021... -
Page 158: Beschrijving Van De Werking
4.3.2 Beschrijving van de werking Menu Opties Waarde Betekenis Starten van het registreren (terugkeer in de bedrijfsmodus) Stoppen van het registreren (terugkeer in de bedrijfsmodus) Uitlezen van handmatig opgeslagen meetgegevens Datarecord = St. X Uitlezen van maximaal 1000 datarecords (X = 1 ... 1000) Meetwaarde Uitlezing als pH-waarde of als in mV-waarde Temperatuur Uitlezing in °C of in °F... -
Page 159: Ph- En Redox-Meting
5 pH- en redox-meting 5.1 Voorbereiden van de pH-/redox-elektrode Wegnemen van de bewaarfles. Inspec- teren van de staat waarin de elektrode verkeert. Is de sensor droog? Leg dan de elektrode gedurende ten minste 5 h in een verse bewaaroplossing (3 M KCl). droog? Inspecteer de punt van de sensor op aanwezigheid van luchtbellen. - Page 160 Dompel de pH-elektrode onder (incl. een temperatuur- sonde) in de kalibreeroplossing. Zorg voor voldoende aanstroming. Handel daartoe als volgt: a) gebruik een magnetisch roerijzer met roervin (aan- bevolen) of b) zwenk de pH-elektrode in de oplossing heen en weer. Onderbreek het roeren en start het kalibreren door de toets <CAL>...
-
Page 161: Kalibreerherinnering
Hint: De automatische temperatuurcompensatie bij de kalibratie Zowel het signaal, afgegeven door de pH-elektrode, als de pH-waarde van de kalibreeroplossingen zijn afhankelijk van de temperatuur. Is een temperatuur- sonde aangesloten? Dan wordt de temperatuurinvloed van de elektrode zowel automatisch gecompenseerd tijdens het meten als tijdens het kalibreren. Als alternatief kunt u de feitelijke temperatuur van de desbetreffende buffer zo nauwkeurig mogelijk invoeren. -
Page 162: Kalibreren Van De Redox-Elektrode
5.6 Kalibreren van de redox-elektrode Kalibreren van redoxelektroden is niet mogelijk omdat de redoxwaarde anders dan de pH- waarde niet-specifiek is. De waarde is bovendien afhankelijk van alle in het monster opgeloste stoffen. Wilt u toch de staat van de sensor in een redoxelektrode inspecteren? Dan kunt u die elektrode in een controle-oplossing met een bekende redoxwaarde steken. -
Page 163: Datalogger
6 Datalogger Het meetinstrument is voorzien van twee verschillende logfuncties die gegevens registre- ren: • "Func-Stor": handmatige registratie van meetwaarden door middel van een druk-op- de-knop. Bovendien wordt gevraagd het meetpunt (L-Id) in te voeren. • "Func-CYCL": automatische verlopende registratie van meetwaarden en wel na het verstrijken van de ingestelde cyclusduur. -
Page 164: Universele Uitgang
6.2 Func-CYCL Automatisch registreren van meetwaarden In deze modus kunt u maximaal tienduizend datarecords opslaan. Selecteer daartoe in het configureermenu <SEt LoGG> de menukeuze"Func = CYCL" Op het scherm verschijnt nu een indicatiepijl boven 'logg' ( ). Het automatisch, na het verstrijken van de ingestelde cyclusduur, registreren van gegevens kunt u via een druk-op-de-knop starten. -
Page 165: Analoge Uitgang
7.2 Analoge uitgang Wilt u de universele uitgang als USB-interface toepassen? Configureer dan via het uitgebreide configureermenu de uitgang <SEt Out> op Out = dAC. Op de bus van de universele uitgang kunt u een analoge spanning van 0 V of 1 V afnemen. Via dAC.0 en via dAC.1 kunt u de analoge uitgang zeer eenvoudig schaalbaar maken. -
Page 166: Oorzaken Van Storingen En Het Wegnemen Van Die Oorzaken
9 Oorzaken van storingen en het wegnemen van die oorzaken Storing Oorzaak Remedie De batterijen zijn leeg Plaats nieuwe batterijen Geen uitlezing of verminkte Netvoeding: Uitlezing van het geselecteerde tekens Onjuiste spanning of ompoling meetpunt Systeemstoring Neem de aansluitingen van de batte- Het meetins- rijen en van de netvoeding los. -
Page 167: Toebehoren
10 Toebehoren Elektroden Beschrijving Bestelnr. pH-Elektrode type 231 inclusief temperatuursonde 721231 (NTC 30 k), dubbelvoudig diafragma, kunststof, gelei-elektrolyt, Ag/AgCl Single Junction pH-Elektrode type 226 dubbelvoudig diafragma, 721226 kunststof, gelei-elektrolyt, Ag/AgCl Single Junction pH-Elektrode type 330 inclusief enkelvoudig 721330 diafragma, kunststof, gelei-elektrolyt, Ag/AgCl Single Junction pH-Elektrode type 235 enkelvoudig diafragma, 721235BNC... -
Page 168: Technische Specificaties
0,1 °C Nauwkeurig- ± 0,05% FS ± 0,2 °C ± 0,005 pH heid • Lovibond standaardbuffer (pH: 4,01 / 7,00 / 10,01) ® pH-Kalibratie automatisch • DIN 19266 (pH: 1,68 / 4,01 / 6,87 / 9,18 / 12,45) (éénpunts- tot driepuntskali- •... -
Page 169: Algemene Gegevens Van Het Meetinstrument
11.2 Algemene gegevens van het meetinstrument Scherm LCD, 4½-cijfers, samengesteld uit zeven segmenten, inclusief achtergrondverlichting, 52 x 40 mm (breed x hoog) Behuizing Breukvaste behuizing, vervaardigd van ABS inclusief beschermende wapening Afmetingen 164 x 100 x 37 mm inclusief beschermende wapening (breedte x hoogte x diepte) Massa 302 g inclusief batterijen en beschermende wapening Beschermklasse... - Page 170 Informações importantes relativas à eliminação de pilhas e acumuladores De acordo com o regulamento relativo a pilhas (Diretiva 2006/66/CE), todos os consumidores são legalmente obrigados a devolver todas as pilhas ou acumuladores usados e gastos. É proibida a sua eliminação em conjunto com resíduos domésticos. Uma vez que as pilhas e os acumuladores estão também incluídos no volume de fornecimento dos produtos da nossa gama, tomamos a oportunidade de chamar a sua atenção para o seguinte:...
- Page 171 Índice de conteúdos 1 Segurança ............173 1.1 Indicações gerais .
- Page 172 6 Logger de dados ..........190 6.1.
-
Page 173: Segurança
1 Segurança 1.1 Indicações gerais A responsabilidade e a garantia do fabricante por danos e danos consequentes extingue-se em caso de utilização incorreta, não observação deste manual de instruções, utilização de pessoal técnico insuficientemente especializado, bem como, alterações por iniciativa própria no equipamento. O fabricante não se responsabiliza por custos ou danos, causados ao utilizador ou terceiros pela utilização deste equipamento, especialmente em caso de utilização in- correta do equipamento ou uso indevido ou avarias das ligações ou do equipamento. -
Page 174: Visão Geral
2 Visão geral Saída universal: Interface USB, fonte de alimen- 2.1 Ligações tação, saída analógica Ficha BNC: ligação para o elétrodo de pH ou de redox Fichas banana: ligação para o sensor de temperatu- ra Pt1000 ou NTC 30 kΩ •... -
Page 175: Indicações No Visor
Teclas de atalho Premir de forma prolongada Abrir o menu de configuração avançada Restaurar as configurações de fábrica 2.3 Indicações no visor Símbolo Significado Setas indicadoras para identificação de um parâmetro selecionado Indicação principal de apresentação do parâmetro de medição selecionado ( ) •... -
Page 176: Substituição De Pilhas
2.4 Substituição de pilhas Caso surja a mensagem >bAt< na indicação inferior, as pilhas estão gastas e devem ser substituídas. No entanto, o funcionamento do aparelho ainda será assegurado durante um determinado período de tempo. Caso surja a mensagem >bAt< na indicação superior, a tensão das pilhas já... -
Page 177: Suporte
2.6 Suporte Puxar Suporte fechado. O apa- Puxar para abrir Puxar 1x: Puxar 2x: relho pode ser pendura- permite suportar permite do num cinto o aparelho sobre pendurar o a mesa aparelho num parafuso 3. Colocação em funcionamento 3.1 Volume de fornecimento SD 305 pH/ORP SD 305 pH/ORP SD 305 pH/ORP... -
Page 178: Configurações
4 Configurações 4.1 Menu de configuração 4.1.1 Estrutura e navegação Modo de Opção de Opção de Valor operação menu parâmetro Função 1. Abrir o menu de configuração premindo a tecla de forma prolon- gada (aprox. 3 s) 2. Selecionar a opção (menu, parâmetro) 3. -
Page 179: Descrição Das Funcionalidades
4.1.2 Descrição das funcionalidades Menu Parâmetro Valores Signifi cado Defi nir parâmetro: confi guração do parâmetro de medição Selecção da resolução apresentada 0.01 e.g. pH 7.01 0.001 e.g. pH 7.001 Calibração: seleção do número de pontos de calibração 1-Pt Calibração de 1 ponto (calibração offset, inclinação de 59,2 mV/pH) 2-Pt Calibração de 2 pontos (mais neutra... - Page 180 Compensação da temperatura (apenas disponí- vel caso não se encontre ligado qualquer sensor de temperatura) -5 … 150 °C Indicação da temperatura durante a (23 … 302 °F) compensação manual da temperatura Defi nir instrumento: confi gurações dos aparelhos Auto Hold: determinação automática dos valores medidos Registo automático do valor medido Registo do valor medido através de...
-
Page 181: Menu De Configuração Avançada
4.2 Menu de configuração avançada 4.2.1 Estrutura e navegação Modo de Opção de Opção de Valor operação menu parâmetro Função Abrir o menu de configuração avançada premindo a tecla de forma prolongada (aprox. 3 s) 1. Selecionar a opção (menu, parâmetro) 2. -
Page 182: Descrição Das Funcionalidades
4.2.2 Descrição das funcionalidades Menu Parâmetro Valores Signifi cado Defi nir alarme: confi guração da função de alarme Monitorização de pH/mV: alarme ligado com som No. So Monitorização de pH/mV: alarme ligado sem som Sem alarme durante a monitorização de pH/mV Por ex., Valor limite de alarme mínimo para pH 1,00... - Page 183 Definir saída: configuração da saída universal Saída universal Interface e saída analógica desativa- das (consumo mínimo de energia) Interface de série ativada Saída analógica ativada 01,11 ... 91 Endereço base do aparelho para comunicação de interface de série (Out = SEr) Por ex., Introdução do valor medido para o pH 1,00...
-
Page 184: Arquivo De Dados
4.3 Arquivo de dados 4.3.1 Estrutura e navegação Seleção do Modo de Opção de conjunto de Valor operação menu dados Função Abrir o arquivo de dados premindo a tecla de forma prolongada (aprox. 3 s) Selecionar a opção/o conjunto de dados Navegação (para cima/para baixo) Voltar para a opção anterior ou para o modo de operação SD_305_pH/ORP_1 04/2021... -
Page 185: Descrição Das Funcionalidades
4.3.2 Descrição das funcionalidades Menu Opções Valores Signifi cado Iniciar logger (regressar ao modo de operação) Interromper logger (regressar ao modo de operação) Leitura dos dados medidos armazenados manualmente Conjunto de dados Leitura de até 1000 conjuntos de dados (X = 1 a 1000) = X unidades Valor Indicação de pH ou mV... -
Page 186: Medição Do Valor Ph E De Redox
5 Medição do valor pH e de redox 5.1 Preparação do elétrodo de pH/redox Remova a garrafa de armazenamento. Verifique o estado do elétrodo. Caso o sensor se encontre seco, coloque o elétro- do em solução de armazenamento fresca (3 M KCl) durante, pelo menos, cinco horas. Seco? Verifique a ponta do sensor quanto a bolhas de ar. - Page 187 Mergulhe o elétrodo de pH (incl. sensor de temperatura) na solução de calibração. Assegure um fluxo de entrada suficiente, por exemplo, a) utilizando um agitador magnético com vara de agitação (recomendado) ou b) girando o elétrodo de pH na solução. Interrompa a agitação e inicie a calibração, mantendo premida a tecla <CAL>...
-
Page 188: Lembrete De Calibração
Nota: A compensação automática da temperatura durante a calibração Tanto o sinal do elétrodo de pH como o valor pH das soluções de calibração de- pendem da temperatura. Caso seja ligado um sensor de temperatura, o efeito da temperatura do elétrodo é automaticamente compensado durante a realização da medição e da calibração. -
Page 189: Calibração Do Elétrodo De Redox
5.6 Calibração do elétrodo de redox Não é possível realizar a calibração dos elétrodos de redox, uma vez que o valor de redox, ao contrário do valor pH, não é específico e depende de todas as substâncias dissolvidas numa amostra. No entanto, de forma a realizar a verificação do estado do sensor de um elétrodo de redox, estes podem ser mergulhados numa solução de verificação com um valor de redox conhecido. -
Page 190: Logger De Dados
6 Logger de dados O aparelho possui duas diferentes funções de logger para o registo de dados: • "Func-Stor": registo manual dos valores medidos através de toques nas teclas. Adicio- nalmente, é necessária a introdução de um ponto de medição (L-Id). •... -
Page 191: Função Func-Cycl
6.2 Função Func-CYCL Registo automático dos valores medidos Neste modo, é possível armazenar até 10 000 conjuntos de dados. Para tal, selecione o item Func = CYCL no menu de configuração <SEt LoGG>. É apresentada uma seta indicadora ( ) no visor, sobre a variável "logg". -
Page 192: Saída Analógica
7.2 Saída analógica De forma a utilizar a saída universal como saída analógica, defina a saída <SEt Out> para Out = dAC no menu de configuração avançada. Pode ser gerada uma tensão analógica de 0–1 V no conector de saída universal. Com dAC.0 e dAC.1, é possível escalar facilmente a saída analógica. -
Page 193: Causas Dos Erros E Resolução De Problemas
9 Causas dos erros e resolução de problemas Erro Causa Resolução As pilhas estão gastas Introduzir novas pilhas Sem indicação ou caracteres Operação da fonte de alimentação: Indicação do ponto de medição estranhos tensão/polaridade incorreta selecionado Erro do sistema Retirar as pilhas e desligar a fonte O aparelho de alimentação, aguardar um mo- não reage aos... -
Page 194: Acessórios
10 Acessórios Elétrodos Descrição N.º de enco- menda Elétrodo de pH do tipo 231 incl. sensor de temperatura 721231 (NTC 30 k), diafragma duplo, material em plástico, eletrólito de gel, Ag/AgCl junção única Elétrodo de pH do tipo 226, diafragma duplo, material 721226 em plástico, eletrólito de gel, Ag/AgCl junção única Elétrodo de pH do tipo 330, diafragma único, material... -
Page 195: Dados Técnicos
0,1 mV 0,1 °C Precisão ± 0,005 pH ± 0,05% de FS ± 0,2 °C Calibração • Tampão padrão Lovibond (pH: 4,01/7,00/10,01) ® Automático de pH • Norma DIN 19266 (pH: 1,68/4,01/6,87/9,18/12,45) (calibração de • Soluções tampão pH individuais (introdução de valores) -
Page 196: Dados Gerais Do Aparelho
11.2 Dados gerais do aparelho Visor LCD, 4½ dígitos de 7 segmentos incl. iluminação de fundo, 52 x 40 mm (largura x altura) Caixa Caixa de ABS inquebrável incl. blindagem de proteção Dimensões 164 x 100 x 37 mm incl. blindagem de proteção (largura x altu- ra x profundidade) Peso 302 g incl. - Page 197 电池和蓄电池的重要废弃处理提示 基于电池条例(指令 2006/66/EC),每位消费者都必须履行归还所有用过或者没电 的电池或者蓄电池的法律义务。禁止作为生活垃圾进行废弃处理。由于我们各类产品 的供货范围中也包括了电池和蓄电池,因此,我们提请您注意下列事项: 没电的电池和蓄电池不属于生活垃圾,而是可以免费送至您所在地区的公共回收站, 以及任何销售同类电池和蓄电池的地方。除此以外,最终消费者还可以将电池和蓄电 池归还给当初购买时的经销商(法定回收义务)。 重要信息 为了保持、保护并且改善我们环境的质量,将在欧盟国家废弃处理电子设备 根据欧盟规定 2012/19/EU,您的电子设备不得作为普通生活垃圾废弃处理! Tintometer GmbH 会以专业且对环境负责的方式废弃处理您的电器设备。这项服务是 免费的,但运输费用除外。这项服务仅限 2005 年 08 月 13 日以后购买的电器设备。 将需要废弃处理的 Tintometer 设备免运费地发送给您的供应商。...
- Page 198 目录 1 安全 . . . . . . . . . . . . . . . . . . . . . . . . . . . . . . . . . . . . . . . . . . . . . . . . . . . . . . . . . . . . 201 1.1 基本提示...
- Page 199 5.7 氧化还原测量 . . . . . . . . . . . . . . . . . . . . . . . . . . . . . . . . . . . . . . . . . . . . . . . . . . . 217 5.8 pH/氧化还原电极的维护和存放...
-
Page 200: 基本提示
1 安全 1.1 基本提示 违 规 使 用 、 不 遵 守 本 使 用 说 明 书 、 采 用 资 质 不 足 的 专 业 人 员 以 及 擅 自 更 改 设 备 时 , 对 于 产 生 的 损 坏 和 后 续 损 坏 , 制 造 商 概 不 负 责 , 也 不 提 供 担 保 。 如... -
Page 201: 操作元件
2 概览 通用输出端:USB 接口、供电、模拟输出端 2.1 接口 BNC 插口:pH 电极或者氧化还原电极接口 香蕉插口:Pt1000 或者 NTC 30 kΩ 温度探针用接口 • 对于一体式温度探针的 pH 电极 (NTC 30 kΩ), 会在外部连接香蕉插头。 • 对于单独的温度探针 (Pt1000),会连接两个香 蕉插头。 2.2 操作元件 305 pH/ 按钮 名称 短按按钮 长按按钮 Mode / Cal • 切换测量变量*(pH / mV / mV 开始校准... -
Page 202: 屏幕显示
组合键 长按按钮 打开高级配置菜单 恢复出厂设置 2.3 屏幕显示 图标 含义 用来标记一个已选参数的显示箭头 或者 用来显示已选测量参数的主显示( ) • pH 值 (pH) • 氧化还原电位 ORP (mV, mV -> 通过 <Mode> 按钮在 pH 和 ORP 之间切换 辅助显示,用来显示 • 温度 (°C / °F) 用来显示电池或者传感器状态的显示条 -> 通过 <Enter> 按钮在电池和传感器状态之间切换 MAX / MIN 用来提示所保存最大/最小测量值的显示... -
Page 203: 电池更换
2.4 电池更换 如果在下部显示中显示 >bAt< ,则电池耗尽,并且必须换新的。但仍可以保证设备一段时 间的功能。如果在上部显示中显示 >bAt<,则电池电压不再足够设备运行,现在电池已完 全耗尽。必须进行电池更换。为此,如下进行操作: 显示屏朝下地放置设 将设备翻转,使显 上翻上半部分。 放入电池。 备,并且拆除外壳上 示屏朝上。 绝对不要接触印刷线路 的螺栓。 板! 重新用螺栓将设备组装 重新将上半部分放上。注意下半部分 到一起。期间不要施加 中的 3 个密封圈和上半部分中的外壳 过大的压力! 密封件。 2.5 保护板和电极支架 SD_305_pH/ORP_1 04/2021... -
Page 204: 第 3 个启用
2.6 支架 拉动 支架已收起。可以将设备 拉动,以便翻转 拉动 1 次: 拉动 2 次: 挂到皮带上 将设备架放在桌 将设备悬挂到 子上 螺栓上 第 3 个启用 3.1 交货范围 SD 305 pH/ORP (Set-1) SD 305 pH/ORP (Set-2) SD 305 pH/ORP (Set-3) • 基础设备 • 基础设备 • 基础设备 • pH/温度电极... -
Page 205: 配置菜单
4 设置 4.1 配置菜单 4.1.1 结构和导航 运行 菜单 参数 值 模式 选项 选项 功能 1. 通过长按按钮打开配置菜单(大约 3 s) 2. 选择选项(菜单,参数) 3. 保存值 导航(向上/向下) 返回至上一个选项或者运行模式 * 如果未在配置菜单中按下任何按钮,并且时间超过 2 分钟,则会取消配置,并且设备会返回至运行模式。 SD_305_pH/ORP_1 04/2021... -
Page 206: 功能描述
4.1.2 功能描述 菜单 参数 值 含义 Set Parameter:测量参数的设置 选择显示的分辨率 如:pH值7.01 0.01 如:pH值7.001 0.001 校准:选择校准点的数量 1-Pt 1 点式校准(偏差校准,斜率 - 59.2 mV/pH) 2-Pt 2 点式校准(中性缓冲液和另外一种 缓冲液) 3-Pt 3 点式校准(中性缓冲液和另外两种 缓冲液) 校准:缓冲溶液系列的选择 标准缓冲溶液 pH 4.01, pH 7.00, pH 10.01 符 合 D I N 1 9 2 6 6 的 缓 冲 溶 液 pH 1.68, pH 4.01, pH 6.86, pH 9.18, pH 12.45 Edit... - Page 207 温度补偿(仅在未连接温度探针的情况下可用) -5 … 150 °C 手动温度补偿时的温度说明 (23 … 302 °F) Set Instrument:设备设置 Auto Hold:自动测量值确定 自动记录测量值 通过按钮记录测量值 Auto Power-Off :自动设备关断 1 … 120 不使用时将在几分钟内自动关断设备 自动关断已停用(连续运行) 背光照明 无照明 5 … 120 几秒内自动关断照明 照明始终接通 时间设置 HH:MM 小时:分钟 年份设置 YYYY 年份 日期设置 TT:MM 日期:月份 Set Logger:记录仪功能的设置...
-
Page 208: 高级配置菜单
4.2 高级配置菜单 4.2.1 结构和导航 运行 菜单 参数 值 模式 选项 选项 功能 通过长按按钮打开高级配置菜单(大约 3 s) 1. 选择选项(菜单,参数) 2. 保存值 导航(向上/向下) 返回至上一个选项或者运行模式 * 如果未在配置菜单中按下任何按钮,并且时间超过 2 分钟,则会取消配置,并且设备会返回至运行模式。 SD_305_pH/ORP_1 04/2021... -
Page 209: 功能描述
4.2.2 功能描述 菜单 参数 值 含义 Set Alarm:设置报警功能 pH/mV 监控:报警接通并且带有声音 No.So pH/mV 监控:报警接通,不带有声音 pH/mV 监控无报警 例如 pH 1.00 pH/mV 最小报警极限值 (AL.1 = On/ No.So) 例 如 pH/mV 最大报警极限值 13.00 (AL.1 = On/ No.So) 温度监控:报警接通并且带有声音 No.So 温度监控:报警接通,不带有声音 无温度监控报警 例如 -5 °C 温度的最小报警极限值... - Page 210 Set Output:通用输出端设置 通用输出端 接口和模拟输出端关闭(最小耗电 量) 串行接口激活 模拟输出端激活 01、11 . . .91 串行接口通信设备的基础地址 (Out = SEr) 例如 pH 1.00 输入哪个测量值时应输出 0V 模拟输出 (Out = dAC) 例 如 哪个测量值时应输出 1V 模拟输出 13.00 (Out = dAC) Set Correction:测量的校准 零点校正/电压测量的偏移量 没有零点校正 -10.00 … 零点校正,单位为...
-
Page 211: 数据存档
4.3 数据存档 4.3.1 结构和导航 运行 菜单 数据集 值 模式 选项 选择 功能 通过长按按钮打开数据存档(大约 3 s) 选择选项/数据集 导航(向上/向下) 返回至上一个选项或者运行模式 SD_305_pH/ORP_1 04/2021... -
Page 212: 功能描述
4.3.2 功能描述 菜单 参数 值 含义 启动记录仪 (返回至运行模 式) 停止记录仪 (返回至运行模 式) 读取手动保存的测量数据 数据集 = St. X 读取最多 1000 个数据集(X = 1 至 1000) 测量值 显示 pH 或者 mV 温度 显示 °C 或者 °F L-Id 显示选择的测量位置 日期 显示日期/月份和时间 删除数据记录仪 CLr no 取消删除... -
Page 213: Ph 和氧化还原测量
5 pH 和氧化还原测量 5.1 pH/氧化还原电极的准备工作 移 除 保 管 用 瓶 。 检 查 电 极 的 状 态 。 如 果 传 感 器 干 燥 , 则 将 电 极 放 入 新 鲜 的 保管用溶液 (3 M KCl) 中至少 5 h。 dry? 检查传感器尖端是否有气泡。如果存在,... - Page 214 将 pH 电极(可选:带有温度探针)浸入校准溶液中。 确保充分的流动,为此: a) 使用一个带有搅拌棒的磁搅拌器(推荐)或者 b) 在溶液中摇晃 pH 电极。 中断搅拌并且启动校准,具体方法是按住 <CAL> 按钮 (大约 3 s)。在显示屏上会在“cal”(校准模式)上方 弹出一个显示箭头 ( )。 pH 校准应始终用一种中性缓冲溶液开始。自动缓冲 溶液识别:所使用的缓冲溶液的 pH 值会在显示屏上 闪烁。一旦确定了一个稳定的测量值,设备会继续下 一步。手动设置:用箭头按钮设置所使用的校准溶液 的 pH 值。一旦 pH 值稳定,则会在显示屏上“ok”上 方弹出一个显示箭头 ( )。现在,通过 <Enter> 按钮 继续校准。 仅限没有温度探针的情况下: 如果没有连接温度探针,则现在必须手动输入温度并且 操作 <ENTER>。 用蒸馏水或者去离子水冲洗电极,并且用一张纸巾小心...
-
Page 215: 校准提醒
提示:校准时的自动温度补偿 无论是 pH 电极的信号还是校准溶液的 pH 值都取决于温度。如果连接了一个 温度探针,则无论是在测量过程中,还是在校准时,都会自动对电极的温度影 响进行补偿。否则,应尽可能精确地输入对应缓冲溶液的实际温度。如果使用的是标准 或者 DIN 缓冲溶液,则还要额外补偿缓冲溶液的温度影响。对于手动缓冲溶液选择,应 在所属的温度处输入缓冲溶液的 pH 值,以便实现尽可能精确的校准 5.3 校准提醒 为了定期检查校准数据,设置一个提醒:(<SEt PArA> : C.int)。选择的时间间隔取决于 应用和电极的稳定性。一旦过了该间隔时间,则作为提醒,在显示中 >CAL< 会闪烁。 5.4 校准数据存储器 最近 16 次校准以及测量结果的信息和日期会保存在设备中。保存的校准数据既可以通过 计算机软件 GSOFT3050,或者在 <rEAd CAL> 菜单中读取(为此,参见章节 4.3)。 5.5 pH 测量 pH 测量是一项非常精确,但也非常灵敏的测量。测得的信号非常微弱(高电阻值),尤 其是在离子量低的介质中。因此,必须确保 •... -
Page 216: 氧化还原电极的校准
5.6 氧化还原电极的校准 不能校准氧化还原电极,因为氧化还原值和 pH 值不同是不确定的,并且取决于一种样品 中所有溶解的物质。尽管如此,为了检查氧化还原电极的传感器状态,可以将其浸入带有 已知氧化还原值的一种检查溶液中。如果绝对测量值严重偏离所使用的检查溶液的氧化还 原值 (± 40 mV),则建议对电极进行维护、清洁或者更换。 5.7 氧化还原测量 氧化还原电位(也称为 ORP,英语:oxidation/reduction potential)说明的是一种样品 的氧化或者还原效果,并且会始终根据所使用的基准电极,以 mV 为单位进行说明。 测量经常会使用广泛使用的 Ag/AgCl 基准电极进行。而在参考文献中,也会在标准氢 电极 (SHE) 的基础上说明 ORP,以便在使用不同基准电极的情况下,仍然能够对测量 值进行比较。因此,借助 <Mode> 按钮,可以以 mV 或者 mV 来显示氧化还原值。 相对于 Ag/AgCl (3 M Kcl) 显示氧化还原值 相对于 SHE 显示氧化还原值 ORP vs. -
Page 217: 数据记录仪
6 数据记录仪 设备带有两种不同的记录仪功能,以便记录数据: • “Func-Stor”:通过按钮手动记录测量值。此外,还将要求进行测量位置输入 (L-Id)。 • “Func-CYCL”:根据所设置的循环时间,自动记录测量值。 记录仪会分别为每个数据集记录 2 个测量结果。一个数据集的组成部分包括: • 测量值 pH 或者 mV / mV • 温度测量值 (°C / °F) • 测量位置 L-Id(仅限“Func-Stor”) • 保存时刻的时间和日期 为了对记录仪数据和校准时刻进行时间关联,需要用到实时时钟。因此,必要 时检查 <SEt InSt> 下的设置。 第 6.1 个Func-Stor 手动测量值记录 该模式下最多可保存 1000 条数据集。为此,在配置菜单 <SEt LoGG> 中选择菜单项 Func = Stor 。显示屏上现在会在... -
Page 218: Func-Cycl
6.2 Func-CYCL 自动测量值记录 该模式下最多可保存 10000 条数据集。为此,在配置菜单 <SEt LoGG> 中选择菜单项 Func = CYCL 。显示屏上现在会在 logg 上方弹出一个显示箭头( )。在设置了循环时间的 情况下,可以通过按钮启动自动数据记录。为此,如下进行操作: 开始测量值记录: 通过在运行模式下长按 <Store> 按钮,会弹出询问 <Logg Run>, 按下 确认。logg 上方的显示箭头开始闪烁 > < 停止测量值记录: 通过在数据记录过程中长按 <Store> 按钮会弹出询问 <Logg Stop> ,按下 确认。 数据的删除通过数据存档进行。 7 通用输出端 通用输出端可以停用,用作串行接口(出厂设置: <SEt Out> = SEr)或者用作模拟输出 端。不使用时建议停用输出端... -
Page 219: 设备的调校
7.1 USB 接口 为了将通用输出端用作 USB 接口,在高级配置菜单中将输出端 <SEt Out> 设置为 Out = SEr。 通过一个电绝缘的接口转换器 USB 300(配件),就可以将设备直接连接到一台计算机的 USB 接口上。如果通过接口适配器 USB 300 运行设备,就会通过这个接口为设备供电。 除 此 以 外 , 还 可 以 通 过 接 口 传 输 、 分 析 数 据 , 并 且 操 作 记 录 仪... -
Page 220: 故障原因和排除
9 故障原因和排除 故障 原因 排除方法 电池电量耗尽 放入新的电池 没有显示或者 电源运行模式: 显示选择的测量位置 乱码 错误的电压/极性 系统故障 断开电池和电源,等待片刻,重 设备对按钮操作 新插上 没有响应 设备损坏 送修 菜单项不可见 在存档中保存了记录仪数据 删除测量数据 LoGG FULL 数据存储器已存满 删除数据存储器 超过了量程范围 检查测量值是否超过了传感器的 允许量程范围 Err.1 传感器损坏 更换传感器 低于量程范围 检查测量值是否低于传感器的允 许量程范围 Err.2 传感器损坏 更换传感器 系统故障 送修 Err.7 严重超过或者低于量程范围... - Page 221 10 配件 电极 描述 订购号 pH 电极型号 231 包括温度探针 (NTC 30 k),双 721231 隔膜,塑料,胶体电解质,Ag/AgCl 单结 p H 电 极 型 号 2 2 6 , 塑 料 双 隔 膜 , 胶 体 电 解 721226 质,Ag/AgCl 单结 pH 电极型号 330,单隔膜,塑料,胶体电解 721330 质,Ag/AgCl 单结...
-
Page 222: 技术数据
0.1 mV 0.1 °C 精度 ± 0.005 pH ± 0.05 % FS ± 0.2 °C • Lovibond 标准缓冲溶液 (pH: 4.01 / 7.00 / 10.01) ® pH 校准 自动 • DIN 19266 (pH: 1.68 / 4.01 / 6.87 / 9.18 / 12.45)... -
Page 223: 基本设备数据
11.2 基本设备数据 显示屏 LCD,4 ½ 位 7 段式,包括背光照明,52 x 40 mm(宽度 x 高度) 外壳 防破裂 ABS 外壳,包括保护板 尺寸 164 x 100 x 37 mm,包括保护板(宽度 x 高度 x 深度) 重量 302 g,包括电池和保护板 壳体防护方式 IP 67 检验标志 CE 允许的环境条件 温度 • 运行:-20 °C 至 +50 °C •... - Page 224 Tintometer GmbH The Tintometer Limited Tintometer Inc. Tintometer Spain Lovibond Water Testing Lovibond House 6456 Parkland Drive Postbox: 24047 ® Schleefstraße 8-12 Sun Rise Way Sarasota, FL 34243 08080 Barcelona 44287 Dortmund Amesbury, SP4 7GR Tel: 941.756.6410 Tel.: +34 661 606 770 Tel.: +49 (0)231/94510-0...