Table des Matières
Publicité
Les langues disponibles
Les langues disponibles
Liens rapides
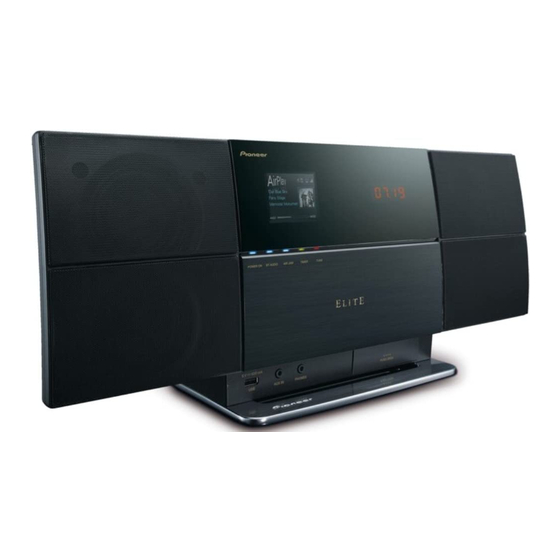
X-SMC4
MUSIC TAP
Register your product at:
http://www.pioneerelectronics.com (US)
http://www.pioneerelectronics.ca (Canada)
• Protect your new investment
The details of your purchase will be on file for reference in the event of an insurance claim such as loss or theft.
• Receive free tips, updates and service bulletins on your new product
• Improve product development
Your input helps us continue to design products that meet your needs.
• Receive a free Pioneer newsletter
Registered customers can opt in to receive a monthly newsletter.
http://www.pioneerelectronics.com (États-Unis)
http://www.pioneerelectronics.ca (Canada)
"MUSIC TAP" is a registered trademark of PIONEER CORPORATION.
"MUSIC TAP" est une marque deposee de PIONEER CORPORATION.
Operating Instructions
Mode d'emploi
-K
Publicité
Chapitres
Table des Matières
Dépannage

Manuels Connexes pour Pioneer MUSIC TAP Elite X-SMC4-k


Sommaire des Matières pour Pioneer MUSIC TAP Elite X-SMC4-k
- Page 1 • Receive a free Pioneer newsletter Registered customers can opt in to receive a monthly newsletter. http://www.pioneerelectronics.com (États-Unis) http://www.pioneerelectronics.ca (Canada) “MUSIC TAP” is a registered trademark of PIONEER CORPORATION. "MUSIC TAP" est une marque deposee de PIONEER CORPORATION. Operating Instructions Mode d’emploi...
-
Page 2: Important Notice
IMPORTANT NOTICE THE MODEL NUMBER AND SERIAL NUMBER OF THIS EQUIPMENT ARE ON THE REAR OR BOTTOM. RECORD THESE NUMBERS ON YOUR ENCLOSED WARRANTY CARD AND KEEP IN A SAFE PLACE FOR FUTURE REFERENCE. D36-AP9-1_A1_En NOTE: This equipment has been tested and found to comply with the limits for a Class B digital device, pursuant to Part 15 of the FCC Rules. -
Page 3: Important
IMPORTANT The lightning flash with arrowhead symbol, The exclamation point within an equilateral CAUTION: within an equilateral triangle, is intended to TO PREVENT THE RISK OF ELECTRIC triangle is intended to alert the user to the alert the user to the presence of uninsulated SHOCK, DO NOT REMOVE COVER (OR presence of important operating and “dangerous voltage”... -
Page 4: Establish A Safe Level
BE SURE TO OBSERVE THE FOLLOWING • Pioneer is not responsible for any malfunction of the compatible Pioneer product due to communication GUIDELINES: error/malfunctions associated with your network •... -
Page 5: Table Des Matières
Advanced operations for the Internet radio ..24 Registering broadcast stations not on the vTuner list from the special Pioneer site ..... . 24... -
Page 6: Before You Start
Before you start Chapter 1: Before you start • Do not heat batteries, disassemble them, or throw them into flames or water. What’s in the box • Batteries may have different voltages, even if they are the Please confirm that the following accessories are in the box same size and shape. -
Page 7: Connections
Connections Chapter 2: Connections • Be sure to turn off the power and unplug the power cord from the power outlet whenever making or changing Connecting your TV connections. To watch iPod/iPhone images on a television, connect it • Connect the power cord after all the connections using a composite video cable. -
Page 8: Connecting To The Network Through The Lan Interface
Connections Connecting using wireless LAN Connecting to the network through the LAN interface Internet By connecting this unit to the network via the LAN interface, you can play back audio files stored on components on the network, including your PC, and listen to Internet radio stations. -
Page 9: Plugging In
Connections Plugging in Important • Before making or changing the connections, switch off the power and disconnect the power cord from the AC outlet. After you’ve finished making all connections, plug the unit into an AC outlet. This unit’s rear panel ANTENNA VIDEO DC IN... -
Page 10: Part Names And Functions
Part names and functions Chapter 3: Part names and functions STANDBY/ON Remote control Press to turn the power on and off. DISP OFF Press to turn the main display off when you do not need it. Number buttons (0 to 9) STANDBY/ON Use them to select the station preset when using the tuner, etc. -
Page 11: Top Panel
Part names and functions 11 PREV 17 MUTE Press to return to the beginning of the currently playing track Press to temporarily silence the sound. or file. Press twice to move back to the beginning of the 18 SHUFFLE previous track or file. -
Page 12: Front Panel
Part names and functions Front panel POWER ON Main Display When the power is on, this indicator lights. Sub Display BT AUDIO Speaker units When BT Audio is selected as the input source, this indicator lights. USB port AIR JAM AUX IN When Air Jam is selected as the input source, this Use to connect auxiliary components. -
Page 13: Main Display
Part names and functions Main display Song Artist Album Input source Repeat and Shuffle Sleep timer When the sleep timer is set, the remaining time until power Repeat all files. off is displayed. AirPlay Repeat a file. This appears in blue during AirPlay operation, and in white during stop mode. -
Page 14: Getting Started
Getting started Chapter 4: Getting started When you use the unit for the first time, the following screens • The Demo Mode and Quick Start Mode settings can will be displayed. also be changed manually in the Option Settings (see page 30). -
Page 15: Ipod/Iphone Playback
• Features such as the equalizer cannot be controlled using this system, and we recommend switching the equalizer off before connecting. • Pioneer cannot under any circumstances accept responsibility for any direct or indirect loss arising from any inconvenience or loss of recorded material resulting from iPod/iPhone failure. -
Page 16: Connecting Your Tv
iPod/iPhone playback Connect your iPod/iPhone. Playing your iPod/iPhone Caution • When your iPod/iPhone is connected to this unit and you wish to operate the iPod/iPhone directly, be sure to hold the iPod/iPhone steady with the other hand to prevent malfunctions due to faulty contacts. Connect your iPod/iPhone. - Page 17 iPod/iPhone playback Important If this unit cannot play your iPod/iPhone, perform the following troubleshooting checks: • Check whether the iPod/iPhone is supported by this unit. • Reconnect the iPod/iPhone to the unit. If this doesn’t seem to work, try resetting your iPod/iPhone. •...
-
Page 18: Bluetooth ® Audio Playback
® • The Bluetooth word mark and logos are registered trademarks owned by Bluetooth SIG, Inc. and any use of such marks by PIONEER CORPORATION is under license. Other trademarks and trade names are those of their respective owners. 2 • The Bluetooth wireless technology enabled device must support AVRCP profiles. -
Page 19: Setting The Pin Code
® Bluetooth Audio playback Setting the PIN code ® Pairing Bluetooth adapter and Set this unit’s PIN code to the same setting as that for the Bluetooth wireless technology device Bluetooth wireless technology device used. Supported PIN “Pairing” must be done before you start playback of Bluetooth code setting values include 0000, 1234 or 8888. -
Page 20: Air Jam
AIR JAM • In the event noise appears in your television image, there – Air Jam a Pioneer-exclusive application and available for is the possibility that a Bluetooth wireless technology free. enabled device or this unit (including products supported by this unit) are causing signal interference... -
Page 21: Scope Of Operation
® Bluetooth Audio playback Scope of operation Use of this unit is limited to home use. (Transmission distances may be reduced depending on communication environment). In the following locations, poor condition or inability to receive radio waves may cause the audio to be interrupted or stopped: •... -
Page 22: Usb Playback
The following screen appears on the main display when you play back audio files. Note that some file types may not be • Pioneer does not guarantee that any file recorded on a displayed. USB storage device will play or that power will be supplied to a USB storage device. -
Page 23: Internet Radio
Internet radio Chapter 8: Internet radio Use / to select the station, then press Listening to the Internet radio ENTER. Connecting to a LAN network Connect to the network using the LAN interface. For details on the connections, see Connecting to the network through the LAN interface on page 8. -
Page 24: Adding The Stations To The Favorites
ENTER. Add to Favorites The access code required for registration on the special Pioneer Internet radio site is displayed. Make a memo of this address. To delete the stations from the list The following can be checked on the Help screen: Press MENU to display the Internet radio •... -
Page 25: Music Server
This unit supports this DMR function. iPhone, iPad and the software versions for iTunes that are indicated on the Pioneer website. AirPlay may not be When this unit is selected as a DMR and DMS playback is compatible with iPod touch, iPhone, iPad or iTunes begun, the unit’s input automatically switches to DMR. -
Page 26: Authorizing This Unit
Music server • When the file you want to play is in the folder, select the Authorizing this unit folder first. This unit must be authorized to enable playback. The unit is • If you press RETURN during playback, the previous automatically authorized when it is connected to a PC over a (folders/files) screen will be displayed. -
Page 27: Using The Tuner
Using the tuner Chapter 10: Using the tuner • Automatically saving station presets Listening to the FM radio broadcasts Press and hold PRESET + for a few seconds. The tuner can receive FM broadcasts, and can save your Auto tuning starts. favorite stations. -
Page 28: Other Connections
Other connections Chapter 11: Other connections • Before making or changing the connections, switch off the power and disconnect the power cord from the Listening to auxiliary components power outlet. • If the AUX IN mini-plug jack is connected to auxiliary Press FUNCTION /... -
Page 29: Changing The Settings
Changing the settings Chapter 12: Changing the settings The factory default settings are indicated in italic. Press SET UP to show the Initial Setup screen. Use / to select the item, then press ENTER. Follow the descriptions on the main display to change the setting. Settings What it does Setting the wake-up timer and the time the unit will be turned on. -
Page 30: Using The Timer
Changing the settings Settings What it does Use this to set the Bluetooth PIN code. (page 19) BT PIN Select (0000/1234/8888) When On is selected, the volume can be set between 0 to 30. Volume Limit Setting (On/Off) Each time this setting has been changed, the volume becomes to 0. Restricts usage of internet radio using password. -
Page 31: Timer Setting
Changing the settings Select Timer Setting. The Timer Setting screen is displayed. Network setting Use /// or number buttons to adjust If a broadband router (with built-in DHCP server function) is connected to this unit, you can simply turn on the DHCP the clock, then press ENTER. -
Page 32: Static Ip Address
Changing the settings Wired Setting Wireless Setting Use / to select DHCP Off, then press Use / to select Manual, then press ENTER. ENTER. The IP address setting screen is displayed. Use /// or number buttons to adjust the numbers, then press ENTER. •... -
Page 33: Enter Password
Changing the settings Use / to select security type, then press WPS connection setting ENTER. WPS is abbreviation of Wi-Fi Protected Setup. A standard established by the Wi-Fi Alliance industry group for a function allowing settings related to interconnection of WPS compatible wireless LAN devices and encryption to be made with simple operations. -
Page 34: Connecting Using Pin Input
Changing the settings Connecting using PIN Input Friendly Name Press SET UP and select Network Setting Press SET UP. PIN Input, then press ENTER. Use / to select the access point which Select Network Setting Friendly Name. you want to connect, then press ENTER. -
Page 35: Software Update
USB storage device then inserting the USB storage device into the USB port on the unit’s front panel. • If an update file is provided on the Pioneer website, download it onto your computer. When downloading an Sound settings update file from the Pioneer website onto your computer, the file will be in ZIP format. -
Page 36: Additional Information
If the trouble cannot be rectified even after exercising the checks listed below, ask your nearest Pioneer authorized service center or your dealer to carry out repair work. • If the unit does not operate normally due to external effects such as static electricity disconnect the power plug from the outlet and insert again to return to normal operating conditions. - Page 37 Additional information Problem Check Remedy Bluetooth wireless • Check that no object that emits electromagnetic waves in the 2.4 technology device cannot be GHz band (microwave oven, wireless LAN device or Bluetooth connected or operated. wireless technology apparatus) is near the unit. If such an object Bluetooth Sound from the is near the unit, set the unit far from it.
- Page 38 Additional information Problem Check Remedy Power is not supplied to the Does an error message appear in the Turn the power off then back on. USB storage device. front panel display? Turn the power off, then disconnect and reconnect the USB storage No power is supplied if the power device.
- Page 39 Additional information Problem Check Remedy The audio files stored on Windows Media Player 11 or Install Windows Media Player 11 or Windows Media Player 12 on components on the network, Windows Media Player 12 is not your PC (page 25). such as a PC, cannot be currently installed on your PC.
- Page 40 Additional information Problem Check Remedy Cannot listen to Internet The firewall settings for components Check the firewall settings for components on the network. radio stations. on the network are currently in operation. You are currently disconnected from Check the connection settings for components on the network, and the Internet.
-
Page 41: Playable File Formats
Additional information Category Extension Stream Playable file formats Sampling 8 kHz to 48 kHz This unit supports the following file formats. Note that some frequency file formats are not available for playback although they are listed as playable file formats. Also, the compatibility of file Quantization 16 bit formats varies depending on the type of server. -
Page 42: Cautions On Use
Additional information Cleaning the product Cautions on use • Unplug the power cord from the power outlet when cleaning this unit. • Clean this unit using a soft cloth. For tough dirt, apply When moving this unit some neutral detergent diluted in 5 to 6 parts water to a When moving this unit, be sure to first disconnect the iPod/ soft cloth, wring out thoroughly, wipe off the dirt, then iPhone, USB storage device, LAN cable or any other... -
Page 43: Content Playable Over A Network
• Supported file formats vary by server. As such, files not Pioneer is not responsible for any malfunction of the player supported by your server are not displayed on this unit. and/or the Music Server features due to communication... -
Page 44: About Ipod/Iphone
Additional information Authorizing this unit About iPod/iPhone In order to be able to play with Music Server, this unit must be authorized. This happens automatically when the unit makes a connection over the network to the PC. If not, please authorize this unit manually on the PC. -
Page 45: Specifications
Power cord Warranty card Operating instructions (This document) Note • Specifications and the design are subject to possible modifications without notice, due to improvements. • This product is not designed for use in Japan. © 2011 PIONEER CORPORATION. All rights reserved. -
Page 46: Remarque Importante
REMARQUE IMPORTANTE LE NUMÉRO DE MODÈLE ET LE NUMÉRO DE SÉRIE SE TROUVENT À L’ARRIÈRE OU SUR LE FOND DE CET APPAREIL. ENREGISTREZ CES NUMÉROS SUR LA CARTE DE GARANTIE CI-JOINTE ET CONSERVEZ-LA EN UN LIEU SÛR POUR VOUS Y RÉFÉRER ULTÉRIEUREMENT. D36-AP9-1_A1_Fr REMARQUE : Cet appareil a été... - Page 47 IMPORTANT ATTENTION DANGER D´ELECTROCUTION NE PAS OUVRIR ATTENTION : Ce symbole de l’éclair, placé dans un Ce point d’exclamation, placé dans un triangle équilatéral, a pour but d’attirer POUR ÉVITER TOUT RISQUE triangle équilatéral, a pour but d’attirer l’attention de l’utilisateur sur la présence, à D’ÉLECTROCUTION, NE PAS ENLEVER LE l’attention de l’utilisateur sur la présence, l’intérieur du coffret de l’appareil, de...
-
Page 48: La Protection De Votre Ouïe Est Entre Vos Mains
électrique. Vérifier le câble d’alimentation de temps et – plus important encore – la protection de votre ouïe, en temps. Contacter le service après-vente PIONEER le réglez le volume à un niveau raisonnable. Pour ne pas plus proche ou le revendeur pour un remplacement. - Page 49 Démarches avancées pour la radio Internet..24 l’aspect réel du produit. Mémorisation de stations émettrices absentes de la liste vTuner depuis le site spécial Pioneer ... 24...
-
Page 50: Avant De Commencer
Avant de commencer Chapitre 1 : Avant de commencer • Les piles peuvent avoir des tensions différentes, même si elles ont une taille et une forme identiques. N’utilisez Contenu de la boîte pas ensemble différents types de piles. • Pour éviter toute fuite d’électrolyte, retirez les piles si Veuillez confirmer que les accessoires suivants sont présents vous prévoyez de ne pas utiliser la télécommande dans la boîte quand vous l’ouvrez. -
Page 51: Connexions
Connexions Chapitre 2 : Connexions • Veillez toujours à éteindre les appareils et à débrancher le cordon d’alimentation de la prise secteur avant de Connexion de votre téléviseur raccorder un appareil ou de changer les connexions. Pour regarder les images d’un iPod/iPhone sur un téléviseur, •... -
Page 52: Connexion Au Réseau Via L'interface Lan
Connexions Connexion avec une interface LAN sans fil Connexion au réseau via l’interface LAN En raccordant cet appareil au réseau par l’interface LAN, Internet vous pourrez écouter des fichiers audio enregistrés sur des composants en réseau, par exemple votre ordinateur, ainsi que des stations radio Internet. -
Page 53: Connexion Au Secteur
Connexions Connexion au secteur Important • Avant d’effectuer ou de modifier les raccordements, mettez l’appareil hors tension et débranchez le cordon d'alimentation au niveau de la prise secteur. Après avoir effectué toutes les connexions, branchez l’appareil sur une prise secteur. Panneau arrière de cet appareil ANTENNA VIDEO... -
Page 54: Les Organes Et Leurs Fonctions
Les organes et leurs fonctions Chapitre 3 : Les organes et leurs fonctions STANDBY/ON Appuyez pour mettre l’appareil sous ou hors tension. Télécommande DISP OFF Appuyez pour éteindre l’afficheur principal quand il n’est pas nécessaire. STANDBY/ON Touches numériques (0 à 9) A utiliser pour sélectionner une station préréglée à... -
Page 55: Panneau Supérieur
Les organes et leurs fonctions 11 PREV 17 MUTE Permet de revenir au début de la plage ou du fichier en cours Appuyez pour couper temporairement le son. de lecture. Appuyez deux fois pour revenir au début de la 18 SHUFFLE plage ou du fichier précédent. -
Page 56: Panneau Avant
Les organes et leurs fonctions Panneau avant POWER ON Afficheur principal Ce voyant s’allume quand l’appareil est sous tension. Afficheur auxiliaire BT AUDIO Enceintes Lorsque BT Audio est sélectionné comme source d’entrée, ce voyant s’allume. Port USB AIR JAM AUX IN Lorsque Air Jam est sélectionné... -
Page 57: Afficheur Principal
Les organes et leurs fonctions Afficheur principal Song Artist Album Source d’entrée Lecture répétée and Lecture aléatoire Minuteur de mise en veille Quand la minuterie de mise en veille est programmée, la Répétition de tous les fichiers. durée restante jusqu’à la mise hors tension est affichée. AirPlay Répétition d’un fichier. -
Page 58: Mise En Marche
Mise en marche Chapitre 4 : Mise en marche Lorsque vous utilisez l’appareil pour la première fois, les Option Settings est ultérieurement utilisé pour annuler écrans suivants sont affichés. le Demo Mode, le Quick Start Mode ne sera pas annulé simultanément. Les deux réglages doivent être Programmez les paramètres suivants pour personnaliser changés indépendamment. -
Page 59: Lecture Par Un Ipod/Iphone
• Les fonctions telles que l’égaliseur ne peuvent pas être commandées en utilisant ce système et nous recommandons de désactiver l’égaliseur avant la connexion. • Pioneer ne peut en aucun cas être tenu responsable pour toute perte directe ou indirecte, liée à un problème ou une perte des données enregistrées à la suite d’une défaillance de l’iPod/iPhone. -
Page 60: Connexion De Votre Téléviseur
Lecture par un iPod/iPhone Connectez votre iPod/iPhone. Lecture par votre iPod/iPhone Attention • Quand votre iPod/iPhone est connecté à cet appareil et que vous souhaitez le faire fonctionner en le touchant directement, assurez-vous de tenir solidement l’iPod/ iPhone avec l’autre main pour éviter un mauvais fonctionnement causé... - Page 61 Lecture par un iPod/iPhone Conseil • L’iPod/iPhone se charge chaque fois qu’il est connecté à cet appareil. (C’est aussi valable quand l’appareil se trouve en mode veille.) • Lorsque l’entrée est changée de iPod à une autre fonction, la lecture iPod/iPhone est temporairement arrêtée.
-
Page 62: Lecture Audio Bluetooth
1 • Le périphérique adapté pour la technologie sans fil Bluetooth doit prendre en charge les profils A2DP. • Pioneer ne garantit pas une connexion et un fonctionnement corrects de cet appareil avec tous les périphériques adaptés à la technologie sans fil Bluetooth. -
Page 63: Réglage Du Code Pin
® Lecture audio Bluetooth Réglage du code PIN ® Appariement de l’adaptateur Bluetooth Réglez le code PIN de cet appareil à la même valeur que celui et du périphérique à technologie sans fil du périphérique à technologie sans fil Bluetooth utilisé. Les Bluetooth valeurs de réglage prises en charge pour le code PIN sont du type 0000, 1234 ou 8888. -
Page 64: Air Jam
AIR JAM d’antenne de votre téléviseur, vidéo, tuner satellite, etc. – Air Jam une application exclusive de Pioneer est disponible Dans ce cas, écartez le connecteur d’entrée d’antenne gratuitement. par rapport au périphérique adapté à la technologie sans fil Bluetooth ou à cet appareil (y compris des éléments Air Jam vous permet de raccorder plusieurs périphériques... -
Page 65: Portée D'utilisation
® Lecture audio Bluetooth Portée d’utilisation L’utilisation de cet équipement est limitée à un usage privé. (Il se peut que les distances de transmission soient réduites en fonction de l’environnement de communication). Dans les endroits suivants, des conditions défavorables ou l’incapacité... -
Page 66: Lecture Usb
à la page 37. peuvent pas être affichés. • Pioneer ne garantit pas que tout fichier, enregistré sur une clé de mémoire USB, pourra être lu ou que le courant électrique sera fourni à tous les types de clé... -
Page 67: Radio Internet
Radio Internet Chapitre 8 : Radio Internet Syntonisation sur une station Écoute de la radio Internet Appuyez sur FUNCTION / pour sélectionner Internet Radio comme source Connexion à un réseau local LAN d’entrée. Connexion au réseau via l’interface LAN • Les informations relatives à la station sélectionnée en Pour les détails, reportez-vous à... -
Page 68: Ajout De Stations À Sa Favorites
Pioneer et • Un maximum de 20 stations peuvent être mémorisées enregistrez les stations que vous souhaitez dans le dossier sous Favorites. -
Page 69: Serveur De Musique
à DMR. Pendant l’entrée DMR, le nom de l’iTunes, indiquées sur le site web de Pioneer. Il se peut la plage en cours de lecture, le nom d’artiste, le nom d’album qu’AirPlay ne soit pas compatible avec des versions... -
Page 70: Autorisation De Cet Appareil
Serveur de musique Utilisez / pour sélectionner le fichier à Si votre routeur n’intègre pas cette fonction, il faudra paramétrer le réseau manuellement. Sinon, vous ne pourrez reproduire, puis appuyez sur ENTER. pas lire les fichiers audio enregistrés sur les composants en La lecture commence. -
Page 71: Utilisation Du Syntonisateur
Utilisation du syntonisateur Chapitre 10 : Utilisation du syntonisateur Faites l’accord sur une station. Écoute des émissions radio FM Maintenez enfoncée une des touches Le syntonisateur peut capter les émissions FM et mémoriser numériques (1 à 9) pendant quelques secondes. vos stations préférées. -
Page 72: Autres Connexions
Autres connexions Chapitre 11 : Autres connexions • Avant d’effectuer ou de modifier les raccordements, mettez l’appareil hors tension et débranchez le cordon Ecoute de composants auxiliaires d’alimentation au niveau de la prise secteur. • Si le jack à mini-fiche AUX IN est branché sur la prise Appuyez sur la touche FUNCTION /... -
Page 73: Changement Des Réglages
Changement des réglages Chapitre 12 : Changement des réglages Les réglages par défaut sont indiqués en italique. Appuyez sur SET UP pour obtenir l’écran Initial Setup. Utilisez / pour sélectionner le paramètre, puis appuyez sur ENTER. Suivez les instructions sur l’afficheur principal pour modifier le réglage. Réglages Leur rôle Réglage du minuteur de réveil et de l’heure de mise sous tension de l’appareil. -
Page 74: Utilisation Du Minuteur
Changement des réglages Réglages Leur rôle A utiliser pour définir le code PIN Bluetooth (page 19). BT PIN Select (0000/1234/8888) Quand On est sélectionné, le volume peut être ajusté entre 0 et 30. Volume Limit Setting (On/Off) Chaque fois que ce réglage est modifié, le volume revient à 0. Permet de limiter l’accès à... -
Page 75: Mise En/Hors Service Du Minuteur De Réveil
Changement des réglages Sélectionnez Timer Setting. Appuyez de façon répétée sur SLEEP pour L’écran Timer Setting (réglage du minuteur) apparaît. sélectionner la durée avant la mise à l’arrêt. Utilisez /// ou les touches Choisissez enter 5 min, 15 min, 30 min, 60 min, 90 min ou Hors service. -
Page 76: Réglage Câblé
Changement des réglages Réglage câblé Réglage sans fil Utilisez / pour choisir DHCP Off, puis Utilisez / pour sélectionner Manual, puis appuyez sur ENTER. appuyez sur ENTER. L’écran de réglage de l’adresse IP apparaît. Utilisez /// ou les touches Conseil numériques pour ajuster les chiffres, puis •... -
Page 77: Réglage De Connexion Wps
Changement des réglages Utilisez / pour sélectionner le type de sécurité, puis appuyez sur ENTER. Réglage de connexion WPS WPS est un acronyme pour “Wi-Fi Protected Setup”. Il s’agit d’une norme établie par le groupe industriel Wi-Fi Alliance pour permettre des réglages, liés à l’interconnexion de dispositifs LAN sans fil compatibles WPS et un cryptage réalisable par de simples opérations. -
Page 78: Connexion Au Moyen De L'entrée Pin
Changement des réglages Connexion au moyen de l’entrée PIN Friendly Name Appuyez sur SET UP et sélectionnez Network WPS PIN Input, puis appuyez sur Setting Appuyez sur SET UP. ENTER. Sélectionnez Network Setting Friendly Utilisez / pour sélectionner le point Name. -
Page 79: Mise À Jour Du Logiciel
Réglages du son Pioneer, téléchargez-le sur votre ordinateur. Lors du téléchargement d’un fichier de mise à jour depuis le site Web de Pioneer sur votre ordinateur, le fichier sera en Utilisation de Virtual Surround/Sound format ZIP. Dézippez (décompressez) le fichier ZIP avant Retriever de le sauvegarder sur la clé... -
Page 80: Informations Supplémentaires
Examinez les autres composants et appareils électriques utilisés. Si le problème ne peut pas être résolu en dépit des vérifications ci-dessous, consultez le service après-vente Pioneer le plus proche pour faire réparer l’appareil. • Si l’appareil ne fonctionne pas normalement en raison de causes externes comme l’électricité statique, débranchez la fiche d’alimentation de la prise de courant et insérez-la de nouveau pour rétablir les conditions normales de fonctionnement. -
Page 81: Quand Un Ipod/Iphone Est Raccordé
Informations supplémentaires Problèmes Vérification Solutions Le périphérique à • Vérifiez qu’aucun objet émettant des ondes électromagnétiques technologie sans fil dans la bande 2,4 GHz (four à micro-ondes, périphérique LAN Bluetooth Bluetooth ne peut pas être sans fil ou appareil à technologie sans fil ) ne se trouve raccordé... - Page 82 Informations supplémentaires Problèmes Vérification Solutions L’appareil a besoin d’un Quelle est la capacité de la clé USB ? Le chargement des données peut prendre un certain temps temps considérable pour (plusieurs minutes) quand des clé USB à grande capacité sont reconnaître la clé...
- Page 83 Informations supplémentaires Problèmes Vérification Solutions Les fichiers audio enregistrés Windows Media Player 11 ou Installez Windows Media Player 11 ou Windows Media Player 12 sur les composants en Windows Media Player 12 n’est pas sur votre ordinateur (page 25). réseau, par exemple sur un installé...
- Page 84 Informations supplémentaires Problèmes Vérification Solutions Impossible d’écouter des Les réglages de pare-feu des Vérifiez les réglages de pare-feu des composants en réseau. stations radio Internet. composants en réseau agissent actuellement. Vous êtes actuellement déconnecté Vérifiez les réglages de connexion des composants en réseau et, au d’Internet.
-
Page 85: Formats De Fichiers Utilisables
Informations supplémentaires Catégorie Extension Flux Formats de fichiers utilisables Fréquence 8 kHz à 48 kHz d’échantil- Ce lecteur prend en charge les formats de fichier suivants: lonnage Notez que certains formats de fichiers ne sont pas disponibles pour la lecture bien qu’ils figurent comme Débit binaire 16 bit formats de fichiers lisibles. -
Page 86: Précautions D'emploi
Informations supplémentaires Nettoyage de l’appareil • Débranchez le cordon d’alimentation de la prise secteur Précautions d’emploi avant de nettoyer cet appareil. • Nettoyez l’appareil avec un chiffon doux. Pour enlever Lors d’un déplacement de l’appareil les taches rebelles, imprégnez le chiffon d’un détergent neutre dilué... -
Page 87: Contenus Lisibles Via Un Réseau
PRÉCÈDE. PIONEER N'EST PAS RESPONSABLE EN CAS DE PERTE OU DE DÉGÂTS DÉCOULANT DE L’ACCÈS OU DE L’UTILISATION DES CONTENUS. AUCUNE INFORMATION OU CONSEIL ORAL OU ÉCRIT FOURNI PAR PIONEER OU PAR DES REPRÉSENTANTS DE SES SERVICES CLIENTÈLE NE JUSTIFIERA UNE TELLE GARANTIE. -
Page 88: À Propos De L'ipod/Iphone
Informations supplémentaires ® ® ® ® Microsoft , Windows 7, Windows Vista, Windows DE RESPONSABILITE, QU’ELLE DÉCOULE D’UN CONTRAT, ® ® ® Windows 2000, Windows Edition Millennium , Windows DE RESPONSABILITÉ STRICTE OU D’ACTE DÉLICTUEL (Y ® et WindowsNT sont soit des marques déposées ou des COMPRIS NÉGLIGENCE OU AUTRE) DÉCOULANT DE marques de commerce de Microsoft Corporation aux Etats- L’EMPLOI DE CE LOGICIEL, MÊME EN CAS D’ANNONCE LA... -
Page 89: Fiche Technique
Remarque • Spécifications et design sujets à des modifications éventuelles sans préavis suite à des améliorations. • Ce produit n'est pas conçu en vue d’une utilisation au Japon. © 2011 PIONEER CORPORATION. Tous droits de reproduction et de traduction réservés. - Page 90 Informations supplémentaires...
- Page 91 Informations supplémentaires...
- Page 92 253 Alexandra Road, #04-01, Singapore 159936 TEL: 65-6472-7555 PIONEER ELECTRONICS AUSTRALIA PTY. LTD. 5 Arco Lane, Heatherton, Victoria, 3202, Australia, TEL: (03) 9586-6300 PIONEER ELECTRONICS DE MEXICO S.A. DE C.V. Blvd.Manuel Avila Camacho 138 10 piso Col.Lomas de Chapultepec, Mexico, D.F. 11000 TEL: 55-9178-4270 K002_B3_En...