Pit Boss SPORTSMAN PB1000SP Guide De Montage
Gril & fumoir à granules de bois
Table des Matières
Les langues disponibles
Les langues disponibles
Liens rapides
WOOD PELLET GRILL & SMOKER
IMPORTANT, READ CAREFULLY, RETAIN FOR FUTURE
REFERENCE. MANUAL MUST BE READ BEFORE OPERATING!
GRIL & FUMOIR À GRANULES DE BOIS
IMPORTANT, PRENEZ CONNAISSANCE DE CE DOCUMENT ET
CONSERVEZ-LE POUR RÉFÉRENCE ULTÉRIEURE. VOUS DEVEZ
LIRE CE GUIDE AVANT D'UTILISER LE BARBECUE!
For outdoor and household use only. Not for commercial use.
Réservé à l'usage extérieur et résidentiel uniquement. Non destiné à un usage commercial.
WARNING: Please read the entire manual
before installation and use of this electric,
pellet fuel-burning appliance. Failure to
follow these instructions could result
in property damage, bodily injury or
even death. Contact local building or fire
officials about restrictions and installation
inspection requirements in your area.
AVERTISSEMENT : Veuillez lire l'intégralité
du
manuel
avant
l'installation
l'utilisation de cet appareil électronique à
granules. Le non-respect de ces instructions
peut entraîner des dommages aux
biens, des blessures ou même la mort.
Communiquez avec les autorités locales
en matière d'incendie et de bâtiment
concernant les restrictions et les exigences
d'installation dans votre région.
et
MODEL / MODÈLE : PB1000SP
PART / PIÈCE : 10534, 10567
5005166
ASSEMBLY GUIDE
GUIDE DE MONTAGE
Chapitres
Table des Matières

Manuels Connexes pour Pit Boss SPORTSMAN PB1000SP


Sommaire des Matières pour Pit Boss SPORTSMAN PB1000SP
- Page 12 TABLE DES MATIÈRES Pièces et spécifications ..........14 Préparation de l'assemblage .........15 Instructions d’assemblage Montage des roues aux pieds ..........16 Assemblage du chariot ............. 16 Assembler les panneaux du chariot ........17 Installer le chariot au baril ............17 Fixer la butée de la porte, l'aimant de porte ...... 18 Fixer les poignées de porte de l'armoire ......
-
Page 13: Pb - Exigences Électriques
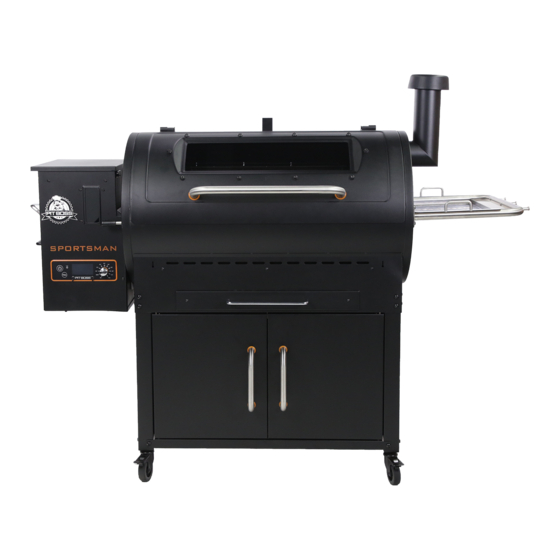
PIÈCES ET SPÉCIFICATIONS Description des pièces Description des pièces Grille de cuisson supérieure en acier recouvert de Étagère inférieure (x1) porcelaine (x1) Panneau du chariot / arrière (x1) Grille de cuisson en fonte recouverte de porcelaine (x3) Panneau du chariot / latéral (x2) Plaque de diffusion (x1) Vis (x24) Glissière de la chaudière (x1) -
Page 14: Pièces Et Spécifications
PIÈCES ET SPÉCIFICATIONS... -
Page 15: Préparation De L'assemblage
à la liste des pièces. En cas de pièce manquante ou endommagée, ne tentez pas d’assembler. Les dommages lors de l'expédition ne sont pas couverts par la garantie. Contactez votre revendeur ou le service à la clientèle de Pit Boss® pour les pièces : du lundi au samedi, de 4 h à... -
Page 16: Assembler Les Panneaux Du Chariot
3. ASSEMBLER LES PANNEAUX DU CHARIOT Pièces nécessaires : Panneau arrière du chariot (#34) Panneau latéral du chariot (#35) Vis (#D) 12 x Installation : • Fixez le panneau arrière du chariot aux pieds de support arrières du chariot et fixez en place les bords intérieurs à l'aide de quatre vis. Répétez la même installation pour assembler les deux panneaux latéraux du chariot aux autres pieds de support. -
Page 17: Fixer La Butée De La Porte, L'aimant De Porte
5. FIXER LA BUTÉE DE LA PORTE, L'AIMANT DE PORTE Pièces nécessaires : Butée de la porte (#28) Aimant de porte (#27) Vis (#D) Installation : • Enlevez les deux vis précédemment installées au centre de l'étagère inférieure. Fixez la butée de la porte à la même zone en utilisant les deux vis, de sorte que la butée en position relevée fasse face à... -
Page 18: Fixer La Poignée Du Couvercle
8. FIXER LA POIGNÉE DU COUVERCLE Pièces nécessaires : Cadran de la poignée du couvercle (#12) Poignée de couvercle (#13) Installation : • Retirez les vis préinstallées de la poignée du couvercle. De l'intérieur du couvercle du baril, insérez une vis pour la faire sortir vers l'extérieur. Ajoutez un cadran sur la vis, puis serrez à... -
Page 19: Installer Le Plateau À Graisse
11. INSTALLER LE PLATEAU À GRAISSE Pièces nécessaires : Plateau à graisse (#18) Poignée du plateau à graisse (#19) Installation : • Retirez les quatre vis préinstallées de la poignée de la tablette latérale. Sur le coin du plateau à graisse avec les deux trous, alignez la poignée avec les trous puis serrez la vis à... -
Page 20: Installer Les Composants De Cuisson
14. INSTALLER LES COMPOSANTS DE CUISSON Pièces nécessaires : Grille de cuisson supérieure (#1) Grilles de cuisson (#2) Plaque de diffusion (#3) Glissière de la chaudière (#4) Plateau principal de la chaudière (#5) Poignée de la barre de réglage pour chaudière (#25) Barre de réglage pour chaudière (#26) Installation : •... -
Page 21: Connexion À Une Source D'alimentation
15. CONNEXION À UNE SOURCE D'ALIMENTATION REMARQUE : Avant de brancher votre Pit Boss® dans une prise FUSIBLE À ACTION RAPIDE, électrique, assurez-vous que la molette de température est en 5 AMPÈRES position OFF. • PRISE STANDARD Cet appareil nécessite un voltage de 110-120 Volts, 60hz, 275w, 5 ampères. -
Page 24: Ne Retournez Pas Le Produit Au Magasin
IMPORTANT DO NOT RETURN PRODUCT TO STORE For all questions, comments, or inquiries, please contact Dansons directly. Our Customer Service department is available Monday through Sunday, 4am - 8pm PST (EN/FR/ES). TOLL FREE: 1-877-303-3134 | TOLL FREE FAX: 1-877-303-3135 service@pitboss-grills.com IMPORTANT NE RETOURNEZ PAS LE PRODUIT AU MAGASIN Pour toute questions, commentaires ou demandes de renseignements, veuillez communiquer...