Sony CDP-CX355 Mode D'emploi

Manuels Connexes pour Sony CDP-CX355


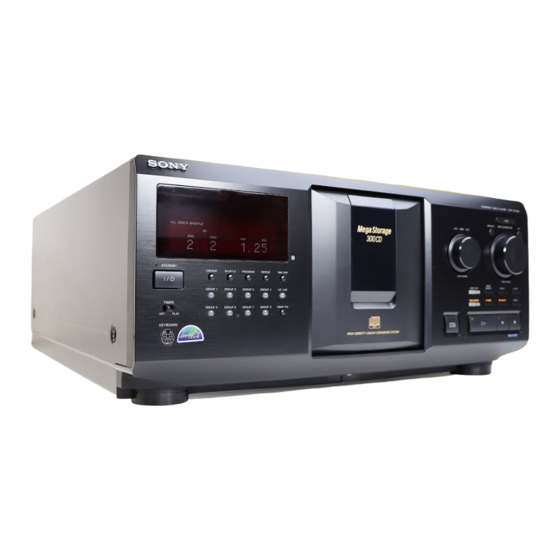
Sommaire des Matières pour Sony CDP-CX355
- Page 36 ELECTRIQUES, NE PAS UTILISER d’incendie ou d’électrocution, l’acquisition de ce lecteur de disques CETTE FICHE POLARISEE AVEC compacts Sony. Avant d’utiliser cet gardez cet appareil à l’abri de UN PROLONGATEUR, UNE PRISE appareil, nous vous recommandons de DE COURANT OU UNE AUTRE la pluie et de l’humidité.
- Page 37 ABLE DES MATIERES Préparation Déballage ..........................4 Raccordement du système ....................4 Raccordement d’un autre lecteur CD ................6 Introduction des disques compacts ................... 7 Opérations de base Lecture d’un disque compact ................... 10 Lecture de disques compacts Utilisation de la fenêtre d’affichage ................12 Localisation d’un disque déterminé...
-
Page 38: Préparation
Préparation Préparation Déballage Raccordement du système Assurez-vous que les accessoires suivants vous ont été Présentation livrés: • Câble audio (1) Cette section décrit le raccordement du lecteur de • Télécommande (1) disques compacts à un amplificateur. Avant de réaliser • Piles AA (R6) (2) la connexion, n’oubliez pas de mettre hors tension tous les appareils concernés. -
Page 39: Raccordement
Préparation Raccordement Si vous utilisez un autre lecteur de CD Sony avec ce lecteur Lors du raccordement du câble audio, assurez-vous Vous ne pouvez utiliser la télécommande fournie qu’avec que le code de couleur des fiches correspond à celui ce lecteur. -
Page 40: Raccordement D'un Autre Lecteur Cd
CD • Câble à minifiche monaural (2 broches) (1) (non fourni) Si vous disposez d’un lecteur CD Sony dans lequel Raccordez les lecteurs au moyen d’un câble audio vous pouvez introduire 5, 50, 200 ou 300 disques et (voir également “Raccordement”... -
Page 41: Introduction Des Disques Compacts
Préparation Tournez le disque JOG jusqu’à ce que vous ayez Introduction des disques trouvé le logement de disque dans lequel vous voulez introduire un disque, tout en contrôlant le compacts numéro de disque (inscrit sur le côté de tous les logements ainsi que dans la fenêtre d’affichage). - Page 42 • Si vous laissez tomber un disque dans le lecteur et/ou si le disque n’entre pas correctement dans le logement, Avec la face consultez votre revendeur Sony. imprimée orientée vers la droite • Lorsque vous transportez le lecteur, retirez-en tous les disques.
-
Page 43: Retrait De Disques Compacts
Préparation Retrait de disques compacts Après avoir appliqué les étapes 1 à 3 de la procédure “Introduction des disques compacts” à la page 7, retirez les disques. Refermez ensuite le volet frontal. Pour retirer des disques facilement Après avoir exécuté les étapes 1 à 3 de la procédure “Introduction des disques compacts”... -
Page 44: Opérations De Base
Opérations de base Lecture d’un disque compact +100 MENU/NO DISC/CHARACTER ≠ AMS ± STANDBY PUSH ENTER CONTINUE SHUFFLE PROGRAM REPEAT TIME/TEXT PUSH ENTER I / u EASY PLAY MEMO SEARCH CHECK CLEAR GROUP 1 GROUP 2 GROUP 3 GROUP 4 HIT LIST MEGA CONTROL X-FADE... -
Page 45: Pour Arrêter La Lecture
Opérations de base Poussez sur le disque JOG ou appuyez sur · pour démarrer la lecture. Le disque sélectionné se met en position de lecture et le lecteur reproduit une fois tous les disques à partir du disque sélectionné (ALL DISCS) ou toutes les plages du disque (1 DISC). -
Page 46: Lecture De Disques Compacts
Lecture de disques compacts Lecture de disques compacts Informations affichées pendant la lecture Utilisation de la fenêtr e d’un disque d’affichage Pendant la lecture d’un disque, la fenêtre d’affichage indique le numéro du disque, le numéro de la plage, la La fenêtre d’affichage vous permet de contrôler une durée de lecture de la plage et le numéro du disque série d’informations concernant le disque sélectionné. -
Page 47: Sélection De La Langue D'affichage Des Informations Cd Text
Lecture de disques compacts Sélection de la langue d’affichage des Informations affichées pendant la lecture d’un disque informations CD TEXT Chaque fois que vous appuyez sur TIME/TEXT, la Vous pouvez sélectionner la langue d’affichage des fenêtre d’affichage indique les informations concernant informations CD TEXT lorsque vous sélectionnez un le disque comme illustré... -
Page 48: Localisation D'un Disque Déterminé
Lecture de disques compacts Localisation directe d’un disque avec la Localisation d’un disque télécommande déterminé Appuyez sur DISC. ≠ AMS ± +100 Appuyez sur la touche numérique correspondant au disque. Exemple: Pour introduire le numéro 35 +100 Appuyez sur 3 et puis sur 5. Pour introduire le numéro 100 I / u Appuyez sur 1, puis deux fois sur 10/0. -
Page 49: Localisation D'un Disque En Recherchant Un Mémo De Disque Spécifique (Recherche De Mémo)
Lecture de disques compacts Localisation d’un disque en recherchant un Spécification du disque mémo de disque spécifique (recherche de mémo) suivant à r eproduire Vous pouvez rechercher et localiser un disque à l'aide Vous pouvez spécifier le disque suivant à reproduire du premier caractère du mémo de disque (voir page pendant la lecture d’un disque en mode de lecture 24). -
Page 50: Localisation D'une Plage Déterminée Ou D'un Passage Sur Une Plage
Lecture de disques compacts Procédez comme suit Pour localiser Localisation d’une plage Tournez le disque ≠ AMS ± l’une des plages déterminée ou d’un passage dans le sens horaire jusqu'à ce que suivantes vous ayez trouvé la plage. sur une plage Tournez le disque ≠... -
Page 51: Lecture Répétée
Lecture de disques compacts Lecture répétée Lecture des plages dans un ordre quelconque Vous pouvez activer la lecture répétée de disques ou (lecture aléatoir e) des plages dans n’importe quel mode de lecture. REPEAT Vous pouvez programmer le lecteur pour qu’il “mélange”... -
Page 52: Création De Programmes Musicaux Personnalisés (Lecture Programmée)
Lecture de disques compacts Lecture de toutes les plages d’un disque Création de programmes spécifié dans un ordre aléatoire musicaux personnalisés Appuyez deux fois sur SHUFFLE. Les indications “1 DISC” et “SHUFFLE” (lecture programmée) apparaissent dans la fenêtre d’affichage. Vous pouvez agencer l’ordre des plages et/ou des Tournez le disque JOG jusqu’à... -
Page 53: Création D'un Programme Musical Au Moyen De La Télécommande Z
Lecture de disques compacts Création d’un programme musical au Poussez sur le disque JOG. moyen de la télécommande Z Numéro de la plage en cours de programmation PROGRAM1 DISC TRACK STEP PROGRAM DISC Disque en cours de Ordre de lecture programmation Touches numériques... -
Page 54: Lecture Par Programmateur
Lecture de disques compacts Effacement des programmes musicaux Pour programmer d’autres disques/plages, procédez comme suit: mémorisés Répétez les étapes Appuyez plusieurs fois de suite sur PROGRAM en Pour programmer mode d’arrêt jusqu’à ce que le numéro du 2 à 4 Toutes les plages d’(un) programme à... -
Page 55: Commander Un Autre Lecteur Cd (Advanced Mega Control)
Lecture de disques compacts Appuyez sur la touche MEGA CONTROL de ce Commander un autre lecteur lecteur. La touche MEGA CONTROL et l’indication “2nd” CD (Advanced Mega Control) dans la fenêtre d’affichage s’allument. La fenêtre d’affichage indique le numéro ou le mémo du Cet appareil peut commander un second lecteur CD disque en cours sur le second lecteur. -
Page 56: Fondu Enchaîné D'entrée Ou De Sortie
Lecture de disques compacts Téléchargement des mémos de disque du Fondu enchaîné d’entrée ou de second lecteur CD sortie Si le second lecteur CD est doté de la fonction de mémo de disque (voir page 24), vous pouvez télécharger les Vous pouvez activer manuellement un fondu enchaîné... -
Page 57: Lecture Alternée (Lecture Alternée Sans Transition/Enchaînée)
Sélectionnez le mode de lecture voulu sur chaque départ d’un autre appareil lecteur. Si vous sélectionnez la lecture alternée sans Si vous raccordez le lecteur à une platine MD Sony transition compatible avec la fonction Mega Control ou si vous Appuyez sur NO DELAY. -
Page 58: Mémorisation D'informations Relatives Aux Cd (Fichiers Personnalisés)
Mémorisation d’informations relatives aux CD (fichiers personnalisés) Mémorisation d’informations relatives aux CD (fichiers personnalisés) Que pouvez-vous faire avec les Identification des disques fichiers personnalisés (mémo de disque) Le lecteur peut mémoriser trois types d’informations Vous pouvez identifier les disques au moyen de 13 désignés “fichiers personnalisés”... -
Page 59: Changement Du Mémo De Disque
Mémorisation d’informations relatives aux CD (fichiers personnalisés) Changement du mémo de disque Tournez le disque JOG jusqu’à ce que le caractère voulu apparaisse dans la fenêtre d’affichage. Exécutez les étapes 1 à 3 de la procédure Le curseur disparaît et le premier espace pour le “Identification des disques sur le lecteur”... - Page 60 Mémorisation d’informations relatives aux CD (fichiers personnalisés) Identification des disques au moyen de la Pour introduire une lettre, appuyez sur la touche télécommande Z numérique correspondant à la lettre voulue (indiquée à côté de chaque touche numérique). Le curseur disparaît et le premier espace pour le mémo de disque se met à...
-
Page 61: Mémorisation Des Informations Des Fichiers Personnalisés Au Moyen D'un Clavier
Mémorisation d’informations relatives aux CD (fichiers personnalisés) Si vous avez fait une erreur lors de la saisie des Mémorisation des informations caractère(s) Pour corriger un caractère des fichiers personnalisés au 1 Appuyez sur = ou + jusqu’à ce que le curseur se moyen d’un clavier place en regard du caractère incorrect. -
Page 62: Mémorisation De Plages Spécifiques (Bloc De Suppression)
Mémorisation d’informations relatives aux CD (fichiers personnalisés) Mémorisation de plages Groupement de disques spécifiques (fichier de groupe) (bloc de suppression) Si vous estimez qu’un trop grand nombre de disques complique la recherche d’un disque particulier, sachez Vous pouvez supprimer les plages jugées indésirables que ce lecteur est doté... - Page 63 Mémorisation d’informations relatives aux CD (fichiers personnalisés) Identification des groupes Tournez le disque ≠ AMS ± pour déplacer le (mémo de groupe) curseur sur la position que vous voulez modifier. Lorsque le curseur s’est positionné sur un Vous pouvez identifier un numéro de groupe caractère, le caractère se met à...
-
Page 64: Localisation D'un Disque Dans Un Groupe En Explorant Chaque Mémo De Disque Z
Mémorisation d’informations relatives aux CD (fichiers personnalisés) Appuyez sur ENTER ou · lorsque le mémo de Appuyez sur l’une des touches GROUP 1 – 8 pour sélectionner le groupe et appuyez sur ·. disque voulu apparaît. La lecture de groupe démarre à partir du premier La lecture de groupe démarre à... -
Page 65: Identification Des Plages De La Liste Des Hits (Titre Des Hits)
Mémorisation d’informations relatives aux CD (fichiers personnalisés) Lecture de plages de la liste des hits Poussez sur le disque JOG. Le curseur clignotant ( ) apparaît dans la fenêtre Appuyez sur HIT LIST avant de démarrer la d’affichage. lecture. La touche HIT LIST s’allume et l’indication Tournez le disque JOG jusqu’à... -
Page 66: Informations Complémentaires
• Si des liquides ou des solides venaient à tomber dans le concernant votre lecteur, consultez votre revendeur châssis, débranchez le lecteur et faites-le vérifier par un Sony. personnel qualifié avant de le remettre en service. • Cette chaîne n’est pas déconnectée de la source d’alimentation secteur tant qu’elle est raccordée à... -
Page 67: Dépannage
Laser Semi-conducteur à laser (λ = 780 nm) Durée d’émission: continue survenu. Si le problème persiste, consultez votre revendeur Sony. Max 44,6 µW* Puissance de sortie laser * Cette puissance est la valeur mesurée à une distance de 200 mm de la Il n’y a pas de son. -
Page 68: Index
Fenêtre d’affichage 12 lecture programmée 18 Logements de disque 7 lecture répétée 17 Plateau rotatif 7 lecture simple 15 Sélecteur COMMAND Lecture aléatoire MODE 5 de tous les disques 17 Volet frontal 7 d’1 disque 18 Sony Corporation Printed in Malaysia...