Table des Matières

Publicité

Les langues disponibles
  • FR

Les langues disponibles

  • FRANÇAIS, page 14

Liens rapides

Art.Nr.
5906205901
5906205850 | 07/2014
DE
FR
IT
GB
CZ
SK
Generator
Originalbetriebsanleitung
Générateur de courant
Traduction du manuel d'origine
Generatore
Traduzione dal libretto d'istruzione originale
Generator
Translation from the original instruction manual
Generátor
Překlad originálního návodu k obsluze
Generátor
Preklad originálneho návodu na obsluhu
SG950
2-13
14-25
26-37
38-49
50-61
62-73

Publicité

Table des Matières
loading

Sommaire des Matières pour Scheppach 5906205901

  • Page 1 Art.Nr. 5906205901 5906205850 | 07/2014 SG950 Generator 2-13 Originalbetriebsanleitung Générateur de courant 14-25 Traduction du manuel d’origine Generatore 26-37 Traduzione dal libretto d’istruzione originale Generator 38-49 Translation from the original instruction manual Generátor 50-61 Překlad originálního návodu k obsluze Generátor 62-73 Preklad originálneho návodu na obsluhu...
  • Page 2: Table Des Matières

    Inhaltsverzeichnis: Seite: Einleitung Gerätebeschreibung Lieferumfang Bestimmungsgemäße Verwendung Sicherheitshiweis Technische Daten Vor Inbetriebnahme Bedienung Reinigung, Wartung und Lagerung Entsorgung und Wiederverwertung Störungsabhilfe Konformitätserklärung...
  • Page 3: Erklärung Der Symbole Auf Dem Gerät

    Erklärung der Symbole auf dem Gerät Die Verwendung von Symbolen in diesem Handbuch soll Ihre Aufmerksamkeit auf mögliche Risiken lenken. Die Sicherheitssymbole und Erklärungen, die diese begleiten, müssen genau verstanden werden. Die Warnungen selbst beseitigen keine Risiken und können korrekte Massnahmen zum Verhüten von Unfällen nicht ersetzen.
  • Page 4: Einleitung

    1. EINLEITUNG Lesen Sie vor der Montage und vor Inbetriebnahme den ge samten Text der Bedienungsanleitung durch. Diese Bedienungsanleitung soll es Ihnen erleichtern, Ihr Elektrowerkzeug kennenzulernen und dessen bestimmungsgemässen Einsatzmöglichkeiten zu nutzen. Die Bedienungsanleitung enthält wichtige Hinweise, wie Sie mit dem Elektrowerkzeug sicher, fachgerecht und wirt schaft lich arbeiten, und wie Sie Gefahren vermeiden, Reparaturkosten sparen, Ausfallzeiten verringern und die Zuverlässigkeit und Lebensdauer des Elektrowerkzeugs erhöhen.
  • Page 5: Lieferumfang

    5. Ein-/Ausschalter 9. Schraubensatz für Tragegriffmontage 1. Tankdeckel 2. Tragegriff 6. 230V-Steckdose 10. Zündkerzenschlüssel 3. Sicherheitsauslöser 7. Reversierstarter 11. Zündkabel 4. Chokehebel 8. Benzinhahn 12. Auspuff 3. LIEFERUMFANG • Öffnen Sie die Verpackung und nehmen Sie das Gerät vorsichtig heraus. Entfernen Sie die Verpackungsmaterialien.
  • Page 6 - Lagen Sie Kraftstoff in Behältern, die speziell für diesen Zweck konzipiert sind. - Füllen Sie Kraftstoff nur im Freien nach und rauchen Sie dabei nicht. - Füllen Sie Kraftstoff nach, bevor Sie den Motor anlassen. Entfernen Sie niemals die Kap- pe des Kraftstofftanks oder füllen Sie Kraftstoff nach, während der Motor läuft oder noch heiss ist.
  • Page 7 sen, dürfen nicht modifiziert oder ersetzt werden. n) Es müssen regelmässige Prüfungen auf Leckstellen oder Spuren von Abrieb im Kraft- stoffsystem durchgeführt werden, beispielsweise durch poröse Rohre, lose oder fehlende Klemmen und Schäden am Tank oder Tankdeckel. Vor der Nutzung müssen alle Defekte behoben werden.
  • Page 8: Technische Daten

    den. Nicht in der Nähe von offenem Licht, Feuer oder Funkenflug betanken, bzw. den Tank ent- • leeren. Nicht rauchen! Berühren Sie keine mechanisch bewegten oder heissen Teile. Entfernen Sie keine Schutz- • abdeckungen. Die Geräte dürfen keiner Feuchtigkeit oder Staub ausgesetzt werden. Zulässige Umge- •...
  • Page 9: Vor Inbetriebnahme

    Betriebsart S1 (Dauerbetrieb) Die Maschine kann dauerhaft mit der angegebenen Leistung betrieben werden. Betriebsart S2 (Kurzzeitbetrieb) Die Maschine darf kurzzeitig mit der angegebenen Leistung betrieben werden. Danach muss die Maschine eine Zeitspanne stillstehen, um sich nicht unzulässig zu erwärmen. 7. VOR INBETRIEBNAHME 7.1 Elektrische Sicherheit: Elektrische Zuleitungen und angeschlossene Geräte müssen in einem einwandfreien Zu- •...
  • Page 10: Bedienung

    Den Tragegriff (2) an beiden Seiten mit je 1 Schraube und 1 Unterlegscheibe (9) an den Tank schrauben (Bild 3c). 7.4 Erdung Zur Ableitung statischer Aufladungen ist eine Erdung des Gehäuses zulässig. Hierzu ein Kabel auf der einen Seite am Erdungsanschluss des Generators (Abb. 4) und auf der anderen Seite mit einer externen Masse (z.
  • Page 11: Motor Abstellen

    Achtung: Diese Steckdose darf dauernd (S1) mit 650W und kurzzeitig (S2) für max. 2 Minuten mit 720W belastet werden. • Der Stromerzeuger ist für 230V~Wechselspannungsgeräte geeignet • Den Generator nicht an ein Haushaltsnetz anschliessen, dadurch kann eine Beschädigung des Generators oder anderer Elektrogeräte im Haus verursacht werden. Hinweis: Manche Elektrogeräte (Motorstichsägen, Bohrmaschinen usw.) können einen höheren Stromverbrauch haben, wenn sie unter erschwerten Bedingungen eingesetzt werden.
  • Page 12 9.2. Luftfilter (Abb. 5/6) • Der Luftfilter sollte alle 30 Betriebsstunden gereinigt werden. • Entfernen Sie den Luftfilterdeckel (Abb.5) • Entfernen Sie das Filterelement (Abb.6) • Reinigen Sie das Filterelement mit Seifenwasser, spülen es anschliessend mit klarem Was- ser und lassen es vor erneutem Einbau gut trocknen. •...
  • Page 13: Transport

    vom restlichen Treibstoff. 5. Lassen Sie die Maschine abkühlen.(ca. 5 Minuten) 6. Entfernen Sie die Zündkerze (siehe Punkt 7.3). 7. Füllen Sie eine Teelöffel grosse Menge 2-Takt Motoröl in die Feuerungskammer. Ziehen Sie mehrmals vorsichtig die Anlasserleine heraus, um die inneren Bauteile mit dem Öl zu benet- zen.
  • Page 14 Table des matières: Page: Introduction Description de lʼappareil Limite de fourniture Utilisation conforme à lʼaffectation Recommandations générales concernant la sécurité Caracteristiques techniques Avant la mise en service Commande Nettoyage, maintenance et stockage Mise au rebut et recyclage Dépannage Déclaration de conformité...
  • Page 15: Explication Des Symboles Sur L'appareil

    Explication des symboles sur l’appareil L’utilisation de symboles dans ce manuel a pour but d’attirer votre attention sur d’éventuels risques. Les symboles de sécurité et les explications qui les accompagnent doivent être parfaitement compris. Les avertissements proprement dits n’éliminent pas les risques et ne peuvent pas remplacer les actions correctes à...
  • Page 16: Introduction

    1. INTRODUCTION De lire intégralement le manuel d’utilisation, avant d’effectuer le montage et la mise en service. Le présent manuel d‘utilisation vous facilitera la prise en main et la connaissance de la ma- chine, tout en vous permettant d‘en utiliser pleinement le potentiel dans le cadre d’une utilisation conforme.
  • Page 17: Limite De Fourniture

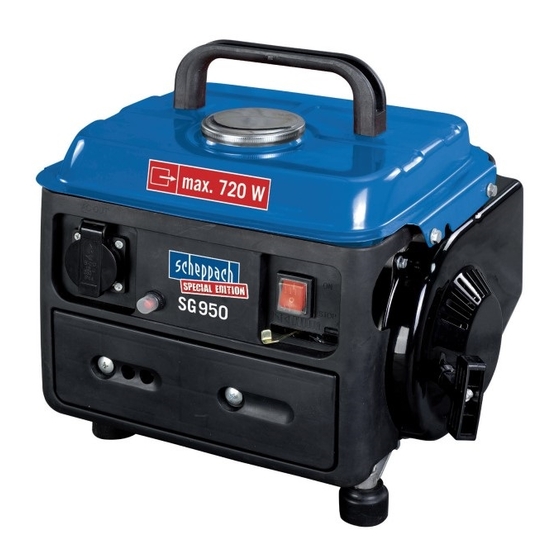
    5. Interrupteur Marche/ 9. Jeu de visserie pour montage de la 1. Couvercle du réservoir Arrêt poignée 2. Poignée 6. Prise femelle 230 V~ 10. Clé à bougie 3. Interrupteur de sécurité 7. Starter réversible 11. allumage 4. Levier étrangleur 8.
  • Page 18: Preparation

    2. Preparation a) AVERTISSEMENT - L‘essence est très inflammable : - Stockez l’essence dans des conteneurs spécialement conçus pour cet usage ; - ne faites le plein qu’à l’extérieur et ne fumez pas en faisant le plein ; - faites le plein avant de démarrer le moteur. N’enlevez jamais le capuchon du réservoir de carburant, et n’ajoutez pas d’essence lorsque le moteur est en marche ou très chaud ;...
  • Page 19: Avertissements De Sécurité Supplémentaires

    entre l’utilisation de l’équipement avec le réseau électrique public et l’utilisation du groupe électrogène est habilité à exécuter ladite connexion. n) Le moteur ne doit pas fonctionner à une vitesse de rotation excessive. Le fonctionnement du moteur à une vitesse de rotation excessive augmente les risques de blessures. Les pièces gênant la vitesse de rotation ne doivent ni être modifiées, ni remplacées.
  • Page 20: Caracteristiques Techniques

    • Si vous utilisez des rallonges de câbles, la lon gueur totale pour 1,5 mm2 ne doit pas dépas- ser 50 m, pour 2,5 mm2, 100 m. Il ne faut modifier en aucun cas les réglages de moteur et de générateur. •...
  • Page 21: Avant La Mise En Service

    Max. hauteur d’installation (au-dessus 1000 m du niveau de la mer) Température de service max. 40°C Type de bougie LD F6TC Type d'essence Essence sans plomb ou Octane 90 (E10) Mode S1 (fonctionnement continu) La machine peut être exploitée durablement à la puissance indiquée. Mode S2 (fonctionnement bref) La machine peut être exploitée brièvement à...
  • Page 22: Mise À La Terre

    Utilisez des deux côtés 1 vis et 1 rondelle (9) pour fixer la poignée de transport (2) sur le réser- voir (fig. 3) 7.4 Mise à la terre Pour dériver les charges statiques, il est permis de mettre le boîtier à la terre. Pour ce faire, raccordez un câble dʼun côté...
  • Page 23: Charge Du Générateur De Courant

    être nécessaire pour démarrer jusqu’à ce que l’essence circule du réservoir au moteur. • Repoussez le levier étrangleur (4) après le démarrage du moteur. Attention ! Lors du démarrage avec le démarreur, le moteur qui démarre peut provoquer un retour soudain et des blessures au niveau de la main.
  • Page 24 9.3. Bougie dʼallumage (fig. 7) Contrôlez la bougie dʼallumage pour la première fois au but de 10 heures de service. Repérez les encrassements et nettoyez-les le cas échéant à lʼaide dʼune brosse à fils de cuivre. Effec- tuez ensuite une maintenance de la bougie dʼallumage toutes les 50 heures de service. •...
  • Page 25: Mise Au Rebut Et Recyclage

    et de substances inflammables. Les engrais ou autres produits chimiques pour jardins comprennent fréquemment des subs- tances qui accélèrent la corrosion des métaux. Nʼentreposez pas la machine à proximité dʼengrais ou dʼautre agents chimiques. Remise en service 1. Retirez la bougie dʼallumage. 2.
  • Page 26 Indice: Pagina: Introduzione Descrizione dell’apparecchio Prodotto ed accessori in dotazione Uso corretto Avvertenze generali di sicurezza Caratteristiche tecniche Prima della messa in esercizio Pulizia, manutenzione e conservazione Smaltimento e riciclaggio Eliminazione delle anomalie Dichiarazione di conformità IT/CH...
  • Page 27: Spiegazione Dei Simboli Sull'apparecchio

    Spiegazione dei simboli sull’apparecchio L’uso di simboli nel presente manuale ha lo scopo di convogliare l’attenzione del lettore sui possibili rischi. I simboli di sicurezza e le spiegazioni che li accompagnano devono essere compresi perfettamente. Gli avvertimenti in sé non eliminano i rischi e non possono sostituire le misure idonee ad evitare gli incidenti. Leggere il manuale operativo.
  • Page 28: Introduzione

    1. INTRODUZIONE Prima del montaggio e della messa in funzione, leggere tutto il testo delle istruzioni per l‘uso. Le presenti istruzioni per l’uso le consentono di conoscere l‘utensile elettrico e di sfruttare le sue possibilità d’impiego conformi. Le istruzioni per l‘uso contengono avvertenze importanti su come utilizzare l‘utensile elettrico in modo sicuro, corretto ed economico e su come evitare i pericoli, risparmiare sui costi di ripara- zione, ridurre i tempi di inattività...
  • Page 29: Prodotto Ed Accessori In Dotazione

    9. Set di viti per montaggio della maniglia 5. Interruttore ON/OFF 1. Tappo del serbatoio di trasporto 2. Maniglia 6. Presa 230 V ~ 10. Chiave della candela di accensione 7. Avviatore 3. Dispositivo di sicurezza 11. accensione autoavvolgente 4. Levetta della valvola 8.
  • Page 30 - immagazzinate il carburante in recipienti progettati in modo specifico e approvati per tale scopo; - eseguire il rifornimento solo all’aperto e non fumare durante la sua esecuzione; - aggiungere carburante prima di avviare il motore. Non rimuovete mai il tappo del serbato- io della benzina se il motore è...
  • Page 31 ponenti che influenzano la velocità di rotazione non devono essere modificati o sostituiti. o) Controllare regolarmente eventuali segni di perdite o tracce di abrasione nel sistema del carburante, come ad esempio tubi permeabili, morsetti allentati o mancanti e danni al ser- batoio o al tappo dello stesso.
  • Page 32 mare! Non toccate parti mosse meccanicame te o molto calde. Non togliete nessuna copertura di • protezione. Gli apparecchi non devono essere esposti ad umidità o polvere. Temperatura ambiente con- • sentita da -10 a +40°C, altitudine max. sul livello del mare di 1000 m, umidità relativa dell’a- ria: 90% (senza formazione di condensa).
  • Page 33: Prima Della Messa In Esercizio

    L’apparecchio può essere fatto funzionare brevemente con la potenza indicata. Poi l’apparec- chio deve rimanere ferma per un intervallo di tempo per non surriscaldarsi eccessivamente. 7. PRIMA DELLA MESSA IN ESERCIZIO 7.1 Sicurezza elettrica • I cavi elettrici di alimentazione e gli apparecchi collgati devono essere in perfette condizioni. •...
  • Page 34: Messa A Terra

    Utilizzare su entrambi i lati 1 vite e 1 rondella (9) per fissare la maniglia di trasporto (2) sul ser- batoio (Fig.3) 7.4 Messa a terra Per la conduzione delle cariche elettriche è consentita una messa a terra del rivestimento. A tal fine collegate un cavo con unʼestremità...
  • Page 35: Sollecitazione Del Gruppo Elettrogeno

    • Dopo l’avvio del motore riportate indietro la levetta dell’aria (4). Attenzione! In caso di avviamento con avviatore autoavvolgente è possibile che a causa di un improvviso contraccolpo dovuto al motore che si avvia vengano causate lesioni alle mani. Portate dei guan- ti al momento dellʼaccensione.
  • Page 36 9.3. Candela di accensione (fig. 7) Controllare la candela per lo sporco e la sporcizia dopo 10 ore di funzionamento e, se neces- sario, pulire con una spazzola di filo di rame. Successivamente la manutenzione della candela ogni 50 ore di funzionamento. •...
  • Page 37: Smaltimento E Riciclaggio

    tela la corda di avviamento un paio di volte, per umettare i componenti interni con lʼolio. In- serite di nuovo la candela di accensione. 8. Pulite lʼinvolucro esterno dellʼapparecchio. 9. Conservate lʼutensile in un luogo freddo e asciutto, distante da fonti di accensione e sostan- ze combust bili.
  • Page 38 Table of contents: Page: Introduction Layout Scope of delivery Intended use Safty iformation Technical data Before putting the machine into operation Operation Cleaning, maintenance and storage Disposal and recycling Troubleshooting Declaration of conformity...
  • Page 39: Explanation Of The Symbols On The Equipment

    Explanation of the symbols on the equipment The use of symbols in this manual is intended to draw your attention to possible risks. The safety symbols and the explanations that accompany them must be perfectly understood. The warnings in themselves do not remove the risks and cannot replace correct actions for preventing accidents.
  • Page 40: Introduction

    1. Introduction Read through the complete text in the operating instructions before installing and commissioning the device. The operating instructions are intended to help the user to become familiar with the ma- chine and take advantage of its application possibilities in accordance with the recommendations. The operating instructions contain important information on how to operate the machine safely, pro- fessionally and economically, how to avoid danger, costly repairs, reduce downtimes and how to increase reliability and service life of the machine.
  • Page 41: Scope Of Delivery

    3. Scope of delivery Open the packaging and remove the device carefully. • Remove the packaging material. • Check that the delivery is complete. • Check the device and accessory parts for transport damage. • ATTENTION The device and packaging materials are not toys! Children must not be allowed to play with plastic bags, film and small parts! There is a risk of swallowing and suffocation! 4.
  • Page 42 b) Replace faulty silencers; c) Before using, always visually inspect to see that the tools are not worn or damaged. Re- place worn or damaged elements and bolts in sets to preserve balance. d) Do not smoke near the generator. e) Do not wear loose clothing, jewellery, or similar items that could be caught in the starter or other moving parts.
  • Page 43 c) Allow the engine to cool before storing in any enclosure. d) To reduce the fire hazard, keep the engine, silencer, battery compartment and petrol stor- age area free of vegetative material and excessive grease. e) Replace worn or damaged parts for safety. f) If the fuel tank has to be drained, this should be done outdoors.
  • Page 44: Technical Data

    6. TECHNICAL DATA Model SG950 Generator Synchronous IP class: IP23M Continuous power S1 (RPR): 650VA / 650W Maximum power S2, 2 min.: 720VA / 720W Rated voltage: 230V~ Rated current: 3,0A ~ Frequency: 50 Hz Drive engine design 2-stroke, air-cooled Quality class Class B Performance class...
  • Page 45: Connecting To Earth

    7.3 Assembly Take the measuring jug out of the tank (Fig. 3a) and fit into the recess on the bottom of the tank cover (Figure 3b). Use on both sides 1 screw and 1 washer (9) to fast the carry handle (2) onto the tank (Fig.3) 7.4 Connecting to earth The housing is allowed to be connected to earth in order to discharge static electricity.
  • Page 46: Starting The Engine

    • Make sure that the generator has sufficient ventilation Make sure that the ignition cable is secured to the spark plug • Inspect the immediate vicinity of the generator • Disconnect any electrical equipment which may already be connected to the generator •...
  • Page 47: Cleaning, Maintenance And Storage

    9. Cleaning, maintenance, storage and transport Switch off the motor and pull the spark plug boot from the spark plug before doing any cleaning and maintenance work on the equipment. Important: Switch off the machine immediately and contact your service station: •...
  • Page 48: Disposal And Recycling

    9.4 Maintenance There are no parts inside the equipment which require additional maintenance. 9.5 Storage Please note: If you fail to follow these instructions correctly, deposits may form on the interior of carburetor which may result in the engine being more difficult to start or the machine suffering permanent damage.
  • Page 49: Troubleshooting

    11. Troubleshooting Fault Possible cause Remedy Automatic oil cut-out has not Check the oil level, top up with responded engine oil Engine does not start No fuel Refuel Controller or capacitor defective Contact your dealer Generator has too little Overcurrent circuit-breaker has Actuate the circuit-breaker and or no voltage triggered...
  • Page 50 Obsah: Strana: Úvod Popis přístroje Rozsah dodávky Použití v souladu s určením Bezpečnostní pokyn Technické údaje Před uvedením do provozu Obsluha Čištění, údržba a skladování Likvidace a recyklace Řešení problémů Prohlášení o shodě...
  • Page 51: Vysvětlení Symbolů Na Přístroji

    Vysvětlení symbolů na přístroji Symboly použité v této příručce vás mají upozornit na možná rizika. Bezpečnostní symboly a vysvětlivky, které je provázejí, musejí být přesně pochopeny. Samotné výstrahy rizika neodstraní a nemohou nahradit správná opatření pro prevenci úrazů. Přečtěte si provozní příručku. Před použitím přístroje si vždy přečtěte příslušný...
  • Page 52: Popis Přístroje

    1. EINLEITUNG Před montáží a zprovozněním si přečtěte celý text návodu k obsluze. Tento návod k obsluze vám má usnadnit seznámení s elektrickým nástrojem a jeho používání v souladu s určením. Návod k obsluze obsahuje důležité pokyny, jak s elektrickým nástrojem pracovat bezpečně, odborně...
  • Page 53: Rozsah Dodávky

    9. Sada šroubů pro montáž přenášecího 5. Spínač/vypínač 1. Víko nádrže držadla 2. Přenášecí držadlo 6. Zásuvka 230 V 10. Klíč na zapalovací svíčky 3. Bezpečnostní vypínač 7. Reverzní startér 11. Kabel zapalování 4. Páka sytiče 8. Benzínový kohout 12. Výfuk 3.
  • Page 54 - Dolévejte palivo před spuštěním motoru. Nikdy nesnímejte kryt palivové nádrže ani nedo- lévejte palivo, když motor běží nebo je ještě horký. - Pokud dojde k rozlití paliva, nepokoušejte se nastartovat motor, ale vzdalte stroj z pros- toru, kde je rozlité palivo, a odstraňte všechny zápalné zdroje, dokud nevyprchají výpary z paliva.
  • Page 55: Doplňující Bezpečnostní Pokyny

    -před doplňováním paliva r) Aby nedopatřením nedošlo ke spuštění, odstraňte před kontrolou nebo nastavováním ge- nerátoru či motoru zapalovací svíčku nebo kabel zapalování. 4. Údržba a skladování a) Abyste zajistili, že je vybavení v bezpečném provozním stavu, utáhněte všechny matice, čepy a šrouby.
  • Page 56: Technické Údaje

    vlivu na aktuální imisní hranici pracovníka zahrnují vlastnosti pracovního prostoru jiné zdro- je hluku atd., jako např. počet strojů a jiných hraničních procesů a časový úsek, v němž je pracovník obsluhy vystaven hluku. Povolená imisní hladina se rovněž může odlišovat pod- le příslušné...
  • Page 57: Ochrana Životního Prostředí

    7.2 Ochrana životního prostředí Znečištěný materiál po údržbě a provozní látky je nutné odevzdat ve sběrně, která je k tomu • určena. Obalový materiál, kov a plasty odevzdejte k recyklaci. • 7.3 Montáž Z nádrže vyjměte odměrku (obrázek 3a) a zasuňte ji do drážky na spodní straně víka nádrže (obrázek 3b).
  • Page 58: Spuštění Motoru

    8. OVLÁDÁNÍ Pozor! Před prvním uvedením do provozu musíte nádrž naplnit směsí benzínu v poměru 1:40. Za tím účelem můžete použít odměrku (obr. 3b), která se nachází uvnitř nádrže (pozor: množství naplnění na jeden dílek na stupnici je 20 ml). Benzínovou směs musíte před na- léváním do nádrže protřepat.
  • Page 59: Čištění, Údržba A Skladování

    9. ČIŠTĚNÍ, ÚDRŽBA A SKLADOVÁNÍ Před čištěním a údržbou vypněte motor a vytáhněte vidlici ze zapalovací svíčky. Pozor: Přístroj ihned vypněte a obraťte se na servisní stanici: • při neobvyklých otřesech nebo zvucích • pokud se motor zdá být přetížen nebo má vadné zapalování 9.1 Čištění...
  • Page 60 9.4 Údržba Uvnitř nástroje se nenacházejí žádné díly, na kterých by bylo potřeba provádět údržbu. 9.5 Skladování Pozor: Při nesprávném dodržování těchto pokynů se uvnitř karburátoru mohou tvořit usazeniny, což může způsobit obtížnější startování motoru nebo trvale poškodit stroj. 1. Provádějte všechny všeobecné údržbové práce, které jsou uvedeny v návodu k obsluze v oddíle Údržba.
  • Page 61: Likvidace A Recyklace

    10. LIKVIDACE A RECYKLACE Nářadí je v obalu, aby se zabránilo přepravním škodám. Tento obal je surovina a lze ho tudíž recyklovat nebo vrátit do oběhu surovin. Nářadí a jeho příslušenství se skládají z různých materiálů, jako např. kov a plasty. Vadné součásti zlikvidujte jako speciální odpad. Zeptejte se ve specializovaném obchodě...
  • Page 62 Obsah: Strana: Úvod Popis prístroja Rozsah dodávky Použitie v súlade s určením Bezpečnostné upozornenie Technické údaje Pred uvedením do prevádzky Obsluha Čistenie, údržba a skladovanie Likvidácia a opätovné zhodnotenie Odstraňovanie porúch Vyhlásenie o zhode...
  • Page 63: Vysvetlenie Symbolov Na Prístroji

    Vysvetlenie symbolov na prístroji Použitie symbolov v tomto manuáli má upriamiť vašu pozornosť na možné riziká. Bezpečnostné symboly a vysvetlenia, ktoré ich sprevádzajú, musia byť presne pochopené. Výstrahy samotné neodstraňujú riziká a nemôžu nahradiť správne opatrenia na zabránenie nehodám. Prečítajte si návod na obsluhu. Skôr ako použijete prístroj, vždy sa pozrite do príslušného odseku príručky pre užívateľa.
  • Page 64: Úvod

    1. ÚVOD Pred montážou a uvedením do prevádzky si prečítajte cely text návodu na obsluhu. Návod na obsluhu vám má uľahčiť, aby ste sa oboznámili s elektrickým náradím a používali ho v súlade s jeho určenými možnosťami použitia. Návod na obsluhu obsahuje dôležité pokyny, ako s elektrickým náradím bezpečne, odborne a hospodárne pracovať...
  • Page 65: Rozsah Dodávky

    5. Zapínač/vypínač 9. Súprava skrutiek pre montáž držiaku 1. Veko palivovej nádrže 2. Držiak 6. 230V zásuvka 10. Kľúč na zapaľovacie sviečky 3. Spúšťač so zaisťovačom 7. Reverzný štartér 11. Zapaľovací kábel 4. Páčka sýtiča 8. Benzínový kohút 12. Výfuk 3.
  • Page 66 - Keď je palivo rozliate, nepokúšajte sa naštartovať motor, ale odíďte so strojom z oblasti rozliateho paliva a zamedzte všetky zápalné zdroje, kým nevyprchajú všetky palivové výpary. - Viečko palivovej nádrže a kanistra opäť bezpečne nasaďte. b) Vymeňte chybné tlmiče hluku. c) Pred použitím vždy vizuálnou kontrolou skontrolujte, či nie sú...
  • Page 67: Dodatočné Bezpečnostné Upozornenia

    r) Predtým ako budete generátor alebo motor kontrolovať alebo nastavovať, musí sa odstrániť zapaľovacia sviečka resp. zapaľovací kábel, aby sa zabránilo neúmyselnému spusteniu. 4. Údržba a skladovanie a) Utiahnite všetky matice, čapy a skrutky, aby ste zaistili, že je vybavenie v bezpečnom pre- vádzkovom stave.
  • Page 68: Technické Údaje

    nych bezpečnostných opatrení. Ovplyvňujúce činitele na aktuálnu úroveň imisií pracovnej sily zahŕňajú vlastnosti pracovného priestoru, iné zdroje hluku, atď., ako napr. počet strojov a iných susediacich procesov a časový interval, počas ktorého je obsluha vystavená hluku. Takisto sa môže prípustná úroveň imisií líšiť z krajiny na krajinu. Napriek tomu sa táto infor- mácia poskytuje prevádzkovateľovi stroja, aby mohol urobiť...
  • Page 69: Ochrana Životného Prostredia

    7.2 Ochrana životného prostredia Znečistený údržbový materiál a prevádzkové látky odovzdajte do na to určenej zberne • Obalový materiál, kov a plasty odovzdajte na recykláciu. • 7.3 Montáž Vyberte odmerku z nádrže (obrázok 3a) a zasuňte ju do výrezu na spodnej strane veka nádrže (obrázok 3b).
  • Page 70: Obsluha

    8. OBSLUHA Pozor! Pred prvým uvedením do prevádzky musíte nádrž naplniť zmesou benzínu v zmiešavacom pomere 1:40. Na to môžete použiť odmerku nachádzajúcu sa vnútri nádrže (obr. 3b) (Pozor: Množstvo náplne na jeden dielik je 20 ml). Benzínová zmes sa musí pred napl- nením do nádrže pretrepať.
  • Page 71 9.1 Čistenie • Ochranné zariadenia, vzduchové štrbiny a teleso motora udržiavajte podľa možností bez prachu a nečistôt. Prístroj čistite čistou handričkou alebo vyfúkajte stlačeným vzduchom pri nízkom tlaku. • Odporúčame, aby ste prístroj vyčistili hneď po použití. • Prístroj pravidelne čistite vlhkou handričkou a malým množstvom mazľavého mydla. Nepoužívajte čistiace prostriedky ani rozpúšťadlá, mohli by poškodiť...
  • Page 72: Opätovné Uvedenie Do Prevádzky

    9.4 Údržba Vo vnútri prístroja sa nenachádzajú žiadne diely, pri ktorých by sa mala vykonávať údržba. 9.5 Uskladnenie Pozor: Ak správne nedodržíte tieto pokyny, vnútri karburátora sa môžu vytvoriť usadeniny, ktoré môžu mať za následok ťažšie štartovanie motora alebo permanentné poškodenie stroja. 1.
  • Page 73: Odstraňovanie Porúch

    11. ODSTRAŇOVANIE PORÚCH Porucha Možná príčina Náprava Zapaľovaciu sviečku vyčistite resp. vymeňte. Vzdialenosť elektród 0,6 mm Motor sa nedá Zapaľovacia sviečka je znečistená sadzami naštartovať žiadne palivo Doplňte palivo/ nechajte skontrolovať benzínový kohút Chybný regulátor alebo kondenzátor Vyhľadajte špecializovaného predajcu Generátor má...
  • Page 75: Konformitätserklärung

    Fabrikation von Holzbearbeitungsmaschinen GmbH • Günzburger Str. 69 • D-89335 Ichenhausen 12. Konformitätserklärung erklärt folgende Konformität gemäß prehlasuje nasledujúcu zhodu podla smernice EU a EU-Richtlinie und Normen für den Artikel noriem pre výrobok kinnitab järgmist vastavus vastavalt ELi direktiivi ja...
  • Page 76 ónothæfur er vegna gallaðs efnis eða skemmda í framleiðslu innan ákveðins tímabils. Af því er tekur til hluti sem ekki eru framleiddir af okkur, ábyrgjumst við af því leiti aðeins að við eigum rétt á ábyrgðarkröfum gagnvart birgðasölum. Kostnaður vegna uppsetningar á nýjum scheppach Fabrikation von Holzbearbeitungsmaschinen GmbH | Günzburger Str. 69 | D-89335 Ichenhausen | www.scheppach.com...

Ce manuel est également adapté pour:

Sg950

Table des Matières