LawnMaster CLGT6014A Mode D'emploi
Table des Matières
Les langues disponibles
Les langues disponibles
Liens rapides
Operators Manual / Mode D'emploi
EN p. 2
60V MAX*-14" Li-ion Cordless Grass Trimmer CLGT6014A
FR p. 31
Coupe-gazon Sans Fil CLGT6014A De 35,56CM (14 po) À
Batterie Lithium-ion 60V MAX*
* Maximum initial battery workload voltage
(measured without a workload) is 60 volts.
Nominal voltage is 54 volts
* Tension batterie de la charge de travail initiale
maximale (mesurée sans charge de travail)
est de 60 volts.
Tension nominale est de 54 volts
MNL_CLGT6014A_V1
Read all safety rules and instructions carefully before operating this tool.
Distributed By Cleva North America 601 Regent Park Court Greenville, SC 29607 (866)-384-8432
Lisez attentivement l'ensemble des règles de sécurité et les instructions avant d'utiliser cet appareil.
Distribué par Cleva North America 601 Regent Park Court Greenville, SC 29607 (866)-384-8432
Chapitres
Table des Matières
Dépannage

Manuels Connexes pour LawnMaster CLGT6014A


Sommaire des Matières pour LawnMaster CLGT6014A
-
Page 30: Notes
NOTES... - Page 31 UTILISATION 45-51 ENTRETIEN 52-53 DÉPANNAGE MISE AU REBUT DES BATTERIES DANS DES CONDITIONS RESPECTUEUSES DE L'ENVIRONNEMENT GARANTIE DE LA TONDEUSE LawnMaster 60 V ® VUE ÉCLATÉE LISTE DES PIÈCES REMARQUES SPÉCIFICATIONS Coupe-gazon sans fil fonctionnant sur batterie d’une tension maximale de 60 volts...
-
Page 32: Règles Générales De Sécurité
RÈGLES GÉNÉRALES DE SÉCURITÉ AVERTISSEMENT Lisez et assimilez toutes les instructions avant d'utiliser ce produit. Le non-respect des instructions ci-dessous peut entraîner des risques d'électrocution, d'incendie et/ou de blessures graves. ■ N’utilisez pas d’outils électriques dans des atmosphères explosives, comme en présence de liquides, de gaz ou de poussières inflammables. -
Page 33: Sécurité Des Enfants
RÈGLES GÉNÉRALES DE SÉCURITÉ ■ Maintenez les personnes présentes, les enfants et les animaux domestiques à une distance d’au moins 15 m (50 pieds). ■ N’utilisez jamais l’appareil lorsque vous êtes fatigué, malade ou sous l'effet de l’alcool, de drogues ou de médicaments. ■... -
Page 34: Règles De Sécurité Spécifiques
RÈGLES DE SÉCURITÉ SPÉCIFIQUES CONSIGNES DE SÉCURITÉ RELATIVES AUX BATTERIES ■ Les outils fonctionnant sur batteries n'ayant pas besoin d'être branchés sur une prise secteur, ils sont toujours en état de fonctionnement. Tenez compte des dangers possibles lorsque l’outil n’est pas en usage et lors du remplacement des batteries. Le respect de cette consigne réduira les risques d’incendie, de choc électrique et de blessures graves. -
Page 35: Batterie Et Chargeur
RÈGLES DE SÉCURITÉ SPÉCIFIQUES BATTERIE ET CHARGEUR ATTENTION N’UTILISEZ QUE DES BATTERIES DE RÉCHANGE LawnMaster , LES AUTRES TYPES ® POUVANT CAUSER DES DYSFONCTIONNEMENTS OU ENDOMMAGER L’APPAREIL. Utilisez une batterie LawnMaster® de 60V et lithium-ion. Assurez-vous que l’appareil est hors tension avant insertion de la batterie. L’insertion d’une batterie dans un outil électrique sous tension peut entraîner des accidents. - Page 36 RÈGLES DE SÉCURITÉ SPÉCIFIQUES Utilisez le chargeur uniquement avec les batteries d’origine appropriées. La charge d’autres batteries peut entraîner des blessures et un risque d'incendie. Évitez toutes détériorations mécaniques au chargeur. Celles-ci pourraient provoquer des court-circuits internes. N’utilisez pas le chargeur sur une surface inflammable (p. ex du papier, des textiles). Risque d’incendie dû...
-
Page 37: Symbols
SYMBOLES Vous trouverez la plaque signalétique sur l'appareil. Parmi ces instructions figurent entre autres les symboles et abréviations suivants. Familiarisez-vous avec eux afin de réduire les risques de blessures corporelles et de dommages matériels, par exemple. SYMBOLE NOM DÉSIGNATION/EXPLICATION Volts Tension Courant Ampères... -
Page 38: Conservez Ces Consignes
SYMBOLES Les termes de mise en garde suivants et leur signification visent à expliquer le degré de risque associé à cet appareil. SYMBOLE MISE EN GARDE SIGNIFICATION Indique une situation de danger immédiat qui, si elle n’est pas DANGER: évitée, provoquera des blessures graves, voire la mort. Indique une situation de danger potentiel qui, si elle n’est pas AVERTISSEMENT: évitée, peut provoquer des blessures graves, voire la mort. -
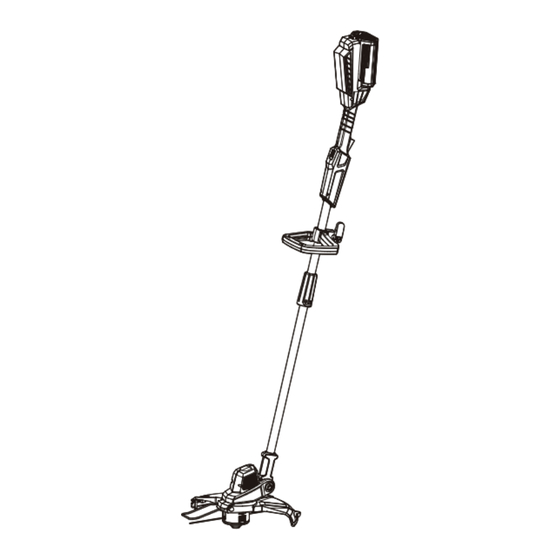
Page 39: Caractéristiques De L'appareil
CARACTERISTIQUES DE L’APPAREIL Fig. 1... -
Page 40: 17. Chargeur De Batterie
CARACTERISTIQUES DE L’APPAREIL Caractéristiques de la tondeuse (voir Figure 1) Pour une utilisation de cet appareil en toute sécurité, assimilez bien les informations inscrites sur l'appareil et figurant dans ce manuel d'utilisation. Préparez également soigneusement votre projet de travail. Avant d’utiliser cet appareil, familiarisez-vous avec toutes les caractéristiques de fonctionnement ainsi que les règles de sécurité. -
Page 41: Montage
MONTAGE AVERTISSEMENT Avant de procéder au montage, assurez-vous que le coupe-gazon est hors tension et la batterie retirée. Si des pièces sont manquantes ou endommagées, ne faites pas fonctionner ce produit avant de les avoir remplacées. Le non-respect de cet avertissement peut entraîner des blessures corporelles graves. -
Page 42: Dispositif De Sécurité (Voir Figure 5)
MONTAGE Dispositif de sécurité (voir Figure 5) ■ Alignez le dispositif de sécurité sur la tête du coupe-gazon. ■ Fixez-le en serrant les trois vis de montage à l’aide d’un tournevis. Fig. 5 INSTALLATION ET RETRAIT DU BLOC BATTERIE Pour installer le bloc batterie: ■... -
Page 43: Bloc Batterie Et Chargeur
BLOC BATTERIE ET CHARGEUR CHARGE DE LA BATTERIE ■ Utilisez uniquement des chargeurs de batterie LawnMaster® 60 V. Le chargeur de batterie fourni est conçu spécifiquement pour la batterie à Lithium-Ion utilisée dans cet appareil de jardinage. ■ Vérifiez la tension d’alimentation! Les chargeurs de batterie fonctionnent sur 120 V. -
Page 44: Panneau Des Témoins Led De La Batterie
BLOC BATTERIE ET CHARGEUR Les témoins lumineux qui se trouvent sur le chargeur indiquent l'état du chargeur: SYMBOLE TEMOINS LUMINEUX ÉTAT Rouge, continu Branché à la source d'alimentation Vert, clignotant Charge en cours Vert, continu Entièrement chargée Problème de charge: Rouge, clignotant Voir Problème technique PANNEAU DES TÉMOINS LED DE LA BATTERIE... -
Page 45: Utilisation
UTILISATION UTILISATION PRÉVUE Ce coupe-gazon CLGT6014A est équipé d'une batterie dont la tension nominale est de 60V. 60LFC01-ETL désigne le chargeur correspondant ayant une tension de charge de 60V. Cet appareil est destiné à la coupe de l'herbe, des mauvaises herbes ou d'une végétation similaire dans les zones difficilement accessibles, par exemple sous les buissons, sur les pentes et les bords. -
Page 46: Pivotement De La Tête (Voir Figures 7 À 10)
UTILISATION PIVOTEMENT DE LA TÊTE (voir Figures 7 à 10) ■ Pour faire pivoter la tête, poussez le bouton de pivot (10), puis réglez-la sur l’une des 7 positions indiquées (A) (Fig. 7). ■ Réglez l'angle de la tête de coupe en fonction de l'utilisation prévue. -
Page 47: Remplacement De La Ligne (Voir Figures. 15-18)
■ Remettez en place la jupe de la bobine en enfonçant les ergots dans la fente située sur la tête du fil, puis maintenez-les enfoncés jusqu’à ce la jupe de la bobine se verrouille en place. REMARQUE: Utilisez une bobine de remplacement LawnMaster – Modèle N° RS0606. Cavité d'ancrage... - Page 48 UTILISATION REMARQUE: Retirez tout fil ancien restant sur la bobine. Utilisez exclusivement un fil rond en monofilament de diamètre : 2 mm (0,080 po). ■ Prenez une nouvelle ligne de coupe d’une longueur suffisante. Pliez-la en deux, puis réglez-la de manière à que l’une des extrémités soit plus longue (environ 9 cm) que l’autre (Fig. 16). ■...
-
Page 49: Fonctionnement Général
UTILISATION FONCTIONNEMENT GÉNÉRAL ■ Vérifiez le produit, son bloc batterie et son chargeur ainsi que ses accessoires afin de détecter tout dommage éventuel avant chaque utilisation. N’utilisez pas le produit s'il est endommagé ou s'il présente des signes d'usure. ■ Vérifiez attentivement si les accessoires et lames de coupe sont correctement fixés. ■... - Page 50 UTILISATION ■ Maintenez la tête de coupe à un angle à environ 30° du sol lors de la coupe. Évitez de la presser contre le sol sauf en cas d’avancement de ligne (Fig. 23). Fig. 23 REMARQUE: Laissez le dispositif de coupe faire le travail. Laissez-le travailler à son propre rythme, ne forcez jamais dans la zone à...
-
Page 51: Après Utilisation
UTILISATION APRÈS UTILISATION ■ Éteignez l'appareil, retirez le bloc batterie et laissez-le refroidir. ■ Vérifiez, nettoyez et entreposez l'appareil comme décrit ci-dessous. NETTOYAGE GÉNÉRAL ■ Nettoyez l'appareil à l'aide d'un chiffon sec. Utilisez une brosse pour les zones difficiles d'accès. ■... -
Page 52: Entretien
ENTRETIEN RÉPARATIONS ■ Aucune des pièces de ce produit ne peut être réparée par le consommateur. Contactez un spécialiste qualifié pour vérification et réparation. CONSERVATION ■ Suivez les instructions de nettoyages décrites ci-dessus. ■ Rangez le produit et ses accessoires dans un endroit sec et à l'abri du gel. ■... -
Page 53: Bloc Batterie
ENTRETIEN ■ Nettoyez les pièces en plastique et le boîtier à l’aide d’un tissu fin et humide. N'utilisez aucun solvant ou détergent sur le boîtier ou les composants en plastique. Certains produits de nettoyage domestique peuvent provoquer des dommages et des risques d'électrocution. BLOC BATTERIE ■... -
Page 54: Dépannage
DÉPANNAGE Les dysfonctionnements présumés sont souvent dus à des problèmes que l'utilisateur peut réparer lui-même. Vérifiez le produit à l'aide de cette section. Dans la plupart des cas, le problème peut être résolu rapidement. AVERTISSEMENT Suivez uniquement les étapes décrites dans ces instructions! Si vous n'êtes pas en mesure de résoudre le problème, les travaux d'inspection, d'entretien et de réparation supplémentaires doivent être effectués par un centre de réparation agréé... -
Page 55: Mise Au Rebut Des Batteries Dans Des Conditions Respectueuses De L'environnement
MISE AU REBUT DES BATTERIES DANS DES CONDITIONS RESPECTUEUSES DE L'ENVIRONNEMENT Les produits toxiques et corrosifs suivants se trouvent dans les batteries utilisées avec ce bloc batterie: Lithium-ion, une substance toxique. AVERTISSEMENT Tous les produits toxiques doivent être éliminés d'une manière déterminée afin de ne pas contam- iner l'environnement. -
Page 56: Garantie De La Tondeuse Lawnmaster ® 60 V
à la charge de l'acheteur. Il incombe à l'acheteur de payer les frais de transport de toute pièce soumise à des fins de remplacement dans le cadre de cette garantie, sauf si ce retour est demandé par écrit par LawnMaster. LA PRÉSENTE GARANTIE S'APPLIQUE UNIQUEMENT À L'ACHETEUR INITIAL DU PRODUIT SUR PRÉSENTATION D'UNE PREUVE D'ACHAT. -
Page 57: Vue Éclatée
VUE ÉCLATÉE VUE ÉCLATÉE DU MODÈLE CLGT6014A... -
Page 58: Liste Des Pièces
LISTE DES PIÈCES LISTE DES PIÈCES DU MODÈLE CLGT6014A Numéro de la pièce Numéro de pièce Description Quantité 121058101 Montage de la poignée principale 121058102 Montage de la poignée auxiliaire 121058103 Protection des fleurs 121058104 Protection contre les débris 121058105... -
Page 59: Remarques
REMARQUES...