KitchenAid KSIB900ESS Guide D'utilisation
Table des Matières
Les langues disponibles
Les langues disponibles
THANK YOU for purchasing this high-quality product. Register your range at www.kitchenaid.com. In Canada, register your range
at www.kitchenaid.ca.
For future reference, please make a note of your product model and serial numbers. These can be found on the label located on the oven
frame behind the top-right side of the oven door.
Model Number______________________________________________
Para una versión de estas instrucciones en español, visite www.kitchenaid.com.
Deberá tener a mano el número de modelo y de serie, que están ubicados en el marco del horno, detrás del lado derecho superior
de la puerta del horno.
W10896674A
Table of Contents
RANGE SAFETY .............................................................................2
The Anti-Tip Bracket ....................................................................2
KEY USAGE TIPS ...........................................................................5
®
Self-Cleaning Technology ............................................5
Surface Temperatures ..................................................................5
Preheating ....................................................................................5
Ceramic Glass Cooktop Cleaning ...............................................5
FEATURE GUIDE ............................................................................6
Electronic Oven Controls .............................................................9
COOKTOP .....................................................................................10
Cookware ...................................................................................13
Home Canning ...........................................................................14
OVEN .............................................................................................14
Aluminum Foil .............................................................................14
Positioning Racks and Bakeware ..............................................14
Roll-Out Rack .............................................................................15
Oven Vent ...................................................................................16
Sabbath Mode............................................................................16
Baking and Roasting ..................................................................17
Broiling........................................................................................17
Convection Cooking ..................................................................17
Proofing Bread ...........................................................................18
Cook Time ..................................................................................18
Meat Probe .................................................................................18
Baking Drawer ............................................................................18
Oven Light ..................................................................................19
RANGE CARE ...............................................................................19
Self-Clean Cycle .........................................................................19
General Cleaning ........................................................................20
Remove/Replace Drawer ...........................................................21
TROUBLESHOOTING ..................................................................22
ACCESSORIES .............................................................................24
WARRANTY ..................................................................................25
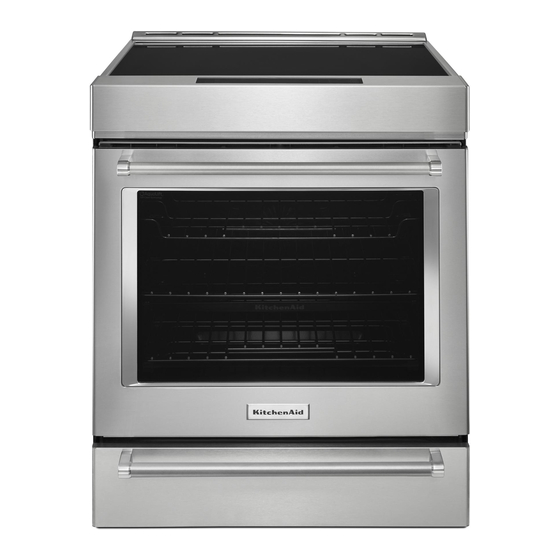
User Guide
Electric Induction Range
Serial Number_______________________________________________
Chapitres
Table des Matières
Dépannage

Manuels Connexes pour KitchenAid KSIB900ESS


Sommaire des Matières pour KitchenAid KSIB900ESS
- Page 26 Guide d’utilisation Cuisinière électrique à induction MERCI d’avoir acheté ce produit de grande qualité. Enregistrez la cuisinière sur www.kitchenaid.com. Au Canada, enregistrer la table de cuisson sur www.kitchenaid.ca. Pour référence ultérieure, consignez par écrit les numéros de modèle et de série de votre produit. Vous trouverez les numéros de modèle et de série sur la plaque signalétique située sur le châssis du four, derrière la partie supérieure droite de la porte du four.
-
Page 27: Sécurité De La Cuisiniére
SÉCURITÉ DE LA CUISINIÉRE Votre sécurité et celle des autres est très importante. Nous donnons de nombreux messages de sécurité importants dans ce manuel et sur votre appareil ménager. Assurez-vous de toujours lire tous les messages de sécurité et de vous y conformer. Voici le symbole d’alerte de sécurité. -
Page 28: Importantes Instructions De Sécurité
IMPORTANTES INSTRUCTIONS DE SÉCURITÉ AVERTISSEMENT : Pour réduire le risque d’incendie, de NE PAS TOUCHER LES ÉLÉMENTS DE SURFACE OU ■ choc électrique, de blessures ou de dommages lors de L’ESPACE PRÈS DES ÉLÉMENTS – Les éléments de l’utilisation de la cuisinière, il convient d’observer certaines surface peuvent être chauds même lorsqu’ils ont une teinte précautions élémentaires dont les suivantes : foncée. - Page 29 IMPORTANTES INSTRUCTIONS DE SÉCURITÉ Nettoyer la table de cuisson avec prudence – Si une Pour les cuisinières avec programme d’autonettoyage – ■ éponge ou un chiffon mouillé est utilisé pour essuyer les Ne pas nettoyer le joint de la porte – Le joint de la porte ■...
-
Page 30: Conseils Élémentaries D'utilisation
CONSEILS ÉLÉMENTARIES D’UTILISATION Technologie d’autonettoyage AquaLift Nettoyage de la table de cuisson ® en vitrocéramique Afin d’éviter d’endommager la table de cuisson, ne pas utiliser de laine d’acier, de nettoyants en poudre abrasifs, d’eau de Javel, de produit antirouille ou d’ammoniaque. 1. -
Page 31: Guide Des Caractéristiques
Ce manuel concerne plusieurs modèles. Le modèle que vous avez peut comporter toutes les caractéristiques énumérées ou seulement certaines d’entre elles. Consulter ce manuel ou la section d’aide des produits de notre site Internet www.kitchenaid.com. Au Canada, consulter la section d’aide des produits de notre site Internet www.kitchenaid.ca. - Page 32 Touche Caractéristique Instructions BAKE Cuisson au four 1. Appuyer sur BAKE (cuisson au four). (cuisson au four) et rôtissage 2. Régler la température souhaitée entre 170°F et 500°F (75°C et 260°C) en utilisant les touches numériques. La température par défaut est de 350°F (180°C). 3.
- Page 33 Touche Caractéristique Instructions EASY CONVECT Cuisson par 1. Appuyer sur EASY CONVECT BROIL (cuisson au gril par convection facile). BROIL convection 2. Appuyer sur “1” pour que le four convertisse automatiquement la température et la (cuisson au gril par durée pour la cuisson par convection. Appuyer sur “2” pour convertir manuellement convection facile) la température et la durée.
-
Page 34: Self Clean
Touche Caractéristique Instructions AQUALIFT Programme Voir la section “Programme de nettoyage”. SELF CLEAN de nettoyage (autonettoyage Aqualift) START Verrouillage des 1. Vérifier que le four est OFF (éteint). (Control Lock hold 3 commandes du 2. Appuyer pendant 3 secondes sur la touche START (Control Lock Hold 3 Sec) (mise sec to lock) four en marche [verrouillage des commandes - appuyer pendant 3 secondes]). - Page 35 Fahrenheit et Celsius Horloge 12/24 heures Le four est préréglé pour un affichage de la température en degrés 1. Appuyer sur CLOCK/TOOLS (réglages/outils) jusqu’à afficher Fahrenheit, mais on peut le permuter en degrés Celsius. “12/24 HOUR” (horloge sur 12/24 heures). 1.
-
Page 36: Table De Cuisson
Commande de décalage de température du four Ajustement de la température du four : 1. Appuyer sur CLOCK/TOOLS (réglages/outils) jusqu’à afficher IMPORTANT : Ne pas utiliser de thermomètre pour mesurer “TEMP CALIB” (étalonnage température). la température du four. Les éléments chauffants s’allument et s’éteignent en alternance pour maintenir une température 2. -
Page 37: Utilisation
Allumage d’une surface de cuisson : Cuisson par induction 1. Toucher directement la zone d’affichage correspondant à la La cuisson par induction est très différente des formes de cuisson surface de cuisson que l’on souhaite utiliser. Voir D, E, I et J traditionnelles. - Page 38 Pour désactiver la fonction de liaison : Indicateur de surface chaude 1. Toucher la touche BRIDGE (liaison). Si le témoin lumineux d’alimentation de la table de cuisson est Les surfaces de cuisson se remettent à fonctionner allumé, un “H” et un “0” clignotent sur l’affichage du réglage de indépendamment l’une de l’autre.
- Page 39 Fonction d’optimisation du rendement Signaux sonores Cette fonction vous permet d’augmenter le niveau de chaleur au- Les signaux sonores avertissent l’utilisateur de divers événements : delà du réglage de chaleur maximal 9 pendant 10 minutes ou moins. Un seul signal sonore REMARQUE : La fonction d’optimisation du rendement n’est disponible que sur une surface de cuisson à...
-
Page 40: Ustensiles De Cuisson
Ustensiles de cuisson Utiliser des ustensiles de cuisson de la même taille environ ■ que la surface de cuisson. L’ustensile de cuisson ne doit pas dépasser de plus de " (1,3 cm) hors de la zone de cuisson. IMPORTANT : Cette cuisinière est dotée d’éléments de cuisson à La taille minimale du plat est également indiquée sur la table induction. -
Page 41: Mise En Conserve À La Maison
Mise en conserve à la maison La mise en conserve peut se faire sur la table de cuisson à Sur les modèles en vitrocéramique, utiliser seulement des ■ induction. Voir la section “Ustensiles de cuisson” pour vérifier si autoclaves à fond plat pour éviter d’endommager la table de l’autoclave fonctionne sur la table de cuisson à... -
Page 42: Grille Déployante
Cuisson au four de biscuits et de gâteaux à étages Insertion de la grille déployante sur 2 grilles 1. Incliner l’avant de la grille vers le haut et insérer le pourtour de la grille dans l’encoche en “V” des glissières de grille à Cuisson au four de gâteaux à... -
Page 43: Évent Du Four
Dépose de la grille déployante 4. Appuyer sur CLOCK/TOOLS (horloge/outils). Trois signaux sonores retentissent. Appuyer ensuite sur “7”. “SAb” apparaît 1. Enfoncer complètement la grille coulissante jusqu’à ce qu’elle sur l’affichage. soit rétractée et emboîtée. Réglage de la température (lorsque le mode Sabbat 2. -
Page 44: Cuisson Au Gril
Cuisson au four vapeur Durant la cuisson ou le rôtissage par convection, les éléments de cuisson au four, cuisson au gril et de convection s’allument et La fonction de cuisson au four vapeur s’utilise avec la grille s’éteignent par intermittence tandis que le ventilateur fait circuler d’étuvage pour apporter davantage d’humidité... -
Page 45: Durée De Cuisson
Durée de cuisson Tiroir de cuisson AVERTISSEMENT AVERTISSEMENT Risque d'empoisonnement alimentaire Risque d'empoisonnement alimentaire Ne pas laisser des aliments dans un four plus d'une Ne pas laisser des aliments dans un four plus d'une heure avant ou après la cuisson. heure avant ou après la cuisson. -
Page 46: Entretien De La Cuisiniére
Lampe du four 6. Appuyer sur START (mise en marche). 7. Appuyer sur CANCEL LOWER (annulation four inférieur) après avoir terminé. La lampe du four est une ampoule standard de 40 watts pour appareil électroménager. Avant le remplacement, s’assurer que 8. -
Page 47: Remarques
étiquettes des produits de nettoyage. Pour plus d’informations, le nettoyage. consulter la section service à la clientèle à l’adresse www.kitchenaid.com. Au Canada, consulter notre site Web www.kitchenaid.ca. Du savon, de l’eau et un chiffon doux ou une éponge sont recommandés, à moins d’indications contraires. -
Page 48: Grilles Du Four
GRILLES DU FOUR 2. Appliquer quelques gouttes de nettoyant pour table de cuisson affresh ® sur les zones concernées. Méthode de nettoyage : Tampon en laine d’acier ■ Pour les grilles ternies qui glissent difficilement, enduire ■ légèrement les glissières d’huile végétale; cela facilitera leur glissement. -
Page 49: Dépose Et Réinstallation Du Tiroir
Dépose et réinstallation du tiroir Réinstallation : Enlever tous les articles de l’intérieur du tiroir de cuisson au four et laisser la cuisinière refroidir complètement avant d’essayer 1. Aligner les encoches de l’avant du tiroir avec les encoches des d’enlever le tiroir. glissières latérales à... -
Page 50: Dépannage
QR avec votre appareil mobile, ou visiter le site Internet http://kitchenaid.custhelp.com. Au Canada, visiter le site Internet http://www.kitchenaid.ca. Vous pouvez adresser tous commentaires ou questions par courrier à l’adresse ci-dessous : Au Canada : Aux États-Unis :... - Page 51 Problème Causes et/ou solutions possibles “F” ou “C” ainsi que des chiffres clignotent-ils sur l’affichage? Si “F” ou “C” ainsi qu’un chiffre clignotent en alternance sur l’affichage, consulter la section suivante pour trouver une éventuelle solution : La table de cuisson s’est Un objet, des liquides ou des saletés exercent une pression sur le tableau de commande - éteinte et émet un signal Bien essuyer les touches ou retirer tout objet qui pourrait gêner.
-
Page 52: Accessoires
été éteinte si la température détectée est trop élevée. ACCESSOIRES Pour les accessoires, consulter notre site Web www.kitchenaid.com ou nous contacter au 1-800-422-1230. Au Canada, visitez notre site Web à l’adresse www.kitchenaid.ca ou appelez-nous au 1-800-807-6777. -
Page 53: Garantie
EXONÉRATION DE RESPONSABILITÉ DANS LES DOMAINES NON COUVERTS PAR LA GARANTIE KitchenAid décline toute responsabilité au titre de la qualité, de la durabilité ou en cas de dépannage ou de réparation nécessaire sur ce gros appareil ménager autre que les responsabilités énoncées dans la présente garantie. Si vous souhaitez une garantie plus étendue ou plus complète que la garantie limitée fournie avec ce gros appareil ménager, adressez-vous à... - Page 54 Notes...
- Page 55 Notes...
- Page 56 W10896674A ® /™ © 2016. Used under license in Canada. All rights reserved. SP PN W10898308 Utilisé sous licence au Canada. Tous droits réservés. 6/16...