Qlima EOR 1515 LCD Manuel D'utilisation

Qlima EOR 1515 LCD Manuel D'utilisation

Masquer les pouces Voir aussi pour EOR 1515 LCD:

Publicité

Les langues disponibles

Les langues disponibles

Liens rapides

MANUEL D'UTILISATION
3
4
>
GEBRUIKSAANWIJZING
1
EOR 1515 LCD
OPERATING MANUAL
ISTRUZIONI D'USO
2
18
34
52

Publicité

Table des Matières
loading

Sommaire des Matières pour Qlima EOR 1515 LCD

  • Page 1 EOR 1515 LCD MANUEL D’UTILISATION OPERATING MANUAL ISTRUZIONI D’USO > GEBRUIKSAANWIJZING...
  • Page 2 à condition de l’utiliser de façon responsable et correcte. Pour assurer à votre produit de chauffage Qlima une durée de vie et une sécurité d’utilisation maximum, lisez attentivement ce manuel avant utilisation et conservez-le pour pouvoir le consulter ultérieurement.
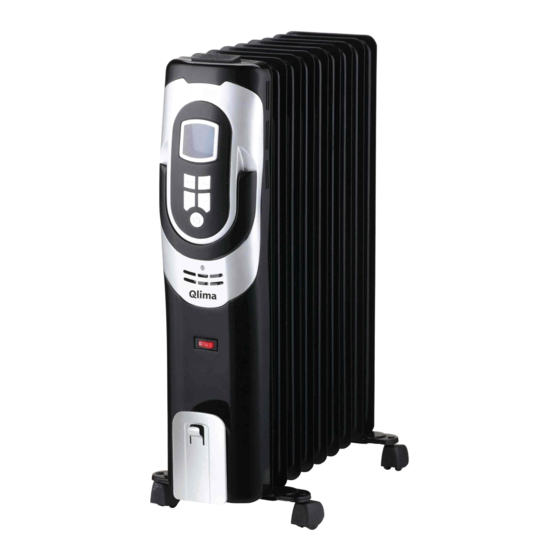
  • Page 3 PRINCIPAUX BELANGRIJKE ONDERDELEN ÉLÉMENTS Roues pivo- Bedieningspaneel tantes (2) Uitlaat van droge lucht Bouton d'alimentation Uitneembaar  waterreservoir Boutons Inlaat van vochtige Écran d'affi- lucht chage à cris- Luchtfilter taux liquides  Afvoertuit Bouton (ø 13 mm) met dop d'alimentation ...
  • Page 4: Prescriptions De Sécurité

    PRESCRIPTIONS DE SÉCURITÉ Lisez attentivement ce manuel d’utilisation avant d’utiliser l’appareil et conservez-le pour toute référence ultérieure. Installez cet appareil uniquement s’il est conforme à la législation, aux ordonnances et aux normes locales et nationales. Ce produit a été conçu pour être utilisé comme convec- teur électrique dans des maisons résiden- tielles, et il doit être utilisé...
  • Page 5 • Si le cordon électrique est endommagé, faites-le remplacer pour éviter tout dan- ger. Pour cela, contactez un centre de réparations agréé par Qlima ou un tech- nicien aux qualifications comparables. • Pour inspection ou réparation, adres- sez-vous toujours à un centre technique agréé...
  • Page 6 ATTENTION • En présence d’une odeur inhabituelle ou d’un bruit anormal, éteignez et débran- chez immédiatement l’appareil. Faites-le vérifier par un centre technique Qlima agréé. • Avant de déplacer ou de nettoyer l’ap- pareil, éteignez et débranchez-le en sui- vant les instructions.
  • Page 7: Installation De L'appareil

    Cet appareil contient une quantité pré- cise d’huile spécifique. La réparation et l’ouverture de cet appareil doit être fait par un centre autorisé par Qlima. En cas de fuite d’huile, contacter votre reven- deur ou un service après-vente agréé. • Merci de respecter la législation en vigueur pour le recyclage de l’huile si...
  • Page 8 - Roues pivotantes - Ecrous papillons - Pattes en forme d'arc - Manuel d’utilisation Conservez le carton et l’emballage (fig. A) a des fins d’entreposage et/ou de transport. 2. Déballer les roues pivotantes et les pattes en forme d'arc, de l'emballage du produit.
  • Page 9: L'utilisation

    6. Mettre le radiateur en position verticale une fois les roulettes installées. L’UTILISATION ATTENTION: N'utiliser le radiateur qu'en position verticale droite, les roulettes installées en bas de l'appareil, car toute autre position pourrait être dangereuse 1. Brancher la fiche dans la prise murale. 2.
  • Page 10: Réglage De La Température

    faible. L’écran affiche . Le chauffage continuera de fonctionner à pleine puis- sance jusqu'à ce que le courant soit coupé manuellement, ou que la tempé- rature ambiante dépasse 30° C. 4. Appuyer sur le bouton B pour couper le chauffage. RÉGLAGE DE LA TEMPÉRATURE POWER 1.
  • Page 11: Protection En Cas De Surchauffes

    5. Dès que la température de la pièce des- cend de 1º C en-dessous de la tempéra- ture réglée, le chauffage va commencer à chauffer à nouveau, et l'icône de tem- pérature, sur l'écran, cesse de clignoter. PROTECTION EN CAS DE SURCHAUFFES Cet appareil dispose de deux niveaux de protection en cas de surchauffes : 1.
  • Page 12: Réglage De La Minuterie

    RÉGLAGE DE LA MINUTERIE S'assurer de régler à la température COUPURE AUTOMATIQUE (AUTO OFF) souhaitée, avant de procéder au réglage de la minuterie, afin que le chauffage s'éteigne à la température souhaitée. Grâce à la minuterie d'arrêt automatique, vous pouvez décider du moment où le chauffage doit automatiquement se cou- per.
  • Page 13: Continuer D'appuyer Sur Le Bouton

    AUTO ON (MISE EN MARCHE AUTOMA- TIQUE) S'assurer de régler à la température souhaitée, avant de procéder au réglage de la minuterie, afin que le chauffage s'éteigne à la température souhaitée. Si la température souhaitée est définie, cette fonction remplace la minuterie.
  • Page 14: Maintenance Et Stockage

    En mode de mise en marche automatique, le chauffage s'allume une fois le délai défini écoulé. Si aucune heure d'arrêt automatique n'a été sélectionnée, par défaut, une minuterie de 10 heures sera appliquée à la fonction. FONCTION FAHRENHEIT/CELSIUS Ce chauffage permet de lire la tempé- rature en degrés Fahrenheit ou Celsius.
  • Page 15: Spécification Techniques

    ATTENTION: Ne pas laisser d'eau ou autres liquides pénétrer à l'intérieur de l'appareil, ce qui pourrait entrainer un incendie et / ou des risques de chocs électriques. • Ne pas utiliser de nettoyants abrasifs ou de solvants, car ils pourraient endomma- ger l'appareil.
  • Page 16: Déclaration De Conformité Ce

    DÉCLARATION DE CONFORMITÉ CE L’appareil est conçu, fabriqué et distribué conformément aux directives de sécurité 2006/95/CE Matériel à basse tension 2004/108/CE CEM 93/68/CEE Marquage CE L’appareil est uniquement destiné à une utilisation domestique et doit être exclusi- vement utilisé dans le but pour lequel il a été...
  • Page 17 5. La garantie s’applique uniquement sur présentation de la preuve d’achat d’origine datée et sans aucun rature ni modification. 6. La garantie ne s’applique pas aux dégâts causés par la négligence de l’uti- lisateur ou par le non respect du pré- sent mode d’emploi.
  • Page 18 Dear Sir, Madam, Congratulations with your purchase of a portable domestic heater. You have purchased a quality product, which will serve you for many years to come. This, of course, provided you use the heater correctly. Please read these Directions for Use first, to ensure maximum lifetime for your heater.
  • Page 19 MAIN BELANGRIJKE ONDERDELEN COMPONENTS Castor Bedieningspaneel wheels (2) Uitlaat van droge lucht Power button Uitneembaar  waterreservoir Buttons Inlaat van vochtige lucht LCD display screen Luchtfilter  Power Afvoertuit (ø 13 mm) met dop switch  Zwenkwieltje Control panel Stekker en snoer Front cover Handvat ...
  • Page 20: Safety Instructions

    SAFETY INSTRUCTIONS Read this user manual carefully before using the appliance and keep it for future reference. Install this device only when it complies with local/national legislation, ordinances and standards. This product is intended to be used as a mobile heater in residential houses and is only suitable for use in normal household conditions, indoors in living room, kitchen, and...
  • Page 21 • If the mains cord is damaged, you must have it replaced by a service centre authorised by Qlima or similarly qualified persons in order to avoid a hazard. • A l w a y s r e t u r n t h e a p p l i a n c e t o a service centre authorised by Qlima for examination or repair.
  • Page 22 • This heater is filled with a precise amount of special oil. Opening the heater and repairs to it should be carried out by a service centre authorised by Qlima. If the case of oil leakage, contact the manufacturer or an authorized service...
  • Page 23: Installing The Heater

    • When disposing of the stove, please respect the existing rules on oil recycling. • This appliance can be used by children aged from 8 years and above and persons with reduced physical, sensory or mental capabilities or lack of experience and knowledge if they have been given supervision or instruction concerning use of the appliance in a safe way and...
  • Page 24 Keep the box and the packaging materials for storage and/or transportation. 2. Unpack the Castor Wheels and Arc- shaped Brackets from the product packaging. 3. Turn the radiator upside-down on a scratch-free and stable surface to prevent damage to the paint finish or your floor surfacing.
  • Page 25: Temperature Setting

    1. Insert the plug in the wall outlet. 2. Use the power switch E and press the -button B to switch the heater on. The heater starts operating at maximum power. The display shows . The heater will continue operating at full power until the power is switched off manually or if the room temperature exceeds 30ºC.
  • Page 26: Overheat Protection

    temperature is displayed and can be changed as the temperature icon blinking. 2. Use the + and - button to set the desired temperature, from 13 to 30ºC. 3. The temperature icon will stop blinking and the current room temperature will appear after the desired temperature is set.
  • Page 27: Timer Setting

    be returned to an approved service cen- tre for replacement. If overheating or malfunctions occur on a regular basis, return the heater to an approved service centre for examination. TIMER SETTING AUTO OFF Make sure to set the desired temperature prior to setting the timer, so that the heater will shut off at the desired temperature setting.
  • Page 28 NOTE! When both desired temperature and timer off function have been activated, the heater will switch on and off per the set temperature setting and will stop operating once the programmed timer setting has been reached. AUTO ON Make sure to set the desired temperature prior to setting the timer, so that the heater will shut off at the desired temperature setting.
  • Page 29: Maintenance And Storage

    NOTE! When both desired temperature and timer on function have been activated, the heater will switch on and off per the set temperature setting once the heater begins to operate. In the Auto-on function the heater will turn on after the set time has elapsed.
  • Page 30: Technical Specifications

    serious burns or other personal injury. • Clean the exterior surface of the product by wiping it with a soft, damp cloth. CAUTION: Do not allow water or other liquids to run into the interior of the product, as this could create a fire and/or electrical hazard.
  • Page 31: Ec Declaration Of Conformity

    EC DECLARATION OF CONFORMITY The appliance has been designed, con- structed and distributed in conformity with the safety regulations of EC direc- tives. The appliance is intended for normal domestic use and for the described pur- poses only. GUARANTEE CONDITIONS The appliance is supplied with a 24-month guarantee, commencing on the date of purchase.
  • Page 32 been made. 6. The guarantee is invalid for damage caused by neglect or by actions that deviate from those in this instruction booklet. 7. Transportation costs and the risks involved during the transportation of the appliance or components of the appliance shall always be for the account of the purchaser 8.
  • Page 34 Egregio Signore, Gentile Signora, Ci congratuliamo con Lei per l'acquisto di una stufa portatile. Lei ha acquistato un prodotto di qualità, da cui trarrà grande soddisfazione per molti anni, naturalmente sempre a patto che Lei adoperi la stufa in modo corretto. Per tale motivo, al fine di garantire la massima durata delle stufe portatili, Le consigliamo di leggere con attenzione le istruzioni prima dell'uso.
  • Page 35 COMPONENTI BELANGRIJKE ONDERDELEN PRINCIPALI Ruote Bedieningspaneel basculanti (2) Uitlaat van droge lucht Pulsante di accensione Uitneembaar  waterreservoir Pulsanti Inlaat van vochtige lucht Schermo display LCD Luchtfilter  Interruttore di Afvoertuit (ø 13 mm) met dop alimentazione  Zwenkwieltje Pannello di controllo Stekker en snoer Coperchio...
  • Page 36: Struzioni Per La Sicurezza

    STRUZIONI PER LA SICUREZZA Prima di usare l’apparecchiatura, leggere attentamente il presente manuale e conservarlo come riferimento futuro. Installare questo dispositivo soltanto quando è conforme con la legislazione, le ordinanze e gli standard locali/nazionali. Questo prodotto è destinato a essere usato come stufe nelle case ad uso residenziale ed è...
  • Page 37 • Nel caso in cui il cavetto elettrico risulti danneggiato e onde evitare qualsiasi rischio provvedere alla sua sostituzione rivolgendosi ad un centro di assistenza autorizzato Qlima o ad un riparatore qualificato. • Se l’apparecchio necessita di verifiche o riparazioni va sempre consegnato ad un centro di assistenza autorizzato Qlima.
  • Page 38 In questi casi l’apparecchio deve essere consegnato ad un centro di assistenza autorizzato Qlima per i controlli del caso. • Prima di spostare o pulire l’apparecchio disattivarlo e staccare la spina dalla...
  • Page 39 presa di alimentazione. • L ’ a p p a r e c c h i o e d i l c a v e t t o d i alimentazione vanno posizionati sempre a distanza di sicurezza dai bambini piccoli (ad almeno un metro).
  • Page 40: Installazione Della Stufa

    • Il dispositivo può essere usato da bambini a partire dagli 8 anni di età e da persone con capacità fisiche, sensoriali o mentali ridotte o con mancanza di esperienza e conoscenze a condizione che siano state fornite istruzioni e supervisione in merito a un uso sicuro del dispositivo accertandosi del fatto che siano stati compresi i rischi associati all’uso del...
  • Page 41 Conservare la scatola ed il materiale d'imballaggio per l'immagazzinaggio e/o il trasporto. 2. Disimballare le ruote basculanti e le staffe a forma di arco dall'imballaggio del prodotto. 3. C a p o v o l g e r e i l r a d i a t o r e s u u n a superficie priva di graffi e stabile al fine di evitare danni alle finiture della vernice o alla superficie del pavimento.
  • Page 42 OPERATION ATTENZIONE: Usare il radiatore solo quando è dritto, coi gruppi Ruote basculanti fissati alla parte inferiore dell'unità; altre posizioni potrebbero causare situazioni di pericolo. 1. Inserire la spina nella presa a parete. 2. Servirsi dell'interruttore di corrente E e premere il pulsante di accensione per accendere il radiatore.
  • Page 43: Impostazione Della Temperatura

    IMPOSTAZIONE DELLA TEMPERATURA POWER 1. P r e m e r e i l p u l s a n t e M o d e f i n o a che l'icona della temperatura lampeggia. Sul display compare la temperatura desiderata e può...
  • Page 44: Protezione Anti-Surriscaldamento

    PROTEZIONE ANTI-SURRISCALDAMENTO Questo apparecchio dispone di due livelli di protezione anti-surriscaldamento: 1. Interruttore a soglia termica Questo dispositivo spegne la stufa nel caso rilevi casi di surriscaldamento o malfunzionamento, per poi ripristinar- la nuovamente quando la temperatura scende a livelli standard. 2.
  • Page 45: Accensione Automatica

    possibile decidere l'ora in cui il radiatore si dovrebbe spegnere in automatico. 1. Tenere premuto il pulsante Mode fino a che l'icona del timer non lampeggia. Comparirà anche l'icona di spegnimento automatico. 2. Servirsi dei pulsanti + e - per impostare il tempo di funzionamento del radiatore fra 1 e 24 ore (l'opzione predefinita è...
  • Page 46 Col t im e r d i a c cens i on e au tomatic a acceso sarà possibile decidere l'ora in cui il radiatore si dovrebbe accendere in automatico. 1. Tenere premuto il pulsante Mode fino a che non compaiono l'icona timer e l'icona Auto ON.
  • Page 47: Manutenzione E Stoccaggio

    FUNZIONE FAHRENHEIT/CELSIUS Questo radiatore offre la possibilità di leggere l'impostazione della temperatura in Fahrenheit o Celsius. Premere il pulsante F/C per alternare fra la visualizzazione Fahrenheit e Celsius. MANUTENZIONE E STOCCAGGIO Lasciar raffreddare completamente il prodotto prima di maneggiarlo o pulirlo.
  • Page 48: Specifiche Tecniche

    • N o n u s a r e d e t e r g e n t i a b r a s i v i o solventi, che potrebbero danneggiare il prodotto. • Conservare in un luogo pulito e secco quando non viene utilizzato.
  • Page 49: Condizioni Di Garanzia

    le secondo gli scopi previsti. CONDIZIONI DI GARANZIA Sul presente apparecchio e concessa una garanzia di 24 mesi: la garanzia decorre dalla data di acquisto. Entro questo perio- do si ha diritto alla riparazione gratuita di tutti i difetti di materiale ed i vizi di fab- bricazione o alla sostituzione gratuita di componenti difettate.
  • Page 50 si al trasporto dell’apparecchio o di sue componenti sono a carico dell’acquiren- te in tutti i casi. 8. I danni causati dal non avere utilizzato i ricambi di tipo adatto non sono coperti dalla garanzia. Onde evitare un’inutile spesa consigliamo di leggere innanzitutto le presenti istru- zioni per l’uso con accuratezza.
  • Page 51 >...
  • Page 52 Geachte mevrouw / mijnheer, Van harte gefeliciteerd met de aankoop van uw elektrische kachel. U heeft een kwaliteitsproduct aangeschaft waar u nog vele jaren plezier van zult hebben, mits u het apparaat verantwoord gebruikt. Lees daarom eerst deze gebruiksaanwijzing voor een optimale levensduur van uw kachel.
  • Page 53 KERNCOM- BELANGRIJKE ONDERDELEN PONENTEN Zwenkwielen Bedieningspaneel Uitlaat van droge Aan- en uit lucht knop Uitneembaar Knoppen  waterreservoir Inlaat van vochtige LCD display lucht Aan/uit Luchtfilter  schakelaar Afvoertuit (ø 13 mm) met dop Bedienings- paneel  Zwenkwieltje Voorpaneel Stekker en snoer Radiator- Handvat ...
  • Page 54: Veiligheidsvoorschriften

    VEILIGHEIDSVOORSCHRIFTEN Lees deze gebruikershandleiding aandach- tig alvorens het toestel te gebruiken en bewaar het voor later. Installeer dit toestel enkel wanneer het voldoet aan de lokale/ nationale wetgeving, regelgeving en nor- men. Dit product is bedoeld om gebruikt te worden als een verplaatsbare kachel in woningen en is alleen geschikt voor gebruik binnenshuis in woonkamers, keu- kens en garages, in normale huishoudelijke...
  • Page 55 Qlima erkend servicecentrum of door vergelijkbaar bevoegde personen. • Breng het apparaat ter inspectie of repa- ratie altijd bij een door Qlima erkend servicecentrum. • Reparaties door onbevoegden kunnen extreem gevaarlijke situaties opleveren voor de gebruiker.
  • Page 56 Breng het apparaat naar een erkend Qlima servicecentrum. • Zet het apparaat uit en trek de stekker uit het stopcontact volgens de gebruiks- instructies voordat u het verplaatst of schoonmaakt.
  • Page 57 • Gebruik geen verlengsnoeren of meer- voudige adapters. • Haal altijd de stekker uit het stopcontact als het apparaat niet wordt gebruikt. • Deze kachel is gevuld met een nauwkeu- rige hoeveelheid speciale olie. De kachel openen of repareren is alleen toege- staan aan de fabrikant of een bevoegde servicevertegenwoordiger.
  • Page 58 - Zwenkwielen - Vleugelmoeren - Boogvormige beugels - Deze gebruiksaanwijzing Bewaar de doos en het verpakkingsmate- riaal (fig. A) voor opslag en/of transport. 2. Verwijder de verpakking van de zwenk- wielen en de boogvormige beugels. 3. Draai de radiator ondersteboven op een krasvrije en stabiele ondergrond en dek de vloer af om eventuele schade te voor- komen.
  • Page 59: Ingebruikname

    6. Zet de radiator rechtop, nadat de zwenkwielen zijn gemonteerd. INGEBRUIKNAME WAARSCHUWING: Gebruik de radiator enkel in de gebruikelijke verticale positie met de zwenkwielen aan de onderzijde van het apparaat bevestigd. Een andere positie kan een gevaarlijke situatie veroorzaken. 1. Steek de stekker in het stopcontact. 2.
  • Page 60: Temperatuurinstelling

    verwarming zal blijven werken in lage verwarmingsmodus totdat de kachel handmatig wordt uitgeschakeld of de kamertemperatuur hoger is dan 30 º C. 4. Druk opnieuw op de -knop B om de verwarming uit te schakelen. TEMPERATUUR INSTELLING POWER 1. Druk op de Mode-knop totdat het tem- peratuur icoon begint te knipperen.
  • Page 61 Wanneer deze niet-her- stelbare schakelaar zijn werk heeft gedaan dient het apparaat geretour- neerd worden naar een door Qlima geautoriseerde dealer. Indien oververhitting of storingen zich blij- ven voordoen, breng het apparaat retour...
  • Page 62 TIMER-INSTELLING AUTO OFF Zorg ervoor dat de gewenste temperatuur ingesteld is voorafgaand aan het instellen van de timer, zodat de kachel uitschakelt op de gewenste temperatuur instelling. Met de Auto OFF timer-instelling kan de tijd bepaald worden waarop de verwar- ming automatisch uitschakelt.
  • Page 63 AUTO ON Zorg ervoor dat de gewenste temperatuur ingesteld is voorafgaand aan het instellen van de timer, zodat de kachel uitschakelt op de gewenste temperatuur instelling. Als de gewenste temperatuur is ingesteld, zal deze functie de timer functie overtreffen. Met de Auto ON timer-instelling kan de tijd bepaald worden waarop de verwar- ming automatisch moet inschakelen.
  • Page 64: Onderhoud En Opslag

    In de Auto-ON functie wordt de verwarming ingeschakeld, nadat de ingestelde tijd is verstreken. Als er geen Auto-OFF is geselecteerd, wordt een standaard timer van 10 uur aangehouden. FAHRENHEIT / CELSIUS FUNCTIE Deze kachel biedt de mogelijkheid om de temperatuurinstelling te tonen in Celsius of Fahrenheit.
  • Page 65: Technische Specificaties

    WAARSCHUWING: Laat geen water of andere vloeistoffen in het interieur van het product komen, omdat dit tot brand en / of elektrisch gevaar kan leiden. • Gebruik geen schuur- of oplosmiddelen, omdat dan schade aan het product kan optreden. • Bewaar het product, wanneer het niet in gebruik is op een schone, droge plaats.
  • Page 66: Eg-Verklaring Van Overeenstemming

    EG VERKLARING VAN OVEREENSTEMMING Het apparaat is ontworpen, geconstru- eerd en gedistribueerd in overeenstem- ming met de veiligheidsvoorschriften van de EG-richtlijnen. Het apparaat is uitsluitend bestemd voor normaal huishoudelijk gebruik en voor de beschreven doeleinden. GARANTIEVOORWAARDEN Het apparaat wordt geleverd met een garantie van 24 maanden die ingaat op de aankoopdatum.
  • Page 67 of handelingen die niet overeenkomen met die in deze handleiding. 7. Vervoerkosten en de risico’s verbonden aan vervoer van het apparaat of appa- raatonderdelen zijn altijd voor de reke- ning van de klant. 8. Schade veroorzaakt door het niet gebruiken van geschikte reserveonder- delen wordt niet gedekt door de garan- tie.
  • Page 68 FIN Jos haluat huoltoapua, lisätietoja tai laitteen kanssa tulee ongelmia, tutustu verkkosivustoon osoitteessa www.qlima.com tai kysy neuvoa PVG kuluttajapalvelukeskuksesta (www.qlima.com). GB If you need information or if you have a problem, please visit the our website (www.qlima.com) or contact our sales support (you find its phone number on www.qlima.com) I Per informazioni e in caso di problemi, visitate il sito Web www.qlima.com oppure contattate...

Table des Matières