Saeco Talea Ring Plus Mode D'emploi
Masquer les pouces Voir aussi pour Talea Ring Plus:
Table des Matières

Publicité

Les langues disponibles

Les langues disponibles

Liens rapides

Operation and maintenance manual
Before using the machine, please read the attached operating instructions.
Carefully read the safety rules
Mode d'emploi
Veuillez lire attentivement le mode d'emploi
(notamment les consignes de sécurité) avant d'utiliser l'appareil.
FOR HOUSEHOLD USE ONLY

Publicité

Chapitres

Table des Matières
loading

Sommaire des Matières pour Saeco Talea Ring Plus

  • Page 1 Operation and maintenance manual Before using the machine, please read the attached operating instructions. Carefully read the safety rules Mode d'emploi Veuillez lire attentivement le mode d'emploi (notamment les consignes de sécurité) avant d'utiliser l'appareil. FOR HOUSEHOLD USE ONLY...
  • Page 2: Important Safeguards

    IMPORTANT SAFEGUARDS When using electrical appliances, basic safety precautions should always be followed to reduce the risk of fire, electric shock, and/or injury to persons, including the following: 1 Read all instructions and information in this instruction book and any other literature included in this carton referring to this product before operating or using this appliance.
  • Page 3: Instructions For The Power Supply Cord

    CAUTION This appliance is for household use only. Any servicing, other than cleaning and user maintenance, should be performed by an authorized service centre. Do not immerse machine in water. To reduce the risk of fire or electric shock, do not disassemble the machine. There are no user serviceable parts inside the machine serviceable by the user.
  • Page 4: Table Des Matières

    CONTENTS GENERAL INFORMATION ........................3 APPLIANCE ............................4 ..............................4 ACCESSORIES INSTALLATION ............................ 5 ............................5 STARTING THE MACHINE ............................6 SETTING THE LANGUAGE “ ” ........................... 7 AQUA PRIMA WATER FILTER DISPLAY .............................. 8 ....................8 OPTI DOSE INDICATES THE COFFEE DOSE PER CUP ADJUSTMENTS ...........................
  • Page 5: General Information

    GENERAL INFORMATION The coffee machine is suitable for preparing espresso coffee using coffee beans, and it is equipped with a device to dispense steam and hot water. The machine is designed for domestic use only, and is not suitable for heavy or professional use. Warning: no liability is assumed for any damage caused by: •...
  • Page 6: Appliance

    APPLIANCE Coffee bean hopper Coffee bean hopper cover Cup warming surface Compartment for pre- ground coffee Control panel Power button SBS knob Service door Dispensing head Coffee grounds drawer Hot water / steam knob Button for raising/lowering the drip tray Hot water / steam spout Water tank...
  • Page 7: Installation

    INSTALLATION STARTING THE MACHINE Make sure that the main power button is not pressed in the “ON” position. Remove the coffee bean hopper Close the cover pushing it down Remove the water tank. We cover. completely. recommend installing the “Aqua Fill the hopper with coffee beans.
  • Page 8: Setting The Language

    English English Select the desired language by When the desired language is navigating the click wheel with displayed, press Talea Ring Plus warming up rinse cycle please wait The machine starts and displays Wait until the machine completes When the right temperature is all the messages in the selected the heating stage.
  • Page 9: Aqua Prima" Water Filter

    “AQUA PRIMA” WATER FILTER To improve the quality of the water you use, and guarantee longer machine life at the same time, it is Remove the “Aqua Prima” Fill the tank with fresh drinking Enter the date of the current Press down until it clicks into tank for 30 minutes for correct month.
  • Page 10: Display

    DISPLAY strong aroma Accessing the Steam button espresso coffee 08:33 programming menu Click wheel Select the coffee bean Hot water button dose or the quantity of pre-ground coffee • Press the button twice to make 2 cups. Press twice selected selected espresso coffee double espresso...
  • Page 11: Adjustments

    The SBS system has been carefully designed to give your coffee the intense taste you desire. Simply turn the dial and you will notice that the coffee goes from mild intensity to strong intensity. MEDIUM SBS – SAECO BREWING SYSTEM COFFEE SBS adjusts the intensity of the brewed coffee.
  • Page 12: Beverage Dispensing

    BEVERAGE DISPENSING COFFEE BREWING CAN BE STOPPED AT ANY TIME BY PRESSING THE BUTTON AGAIN. THE STEAM SPOUT MAY REACH HIGH TEMPERATURES: DANGER OF SCALDING. DO NOT TOUCH IT WITH BARE HANDS. Check that all the containers are clean. To carry out this operation, follow the instructions in the “Cleaning and Maintenance”...
  • Page 13: Dispensing Beverages With Ground Coffee

    DISPENSING BEVERAGES WITH GROUND COFFEE The machine allows you to use pre-ground and decaffeinated coffee. Pre-ground coffee must be poured into the appropriate compartment positioned next to the coffee bean hopper. Only use coffee ground for espresso machines and never coffee beans or instant coffee. WARNING: ONLY PUT PRE-GROUND COFFEE INTO THE COMPARTMENT WHEN YOU WISH TO DISPENSE THIS TYPE OF BEVERAGE.
  • Page 14: Hot Water Dispensing

    BEVERAGE DISPENSING HOT WATER DISPENSING DISPENSING MAY BE PRECEDED BY SHORT SPURTS OF HOT WATER AND SCALDING IS POSSIBLE. THE HOT WATER/STEAM SPOUT MAY REACH HIGH TEMPERATURES: DO NOT TOUCH IT WITH BARE HANDS. USE THE APPROPRIATE HANDLE ONLY. selected hot water Place a container beneath the Press the...
  • Page 15: Dispensing Steam

    DISPENSING STEAM DISPENSING MAY BE PRECEDED BY SHORT SPURTS OF HOT WATER AND SCALDING IS POSSIBLE. THE HOT WATER/STEAM SPOUT MAY REACH HIGH TEMPERATURES: DO NOT TOUCH IT WITH BARE HANDS. USE THE APPROPRIATE HANDLE ONLY. selected steam Place a container with the Turn the knob to the Press the button.
  • Page 16: Making Cappuccino

    BEVERAGE DISPENSING MAKING CAPPUCCINO DISPENSING MAY BE PRECEDED BY SHORT SPURTS OF HOT WATER AND SCALDING IS POSSIBLE. THE HOT WATER/STEAM SPOUT MAY REACH HIGH TEMPERATURES: DO NOT TOUCH IT WITH BARE HANDS. USE THE APPROPRIATE HANDLE ONLY. selected steam Fill 1/3 of the cup with cold milk.
  • Page 17: Milk Island ( Optional )

    MILK ISLAND (OPTIONAL) This device, which may be purchased separately, enables you to easily and comfortably prepare delicious cappuccinos. Warning: before using the Milk Island, read the manual and all precautions carefully for correct use. Important note: the quantity of milk in the carafe must never be below the “MIN” minimum level nor exceed the “MAX”...
  • Page 18: Beverage Programming

    BEVERAGE PROGRAMMING Every beverage can be programmed according to your individual tastes. 1. PROGRAMMING FOR SELF-LEARNING You can program the quantity of coffee and/or milk you wish to be dispensed into the cups when you press the button for any beverage. Select the type of beverage you want to program, then press and hold the button until the display shows (for example):...
  • Page 19 strong aroma beverage settings espresso coffee 08:33 Check that the water and coffee bean Press the button. Select “beverage settings”. Press container are full; place the cup under the dispensing head. espresso coffee medium aroma When the settings are espresso coffee changed, the message on the When the changes are stored Select the beverage to program.
  • Page 20: Programming The Machine

    PROGRAMMING THE MACHINE Some of the machine’s functions can be programmed to customize operations according to your individual preferences. beverage settings Press the button to: - save the new settings. 1 Press the button. select the functions change the function settings. beverage settings energy saving Beverage setting...
  • Page 21: Machine Settings

    MACHINE SETTINGS To change the machine’s operation settings, press the button, select “machine settings” and press language rinsing English set the coffee circuit rinse cycle. set the menu language. water hardness cup-warming surface activate/deactivate the operation of set the water hardness. the cup warming surface acoustic alarm clock setting...
  • Page 22: Acoustic Alarm " Menu

    PROGRAMMING THE MACHINE “WATER HARDNESS” MENU > machine settings > water hardness With the “Water hardness” function you can adapt your machine to the degree of hardness of the water you use, so that the machine will request descaling at the right moment. Hardness is expressed on a scale from 1 to 4.
  • Page 23: Filter Alarm" Menu

    “FILTER ALARM” MENU > machine settings > filter alert Select by navigating the click machine settings filter alert It is possible to set: - on - off Press the button to save. “RINSE” MENU > machine settings > rinsing The rinse setting cleans the internal circuits in order to guarantee that the beverages are only made with fresh water.
  • Page 24: Clock Setting" Menu

    PROGRAMMING THE MACHINE “CLOCK SETTING” MENU > machine settings > clock setting To set the current time, date and hour format to display. In this menu you can set: machine settings clock setting - the current time (hour and minutes) - the hour format (24 hours - AM/PM) - the current date (day - month - year - day of the week)
  • Page 25 Time format > machine settings > clock setting > time format To set the time view mode. This setting adjusts all clock functions to either “am/pm” or “24 hour” formats. clock setting 2.7.2 time format 2.7.2 time format 2.7.2 time format The machine also allows displaying the time in the American format (am/pm).
  • Page 26 PROGRAMMING THE MACHINE 2.7.3 date setting 2.7.3 date setting tuesday 18/04/06 tuesday 18/04/06 The day of the week is automatically set according to the set date. Select the month and press the Select the year and press the Date format >...
  • Page 27: Maintenance

    MAINTENANCE MAINTENANCE To access the machine’s maintenance programs, press the button, select “maintenance” and press water filter group wash wash the Brew Group. descaling “WATER FILTER” MENU > maintenance > water filter In this menu you can: maintenance water filter - check the number of litres before replacement;...
  • Page 28 MAINTENANCE Filter state > maintenance > water filter > filter status maintenance water filter 3.1.2 filter status Select by navigating the click It is possible to set: - on - off Press the button to save. Load filter > maintenance > water filter > activate filter maintenance water filter 3.1.3...
  • Page 29: Descaling" Menu

    A PERSON MUST BE PRESENT DURING THE OPERATION. WARNING! NEVER USE VINEGAR AS A DESCALER. Saeco descaler is recommended; however, you can use any non-toxic and/or non-harmful descaling beverage for coffee machines. The used solution is to be disposed of according to the manufacturer’s instructions and/or...
  • Page 30 MAINTENANCE Note: before beginning the descaling cycle make sure that: 1. a large enough container is positioned under the water spout; 2. THE “AQUA PRIMA” FILTER HAS BEEN REMOVED. maintenance descaling 3.2.2 descaling execute now Descaling is carried out at a controlled temperature. If the machine is cold, you must wait until it has reached the right temperature;...
  • Page 31 following message appears on the display: descaling cycle passage fill the please wait [ 2/15] water tank The machine begins to dispense The intervals are displayed in such Remove the water tank, rinse the descaling solution through the a way as to check the state of with fresh drinking water to hot water spout.
  • Page 32: Brew Group Washing

    To clean the machine’s internal circuits used for brewing coffee. To wash the Brew Group, simply clean with water as shown on page 35. This wash completes maintenance of the Brew Group. We recommend using Saeco tablets, which can be purchased separately.
  • Page 33: Programming The Machine

    PROGRAMMING THE MACHINE ENERGY SAVING To adjust the energy saving parameters, press the button, select “energy saving” and press the turn-off delay monday Set the machine’s turn on/off times (one Set the time which must pass after the last setting for each day of the week) product dispensing before the machine enters the energy saving mode.
  • Page 34: Monday" Timer Setting

    “MONDAY” TIMER SETTING > energy saving > monday This and the following menus are used to set the turn on/off times for each day of the week. The procedure described below shows how to set the turn on/off times for “Monday”. To set the turn on/off times for the other days of the week, follow the same procedure after selecting the desired day.
  • Page 35: Special Functions

    SPECIAL FUNCTIONS This menu allows you to access special functions present on the machine. Press the button to access and select “special function” and press the button. Navigate the reset settings execute now restore the basic machine operating parameters. RESTORE SETTINGS >...
  • Page 36: Cleaning And Maintenance

    CLEANING AND MAINTENANCE GENERAL MACHINE CLEANING The cleaning described below must be performed once a week. Note: if water remains in the tank for several days, do not use it. WARNING! Never immerse the machine in water. If you remove grounds with the machine off or when not signaled on the display, the count of the grounds emptied into the drawer is not reset.
  • Page 37: Cleaning The Brew Group

    CLEANING THE BREW GROUP The Brew Group must be cleaned at least once a week. Wash the Brew Group with warm water. WARNING! Do not wash the Brew Group with detergents that can compromise its correct operation. Do not wash in the dishwasher. Open the service door and remove Press the PUSH button to remove the coffee grounds drawer.
  • Page 38: Error Codes

    ERROR CODES GUIDE MESSAGE THAT APPEARS HOW TO REMOVE THE MESSAGE out of service (xx) restart to fix… seconds turn the machine on again to restore normal operation.If the problem persists, call the service centre and give the code (xx) shown on the display. close coffee bean lid Close the coffee bean hopper cover to be able to make a beverage.
  • Page 39: Troubleshooting

    TROUBLESHOOTING ROBLEMS AUSES OLUTIONS The machine does not turn on. The machine is not connected to the Connect the machine to the power power source. source. The plug has not been plugged into the Insert the plug into the machine’s power back of the machine.
  • Page 40: Safety Rules

    SAFETY RULES IN CASE OF EMERGENCY IMMEDIATELY UNPLUG THE CORD FROM THE OUTLET. ONLY USE THE APPLIANCE • Indoors. • For preparing coffee, hot water and for frothing milk. • For domestic use. • By adults in non altered psycho-physical conditions. PRECAUTIONS FOR THE USE OF THE MACHINE •...
  • Page 41 DANGERS • The appliance must not be used by children and persons who have not been informed of its operation. • The appliance is dangerous to children. When left unattended, unplug from the electrical outlet. • Keep the coffee machine packaging out of the reach of children. •...
  • Page 42: Technical Data

    TECHNICAL DATA TECHNICAL DATA See label on the appliance Nominal voltage See label on the appliance Power rating See label on the appliance Power supply ABS - Thermoplastic Shell material 320 x 370 x 400 mm - 12.60” x 14.57” x 15.75” Size (w x h x d) 9 Kg - 19.8 lbs Weight...
  • Page 44: Important

    IMPORTANT Lors de l’utilisation d’appareils électriques, il est important de prendre les précautions suivantes, afin d’éviter les décharges électriques, les courts circuits et les accidents corporels. 1 Lire toutes les instructions et les indications données dans cette brochure, ainsi que toute autre information que contient l’emballage, avant de mettre la machine en marche.
  • Page 45: Précautions

    PRÉCAUTIONS Machine est réservée à un usage domestique. Tout entretien, en dehors du nettoyage et de l’entretien usuel par l’usager, doit être fait par un centre de service autorisé. Ne pas plonger la base dans l’eau. Pour éviter les courts- circuits et les décharges électriques, ne pas démonter la base.
  • Page 46 TABLE DES MATIÈRES GÉNÉRALITÉS ............................ 3 APPAREIL ............................4 ..............................4 ACCESSOIRES MISE EN PLACE ..........................5 ..........................5 MISE EN MARCHE DE LA MACHINE ............................6 SÉLECTIONNER LA LANGUE « » ............................7 FILTRE AQUA PRIMA AFFICHEUR ............................8 .....................
  • Page 47: Généralités

    GÉNÉRALITÉS La machine à café est indiquée pour la préparation de café expresso avec du café en grains et dotée d’un dispositif pour la distribution d’eau chaude et de vapeur. Au design elegant, cet appareil a ete conçu exclusivement pour un usage domestique et n’est donc pas indique pour un fonctionnement continu de type professionnel.
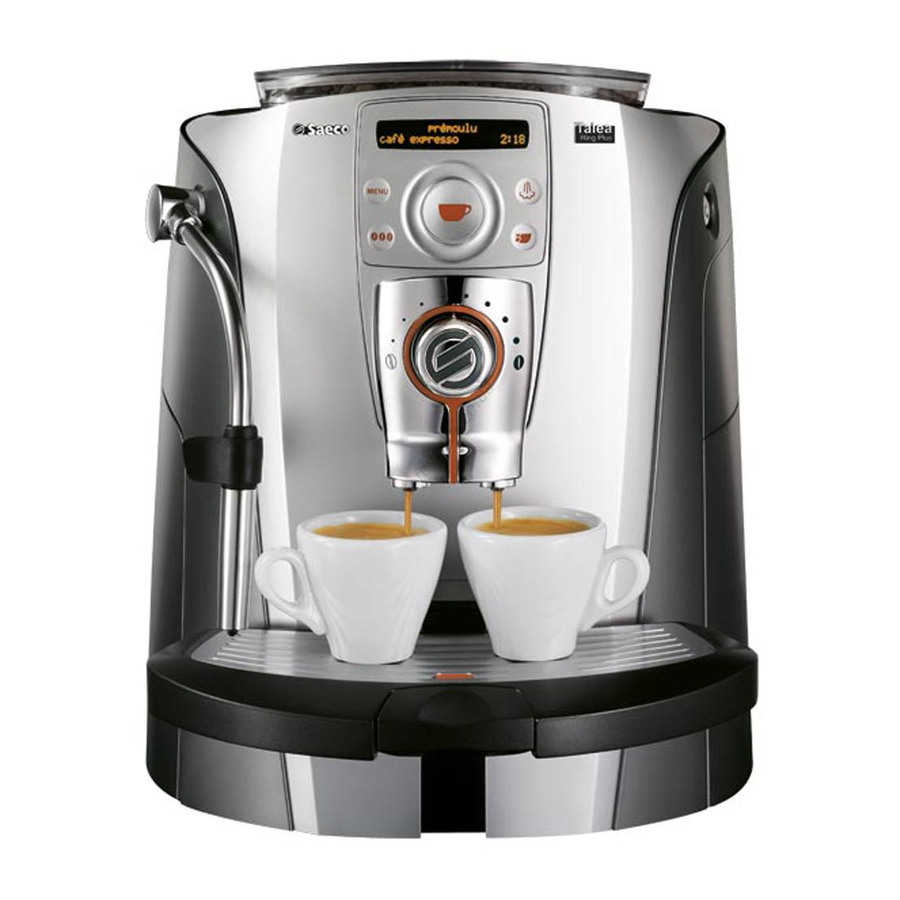
  • Page 48: Appareil

    APPAREIL Réservoir à café en grains Couvercle du réservoir à café en grains Plaque chauffe-tasses Logement café prémoulu Tableau de commande Interrupteur général Porte de service Distributeur Bac d’égouttement + Tiroir à marc Bouton robinet eau- chaude/vapeur Touche pour lever/baisser le bac d’égouttement Tuyau de distribution de l’eau chaude/vapeur...
  • Page 49: Mise En Place

    MISE EN PLACE MISE EN MARCHE DE LA MACHINE S’assurer que l’interrupteur général n’est pas activé. Retirer le couvercle du réservoir à Fermer le couvercle en appuyant à Retirer le réservoir à eau. café. fond. Remplir le réservoir avec du café «...
  • Page 50: Sélectionner La Langue

    Sélectionner la langue souhaitée Lorsque la langue choisie est en faisant glisser le doigt sur le disque de sélection. Talea Ring Plus chauffage en cours Cycle de rinçage veuillez patienter La machine se met en marche et Attendre que la machine termine Une fois la phase de chauffage la phase de chauffage.
  • Page 51: Filtre « Aqua Prima

    FILTRE « AQUA PRIMA » Pour améliorer la qualité de l’eau utilisée, tout en garantissant la longévité de l’appareil, il est conseillé Remplir le réservoir avec de l’eau régler la date sur le mois en cours. à l’intérieur du réservoir vide (voir le réservoir plein pendant 30 minutes d’arrêt.
  • Page 52: Afficheur

    AFFICHEUR arôme fort Touche de sélection Accéder au menu de café expresso 08:33 distribution de la vapeur programmation Disque de sélection Touche de sélection Sélectionner la distribution d’eau chaude quantité de café à moudre ou prémoulu • Pour obtenir 2 tasses, appuyer 2 fois sur la touche Cette opération est possible jusqu’à...
  • Page 53: Réglages

    DENSITÉ DU CAFÉ Le dispositif SBS a été spécialement conçu pour permettre de donner la densité et l’intensité de goût CAFE SBS – SAECO BREWING SYSTEM MOYEN Pour régler la densité du café distribué. Le réglage peut également être effectué durant la distribution du café.
  • Page 54: Distribution De La Boisson

    DISTRIBUTION DE LA BOISSON LA DISTRIBUTION DE CAFÉ PEUT ÊTRE INTERROMPUE À TOUT MOMENT EN APPUYANT DE NOUVEAU SUR LA TOUCHE LA VAPEUR PEUT ATTEINDRE UNE TEMPÉRATURE ÉLEVÉE : RISQUE DE BRÛLURES. ÉVITER TOUT CONTACT DIRECT AVEC LES MAINS. entretien » (voir page 34). Pour la préparation de 2 tasses, la machine distribue le premier café...
  • Page 55: Distribution De La Boisson Avec Du Café Moulu

    DISTRIBUTION DE LA BOISSON AVEC DU CAFÉ MOULU La machine permet d’utiliser du café prémoulu ou décaféiné.Verser le café prémoulu dans le compartiment prévu à cet effet à côté du réservoir à café en grains. Ne verser que du café moulu pour machines à café expresso mais jamais du café...
  • Page 56: Distribution Deau Chaude

    DISTRIBUTION DE LA BOISSON DISTRIBUTION D’EAU CHAUDE AU DÉBUT DE LA DISTRIBUTION, FAIRE ATTENTION AU RISQUE DE BRÛLURES CAR IL PEUT Y AVOIR DES ÉCLABOUSSURES D’EAU CHAUDE. LA BUSE POUR LA DISTRIBUTION DE L’EAU CHAUDE/ VAPEUR PEUT ATTEINDRE DES TEMPÉRATURES ÉLEVÉES : ÉVITER DE LA TOUCHER DIRECTEMENT AVEC LES MAINS, UTILISER EXCLUSIVEMENT LA POIGNÉE PRÉVUE À...
  • Page 57: Distribution Vapeur

    DISTRIBUTION VAPEUR AU DÉBUT DE LA DISTRIBUTION, FAIRE ATTENTION AU RISQUE DE BRÛLURES CAR IL PEUT Y AVOIR DES ÉCLABOUSSURES D’EAU CHAUDE. LA BUSE POUR LA DISTRIBUTION DE L’EAU CHAUDE/ VAPEUR PEUT ATTEINDRE DES TEMPÉRATURES ÉLEVÉES : ÉVITER DE LA TOUCHER DIRECTEMENT AVEC LES MAINS, UTILISER EXCLUSIVEMENT LA POIGNÉE PRÉVUE À...
  • Page 58: Distribution Cappuccino

    DISTRIBUTION DE LA BOISSON DISTRIBUTION CAPPUCCINO AU DÉBUT DE LA DISTRIBUTION, FAIRE ATTENTION AU RISQUE DE BRÛLURES CAR IL PEUT Y AVOIR DES ÉCLABOUSSURES D’EAU CHAUDE. LA BUSE POUR LA DISTRIBUTION DE L’EAU CHAUDE/ VAPEUR PEUT ATTEINDRE DES TEMPÉRATURES ÉLEVÉES : ÉVITER DE LA TOUCHER DIRECTEMENT AVEC LES MAINS, UTILISER EXCLUSIVEMENT LA POIGNÉE PRÉVUE À...
  • Page 59: Milk Island ( En Option )

    MILK ISLAND (EN OPTION) Cet accessoire, que l’on peut acheter à part, permet de préparer très facilement et en toute commodité d’excellents cappuccinos. Attention : avant d’utiliser le Milk Island consulter le manuel correspondant contenant toutes les précautions pour une utilisation correcte. Remarque importante : la quantité...
  • Page 60: Programmation Boisson

    PROGRAMMATION BOISSON L’utilisateur peut programmer chaque boisson selon son goût personnel. 1. PROGRAMMATION POUR AUTO-APPRENTISSAGE La quantité de café qui est distribuée dans la tasse chaque fois que l’on appuie sur le bouton peut être programmée rapidement pour toutes les boissons. Après avoir sélectionné...
  • Page 61 arôme fort réglage des boissons café expresso 08:33 Appuyer sur la touche Sélectionner « réglage des réservoir à café en grains soient boissons ». Appuyer sur la touche pleins ; mettre la tasse sous le distributeur. Lorsqu’on change les réglages, café...
  • Page 62: Programmation Machine

    PROGRAMMATION MACHINE personnelles. réglage des boissons Appuyer sur la touche pour : - mémoriser les nouveaux réglages 1 Appuyer sur la touche 2 Faire glisser le doigt sur le disque pour : sélectionner les fonctions réglage des boissons economie d'énergie Réglage des boissons Économie d’énergie (voir page 16)
  • Page 63: Réglage De La Machine

    RÉGLAGE DE LA MACHINE sélectionner « réglages de la machine » et appuyer sur la touche . Faire glisser le doigt sur le disque de sélection pour : langue rinçage français activé régler le rinçage des sélectionner la langue circuits du café. des menus.
  • Page 64: Menu « Dureté De L'eau

    PROGRAMMATION MACHINE MENU « DURETÉ DE L’EAU » > réglage de la machine > dureté de l'eau puisse demander de faire un cycle de détartrage au moment voulu. La dureté est exprimée avec une échelle de 1 à 4. La machine est préréglée sur 3. Plonger dans l’eau la bande de Déterminer la valeur.
  • Page 65: Menu « Alerte Filtre

    MENU « ALERTE FILTRE » > réglage de la machine > alerte filtre réglage de la machine alerte filtre Sélectionner en glissant le activé doigt sur le disque de sélection. Il est possible de régler : - activé - désactivé Mémoriser en appuyant sur MENU «...
  • Page 66: Menu « Réglage De L'horloge

    PROGRAMMATION MACHINE MENU « RÉGLAGE DE L’HORLOGE » > réglage de la machine > réglage horloge Il sert à régler : réglage de la machine réglage horloge - l’heure actuelle (heure et minutes) heures - AM/PM) - la date actuelle (jour - mois - année - jour de la semaine) - le format de la date (anglo-saxon –...
  • Page 67 Format heure > réglage de la machine > réglage horloge > format de l’heure réglage horloge 2.7.2 format de l'heure 2.7.2 format de l'heure 2.7.2 format de l'heure La machine permet dans le format anglo-saxon (am/pm). Réglage de la date >...
  • Page 68 PROGRAMMATION MACHINE 2.7.3 réglage de la date 2.7.3 réglage de la date mardi 18/04/06 mardi 18/04/06 Le jour de la semaine est réglé automatiquement en fonction de la date saisie. avec la touche avec la touche Format date > réglage de la machine > réglage horloge > format de la date réglage horloge 2.7.4 format de la date...
  • Page 69: Entretien

    ENTRETIEN ENTRETIEN Pour accéder aux programmes d’entretien de la machine, appuyer sur la touche ; sélectionner « entretien » et appuyer sur la touche . Faire glisser le doigt sur le disque de sélection pour : filtre à eau rinçage du groupe laver le groupe de distribution.
  • Page 70 ENTRETIEN État du filtre > entretien > filtre à eau > état du filtre entretien filtre à eau 3.1.2 etat du filtre activé Sélectionner en glissant le doigt sur le disque de sélection. Il est possible de régler : - activé - désactivé...
  • Page 71: Menu « Détartrage

    ATTENTION ! NE JAMAIS UTILISER DE VINAIGRE POUR DÉTARTRER LA MACHINE. Il est recommandé d’utiliser de préférence le détartrant Saeco ou un des produits détartrants pour machines à café non toxiques ni nocifs que l’on trouve dans le commerce. La solution utilisée doit être éliminée conformément à ce...
  • Page 72 ENTRETIEN 2. QUE LE FILTRE « AQUA PRIMA » NE SOIT PLUS DANS LE RÉSERVOIR À EAU . entretien détartrage 3.2.2 détartrage exécuter maintenant Le détartrage a lieu à une température contrôlée. Si la machine est froide, attendre qu’elle arrive à la juste température ;...
  • Page 73 Quand la solution est terminée, cycle de détartrage passage remplir le veuillez patienter [ 2/15] réservoir à eau La machine commence à distribuer Enlever le réservoir à eau, le la solution détartrante dans la buse rincer à l’eau froide pour de distribution de l’eau chaude.
  • Page 74: Lavage Du Groupe

    Cette fonction permet d’effectuer le nettoyage des circuits internes de l’appareil qui servent à la distribution du café. complète l’entretien du groupe de distribution. Il est conseillé d’utiliser des pastilles Saeco, que l’on peut acheter à part auprès de votre revendeur.
  • Page 75: Programmation Machine

    PROGRAMMATION MACHINE ÉCONOMIE D’ÉNERGIE Pour régler les paramètres de l’économie d’énergie de la machine, appuyer sur la touche sélectionner « économie d’énergie » et appuyer sur la touche . Faire tourner le disque de sélection d’un doigt pour : arrêt différé lundi Régler le moment où...
  • Page 76: Réglage Minuterie « Lundi

    RÉGLAGE MINUTERIE « LUNDI » > èconomie d’énergie > lundi Ce menu et ceux qui suivent servent à régler un horaire d’allumage et d’arrêt pour chaque jour de la semaine. L’exemple reporte la façon de régler l’horaire d’allumage et d’arrêt du « Lundi » ; suivre la même procédure après avoir sélectionné...
  • Page 77: Des Fonctions Spéciales

    DES FONCTIONS SPÉCIALES Ce menu permet d’accéder aux fonctions spéciales prévues sur la machine. Pour ce faire, appuyer sur la touche et choisir « fonctions spéciales » et appuyer sur la touche Faire glisser le doigt sur le disque de sélection pour : rétablir réglages exécuter maintenant rétablir les paramètres de base de la...
  • Page 78: Nettoyage Et Entretien

    NETTOYAGE ET ENTRETIEN NETTOYAGE GÉNÉRAL DE LA MACHINE Le nettoyage décrit ci-dessous doit être fait au moins une fois par semaine. Remarque : ne pas utiliser de l’eau qui n’a pas été remplacée depuis plusieurs jours. ATTENTION ! Ne pas plonger la machine dans l’eau. Le comptage du marc déposé...
  • Page 79: Nettoyage Du Groupe De Distribution

    NETTOYAGE DU GROUPE DE DISTRIBUTION Le groupe de distribution doit être nettoyé au moins une fois par semaine. Laver le groupe de distribution à l’eau tiède. ATTENTION ! Ne pas laver le groupe de distribution avec des détergents qui pourraient affecter son fonctionnement.
  • Page 80: Messages D'erreur

    MESSAGES D’ERREUR MESSAGE QUI APPARAÎT COMMENT RÉTABLIR LE MESSAGE hors service (xx) Où (xx) indique un code d’erreur.Éteindre et rallumer la redémarrer pour résoudre… machine au bout de 30 secondes pour rétablir le fonctionnement normal.Si le problème persiste, demander l’intervention du Centre d’assistance agréé et communiquer fermer couvercle grains de Fermer le couvercle du réservoir à...
  • Page 81: Problèmes - Causes - Remèdes

    PROBLÈMES - CAUSES - REMÈDES ROBLÈMES AUSES EMÈDES La machine ne s’allume pas La machine n’est pas branchée sur Brancher la machine sur le réseau le réseau électrique. électrique. prise située au dos de la machine. La machine ne distribue ni eau Le trou de la buse de vapeur est Nettoyer le trou de la buse de vapeur à...
  • Page 82: Consignes De Sécurité

    CONSIGNES DE SÉCURITÉ EN CAS D’URGENCE N’UTILISER L’APPAREIL • que dans des locaux fermés • que pour la préparation de café, d’eau chaude et de mousse de lait • Que par des adultes dotés d’une bonne constitution physique et mentale. MESURES DE PRÉCAUTION CONCERNANT L’UTILISATION DE L’APPAREIL •...
  • Page 83: Elimination

    DANGERS • Ne pas laisser les enfants se servir de l’appareil. Cette consigne vaut également pour les personnes qui ne connaissent pas le fonctionnement de l’appareil. • L’appareil peut représenter un danger pour les enfants. Si l’appareil est laissé sans surveillance, •...
  • Page 84: Données Techniques

    DONNÉES TECHNIQUES DONNÉES TECHNIQUES Voir plaque signalétique placée sur l’appareil. Tension nominale Voir plaque signalétique placée sur l’appareil. Puissance nominale Voir plaque signalétique placée sur l’appareil. Alimentation ABS - Thermoplastique Matériau du corps 320 x 370 x 400 mm Dimensions (l x a x p) 9 Kg Poids 1200 mm...
  • Page 88 Tel: + 39 0534 771111 Fax: + 39 0534 31025 www.saeco.com The manufacturer reserves the right to change the features of the product without prior notice. Le producteur se réserve le droit d“apporter toutes modifications sans préavis. © Saeco International Group S.p.A.

Table des Matières