Télécharger Imprimer la page

Publicité

Les langues disponibles
  • FR

Les langues disponibles

  • FRANÇAIS, page 18

Liens rapides

Waterpik
All manuals and user guides at all-guides.com
Water Flosser
®
Model WF-03
Munddusche Waterpik
Hydropulseur Waterpik
Idropulsore Waterpik
Irrigador bucal Waterpik
Waterpik
Modelo do Irrigador dentário
Ирригатор Waterpik
Modells WF-03
Modèle WF-03
Modello WF-03
Modelo WF-03
Water Flosser
®
Model WF-03
Waterpik
WF-03
®
Модель WF-03
®
®
®
®
®

Publicité

loading

Sommaire des Matières pour Waterpik WF-03

  • Page 1 All manuals and user guides at all-guides.com Waterpik Water Flosser ® Model WF-03 Munddusche Waterpik ® Modells WF-03 Hydropulseur Waterpik ® Modèle WF-03 Idropulsore Waterpik ® Modello WF-03 Irrigador bucal Waterpik ® Modelo WF-03 Waterpik Water Flosser ® Model WF-03 Modelo do Irrigador dentário...
  • Page 2 All manuals and user guides at all-guides.com IMPORTANT SAFEGUARDS IMPORTANT • Only use tips and accessories that are recommended by Water Pik, Inc. SAFEGUARDS • Do not drop or insert any foreign object into any When using electrical products, especially when children are present, basic safety precautions opening on the product.
  • Page 3 All manuals and user guides at all-guides.com Closely instruct and • supervise children 8 years and above and individuals with special needs in the proper use of this product. Children should be • supervised to ensure that they do not play with the appliance.
  • Page 4 All manuals and user guides at all-guides.com TABLE OF CONTENTS Product Description Getting Started Cleaning and Troubleshooting Your Waterpik Water Flosser ® Limited Two-Year Warranty...
  • Page 5 All manuals and user guides at all-guides.com PRODUCT DESCRIPTION 1. Power/pressure switch 2. Power handle 3. Battery door 4. Tip 5. Tip eject button 6. Flip top water inlet 7. Reservoir TIPS NOT ALL TIPS INCLUDED IN ALL MODELS A. Orthodontic Tip* - Braces/General Use B.
  • Page 6 All manuals and user guides at all-guides.com GETTING STARTED Inserting Batteries 1. Remove water reservoir. 2. Twist battery door left from the locked position to unlocked position and pull battery door away from the unit. 3. Insert 3 AA batteries as shown. 4.
  • Page 7 All manuals and user guides at all-guides.com When Finished Turn the unit off. Empty any liquid left in the reservoir. Power If desired, the reservoir may be removed from the power handle by sliding the reservoir down towards the base of the unit. To replace the reservoir on the power handle, simply slide it up towards the top of the unit.
  • Page 8 All manuals and user guides at all-guides.com CLEANING AND TROUBLESHOOTING YOUR WATERPIK WATER FLOSSER ® Using Mouthwash and Other Solutions Your Waterpik Water Flosser can be used to deliver mouthwash and ® antibacterial solutions. After using any special solution, rinse unit to prevent clogging by partially filling reservoir with warm water and running unit with tip pointed into sink until unit is empty.
  • Page 9 For all your warranty and accessory needs, please email InternationalService@Waterpik.com. Please do not ship product to Waterpik International, Inc. offices, this will delay service. Refer to the serial and model numbers in all correspondence.
  • Page 10 All manuals and user guides at all-guides.com WICHTIGE SICHERHEITSHINWEISE WICHTIGE • Verwenden Sie nur von Water Pik, Inc. empfohlene Aufsatzdüsen und Zubehörteile. SICHERHEITSHINWEISE • Keine Fremdkörper in eine der Öffnungen des Bei der Verwendung von Elektrogeräten müssen, Geräts einstecken oder fallen lassen. besonders, wenn Kinder in der Nähe sind, die Sicherheitsmaßnahmen immer befolgt werden.
  • Page 11 All manuals and user guides at all-guides.com Erklären Sie Kindern Es befinden sich keine • • unter 8 Jahren vom Verbraucher sowie Personen austauschbaren mit besonderen Teile im Gerät und Bedürfnissen genau Wartungsarbeiten sind die ordnungsgemäße nicht erforderlich. Verwendung dieses Füllen Sie den Tank nur •...
  • Page 12 All manuals and user guides at all-guides.com INHALTSVERZEICHNIS Produktbeschreibung Inbetriebnahme Reinigung und Problemlösung bei Ihrem Waterpik Water Flosser ® Begrenzte Garantie von zwei Jahren...
  • Page 13 All manuals and user guides at all-guides.com PRODUKTBESCHREIBUNG 1. Power/Druckregler 2. Griff 3. Batteriefachabdeckung 4. Jet-Düse 5. Düsenauswurftaste 6. Aufklappbarer Wassereinlass 7. Wassertank DÜSEN NICHT ALLE SPITZEN SIND BEI ALLEN MODELLEN ENTHALTEN. A. Orthodontic-Düse* - Zahnspangen/Allgemeiner Gebrauch B. Pik Pocket™ Düse* - Parodontaltaschen/Furkationen C.
  • Page 14 All manuals and user guides at all-guides.com INBETRIEBNAHME Einlegen der Batterien 1. Den Wassertank abnehmen. 2. Die Abdeckung des Batteriefachs nach links, aus der verriegelten Position in die entriegelte Position drehen und die Abdeckung vom Gerät abziehen. 3. 3 AA-Batterien wie dargestellt einlegen. 4.
  • Page 15 All manuals and user guides at all-guides.com Nach Gebrauch Schalten Sie die Einheit AUS. Im Wassertank verbliebene Flüssigkeit ausleeren. Power AUS Falls gewünscht, kann der Wassertank vom Griff abgenommen werden, indem der Tank nach unten, zur Unterseite des Geräts geschoben wird. Zum erneuten Anbringen am Griff den Tank einfach nach oben zur Oberseite des Geräts hin schieben.
  • Page 16 All manuals and user guides at all-guides.com REINIGUNG UND PROBLEMLÖSUNG BEI IHREM WATERPIK WATER FLOSSER ® Verwendung von Mundwasser und anderen Lösungen Ihr Waterpik Water Flosser kann verwendet werden, um Mundspülungen und ® antibakterielle Lösungen anzuwenden. Nach Verwendung einer Speziallösung spülen Sie die Einheit gründlich, um einem Verstopfen vorzubeugen, indem Sie das...
  • Page 17 Bei Anfragen hinsichtlich Garantie und Zubehör wenden Sie sich bitte per E-Mail an InternationalService@Waterpik.com. Bitte senden Sie das Produkt nicht an die Büros von Waterpik International, Inc., denn das würde den Kundendienst verzögern. Beziehen Sie sich bei jeder Korrespondenz auf die Serien- und Modellnummer. Diese Nummern befinden sich jeweils auf der Rückseite des Handgriffs und auf der Unterseite des...
  • Page 18 All manuals and user guides at all-guides.com MISES EN GARDE IMPORTANTES PRÉCAUTIONS • N’utilisez pas de piles au lithium dans ce produit. Ces piles peuvent produire des IMPORTANTES pressions pouvant se révéler inconfortables Pour l’utilisation de tout produit électrique, pour l’utilisateur et pouvant également particulièrement si des enfants sont présents, endommager l’appareil.
  • Page 19 All manuals and user guides at all-guides.com Cet appareil ne contient • N’utilisez pas l’appareil si vous avez une plaie • ouverte sur la langue ou dans la bouche. aucun composant • Si votre médecin vous a conseillé de prendre remplaçable par des antibiotiques avant les soins dentaires, l’utilisateur, et ne...
  • Page 20 All manuals and user guides at all-guides.com TABLE DES MATIÈRES Description du produit Comment démarrer Nettoyage et dépannage de l’hydropulseur Waterpik ® Garantie limitée de deux ans...
  • Page 21 
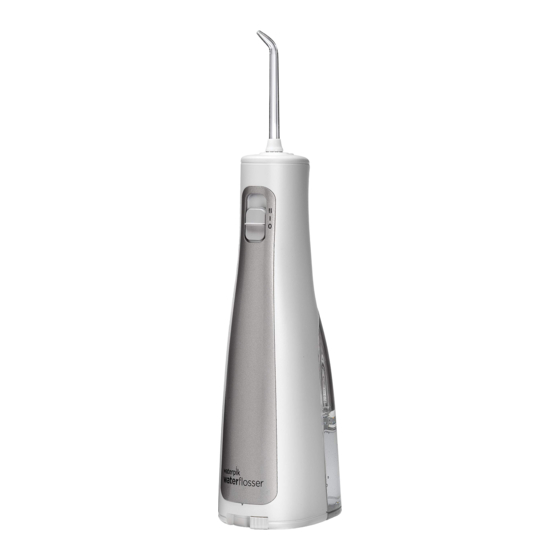
All manuals and user guides at all-guides.com DESCRIPTION DU PRODUIT 1. Interrupteur marche/pression 2. Poignée d’alimentation 3. Couvercle du compartiment des piles 4. Embout 5. Bouton d’éjection de l’embout 6. Orifice d’entrée d’eau avec dessus rabattable 7. Réservoir EMBOUTS TOUS LES EMBOUTS NE SONT PAS COMPRIS AVEC TOUS LES MODÈLES.
  • Page 22 All manuals and user guides at all-guides.com COMMENT DÉMARRER Insertion des piles 1. Retirez le réservoir d’eau. 2. Faites tourner le couvercle du compartiment des piles de la gauche (position verrouillée) vers la position déverrouillée et retirez le couvercle du compartiment des piles de l’appareil. 3.
  • Page 23 All manuals and user guides at all-guides.com Lorsque le nettoyage est terminé Placer le commutateur à la position d’ARRÊT. Videz le réservoir de tout liquide. Mise hors Si désiré, le réservoir peut être retiré de la poignée d’alimentation en faisant tension coulisser le réservoir vers le socle de l’appareil.
  • Page 24 All manuals and user guides at all-guides.com NETTOYAGE ET DÉPANNAGE DE L’HYDROPULSEUR WATERPIK ® Utilisation de bains de bouche et autres solutions Vous pouvez utiliser l’hydropulseur Waterpik pour l’administration d’un rince- ® bouche ou d’une solution antibactérienne. Après l’utilisation d’une quelconque solution spéciale, rincez l’appareil pour éviter la formation d’une obstruction :...
  • Page 25 Pour tous vos besoins en garantie et en accessoires, veuillez envoyer un courriel à InternationalService@Waterpik.com. Veuillez ne pas expédier le produit aux bureaux de Waterpik International, Inc., ceci retardera le service. Veuillez indiquer les numéros de série et de modèle dans toute correspondance. Ces numéros sont situés à l’arrière de la poignée et sous le réservoir, respectivement.
  • Page 26 All manuals and user guides at all-guides.com INFORMAZIONI IMPORTANTI SULLA SICUREZZA INFORMAZIONI • Usare solamente i ricambi e gli accessori ortodontici raccomandati da Water Pik, Inc. IMPORTANTI SULLA • Non inserire o far cadere oggetti estranei nelle SICUREZZA aperture del prodotto. Quando si utilizzano elettrodomestici, specialmente in presenza di bambini, adottare •...
  • Page 27 All manuals and user guides at all-guides.com Istruire i bambini oltre • i 8 anni e le persone con esigenze particolari sull’uso appropriato del prodotto. Sorvegliare i bambini • per accertarsi che non giochino con l’apparecchio. L’apparecchio non • possiede parti di ricambio e non richiede alcun servizio di manutenzione.
  • Page 28 All manuals and user guides at all-guides.com INDICE Descrizione del prodotto Per iniziare Pulizia dell’idropulsore Waterpik e risoluzione dei problemi ® Garanzia limitata di due anni...
  • Page 29 All manuals and user guides at all-guides.com DESCRIZIONE DEL PRODOTTO 1. Interruttore Alimentazione / Pressione 2. Manico 3. Porta batteria 4. Beccuccio 5. Tasto di espulsione del beccuccio 6. Ingresso dell’acqua con coperchio 7. Serbatoio BECCUCCI NON TUTTI I BECCUCCI SONO FORNITI CON TUTTI I MODELLI. A.
  • Page 30 All manuals and user guides at all-guides.com PER INIZIARE Inserimento delle batterie 1. Rimuovere il serbatoio dell’acqua. 2. Girare lo sportello della batteria a sinistra dalla posizione di blocco alla posizione di sblocco e togliere lo sportello della batteria dall’unità 3.
  • Page 31 All manuals and user guides at all-guides.com Al termine Spegnere l’unità posizionando l’interruttore su “OFF”. Svuotare il liquido residuo Alimentazione nel serbatoio. Se desiderato, il serbatoio può essere rimosso dal manico facendo scorrere il serbatoio di alimentazione verso la base dell’unità. Per rimontare il serbatoio sul manico, farlo scorrere verso la parte superiore dell’apparecchio.
  • Page 32 PULIZIA DELL’IDROPULSORE WATERPIK E RISOLUZIONE DEI PROBLEMI ® Uso di colluttori e altre soluzioni È possibile usare l’idropulsore Waterpik per l’erogazione di collutori e altre ® soluzioni antibatteriche. Dopo aver usato una soluzione speciale, risciacquare per evitare l’intasamento riempiendo parzialmente il serbatoio con acqua calda e azionando l’unità...
  • Page 33 InternationalService@Waterpik.com. Si prega di non spedire il prodotto agli uffici Waterpik International, Inc., in quanto ciò ritarderebbe il servizio. Fare riferimento ai numeri di serie e di modello in tutte le comunicazioni. Questi numeri si trovano rispettivamente sul retro del manico e nella parte inferiore del serbatoio.
  • Page 34 All manuals and user guides at all-guides.com MEDIDAS DE SEGURIDAD IMPORTANTES MEDIDAS DE • No use pilas de litio en este producto. Estas pilas pueden producir presiones que pueden SEGURIDAD resultar incómodas para el usuario y causar IMPORTANTES daños en el aparato. El uso de pilas de litio Cuando use productos eléctricos, especialmente anulará...
  • Page 35 All manuals and user guides at all-guides.com Instruya y supervise • de cerca a los niños de 8 años y adultos con necesidades especiales sobre el uso correcto de este aparato. Los niños deben ser • supervisados para asegurar que no jueguen con el irrigador.
  • Page 36 All manuals and user guides at all-guides.com ÍNDICE Descripción del producto Introducción Cómo limpiar y reparar el irrigador bucal inalámbrico Waterpik ® Garantía limitada de dos años...
  • Page 37 All manuals and user guides at all-guides.com DESCRIPCIÓN DEL PRODUCTO 1. Interruptor de Encendido/Presión 2. Mango 3. Tapa de las pilas 4. Boquilla 5. Botón para expulsión de las boquillas 6. Entrada de agua con la parte superior abatible 7. Depósito BOQUILLAS NO SE INCLUYEN TODAS LOS BOQUILLAS O CABEZALES EN TODOS LOS MODELOS...
  • Page 38 All manuals and user guides at all-guides.com INTRODUCCIÓN Colocación de las pilas 1. Quite el depósito de agua. 2. Gire la tapa de las pilas hacia la izquierda desde la posición bloqueada a desbloqueada y retire la tapa de las pilas para quitarla de la unidad. 3.
  • Page 39 All manuals and user guides at all-guides.com Cuando haya terminado APAGUE la unidad. Vacíe el líquido que haya podido quedar en el depósito. Apagado Si lo desea, puede quitar el depósito del mango de encendido deslizando el depósito hacia abajo en dirección a la base de la unidad. Para volver a colocar el depósito en el mango de encendido, simplemente deslícelo hacia la parte superior de la unidad.
  • Page 40 All manuals and user guides at all-guides.com CÓMO LIMPIAR Y REPARAR EL IRRIGADOR BUCAL INALÁMBRICO WATERPIK ® Uso de enjuague bucal y otras soluciones Puede utilizar su irrigador bucal Waterpik para aplicar enjuagues bucales ® y soluciones antibacterianas. Después de usar cualquier solución especial, enjuague la unidad para evitar que se obstruya;...
  • Page 41 Para obtener información sobre la garantía y los accesorios, envíe un correo electrónico a InternationalService@Waterpik.com. No envíe el producto a las oficinas de Waterpik International, Inc.; esto demorará el servicio. Incluya los números de serie y de modelo en toda la correspondencia. Estos números se encuentran en la parte posterior del mango y la base del depósito,...
  • Page 42 All manuals and user guides at all-guides.com BELANGRIJKE VOORZORGSMAATREGELEN BELANGRIJKE • Alleen tips en accessoires gebruiken die aanbevolen zijn door Water Pik, Inc. VOORZORGSMAATREGELEN • Geen vreemde voorwerpen in één van de Bij het gebruik van elektrische apparaten, vooral openingen van het product steken of er in laten daar waar kinderen zijn, dient u altijd elementaire veiligheidsmaatregelen te nemen, waaronder vallen.
  • Page 43 All manuals and user guides at all-guides.com Houd toezicht bij, en Vul het reservoir • • verstrek instructies aan, met warm water of kinderen van 8 jaar een andere door een en ouder en personen tandheelkundige met speciale behoeften aanbevolen oplossing. wat betreft het correcte BEWAAR DEZE INSTRUCTIES.
  • Page 44 All manuals and user guides at all-guides.com INHOUDSTABEL Productbeschrijving Van start gaan Reinigen en problemen oplossen van uw Waterpik Water Flosser 48 ® Twee jaar beperkte garantie...
  • Page 45 All manuals and user guides at all-guides.com PRODUCTBESCHRIJVING 1. Aan-uit/drukschakelaar 2. Bedieningshandgreep 3. Batterijklepje 4. Tip 5. Knop om tip uit te werpen 6. Vulopening met deksel 7. Reservoir TIPS ALLE TIPS ZIJN NIET BIJ ALLE MODELLEN INBEGREPEN A. Orthodontische tip* - Beugels/algemeen gebruik B.
  • Page 46 All manuals and user guides at all-guides.com VAN START GAAN Batterijen plaatsen 1. Haal het waterreservoir los. 2. Ontgrendel het batterijklepje door het naar links te draaien en haal de batterijen uit het apparaat. 3. Plaats 3 AA-batterijen zoals afgebeeld. 4.
  • Page 47 All manuals and user guides at all-guides.com Wanneer u klaar bent Schakel het apparaat UIT. Giet eventuele vloeistof die in het reservoir is Power UIT achtergebleven weg. U kunt het reservoir loshalen uit de bedieningshandgreep door het naar beneden te schuiven. Om het reservoir opnieuw op de bedieningshandgreep te plaatsen, het reservoir omhoog schuiven naar de bovenzijde van het apparaat.
  • Page 48 All manuals and user guides at all-guides.com REINIGEN EN PROBLEMEN OPLOSSEN VAN UW WATERPIK WATER FLOSSER ® Mondspoelmiddel en andere oplossingen gebruiken Uw Waterpik Water Flosser kan worden gebruikt in combinatie met mondwater ® en antibacteriële oplossingen. Om verstopping te voorkomen dient u het...
  • Page 49 InternationalService@Waterpik.com. Verzend uw product niet naar het kantoor van Waterpik International, Inc.; dit zal de service vertragen. Vermeld het serie- en modelnummer in alle correspondentie. Deze contactgegevens staan vermeld op de achterzijde van de handgreep respectievelijk de onderzijde van het reservoir.
  • Page 50 All manuals and user guides at all-guides.com SALVAGUARDAS IMPORTANTES SALVAGUARDAS • Utilize somente as pontas e acessórios recomendados pela Water Pik, Inc. IMPORTANTES • Não deixe cair ou insira qualquer objeto Ao utilizar produtos elétricos, especialmente com estranho em qualquer abertura no produto. crianças presentes, devem ser sempre seguidas as precauções básicas de segurança, incluindo o •...
  • Page 51 All manuals and user guides at all-guides.com Acompanhe e Não há peças reparáveis • • supervisione por parte do consumidor atentamente as crianças neste aparelho e de 8 anos e com idade não requer qualquer superior e os indivíduos manutenção. com necessidades Encha o reservatório •...
  • Page 52 All manuals and user guides at all-guides.com ÍNDICE Descrição do produto Introdução Limpeza e resolução de problemas do Irrigador dentário Waterpik ® Garantia limitada de dois anos...
  • Page 53 All manuals and user guides at all-guides.com DESCRIÇÃO DO PRODUTO 1. Interruptor de alimentação/ pressão 2. Pega elétrica 3. Porta da bateria 4. Ponta 5. Botões de ejeção da ponta 6. Entrada de água “flip top” 7. Reservatório PONTAS NEM TODAS AS PONTAS ESTÃO INCLUÍDAS A.
  • Page 54 All manuals and user guides at all-guides.com INTRODUÇÃO Inserção de baterias 1. Remova o reservatório de água. 2. Rode a porta da bateria para a esquerda a partir da posição bloqueada para a posição desbloqueada e remova a porta da bateria da unidade. 3.
  • Page 55 All manuals and user guides at all-guides.com Ao terminar Coloque a unidade na posição OFF (Desligado). Remova qualquer líquido Alimentação desligada remanescente no reservatório. (OFF) Caso pretenda, o reservatório pode ser removido a partir da pega elétrica ao deslizar o reservatório na direção da base da unidade. Para substituir o reservatório na pega elétrica, baste deslizá-lo em direção à...
  • Page 56 All manuals and user guides at all-guides.com LIMPEZA E RESOLUÇÃO DE PROBLEMAS DO IRRIGADOR DENTÁRIO WATERPIK ® Utilização de antisséticos bucais ou de outras soluções O Irrigador dentário Waterpik pode ser utilizado para fornecer antisséticos ® bocais e soluções antibacterianas. Após utilizar qualquer solução especial, lave a unidade para evitar o entupimento, enchendo parcialmente o reservatório...
  • Page 57 Relativamente às questões de garantia ou necessidades de acessórios, envie um e-mail para InternationalService@Waterpik.com. Não envie o produto para os escritórios da Waterpik International, Inc., pois tal ação irá atrasar a assistência. Indique os números de série e de modelo em toda a correspondência.
  • Page 58 All manuals and user guides at all-guides.com ВАЖНЫЕ МЕРЫ ПРЕДОСТОРОЖНОСТИ ВАЖНЫЕ МЕРЫ • Не роняйте изделие и не вставляйте посторонние предметы в его ПРЕДОСТОРОЖНОСТИ отверстия. При использовании электрических • Не используйте данное изделие изделий, особенно в присутствии детей, на открытом воздухе, в местах необходимо...
  • Page 59 All manuals and user guides at all-guides.com Тщательно обучите и СОХРАНИТЕ ЭТУ ИНСТРУКЦИЮ. • контролируйте правильное Ирригаторы полости рта Waterpik предназначены для массажа тканей десен, использование данного удаления зубного налета и улучшения здоровья десен. Ирригаторы Waterpik изделия детьми в возрасте...
  • Page 60 All manuals and user guides at all-guides.com СОДЕРЖАНИЕ Описание изделия Перед началом использования Очистка, поиск и устранение неисправностей ирригатора Waterpik® Ограниченная гарантия на два года...
  • Page 61 All manuals and user guides at all-guides.com ОПИСАНИЕ ИЗДЕЛИЯ 1. Переключатель мощности/давления 2. Корпус с блоком питания 3. Крышка батарейки 4. Насадка 5. Кнопка сброса насадки 6. Откидная крышка резервуара для воды 7. Резервуар НАСАДКИ ПРИМЕЧАНИЕ: НЕ ВСЕ НАСАДКИ ВХОДЯТ A.
  • Page 62 All manuals and user guides at all-guides.com ПЕРЕД НАЧАЛОМ ИСПОЛЬЗОВАНИЯ Замена батареек 1. Снимите резервуар для воды 2. Поверните крышку батарейки влево из положения «закрыто» в положение «открыто» и откройте крышку прибора 3. Вставьте 3 АА батарейки, как показано на рисунке. 4.
  • Page 63 All manuals and user guides at all-guides.com Когда вы закончили Выключите устройство – Выкл. Вылейте остатки жидкости из резервуара. При желании резервуар для воды можно снять Отключение питания с ручки прибора скользящим движением вниз к основанию прибора. Для того, чтобы заменить резервуар в корпусе, просто потяните его...
  • Page 64 All manuals and user guides at all-guides.com ОЧИСТКА, ПОИСК И УСТРАНЕНИЕ НЕИСПРАВНОСТЕЙ ИРРИГАТОРА WATERPIK ® Использование ополаскивателя для рта и других растворов Ирригатор Waterpik может использоваться для подачи ополаскивателя ® и антибактериальных растворов. После использования любого специального раствора прополощите устройство для предотвращения...
  • Page 65 обслуживания. По всем вопросам, связанным с гарантией и аксессуарами, обращайтесь по адресу: InternationalService@Waterpik.com. Не отправляйте изделие в офисы Waterpik International, Inc., так как это приведет к задержке обслуживания. В письмах указывайте номер серии и номер модели. Эти номера находятся на задней части ручки...
  • Page 66 Inc. registrada en Alemania, Arabia Saudita, Argentina, eingetragenes Warenzeichen in Argentinien, Australien, Australia, Benelux, Brasil, Canadá, Chile, China, Corea, Waterpik® – торговая марка компании Water den Beneluxländern, Brasilien, Kanada, Chile, China, Dinamarca, Estados Unidos Federación Rusa, España, Pik, Inc., зарегистрированная в Аргентине, der Tschechischen Republik, Dänemark, der EU,...