
Manuels Connexes pour TechniSat DIGITRADIO 360 CD


Sommaire des Matières pour TechniSat DIGITRADIO 360 CD
- Page 1 All manuals and user guides at all-guides.com DIGITRADIO 360 CD Stereo DAB+ and USW radio with USB connection, audio input and MP3/CD player...
- Page 2 all-guides.c...
- Page 3 All manuals and user guides at all-guides.com CONTENTS ENGLISH ................... 3-58 FRANÇAIS ..................59-114 ITALIANO ..................115-170 NEDERLANDS ................171-226 NORSK ..................227-282 DANSK ..................283-338 POLSKE ..................339-394 ČEŠTINA ..................395-450 SLOVENSKÉ ................451-506...
- Page 4 All manuals and user guides at all-guides.com Instruction Manual DIGITRADIO 360 CD Stereo DAB+ and USW radio with USB connection, audio input and MP3/CD player...
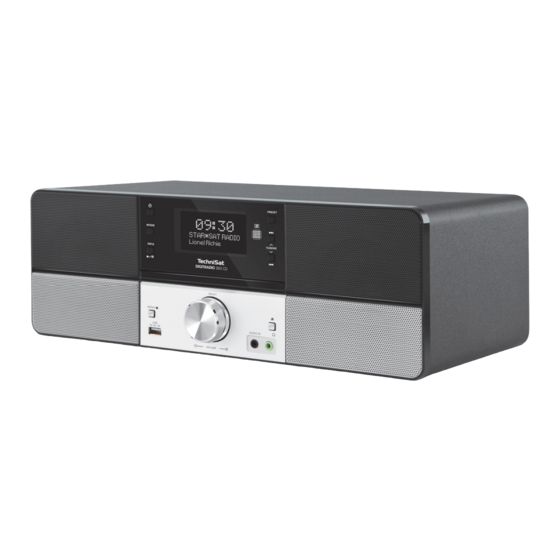
- Page 5 All manuals and user guides at all-guides.com 1 Illustrations Operation: ON/STANDBY PRESET MODE FORWARD / TUNING r/: PLAY/PAUSE /INFO BACK / TUNING s/9 DISPLAY IR RECEIVER SELECT / VOLUME AUDIO INPUT MENU / STOP EJECT/ open/close CD compartment USB CONNECTION HEADPHONE CONNECTION CD compartment...
- Page 6 All manuals and user guides at all-guides.com Rear: Telescopic antenna...
- Page 7 All manuals and user guides at all-guides.com Remote control: ON/STANDBY Device on/off (Standby), Alarm off OPEN/CLOSE Open/close CD compartment PRESET Programming function CLOCK Set time TIMER Setting the alarm time INTRO CD, USB: Preview function, 10 s per track RANDOM CD, USB: Random function MUTE Mute function...
- Page 8 all-guides.c...
- Page 9 All manuals and user guides at all-guides.com SCAN Automatic USW scan SCAN Automatic DAB scan DISPLAY Track information for CD /USB playback Switch ID3 tags on/off USB playback operating mode CD playback operating mode FOLDER - CD/USB: album selection PRESET s Select DAB, USW TUNER: PRESET stations VOL -...
- Page 10 Remote control ....................................... 22 Description of the DIGITRADIO 360 CD ......................... 22 Scope of delivery ....................................22 The special features of the DIGITRADIO 360 CD ........................22 Preparing the DIGITRADIO 360 CD for operation ........................23 4.3.1 Connecting the mains cable ................................23 4.3.2 Improving the antenna reception ..............................24...
- Page 11 All manuals and user guides at all-guides.com Menu operation ................................29 DAB radio ..................................30 What is DAB+? ......................................30 6.1.1 Data compression ....................................30 6.1.2 Audio stream ......................................30 DAB radio reception ....................................31 Performing the automatic scan ..............................31 Selecting DAB stations ..................................
- Page 12 All manuals and user guides at all-guides.com Track sampling ......................................42 Programming function ..................................43 Playing USB media ..............................44 Audio input ..................................45 Other functions ................................46 11.1 Sleep function ......................................46 11.2 Time setting ......................................47 11.3 Alarm ........................................... 47 11.3.1 Switching off the alarm after being woken ..........................48 11.3.2 Switching the alarm on/off ................................48 11.4 Sound setting ......................................49...
- Page 13 All manuals and user guides at all-guides.com 2 Foreword This instruction manual helps you to use your radio system properly and safely, hereinafter referred to as DIGITRADIO or device. 2.1 Target group for this instruction manual The instruction manual is intended for anyone who is installing, operating, cleaning or disposing of the device. 2.1.1 Intended use The device has been developed for the reception of DAB+/USW radio programmes.
- Page 14 all-guides.c...
- Page 15 All manuals and user guides at all-guides.com 2.2.1 Safety For your own protection you should read the safety precautions carefully before using your new device. The manufacturer accepts no liability for damage caused by inappropriate handling, or by non-compliance with the safety precautions.
- Page 16 All manuals and user guides at all-guides.com In the event of a thunderstorm, disconnect the device from the mains. Overvoltage can damage the device. In the event of an obvious fault with the device, emanation of odour or smoke, substantial malfunctions, damage to the housing or fluid ingress, immediately switch off the device and contact the Service department.
- Page 17 All manuals and user guides at all-guides.com This device is not intended to be used by people (including children) with limited physical, sensory or mental capacities or lack of experience and/or knowledge, unless they are supervised by a person responsible for their safety or they are instructed by them as to how to use the device. Children must be supervised to ensure that they do not play with the device.
- Page 18 All manuals and user guides at all-guides.com Using the batteries Ensure that the batteries are kept out of the reach of children. Children could put the batteries into their mouths and swallow them. This could lead to serious injuries. Therefore ensure that the batteries and remote control are out of reach of young children.
- Page 19 All manuals and user guides at all-guides.com 2.2.2 Disposal The device packaging is exclusively comprised of recyclable materials. Please sort the components appropriately, and dispose of them in line with your local waste disposal regulations At the end of its service life, this device must not be disposed of with your regular household waste. It must be taken to a recycling collection point for electrical and electronic equipment.
- Page 20 all-guides.c...
- Page 21 TechniSat herewith declares that the radio system model DIGITRADIO 360 CD corresponds to Directive 2014/53/EU. The complete text of the EU declaration of conformity is available at the following website: http://konf.tsat.de/?ID=11100 TechniSat accepts no liability for product damage as a result of external influences, wear or improper handling, unauthorised repairs, modifications or accidents.
- Page 22 All manuals and user guides at all-guides.com Changes and printing errors reserved. Version 03/18. Copy and reproduction are subject to the publisher's consent. The respective current version of the instructions can be downloaded in PDF format in the download area of the TechniSat homepage at www. technisat.de.
- Page 23 If you encounter a problem with this equipment, please contact our Technical Hotline initially. Mon. - Fri. 8:00 am - 8:00 pm +49 (0)3925 9220 1800 Should you wish to return the device, please do so to the following address only: TechniSat Digital GmbH Service-Center Nordstr. 4a 39418 Staßfurt, Germany The names of the companies, institutions or makes referred to are trademarks or registered trademarks of the respective owners.
- Page 24 Place a protective layer between your furniture and the device. > You may only operate the device in a horizontal position. Do not use outdoors! > Keep the DIGITRADIO 360 CD away from devices which emit intense magnetic fields.
- Page 25 All manuals and user guides at all-guides.com > Do not place any heavy objects on the device. > If you move the device from a cold environment to a hot environment, moisture could accumulate inside the device. In such a case, wait approximately one hour before putting it into operation. >...
- Page 26 all-guides.c...
- Page 27 DIGITRADIO 360 CD 1 x remote control with battery 1 x instruction manual 4.2 The special features of the DIGITRADIO 360 CD DIGITRADIO 360 CD is comprised of a stereo DAB+/USW receiver with USB/AUX input, MP3/CD player and timer function.
- Page 28 All manuals and user guides at all-guides.com 4.3 Preparing the DIGITRADIO 360 CD for operation 4.3.1 Connecting the mains cable > Connect the device to the power supply using the mains plug. Ensure that the operating voltage of the device matches the mains voltage before you insert it in the wall socket.
- Page 29 All manuals and user guides at all-guides.com 4.3.2 Improving the antenna reception The number and quality of the stations to be received depend on the reception conditions at the installation location. Excellent reception can be achieved with the telescopic antenna. >...
- Page 30 All manuals and user guides at all-guides.com 4.3.3 Inserting the battery > Close the battery compartment lid carefully again to ensure that the lid retaining tabs engage in the housing. To operate the remote control, an alkaline battery (type mignon, 1.5 V, LR6/AA) is required. Ensure that the polarity is correct when inserting.
- Page 31 All manuals and user guides at all-guides.com 4.4.1 Switching on the device > Use the On/Standby button on the device (1) or on the remote control (16) to switch the device on or back to standby. Fully extend the antenna before using the device. After switching on for the first time, the device is in DAB radio mode.
- Page 32 all-guides.c...
- Page 33 All manuals and user guides at all-guides.com 4.4.3 Adjusting the volume > Adjust the volume using the VOL -/+ (43, 26) buttons on the remote control or by rotating the SELECT/ VOLUME (5) knob on the device. - Clockwise = higher - Anti-clockwise = lower The volume setting is shown on the display.
- Page 34 All manuals and user guides at all-guides.com 4.4.6 Retrieving displays > By repeatedly pressing the INFO (3) button on the device (in CD/USB mode the button must be kept depressed for a few seconds), or on the remote control the DISPLAY buttons of the respective modes (button 33 for DAB, 35 for FM, 38 for CD/USB), you can display and scroll through the following information: DAB mode:...
- Page 35 All manuals and user guides at all-guides.com 5 Menu operation Different settings can be adjusted on the DIGITRADIO 360 CD via a menu, on the device or by using the remote control. The menu items shown depend on the selected operating mode (DAB or FM).
- Page 36 All manuals and user guides at all-guides.com 6 DAB radio 6.1 What is DAB+? DAB+ is a new digital format through which crystal clear sound with no noise can be heard. Contrary to conventional analogue radio transmitters, with DAB multiple stations are transmitted on one and the same frequency.
- Page 37 All manuals and user guides at all-guides.com 6.2 DAB radio reception > To switch on DAB mode, press the MODE (2) button on the device as often as required until DAB Radio is shown in the display, or use the TUNER/DAB (30) button on the remote control. If the device is being started for the first time, a complete scan is performed and a station list added.
- Page 38 all-guides.c...
- Page 39 All manuals and user guides at all-guides.com 6.4 Selecting DAB stations > By pressing the TUNING s/9 or TUNING r/: (10, 9) button on the device or the TUNING s/97 or TUNING r/8: (45, 25) buttons on the remote control, you can select the stations found during the DAB scan and select by pressing the SELECT/VOLUME knob on the device or pressing the ENTER button on the remote control.
- Page 40 All manuals and user guides at all-guides.com 6.6 Retrieving DAB stations from a memory slot > In order to retrieve a station that you have stored on a memory slot, briefly press the PRESET button on the device or on the remote control. The list now appears with the 30 available memory slots.
- Page 41 All manuals and user guides at all-guides.com > The menu item is selected by pressing the SELECT/VOLUME knob on the device or ENTER on the remote control. > You can select a channel by rotating the SELECT/VOLUME knob on the device or using the TUNING s/97 or TUNING r/8: buttons on the remote control (5A to 13F and their frequencies).
- Page 42 All manuals and user guides at all-guides.com 6.9 Deleting inactive stations > By selecting MENU > Inactive stations, you can clear the station list of stations which are no longer broadcasting or can no longer be received. > When the confirmation prompt appears, use the TUNING s/9 or TUNING r/: (10, 9) buttons on the device or the TUNING s/97 or TUNING r/8: (45, 25) buttons on the remote control or YES, and confirm with ENTER to start the process.
- Page 43 All manuals and user guides at all-guides.com 7 USW mode > As described in section 4.4.5, select the FM Radio source. When switching on for the first time, the frequency 87.5 MHz is set. If you have already set or saved a station, the radio plays the last station set. The display features the RDS information RT (Radio text), PS (Station name) and PTY (Programme type), provided that the selected station is broadcasting these data.
- Page 44 all-guides.c...
- Page 45 All manuals and user guides at all-guides.com 7.2 Manual station scan > Briefly press the TUNING s/9 or TUNING r/: (10, 9) buttons on the device or the TUNING s/97 or TUNING r/8: (45, 25) buttons on the remote control as often as required until the frequency of the desired radio station has been reached.
- Page 46 All manuals and user guides at all-guides.com > Select the desired memory slot by rotating the SELECT/VOLUME knob on the device or by using the PRESET r or PRESET s (44, 42) buttons on the remote control. Confirm the storage process by pressing the SELECT/VOLUME knob on the device or ENTER on the remote control.
- Page 47 All manuals and user guides at all-guides.com 7.5 Audio setting (Mono/Stereo) > With MENU > Audio setting you can preselect whether you wish the sound to be emitted in mono only (Only mono) or also in stereo (Stereo available). Alternatively: >...
- Page 48 All manuals and user guides at all-guides.com Due do the range of different encoder software, it cannot be guaranteed that every file can be played error-free. In the event of tracks/files being faulty, playback will continue with the next track/file. When burning the CD, it is worth doing so at low speed and creating the CD as a single session and finalising.
- Page 49 Playback is stopped by using the STOP (6) button on the device or < (32) on the remote control. The total number of tracks appears on the display. Always stop the playback prior to removing the CD. If there is no playback, the DIGITRADIO 360 CD switches to standby after 15 minutes. 8.4 Setting the track >...
- Page 50 all-guides.c...
- Page 51 All manuals and user guides at all-guides.com 8.5 Quick search While the track is playing, you can perform a quick search forwards or backwards to find a specific section. There is no playback during the search process. > Press and hold the FORWARD or BACK buttons on the device or the TUNING s/97 or TUNING r/8: (45, 25) buttons on the remote control in order to perform a quick fast forward and rewind within the track for as long as the buttons are held down.
- Page 52 All manuals and user guides at all-guides.com 8.9 Programming function With the programming function, you can play up to 32 tracks on a music CD or 64 tracks on an MP3/WMA-CD in an order determined by you. You can only carry out programming if there is a disc in the closed CD compartment and the device is in stop mode.
- Page 53 All manuals and user guides at all-guides.com With MP3 CDs you also indicate the folder/album number. > After starting the programming function using the PRESET button, an F flashes on the display, followed by the folder/album number. Select the folders/albums using the FOLDER- or FOLDER+ (41, 28) buttons on the remote control.
- Page 54 If no memory medium has been connected or it cannot be read, No USB appears on the display. If there is no playback, the DIGITRADIO 360 CD switches to standby after 15 minutes. 10 Audio input...
- Page 55 It is recommended that you set the volume on the DIGITRADIO 360 CD on a DAB+ or USW station, for example, switch to audio input and then adjust the volume on the connected device in such a way that the overall volume of the audio input corresponds approximately to the volume of the DAB+/ USW station.
- Page 56 all-guides.c...
- Page 57 All manuals and user guides at all-guides.com 11.2 Time setting If a DAB signal is being received, the time is synchronised automatically and the correct time is set. If the time is not set automatically, proceed as follows: > Switch the device to standby. >...
- Page 58 All manuals and user guides at all-guides.com > Use the TUNING s/97 or TUNING r/8: buttons to set the switch-off time in hours and minutes. Press the TIMER button each time to confirm. > The switch-on source flashes. Use TUNING s/97 or TUNING r/8: to set the desired source (DAB, FM, DISC (CD), USB).
- Page 59 All manuals and user guides at all-guides.com 11.4 Sound setting In order to adjust the sound of the DigitRadio 360 CD, you can use the equaliser with the preset tuning options. > Press the EQ (47) button on the remote control for direct access to the equaliser settings. Select the desired the equaliser settings by repeatedly pressing the EQ button.
- Page 60 All manuals and user guides at all-guides.com 11.6 Factory setting If you change the location of the device, e.g. when moving house, it is possible that the saved DAB stations can no longer be received. In this case you can reset the device to factory settings to delete all the saved stations and launch a new scan at the same time.
- Page 61 All manuals and user guides at all-guides.com 11.8 Using headphones Do not listen to music at a high volume when using headphones. Doing so can cause permanent hearing impairment. Turn down the radio volume to the lowest volume before using headphones. When you connect headphones (not included in the scope of delivery), the speakers are muted and sound is only heard via the headphones.
- Page 62 all-guides.c...
- Page 63 All manuals and user guides at all-guides.com 12.1 CD advice Always keep the CD in its cover and only hold it by the edges. The rainbow-coloured, shimmering surface must never be touched and must always be kept clean. Do not stick paper or adhesive tape to the label side of the disc.
- Page 64 All manuals and user guides at all-guides.com 13 Troubleshooting If the device does not operate as intended, check the following tables for information. 13.1 Problems with the device Symptom Possible cause/remedy The device is not being supplied with power. The device cannot be switched on. Connect the mains plug correctly to the mains outlet.
- Page 65 All manuals and user guides at all-guides.com 13.2 Problems with USB media Symptom Possible cause/remedy The device is not in USB mode. Switch to the respective source using MODE. No playback possible. Medium not inserted or empty. Insert the medium correctly or provide it with music data.
- Page 66 All manuals and user guides at all-guides.com 13.4 Problems with the radio Symptom Possible cause/remedy The device is not in radio mode. No radio stations are being received. Press the MODE button. Check whether DAB reception is possible in the region. No DAB signal is received.
- Page 67 All manuals and user guides at all-guides.com 13.5 Problems with the CD player Symptom Possible cause/remedy The device is not in CD mode. Faulty CD inserted. The CD compartment is not closed. Close the CD compartment. The CD is incorrectly inserted. Insert the CD with the labelled side facing upwards.
- Page 68 all-guides.c...
- Page 69 All manuals and user guides at all-guides.com Symptom Possible cause/remedy The volume is set too high. Decrease the volume. The CD is damaged or dirty. The sound is intermittent. Clean the CD or replace it. The device is being exposed to vibration. Install the device in a location with low vibration levels.
- Page 70 All manuals and user guides at all-guides.com 14 Technical data Subject to technical changes and errors. The dimensions are approximate values. Reception channels DAB/DAB+, USW, CD, USB, AUX USW: 87.5-108MHz Frequencies DAB/DAB+: 174-240MHz Mains voltage AC Input: 110-240; 50Hz USB supply DC 5V 1.0A Output power Speaker 2 x 5W RMS...
- Page 71 All manuals and user guides at all-guides.com Mode d'emploi DIGITRADIO 360 CD Radio FM et DAB+ stéréo avec port USB, entrée audio et lecteur CD/MP3...
- Page 72 All manuals and user guides at all-guides.com 1 Illustrations Utilisation : ON/STAND-BY PRESET MODE AVANCE/TUNING r/: PLAY/PAUSE / INFO RETOUR/TUNING s/9 ÉCRAN RÉCEPTEUR IR SELECT / VOLUME ENTRÉE AUDIO MENU / STOP EJECT/ Ouvrir/fermer le compartiment à CD PORT USB PRISE CASQUE Compartiment à...
- Page 73 All manuals and user guides at all-guides.com Arrière : Antenne télescopique...
- Page 74 all-guides.c...
- Page 75 All manuals and user guides at all-guides.com Télécommande : ON/STAND-BY Mise en marche/arrêt de l'appareil (veille), Arrêt de l'alarme OPEN/CLOSE Ouvrir/fermer le compartiment à CD PRESET Fonction programmation CLOCK Réglage de l'heure TIMER Réglage de l'alarme INTRO CD, USB : fonction Préaffichage, 10 s. par titre RANDOM CD, USB : lecture aléatoire MUTE...
- Page 76 All manuals and user guides at all-guides.com SCAN Recherche automatique FM SCAN Recherche automatique DAB ÉCRAN Informations sur les titres Lecture CD/USB Mise en marche/arrêt des tags ID3 Mode : lecture USB Mode : lecture CD FOLDER – CD/USB : choix de l'album PRESET s DAB, TUNER FM : sélection des stations PRESET...
- Page 77 Description de la DIGITRADIO 360 CD ........................78 Contenu de la livraison ..................................78 Caractéristiques spécifiques de la DIGITRADIO 360 CD ...................... 78 Préparation de la DIGITRADIO 360 CD au fonctionnement ....................79 4.3.1 Branchement du câble d'alimentation ............................79 4.3.2 Amélioration de la réception de l'antenne ..........................80...
- Page 78 All manuals and user guides at all-guides.com Commande du menu ..............................85 Radio DAB ..................................86 Qu'est-ce que le DAB+ ? ..................................86 6.1.1 Compression des données ................................86 6.1.2 Flux audio ........................................86 Réception radio DAB .................................... 87 Exécution d'une recherche automatique ..........................87 Sélection des stations DAB ................................
- Page 79 All manuals and user guides at all-guides.com Écouter un extrait du titre .................................. 98 Fonction programmation ...................................99 Lecture de médias USB ............................100 Entrée audio .................................101 Fonctions supplémentaires ............................. 102 11.1 Fonction de veille ....................................102 11.2 Réglage de l'heure....................................103 11.3 Réveil..........................................
- Page 80 all-guides.c...
- Page 81 All manuals and user guides at all-guides.com 2 Avant-propos Ce mode d’emploi vous aide à utiliser votre système de radio, ci-après nommé DIGITRADIO ou appareil, de manière sûre et conforme à sa destination. 2.1 Groupe cible de ce mode d’emploi Ce mode d’emploi s’adresse à...
- Page 82 All manuals and user guides at all-guides.com 2.2.1 Sécurité Pour votre sécurité, vous devez lire attentivement les consignes de sécurité avant de mettre en service votre nouvel appareil. Le fabricant décline toute responsabilité pour les dommages résultant d’une utilisation inappropriée de l’appareil et du non-respect des dispositions de sécurité. N’ouvrez jamais l’appareil ! Tout contact avec des pièces conductrices de tension peut entraîner la mort ! Les interventions éventuellement nécessaires doivent être uniquement effectuées par du personnel...
- Page 83 All manuals and user guides at all-guides.com En cas d’orage, il est conseillé de débrancher l’appareil du secteur. Une surtension peut endommager l’appareil. Si l’appareil semble défectueux, s’il produit des odeurs ou fumées, s’il présente des dysfonctionnements importants, si le boîtier est endommagé, si du liquide est entré en contact avec l'appareil, arrêtez immédiatement l’appareil et contactez l’assistance technique.
- Page 84 All manuals and user guides at all-guides.com N’écoutez pas la musique ou la radio à plein volume. Cela peut entraîner des lésions auditives permanentes. Cet appareil n’est pas destiné à être utilisé par des personnes (y compris les enfants) dont les capacités physiques, sensorielles ou mentales sont limitées ou manquant d’expérience et/ou de connaissances, sauf si elles sont surveillées par une personne responsable de leur sécurité...
- Page 85 All manuals and user guides at all-guides.com Manipulation des piles Veillez à ce que les piles ne tombent pas entre les mains des enfants. Les enfants peuvent les mettre dans la bouche et les avaler, ce qui peut entraîner de graves problèmes de santé. Conservez de ce fait les piles et la télécommande hors de portée des enfants en bas âge.
- Page 86 all-guides.c...
- Page 87 All manuals and user guides at all-guides.com 2.2.2 Élimination L’emballage de votre appareil est exclusivement composé de matériaux recyclables. Merci de les remettre dans le circuit du tri sélectif. Une fois arrivé en fin de vie, ce produit ne doit pas être mis au rebut avec les déchets ménagers ordinaires. Il doit être déposé...
- Page 88 2014/53/UE. Le texte intégral de la déclaration de conformité européenne est disponible à l’adresse suivante : http://konf.tsat.de/?ID=11100 La société TechniSat ne peut être tenue pour responsable des dommages causés au produit dans le cas d’influences extérieures, d’une usure, d’une utilisation inappropriée, d’une réparation non autorisée, de modifications ou d’accidents.
- Page 89 Sous réserve de modifications et d’erreurs typographiques. Dernière mise à jour 03/18. Toutes copies et reproductions sont soumises à l’autorisation de l’éditeur. Vous pouvez télécharger une version actuelle du manuel au format PDF dans l'espace de téléchargement du site Internet TechniSat sur www.technisat.de.
- Page 90 Du lundi au vendredi de 8h00 à 20h00 au +49 (0) 39 25 92 20 18 00 En cas d'éventuel retour de l'appareil, merci d'adresser votre colis uniquement à l'adresse suivante : TechniSat Digital GmbH Service-Center Nordstr. 4a D-39418 Stassfurt Les noms de sociétés, institutions ou marques citées sont des marques ou des marques déposées de leurs...
- Page 91 Utilisez une protection entre vos meubles et l’appareil. > L'appareil ne doit être utilisé qu'en position horizontale. Ne pas utiliser en plein air ! > Tenez la DIGITRADIO 360 CD éloignée d’appareils produisant des champs magnétiques puissants.
- Page 92 all-guides.c...
- Page 93 All manuals and user guides at all-guides.com > Ne posez pas d'objets lourds sur l'appareil. > Si vous passez l'appareil d'un environnement froid à un environnement chaud, de l'humidité peut apparaître à l'intérieur de l'appareil. Dans ce cas, patientez env. une heure avant de le mettre en marche. >...
- Page 94 DIGITRADIO 360 CD 1 x télécommande avec pile 1 x mode d’emploi 4.2 Caractéristiques spécifiques de la DIGITRADIO 360 CD DIGITRADIO 360 CD est composée d'un récepteur FM/DAB+ stéréo avec une entrée USB/AUX, un lecteur MP3/ CD et une fonction d'horloge.
- Page 95 All manuals and user guides at all-guides.com 4.3 Préparation de la DIGITRADIO 360 CD au fonctionnement 4.3.1 Branchement du câble d'alimentation > Branchez l'appareil avec la fiche secteur au réseau électrique. Assurez-vous que la tension de fonctionnement de l'appareil corresponde à la tension réseau locale avant de le brancher dans la prise secteur murale.
- Page 96 All manuals and user guides at all-guides.com 4.3.2 Amélioration de la réception de l'antenne Le nombre et la qualité des stations reçues dépendent des conditions de réception à l’endroit où est placé l’appareil. L’antenne télescopique permet d’obtenir une excellente réception. >...
- Page 97 All manuals and user guides at all-guides.com 4.3.3 Insertion de la pile > Refermez avec précaution le couvercle du compartiment à piles de manière à ce que les pattes de retenue du couvercle s'enclenchent dans le boîtier. Pour faire fonctionner la télécommande, vous avez besoin d'une pile alcaline, de type Mignon, 1,5 V, LR6/AA.
- Page 98 all-guides.c...
- Page 99 All manuals and user guides at all-guides.com 4.4.1 Mise en marche de l’appareil > Avec la touche On/Stand-by de l'appareil (1) ou de la télécommande (16), vous pouvez mettre en marche, puis remettre en veille l'appareil. Avant l'utilisation de l'appareil, tirez l'antenne sur toute la longueur. Après la première mise en service, l'appareil est en mode radio DAB.
- Page 100 All manuals and user guides at all-guides.com 4.4.3 Réglage du volume > Réglez le volume avec les touches VOL -/+ (43, 26) de la télécommande ou en tournant le bouton SELECT/VOLUME (5) de l'appareil. - Rotation dans le sens des aiguilles d'une montre : plus fort - Rotation dans le sens inverse des aiguilles d'une montre : moins fort Le volume réglé...
- Page 101 All manuals and user guides at all-guides.com 4.4.6 Ouverture de l’affichage à l’écran > Vous pouvez afficher et parcourir les informations suivantes en appuyant plusieurs fois sur la touche INFO (3) de l'appareil (avec le mode CD/USB, la touche doit être maintenue enfoncée pendant quelles secondes) ou sur la télécommande avec les touches DISPLAY de chaque mode (touche 33 pour le mode DAB, 35 le mode FM, 38 pour le mode CD/USB) : Mode DAB:...
- Page 102 All manuals and user guides at all-guides.com 5 Commande du menu Via un menu, différents réglages de la DIGITRADIO 360 CD peuvent être entrepris sur l'appareil ou avec la télécommande. Les options de menu affichées dépendent du mode de fonctionnement sélectionné (DAB ou FM).
- Page 103 All manuals and user guides at all-guides.com 6 Radio DAB 6.1 Qu'est-ce que le DAB+ ? Le DAB+ est un nouveau format numérique, qui permet d’écouter un son cristallin sans aucun grésillement. Contrairement aux stations de radio analogiques, le DAB permet de diffuser plusieurs stations sur une seule et même fréquence.
- Page 104 all-guides.c...
- Page 105 All manuals and user guides at all-guides.com 6.2 Réception radio DAB > Pour mettre en marche le mode DAB, appuyez sur la touche MODE (2) de l'appareil jusqu'à ce que Radio DAB s'affiche à l'écran ou sur la touche TUNER/DAB (30) de la télécommande. Si l'appareil est démarré...
- Page 106 All manuals and user guides at all-guides.com 6.4 Sélection des stations DAB > En appuyant sur les touches TUNING s/9 ou TUNING r/: (10, 9) de l'appareil ou sur les touches TUNING s/97 ou TUNING r/8: (45, 25) de la télécommande, vous pouvez sélectionner les stations trouvées lors de la recherche DAB et y accéder en appuyant sur le bouton SELECT/VOLUME de l'appareil ou en appuyant sur la touche ENTER de la télécommande.
- Page 107 All manuals and user guides at all-guides.com Les emplacements mémoire occupés s'affichent accompagnés du nom de la station mémorisée. 6.6 Accès à une station DAB à partir d’un emplacement mémoire > Pour accéder à nouveau à une station que vous avez mémorisée sur un emplacement mémoire, appuyez brièvement sur la touche PRESET de l'appareil ou de la télécommande.
- Page 108 All manuals and user guides at all-guides.com > En appuyant sur le bouton SELECT/VOLUME de l'appareil ou sur la touche ENTER de la télécommande, l'option de menu est sélectionnée. > En tournant le bouton SELECT/VOLUME de l'appareil ou avec les touches TUNING s/97 ou TUNING r/8: de la télécommande, vous pouvez sélectionner un canal (5A à...
- Page 109 All manuals and user guides at all-guides.com 6.9 Suppression des stations inactives > En sélectionnant MENU > Stations inactives, vous pouvez supprimer de la liste de stations les stations qui ne sont plus actuellement émises ou reçues. > Dans la question de sécurité qui s'affiche, sélectionnez avec les touches TUNING s/9 ou TUNING r/: (10, 9) de l'appareil, ou avec les touches TUNING s/97 ou TUNING r/8: (45, 25) de la télécommande, OUI et confirmez avec ENTER, pour démarrer le processus.
- Page 110 all-guides.c...
- Page 111 All manuals and user guides at all-guides.com 7 Mode FM > Sélectionnez comme décrit au point 4.4.5 la source FM. Lors de la première mise en marche, la fréquence est réglée sur 87,5 MHz. Si vous avez déjà mémorisé ou réglé une station, la radio diffusera la dernière station réglée. Les informations RDS RT (texte radio), PS (nom de la station), PTY (type de programme) sont affichées à...
- Page 112 All manuals and user guides at all-guides.com 7.2 Recherche manuelle des stations > Appuyez brièvement sur les touches TUNING s/9 ou TUNING r/: (10, 9) de l'appareil ou sur les touches TUNING s/97 ou TUNING r/8: (45, 25) de la télécommande jusqu'à atteindre la fréquence de la station de radio souhaitée.
- Page 113 All manuals and user guides at all-guides.com > Sélectionnez l'emplacement mémoire souhaité en tournant le bouton SELECT/VOLUME de l'appareil ou avec les touches PRESET r ou PRESET s (44, 42) de la télécommande et confirmez le processus d'enregistrement en appuyant sur le bouton SELECT/VOLUME de l'appareil ou en appuyant sur la touche ENTER de la télécommande.
- Page 114 All manuals and user guides at all-guides.com 7.5 Réglage audio (mono/stéréo) > Via MENU > Réglage audio vous pouvez présélectionner si le son doit être diffusé uniquement en mono (uniquement mono) ou également en stéréo (stéréo possible). Autre méthode : > Appuyez sur la touche MONO/STEREO (46) de la télécommande.
- Page 115 All manuals and user guides at all-guides.com L'appareil peut lire des CD comportant des fichiers MP3 et des CD audio normaux (CD-DA). Aucune autre extension, p. ex. *.doc, *.txt, *.pdf, ne peut être utilisée lorsque des fichiers audio sont convertis en MP3. Les fichiers musicaux au format *.AAC, *.DLF, *.M3U et *.PLS ou *.WMA ne peuvent notamment pas être lus.
- Page 116 all-guides.c...
- Page 117 La touche STOP (6) de l'appareil ou < (32) de la télécommande vous permet d'arrêter la lecture. Le nombre total de titres s'affiche à l'écran. Arrêtez toujours la lecture avant de retirer le CD. Si rien ne se produit, la DIGITRADIO 360 CD se met en veille après 15 minutes. 8.4 Réglage du titre >...
- Page 118 All manuals and user guides at all-guides.com 8.5 Recherche rapide Vous pouvez avancer ou reculer rapidement dans le titre en cours pour rechercher un moment précis. Il n'y a pas de lecture pendant la recherche. > Maintenez enfoncées les touches AVANCE ou RETOUR de l'appareil ou les touches TUNING s/97 ou TUNING r/8: (45, 25) de la télécommande pour effectuer une avance ou un retour rapide au sein du titre pendant toute la durée de pression de la touche.
- Page 119 All manuals and user guides at all-guides.com 8.9 Fonction programmation Grâce à la fonction programmation, vous pouvez lire jusqu'à 32 titres d'un CD de musique ou 64 titres d'un CD MP3/WMA selon un ordre défini par vos soins. Vous pouvez effectuer cette programmation uniquement si le compartiment à CD est fermé et contient un disque, et si l'appareil se trouve en mode Arrêt.
- Page 120 All manuals and user guides at all-guides.com Avec les CD MP3, vous indiquez également le numéro de dossier/album. > Après démarrage du processus de programmation au moyen de la touche PRESET, un F suivi du numéro de dossier/album clignote à l'écran. Sélectionnez les dossiers/albums avec les touches FOLDER- ou FOLDER+ (41, 28) de la télécommande.
- Page 121 Sélectionnez comme décrit au point 4.4.5 la source AUX. En mode AUX, la DIGITRADIO 360 CD s'arrête automatiquement après 4 heures. Cela est annoncé à l'écran. Le processus d'arrêt peut être interrompu en appuyant sur la touche INTRO de la télécommande.
- Page 122 all-guides.c...
- Page 123 Appuyez sur la touche SLEEP (24) de la télécommande jusqu'à l'affichage à l'écran de la valeur choisie. Si la fonction veille est active, une info s'affiche à l'écran indiquant le temps encore à disposition avant que la DigitRadio 360 CD ne se mette en veille.
- Page 124 All manuals and user guides at all-guides.com 11.2 Réglage de l'heure Si un signal DAB est reçu, l'heure est automatiquement harmonisée et l'heure correcte est réglée. Si l'heure n'est pas réglée automatiquement, procédez comme suit : > Mettez l'appareil en veille. >...
- Page 125 All manuals and user guides at all-guides.com > Réglez l'heure de mise en veille, en heures et minutes, avec les touches TUNING s/97 ou TUNING r/8:. Pour confirmer, appuyez chaque fois sur la touche TIMER. > La source de mise en marche clignote. Réglez la source souhaitée avec TUNING s/97 ou TUNING r/8:, p.
- Page 126 All manuals and user guides at all-guides.com 11.4 Réglage du son Pour modifier le son de la DigitRadio 360 CD, vous disposez de l'égaliseur avec des réglages prédéfinis. > Appuyez sur la touche EQ (47) de la télécommande pour accéder directement aux réglages de l'égaliseur.
- Page 127 All manuals and user guides at all-guides.com 11.6 Réglage d’usine Si vous modifiez l’emplacement de l’appareil, p. ex. lors d’un déménagement, les stations DAB mémorisées ne seront éventuellement plus captées. Grâce à la réinitialisation des réglages d'usine, vous pouvez alors supprimer toutes les stations enregistrées et démarrer en même temps une nouvelle recherche de stations.
- Page 128 all-guides.c...
- Page 129 All manuals and user guides at all-guides.com 11.8 Utilisation des écouteurs N’écoutez pas la musique à plein volume avec des écouteurs. Cela peut entraîner des lésions auditives permanentes. Avant d'utiliser des écouteurs, réglez le volume de l’appareil sur le volume minimal. Si vous branchez des écouteurs (non fournis), les haut-parleurs se mettent en sourdine et l'émission du son se fait ensuite exclusivement via les écouteurs.
- Page 130 All manuals and user guides at all-guides.com 12.1 Remarques sur les CD Toujours conserver le CD dans son étui et le saisir uniquement par les bords. Ne pas toucher la surface aux reflets arc-en-ciel et la conserver toujours propre. Ne coller aucun papier ou ruban adhésif du côté de l'étiquette du disque.
- Page 131 All manuals and user guides at all-guides.com 13 Dépannage Si l'appareil ne fonctionne pas comme prévu, vérifiez-en le fonctionnement à l'aide des tableaux suivants. 13.1 Problèmes avec l'appareil Symptôme Cause possible/résolution L'appareil n'est pas alimenté en électricité. Brancher correctement la fiche secteur Impossible de mettre l'appareil en marche.
- Page 132 All manuals and user guides at all-guides.com 13.2 Problèmes avec les médias USB Symptôme Cause possible/résolution L'appareil n'est pas en mode USB. Changer la source avec MODE. Aucune lecture possible. Le média n'est pas inséré ou est vide. Insérer correctement le média ou stocker sur le média des fichiers musicaux.
- Page 133 All manuals and user guides at all-guides.com 13.4 Problèmes avec la radio Symptôme Cause possible/résolution L'appareil ne se trouve pas en Aucune station de radio reçue. mode radio. Appuyer sur la touche MODE. Vérifier si la réception DAB est possible dans la région.
- Page 134 all-guides.c...
- Page 135 All manuals and user guides at all-guides.com 13.5 Problèmes avec le lecteur CD Symptôme Cause possible/résolution L'appareil ne se trouve pas en mode CD. Mauvais CD inséré. Le compartiment à CD n'est pas fermé. Fermer le compartiment à CD. Le CD est mal inséré. Insérer le CD avec le côté...
- Page 136 All manuals and user guides at all-guides.com Symptôme Cause possible/résolution Le volume est réglé trop fort. Baisser le volume. Le CD est abîmé ou sale. Le son s'arrête. Nettoyer le CD ou le remplacer. L'appareil est soumis à des vibrations. Placer l'appareil dans un endroit avec peu de vibrations.
- Page 137 All manuals and user guides at all-guides.com 14 Données techniques Sous réserve de modifications techniques et d’erreurs. Les dimensions sont des valeurs approximatives. Modes de réception DAB/DAB+, FM, CD, USB, AUX FM : 87,5 - 108 MHz Fréquences DAB/DAB+ : 174 - 240 MHz Tension de secteur Entrée CA : 110 - 240 ;...
- Page 138 All manuals and user guides at all-guides.com Istruzioni per l'uso DIGITRADIO 360 CD Stereo DAB+ e radio FM con collegamento USB, ingresso audio e lettore MP3/CD...
- Page 139 All manuals and user guides at all-guides.com 1 Immagini Utilizzo: ON/STANDBY PRESET MODE AVANTI / TUNING r/: PLAY/PAUSE / INFO INDIETRO / TUNING s/9 DISPLAY RICEVITORE IR SELECT / VOLUME INGRESSO AUDIO MENU / STOP EJECT/ aprire/chiudere il vano CD COLLEGAMENTO USB COLLEGAMENTO CUFFIE Vano CD...
- Page 140 all-guides.c...
- Page 141 All manuals and user guides at all-guides.com Lato posteriore: Antenna telescopica...
- Page 142 All manuals and user guides at all-guides.com Telecomando: ON/STANDBY Accensione/spegnimento dell'apparecchio (standby), spegnimento l'allarme OPEN/CLOSE Aprire/chiudere il vano CD PRESET Funzione di programmazione CLOCK Impostare l'ora TIMER Impostare la sveglia INTRO CD, USB: funzione di breve ascolto, 10 sec. per titolo RANDOM CD, USB: funzione casuale MUTE...
- Page 143 All manuals and user guides at all-guides.com SCAN Ricerca automatica FM SCAN Ricerca automatica DAB DISPLAY Informazioni titoli riproduzione CD/USB Accensione/spegnimento tag ID3 Modalità riproduzione USB Modalità riproduzione CD FOLDER – CD/USB: scelta dell'album PRESET s DAB, TUNER FM: selezionare emittente PRESET VOL - Ridurre il volume...
- Page 144 Telecomando ......................................134 Descrizione della DIGITRADIO 360 CD ......................... 134 Entità della fornitura ................................... 134 Le funzionalità speciali della DIGITRADIO 360 CD ....................... 134 Preparare DIGITRADIO 360 CD al funzionamento ....................... 135 4.3.1 Collegare il cavo di rete ..................................135 4.3.2 Migliorare la ricezione dell'antenna .............................
- Page 145 All manuals and user guides at all-guides.com Uso del menu ................................141 Radio DAB ..................................142 Cos'è DAB+ ......................................142 6.1.1 Compressione dei dati ..................................142 6.1.2 Stream audio ......................................142 Ricezione radio DAB ................................... 143 Eseguire ricerca automatica ................................143 Selezionare l'emittente DAB ................................144 Salvare l’emittente DAB su uno slot di memoria ........................144 Aprire l’emittente DAB da uno slot di memoria ........................
- Page 146 all-guides.c...
- Page 147 All manuals and user guides at all-guides.com Ascolta inizio titolo ....................................154 Funzione di programmazione ................................ 155 Riprodurre supporti USB ............................156 Ingresso audio................................157 Altre funzioni ................................158 11.1 Funzione sleep ...................................... 158 11.2 Impostazioni di tempo ..................................159 11.3 Sveglia ........................................
- Page 148 All manuals and user guides at all-guides.com 2 Introduzione Le presenti istruzioni per l’uso illustrano all’utente l’utilizzo conforme e sicuro dell’apparecchio radio, di seguito denominato DIGITRADIO o apparecchio. 2.1 A chi si rivolgono le presenti istruzioni per l’uso Le istruzioni per l’uso sono rivolte a tutti coloro che collocano, utilizzano, puliscono o smaltiscono l'apparecchio. 2.1.1 Uso conforme alle disposizioni L’apparecchio è...
- Page 149 All manuals and user guides at all-guides.com 2.2.1 Sicurezza Per la propria sicurezza, leggere attentamente le norme di sicurezza prima di mettere in funzione il nuovo apparecchio. Il produttore declina ogni responsabilità per danni derivanti da un uso non conforme e dalla mancata osservanza delle misure di sicurezza.
- Page 150 All manuals and user guides at all-guides.com In caso di temporale, staccare l'apparecchio dalla presa di corrente. La sovratensione può danneggiare l'apparecchio. In caso di evidenti difetti all’apparecchio, produzione di odori o fumo, malfunzionamenti gravi, danneggiamenti all’alloggiamento nonché in caso di penetrazione di liquidi, spegnere l’apparecchio e contattare il servizio di assistenza.
- Page 151 All manuals and user guides at all-guides.com Questo apparecchio non è progettato per essere utilizzato da persone (ivi compresi i bambini) con capacità fisiche, sensoriali o intellettuali limitate o carenti di esperienza e/o di conoscenze, a meno che non siano sorvegliate da una persona responsabile della loro sicurezza o abbiano ricevuto da quest'ultima indicazioni sul corretto utilizzo dell'apparecchio.
- Page 152 all-guides.c...
- Page 153 All manuals and user guides at all-guides.com Uso delle batterie Controllare che le batterie non siano maneggiate da bambini. I bambini possono portarle alla bocca e ingerirle, ciò che può causare gravi danni alla loro salute. Conservare pertanto le batterie e il telecomando fuori dalla portata dei bambini.
- Page 154 All manuals and user guides at all-guides.com 2.2.2 Smaltimento L'imballaggio dell'apparecchio è composto esclusivamente da materiali riciclabili. Smaltire pertanto la confezione con il "sistema duale" , separando opportunamente i materiali. Al termine del ciclo di vita questo prodotto non può essere smaltito con i normali rifiuti domestici, deve invece essere depositato in un centro di raccolta per il riciclaggio di apparecchi elettrici ed elettronici.
- Page 155 2006/66/CE. Non vanno smaltite con i normali rifiuti domestici. 2.2.3 Avvertenze legali Con la presente TechniSat dichiara che il modello di impianto radio DIGITRADIO 360 CD è conforme alla direttiva 2014/53/UE. Il testo completo della dichiarazione di conformità UE è disponibile al seguente indirizzo Internet: http://konf.tsat.de/?ID=11100...
- Page 156 Con riserva di modifiche ed errori di stampa. Ultimo aggiornamento 03/18. La copia e la riproduzione sono consentite solo con il permesso dell'editore. L'utente può ottenere la versione attuale delle istruzioni in formato PDF nell'area di Download del sito web di TechniSat: www.
- Page 157 Lun. - Ven. 8:00 - 20:00 03925/92201800 Qualora fosse necessario spedire l'apparecchio, utilizzare esclusivamente il seguente indirizzo: TechniSat Digital GmbH Service-Center Nordstr. 4a 39418 Staßfurt I nomi delle aziende, delle istituzioni o dei marchi menzionati sono marchi di fabbrica o marchi registrati...
- Page 158 all-guides.c...
- Page 159 Tenere presente che in determinate circostanze i piedi dell’apparecchio possono lasciare impronte di colore sulle superfici di mobili. Utilizzare una protezione tra i mobili e l’apparecchio. > È consentito azionare l'apparecchio solo in posizione orizzontale. Non utilizzare all'aria aperta! > Tenere DIGITRADIO 360 CD lontano da apparecchi che generano forti campi magnetici.
- Page 160 All manuals and user guides at all-guides.com > Non collocare oggetti pesanti sull’apparecchio. > Se l’apparecchio viene spostato da un ambiente freddo ad uno caldo, all’interno dell’apparecchio si può formare della condensa. In questo caso attendere circa un’ora prima di metterlo in funzione. >...
- Page 161 Assicurarsi che siano presenti tutti i componenti e accessori riportati di seguito: DIGITRADIO 360 CD 1 telecomando con batteria 1 manuale di istruzioni per l’uso 4.2 Le funzionalità speciali della DIGITRADIO 360 CD DIGITRADIO 360 CD è composta da un ricevitore stereo DAB+/FM con ingresso USB/AUX, lettore MP3/CD e funzione timer.
- Page 162 All manuals and user guides at all-guides.com 4.3 Preparare DIGITRADIO 360 CD al funzionamento 4.3.1 Collegare il cavo di rete > Collegare l'apparecchio inserendo la spina nella rete di corrente. Accertarsi che la tensione d’esercizio dell’apparecchio sia conforme alla tensione di rete locale, prima di collegarlo alla presa.
- Page 163 All manuals and user guides at all-guides.com 4.3.2 Migliorare la ricezione dell'antenna Il numero e la qualità delle emittenti ricevute dipende dalle condizioni di ricezione sul luogo d’installazione. Con l’antenna telescopica è possibile ottenere una ricezione eccezionale. > Svitare l'antenna telescopica dal supporto, sollevarla ed estrarla in lunghezza. Spesso è...
- Page 164 all-guides.c...
- Page 165 All manuals and user guides at all-guides.com 4.3.3 Inserire la batteria > Richiudere con cura il coperchio del vano batteria in modo che le linguette di tenuta del coperchio si innestino nell'alloggiamento. Per il funzionamento del telecomando è necessaria una batteria alcalina, tipo ministilo, 1,5 V, LR6/AA. Nell'inserimento verificare la giusta polarità.
- Page 166 All manuals and user guides at all-guides.com 4.4.1 Accendere l'apparecchio > Con i tasti On/Standby dell'apparecchio (1) o del telecomando (16) è possibile accendere l'apparecchio oppure passare in modalità standby. Prima dell'utilizzo dell'apparecchio estrarre interamente l'antenna. Dopo la prima accensione l'apparecchio è in modalità radio DAB. L'apparecchio esegue automaticamente una ricerca delle emittenti.
- Page 167 All manuals and user guides at all-guides.com 4.4.3 Impostazione del volume > Impostare il volume con i tasti VOL -/+ (43, 26) o con il telecomando o ruotando il pulsante SELECT/ VOLUME (5) dell'apparecchio. - Ruotare in senso orario – aumentare il volume - Ruotare in senso antiorario –...
- Page 168 All manuals and user guides at all-guides.com 4.4.6 Aprire le visualizzazioni del display > Premendo più volte il tasto INFO (3) dell'apparecchio (nella modalità CD/USB tenere premuto il tasto alcuni secondi) oppure i tasti DISPLAY del telecomando della rispettiva modalità (tasto 33 per DAB, 35 per FM, 38 per CD/USB), è...
- Page 169 All manuals and user guides at all-guides.com 5 Uso del menu Mediante un menu è possibile eseguire diverse impostazioni della DIGITRADIO 360 CD, utilizzando l'apparecchio o il telecomando. Le voci di menu visualizzate dipendono dalla modalità selezionata (DAB o FM). >...
- Page 170 all-guides.c...
- Page 171 All manuals and user guides at all-guides.com 6 Radio DAB 6.1 Cos'è DAB+ DAB+ è un nuovo formato digitale che consente di ascoltare suoni cristallini senza alcun rumore di fondo. A differenza delle emittenti di radio analogiche tradizionali, con DAB vengono trasmesse più emittenti su una stessa frequenza.
- Page 172 All manuals and user guides at all-guides.com 6.2 Ricezione radio DAB > Per il passaggio alla modalità DAB premere il tasto MODE (2) dell'apparecchio fin quando sul display viene visualizzato DAB Radio oppure il tasto TUNER/DAB (30) del telecomando. Alla prima accensione dell'apparecchio viene eseguita una ricerca automatica completa e viene creata una lista di emittenti.
- Page 173 All manuals and user guides at all-guides.com 6.4 Selezionare l'emittente DAB > Premendo i tasti TUNING s/9 o TUNING r/: (10, 9) dell'apparecchio o i tasti TUNING s/97 o TUNING r/8: (45, 25) del telecomando è possibile selezionare l'emittente trovata durante la ricerca automatica DAB e attivarla premendo il pulsante SELECT/VOLUME dell'apparecchio o il tasto ENTER del telecomando.
- Page 174 All manuals and user guides at all-guides.com 6.6 Aprire l’emittente DAB da uno slot di memoria > Per riaprire un'emittente salvata su uno slot di memoria premere brevemente il tasto PRESET dell'apparecchio oppure del telecomando. Compare ora la lista con i 30 slot di memoria disponibili. >...
- Page 175 All manuals and user guides at all-guides.com > Premendo il pulsante SELECT/VOLUME dell'apparecchio oppure il tasto ENTER del telecomando viene selezionata la voce di menu. > Ruotando il pulsante SELECT/VOLUME dell'apparecchio o premendo i tasti TUNING s/97 o TUNING r/8: del telecomando è possibile selezionare un canale (da 5A a 13F e la loro frequenza). >...
- Page 176 all-guides.c...
- Page 177 All manuals and user guides at all-guides.com 6.9 Cancellare stazioni non attive > Selezionando dal MENU > Cancellare stazioni non attive è possibile depurare la lista delle emittenti eliminando quelle che attualmente non trasmettono o che non si ricevono più. >...
- Page 178 All manuals and user guides at all-guides.com 7 Modalità FM > Selezionare come descritto al punto 4.4.5 la fonte Radio FM. Al momento della prima accensione la frequenza è impostata su 87,5 MHz. Se si è già impostata o memorizzata un’emittente, la radio riproduce l’ultima emittente impostata. Sul display vengono mostrate le informazioni RDS RT (testo radio), PS (nome dell'emittente), PYT (tipo di canale), nel caso in cui l'emittente selezionata trasmetta questi dati.
- Page 179 All manuals and user guides at all-guides.com 7.2 Ricerca manuale emittenti > Premere più volte brevemente i tasti TUNING s/9 o TUNING r/: (10, 9) dell'apparecchio oppure i tasti TUNING s/97 o TUNING r/8: (45, 25) del telecomando fino a quando si raggiunge la frequenza dell'emittente radio desiderata.
- Page 180 All manuals and user guides at all-guides.com > Selezionare lo slot di memoria desiderato ruotando il pulsante SELECT/VOLUME dell'apparecchio oppure utilizzando i tasti PRESET r o PRESET s (44, 42) del telecomando e confermare il processo di archiviazione con il pulsante SELECT/VOLUME dell'apparecchio o con il tasto ENTER del telecomando. In alternativa: >...
- Page 181 All manuals and user guides at all-guides.com 7.5 Impostazione audio (mono/stereo) > Tramite MENU > Impostazione audio è possibile eseguire una preselezione dell'emissione audio: solo in mono (Solo mono) o anche in stereo (Stereo possibile). In alternativa: > Premere il tasto MONO/STEREO (46) del telecomando. Nel caso di emittenti FM di debole ricezione la riproduzione mono può...
- Page 182 all-guides.c...
- Page 183 All manuals and user guides at all-guides.com Data la molteplicità di software codificatori diversi, non può essere garantito che ogni file MP3 possa essere riprodotto senza che si verifichino anomalie. In caso di titoli/file errati la riproduzione avanza al titolo/file successivo. Nella masterizzazione di CD conviene masterizzare ad una velocità...
- Page 184 Con il tasto STOP (6) dell'apparecchio o < (32) del telecomando si ferma la riproduzione. Sul display compare il numero totale di titoli. Interrompere sempre la riproduzione prima di rimuovere il CD. Se non vi sono riproduzioni in corso, dopo ca. 15 minuti la DIGITRADIO 360 CD passa in standby. 8.4 Impostare titoli >...
- Page 185 All manuals and user guides at all-guides.com 8.5 Ricerca rapida Nel titolo in corso è possibile eseguire una ricerca rapida in avanti o indietro per cercare un determinato punto. Durante la ricerca non viene effettuata alcuna riproduzione. > Tenere premuti i tasti IN AVANTI o INDIETRO dell'apparecchio o i tasti TUNING s/97 o TUNING r/8: (45, 25) del telecomando per eseguire un rapido avanzamento o riavvolgimento all'interno del titolo per la durata della pressione del tasto.
- Page 186 All manuals and user guides at all-guides.com 8.9 Funzione di programmazione Con la funzione di programmazione è possibile riprodurre, in una sequenza stabilita dall'utente, fino a 32 titoli di un CD musicale o 64 titoli di un CD MP3/WMA. È possibile effettuare la programmazione solo se nel vano CD chiuso è presente un disco e con l'apparecchio in modalità...
- Page 187 9 Riprodurre supporti USB L'utente ha la possibilità di riprodurre con la DigitRadio 360 CD file audio che si trovano su un supporto dati USB. A tal fine, il supporto dati USB deve essere collegato ad una presa USB (7).
- Page 188 all-guides.c...
- Page 189 Se non sono collegati o non possono essere letti supporti di memoria, sul display compare il messaggio Nessun USB Se non vi sono riproduzioni in corso, dopo ca. 15 minuti la DIGITRADIO 360 CD passa in standby. 10 Ingresso audio...
- Page 190 Si consiglia ad esempio di impostare il volume della DIGITRADIO 360 CD un'emittente DAB+ o FM, di passare all'ingresso audio e poi di modificare il volume dell'apparecchio collegato in modo che il volume complessivo dell'ingresso audio corrisponda a grandi linee al volume dell'emittente DAB+/FM.
- Page 191 All manuals and user guides at all-guides.com 11.2 Impostazioni di tempo Se il segnale DAB viene ricevuto, automaticamente viene effettuata la regolazione dell'ora e viene impostato l'orario corretto. Nel caso in cui l'ora non si dovesse impostare automaticamente, procedere come segue: >...
- Page 192 All manuals and user guides at all-guides.com > La fonte di accensione lampeggia. Con TUNING s/97 o TUNING r/8: impostare la fonte desiderata (DAB, FM, DISC (CD), USB). Premere il TIMER per la conferma. > Sul display compare VOLUME. Impostare il volume di accensione desiderato con TUNING s/97 o TUNING r/8: e terminare l'impostazione del timer premendo il tasto TIMER.
- Page 193 All manuals and user guides at all-guides.com 11.4 Impostazione del suono Per personalizzare il suono della DigitRadio 360 CD ci si può avvalere dell'equalizzatore, disponibile con le impostazioni predefinite. > Premere il tasto EQ (47) del telecomando per accedere direttamente alle impostazioni dell'equalizzatore.
- Page 194 all-guides.c...
- Page 195 All manuals and user guides at all-guides.com 11.6 Impostazione di fabbrica Se l'utente cambia il punto di collocazione dell'apparecchio, ad es. in seguito a trasloco, è possibile che alcune emittenti DAB memorizzate non vengano più ricevute. Ripristinando le impostazioni di fabbrica è possibile cancellare tutte le emittenti memorizzate e avviare allo stesso tempo una nuova ricerca di emittenti.
- Page 196 All manuals and user guides at all-guides.com 11.8 Utilizzare le cuffie Non ascoltare la musica ad alto volume con le cuffie. Un volume elevato può causare danni permanenti all'udito. Prima dell’uso delle cuffie regolare il volume dell’apparecchio al minimo. Nel caso in cui vengano collegate delle cuffie (non in dotazione) gli altoparlanti passano in modalità muto e la riproduzione del suono avviene esclusivamente tramite le cuffie.
- Page 197 All manuals and user guides at all-guides.com 12.1 Osservazioni sul CD Conservare il CD sempre nella custodia e afferrarlo solo dai bordi. La superficie rilucente a colori arcobaleno non va toccata e deve essere tenuta sempre pulita. Non incollare carta o adesivi sul lato del disco con l'etichetta. Il CD deve essere tenuto distante dalla piena irradiazione solare e da fonti di calore come termosifoni.
- Page 198 All manuals and user guides at all-guides.com 13 Risoluzione di errori Se l'apparecchio non funziona come previsto, eseguire una verifica sulla base delle tabelle seguenti. 13.1 Problemi con l'apparecchio Sintomo Possibile causa/rimedio L'apparecchio non è alimentato da corrente. L'apparecchio non si accende. Collegare correttamente la spina alla presa di corrente.
- Page 199 All manuals and user guides at all-guides.com 13.2 Problemi con supporti USB Sintomo Possibile causa/rimedio L'apparecchio non si trova nella modalità USB. Passare con MODE alla fonte corrispondente. Riproduzione non possibile. Supporto non inserito o vuoto. Inserire correttamente il supporto o avviare la riproduzione con dati musicali.
- Page 200 all-guides.c...
- Page 201 All manuals and user guides at all-guides.com 13.4 Problemi con la radio Sintomo Possibile causa/rimedio L'apparecchio non si trova in modalità Non si ricevono emittenti radio. radio. Premere il tasto MODE. Verificare se nella regione è possibile la ricezione DAB. Non si ricevono segnali DAB.
- Page 202 All manuals and user guides at all-guides.com 13.5 Problemi con il lettore CD Sintomo Possibile causa/rimedio L'apparecchio non si trova nella modalità CD. Il CD introdotto è errato. Il vano CD non è chiuso. Chiudere il vano CD. Il CD è stato introdotto in modo errato. Introdurre il CD con la parte stampata rivolta verso l'alto.
- Page 203 All manuals and user guides at all-guides.com Sintomo Possibile causa/rimedio Il volume impostato è troppo alto. Ridurre il volume. Il CD è danneggiato o sporco. Il suono si interrompe. Pulire il CD o sostituirlo. L'apparecchio è esposto a vibrazioni. Posizionare l'apparecchio in un luogo con poche vibrazioni.
- Page 204 All manuals and user guides at all-guides.com 14 Dati tecnici Con riserva di modifiche ed errori. Le dimensioni sono valori approssimativi. Modalità di ricezione DAB/DAB+, FM, CD, USB, AUX FM: 87,5-108 MHz Frequenze DAB/DAB+: 174-240 MHz Tensione di rete Ingresso AC: 110-240; 50 Hz Alimentazione USB DC 5V 1,0A Potenza in uscita altoparlanti...
- Page 205 All manuals and user guides at all-guides.com Handleiding DIGITRADIO 360 CD Stereo DAB+ EN FM-Radio met USB-aansluiting, audio-ingang en mp3/cd-speler...
- Page 206 all-guides.c...
- Page 207 All manuals and user guides at all-guides.com 1 Afbeeldingen Bediening: AAN/STAND-BY PRESET MODUS VOORUIT / TUNING r/: PLAY/PAUSE / INFO ACHTERUIT / TUNING s/9 DISPLAY IR ONTVANGER SELECT / VOLUME AUDIO-INGANG MENU / STOP EJECT/ cd-lade openen/sluiten USB-AANSLUITING KOPTELEFOONAANSLUITING CD-lade...
- Page 208 All manuals and user guides at all-guides.com Achterzijde: Telescoopantenne...
- Page 209 All manuals and user guides at all-guides.com Afstandsbediening: AAN/STAND-BY Het apparaat aan/uit zetten (stand-by), Alarm uitschakelen OPENEN/SLUITEN CD-lade openen/sluiten PRESET Programmeerfunctie KLOK Tijd instellen TIMER Wektijd instellen INTRO CD, USB: kort-afspelenfunctie, 10 sec. per nummer RANDOM CD, USB: functie willekeurig afspelen MUTE Geluid uit SLEEP...
- Page 210 All manuals and user guides at all-guides.com SCAN Automatische scan FM SCAN Automatische scan DAB DISPLAY Titelinformatie CD/USB-weergave Schakel ID3-tags in/uit Bedrijfsmodus USB-weergave Bedrijfsmodus cd-weergave FOLDER – CD/USB: albumselectie PRESETs DAB, FM-TUNER: PRESET-zenders selecteren VOL - Volume verlagen PRESETr DAB, FM-TUNER: PRESET-zenders selecteren TUNINGs DAB: zender selecteren...
- Page 211 Apparaat installeren ..............................188 Afstandsbediening ....................................190 Beschrijving van de DIGITRADIO 360 CD ......................190 Bij de levering is inbegrepen ................................190 De bijzondere kenmerken van de DIGITRADIO 360 CD .....................190 DIGITRADIO 360 CD voorbereiden voor gebruik ........................191 4.3.1 Sluit de voedingskabel aan ................................191 4.3.2 Antenne-ontvangst verbeteren ..............................192...
- Page 212 all-guides.c...
- Page 213 All manuals and user guides at all-guides.com Menubediening ................................197 DAB radio ..................................198 Wat is DAB+ ......................................198 6.1.1 Datacompressie ....................................198 6.1.2 Audiostream ......................................198 DAB radio-ontvangst ..................................199 Automatische zenderscan uitvoeren ............................199 DAB-zender selecteren ..................................200 DAB-zenders in het geheugen opslaan ...........................200 DAB-zender van een opslaglocatie opvragen ........................201 Handmatig instellen ....................................201 Signaalsterkte .......................................202...
- Page 214 All manuals and user guides at all-guides.com Nummer kort afspelen ..................................210 Programmeerfunctie ...................................211 USB-media afspelen ..............................212 Audio-ingang ................................213 Overige functies ................................. 214 11.1 Slaap-functie ......................................214 11.2 Tijdinstellingen ....................................... 215 11.3 Wekker ........................................215 11.3.1 Wekker na alarm uitschakelen ...............................216 11.3.2 Wekker in-/uitschakelen ...................................216 11.4 Geluidsinstelling ....................................
- Page 215 All manuals and user guides at all-guides.com 2 Voorwoord Deze handleiding helpt u om uw radiosysteem, hierna DIGITRADIO of apparaat genoemd, op de juiste manier en veilig te gebruiken. 2.1 De doelgroep van deze handleiding De handleiding is bedoeld voor iedereen die het apparaat installeert, bedient, schoonmaakt of afdankt. 2.1.1 Beoogd gebruik Het apparaat is ontworpen voor de ontvangst van DAB+/FM-radiouitzendingen.
- Page 216 All manuals and user guides at all-guides.com 2.2.1 Veiligheid Voor uw eigen veiligheid moet u de veiligheidsvoorschriften zorgvuldig doorlezen voordat u uw nieuwe apparaat in gebruik neemt. De fabrikant aanvaardt geen aansprakelijkheid voor schade veroorzaakt door ondeskundig gebruik en door het niet in acht nemen van de veiligheidsvoorschriften. Maak het apparaat nooit open.
- Page 217 All manuals and user guides at all-guides.com Tijdens onweer moet u het apparaat van het stopcontact loskoppelen. Overspanning kan het apparaat beschadigen. Bij opvallende defecten aan het apparaat, reuk- of rookontwikkeling, aanzienlijke storingen, schade aan de stroomvoorziening of behuizing, alsook bij binnendringende vloeistof direct de stekker eruit halen en contact opnemen met de serviceafdeling.
- Page 218 all-guides.c...
- Page 219 All manuals and user guides at all-guides.com Dit apparaat is niet bedoeld voor gebruik door personen (inclusief kinderen) met beperkte fysieke, zintuiglijke of mentale capaciteiten of met gebrek aan ervaring en/of kennis, tenzij deze onder toezicht staan van iemand die verantwoordelijk is voor hun veiligheid of over het gebruik van het apparaat zijn geïnstrueerd.
- Page 220 All manuals and user guides at all-guides.com Omgang met batterijen Let erop dat batterijen buiten handbereik van kinderen blijven. Kinderen kunnen batterijen in hun mond nemen en inslikken. Dit kan tot ernstige gezondheidsproblemen leiden. Houd batterijen en afstandsbediening daarom buiten bereik van kleine kinderen. Raadpleeg in dit geval onmiddellijk een arts! Normale batterijen mogen niet worden opgeladen, op andere manieren worden gereactiveerd, niet uit elkaar worden genomen, worden verwarmd of in open vuur worden gegooid (explosiegevaar!).
- Page 221 All manuals and user guides at all-guides.com 2.2.2 Afdanken De verpakking van uw apparaat bestaat uitsluitend uit recyclebare materialen. Breng deze gesorteerd terug naar gescheiden afvalinzameling. Dit product mag aan het eind van zijn levensduur niet met het gewone huisafval worden meegegeven, maar moet bij een inzamelpunt voor het recycleren van elektrische en elektronische apparaten worden ingeleverd.
- Page 222 Europese richtlijn 2006/66/EG. Deze mogen niet met het normale huishoudelijke afval worden afgevoerd. 2.2.3 Juridische informatie TechniSat verklaart hierbij dat de DIGITRADIO 360 CD-radioapparatuur voldoet aan de richtlijn 2014/53/ EU. De volledige tekst van de EU-conformiteitsverklaring is beschikbaar op de volgende website: http://konf.tsat.de/?ID=11100 TechniSat is niet aansprakelijk voor productschade als gevolg van externe invloeden, slijtage of onjuiste behandeling, ongeoorloofde reparatie, veranderingen of ongelukken.
- Page 223 Wijzigingen en drukfouten voorbehouden. Laatst gewijzigd 03/18. Kopiëren en vermenigvuldigen alleen met toestemming van de uitgever. De huidige versie van de handleiding is beschikbaar in PDF-formaat in het downloadgedeelte van de homepage van TechniSat op www.technisat.de. Dit apparaat is bedoeld voor gebruik in alle landen van de Europese Unie en in Zwitserland, Noorwegen, Liechtenstein en IJsland.
- Page 224 all-guides.c...
- Page 225 Ma. - vr. 8.00 - 20.00 uur 03925/92201800 Gebruik in geval van retourzending van het apparaat alleen het volgende adres: TechniSat Digital GmbH Service-Center Nordstr. 4a 39418 Staßfurt Namen van de genoemde bedrijven, instellingen of merken zijn handelsmerken of gedeponeerde...
- Page 226 Gebruik bescherming tussen uw meubels en het apparaat. > U mag dit apparaat alleen in een liggende stand gebruiken. Niet buiten gebruiken. > Houd de DIGITRADIO 360 CD uit de buurt van apparaten die sterke magnetische velden produceren.
- Page 227 All manuals and user guides at all-guides.com > Plaats geen zware voorwerpen op het apparaat. > Als u het apparaat van een koude naar een warme omgeving verplaatst, kan vocht in het apparaat neerslaan. Wacht in dat geval ongeveer een uur voordat u het in gebruik neemt. >...
- Page 228 Controleer of alle onderstaande accessoires aanwezig zijn: DIGITRADIO 360 CD 1x afstandsbediening met batterij 1x handleiding 4.2 De bijzondere kenmerken van de DIGITRADIO 360 CD DIGITRADIO 360 CD bestaat uit een stereo DAB+/FM-ontvanger met USB /AUX-ingang, mp3/cd-speler en heeft een timerfunctie.
- Page 229 All manuals and user guides at all-guides.com 4.3 DIGITRADIO 360 CD voorbereiden voor gebruik 4.3.1 Sluit de voedingskabel aan > Verbind het apparaat via de stekker met de voeding. Zorg ervoor dat de bedrijfsspanning van het apparaat overeenkomt met de lokale netspanning voordat u deze in het stopcontact steekt.
- Page 230 all-guides.c...
- Page 231 All manuals and user guides at all-guides.com 4.3.2 Antenne-ontvangst verbeteren Het aantal en de kwaliteit van te ontvangen zenders is afhankelijk van de ontvangstomstandigheden op de plaats van opstelling. Met de telescoopantenne is een uitstekende ontvangst mogelijk. > Maak de telescoopantenne los uit de houder, zet deze rechtop en trek hem in de lengte uit. Vaak is de exacte uitrichting van de telescoopantenne belangrijk, vooral aan de randen van het zendgebied.
- Page 232 All manuals and user guides at all-guides.com 4.3.3 Batterij plaatsen > Sluit het deksel van het batterijvak voorzichtig, zodat de borglipjes van het deksel in de behuizing vastklikken. Voor het gebruik van de afstandsbediening hebt u een alkalinebatterij (type Mignon, 1,5 V, LR6 / AA) nodig.
- Page 233 All manuals and user guides at all-guides.com 4.4.1 Apparaat aanzetten > Met de knop Aan/Stand-by van het apparaat (1) of van de afstandsbediening (16), kunt u het apparaat aanzetten of weer in stand-by zetten. Trek voordat u het apparaat gebruikt de antenne helemaal uit. Na de eerste keer aanzetten staat het apparaat in de DAB-radiomodus.
- Page 234 All manuals and user guides at all-guides.com 4.4.3 Volume instellen > Pas het volume aan met de VOL - / + knoppen (43, 26) van de afstandsbediening of draai aan de SELECT/VOLUME (5) knop van het apparaat. - Met de klok mee draaien - luider - Tegen de klok in draaien - stiller Het ingestelde volume wordt op het display weergegeven 4.4.4 Mute...
- Page 235 All manuals and user guides at all-guides.com 4.4.6 Displayweergaven opvragen > Door herhaaldelijk op de INFO-knop (3) van het apparaat te drukken (in de CD/USB-modus moet de knop een paar seconden worden vastgehouden), of op de afstandsbediening de knop DISPLAY van de betreffende modi (knop 33 voor DAB, 35 voor FM, 38 voor CD/USB), kunt u de volgende informatie weergeven en doorschakelen: DAB-modus:...
- Page 236 all-guides.c...
- Page 237 All manuals and user guides at all-guides.com 5 Menubediening Via een menu kunnen verschillende instellingen van de DIGITRADIO 360 CD op het apparaat of met de afstandsbediening worden uitgevoerd. De weergegeven menuopties zijn afhankelijk van de geselecteerde bedieningsmodus (DAB of FM).
- Page 238 All manuals and user guides at all-guides.com 6 DAB radio 6.1 Wat is DAB+ DAB+ is een nieuw digitaal formaat dat kristalhelder geluid zonder ruis mogelijk maakt. In tegenstelling tot traditionele analoge radiostations, zendt DAB meerdere stations op een en dezelfde frequentie uit. Dit wordt ensemble of multiplex genoemd.
- Page 239 All manuals and user guides at all-guides.com 6.2 DAB radio-ontvangst > Om de DAB-modus in te schakelen, drukt u herhaaldelijk op de knop MODE (2) van het apparaat totdat DAB Radio op het display verschijnt of op de TUNER/DAB-knop (30) van de afstandsbediening. Wanneer het apparaat voor de eerste keer wordt gestart, wordt een complete zenderscan uitgevoerd en wordt een zenderlijst aangemaakt.
- Page 240 All manuals and user guides at all-guides.com 6.4 DAB-zender selecteren > Door op de knop TUNING s/9 of TUNING r/: (10, 9) van het apparaat of op de knop TUNING s/97 of TUNING r/8: (45, 25) van de afstandsbediening te drukken, kunt u stations vinden die zijn geselecteerd in de DAB-scan en deze selecteren door op de SELECT/VOLUME-knop van het apparaat te drukken of door op de ENTER-knop van de afstandsbediening te drukken.
- Page 241 All manuals and user guides at all-guides.com 6.6 DAB-zender van een opslaglocatie opvragen > Om een zender op te vragen die u in het geheugen hebt opgeslagen, drukt u kort op de toets PRESET van het apparaat of van de afstandsbediening. De lijst met de 30 beschikbare geheugenlocaties verschijnt.
- Page 242 all-guides.c...
- Page 243 All manuals and user guides at all-guides.com > Door op de SELECT/VOLUME-knop van het apparaat of de ENTER-knop van de afstandsbediening te drukken, wordt de menuoptie geselecteerd. > Door aan de SELECT/VOLUME-knop op het apparaat of TUNING s/97 of TUNING r/8: van de afstandsbediening te draaien, kunt u een kanaal (5A tot 13F en hun frequenties) selecteren.
- Page 244 All manuals and user guides at all-guides.com 6.9 Inactieve stations verwijderen > Door MENU> Inactieve stations verwijderen te selecteren, kunt u de zenders van de zenderlijst wissen die momenteel niet meer uitzenden of ontvangen kunnen worden. > Selecteer in de beveiligingsvraag die verschijnt met de toetsen TUNING s/9 of TUNING r/: (10, 9) van het apparaat, of de knoppen TUNING s/97 of TUNING r/8: (45, 25) van de afstandsbediening of JA en bevestig met ENTER om de procedure te starten.
- Page 245 All manuals and user guides at all-guides.com 7 FM-modus > Selecteer volgens de aanwijzingen onder punt 4.4.5 de FM-radiobron. Bij de eerste keer inschakelen is de frequentie 87,5 MHz ingesteld. Als u al een station hebt ingesteld of opgeslagen, speelt de radio de als laatste ingestelde zender af. De RDS-informatie RT (radiotekst), PS (zendernaam), PTY (programmatype) worden op het display weergegeven als de geselecteerde zender deze gegevens uitzendt.
- Page 246 All manuals and user guides at all-guides.com 7.2 Handmatige zenderkeuze > Druk herhaaldelijk kort op de knop TUNING s/9 of TUNING r/: (10, 9) van het apparaat, of op de knop TUNING s/97 of TUNING r/8: (45, 25) van de afstandsbediening tot u de frequentie van de gewenste zender hebt bereikt.
- Page 247 All manuals and user guides at all-guides.com > Selecteer de gewenste geheugenlocatie door aan de SELECT/VOLUME-knop van het apparaat te draaien of door op de PRESET r of PRESET s (44, 42) knoppen van de afstandsbediening te drukken en bevestig het opslaan door op de SELECT/VOLUME-knop van het apparaat te drukken of op ENTER van de afstandsbediening te drukken.
- Page 248 all-guides.c...
- Page 249 All manuals and user guides at all-guides.com 7.5 Audio-instelling (mono/stereo) > Via MENU> Audio-instelling kunt u een voorselectie maken of het geluid alleen in mono (Alleen mono) of in stereo (Stereo mogelijk) moet worden afgespeeld. Alternatief: > Druk op de knop MONO/STEREO (46) van de afstandbediening. Mono afspelen kan in een hoorbare vermindering van ruis resulteren op FM-zenders met een zwakke ontvangst.
- Page 250 All manuals and user guides at all-guides.com Muziekbestanden met andere extensies, zoals *.AAC, *.DLF, *.M3U en *.PLS resp. *.WMA kunnen niet worden afgespeeld. Vanwege de verscheidenheid aan encodersoftware kan niet worden gegarandeerd dat elk mp3-bestand probleemloos kan worden afgespeeld. Bij foutieve titels/bestanden wordt het afspelen met de volgende titel/bestand voortgezet. Het is het beste om bij het branden van de cd op lage snelheid te branden en om de cd als Single Session en afgesloten te maken.
- Page 251 Op het display verschijnt het totale aantal nummers. Stop het afspelen altijd voordat u de cd eruit neemt. Als het afspelen niet start, schakelt de DIGITRADIO 360 CD na ongeveer 15 minuten over naar de stand-by. 8.4 Titel instellen >...
- Page 252 All manuals and user guides at all-guides.com 8.5 Snel zoeken U kunt snel vooruit of achteruit spoelen in het huidige nummer om een bepaalde plek te zoeken. Tijdens het zoeken is er geen geluidsweergave. > Houd de knoppen VOORUIT of ACHTERUIT van het apparaat of de knoppen TUNING s/97 of TUNING r/8: (45, 25) van de afstandsbediening ingedrukt om vooruit of achteruit te spoelen binnen het nummer zolang u de knop ingedrukt houdt.
- Page 253 All manuals and user guides at all-guides.com 8.9 Programmeerfunctie Met de programmeerfunctie kunt u maximaal 32 nummers van een muziek-cd of 64 nummers van een mp3/ wma-cd in een door u vastgelegde volgorde afspelen. De programmering is alleen mogelijk als er zich een cd in de gesloten cd-lade bevindt en het apparaat in de stop-modus staat.
- Page 254 all-guides.c...
- Page 255 De invoer van de titel gaat dan hetzelfde als bij de audio-cd. 9 USB-media afspelen U kunt audiobestanden die op een USB-opslagmedium zijn opgeslagen via de DigitRadio 360 CD afspelen. Voor weergave vanaf een USB-medium moet deze op de USB-poort (7) zijn aangesloten.
- Page 256 Als er geen opslagmedium is aangesloten of deze niet kan worden gelezen, verschijnt het bericht Geen USB op het display Als het afspelen niet start, schakelt de DIGITRADIO 360 CD na ongeveer 15 minuten over naar de stand-by. 10 Audio-ingang...
- Page 257 Het is aan te raden om het volume van DIGITRADIO 360 CD bijvoorbeeld op een DAB+ of FM-station in te stellen, dan naar de audio-ingang over te schakelen en vervolgens het volume van het aangesloten apparaat aan te passen, zodat het totale volume van de audio-ingang ongeveer gelijk is aan het volume van de DAB+/FM-zender.
- Page 258 All manuals and user guides at all-guides.com 11.2 Tijdinstellingen Als een DAB-signaal wordt ontvangen, wordt de tijd automatisch aangepast en de juiste tijd wordt ingesteld. Als de tijd niet automatisch wordt ingesteld, gaat u als volgt te werk: > Zet het apparaat in stand-by. >...
- Page 259 All manuals and user guides at all-guides.com > UITSCHAKELEN verschijnt op het display om de uitschakeltijd in te stellen. De uren knipperen. > Gebruik de knoppen TUNING s/97 of TUNING r/8: om de uitschakeltijd in uren en minuten in te stellen.
- Page 260 all-guides.c...
- Page 261 All manuals and user guides at all-guides.com 11.4 Geluidsinstelling Om het geluid van de DigitRadio 360 CD aan te passen, is de equalizer met de vooraf ingestelde instellingen beschikbaar. > Druk op de EQ-knop (47) van de afstandsbediening om direct naar de equalizerinstellingen te gaan.
- Page 262 All manuals and user guides at all-guides.com 11.6 Fabrieksinstellingen Als u de locatie van het apparaat wijzigt, bijvoorbeeld bij een verhuizing, kunt u de opgeslagen zenders mogelijk niet meer ontvangen. Door de fabrieksinstellingen te herstellen kunt u in dit geval alle opgeslagen zenders verwijderen om tegelijkertijd een nieuwe zenderscan te starten.
- Page 263 All manuals and user guides at all-guides.com 11.8 Koptelefoon gebruiken Luister niet naar muziek op hoog volume via een koptelefoon. Dit kan tot blijvende gehoorschade leiden. Stel het volume zo laag mogelijk in voordat u een koptelefoon gaat gebruiken. Als u een koptelefoon aansluit (niet meegeleverd), worden de luidsprekers gedempt en wordt het geluid alleen via de koptelefoon weergegeven.
- Page 264 All manuals and user guides at all-guides.com 12.1 Aanwijzingen voor de cd Bewaar de cd altijd in het hoesje en pak deze alleen bij de randen vast. Het in regenboogkleuren glinsterende oppervlak mag niet worden aangeraakt en moet altijd schoon zijn. Plak geen papier of plakband op de labelzijde van de schijf.
- Page 265 All manuals and user guides at all-guides.com 13 Storingen verhelpen Als het apparaat niet werkt zoals bedoeld, controleer het dan met behulp van de volgende tabellen. 13.1 Problemen met het apparaat Symptoom Mogelijke oorzaak/oplossing Het apparaat krijgt geen stroom. Sluit de stekker op de juiste manier op Ik kan het apparaat niet aanzetten.
- Page 266 all-guides.c...
- Page 267 All manuals and user guides at all-guides.com 13.2 Problemen met USB-media Symptoom Mogelijke oorzaak/oplossing Het apparaat bevindt zich niet in USB- modus. Schakel met MODE de betreffende bron in. Afspelen lukt niet. Medium niet geplaatst of leeg. Medium correct plaatsen of er muziek op zetten.
- Page 268 All manuals and user guides at all-guides.com 13.4 Problemen met de radio Symptoom Mogelijke oorzaak/oplossing Het apparaat staat niet in de radio- Er wordt geen enkele radiozender modus. ontvangen. Druk op de knop MODE. Controleer of in het gebied DAB- ontvangst mogelijk is.
- Page 269 All manuals and user guides at all-guides.com 13.5 Problemen met de cd-speler Symptoom Mogelijke oorzaak/oplossing Het apparaat staat niet in cd-modus. Verkeerde cd geplaatst. De cd-lade is niet gesloten. Sluit de cd-lade. De cd is verkeerd geplaatst. Plaats de cd met de bedrukte zijde naar boven.
- Page 270 All manuals and user guides at all-guides.com Symptoom Mogelijke oorzaak/oplossing Het volume is te hoog ingesteld. Verlaag het volume. De cd is beschadigd of vervuild. Het geluid valt weg. Reinig de cd of vervang deze. Het apparaat wordt aan trillingen blootgesteld.
- Page 271 All manuals and user guides at all-guides.com 14 Technische gegevens Technische wijzigingen en onjuistheden voorbehouden. De afmetingen zijn bij benadering. Ontvangstmethoden DAB/DAB+, FM, CD, USB, AUX FM: 87,5-108 MHz Frequenties DAB/DAB+: 174-240 MHz Netvoeding AC-invoer: 110-240; 50Hz USB-voeding DC 5V 1,0 A Uitgangsvermogen luidspreker 2x5 W RMS Stroomverbruik...
- Page 272 all-guides.c...
- Page 273 All manuals and user guides at all-guides.com Brukerveiledning DIGITRADIO 360 CD Stereo DAB+ og FM-radio med USB- og lydinngang og MP3/CD-spiller...
- Page 274 All manuals and user guides at all-guides.com 1 Illustrasjoner Betjening: PÅ/STANDBY PRESET MODE FOROVER/TUNING r/: SPILL/PAUSE/INFO BAKOVER/TUNING s/9 DISPLAY IR-MOTTAKER SELECT/VOLUME LYDINNGANG MENU/STOPP LØS UT / Åpne/lukke CD-skuff USB-INNGANG HODETELEFONUTGANG CD-skuff...
- Page 275 All manuals and user guides at all-guides.com Bakside: Teleskopantenne...
- Page 276 All manuals and user guides at all-guides.com Fjernkontroll: PÅ/STANDBY Slå apparatet av/på (standby), slå av vekkelyden OPEN/CLOSE Åpne/lukke CD-skuffen PRESET Programmere favorittkanaler/spilleliste CLOCK Sette klokkeslett TIDSUR Stille inn vekketidspunkt INTRO CD, USB: Prøvespilling 10 s per tittel RANDOM CD, USB: Avspilling i tilfeldig rekkefølge LYD AV Slå...
- Page 277 All manuals and user guides at all-guides.com SCAN Automatisk kanalsøk FM SCAN Automatisk kanalsøk DAB DISPLAY Tittelinformasjon CD-/USB-avspilling Slå ID3-tagger av/på Driftsmodus USB-avspilling Driftsmodus CD-avspilling FOLDER – CD/USB: Velg album PRESETs DAB, FM-tuner: Velg kanal fra minneposisjon. VOL – Reduser volum PRESETr DAB, FM-tuner: Velg kanal fra minneposisjon.
- Page 278 all-guides.c...
- Page 279 Fjernkontroll ......................................246 Beskrivelse av DIGITRADIO 360 CD ........................246 Leveringsomfang ....................................246 Spesielle egenskaper ved DIGITRADIO 360 CD ........................246 Forberedelser til første gangs bruk av DIGITRADIO 360 CD ..................247 4.3.1 Koble til strømmen ..................................... 247 4.3.2 Forbedre antennemottaket ................................248 4.3.3 Legge inn batteri ....................................249...
- Page 280 All manuals and user guides at all-guides.com Betjening av menyen ..............................253 DAB-radio ..................................254 Om DAB+ ........................................ 254 6.1.1 Komprimering av data ..................................254 6.1.2 Audiostrømmer ....................................254 Lytte på DAB ......................................255 Starte et automatisk kanalsøk ..............................255 Velge DAB-kanaler ..................................... 256 Lagre en DAB-kanal på...
- Page 281 All manuals and user guides at all-guides.com Prøvespille titler ....................................266 Programmere spilleliste ..................................267 Avspille USB-medier ..............................268 Lydinngang ...................................269 Flere funksjoner................................270 11.1 Innsovningsfunksjon ..................................270 11.2 Stille klokken ......................................271 11.3 Vekkerklokke ......................................271 11.3.1 Slå av vekkerklokken etter at den har ringt ..........................272 11.3.2 Aktivere/deaktivere vekkerklokken ...............................272 11.4 Klanginnstilling ......................................273...
- Page 282 All manuals and user guides at all-guides.com 2 Innledning Denne brukerveiledningen hjelper deg til å bruke radioanlegget, i det følgende kalt DIGITRADIO eller apparatet, på en sikker og korrekt måte. 2.1 Målgruppen til brukerveiledningen Denne brukerveiledningen er ment for alle personer som setter opp, betjener, rengjør og kasserer apparatet. 2.1.1 Tiltenkt bruk Apparatet er bygd for mottak av DAB+/FM-radiosendinger.
- Page 283 All manuals and user guides at all-guides.com 2.2.1 Sikkerhet For din egen sikkerhets skyld, vær nøye med å lese gjennom alle sikkerhetstiltak før du tar i bruk ditt nye apparat. Produsenten tar ikke ansvar for skader som er forårsaket av uforsvarlig bruk og av manglende overholdelse av de sikkerhetsanvisningene.
- Page 284 all-guides.c...
- Page 285 All manuals and user guides at all-guides.com Ved tordenvær burde du ta apparatet ut av kontakten. Overspenning kan skade apparatet. Ved påfallende skader, lukt- eller røykutvikling, større feilfunksjon, skader på utsiden og vanninntrenging, slå av apparatet og kontakt service. Apparatet skal kun kobles til en strømforsyning på 100–240 V~, 50/60 Hz. Aldri prøv å...
- Page 286 All manuals and user guides at all-guides.com Det er forbudt å ombygge apparatet. Apparater og tilbehør med skader skal ikke lenger brukes. CD-spilleren bruker en usynlig laserstråle. Den kan skade øynene ved feilhåndtering. Aldri se inn i CD-åpningen. Apparatet er klassifisert som klasse 1-laserapparat (CLASS 1 LASER). Det er merket med CLASS 1 LASER PRODUCT på...
- Page 287 All manuals and user guides at all-guides.com Håndtering av batterier Pass på at barn ikke får tak i batterier. Barn kan ta batteriene i munnen og svelge dem. Det kan føre til alvorlig helseskade. Oppbevar derfor batteriene og fjernkontrollen utenfor rekkevidde til små barn. Oppsøk lege straks! Vanlige batterier skal ikke lades eller opplives på...
- Page 288 All manuals and user guides at all-guides.com 2.2.2 Avfallshåndtering Emballasjen til apparatet består av materialer som kan gjenvinnes. Den skal kildesorteres og leveres til et returpunkt. Dette produktet skal ved slutten av dets levetid ikke kastes i vanlig restavfall, men skal leveres til et returpunkt for gjenvinning av elektriske og elektroniske apparater.
- Page 289 Batterier kan inneholde helse- og miljøskadelige giftstoffer. Batterier er omfattet av direktiv 2006/66/EF og skal ikke kastes i vanlig restavfall. 2.2.3 Juridisk informasjon TechniSat erklærer herved at radioutstyrstypen DIGITRADIO 360 CD er i samsvar med direktiv 2014/53/ EU. Den fullstendige teksten til EU-samsvarserklæringen finner du på følgende nettadresse: http://konf.tsat.de/?ID=11100 TechniSat er ikke ansvarlig for skader på...
- Page 290 all-guides.c...
- Page 291 Med forbehold om endringer og trykkfeil. Versjon 03/18. Kopiering kun med utgiverens tillatelse. Den alltid aktuelle versjonen til brukerveiledningen finner du som pdf-fil i Download-området på TechniSats hjemmeside under www.technisat.de. Dette apparatet kan brukes i alle medlemsland til Den europeiske union samt Sveits, Norge, Liechtenstein og Island.
- Page 292 Hvis du har problemer med apparatet, vennligst ring vår kundetelefon for teknisk service: Man - fre 8:00–20:00 +49 3925 92201800 For ev. innlevering av apparatet, bruk følgende adresse: TechniSat Digital GmbH Service-Center Nordstr. 4a DE-39418 Staßfurt Betegnelser til nevnte firmaer, institusjoner og merker er varemerker, eller varemerker registrert av den...
- Page 293 Vær obs på at apparatets føtter ev. kan lage fargemerker på noen typer møbeloverflater. Sett noe imellom møblene og apparatet. > Apparatet skal kun brukes i vannrett stilling. Ikke bruk det ute! > Hold DIGITRADIO 360 CD unna apparater som danner sterke magnetfelt.
- Page 294 All manuals and user guides at all-guides.com > Ikke still tunge gjenstander på apparatet. > Hvis apparatet flyttes fra kalde til varme omgivelser, kan det danne seg kondensvann på innsiden av apparatet. Vent en time før du tar det i bruk. >...
- Page 295 Sjekk at alt tilbehør fulgte med: DIGITRADIO 360 CD 1x fjernkontroll med batteri 1x brukerveiledning 4.2 Spesielle egenskaper ved DIGITRADIO 360 CD DIGITRADIO 360 CD har en stereo DAB+/FM-mottaker med USB/AUX-inngang, MP3/CD-spiller og vekkerklokke. – Du kan lagre opptil 30 DAB+ og FM-kanaler.
- Page 296 all-guides.c...
- Page 297 All manuals and user guides at all-guides.com 4.3 Forberedelser til første gangs bruk av DIGITRADIO 360 CD 4.3.1 Koble til strømmen > Sett støpselet i stikkontakten. Sjekk at den nominelle spenningen til apparatet svarer til spenningen i det lokale strømnettet før du setter støpselet i veggkontakten.
- Page 298 All manuals and user guides at all-guides.com 4.3.2 Forbedre antennemottaket Antall og kvaliteten til kanalene som kommer inn, er avhengige av mottaksforholdene på stedet. Med teleskopantennen kan du oppnå utmerket mottak. > Løsne teleskopantennen fra klemmen, rett den opp og dra den helt ut. Det kan være viktig å...
- Page 299 All manuals and user guides at all-guides.com 4.3.3 Legge inn batteri > Lukk lokket til batteriluken forsiktig, til klipsene på lokket smekker på plass. Fjernkontrollen bruker et alkalisk batteri, type Mignon, 1,5 V, LR6/AA. Pass på riktig tilkobling av +/– polene, når du legger inn batteriet.
- Page 300 All manuals and user guides at all-guides.com 4.4.1 Slå på apparatet > Apparatet slås på eller tilbake til standby, ved hjelp av knappen På/Standby på apparatet (1) eller på fjernkontrollen (16). Før du bruker apparatet, dra antennen helt ut. Når du slår på apparatet for første gang, starter det i DAB-modus. Apparatet utfører et automatisk kanalsøk.
- Page 301 All manuals and user guides at all-guides.com 4.4.3 Justere volum > Juster volumet med VOL–/+-knappene (43, 26) på fjernkontrollen, eller ved å dreie SELECT/VOLUME- hjulet (5) på apparatet. – Dreiing med klokka øker volumet – Dreiing mot klokka reduserer volumet Displayet viser det innstilte volumet 4.4.4 Slå...
- Page 302 all-guides.c...
- Page 303 All manuals and user guides at all-guides.com 4.4.6 Vise informasjon på displayet > Trykk flere ganger på INFO (3) på apparatet (i CD/USB-modus må knappen holdes i et par sekunder), eller trykk på DISPLAY på fjernkontrollen ved siden av den respektive modus (knapp 33 for DAB, 35 for FM, 38 for CD/USB) for å...
- Page 304 All manuals and user guides at all-guides.com 5 Betjening av menyen I menyen kan du foreta forskjellige innstillinger på DIGITRADIO 360 CD, ved hjelp av knappene på apparatet eller på fjernkontrollen. Menypunktene som vises på displayet, er avhengige av den valgte driftsmodus (DAB eller FM).
- Page 305 All manuals and user guides at all-guides.com 6 DAB-radio 6.1 Om DAB+ DAB+ er et nytt digitalt format som gir krystallklar lyd uten skurring. I motsetning til vanlige analog-radiokanaler kan flere DAB-kanaler sendes på samme frekvens samtidig. Det kaller man for blokk, ensemble eller multiplekser. En blokk består av radiostasjonen og flere service-elementer eller datatjenester som sendes ved siden av.
- Page 306 All manuals and user guides at all-guides.com 6.2 Lytte på DAB > For å slå på DAB-modus, trykk flere ganger på MODE (2) på apparatet, eller på TUNER/DAB (30) på fjernkontrollen, til du ser DAB-radio på displayet. Hvis du har startet apparatet for første gang, gjennomføres det først et fullstendig kanalsøk som lagrer en kanalliste.
- Page 307 All manuals and user guides at all-guides.com 6.4 Velge DAB-kanaler > Trykk på TUNING s/9 eller TUNINGr/: (10, 9) på apparatet, eller på TUNING s/97 eller TUNING r/8: (45, 25) på fjernkontrollen for å velge en av kanalene funnet av kanalsøket, og spill den ved å trykke på...
- Page 308 all-guides.c...
- Page 309 All manuals and user guides at all-guides.com 6.6 Hente en lagret DAB-kanal > For å hente en kanal som ble lagret på en minneposisjon, trykk kort på PRESET på apparatet eller på fjernkontrollen. Nå vises en liste med de 30 tilgjengelige minneposisjonene. >...
- Page 310 All manuals and user guides at all-guides.com > Trykk på SELECT/VOLUME-hjulet på apparatet, eller på ENTER på fjernkontrollen for å velge menypunktet. > Drei på SELECT/VOLUME-hjulet på apparatet, eller på TUNING s/97 eller TUNING r/8: på fjernkontrollen for å velge en blokk (5A til 13F og dens frekvens). >...
- Page 311 All manuals and user guides at all-guides.com 6.9 Slette ikke-aktive stasjoner > Med funksjonen MENU > Slett ikke-aktive kanaler kan du fjerne kanaler fra kanallisten som for tiden ikke sender eller som det ikke er mulig å motta. > Svar på sikkerhetsspørsmålet på displayet ved å velge JA med TUNING s/9 eller TUNING s/: (10,9) på...
- Page 312 All manuals and user guides at all-guides.com 7 FM-modus > Velg kilden 4.4.5 FM-radio som beskrevet i punkt. Når du slår på radioen for første gang, er frekvensen stilt inn på 87,5 MHz. Hvis du allerede har innstilt eller lagret en kanal, spiller radioen den sist valgte kanalen. Displayet viser RDS-informasjonene RT (radiotekst), PS (kanalnavn), PTY (programtype), dersom den valgte kanalen sender RDS-data.
- Page 313 All manuals and user guides at all-guides.com 7.2 Velge en kanal manuelt > Trykk flere ganger kort på TUNING s/9 eller TUNINGr/: (10, 9) på apparatet, eller på TUNING s/97 eller TUNING r/8: (45, 25) på fjernkontrollen, til du har nådd frekvensen til den ønskede radiokanalen.
- Page 314 all-guides.c...
- Page 315 All manuals and user guides at all-guides.com > Velg ønsket minneposisjon ved å dreie på SELECT/VOLUME-hjulet på apparatet eller ved å trykke på PRESET r eller PRESET s (44, 42) på fjernkontrollen, og bekreft lagringen ved å trykke på SELECT/ VOLUME på...
- Page 316 All manuals and user guides at all-guides.com 7.5 Mono/stereo-innstilling > I MENU > Mono/Stereo-innstilling kan du oppgi i forveien om lyden skal gjengis kun i mono (Kun mono) eller også i stereo (Stereo mulig). Alternativt: > Trykk på MONO/STEREO (46) på fjernkontrollen. Gjengivelsen i mono kan tydelig redusere skurringen hos kanaler med svake signaler.
- Page 317 All manuals and user guides at all-guides.com På grunn av det store antall forskjellige brenneprogrammer kan vi ikke garantere at hver MP3-fil kan spilles uten problemer. Ved problemer med en tittel/fil fortsetter avspillingen med neste tittel/fil. Det er en fordel å brenne CD-en med lav hastighet og konfigurere den som single-session og som avsluttet («finalized»).
- Page 318 Med STOPP-knappen (6) på apparatet, eller < (32) på fjernkontrollen kan du avbryte avspillingen. Displayet viser totalt antall titler. Stopp alltid CD-en før du åpner CD-rommet for å ta den ut. Hvis det ikke avspilles noe innen 15 minutter, går DIGITRADIO 360 CD i standby. 8.4 Velge tittel >...
- Page 319 All manuals and user guides at all-guides.com 8.5 Spole raskt forover/bakover Du kan spole raskt forover eller bakover under avspillingen for å finne et spesielt sted. Under spolingen foregår det ikke noe avspilling. > Trykk lenge på FOROVER eller BAKOVER på apparatet, eller på TUNING s/97 eller TUNING r/8: (45, 25) på...
- Page 320 all-guides.c...
- Page 321 All manuals and user guides at all-guides.com 8.9 Programmere spilleliste Med programmeringsfunksjonen kan du spille opptil 32 titler på en musikk-CD og opptil 64 titler på en MP3/ WMA-CD i en rekkefølge som du selv bestemmer. Du kan programmere spillelisten kun hvis platen ligger i det lukkede CD-rommet, og avspilling er stoppet.
- Page 322 All manuals and user guides at all-guides.com Hos MP3-CD-er kan du i tillegg velge mappe/albumnummer. > Når du har startet programmeringen med PRESET, blinker det først en F fulgt av mappe/albumnummeret. Velg en mappe/album med FOLDER – eller FOLDER + (41, 28) på fjernkontrollen. Titlene kan nå...
- Page 323 Hvis ingen lagringsmedium er satt inn, eller det ikke kunne leses, vises Ingen USB på displayet. Hvis det ikke avspilles noe innen 15 minutter, går DIGITRADIO 360 CD i standby. 10 Lydinngang Du kan sende lyden fra en ekstern enhet til høyttaleren på...
- Page 324 Det lønner seg å først innstille volumet til DIGITRADIO 360 CD på f.eks. en DAB+ eller FM-sender, bytte til lydinngang (AUX) og så justere volumet på den tilkoblede enheten slik at det resulterende volumet omtrent tilsvarer volumet til DAB+/FM-senderen.
- Page 325 All manuals and user guides at all-guides.com 11.2 Stille klokken Hvis det kan mottas DAB-signaler, oppdaterer klokken seg automatisk og viser korrekt tid. Hvis klokkeslettet ikke oppdaterer seg automatisk, gjør dette: > Sett apparatet i standby. > Trykk på CLOCK (19) på fjernkontrollen. Klokkevisningen blinker. >...
- Page 326 all-guides.c...
- Page 327 All manuals and user guides at all-guides.com > Bruk TUNING s/97 eller TUNING r/8: for å stille inn utkoblingsklokkeslettet i timer og minutter. Bekreft hver gang med TIMER. > Lydkilden blinker. Bruk TUNING s/97 eller TUNING r/8: for å stille inn ønsket lydkilde (DAB, FM, PLATE (CD), USB).
- Page 328 All manuals and user guides at all-guides.com 11.4 Klanginnstilling Med tonekontrollen (equalizer) kan du tilpasse klangen på DigitRadio 360 CD ved hjelp av et utvalg klangkarakterer. > Trykk på EQ (47) på fjernkontrollen for å gå direkte til innstillingene for tonekontroll. Velg ønsket innstilling ved å...
- Page 329 All manuals and user guides at all-guides.com 11.6 Fabrikkinnstillinger Hvis du forandrer plasseringen på apparatet, f.eks. når du flytter, er det kanskje ikke lenger mulig å motta de lagrede DAB-kanalene. I dette tilfelle kan du sette apparatet tilbake til fabrikkinnstillingene for å slette alle lagrede kanaler og starte et nytt kanalsøk.
- Page 330 All manuals and user guides at all-guides.com 11.8 Bruke hodetelefoner Ikke bruk for høyt volum når du bruker hodetelefoner. Det kan forårsake varig hørselskade. Juster volumet på apparatet til minimalt volum før du bruker hodetelefoner. Hvis du setter i hodetelefoner (ikke medlevert), slås lyden på høyttalerne av og spilles istedenfor i hodetelefonene.
- Page 331 All manuals and user guides at all-guides.com 12.1 Behandling av CD-er Oppbevar alltid CD-en i coveret og ta den kun i kanten. Den blanke glinsende overflaten skal ikke røres og den skal alltid være ren. Ikke lim papir eller tape på skriftsiden til platen. Ikke utsett CD-en for fullt sollys eller varmekilder, f.eks.
- Page 332 all-guides.c...
- Page 333 All manuals and user guides at all-guides.com 13 Rette feil Hvis apparatet ikke virker slik det skal, sjekk feilen ved hjelp av følgende tabell. 13.1 Problemer med apparatet Symptom Mulig årsak/tiltak Apparatet er ikke koblet til strømnettet. Apparatet lar seg ikke slå på. Sett støpselet ordentlig i kontakten.
- Page 334 All manuals and user guides at all-guides.com 13.2 Problemer med USB-medier Symptom Mulig årsak/tiltak Apparatet er ikke i USB-modus. Velg lydkilde med MODE. Ingen avspilling. Ingen medium satt inn, eller tom medium. Sett inn mediet ordentlig eller fyll det med musikkdata. 13.3 Problemer med fjernkontrollen Symptom Mulig årsak/tiltak...
- Page 335 All manuals and user guides at all-guides.com 13.4 Problemer med radioen Symptom Mulig årsak/tiltak Apparatet er ikke i radiomodus. Ingen radio-mottak. Trykk på MODE-knappen. Sjekk om et er mulig å få inn DAB i området. Ingen mottak av DAB-signal. Juster ev. antennen. Prøv å få inn andre kanaler.
- Page 336 All manuals and user guides at all-guides.com 13.5 Problemer med CD-spilleren Symptom Mulig årsak/tiltak Apparatet er ikke i CD-modus. Feil type CD lagt inn. CD-rommet er ikke lukket. Lukk CD-rommet. CD-en er lagt inn feil. Legg inn CD-en med skriftsiden opp. CD-en må...
- Page 337 All manuals and user guides at all-guides.com Symptom Mulig årsak/tiltak Volumet er stilt inn for høyt. Still volumet lavere. CD-en har riper eller smuss på seg. Lyden svikter. Rengjør CD-en eller bytt den ut. Apparatet er utsatt for vibrasjoner. Flytt apparatet til et sted som er mindre utsatt for vibrasjoner.
- Page 338 all-guides.c...
- Page 339 All manuals and user guides at all-guides.com 14 Tekniske data Med forbehold om tekniske endringer og feiltagelser. Målene er oppgitt med omtrentlige verdier. Lydkilder DAB/DAB+, FM, CD, USB, AUX FM: 87,5–108 MHz Frekvenser DAB/DAB+: 174–240 MHz Nettspenning AC Inngang: 110–240 V; 50 Hz USB-strømforsyning DC 5 V;...
- Page 340 All manuals and user guides at all-guides.com Betjeningsvejledning DIGITRADIO 360 CD Stereo DAB+ og FM-radio med USB-tilslutning, audio indgang og MP3/CD-afspiller...
- Page 341 All manuals and user guides at all-guides.com 1 Illustrationer Betjening: ON/STANDBY PRESET MODE FREMAD / TUNINGr/: PLAY/PAUSE / INFO TILBAGE / TUNING s/9 DISPLAY IR MODTAGER SELECT / VOLUME AUDIO-INDGANG MENU / STOP EJECT / CD-skuffe åben/lukke USB-TILSLUTNING HOVEDTELEFON-TILSLUTNING CD-skuffe...
- Page 342 All manuals and user guides at all-guides.com Bagside: Teleskopantenne...
- Page 343 All manuals and user guides at all-guides.com Fjernbetjening: ON/STANDBY ON/OFF på enheden (standby), Slukke for alarmen OPEN/CLOSE Åben/luk CD-skuffen PRESET Programmeringsfunktion Indstille klokkeslæt TIMER Indstil alarmtidspunkt INTRO CD, USB: intro-funktion, 10 sek. pr. titel TILFÆLDIG CD, USB: Tilfældighedsfunktion MUTE (tavs) Mute lyden SLEEP (sove) Tænde for slumre og vælg TUNINGr...
- Page 344 all-guides.c...
- Page 345 All manuals and user guides at all-guides.com SCAN Automatisk søgning FM SCAN Automatisk søgning DAB DISPLAY Titeloplysninger CD-/USB-afspilning ID3 tags tryk på On-/Off Driftstilstand USB-afspilning Driftstilstand CD-afspilning MAPPE - CD/USB: Valg af album PRESET DAB, FM-TUNER: PRESET-sender vælg VOL - Indstil lydstyrken lavere PRESET DAB, FM-TUNER: PRESET-sender...
- Page 346 Opstilling af enheden ............................... 300 Fjernbetjening ...................................... 302 Beskrivelse af DIGITRADIO 360 CD ........................302 Leveringen ......................................302 DIGITRADIO 360 CD's særlige egenskaber ..........................302 Forbered DIGITRADIO 360 CD til drift ............................303 4.3.1 Tilslut strømkabel ....................................303 4.3.2 Forbedre antennemodtagelse ..............................304 4.3.3 Indsæt batterier ....................................
- Page 347 All manuals and user guides at all-guides.com Menubetjening ................................309 DAB radio ..................................310 Hvad er DAB+ ......................................310 6.1.1 Datakomprimering ....................................310 6.1.2 Audio stream ......................................310 DAB-radiomodtagelse ..................................311 Gennemfør automatisk søgning ..............................311 Vælg DAB-sender ....................................312 Læg DAB-kanal på...
- Page 348 All manuals and user guides at all-guides.com Spil begyndelsen af titel .................................. 322 Programmeringsfunktion .................................323 Afspille USB-medier ..............................324 Audio-indgang ................................325 Yderligere funktioner ..............................326 11.1 Sleep (sove) funktion ..................................326 11.2 Tidsindstilling......................................327 11.3 Vækkeur ........................................327 11.3.1 Sluk vækkeur efter alarm ................................. 328 11.3.2 Tænd-/sluk for alarmen ...................................
- Page 349 All manuals and user guides at all-guides.com 2 Forord Denne betjeningsvejledning hjælper dig med tilsigtet og sikker brug af dit radio-system, i det følgende kaldet DIGITRADIO eller enhed. 2.1 Målgruppen for denne betjeningsvejledning Betjeningsvejledningen henvender sig til enhver person, der stiller enheden op, betjener det, rengør eller bortskaffer den.
- Page 350 all-guides.c...
- Page 351 All manuals and user guides at all-guides.com 2.2.1 Sikkerhed Du bør for din egen sikkerheds skyld læse sikkerhedsinformationerne grundigt igennem, inden du tager din nye enhed i brug. Producenten fraskriver sig ethvert ansvar for skader, der måtte opstå som følge af forkert håndtering eller tilsidesættelse af sikkerhedsanvisningerne.
- Page 352 All manuals and user guides at all-guides.com Ved tordenvejr skal enheden tages ud af stikkontakten. Overspænding kan beskadige enheden. Ved påfaldende enhedsfejl, lugt- eller røgdannelse, tydelige fejlfunktioner, beskadigelser på kabinettet såvel som væske, der er trængt ind i enheden, skal enheden slukkes og service kontaktes. Enheden må...
- Page 353 All manuals and user guides at all-guides.com Denne enhed er ikke egnet til brug af personer (inklusive børn) med begrænsede fysiske, sensoriske eller åndelige færdigheder eller manglende erfaring og/eller manglende viden, medmindre de holdes under opsyn af en for deres sikkerhed kompetent person eller hvis de af denne har fået anvisninger om, hvorledes enheden skal bruges.
- Page 354 All manuals and user guides at all-guides.com Omgang med batterier Pas på at batterier ikke kommer i hænderne på børn. Børn kan tage batterier i munden og sluge dem. Dette kan føre til alvorlige sundhedsskader. Opbevar derfor batterier og fjernbetjening uden for småbørns rækkevidde.
- Page 355 All manuals and user guides at all-guides.com 2.2.2 Bortskaffelse Enhedens emballage består udelukkende af genanvendelige materialer. Venligst returner disse sorteret til "Affaldssortering" Når produktet har nået enden af dets levetid, må det ikke smides ud som almindeligt husholdningsaffald, men skal indleveres på et opsamlingssted for genanvendelse af udtjent elektrisk og elektronisk udstyr. -symbolet på...
- Page 356 all-guides.c...
- Page 357 Batterier kan indeholde giftstoffer, der skader helbredet og miljøet. Batterier er underlagt det europæiske direktiv 2006/66/EF. Disse må ikke bortskaffes med det normale husholdningsaffald. 2.2.3 Juridiske oplysninger Hermed erklærer TechniSat, at radio anlægstypen DIGITRADIO 360 CD er i overensstemmelse med direktivet 2014/53/EU. Den komplette tekst af EU-overensstemmelseserklæringen er tilgængelig under følgende internetadresse: http://konf.tsat.de/?ID=11100...
- Page 358 Kopiering og duplikering kun med udgiverens tilladelse. Den aktuelle version af manualen er tilgængelig i PDF-format i download-området på TechniSat's hjemmeside under www.technisat.de. Dette enhed er beregnet til brug i alle lande i EU såvel som i Schweiz, Norge, Liechtenstein og Island. Drift i frekvensområdet 5150 MHz - 5350 MHz er kun tilladt i lukkede rum.
- Page 359 Man. - Fre. 8:00 - 20:00 03925/92201800 For en eventuel nødvendig indsendelse af enheden henvend dig venligst udelukkende til følgende adresse: TechniSat Digital GmbH Service-Center Nordstr. 4a 39418 Staßfurt Navne på de nævnte firmaer, institutioner eller mærker er varemærker eller indregistrerede varemærker fra de...
- Page 360 All manuals and user guides at all-guides.com 3 Opstilling af enheden > Stil enheden på et fast, sikker og horisontal undergrund. Sørg for god ventilation. Advarsel!: > Stil ikke enheden på bløde overflader som tæpper, dyner eller i nærheden af gardiner og vægbeklædning. Ventilationsåbningerne kan blive dækket.
- Page 361 All manuals and user guides at all-guides.com > Stil ingen tunge genstande på enheden. > Hvis du bringer enheden fra kulde til varme omgivelser, kan der dannes fugtighed i det indre af enheden. I dette tilfælde vent ca. en time, inden du tager det i brug. >...
- Page 362 all-guides.c...
- Page 363 Hvis enheden ikke bruges over længere tid, skal du tage batteriet ud, da dette kan løbe ud og beskadige enheden. Hvis fjernbetjeningens rækkevidde aftager, bør batterierne skiftes ud. 4 Beskrivelse af DIGITRADIO 360 CD 4.1 Leveringen Kontroller venligst at alle efterfølgende listet tilbehørsdele er tilstede.
- Page 364 All manuals and user guides at all-guides.com 4.3 Forbered DIGITRADIO 360 CD til drift 4.3.1 Tilslut strømkabel > Slut enheden til strømnettet med strømstikket. Kontroller at driftsspændingen på enheden svarer overens med den lokale strømspænding inden du sætter det i stikkontakten.
- Page 365 All manuals and user guides at all-guides.com 4.3.2 Forbedre antennemodtagelse Antal og kvalitet af de modtagne stationer afhænger af modtagelsesforholdene på opstillingsstedet. Med teleskopantennen kan der opnås en udmærket modtagelse. > Løsn teleskopantennen fra sin holder, ret den op og træk den ud i fuld længde. Den nøjagtige udretning af teleskopantennen er ofte vigtig, især i perifere områder af det respektive transmissionsområde.
- Page 366 All manuals and user guides at all-guides.com 4.3.3 Indsæt batterier > Luk omhyggeligt batteridæksel igen, så lågets holder går i indgreb i huset. For at bruge fjernbetjeningen har du brug for et alkalisk batteri, type Mignon, 1,5 V, LR6/AA. Overhold den rigtige polaritet ved ilægning.
- Page 367 All manuals and user guides at all-guides.com 4.4.1 Tænd for enheden > Med tasten On/Standby på enheden (1) hhv. på fjernbetjeningen (16) kan du tænde for hhv. sætte enheden i standby igen. Inden brug af enheden skal du trække antennen ud i fuld længde. Efter første tænding er enheden i DAB-radiodrift.
- Page 368 all-guides.c...
- Page 369 All manuals and user guides at all-guides.com 4.4.3 Indstilling af lydstyrke > Indstil lydstyrken med tasterne VOL -/+ (43, 26) på fjernbetjeningen eller ved at dreje på SELECT/ VOLUME (5) knappen på enheden. - Drej med uret - højere - Drej mod uret - lavere Den indstillede lydstyrke vises på...
- Page 370 All manuals and user guides at all-guides.com 4.4.6 Hent display-visning > Ved at trykke flere gange på tasten INFO (3) på enheden (ved CD/USB mode skal tasten holdes trykket nogle sekunder), hhv. på fjernbetjeningen tasterne DISPLAY i de forskellige Mode (tast 33 for DAB, 35 for FM, 38 for CD/USB), kan du indtoning følgende oplysninger og skifte: DAB-drift: FM-drift:...
- Page 371 All manuals and user guides at all-guides.com 5 Menubetjening Over en menu kan du foretage forskellige indstillinger på DIGITRADIO 360 CD på enheden eller med fjernbetjeningen. De viste menupunkter afhænger af den valgte driftsmode (DAB eller FM). > Ved at trykke på tasten MENU (34) på fjernbetjeningen eller på enheden (6) kan du hente menuen og også...
- Page 372 All manuals and user guides at all-guides.com 6 DAB radio 6.1 Hvad er DAB+ DAB+ er et nyt digitalt format, der gør det muligt for dig at høre krystalklar lyd uden støj. I modsætning til de traditionelle analoge radiostationer udsendes DAB fra flere stationer på én og samme frekvens. Dette kalder man Ensemble eller Multipleks.
- Page 373 All manuals and user guides at all-guides.com 6.2 DAB-radiomodtagelse > Tryk for at sætte i DAB-Mode tasten MODE (2) på enheden så ofte, indtil DAB radio vises på displayet, hhv. tasten TUNER/DAB (30) på fjernbetjeningen. Den første gang enheden startes gennemføres en komplet sender søgning og der oprettes en stationsliste.
- Page 374 all-guides.c...
- Page 375 All manuals and user guides at all-guides.com 6.4 Vælg DAB-sender > Ved at trykke på tasterne TUNING s/9eller TUNING r/: (10, 9) på enheden, hhv. tasterne TUNING s/97 eller TUNING r/8: (45, 25) på fjernbetjeningen kan du ved DAB søgning vælge fundne stationer og ved at trykke på...
- Page 376 All manuals and user guides at all-guides.com 6.6 Hente DAB-kanal fra en hukommelsesplads > For at hente en station igen, som du har lagt på en hukommelsesplads, tryk kort på tasten PRESET på enheden eller på fjernbetjeningen. Nu dukker listen med de 30 tilgængelige hukommelsespladser op. >...
- Page 377 All manuals and user guides at all-guides.com > Ved at trykke på SELECT/VOLUME knappen på enheden, hhv. tasten ENTER på fjernbetjeningen vælges menupunktet. > Ved at dreje på SELECT/VOLUME knappen på enheden, hhv. med tasterne TUNING s/97 eller TUNING r/8: på fjernbetjeningen kan du vælge en kanal (5A til 13F og deres frekvenser). >...
- Page 378 All manuals and user guides at all-guides.com 6.9 Slet inaktive stationer > Ved valg af MENU > slette inaktive sendere kan du rense stationslisten for sendere, der ikke længere sendes aktuelt hhv. kan modtages. > Vælg med i det opdukkende sikkerhedsspørgsmål med tasterne TUNING s/9 eller TUNING r/: (10, 9) på...
- Page 379 All manuals and user guides at all-guides.com 7 FM-drift > Vælg som beskrevet under punkt 4.4.5 FM radio kilde. Når du tænder første gang er frekvensen indstillet på 87,5 MHz. Hvis du allerede har indstillet en kanal eller gemt den, spiller radioen den sidst indstillede kanal. På...
- Page 380 all-guides.c...
- Page 381 All manuals and user guides at all-guides.com 7.2 Manuel stationssøgning > Tryk kort på tasterne TUNING s/9 eller TUNINGr/: (10, 9) på enheden, hhv. tasterne TUNING s/97 eller TUNING r/8: (45, 25) på fjernbetjeningen indtil du har nået frekvensen for den ønskede radiostation.
- Page 382 All manuals and user guides at all-guides.com > Vælg den ønskede lagringsplads ved at dreje på SELECT/VOLUME knappen på enheden hhv. med tasterne PRESET eller PRESET (44, 42) på fjernbetjeningen og bekræft lagring ved at trykke på SELECT/VOLUME knappen på enheden hhv. ved at trykke på tasten ENTER på fjernbetjeningen. Alternativ: >...
- Page 383 All manuals and user guides at all-guides.com 7.5 Lydindstilling (mono/stereo) > Over MENU > lyd-indstilling kan du træffe et forudgående valg, om lyden kun skal udgives i mono (kun mono) eller også i stereo (stereo mulig). Alternativ: > Tryk på tasten MONO/STEREO (46) på fjernbetjeningen. Monogengivelse kan føre til en hørbar reduktion af støj ved svage FM-sendere.
- Page 384 All manuals and user guides at all-guides.com På grund af mangfoldigheden af forskellige enkoder-software kan det ikke garanteres at enhver MP3 fil kan afspilles uden problemer. Ved fejlagtige titler/filer fortsætter afspilningen til den næste titel/fil. Det er en fordel at brænde CD'en med lav hastighed og lave CD'en Som enkel-session og finalisere den. 8.2 Hvilke diske du kan anvende CD-afspilleren er kompatibel med CD-, CD-R/RW- og MP3-CD medier.
- Page 385 Med tasten STOP (6) på enheden eller < (32) på fjernbetjeningen standser du afspilningen. På displayet vises det samlede antal titler. Stands altid afspilningen inden du tager CD'en ud. Hvis der ikke spilles noget, så skifter DIGITRADIO 360 CD til standby efter 15 minutter. 8.4 Indstil titel >...
- Page 386 all-guides.c...
- Page 387 All manuals and user guides at all-guides.com 8.5 Hurtig søgning Du kan foretage en hurtig søgning i den løbende titel for at finde et bestemt sted. Under søgningen sker ingen afspilning. > Hold tasterne FREMAD eller TILBAGE på enheden, hhv. tasterne TUNING s/97 eller TUNING r/8: (45, 25) på...
- Page 388 All manuals and user guides at all-guides.com 8.9 Programmeringsfunktion Med program-funktionen kan du afspille op til 32 titler på en musik-CD hhv. 64 titler på en MP3/WMA-CD i en af dig fastlagt rækkefølge. Du kan kun foretage programmering, hvis der ligger en disk i den lukkede CD-skuffe og hvis enheden er i stop-mode.
- Page 389 All manuals and user guides at all-guides.com Ved MP3-CD'er skal du ydermere angive mappen/nummeret på albummet. > Efter påbegyndt programmeringsproces ved hjælp af tasten PRESET, blinker på displayet så først et F efterfulgt af mappen/nummeret på albummet. Vælg mapperne/albummerne med tasterne FOLDER- eller FOLDER+ (41, 28) på...
- Page 390 Hvis et hukommelsesmedium ikke er tilsluttet eller ikke kan læses, vises ingen USB på displayet. Hvis der ikke spilles noget, så skifter DIGITRADIO 360 CD til standby efter 15 minutter. 10 Audio-indgang Du kan afspille lyden fra et eksternt enhed over højttaleren på DIGITRADIO 360...
- Page 391 Det anbefales at indstille lydstyrken på DIGITRADIO 360 CD f.eks. med en DAB+ eller FM-kanal, og så skifte til audio- indgangen og så justere lydstyrken på det tilsluttede enhed således, at den totale lydstyrke ca. svarer til lydstyrken på...
- Page 392 all-guides.c...
- Page 393 All manuals and user guides at all-guides.com 11.2 Tidsindstilling Hvis et DAB-signal modtages justeres tiden automatisk og det korrekte Klokkeslæt indstilles. Hvis klokkeslættet ikke indstilles automatisk, skal du gå frem som følgende: > Sæt enheden i standby. > Tryk på tasten CLOCK (19) på fjernbetjeningen. Timevisningen blinker. >...
- Page 394 All manuals and user guides at all-guides.com > Indstil frakoblingstiden i timer og minutter med tasterne TUNING s/97 eller TUNING r/8:. Tryk på TIMER tasten for at bekræfte. > Tilkoblingskilden blinker. Indstil med TUNING s/97 eller TUNING r/8: den ønskede kilde (DAB, FM, DISC (CD), USB).
- Page 395 All manuals and user guides at all-guides.com 11.4 Lydindstilling For at justere lyden på DigitRadio 360 CDer equalizeren med de forudindstillede justeringer til din rådighed. > Tryk på tasten EQ (47) på fjernbetjeningen for at komme direkte ind i equalizer-indstillingerne. Vælg de ønskede equalizerindstillinger ved at trykke flere gange på...
- Page 396 All manuals and user guides at all-guides.com 11.6 Fabriksindstilling Når du skifter enhedens placering f.eks. ved flytning, er det muligt at de gemte DAB-stationer ikke længere modtages. Med nulstilling til fabriksindstillinger kan du i dette tilfælde slette alle gemte stationer, for samtidig at starte en ny stationssøgning.
- Page 397 All manuals and user guides at all-guides.com 11.8 Brug af hovedtelefoner Lyt ikke til musik med høj lydstyrke over hovedtelefonerne. Dette kan føre til varige høreskader. Sæt enhedslydstyrken på minimal lydstyrke, inden du anvender hovedtelefonerne. Hvis du tilslutter hovedtelefoner (ikke med leveret) bliver højttalerne sat på mute og lydgengivelse sker udelukkende over hovedtelefonerne.
- Page 398 all-guides.c...
- Page 399 All manuals and user guides at all-guides.com 12.1 Henvisninger til CD'er Opbevar altid CD'en i sit hylster og tag kun fat i kanterne. Den i regnbuefarvede skinnende Overflade må ikke berøres og bør altid være ren. Klæb ikke papir eller klæbebånd på diskens etiketside. CD'en bør holdes fjern fra stærke solstråler og varmekilder som radiatorer.
- Page 400 All manuals and user guides at all-guides.com 13 Fejlfinding Hvis enheden ikke virker som det skal, kontroller det ved hjælp af følgende tjeks. 13.1 Problemer med enheden Symptom Mulig årsag/afhjælpning Enheden får ikke strøm. Enheden kan ikke tændes. Tilslut strømstikket rigtigt til stikkontakten. I givet fald.
- Page 401 All manuals and user guides at all-guides.com 13.2 Problemer med USB-medier Symptom Mulig årsag/afhjælpning Enheden er ikke i USB-mode. Skift til den respektive kilde med MODE. Ingen afspilning er mulig. Medium er ikke sat i eller er tom. Sæt medium korrekt i hhv. Afspil med musikdata.
- Page 402 All manuals and user guides at all-guides.com 13.4 Problemer med radioen Symptom Mulig årsag/afhjælpning Enheden befinder sig ikke i radio- Mode. Der modtages ingen radiostation. Tryk MODE knappen. Kontroller om det i området Er muligt at modtage DAB. Der modtages intet DAB-signal. Ret antennen ud igen.
- Page 403 All manuals and user guides at all-guides.com 13.5 Problemer med CD-afspiller Symptom Mulig årsag/afhjælpning Enheden er ikke i CD-mode. Den forkerte CD er lagt i. CD-skuffen er ikke lukket. Luk CD-skuffen. CD'en er lagt forkert i. Læg CD'en i med etiketten op ad. CD'en skal ligge godt centralt i CD-skuffen.
- Page 404 all-guides.c...
- Page 405 All manuals and user guides at all-guides.com Symptom Mulig årsag/afhjælpning Lydstyrken er stillet for højt. Skru ned for lydstyrken. CD'en er beskadiget eller snavset. Lyden slår fra. Rens CD'en eller erstat den. Enheden er udsat for vibrationer. Stil enheden på et sted med få vibrationer. 13.6 Problemer med den eksterne indgang Symptom Mulig årsag/afhjælpning...
- Page 406 All manuals and user guides at all-guides.com 14 Tekniske data Forbeholdt tekniske ændringer og fejl. Dimensionerne er ca. mål. Modtagelses muligheder DAB/DAB+, UKW, CD, USB, AUX FM: 87,5-108MHz Frekvenser DAB/DAB+: 174-240MHz Netspænding AC Input: 110-240; 50Hz USB-forsyning DC 5V 1,0A Højttalerens udgangskapacitet 2x5W RMS Strømforbrug Strømforbrug standby...
- Page 407 All manuals and user guides at all-guides.com Instrukcja obsługi DIGITRADIO 360 CD Radio Stereo DAB+ i UKF z gniazdem USB, wejściem Audio i odtwarzaczem MP3/CD...
- Page 408 All manuals and user guides at all-guides.com 1 Ilustracje Obsługa EIN/STANDBY PRESET TRYB PRACY DO PRZODU / TUNING r/: ODTWARZANIE/PAUZA/INFORMACJE 10 DO TYŁU / TUNING s/9 WYŚWIETLACZ 11 ODBIORNIK IR WYBÓR / GŁOŚNOŚĆ 12 WEJŚCIE AUDIO MENU / STOP 13 WYSUWANIE/ OTWIERANIE/ ZAMYKANIE KIESZENI CD GNIAZDO USB 14 GNIAZDO SŁUCHAWKOWE 15 Kieszeń...
- Page 409 All manuals and user guides at all-guides.com Tylna strona: Antena teleskopowa...
- Page 410 all-guides.c...
- Page 411 All manuals and user guides at all-guides.com Zdalne sterowanie: EIN/STANDBY Włączenie/wyłączenie urządzenia (Standby) Wyłączanie alarmu OPEN/CLOSE Otwarcie/zamknięcie kieszeni CD PRESET Funkcja programowania CLOCK Ustawianie czasu 20 TIMER Ustawianie czasu budzenia INTRO CD, USB: Funkcja odtwarzania 10 s każdego utworu RANDOM CD, USB: Funkcja losowego wyboru utworów MUTE Wyciszenie dźwięku...
- Page 412 All manuals and user guides at all-guides.com SCAN Automatyczne przeszukiwanie pasma UKF SCAN Automatyczne przeszukiwanie pasma DAB WYŚWIETLACZ Informacje o odtwarzanym tytule CD/USB Włączanie/wyłączanie tagów ID3 Tryb odtwarzania USB Tryb odtwarzania CD FOLDER – CD/USB: Wybór albumu PRESET s TUNER DAB, UKF: Wybór stacji w pamięci PRESET VOL - Zmniejszenie głośności PRESET r...
- Page 413 Ustawianie urządzenia .............................356 Pilot zdalnego sterowania ................................358 Opis urządzenia DIGITRADIO 360 CD ........................358 Zakres dostawy .....................................358 Szczególne własności urządzenia DIGITRADIO 360 CD .....................358 Przygotowanie DIGITRADIO 360 CD do eksploatacji......................359 4.3.1 Podłączanie przewodu zasilania ..............................359 4.3.2 Korekta ustawienia anteny ................................360 4.3.3 Wkładanie baterii ....................................
- Page 414 All manuals and user guides at all-guides.com Obsługa menu ................................365 Radio DAB ..................................366 Czym jest DAB+ ....................................366 6.1.1 Kompresja danych ....................................366 6.1.2 Strumień Audio ....................................366 Odbiór stacji radiowych DAB................................367 Automatyczne wyszukiwanie stacji radiowych ........................367 Wybór stacji DAB ....................................368 Przyporządkowanie stacji DAB do określonego miejsca w pamięci ................
- Page 415 All manuals and user guides at all-guides.com Odtwarzanie fragmentów ................................378 Funkcja programowania ...................................379 Odtwarzanie multimediów z napędu USB ......................380 Wejście audio ................................381 Funkcje dodatkowe ..............................382 11.1 Funkcja opóźnionego wyłączenia Sleep ........................... 382 11.2 Ustawianie czasu ....................................383 11.3 Budzik ........................................383 11.3.1 Wyłączanie budzika po uruchomieniu alarmu ........................
- Page 416 all-guides.c...
- Page 417 All manuals and user guides at all-guides.com 2 Wstęp Niniejsza instrukcja obsługi opisuje prawidłową i zgodną z przeznaczeniem obsługę odbiornika radiowego, nazywanego dalej DIGITRADIO lub urządzeniem. 2.1 Grupa docelowa instrukcji obsługi Instrukcja obsługi jest skierowana do wszystkich osób ustawiających, obsługujących, czyszczących oraz utylizujących urządzenie.
- Page 418 All manuals and user guides at all-guides.com 2.2.1 Bezpieczeństwo W celu zapewnienia własnego bezpieczeństwa, przed rozpoczęciem eksploatacji zapoznaj się z zaleceniami dotyczącymi bezpieczeństwa. Producent nie ponosi żadnej odpowiedzialności za uszkodzenia wynikające z nieprawidłowej obsługi i nieprzestrzegania treści zaleceń dotyczących bezpieczeństwa. W żadnym wypadku nie otwieraj urządzenia! Dotknięcie elementów pozostających pod napięciem grozi śmiercią! Ewentualnie konieczne manipulacje mogą...
- Page 419 All manuals and user guides at all-guides.com W trakcie burzy z wyładowaniami atmosferycznymi odłącz wtyczkę od gniazda zasilania. Przepięcie może spowodować uszkodzenie urządzenia. W przypadku stwierdzenia uszkodzenia urządzenia, pojawienia się dymu albo nietypowego zapachu, nieprawidłowości działania, uszkodzenia obudowy albo przedostania się cieczy do jej wnętrza, wyłącz urządzenie i skontaktuj się...
- Page 420 All manuals and user guides at all-guides.com Urządzenie nie jest przystosowane do obsługi przez osoby o obniżonej sprawności fizycznej, psychomotorycznej lub psychicznej albo pozbawione odpowiedniego doświadczenia/wiedzy (włącznie z dziećmi). Nie dotyczy to sytuacji, gdy osoby takie pozostają pod opieką innych osób, przekazujących im wskazówki dotyczące obsługi urządzenia.
- Page 421 All manuals and user guides at all-guides.com Obsługa baterii Dopilnuj, aby baterie nie dostały się w ręce dzieci. Dzieci są w stanie połknąć baterię. Może to spowodować poważne szkody na zdrowiu. Z tego powodu przechowuj baterie pilota zdalnego sterowania w miejscu niedostępnym dla dzieci. W przypadku połknięcia baterii natychmiast skontaktuj się...
- Page 422 all-guides.c...
- Page 423 All manuals and user guides at all-guides.com 2.2.2 Utylizacja Opakowanie urządzenia składa się wyłącznie z materiałów przydatnych do ponownego wykorzystania. Materiały te należy odpowiednio posortować celem ponownego wykorzystania Po zakończeniu okresu eksploatacji, produkt nie może zostać wyrzucony do odpadów gospodarczych. Należy go oddać...
- Page 424 Baterie są objęte treścią rozporządzenia 2006/66/WE. Nie można wyrzucać ich wraz z odpadami gospodarczymi. 2.2.3 Informacje prawne Niniejszym firma TechniSat deklaruje, że odbiornik radiowy typu DIGITRADIO 360 CD odpowiada wymaganiom dyrektywy 2014/53/UE. Pełen tekst deklaracji zgodności z wymogami WE zamieszczono pod następującym adresem: http://konf.tsat.de/?ID=11100...
- Page 425 Zmiany i błędy w druku zastrzeżone. Wydanie 03/18. Powielanie i rozpowszechnianie dozwolone jest jedynie po uzyskaniu zgody dostawcy. Aktualna wersja instrukcji może zostać pobrana w formacie PDF z obszaru pobierania witryny internetowej firmy TechniSat www.technisat.de. Urządzenie jest przystosowane do eksploatacji we wszystkich krajach Unii Europejskiej oraz w Szwajcarii, Norwegii, Liechtensteinie oraz na Islandii.
- Page 426 W przypadku wystąpienia usterki prosimy o kontakt z naszą linią serwisową: Pn.-Pt., w godzinach 8:00–20:00 03925/92201800 Jeśli zaistnieje taka konieczność, urządzenie można przesyłać wyłącznie na następujący adres: TechniSat Digital GmbH Service-Center Nordstr. 4a 39418 Staßfurt Nazwy wymienionych firm, instytucji oraz marek są znakami towarowymi lub zastrzeżonymi znakami firmowymi...
- Page 427 Stopy urządzenia mogą w pewnych warunkach pozostawić kolorowe ślady na niektórych powierzchniach mebli. Zastosuj materiał ochrony pomiędzy urządzeniem a powierzchnią mebla. > Urządzenie może być eksploatowane wyłącznie w pozycji pionowej. Nie eksploatuj urządzenia na zewnątrz! > Nie zbliżaj urządzenia DIGITRADIO 360 CD do urządzeń powodujących powstawanie silnego pola magnetycznego.
- Page 428 all-guides.c...
- Page 429 All manuals and user guides at all-guides.com > Nie ustawiaj na urządzeniu żadnych ciężkich przedmiotów. > W przypadku przenoszenia urządzenia z otoczenia o niskiej temperaturze do otoczenia o wysokiej temperaturze dojść może do skroplenia się wilgoci w jego wnętrzu. W takiej sytuacji odczekaj ok. godzinę...
- Page 430 Sprawdź, czy następujące elementy wyposażenia dodatkowego są dostępne: DIGITRADIO 360 CD 1 x pilot zdalnego sterowania z baterią 1 x Instrukcja obsługi 4.2 Szczególne własności urządzenia DIGITRADIO 360 CD Urządzenie DIGITRADIO 360 CD składa się z odbiornika stereo DAB+/UKF z wejściem MP3/CD i z funkcją timera.
- Page 431 All manuals and user guides at all-guides.com 4.3 Przygotowanie DIGITRADIO 360 CD do eksploatacji. 4.3.1 Podłączanie przewodu zasilania > Podłącz wtyczkę zasilania urządzenia do gniazda sieci elektrycznej. Przed włączeniem wtyczki do gniazda sprawdź, czy napięcie robocze urządzenia jest zgodne z napięciem sieci zasilania.
- Page 432 All manuals and user guides at all-guides.com 4.3.2 Korekta ustawienia anteny Liczba i jakość odbieranych stacji radiowych zależy od warunków odbioru w miejscu ustawienia. Antena teleskopowa umożliwia uzyskanie idealnego odbioru. > Wyjmij antenę teleskopową z mocowania, ustaw ją i wyciągnij na całą długość. Ważne jest precyzyjne ustawienie anteny teleskopowej, w szczególności w obszarach o słabym zasięgu danych Strona internetowa „www.digitalradio.de”...
- Page 433 All manuals and user guides at all-guides.com 4.3.3 Wkładanie baterii > Zamknij gniazdo baterii tak, aby zablokować zatrzask pokrywy w obudowie. Używanie pilota zdalnego sterowania wymaga zastosowania baterii alkalicznej typu manganowego, 1,5 V, LR6/AA. W trakcie montażu uwzględnij prawidłową biegunowość. Natychmiast wymieniaj słabe baterie.
- Page 434 all-guides.c...
- Page 435 All manuals and user guides at all-guides.com 4.4.1 Włącz urządzenie > Włączenie lub przełączenie urządzenia do trybu czuwania możliwe jest za pomocą przycisku Ein/Standby na urządzeniu (1) lub na pilocie zdalnego sterowania (16). Przed włączeniem urządzenia wyciągnij antenę urządzenia na całą jej długość. Po pierwszym uruchomieniu urządzenie pracować...
- Page 436 All manuals and user guides at all-guides.com 4.4.3 Ustawianie głośności > Głośność można ustawić za pomocą przycisków VOL -/+ (43, 26) pilota zdalnego sterowania lub przez obrót pokrętła SELECT/VOLUME (5) na urządzeniu. - Obrót w prawo — zwiększenie głośności - Obrót w lewo — zmniejszenie głośności Ustawiona głośność...
- Page 437 All manuals and user guides at all-guides.com 4.4.6 Wyświetlanie komunikatów na ekranie > Kilkukrotne naciśnięcie przycisku INFO (3) na urządzeniu (w trybie CD/USB przycisk ten należy przytrzymać przez kilka sekund), albo naciśnięcie przycisku DISPLAY na pilocie zdalnego sterowania dla danego trybu (przycisk 33 dla DAB, 35 dla UKF , 38 dla CD/USB), umożliwia wyświetlenie następujących informacji.
- Page 438 All manuals and user guides at all-guides.com 5 Obsługa menu Menu umożliwia zmianę wielu ustawień DIGITRADIO 360 CD za pomocą urządzenia lub pilota zdalnego sterowania. Wyświetlane punkty menu zależą od wybranego trybu pracy (DAB lub UKF). > Wywołanie i wyjście z menu możliwe jest za pomocą przycisku MENU (34) na pilocie zdalnego sterowania lub na urządzeniu (6).
- Page 439 All manuals and user guides at all-guides.com 6 Radio DAB 6.1 Czym jest DAB+ DAB+ to nowy, cyfrowy format, umożliwiający odbiór krystalicznie czystego dźwięku, wolnego od jakichkolwiek szumów. W odróżnieniu od typowych, analogowych stacji radiowych, w przypadku technologii DAB jedna częstotliwość...
- Page 440 all-guides.c...
- Page 441 All manuals and user guides at all-guides.com 6.2 Odbiór stacji radiowych DAB > W celu włączenia trybu DAB naciskaj przycisk MODE (2) na urządzeniu, aż na wyświetlaczu pojawi się wskaźnik DAB Radio lub naciśnij przycisk TUNER/DAB (30) na pilocie zdalnego sterowania. Podczas pierwszego uruchomienia urządzenia wykonane zostanie kompletne przeszukiwanie pasma nadawania i utworzona zostanie lista stacji radiowych.
- Page 442 All manuals and user guides at all-guides.com 6.4 Wybór stacji DAB > Naciśnij przycisk TUNING s/9 lub TUNING r/: (10, 9) na urządzeniu lub przyciski TUNING s/97albo TUNING r/8: (45, 25) na pilocie zdalnego sterowania. Spowoduje to wybór odpowiedniej stacji w trakcie wyszukiwania DAB.
- Page 443 All manuals and user guides at all-guides.com 6.6 Wywoływanie stacji DAB z określonego miejsca w pamięci > W celu wywołania z pamięci stacji radiowej zapisanej pod określonym numerem krótko naciśnij przycisk PRESET na urządzeniu lub na pilocie zdalnego sterowania. Pojawi się lista z 30 dostępnymi miejscami do zapisu stacji radiowych w pamięci. >...
- Page 444 All manuals and user guides at all-guides.com > Naciśnięcie pokrętła SELECT/VOLUME na urządzeniu lub przycisku ENTER na pilocie zdalnego sterowania umożliwia wybór punktu menu. > Obrót pokrętła SELECT/VOLUME na urządzeniu lub naciśnięcie przycisku TUNING s/97 albo TUNING r/8: na pilocie zdalnego sterowania pozwala na wybór kanału (5A do 13F oraz ich częstotliwości). >...
- Page 445 All manuals and user guides at all-guides.com 6.9 Usuwanie nieaktywnych stacji radiowych > Funkcja MENU > Usuwanie nieaktywnych stacji umożliwia usunięcie z listy tych stacji radiowych, które nie są aktualnie odbierane lub nie mogą być odtwarzane. > Po pojawieniu się pytania o potwierdzenie, za pomocą przycisku TUNING s/9 lub TUNING r/: (10, 9) na urządzeniu albo przycisku TUNING s/97 lub TUNING r/8: (45, 25) na pilocie zdalnego sterowania potwierdź...
- Page 446 all-guides.c...
- Page 447 All manuals and user guides at all-guides.com 7 Tryb UKF > Zgodnie z opisem zamieszczonym w punkcie 4.4.5 wybierz źródło Radio UKF. Przy pierwszym włączeniu ustawiona zostaje częstotliwość 87,5 MHz. Jeżeli stacja radiowa została już ustawiona lub zapisana, odbiornik radiowy rozpocznie odtwarzanie ostatnio odtwarzanej stacji.
- Page 448 All manuals and user guides at all-guides.com 7.2 Ręczne wyszukiwanie stacji > Krótko naciskaj przycisk TUNING s/9 albo TUNING r/: (10, 9) na urządzeniu lub przycisk TUNING s/97 albo TUNING r/8: (45, 25) na pilocie zdalnego sterowania, aż do uzyskania częstotliwości nadawania wybranej stacji radiowej.
- Page 449 All manuals and user guides at all-guides.com > Wybierz odpowiednie miejsce w pamięci, obracając pokrętło SELECT/VOLUME albo za pomocą przycisków PRESET r lub PRESET s (44, 42) na pilocie zdalnego sterowania i potwierdź operację programowania, naciskając przycisk SELECT/VOLUME na urządzeniu lub przycisk ENTER na pilocie zdalnego sterowania. Alternatywnie: >...
- Page 450 All manuals and user guides at all-guides.com 7.5 Ustawienia dźwięku (Mono/Stereo) > Funkcja MENU > Ustawienia Audio pozwala wybrać, czy dźwięk będzie odtwarzany w trybie Mono (Tylko Mono) czy także Stereo (Możliwe Stereo). Alternatywnie: > Naciśnij przycisk MONO/STEREO (46) na pilocie zdalnego sterowania. Odtwarzanie dźwięku Mono może zmniejszyć...
- Page 451 All manuals and user guides at all-guides.com plików dźwiękowych do formatu MP3. Odtwarzanie plików z rozszerzeniem *.AAC, *.DLF, *.M3U oraz *.PLS lub *.WMA nie jest możliwe. Ze względu na dużą liczbę programów do kodowania dźwięku nie jesteśmy w stanie zagwarantować prawidłowego odtwarzania wszystkich plików typu MP3.
- Page 452 all-guides.c...
- Page 453 Naciśnięcie przycisku STOP (6) na urządzeniu lub < (32) na pilocie zdalnego sterowania spowoduje zatrzymanie odtwarzania. Na wyświetlaczu widoczna jest całkowita liczba wszystkich utworów. Przed wyjęciem płyty CD zawsze zatrzymuj odtwarzanie. Jeżeli odtwarzanie zostanie zatrzymane, DIGITRADIO 360 CD przejdzie do trybu czuwania po 15 minutach. 8.4 Ustawianie tytułu >...
- Page 454 All manuals and user guides at all-guides.com 8.5 Szybkie wyszukiwanie Urządzenie umożliwia szybkie wyszukiwanie w ramach odtwarzanego tytułu w celu odszukania określonego miejsca. W trakcie wyszukiwania odtwarzanie jest wstrzymane. > Naciśnij i przytrzymaj przycisk DO PRZODU lub DO TYŁU na urządzeniu lub przycisk TUNING s/97 albo TUNING r/8: (45, 25) na pilocie zdalnego sterowania w celu rozpoczęcia szybkiego przesuwania do przodu lub do tyłu w ramach danego utworu.
- Page 455 All manuals and user guides at all-guides.com 8.9 Funkcja programowania Funkcja programowania pozwala na odtworzenie do 32 utworów z płyty CD lub do 64 utworów z płyty MP3/ WMA-CD w określonej przez użytkownika kolejności. Utwory można zaprogramować wyłącznie po włożeniu płyty i zamknięciu kieszeni CD. Urządzenie musi znajdować...
- Page 456 All manuals and user guides at all-guides.com W przypadku płyt MP3 CD podaj dodatkowo folder/numer albumu. > Po rozpoczęciu operacji programowania za pomocą przycisku PRESET na wyświetlaczu migać będzie najpierw wskaźnik F, a następnie folder/numer albumu. Wybierz folder/album za pomocą przycisków FOLDER- i FOLDER+ (41, 28) na pilocie zdalnego sterowania.
- Page 457 Jeżeli napęd nie jest podłączony lub nie może zostać odczytany, na wyświetlaczu pojawi się komunikat Kein USB (brak USB). Jeżeli odtwarzanie zostanie zatrzymane, DIGITRADIO 360 CD przejdzie do trybu czuwania po 15 minutach. 10 Wejście audio DIGITRADIO 360 odtwarza przez wbudowany głośnik sygnał...
- Page 458 all-guides.c...
- Page 459 Pamiętaj, że zbyt niskie ustawienie głośności podłączonego urządzenia i odpowiednio wyższe ustawienie głośności odtwarzacza powoduje uwypuklenie zakłóceń/szumów. Zalecamy ustawienie głośności urządzenia DIGITRADIO 360 CD w trybie DAB+ lub UKF, zmianę trybu na odtwarzanie z wejścia audio i odpowiednie ustawienie głośności podłączonego urządzenia w celu uzyskania takiej głośności dźwięku, jak w trakcie odtwarzania stacji radiowej DAB+/UKF.
- Page 460 All manuals and user guides at all-guides.com 11.2 Ustawianie czasu Odbiór sygnału DAB powoduje automatyczną synchronizację czasu i ustawienie prawidłowej godziny. Jeżeli automatyczne ustawienie czasu nie nastąpiło, wykonaj następującą procedurę: > Przełącz urządzenie do trybu czuwania. > Naciśnij przycisk CLOCK (19) na pilocie zdalnego sterowania. Wskaźnik godzin zacznie migać. >...
- Page 461 All manuals and user guides at all-guides.com > Za pomocą przycisków TUNING s/97 i TUNING r/8: ustaw czas wyłączenia w godzinach i minutach. W celu potwierdzenia naciśnij przycisk TIMER. > Źródło alarmu będzie migać. Za pomocą przycisków TUNING s/97 i TUNINGr/8: ustaw odpowiednie źródło (DAB, FM, DISC (CD), USB).
- Page 462 All manuals and user guides at all-guides.com 11.4 Ustawienia barwy dźwięku W celu dostosowania barwy dźwięku urządzenie DigitRadio 360 CD umożliwia wykorzystanie korektora z zaprogramowanymi ustawieniami. > Naciśnij przycisk EQ (47) na pilocie zdalnego sterowania w celu bezpośredniego przejścia do ustawień...
- Page 463 All manuals and user guides at all-guides.com 11.6 Ustawienia fabryczne W przypadku zmiany miejsca eksploatacji urządzenia, np. przeprowadzki, odbiór zapisanych stacji DAB może okazać się niemożliwy. Przywrócenie Ustawień fabrycznych pozwala na usunięcie wszystkich zapisanych stacji radiowych oraz uruchomienie operacji wyszukiwania stacji. >...
- Page 464 all-guides.c...
- Page 465 All manuals and user guides at all-guides.com 11.8 Korzystanie ze słuchawek Korzystając ze słuchawek, nie słuchaj muzyki o dużej głośności. Może to spowodować trwałe uszkodzenia słuchu. Przed wykorzystaniem słuchawek ustaw minimalną głośność odtwarzanego dźwięku. Podłączenie słuchawek (słuchawki nie należą do zakresu dostawy) spowoduje odłączenie głośnika i rozpoczęcie odtwarzania dźwięku wyłącznie przez słuchawki.
- Page 466 All manuals and user guides at all-guides.com 12.1 Wskazówki dotyczące CD Płytę CD przechowuj zawsze w okładce i chwytaj ją wyłącznie za krawędzie. Mieniąca się tęczą powierzchnia nie może być dotykana i winna być zawsze czysta. Nie naklejaj papieru ani taśmy samoprzylepnej na stronę z etykietą.
- Page 467 All manuals and user guides at all-guides.com 13 Usuwanie usterek Jeżeli urządzenie nie działa w prawidłowy sposób, wykonaj czynności kontrolne zamieszczone w poniższej tabeli. 13.1 Problemy z urządzeniem Usterka Możliwa przyczyna/naprawa Urządzenie nie jest podłączone do prądu. Prawidłowo podłącz wtyczkę do gniazda Włączenie urządzenia nie jest możliwe.
- Page 468 All manuals and user guides at all-guides.com 13.2 Usterki dotyczące nośników USB Usterka Możliwa przyczyna/naprawa Urządzenie nie jest ustawione w trybie USB. Włącz odpowiednie źródło dźwięku za pomocą przycisku TRYB. Odtwarzanie dźwięku nie jest możliwe. Źródło danych nie jest podłączone lub jest puste.
- Page 469 All manuals and user guides at all-guides.com 13.4 Usterki dotyczące radia Usterka Możliwa przyczyna/naprawa Urządzenie nie pracuje w trybie radia. Brak odbioru stacji radiowych. Naciśnij przycisk MODE. Sprawdź, czy odbiór stacji DAB w danym regionie jest możliwy. Sygnał DBS nie będzie odbierany. Ponownie ustaw antenę.
- Page 470 all-guides.c...
- Page 471 All manuals and user guides at all-guides.com 13.5 Usterki dotyczące odtwarzacza CD Usterka Możliwa przyczyna/naprawa Urządzenie nie pracuje w trybie CD. Włożono nieprawidłową płytę CD. Kieszeń CD nie jest zamknięta. Zamknij kieszeń CD. Płyta CD jest nieprawidłowo włożona. Włóż płytę CD zadrukowaną stroną ku górze.
- Page 472 All manuals and user guides at all-guides.com Usterka Możliwa przyczyna/naprawa Zbyt wysokie ustawienie głośności. Zmniejsz głośność. Płyta CD jest zanieczyszczona lub uszkodzona. Dźwięk zanika. Oczyść płytę CD lub wymień ją na inną. Urządzenie jest poddawane działaniu wibracji. Ustaw urządzenie na stabilnym podłożu, które nie będzie wprowadzać...
- Page 473 All manuals and user guides at all-guides.com 14 Dane techniczne Zastrzega się możliwość wprowadzenia zmian technicznych i wystąpienia błędów. Wymiary są przybliżone. Ścieżki odbioru DAB/DAB+, UKF, CD, USB, AUX UKF: 87,5–108 MHz Częstotliwości DAB/DAB+: 174–240 MHz Napięcie zasilania Zasilanie AC: 110–240; 50 Hz Zasilanie USB DC 5 V 1,0 A Moc wyjściowa głośnika...
- Page 474 All manuals and user guides at all-guides.com Návod k obsluze DIGITRADIO 360 CD Stereo rádio DAB+ a VKV s USB připojením, audio vstupem a přehrávačem MP3/CD...
- Page 475 All manuals and user guides at all-guides.com 1 Vyobrazení Ovládání: EIN/STANDBY 8 PRESET 2 MODE 9 VPŘED / TUNING r/: PLAY/PAUSE / INFO 10 VZAD / TUNING s/9 4 DISPLEJ 11 IR PŘIJÍMAČ SELECT/VOLUME 12 AUDIO VSTUP 6 MENU/STOP 13 EJECT (VYSUNOUT) / otevřít/zavřít přihrádku na CD PŘÍPOJKA USB 14 KONEKTOR PRO SLUCHÁTKA 15 Přihrádka na CD...
- Page 476 all-guides.c...
- Page 477 All manuals and user guides at all-guides.com Zadní strana: Teleskopická anténa...
- Page 478 All manuals and user guides at all-guides.com Dálkový ovladač: EIN/STANDBY Zapnutí/vypnutí přístroje (pohotovostní režim), vypnutí budíku OPEN/CLOSE Otevřít/zavřít přihrádku na CD PRESET Funkce programování CLOCK Nastavení času 20 TIMER (ČASOVAČ) Nastavení doby buzení INTRO CD, USB: funkce předehrání, 10 s každá skladba RANDOM CD, USB: funkce náhodného přehrávání...
- Page 479 All manuals and user guides at all-guides.com SCAN Automatické vyhledávání VKV SCAN Automatické vyhledávání DAB DISPLEJ Informace o skladbě, přehrávání z CD/USB Zapnout/vypnout tagy ID3 Režim provozu přehrávání z USB Režim provozu přehrávání CD FOLDER – CD/USB: výběr alba PRESET s DAB, UKW-TUNER: PŘEDNASTAVENÉ...
- Page 480 Dálkové ovládání ....................................414 Popis přístroje DIGITRADIO 360 CD ........................414 Obsah dodávky .....................................414 Zvláštní vlastnosti přístroje DIGITRADIO 360 CD ........................414 Příprava přístroje DIGITRADIO 360 CD k používání ......................415 4.3.1 Připojení napájecího kabelu ................................415 4.3.2 Zlepšení anténního příjmu ................................416 4.3.3 Vložení baterie....................................... 417 Obecné...
- Page 481 All manuals and user guides at all-guides.com Obsluha pomocí menu .............................. 421 DAB rádio ..................................422 Co je DAB+ ......................................422 6.1.1 Komprimace dat ....................................422 6.1.2 Audio Stream ......................................422 Rádiový příjem DAB ................................... 423 Spuštění automatického vyhledávání ............................423 Výběr stanice DAB ....................................424 Uložení...
- Page 482 all-guides.c...
- Page 483 All manuals and user guides at all-guides.com Předehrávka skladby ..................................434 Funkce programování ..................................435 Přehrávání médií přes USB .............................436 Audio vstup ..................................437 Další funkce ..................................438 11.1 Funkce Sleep (spánek) ..................................438 11.2 Nastavení času ..................................... 439 11.3 Budík ......................................... 439 11.3.1 Vypnutí...
- Page 484 All manuals and user guides at all-guides.com 2 Úvod Tento návod k obsluze vám pomůže se správným a bezpečným používáním vašeho rádiového systému, který je dále označován jako DIGITRADIO nebo přístroj. 2.1 Pro koho je tento návod k obsluze určen Návod k obsluze je určen každému, kdo přístroj instaluje, obsluhuje, čistí...
- Page 485 All manuals and user guides at all-guides.com 2.2.1 Bezpečnost Než začnete přístroj používat, přečtěte si pozorně část Bezpečnostní opatření za účelem vlastní ochrany. Výrobce nepřebírá žádnou záruku za škody vzniklé v důsledku používání v rozporu s určeným účelem přístroje nebo v důsledku nedodržování...
- Page 486 All manuals and user guides at all-guides.com Při bouřce byste přístroj měli vytáhnout z elektrické zásuvky. Přepětí může přístroj poškodit. Při zřejmé poruše přístroje, vzniku zápachu nebo kouře, podstatném chybném fungování, poškození krytu nebo při proniknutí tekutiny přístroj vypněte a obraťte se na servis. Přístroj se smí...
- Page 487 All manuals and user guides at all-guides.com Děti musí být pod dohledem, aby bylo jisté, že si s přístrojem nehrají. Je zakázáno provádět jakékoli úpravy přístroje. Poškozené přístroje, resp. poškozené součástí příslušenství se nesmí používat. CD přehrávač používá neviditelné laserové záření. Při nesprávné manipulaci vám toto záření může poškodit oči.
- Page 488 all-guides.c...
- Page 489 All manuals and user guides at all-guides.com Manipulace s bateriemi Dbejte na to, aby se baterie nedostaly do rukou dětem. Děti by si mohly baterie vložit do úst a spolknout je. Tím by mohlo dojít k závažným zdravotním problémům. Baterie a dálkový ovladač proto uchovávejte z dosahu malých dětí.
- Page 490 All manuals and user guides at all-guides.com 2.2.2 Likvidace Obal přístroje je vyroben výhradně z recyklovatelných materiálů. Odevzdejte je prosím správně vytříděné do „duálního systému“ Po ukončení své životnosti se výrobek nesmí likvidovat do běžného domovního odpadu, ale musí se odevzdat na sběrném místě...
- Page 491 2006/66/ES. Tyto se nesmí likvidovat s běžným komunálním odpadem. 2.2.3 Právní upozornění Společnost TechniSat tímto prohlašuje, že rádiové zařízení typu DIGITRADIO 360 CD splňuje požadavky směrnice 2014/53/EU. Úplný text prohlášení o shodě EU je k dispozici na této internetové adrese: http://konf.tsat.de/?ID=11100...
- Page 492 Kopírování a rozmnožování pouze se souhlasem výrobce. Vždy aktuální verzi návodu ve formátu PDF získáte v sekci stahování na domovské stránce společnosti TechniSat na adrese www.technisat.de. Tento přístroj je určen pro použití ve všech zemích Evropské unie a také ve Švýcarsku, Norsku, Lichtenštejnsku a na Islandu.
- Page 493 Pokud se u tohoto přístroje objeví problém, obraťte se prosím nejdříve na naši linku technické podpory: Po–Pá 8:00–20:00 03925/92201800 Pro případně nezbytné odeslání přístroje používejte prosím výhradně následující adresu: TechniSat Digital GmbH Service-Center Nordstr. 4a 39418 Staßfurt, Německo Názvy uvedených firem, institucí nebo značek jsou obchodní značky nebo registrované obchodní značky...
- Page 494 all-guides.c...
- Page 495 Pamatujte, že nožičky přístroje by mohly např. zanechat barevné otisky na některých površích nábytku. Mezi nábytek a přístroj vkládejte ochranu. > Přístroj se smí používat pouze ve vodorovné poloze. Nepoužívejte jej venku! > Přístroj DIGITRADIO 360 CD uchovávejte z dosahu přístrojů, které vytvářejí silné magnetické pole.
- Page 496 All manuals and user guides at all-guides.com > Na přístroj nepokládejte žádné těžké předměty. > Pokud přístroj přenesete z chladného do teplého prostředí, může dojít uvnitř přístroje ke srážení vlhkosti. V takovém případě vyčkejte asi jednu hodinu, než jej zapnete. >...
- Page 497 Ujistěte se prosím, že jsou obsaženy všechny níže uvedené díly příslušenství: DIGITRADIO 360 CD 1x dálkový ovladač s baterií 1x návod k obsluze 4.2 Zvláštní vlastnosti přístroje DIGITRADIO 360 CD DIGITRADIO 360 CD obsahuje stereo přijímač DAB+/VKV se vstupem USB/AUX, přehrávačem MP3/CD a funkcí časovače.
- Page 498 All manuals and user guides at all-guides.com 4.3 Příprava přístroje DIGITRADIO 360 CD k používání 4.3.1 Připojení napájecího kabelu > Přístroj připojte k elektrické síti pomocí síťové zástrčky. Předtím, než zapojíte napájecí zdroj do elektrické zásuvky ve zdi, se ujistěte, že provozní napětí přístroje souhlasí...
- Page 499 All manuals and user guides at all-guides.com 4.3.2 Zlepšení anténního příjmu Počet a kvalita vysílače přijímaných stanic závisí na podmínkách v místě instalace. Pomocí teleskopické antény je možné dosáhnout vynikajícího příjmu. > Uvolněte teleskopickou anténu z jejího držáku, nasměrujte ji a vytáhněte do délky. Často je důležité...
- Page 500 all-guides.c...
- Page 501 All manuals and user guides at all-guides.com 4.3.3 Vložení baterie > Víčko přihrádky na baterii opět pečlivě zavřete, aby západky na víčku zapadly do otvorů. K používání dálkového ovladače potřebujete jednu alkalickou baterii typu mignon, 1,5 V, LR6/AA. Při vkládání dbejte na správnou polaritu. Téměř...
- Page 502 All manuals and user guides at all-guides.com 4.4.1 Zapnutí přístroje > Pomocí tlačítka Ein/Standby (Zap/Standby) na přístroji (1) nebo na dálkovém ovladači (16) můžete přístroj zapnout nebo opět přepnout do pohotovostního režimu. Před používáním přístroje vytáhněte anténu v celé délce. Po prvotním zapnutí...
- Page 503 All manuals and user guides at all-guides.com 4.4.3 Nastavení hlasitosti > Pomocí tlačítek VOL -/+ (43, 26) na dálkovém ovladači nebo otáčením otočného tlačítka SELECT/ VOLUME (5) na přístroji nastavte hlasitost. - otáčení ve směru hodinových ručiček – hlasitěji - otáčení proti směru hodinových ručiček – tišeji Nastavená...
- Page 504 All manuals and user guides at all-guides.com 4.4.6 Vyvolání zobrazení na displeji > Opakovaným stisknutím tlačítka INFO (3) na přístroji (u režimu CD/USB se musí tlačítko několik sekund přidržet stisknuté) nebo stisknutím tlačítek DISPLAY na dálkovém ovladači pro příslušný režim (tlačítko 33 pro DAB, 35 pro FM, 38 pro CD/USB), můžete zobrazovat a procházet následující...
- Page 505 All manuals and user guides at all-guides.com 5 Obsluha pomocí menu Pomocí menu můžete provádět různá nastavení přístroje DIGITRADIO 360 CD, a to na přístroji nebo pomocí dálkového ovladače. To, jaké body menu jsou zobrazeny, závisí na zvoleném režimu provozu (DAB nebo FM). >...
- Page 506 all-guides.c...
- Page 507 All manuals and user guides at all-guides.com 6 DAB rádio 6.1 Co je DAB+ DAB+ je nový digitální formát, díky kterému můžete poslouchat křišťálově čistý zvuk bez šumu. Na rozdíl o běžných analogových stanic vysílá u DAB několik stanic na stejné frekvenci. Tomu se říká ensemble nebo multiplex.
- Page 508 All manuals and user guides at all-guides.com 6.2 Rádiový příjem DAB > Pro zapnutí režimu DAB stiskněte tlačítko MODE (2) na přístroji, resp. tlačítko TUNER/DAB (30) na dálkovém ovladači opakovaně tolikrát, dokud se na displeji nezobrazí DAB Radio. Pokud je přístroj spuštěn poprvé, provede se kompletní vyhledávání stanic a vytvoří se seznam vysílacích stanic.
- Page 509 All manuals and user guides at all-guides.com 6.4 Výběr stanice DAB > Stisknutím tlačítek TUNING s/9 nebo TUNING r/: (10, 9) na přístroji, nebo tlačítek TUNING s/97 nebo TUNING r/8: (45, 25) na dálkovém ovladači můžete vybírat stanice nalezené při vyhledávání...
- Page 510 All manuals and user guides at all-guides.com 6.6 Vyvolání stanice DAB z paměti > Pokud chcete vyvolat stanici, kterou jste uložili do místa v paměti, stiskněte krátce tlačítko PRESET na přístroji nebo na dálkovém ovladači. Nyní se otevře seznam se 30 dostupnými místy v paměti. >...
- Page 511 All manuals and user guides at all-guides.com > Stisknutím otočného tlačítka SELECT/VOLUME na přístroji, resp. tlačítka ENTER na dálkovém ovladači vyberete bod nabídky. > Otáčením otočného tlačítka SELECT/VOLUME na přístroji, resp. pomocí tlačítek TUNING s/97 nebo TUNING r/8: na dálkovém ovladači můžete vybrat kanál (5A až 13F a jejich frekvence). >...
- Page 512 all-guides.c...
- Page 513 All manuals and user guides at all-guides.com 6.9 Smazání neaktivních stanic > Pomocí výběru MENU > Inaktive Sender löschen (Smazání neaktivních stanic) můžete ze seznamu stanic odstranit ty, které již aktuálně nevysílají, resp. není možné je přijímat. > Pro spuštění procesu zvolte pomocí tlačítek TUNING s/9 nebo TUNING r/: (10, 9) na přístroji, resp. tlačítek TUNING s/97 nebo TUNING r/8: (45, 25) na dálkovém ovladači volbu nebo JA (ANO) a potvrďte klávesou ENTER.
- Page 514 All manuals and user guides at all-guides.com 7 Režim VKV > Podle popisu v bodu 4.4.5 zvolte zdroj FM Radio. Při prvotním zapnutí je nastavena frekvence 87,5 MHz. Pokud jste již nějakou stanici nastavili nebo uložili, bude rádio přehrávat naposledy nastavenou stanici. Na displeji se zobrazí...
- Page 515 All manuals and user guides at all-guides.com 7.2 Manuální vyhledávání stanic > Opakovaně krátce stiskněte tlačítka TUNING s/9 nebo TUNING r/: (10, 9) na přístroji, resp. tlačítka TUNING s/97 nebo TUNING r/8: (45, 25) na dálkovém ovladači tolikrát, dokud nenastavíte frekvenci požadované...
- Page 516 All manuals and user guides at all-guides.com > Otáčením otočného tlačítka SELECT/VOLUME na přístroji, resp. pomocí tlačítek PRESET r nebo PRESET s (44, 42) na dálkovém ovladači vyberte požadované místo v paměti a uložení potvrďte stisknutím otočného tlačítkaSELECT/VOLUME na přístroji, resp. stisknutím tlačítka ENTER na dálkovém ovladači. Alternativní...
- Page 517 All manuals and user guides at all-guides.com 7.5 Nastavení audio (mono/stereo) > Prostřednictvím MENU > Audio-Einstellung (Audio nastavení) můžete provést předvýběr, zda se má zvuk přehrávat mono (Nur Mono (Pouze mono)), nebo také stereo (Stereo möglich (Stereo možné). Alternativní řešení: >...
- Page 518 all-guides.c...
- Page 519 All manuals and user guides at all-guides.com Kvůli existenci rozličných kódovacích programů není možné zaručit, že bude možné bez problémů přehrávat každý soubor MP3. V případě vadných titulů/souborů bude přehrávání pokračovat následujícím titulem/souborem. Je výhodné vypalovat CD při nižší rychlosti a zápis provádět jednorázově (single-session) a uzavřít (finalizovat).
- Page 520 Pomocí tlačítka STOP (6) na přístroji, nebo < (32) na dálkovém ovladači zastavíte přehrávání. Na displeji se zobrazí celkový počet skladeb. Před vyjmutím CD vždy zastavte přehrávání. Pokud se nic nepřehrává, přepne se DIGITRADIO 360 CD po 15 minutách do pohotovostního režimu (standbay). 8.4 Nastavení skladby >...
- Page 521 All manuals and user guides at all-guides.com 8.5 Rychlé vyhledávání Pokud chcete v aktuální skladbě nalézt nějaké konkrétní místo, můžete spustit rychlé vyhledávání vpřed nebo vzad. Během vyhledávání přehrávání neprobíhá. > Pro rychlé převíjení vpřed nebo vzad přidržte stisknutá tlačítka VORWÄRTS nebo RÜCKWÄRTS na přístroji, resp.
- Page 522 All manuals and user guides at all-guides.com 8.9 Funkce programování Pomocí funkce programování můžete přehrávat až 32 skladeb z hudebního CD, resp. 64 skladeb z MP3/WMA CD, ve vámi stanoveném pořadí. Programování můžete provést pouze tehdy, pokud disk leží v zavřené přihrádce na CD a zařízení je v režimu zastavení.
- Page 523 All manuals and user guides at all-guides.com U MP3 CD navíc zadáváte číslo adresáře/alba. > Po spuštění programování pomocí tlačítka PRESET pak na displeji bliká nejprve F, následované číslem adresáře/alba. Pomocí tlačítek FOLDER- nebo FOLDER+ (41, 28) na dálkovém ovladači zvolte adresáře/alba. Zadání...
- Page 524 all-guides.c...
- Page 525 Pokud není žádné paměťové zařízení připojeno, nebo jej není možné načíst, zobrazí se na displeji Kein USB (Žádné USB) Pokud se nic nepřehrává, přepne se DIGITRADIO 360 CD po 15 minutách do pohotovostního režimu (standbay). 10 Audio vstup Přes reproduktor...
- Page 526 Doporučujeme nastavit hlasitost přístroje DIGITRADIO 360 CD např. na stanici DAB+ nebo VKV, přepnout na audio vstup a poté nastavit hlasitost připojeného zařízení tak, aby celková hlasitost audio vstupu přibližně odpovídala hlasitosti stanice DAB+/VKV.
- Page 527 All manuals and user guides at all-guides.com 11.2 Nastavení času Pokud je přijímán signál DAB, provádí se automatická aktualizace času a nastaví se správný čas. Pokud by se čas nenastavil automaticky, postupujte takto: > Přístroj přepněte do pohotovostního režimu. > Stiskněte tlačítko CLOCK (19) na dálkovém ovladači.
- Page 528 All manuals and user guides at all-guides.com > Pomocí tlačítek TUNING s/97 nebo TUNING r/8: nastavte dobu vypnutí v hodinách a minutách. Pro potvrzení vždy stiskněte tlačítko TIMER. > Bliká zdroj pro zapnutí. Pomocí TUNING s/97 nebo TUNING r/8: nastavte požadovaný zdroj (DAB, FM, DISC (CD), USB).
- Page 529 All manuals and user guides at all-guides.com 11.4 Nastavení zvuku Pro upravení zvuku DigitRadia 360 CD máte k dispozici ekvalizér s přednastavenými hodnotami. > Pokud chcete přejít přímo do nastavení ekvalizéru, stiskněte tlačítko EQ (47) na dálkovém ovladači. Opakovaným stisknutím tlačítka EQ zvolte požadované nastavení ekvalizéru. Jsou možná...
- Page 530 all-guides.c...
- Page 531 All manuals and user guides at all-guides.com 11.6 Tovární nastavení Pokud změníte umístění přístroje, například při stěhování, může dojít k tomu, že uložené stanice DAB již nebude možné přijímat. Obnovením výrobních nastavení můžete v tomto případě smazat všechny uložené stanice a současně...
- Page 532 All manuals and user guides at all-guides.com 11.8 Používání sluchátek Přes sluchátka neposlouchejte hudbu s vysokou hlasitostí. Mohlo by tak dojít k trvalému poškození sluchu. Před používáním sluchátek nastavte hlasitost přístroje na nejnižší stupeň. Pokud připojíte sluchátka (nejsou součástí dodávky), dojde ke ztlumení reproduktorů a přehrávání zvuku probíhá...
- Page 533 All manuals and user guides at all-guides.com 12.1 Upozornění k CD CD stále uchovávejte v obalu a vždy je berte za okraj. Povrchu s duhovým odleskem se nedotýkejte, musí zůstat stále čistý. Na stranu disku s etiketou nenalepujte žádný papír nebo lepicí pásku. CD udržujte mimo dosah přímého slunečního záření...
- Page 534 All manuals and user guides at all-guides.com 13 Odstraňování chyb Pokud přístroj nepracuje správně, zkontrolujte jej podle následujících tabulek. 13.1 Problémy s přístrojem Příznaky Možná příčina / odstranění Přístroj není připojen k napájení. Přístroj nelze zapnout. Zapojte síťovou zástrčku správně do zásuvky.
- Page 535 All manuals and user guides at all-guides.com 13.2 Problémy s USB zařízeními Příznaky Možná příčina / odstranění Přístroj se nenachází v režimu USB. Pomocí tlačítka MODE přepněte na příslušný zdroj. Není možné přehrávání. Médium nevloženo nebo je prázdné. Zasuňte médium správně, případně na něj nahrajte hudební...
- Page 536 all-guides.c...
- Page 537 All manuals and user guides at all-guides.com 13.4 Problémy s rádiem Příznaky Možná příčina / odstranění Přístroj není v režimu rádia. Nejsou přijímány žádné rozhlasové stanice. Stiskněte tlačítko MODE. Zkontrolujte, zda je v oblasti možný příjem DAB. Není přijímán žádný signál DAB. Znovu nasměrujte anténu.
- Page 538 All manuals and user guides at all-guides.com 13.5 Problémy s CD přehrávačem Příznaky Možná příčina / odstranění Přístroj není v CD režimu. Vloženo nesprávné CD. Přihrádka na CD není zavřená. Zavřete přihrádku na CD. CD je vložené špatně. Vložte CD popsanou stranou nahoru. CD musí...
- Page 539 All manuals and user guides at all-guides.com Příznaky Možná příčina / odstranění Hlasitost je nastavena příliš vysoko. Snižte hlasitost. CD je poškozené nebo znečištěné. Zvuk vynechává. CD vyčistěte nebo jej vyměňte. Přístroj je vystaven vibracím. Umístěte přístroj na místo bez vibrací. 13.6 Problémy s externím vstupem Příznaky Možná...
- Page 540 All manuals and user guides at all-guides.com 14 Technické údaje Technické změny a omyly vyhrazeny. Rozměry jsou přibližné hodnoty. Způsoby příjmu DAB/DAB+, UKW, CD, USB, AUX VKV: 87,5–108 MHz Frekvence DAB/DAB+: 174–240 MHz Síťové napětí AC Input: 110–240; 50 Hz USB napájení DC 5 V 1,0 A Výstupní...
- Page 541 All manuals and user guides at all-guides.com Návod na obsluhu DIGITRADIO 360 CD Stereo DAB+ a VKV RÁDIO, USB prípojka, audio vstup a MP3/CD prehrávač...
- Page 542 all-guides.c...
- Page 543 All manuals and user guides at all-guides.com 1 Obrázky Ovládanie: ON/STANDBY (ZAP./STANDBY) 8 PRESET 2 MODE 9 DOPREDU/TUNING r/: 3 PLAY/PAUSE / INFO 10 DOZADU/TUNING s/9 4 DISPLAY 11 IČ PRIJÍMAČ 5 SELECT / VOLUME 12 AUDIO VSTUP 6 MENU / STOP 13 VYSUNUTIE / otvoriť/zatvoriť...
- Page 544 All manuals and user guides at all-guides.com Zadná strana: Teleskopická anténa...
- Page 545 All manuals and user guides at all-guides.com Diaľkový ovládač: 16 ON/STANDBY Zapnutie/vypnutie prístroja (ZAP./STANDBY) (Standby), vypnutie budíka 17 OPEN/CLOSE Otvorenie/zatvorenie CD priečinka 18 PRESET Funkcia programovania 19 CLOCK Nastavenie času 20 TIMER (ČASOVAČ) Nastavenie budíka 21 INTRO CD, USB: funkcia prehrávania, 10 s každý...
- Page 546 All manuals and user guides at all-guides.com SCAN Automatické vyhľadávanie VKV SCAN Automatické vyhľadávanie DAB DISPLAY Informácie o tituloch pri prehrávaní CD/USB Zapnutie/vypnutie značiek ID3 Prevádzkový režim prehrávania USB Prevádzkový režim prehrávania CD FOLDER – CD/USB: výber albumu PRESET s Tuner DAB, VKV: voľba predvolených staníc VOL - Nastavenie hlasitosti tichšie...
- Page 547 Diaľkový ovládač ....................................470 Popis prístroja DIGITRADIO 360 CD ........................470 Rozsah dodávky ....................................470 Špeciálne vlastnosti prístroja DIGITRADIO 360 CD ......................470 Príprava prístroja DIGITRADIO 360 CD k prevádzke ......................471 4.3.1 Pripojenie sieťového kábla ................................471 4.3.2 Zlepšenie príjmu antény .................................. 472 4.3.3 Vloženie batérií...
- Page 548 all-guides.c...
- Page 549 All manuals and user guides at all-guides.com Obsluha menu ................................477 DAB rádio ..................................478 Čo je DAB+ ......................................478 6.1.1 Kompresia dát .......................................478 6.1.2 Audio streamovanie ....................................478 Príjem DAB rádia ....................................479 Vykonanie automatického vyhľadávania ..........................479 Výber DAB staníc ....................................480 Uloženie DAB staníc do pamäťového miesta ........................480 Vyvolanie DAB stanice z pamäťového miesta ........................481 Manuálne nastavenie ..................................481 Intenzita signálu ....................................
- Page 550 All manuals and user guides at all-guides.com Prehranie titulu ....................................490 Funkcia programovania ..................................491 Prehrávanie USB médií ............................492 Audio vstup ..................................493 Ostatné funkcie ................................494 11.1 Funkcia vypnutia (sleep) ..................................494 11.2 Nastavenie času ....................................495 11.3 Budík ......................................... 495 11.3.1 Vypnutie budíka po budení ................................496 11.3.2 Zapnutie/vypnutie budíka ................................496 11.4 Nastavenia zvuku ....................................
- Page 551 All manuals and user guides at all-guides.com 2 Predslov Tento návod na obsluhu vám pomôže používať váš rádiový prijímač, ďalej označovaný ako DIGITRADIO alebo prístroj, podľa určenia a bezpečným spôsobom. 2.1 Cieľová skupina tohto návodu na obsluhu Návod na obsluhu je určený každej osobe, ktorá prístroj nastavuje, obsluhuje, čistí alebo likviduje. 2.1.1 Použitie v súlade s účelom Prístroj je určený...
- Page 552 All manuals and user guides at all-guides.com 2.2.1 Bezpečnosť Skôr než uvediete nový prístroj do prevádzky, mali by ste si pre vlastnú bezpečnosť prečítať bezpečnostné opatrenia. Výrobca nepreberá žiadne ručenie za škody vzniknuté neodbornou manipuláciou a nedodržiavaním nižšie uvedených bezpečnostných opatrení. Prístroj nikdy neotvárajte! Dotyk s časťami, ktoré...
- Page 553 All manuals and user guides at all-guides.com Pri búrke odpojte prístroj od sieťovej zásuvky. Prepätie môže poškodiť prístroj. V prípade akejkoľvek poruchy, ak sa z prístroja šíri neobvyklý zápach alebo dym, pri vážnych chybných funkciách alebo pri poškodení krytu prístroj vypnite a kontaktujte servisné oddelenie. Prístroj sa smie pripájať...
- Page 554 all-guides.c...
- Page 555 All manuals and user guides at all-guides.com Deti musia byť pod dohľadom, aby sa zabezpečilo, že sa s prístrojom nebudú hrať. Je zakázané vykonávať úpravy a zmeny na prístroji. Poškodené prístroje alebo poškodené diely príslušenstva sa nesmú používať. CD prehrávač používa oku neviditeľný laserový lúč. Tento lúč môže pri nesprávnej manipulácii poškodiť váš...
- Page 556 All manuals and user guides at all-guides.com Manipulácia s batériami Dbajte na to, aby sa batérie nikdy nedostali do rúk detí. Deti by si mohli batérie vložiť do úst a prehltnúť ich. To môže viesť k vážnym zdravotným problémom. Preto uchovávajte batérie a diaľkový ovládač na mieste, ktoré...
- Page 557 All manuals and user guides at all-guides.com 2.2.2 Likvidácia Balenie vášho prístroja pozostáva výlučne z recyklovateľných materiálov. Recyklujte tieto materiály zodpovedne a separujte ich od iných typov odpadu Tento výrobok nesmie byť po ukončení životnosti likvidovaný ako bežný domáci odpad, ale musí byť odovzdaný do zberného recyklačného strediska pre elektrické...
- Page 558 2006/66/ES. Nesmú sa likvidovať spolu s bežným komunálnym odpadom. 2.2.3 Právne upozornenia Spoločnosť TechniSat týmto vyhlasuje, že zariadenie na príjem rozhlasového vysielania DIGITRADIO 360 CD je v súlade so smernicou 2014/53/EÚ. Úplné znenie EÚ vyhlásenia o zhode je k dispozícii na nasledujúcej internetovej adrese:...
- Page 559 All manuals and user guides at all-guides.com Zmeny alebo tlačové chyby vyhradené. Stav 03/18. Kopírovanie a rozmnožovanie iba s povolením vydavateľa. Aktuálna verzia návodu na obsluhu je k dispozícii vo formáte PDF v časti "Downloads" na domovskej stránke spol. TechniSat na adrese www. technisat.de.
- Page 560 all-guides.c...
- Page 561 Ak by sa s týmto prístrojom vyskytol nejaký problém, prosím, obráťte sa najprv na našu technickú asistenčnú linku: Po. - Pi. 8:00 - 20:00 (+49) 03925/92201800 V prípade potreby zaslania prístroja použite výlučne nasledovnú adresu: TechniSat Digital GmbH Service-Center Nordstr. 4a 39418 Staßfurt Názvy uvedených spoločností, inštitúcií alebo značiek sú ochrannými známkami alebo registrovanými...
- Page 562 Upozorňujeme, že nožičky prístroja môžu za určitých okolností zanechať farebné odtlačky na niektorých povrchoch nábytku. Nábytok preto chráňte vhodnou ochranou (obrus a pod.). > Prístroj sa smie prevádzkovať len v horizontálnej polohe. Nepoužívajte ho v exteriéri! > DIGITRADIO 360 CD uchovávajte v dostatočnej vzdialenosti od zariadení, ktoré vytvárajú silné magnetické polia.
- Page 563 All manuals and user guides at all-guides.com > Na prístroj neklaďte žiadne ťažké predmety. > Ak prístroj premiestnite z chladného do teplého prostredia, môže sa vo vnútri prístroja kondenzovať vlhkosť. Preto v tomto prípade počkajte asi hodinu, kým prístroj uvediete do prevádzky. >...
- Page 564 Uistite sa, že máte k dispozícii nasledujúce príslušenstvo: DIGITRADIO 360 CD 1x diaľkový ovládač s batériou 1x návod na obsluhu 4.2 Špeciálne vlastnosti prístroja DIGITRADIO 360 CD DIGITRADIO 360 CD pozostáva zo stereofónneho prijímača DAB+/FM so vstupom USB/AUX, MP3/CD prehrávača a funkcie časovača.
- Page 565 All manuals and user guides at all-guides.com 4.3 Príprava prístroja DIGITRADIO 360 CD k prevádzke 4.3.1 Pripojenie sieťového kábla > Pomocou sieťovej zástrčky pripojte prístroj k elektrickej sieti. Pred pripojením do sieťovej zásuvky sa uistite, že je napätie prístroja kompatibilné s miestnym sieťovým napätím.
- Page 566 all-guides.c...
- Page 567 All manuals and user guides at all-guides.com 4.3.2 Zlepšenie príjmu antény Počet a kvalita prijímaných staníc závisí od podmienok príjmu na mieste inštalácie. S teleskopickou anténou je možné dosiahnuť vynikajúci príjem. > Uvoľnite teleskopickú anténu z držiaka, narovnajte ju a vystihnite ju po celej dĺžke. Mnohokrát je dôležité...
- Page 568 All manuals and user guides at all-guides.com 4.3.3 Vloženie batérií > Opatrne zatvorte kryt priehradky pre batérie tak, aby úchytné výčnelky krytu zasahovali do priehradky. Na fungovanie diaľkového ovládača potrebujete alkalickú batériu typu Mignon, 1,5 V, LR6/AA. Pri vkladaní dbajte na správnu polaritu. Slabnúcu batériu včas vymeňte.
- Page 569 All manuals and user guides at all-guides.com 4.4.1 Zapnutie prístroja > Pomocou tlačidla Zap/Standby na prístroji (1) alebo na diaľkovom ovládači (16) môžete prístroj zapnúť, resp. prepnúť späť do pohotovostného režimu. Pred použitím prístroja vytiahnite anténu po celej dĺžke. Po prvom zapnutí sa prístroj nachádza v režime rádia DAB. Prístroj automaticky vykoná vyhľadávanie staníc.
- Page 570 All manuals and user guides at all-guides.com 4.4.3 Nastavenie hlasitosti > Nastavte hlasitosť pomocou tlačidla VOL -/+ (43, 26) na diaľkovom ovládači alebo otočením ovládača SELECT/VOLUME (5) na prístroji. - Otáčanie v smere hodinových ručičiek – hlasnejšie - Otáčanie proti smeru hodinových ručičiek – tichšie Nastavená...
- Page 571 All manuals and user guides at all-guides.com 4.4.6 Vyvolanie zobrazení na displeji > Opakovaným stláčaním tlačidla INFO (3) na prístroji (v režime CD/USB sa musí tlačidlo podržať niekoľko sekúnd), resp. na diaľkovom ovládači stláčaním tlačidiel DISPLAY a príslušných režimov (tlačidlo 33 pre DAB, 35 pre FM, 38 pre CD/USB), môžete zobraziť...
- Page 572 all-guides.c...
- Page 573 All manuals and user guides at all-guides.com 5 Obsluha menu Prostredníctvom menu môžete vykonať rôzne nastavenia pre DIGITRADIO 360 CD. Menu ovládate priamo cez prístroj alebo diaľkovým ovládačom. Zobrazené položky menu závisia od zvoleného režimu prevádzky (DAB alebo FM). > Stlačením tlačidla MENU (34) na diaľkovom ovládači alebo na prístroji (6) môžete zobraziť...
- Page 574 All manuals and user guides at all-guides.com 6 DAB rádio 6.1 Čo je DAB+ DAB+ je nový digitálny formát, ktorý vám umožní počúvať čistý zvuk bez šumu. Na rozdiel od tradičných analógových rozhlasových staníc vysiela v systéme DAB viacero staníc na rovnakej frekvencii. Táto forma vysielania sa nazýva "ensemble"...
- Page 575 All manuals and user guides at all-guides.com 6.2 Príjem DAB rádia > Na zapnutie režimu DAB stláčajte tlačidlo MODE (2) na prístroji dovtedy, kým sa na displeji nezobrazí DAB Radio, resp. stlačte tlačidlo TUNER/DAB (30) na diaľkovom ovládači. Po prvom spustení prístroja prebehne kompletné vyhľadávanie staníc a vytvorí sa zoznam staníc. Po ukončení...
- Page 576 All manuals and user guides at all-guides.com 6.4 Výber DAB staníc > Stlačením tlačidiel TUNING s/9alebo TUNINGr/: (10, 9) na prístroji; resp. tlačidiel TUNING s/97 alebo TUNING r/8: (45, 25) na diaľkovom ovládači môžete zvoliť stanice nájdené pri vyhľadávaní DAB, a potvrdiť...
- Page 577 All manuals and user guides at all-guides.com 6.6 Vyvolanie DAB stanice z pamäťového miesta > Na opätovné vyvolanie stanice, ktorú ste predtým uložili v pamäti, stlačte krátko tlačidlo PRESET na prístroji alebo na diaľkovom ovládači. Zobrazí sa zoznam s 30 dostupnými pamäťovými miestami. >...
- Page 578 all-guides.c...
- Page 579 All manuals and user guides at all-guides.com > Stlačením ovládača SELECT/VOLUME na prístroji, resp. tlačidla ENTER na diaľkovom ovládači potvrdíte zvolenú položku menu. > Otočením ovládača SELECT/VOLUME na prístroji, resp. tlačidlami TUNING s/97 oder TUNING r/8: na diaľkovom ovládači môžete vybrať želaný kanál (5A až 13F vrátane frekvencií). >...
- Page 580 All manuals and user guides at all-guides.com 6.9 Vymazanie neaktívnych staníc > Výberom položky MENU> Vymazať neaktívne stanice, môžete zo zoznamu staníc vymazať stanice, ktoré už v súčasnosti nevysielajú alebo sa prijímať nedajú. > Na spustenie procesu a potvrdenie zobrazenej bezpečnostnej otázky musíte použiť tlačidlá TUNING s/9 alebo TUNING r/: (10, 9) alebo otočiť...
- Page 581 All manuals and user guides at all-guides.com 7 Režim FM (VKV) > Vyberte zdroj 4.4.5 FM Radio, ako je popísané v bode. Pri prvom zapnutí je nastavená frekvencia 87,5 MHz. Ak ste už nastavili alebo uložili stanicu, rádio prehrá naposledy nastavenú stanicu. Na displeji sa vám zobrazia RDS informácie RT (rádiotext), PS (názov stanice), PTY (typ programu), pokiaľ...
- Page 582 All manuals and user guides at all-guides.com 7.2 Manuálne vyhľadávanie staníc > Stlačte krátko tlačidlá TUNING s/9 alebo TUNING r/: (10, 9) na prístroji; resp. tlačidlá TUNING s/97 alebo TUNING r/8: (45, 25) na diaľkovom ovládači tak často, kým nedosiahnete požadovanú frekvenciu želanej rádiostanice.
- Page 583 All manuals and user guides at all-guides.com > Zvoľte požadované miesto pamäte otočením ovládača SELECT/VOLUME na prístroji tlačidlami PRESETr alebo PRESET s (44, 42) na diaľkovom ovládači a potvrďte postup uloženia stlačením ovládača SELECT/ VOLUME na prístroji alebo stlačením tlačidla ENTER na diaľkovom ovládači. Alternatívne: >...
- Page 584 all-guides.c...
- Page 585 All manuals and user guides at all-guides.com 7.5 Nastavenie audia (mono/stereo) > Prostredníctvom položky MENU> Nastavenie zvuku môžete nastaviť, či sa má zvuk vysielať iba v režime mono (Len Mono) alebo aj v režime stereo (Stereo možné). Alternatívne: > Stlačte tlačidlo MONO/STEREO (46) na diaľkovom ovládači. Prehrávanie v režime Mono môže mať...
- Page 586 All manuals and user guides at all-guides.com Z dôvodu rozmanitosti rozličných šifrovacích softvérov nie je možné zaručiť plynulé prehrávanie každého MP3 súboru. Pri chybných tituloch/súboroch bude prehrávanie pokračovať nasledujúcim titulom/súborom. Je užitočné napaľovať CD pri nízkej rýchlosti a vypáliť CD ako v rámci jednej relácie a finalizácie. 8.2 Aké...
- Page 587 Pomocou tlačidla STOP (6) na prístroji alebo < (32) na diaľkovom ovládači prehrávanie zastavíte. Na displeji sa zobrazí celkový počet titulov. Pred vybratím CD disku vždy zastavte prehrávanie. Ak sa na prístroji neprehráva žiadna hudba, DIGITRADIO 360 CD sa po 15 minútach prepne do režimu prevádzkovej pohotovosti (Standby). 8.4 Nastavenie titulu >...
- Page 588 All manuals and user guides at all-guides.com 8.5 Rýchle vyhľadávanie Pri prehrávanom titule môžete vykonať rýchle vyhľadávanie dopredu alebo dozadu a vyhľadať tak konkrétne miesto v titule. Počas vyhľadávania sa neprehráva žiadna hudba. > Podržte stlačené tlačidlá DOPREDU alebo DOZADU na prístroji, resp. tlačidlá TUNING s/97 alebo TUNING r/8: (45, 25) na diaľkovom ovládači na rýchly posun dopredu alebo dozadu v rámci titulu pre nastavenie požadovanej doby posunu.
- Page 589 All manuals and user guides at all-guides.com 8.9 Funkcia programovania Pomocou funkcie programovania môžete prehrávať až 32 skladieb z hudobného CD disku alebo 64 skladieb z MP3/WMA CD disku vo vami určenom poradí. Programovanie môžete uskutočniť len vtedy, keď sa CD disk nachádza v zatvorenom CD priečinku a prístroj v režime zastavenia.
- Page 590 all-guides.c...
- Page 591 All manuals and user guides at all-guides.com Pri MP3-CD diskoch zadajte navyše priečinok/číslo albumu. > Po spustení procesu programovania stlačením tlačidla PRESET, bliká na displeji písmeno F, po ktorom nasleduje priečinok/číslo albumu. Tlačidlami FOLDER- oder FOLDER+ (41, 28) na diaľkovom ovládači vyberte priečinky/albumy.
- Page 592 Ak nie je pripojené žiadne pamäťové médium, alebo sa nedá prečítať, na displeji sa zobrazí správa Žiadne USB. Ak sa na prístroji neprehráva žiadna hudba, DIGITRADIO 360 CD sa po 15 minútach prepne do režimu prevádzkovej pohotovosti (Standby). 10 Audio vstup Cez reproduktor prístroja...
- Page 593 > Stláčajte tlačidlo SLEEP (24) na diaľkovom ovládači tak často, kým sa na displeji nezobrazí požadovaná hodnota. Keď je funkcia vypnutia (sleep) aktívna, zobrazí sa na displeji informácia o zostávajúcom čase do prepnutia prístroja DigitRadio 360 CD do pohotovostného režimu.
- Page 594 All manuals and user guides at all-guides.com 11.2 Nastavenie času Pri príjme signálu DAB sa čas aktualizuje a nastaví aktuálny čas automaticky. Ak sa čas nenastaví automaticky, postupujte nasledovne: > Prepnite prístroj do pohotovostného režimu. > Na diaľkovom ovládači stlačte tlačidlo CLOCK (19). Ukazovateľ hodín začne blikať. >...
- Page 595 All manuals and user guides at all-guides.com > Pomocou tlačidiel TUNING s/97 alebo TUNING r/8: nastavte čas vypnutia v hodinách a minútach. Na potvrdenie stlačte tlačidlo TIMER. > Zdroj pre budenie začne blikať. Pomocou tlačidla TUNING s/97 alebo TUNING r/8: nastavte požadovaný...
- Page 596 all-guides.c...
- Page 597 All manuals and user guides at all-guides.com 11.4 Nastavenia zvuku Ak chcete upraviť zvuk prístroja DigitRadio 360 CD, máte k dispozícii ekvalizér s prednastavenými nastaveniami. > Stlačte tlačidlo EQ (47) na diaľkovom ovládači, aby ste sa dostali priamo k nastaveniam ekvalizéra. Opakovaným stláčaním tlačidla EQ zvolíte požadované...
- Page 598 All manuals and user guides at all-guides.com 11.6 Výrobné nastavenia Ak zmeníte polohu prístroja, napr. pri presťahovaní, nemusí byť naďalej zabezpečený dobrý príjem uložených DAB staníc. Obnovením výrobných nastavení môžete vymazať všetky uložené stanice a súčasne spustiť nové vyhľadávanie staníc. >...
- Page 599 All manuals and user guides at all-guides.com 11.8 Používanie slúchadiel Nepočúvajte hudbu pri vysokej hlasitosti cez slúchadlá. Môže to viesť k trvalému poškodeniu sluchu. Pred používaním slúchadiel nastavte hlasitosť prístroja na minimálnu hlasitosť. Ak pripojíte slúchadlá (nie sú súčasťou dodávky), budú reproduktory stlmené a prehrávanie zvuku bude prebiehať...
- Page 600 All manuals and user guides at all-guides.com 12.1 Upozornenia k CD CD disky vždy uložte do puzdra a dotýkajte sa ich iba za okraje. Nemali by ste sa dotýkať citlivého lesklého povrchu diskov, ktorý by mal byť vždy čistý. Nelepte žiaden papier ani pásku na potlačenú stranu disku. CD disk by sa mal uchovávať...
- Page 601 All manuals and user guides at all-guides.com 13 Odstránenie chyby Ak prístroj vykazuje nejakú chybu alebo nefunkčnosť, riaďte sa nasledujúcou tabuľkou. 13.1 Problémy s prístrojom Symptóm Možná príčina/náprava Prístroj nie je napájaný elektrickým prúdom. Nie je možné zapnúť prístroj. Sieťovú zástrčku pripojte správne do sieťovej zásuvky.
- Page 602 all-guides.c...
- Page 603 All manuals and user guides at all-guides.com 13.2 Problémy s USB médiami Symptóm Možná príčina/náprava Prístroj sa nenachádza v režime USB. Pomocou tlačidla MODE prepnite na príslušný zdroj. Nie je možné prehrávanie. Médium nie je správne vložené alebo je prázdne. Vložte správne médium, resp.
- Page 604 All manuals and user guides at all-guides.com 13.4 Problémy s rádiom Symptóm Možná príčina/náprava Prístroj sa nenachádza v rádiovom Neprijíma sa žiadna rádiová stanica. režime. Stlačte tlačidlo MODE. Presvedčte sa, či je v oblasti príjem DAB signálu možný. Neprijíma sa žiaden signál DAB. Vyrovnajte nanovo anténu.
- Page 605 All manuals and user guides at all-guides.com 13.5 Problémy s CD prehrávačom Symptóm Možná príčina/náprava Prístroj sa nenachádza v režime prehrávania CD diskov. Bol vložený nesprávny CD disk. CD priečinok nie je zatvorený. Zatvorte CD priečinok. CD disk je vložený nesprávne. Vložte CD disk s popísanou stranou smerom nahor.
- Page 606 All manuals and user guides at all-guides.com Symptóm Možná príčina/náprava Je nastavená príliš vysoká hlasitosť. Znížte hlasitosť. CD disk je poškodený alebo znečistený. Zvuk vypadáva. Vyčistite CD disk alebo ho vymeňte. Prístroj je vystavený vibráciám. Premiestnite prístroj na miesto bez vibrácií. 13.6 Problémy s externým vstupom Symptóm Možná...
- Page 607 All manuals and user guides at all-guides.com 14 Technické údaje Technické zmeny a omyly vyhradené. Uvedené rozmery sú približnými hodnotami. Spôsoby príjmu DAB/DAB+, VKV, CD, USB, AUX VKV: 87,5-108MHz Frekvencie DAB/DAB+: 174-240MHz Sieťové napätie AC vstup: 110-240; 50 Hz Napájanie USB DC 5 V 1,0A Výstupný...
- Page 608 all-guides.c...
- Page 609 All manuals and user guides at all-guides.com...
- Page 610 All manuals and user guides at all-guides.com M000/4990.