Virutex CE96H Mode D'emploi
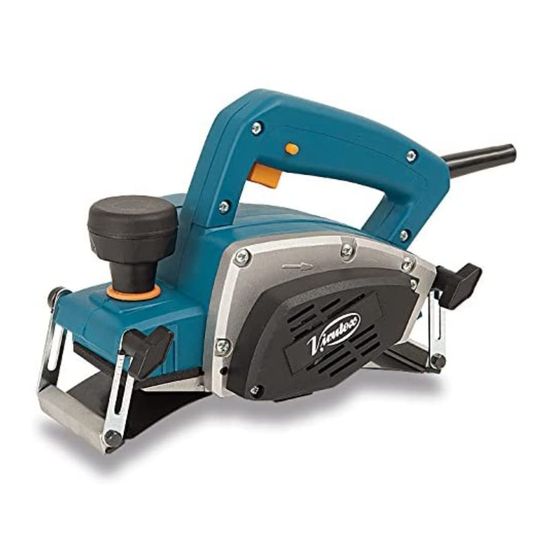
Rabot cintrable
Table des Matières
Les langues disponibles
Les langues disponibles
Liens rapides
All manuals and user guides at all-guides.com
MANUAL DE INSTRUCCIONES
Español
(p. 2)
OPERATING INSTRUCTIONS
English
(p. 4)
MODE D' EMPLOI
Français
(p. 7)
GEBRAUCHSANWEISUNG
Deutsch
(s. 9)
MANUALE D'ISTRUZIONI
Italiano
(p. 12)
MANUAL DE INSTRUÇÕES
Portugués
(p. 15)
ИНСТРУКЦИЯ ПО ЭКСПЛУАТАЦИИ
Русский
(c. 17)
Cepillo de curvas
Curved planer
Rabot cintrable
Kurvenhobel
Pialleto per curve
Plaina de contornos
Криволинейный Рубанок
Table des Matières

Manuels Connexes pour Virutex CE96H


Sommaire des Matières pour Virutex CE96H
-
Page 7: D'instructions Générales De Sécurité
4. DESCRIPTION GÉNÉRALE de besoin. Le rabot CE96H est pourvu d'un patin frontal et d'une base arrière, dont le rayon peut être réglé, qui lui per- 1. INSTRUCTIONS DE SÉCURITÉ POUR mettent d'épouser les surfaces concaves et convexes... - Page 8 All manuals and user guides at all-guides.com Il vaut mieux n'utiliser l'appareil qu'après avoir monté Monter l'équerre guide latérale comme indiqué au l'équerre guide latérale, afi n que la face de la pièce paragraphe 5 (Fig. 1). et les fers de rabotage soient parfaitement perpen- Pour raboter les irrégularités zone par zone, com- diculaires.
-
Page 9: Garantie
E du support pour élever la lame ou la cacher jusqu'à ce qu'elle soit parfaitement en ligne avec la VIRUTEX se réserve le droit de modifi er ses produits règle et parallèle à la base de la machine (Fig.7).