Zephyr ARC Serie Guide D'utilisation, D'entretien Et D'installation
Masquer les pouces
Voir aussi pour ARC Serie:
- Instructions d'installation et d'utilisation (68 pages) ,
- Notice d'utilisation (64 pages) ,
- Mode d'emploi (12 pages)

Manuels Connexes pour Zephyr ARC Serie


Sommaire des Matières pour Zephyr ARC Serie
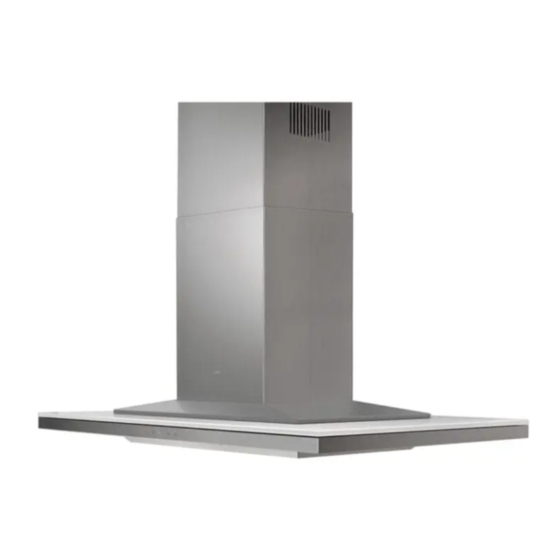
- Page 1 All manuals and user guides at all-guides.com www.zephyronline.com Incline AIN-M80AWX AIN-M80ASX Wave AWA-M90AWX AWA-M90ABX RANGE HOOD - Installation and use instructions ENGLISH........3 FRANÇAIS........33...
- Page 2 All manuals and user guides at all-guides.com LIST OF MATERIALS Incline - Zephyr blower sold separately - Non-ducted recirculating kit sold separately - Duct cover accessory sold separately Remote Blower Collar with Damper (External motor) Remote Blower Wiring Harness Remote Blower Wiring Extension...
- Page 3 All manuals and user guides at all-guides.com LIST OF MATERIALS Wave - Zephyr blower sold separately - Non-ducted recirculating kit sold separately - Duct cover accessory sold separately Remote Blower Collar with Damper (External motor) Remote Blower Wiring Harness Remote Blower Wiring Extension...
- Page 4 All manuals and user guides at all-guides.com DUCTING CALCULATION SHEET Maximum Duct Length: For satisfactory air movement, the total duct length should not exceed 100 equivalent feet. - 8 -...
- Page 5 All manuals and user guides at all-guides.com HOOD SPECIFICATIONS Incline - 9 -...
- Page 6 All manuals and user guides at all-guides.com HOOD SPECIFICATIONS Wave - 10 -...
- Page 7 All manuals and user guides at all-guides.com WIRING DIAGRAM - 11 -...
- Page 8 All manuals and user guides at all-guides.com INSTALLING THE DUCTWORK: ROOF CAP INTERNAL BLOWER 6” ROUND DUCT NOTE: To reduce the risk of fire, use only metal ductwork. 1. Decide where the ductwork will run between the hood and the outside. 2.
- Page 9 All manuals and user guides at all-guides.com CHOOSE AIR OUTLET LOCATION The hood is supplied with upper air outlet; but you can let the air out the back, turning the motor plate. Rotation of the motor plate: 1.Remove the motor plate unscrewing (6) screws (Fig.11).
- Page 10 All manuals and user guides at all-guides.com REMOTE BLOWERS (EXTERNAL AND IN-LINE) CAUTION: To reduce risk of fire and electric shock, install this range hood only with External Blower Model CBE-1000, and In-Line Blower Model PBN-1000A. Other blowers cannot be substituited.
- Page 11 All manuals and user guides at all-guides.com INSTALLATION EXTERNAL KNOCKOUT AND IN-LINE BLOWER NOTE: The following instructions are for preparing the hood for use with external or in-line blower models CBE-1000 or PBN- 1000A. For blower installation details refer to manual included with the blower. 1.
- Page 12 All manuals and user guides at all-guides.com INSTALL THE HOOD Model Incline Remove the plastic protective film from all exterior surfaces, decorative flues and filters, prior to final installation FRAMING BEHIND WOOD CROSS SUPPORT 1. Construct wood wall framing that is flush with interior surface of wall studs (Fig.17/18).
- Page 13 All manuals and user guides at all-guides.com INTERNAL BLOWER WIRING Note: This range hood must be properly grounded. The unit should be installed by a qualified electrician in accordance with all applicable national and local electrical codes. See Fig.19 for Incline Model, see Fig.20 for Wave Model. 1.
- Page 14 All manuals and user guides at all-guides.com MODEL WAVE CONNECT: WHITE-TO-WHITE, BLACK,-TO-BLACK, GREEN-TO-GROUND. BOX MARKED “120 VAC INPUT” WIRING BOX COVER GROUND FIG.20 - 22 -...
- Page 15 All manuals and user guides at all-guides.com REMOTE BLOWER WIRING 1. Remove one knockout from the wiring box marked “Motor Connection”. 2. Run 4-wire plus ground power cable from the remote blower to the remote blower wiring box marked “motor connection” (Fig.21B). 3.
- Page 16 All manuals and user guides at all-guides.com MODEL WAVE WHITE (COMMON) BLACK (HIGH) BLUE (MED) (LOW) GREEN (GROUND) HOOD WIRE REMOTE BLOWER HARNESS BOX MARKED “120 VAC INPUT” CONNECT: WHITE-TO-WHITE, BLACK,-TO-BLACK, GREEN-TO-GROUND. GROUND REMOTE BLOWER CONNECT: WHITE-TO-WHITE, BLACK-TO-BLACK, BLUE-TO-BLUE RED-TO-RED GREEN-TO-GROUND.
- Page 17 All manuals and user guides at all-guides.com INSTALL DUCT COVERS MOUNTING SCREWS (DUCTED VERSION) (3.9 x 6 mm Flat Head) Purchase the optional Z1C-00IN Flue duct cover, sold separately. The kit includes the duct cover and duct cover mounting bracket. 1.Assemble the duct cover mounting bracket, adjusting outside width as shown (Fig.22).
- Page 18 All manuals and user guides at all-guides.com 7. Install upper and lower duct covers onto the range hood (Fig.25). 8. Secure upper duct cover to flue mounting bracket with (2) 3.9 x 6 mm screws (Fig.26). UPPER DUCT COVER FIG.25 LOWER DUCT COVER 3.9 x 6 mm Flat Head SCREWS...
- Page 19 All manuals and user guides at all-guides.com NON-DUCTED INSTALLATION Purchase Non-ducted Recirculating Kit from your local dealer, sold separately. The kit includes the charcoal filter/s and the top cover. Ref. ZRC-00IN (Mod. Incline) Ref. ZRC-00WA (Mod. Wave) Fix the top cover with (3) 3,9 x 6mm mounting screws working from inside the hood (Fig.
- Page 20 All manuals and user guides at all-guides.com COMPLETE THE Model Incline INSTALLATION Upper mesh filter Model Incline Re-install the mesh filters (see section “MESH FILTERS”). Reassemble the front panel. See instructions of Fig.8, proceeding in revers order. Model Wave Reassemble the metal panel and the lower glass.
- Page 21 All manuals and user guides at all-guides.com 32). Remove the charcoal filter holders Model Incline (Fig.34). Remove also the charcoal filter CHARCOAL FILTER HOLDER located in the lower mesh filter. CHARCOAL FILTER 2. To install the CHARCOAL filters, place it over the mesh filter and lock it with a charcoal filter holders (Fig.34).
- Page 22 All manuals and user guides at all-guides.com HOOD DESCRIPTION PART# REPLACEMENT PARTS Metal Mesh Filter 50200056 Metal Mesh Filter 50200057 OPTIONAL ACCESSORIES Recirculating Kit ZRC-00IN Recirculating Kit ZRC-00WA Replacement Charcoal Filters Z0F-02AC Replacement Charcoal Filters Z0F-01AC Duct Cover Kit Z1C-00IN Duct Cover Kit Z1C-00IN To order parts, visit us online at http://store.zephyronline.com or call us at 1.888.880.8368...
- Page 23 All manuals and user guides at all-guides.com Wave AWA-M90AWX, AWA-M90ABX o i t o i t , p i l a t t l i 11000093 Electronics Assembly (SN: 10) 11000101 Electronics Assembly (>=SN: 11) c t i y (SN: 10) 11000104 c t i y (>=SN: 11)
- Page 24 ZEPHYRONLINE.COM D A M P E R replaced by fresh outdoor air. Zephyr’s For use with any Zephyr hood operat- Make-Up Air Damper is designed to ing over 300 CFM. balance the air pressure in your home...
- Page 25 All manuals and user guides at all-guides.com www.zephyronline.com External Blower CBE-1000 Model number: CBE-1000 Serial number: Date of Purchase: Sales Dealer: JUL13.0201 © Zephyr Ventilation...
- Page 26 To reduce risk of re and to properly exhaust air, be sure to duct air outside - Do not vent exhaust air into spaces within walls or ceilings or into attics, crawl spaces or garages. CBE-1000 external blower is to be used only with compatible Zephyr hoods. Please refer to hood manual for external blower compatibility.
- Page 27 All manuals and user guides at all-guides.com NOTE: The following instructions explain the mounting procedures for the CBE-1000 external blower. Refer to your hood’s installation manual for instructions on preparing the hood for use with the external blower. The mounting location of your external blower will impact the noise levels. Plan your installation accordingly. Fig-5 24"...
- Page 28 All manuals and user guides at all-guides.com www.zephyronline.com 1. Remove and discard shipping brackets and wood support (attached to sides of motor and inlet collar). Fig. - 7 BEFORE INSTALLING, check to see if blower wheel turns freely and does not rub on motor brackets. Check damper door to be sure it moves freely and spring returns door to closed position.
- Page 29 All manuals and user guides at all-guides.com 4. Connect the blower to exhaust system with a 10” diameter metal duct only. Use 10” adjustable elbow to adjust to roof angle. IMPORTANT: You must run 10” round duct work from the external blower to the ceiling. Before the duct work passes through the ceiling b racket, use a 10”...
- Page 30 All manuals and user guides at all-guides.com www.zephyronline.com Ventilateur Externe CBE-1000 Numero de modele: CBE-1000 Numero de serie: Date d’achat: Detaillant: JUL13.0201 © Zephyr Ventilation...
- Page 31 Le ventilateur externe CBE-1000 ne doit être utilisé qu’avec les hottes Zephyr compatibles. Veuillez consulter le guide d’utilisation de la hotte pour connaître les...
- Page 32 All manuals and user guides at all-guides.com NOTE: Les présentes instructions expliquent les procédures de montage du ventilateur externe CBE-1000. Consultez le manuel d’installation de votre hotte pour obtenir des directives sur la préparation de la hotte lors de l’utilisation d’un ventilateur externe.
- Page 33 All manuals and user guides at all-guides.com www.zephyronline.com 1. Enlevez et jetez les supports d’expédition et de bois (fixés aux côtés du moteur et du collier d’entrée). Fig. 7 AVANT DE PROCÉDER À L’INSTALLATION, assurez-vous que la roue du ventilateur tourne facilement et ne frotte pas contre les supports du moteur.
- Page 34 All manuals and user guides at all-guides.com 4. Connectez le ventilateur au système d’échappement uniquement avec un conduit métallique de 10” de diamètre. Utilisez un coude ajustable de 10” pour ajuster l’appareil selon l’angle du toit. IMPORTANT : Vous devez faire passer un conduit circulaire de 10”...
- Page 35 All manuals and user guides at all-guides.com www.zephyronline.com In-Line Blower PBN-1000A E12733 4 Model number: Serial Number: SEP14.0201 © Zephyr Ventilation LLC.
- Page 36 All manuals and user guides at all-guides.com www.zephyronline.com...
- Page 37 All manuals and user guides at all-guides.com SAFETY NOTICE ..............LIST OF MATERIALS ............INSTALLATION Ductwork Calculation Sheet ........Blower Positions ............Specifications ............... Mounting the Blower ..........
- Page 38 All manuals and user guides at all-guides.com www.zephyronline.com READ AND SAVE THESE INSTRUCTIONS FOR DOMESTIC COOKING ONLY WARNING WARNING TO REDUCE THE RISK OF FIRE, ELECTRIC SHOCK, OR IN- 4. Use an extinguisher ONLY if: JURY TO PERSONS, OBSERVE THE FOLLOWING: A.
- Page 39 All manuals and user guides at all-guides.com LISEZ ET CONSERVEZ CES INSTRUCTIONS POUR LA CUISSON DOMESTIQUE AVERTISSEMENT AVERTISSEMENT POUR RÉDUIRE LES RISQUES D’INCENDIE, DE DÉCHARGE Utilisez un extincteur SEULEMENT si : ÉLECTRIQUE OU DE BLESSURE, RESPECTEZ CES CONSIGNES : Vous savez que vous possédez un extincteur de classe ABC et vous N’utilisez cet appareil que de la manière prévue par le fabricant.
- Page 40 All manuals and user guides at all-guides.com www.zephyronline.com MODEL: PBN-1000A PARTS SUPPLIED 1 - In-Line blower 2 - Mounting brackets 1 - 10” to 8” transition 1 - Hardware package HARDWARE PACKAGE CONTENTS (4) M4 x 1-1/2” (8) M4 x 8 PARTS NOT SUPPLIED - Ducting, conduit, wiring and all installation tools - Cable connector (if required by local codes)
- Page 41 All manuals and user guides at all-guides.com Equivalent number Equivalent number Duct pieces Duct pieces length x used T otal length x used T otal 3-1/ 4” x 10” 1 Ft. 6” Round 30 Ft. Rect., wall cap straight with damper 6”...
- Page 42 All manuals and user guides at all-guides.com www.zephyronline.com outlet outlet Plywood outlet WARNING: Check installation position so that the blower outlet is exhausting air away from the hood and out of the home. 1. Mount on top of ceiling joists with plywood 2.
- Page 43 All manuals and user guides at all-guides.com front side (bracket positions) 1 9/16” outlet outlet bracket 7 5/16” 20 3/8” bottom (inlet) (outlet) 21 7/8” 23 7/16” 14 3/16”...
- Page 44 All manuals and user guides at all-guides.com www.zephyronline.com 1. Determine blower position (examples on page 5). Install each of the (2) mounting brackets to the sides of the in-line blower housing using (4) M4x8 screws per outlet bracket. There are possible (4) mounting positions for the brackets.
- Page 45 **For Cheng, Arc Collection and AK83 hoods you must transition from 10” to 8” ducting before duct passes through ceiling. A 10” to 8” adapter is included with external and in-line blowers. The exception to this is ALU-E43ASX which uses a 10” round. Zephyr Ventilation | 2277 Harbor Bay Parkway, Alameda, CA 94502 | 888.880.VENT SEP15.0201...
- Page 46 All manuals and user guides at all-guides.com BACK DRAFT DAMPE round damper to prevent return-air from entering kitchen D U C T D I M E N S I O N S M O D E L S I Z E AK00029 6”...
- Page 47 All manuals and user guides at all-guides.com ROOF CAP EXHAUST, J-VENT Exhaust cap for round ducting, installs on roof D U C T D I M E N S I O N S M O D E L S I Z E ”...
- Page 48 All manuals and user guides at all-guides.com WALL CAP EXHAUST, ROUND Exhaust cap for round ducting, prevents return-air, installs on exterior wall D U C T D I M E N S I O N S M O D E L S I Z E ”...
- Page 49 All manuals and user guides at all-guides.com www.zephyronline.com Universal Make-Up Air Damper MUA006A MUA008A MUA010A OCT13.0201 © Zephyr Corporation...
- Page 50 This warranty supersedes all prior warranties. restrictive installation and/or certification requirements, the To qualify for warranty service, you must (a) notify ZEPHYR at the address or telephone aforementioned requirements prevail on those of this document number below, (b) give the model number and part identification and (c) describe the nature of any defect in the product or part.
- Page 51 All manuals and user guides at all-guides.com MODELS MUA006A • MUA008A • MUA010A Page 3 PLAN THE INSTALLATION Planning the installation first requires selecting the most appropriate MINIMUM RETURN AIR TEMPERATURE REQUIREMENTS installation approach. The chart below offers suggestions for the most HVAC equipment manufacturers may have minimum requirements for effective installation approach by considering a few important factors.
- Page 52 All manuals and user guides at all-guides.com MODELS MUA006A • MUA008A • MUA010A Page 4 TYPICAL INSTALLATIONS Installations will vary according to the location in the home where the unit is installed and which model Damper is used. Use the following illustrations and notes as guidance for your own installation.
- Page 53 All manuals and user guides at all-guides.com MODELS MUA006A • MUA008A • MUA010A Page 5 INSTALL THE DAMPER INSTALLATION OF PRESSURE SWITCH AND PROBE TO CENTRAL SYSTEM SET SCREW RETURN AIR OR INTERIOR WALL REGISTER OUTSIDE AIR For the probe & pressure switch to work effectively the roof or wall cap must have a spring loaded damper.
- Page 54 All manuals and user guides at all-guides.com MODELS MUA006A • MUA008A • MUA010A Page 6 LOCATION OF PROBE AND PRESSURE SWITCH The probe must be mounted between the range hood damper The pressure switch should be mounted so it is accessible for and the wall cap, roof cap, in-line blower or external blower.
- Page 55 All manuals and user guides at all-guides.com MODELS MUA006A • MUA008A • MUA010A Page 7 MOUNTING POSITIONS OF PROBE & PRESSURE SWITCH DUCTWORK DUCTWORK FLOW PRESSURE PRESSURE SWITCH SWITCH PROBE TUBING (air flow arrow TUBING pointing in direction of air flow) PROBE DUCTWORK (air flow arrow...
- Page 56 Under certain extreme conditions there could be false tripping of the damper (opening when the range hood blower is off). If false tripping is encountered, place an in-line backdraft damper (available from your local hardware store or from Zephyr) between the probe and the roof or wall cap.
- Page 57 This standard is - One 10” damper for ventilation rated up to 1200 CFM available at www.ashrae.org. 7. Can I use the Zephyr Automatic Make-Up Air Damper with other However, Zephyr highly recommends that a qualified professional HVAC equipment in my home? contractor be consulted after installation to ensure there is no negative No. The Zephyr Automatic Make-Up Air Damper may only be used with...
- Page 58 All manuals and user guides at all-guides.com NOTES 99044999B...
- Page 59 All manuals and user guides at all-guides.com www.zephyronline.com CLAPET UNIVERSEL D’AIR DE COMPENSATION MUA006A MUA008A MUA010A OCT13.0201 © Zephyr Corporation...
- Page 60 à l’installation Pour vous prévaloir de cette garantie, vous devez (a) aviser ZEPHYR à l’adresse ou au numéro et/ou l’homologation, celles-ci auront préséance sur celles de ce de téléphone indiqués ci-dessous, (b) donner le numéro de modèle du produit et le numéro...
- Page 61 All manuals and user guides at all-guides.com MODÈLES MUA006A • MUA008A • MUA010A PLANIFICATION Page 13 DE L’INSTALLATION La planification de l’installation exige d’abord le choix du mode EXIGENCES RELATIVES À LA TEMPÉRATURE MINIMALE DE d’installation le plus approprié. Le tableau ci-dessous présente des L’...
- Page 62 All manuals and user guides at all-guides.com MODÈLES MUA006A • MUA008A • MUA010A Page 14 INSTALLATIONS TYPE Les installations varieront en fonction de l’emplacement de l’appareil dans la maison et du modèle de clapet utilisé. Consultez les illustrations et notes ci-dessous pour vous guider dans l’installation. Respectez toujours les exigences des codes dans toute situation où un détail indiqué...
- Page 63 All manuals and user guides at all-guides.com MODÈLES MUA006A • MUA008A • MUA010A Page 15 INSTALLATION DU CLAPET INSTALLATION DU MANOCONTACTEUR ET VERS LE RETOUR D’ A IR VIS D’ A RRÊT DU SYSTÈME CENTRAL DE LA SONDE OU UN REGISTRE AIR EXTÉRIEUR MURAL INTÉRIEUR Pour que la sonde et le manocontacteur fonctionnent correctement,...
- Page 64 All manuals and user guides at all-guides.com MODÈLES MUA006A • MUA008A • MUA010A Page 16 EMPLACEMENT DE LA SONDE ET DU MANOCONTACTEUR La sonde doit être installée entre le clapet de la hotte et le Le manocontacteur doit être placé à un endroit accessible capuchon mural, le capuchon de toit, le ventilateur intermédiaire pour un entretien éventuel.
- Page 65 All manuals and user guides at all-guides.com MODÈLES MUA006A • MUA008A • MUA010A Page 17 POSITIONS DE MONTAGE DE LA SONDE ET DU MANOCONTACTEUR CONDUIT CONDUIT DÉBIT D'AIR MANOCONTACTEUR MANOCONTACTEUR SONDE TUBE (la flèche TUBE pointe dans le sens du SONDE débit d’air) CONDUIT...
- Page 66 Dans certaines conditions extrêmes, le clapet peut se déclencher alors qu’il ne le devrait pas (s’ouvre alors que la hotte est arrêtée). Si un tel déclenchement indésirable se produit, placez un clapet de refoulement intermédiaire (disponible dans une quincaillerie locale ou auprès de Zephyr), entre la sonde et le capuchon mural ou de toit. LISTE DES PIÈCES DE RECHANGE...
- Page 67 En règle générale, qualité d’air intérieur acceptable dans les constructions Zephyr recommande de déterminer la taille du clapet comme suit : résidentielles basses » – exige l’utilisation d’un clapet d’air de • Un clapet de 15 cm (6 po) pour une ventilation allant jusqu’à...
- Page 68 All manuals and user guides at all-guides.com REMARQUES 99044999B...