Télécharger Imprimer la page
Beninca EVA.5 Manuel D'instructions
Masquer les pouces Voir aussi pour EVA.5:

Publicité

Les langues disponibles
  • FR

Les langues disponibles

  • FRANÇAIS, page 43

Liens rapides

L8543127
10/2015 rev 1
EVA.5
UNIONE NAZIONALE COSTRUTTORI
AUTOMATISMI PER CANCELLI, PORTE
SERRANDE ED AFFINI

Publicité

loading

Sommaire des Matières pour Beninca EVA.5

  • Page 1 L8543127 10/2015 rev 1 EVA.5 UNIONE NAZIONALE COSTRUTTORI AUTOMATISMI PER CANCELLI, PORTE SERRANDE ED AFFINI...
  • Page 3 Min 2,75m - Max 4,75m 1200 EVA.5 - RIGHT EVA.5 - LEFT (STANDARD)
  • Page 4 EVA.5 - LEFT EVA.5 - RIGHT (STANDARD) CLACK! CLACK...
  • Page 5 30mm Posa della piastra di fondazione VE.PS (opzionale) Foundation plate positioning VE.PS (optional) Montage der Fundamentplatte VE.PS (option) Mise en place de la plaque de fondation VE.PS (optionnel) Posicionamiento de la placa de alimentación VE.PS (opcional) Ułożenie płyty fundamentowej VE.PS (opcjonalma)
  • Page 6 Slow-down Open (SLDo) Slow-down Close (SLDC)
  • Page 7 FTC.S 2,9x16 FTC.S 2,9x16 Line 3x1,5mm Photo TX 2x0,5mm Photo RX 4x0,5mm EVA.Led 2x0,5mm SC.EN 2x0,5mm...
  • Page 8 - 24V + AUX2 BLINK 2xDA.BT2 (Optional) ABS. ENCODER (Optional) CP.EVA2 LED 2 24Vdc 500 mA LED 1 - 24V + SA.24V LIGHT LAMP. 24Vdc 24Vdc AUX2 BLINK 100-250 Vac...
  • Page 9 PHOTOTEST AUX1:0000 AUX1:0004 24Vdc tst1:on AUX1 AUX1 24Vdc PHOT 24Vac LAMP SERVICE LIGHT AUX1:0003 24Vdc 24Vac NC NO 24Vac AUX1 Relè 24Vdc 230Vac LAMP MASTER SLAVE Menu Menu ID=0 ID=1 3x0,5mm GND B A GND B A...
  • Page 10 Schema menu di programmazione - Menu programming layout Diagramm Programmiermenü - Menu de programmation Display OFF Menú de la carta de programación - Układ menu programowania Power ON v1. 0 5 Firmware Ver. (3s) 8888 Inst Boom Diagnostic IBCA 0--- ---0 fsts ltca...
  • Page 11 Nman 0012 3456 MACI 2 Cycle AUTO PUSH OPEN/CLOSE RE-ENTER CODE 0000 9000 9C5a conf CODE Display OFF Inst Legenda Premere il tasto (-) / Press key (-) / Die Taste (-) drücken Appuyez sur la touche (-) / Presionar la tecla (-) / Wcisnąć przycisk (-) PUSH Premere il tasto (+) / Press key (+) / Die Taste (+) drücken Appuyez sur la touche (+) / Presionar la tecla (+) / Wcisnąć...
  • Page 12 Fabbricante: Automatismi Benincà SpA Indirizzo: Via Capitello, 45 - 36066 Sandrigo (VI) - Italia Dichiara che il prodotto: automazione per barriere stradali modello EVA.5. è conforme alle condizioni delle seguenti Direttive CE: • DIRETTIVA 2004/108/CE DEL PARLAMENTO EUROPEO E DEL CONSIGLIO del 15 dicembre 2004 concernente il ravvici- namento delle legislazioni degli Stati membri relative alla compatibilità...
  • Page 13 Ogni utilizzo diverso da quello indicato nelle presenti istruzioni non è consentito ed invalida la garanzia del costruttore. Vi ricordiamo che registrandovi sul sito www.beninca.com avrete accesso a tutta la documentazione tecnica aggiornata per tutti prodotti e gli accessori ed alla guida per compilazione del fascicolo tecnico e dei documenti previsti dall'allegato V della Direttiva Macchine, obbligatorio ai sensi delle normative vigenti in materia.
  • Page 14 4) PREDISPOSIZIONE BARRIERA DESTRA-SINISTRA (FIG.3/4) La barriere EVA.5 viene normalmente fornita nella versione destra (Fig. 3 rif A: EVA.5 RIGHT). Si definisce convenzionalmente destra una barriera che, vista frontalmente dal lato della portina di apertura, chiude il passaggio abbas- sando l'asta verso destra.
  • Page 15 5) MANOVRA MANUALE DI EMERGENZA (FIG.5) n caso di assenza di alimentazione di rete o in caso di guasto, è possibile sbloccare l'asta e manovrarla manualmente: • Inserire la chiave personalizzata nella leva di sblocco e ruotarla in senso orario. •...
  • Page 16 12) CENTRALE DI COMANDO CP.EVA2 12.1) COLLEGAMENTI ELETTRICI Nella seguente tabella sono descritti i collegamenti elettrici rappresentati in Fig. 15: MORSETTIERA 1 Morsetti Funzione Descrizione Collegamento antenna scheda radioricevitore integrato (ANT-segnale/SHIELD-schermo). ANT-SHIELD Antenna Nel caso di utilizzo di antenna ricevente esterna rimuovere il cavo precablato nella morsettiera ANT.
  • Page 17 12.2.3) PROGRAMMAZIONE RAPIDA - Entrare nel menu INST - Verificare che il parametro BOOM sia corretto: 3-5 per EVA.5, 7-8 per EVA.7. - Impostare la posizione della barriera nel menu POS, di default è impostata come barriera RIGHT - Entrare nel menu AUTO, confermare con OK ed eseguire l'acquisizione dei parametri ottimali di funzionamento - Selezionare nei menu PAR e LOG i parametri e le logiche di funzionamento richieste in base alla tipologia di installazione.
  • Page 18 Seleziona la modalità di funzionamento dell'uscita ausiliaria 1 (contatto pulito N.O.) 0: Spia barriera aperta, contatto chiuso a barriera aperta, aperto a barriera chiuso, intermittente durante la manovra (fig. 16, rif.SCA) 1: Secondo canale radio della ricevente incorporata 2: Luce Barriera, per il controllo delle luci LED installate sull'ASTA (art EVA.LED), vedi anche parametro LBAR.
  • Page 19 Seleziona la modalità di funzionamento delle luci barriera (uscita 24Vdc AUX2 o con- tatto N.O. dell'uscita AUX 1 configurato con logica 2) . On: Le luci barriera sono spente a barriera chiusa, si accendono a barriera in movi- lBAR (OFF) mento e durante la fase di apertura.
  • Page 20 RESET della centrale. ATTENZIONE!: Riporta la centrale ai valori di default. La prima pressione del pulsante <PG> provoca il lampeggio della scritta RES, una ulteriore pressione del pulsante <PG> effettua il reset della centrale. Nota: Non vengono cancellati i trasmettitori dalla ricevente ne la password di accesso. Vengono riportati ai valori di default tutte le logiche e tutti i parametri, è...
  • Page 21 12.5) APPRENDIMENTO REMOTO TRASMETTITORI Se si dispone di un trasmettitore già memorizzato nella ricevente è possibile effettuare l’apprendimento radio remoto (senza necessità di accedere alla centrale). IMPORTANTE: La procedura deve essere eseguita con asta in posizione di apertura. La logica REM deve essere ON. Procedere come segue: 1 Premere il tasto nascosto del trasmettitore già...
  • Page 22 Manufacturer: Automatismi Benincà SpA. Address: Via Capitello, 45 - 36066 Sandrigo (VI) – Italy It is hereby stated that the product operator for road gates EVA.5. is compliant with provisions set forth in the following EC Directives: • DIRECTIVE 2004/108/EC OF THE EUROPEAN PARLIAMENT AND OF THE COUNCIL of 15 December 2004, on the harmo- nisation of the laws of Member States relating to electromagnetic compatibility and which cancels Directive 89/336/EEC, according to the following harmonised regulations: EN 61000-6-2:2005, EN 61000-6-3:2007.
  • Page 23 Every utilization different from the one described in this instruction manual is not allowed and voids the manufacturer warranty. We would like to remind you that if you register on the site www.beninca.com you will have access to the technical documentation upda- ted for all the Benincà...
  • Page 24 4) LEFT-RIGHT BARRIER (FIG. 3-4) The EVA.5 normally is provided as right barrier (Fig. 3 A : EVA.5 RIGHT) Conventionally it is considered right a barrier which seen from the side of the cabinet door, closes the passage by lowering the boom towards right.
  • Page 25 • Turn the release lever anti-clockwise until the beam is released and it can be opened and closed by hand. • To reset the automatic operation, turn the lever clockwise until the beam is released. Reset the initial position. 6) INSTALLATION OF THE OPTIONAL FOUNDATION PLATEVE.PS (FIG.6) After preparing the cable laying (mains power supply, accessories, etc.), place the foundation plate keeping to dimensions indicated.
  • Page 26 12) CP.EVA2 CONTROL UNIT 12.1) WIRE DIAGRAM Wire connections shown in Fig. 15 are described hereunder: TERMINAL BLOCK 1 TERMINALS Function Description Connection for the antenna of the built in receiver (ANT-signal/SHIELD-shield). ANT-SHIELD Antenna In case of use of an external antenna it is necessary to remove the pre-cabled cable from the terminal ANT Not used Auxiliary output AUX 1 Output with N.O.
  • Page 27 12.2.3) QUICK PROGRAMMING -Enter the INST menu -Verify that the parameter BOOM is correct: 3-5 for EVA.5, 7-8 for EVA.7 -Set the barrier position by means of the menu POS, by default the barrier is set as RIGHT BARRIER -Enter the menu AUTO, confirm with <PG> and wait until the barrier has carried out the autoset of the parameters -By means of the menus PAR and LOG, select the parameters and the logic functions wanted according to the type of installation in object -IMPORTANT: After every change of the parameters FSTS.
  • Page 28 Selects the functioning mode of the auxiliary output 1 (N.O. clean contact) 0: Open barrier light, close contact when the barrier is open, open contact when the barrier is close, intermittent during the maneuver (fig. 16, SCA) 1: Second radio cannel of the built in receiver 2: Boom light, for controlling the LED light installed on the BOOM (EVA.LED), see also aux1 the parameter LBAR.
  • Page 29 The “forced opening in case of power cut-off” function is activated or deactivated (it can be activated only with connected and operating emergency batteries). On: Activated function. In the event of power failure, the control unit causes an open- aopf (OFF) ing operation.
  • Page 30 AUTOSET (AUTO) This function sets the optimal functioning values of the installation, at the end of the procedure, it sets the average values of torque (PMO/PMC and PSO/PSC). To carry out the AUTOSET, proceed as follow: a) Make sure that during the autoset there is no obstacle is in the maneuver area, if necessary, fence off the area so that persons, animals, cars, etc., cannot interrupt the procedure.
  • Page 31 12.5) TRANSMITTERS REMOTE LEARNING If an already memorised transmitter is available in the receiver it is possible to carry out remote radio learning (without needing to access the control unit). IMPORTANT: the procedure must be carried out with barrier open.The logic REM must be ON. Proceed as follows: 1 Press the hidden key of the transmitter which is already memorised.
  • Page 32 Hersteller: Automatismi Benincà SpA Adresse: Via Capitello, 45 - 36066 Sandrigo (VI) - Italien Erklärt, dass das Produkt: Wir erklären, dass: Antriebe für Straßensperren Modell EVA.5 folgenden EG-Richtlinien entspricht: • RICHTLINIE 2004/108/EG DES EUROPÄISCHEN PARLAMENTS UND DES RATES vom 15. Dezember 2004 zur Angleichung der Rechtsvorschriften der Mitgliedstaaten über die elektromagnetische Verträglichkeit und zur Aufhebung der Richtlinie 89/336/EWG,...
  • Page 33 Jeder andere Einsatz als in dieser Anleitung angegeben ist unzulässig und hebt die Herstellergarantie auf. Wir möchten Sie daran erinnern, dass Sie durch Ihre Anmeldung auf der Website www.beninca.com Zugang zu allen aktualisierten technischen Unterlagen der Produkte und Zubehörteile erhalten. Dies schließt auch den Leitfaden für die Ausfüllung der technischen Dokumentation und Unterlagen mit ein, die vom Anhang V der Maschinenrichtlinie vorgesehen und gemäß...
  • Page 34 Baum nach rechts gesenkt wird. Es genügen jedoch einige einfache Eingriffe und aus der rechten Schranke wird eine linke (Abb. 3 Bez. B: EVA.5 LEFT). Falls die Öffnungsrichtung geändert werden muss, folgendermaßen vorgehen, anderenfalls die Anweisungen des nachfolgenden Paragraphen befolgen.
  • Page 35 ACHTUNG: DIE UMSCHALTUNG DER ÖFFNUNGSRICHTUNG ÄNDERT DAS POS-MENÜ; SIEHE HIERZU DEN ABSATZ ÜBER DIE PROGRAMMIERUNG DES STEUERGERÄTS. 5) MANUELLE NOTBEDIENUNG ABB.5 Im Falle eines Stromausfalls oder einer Störung, kann der Schrankenarm entriegelt und von Hand bewegt werden: • Den personalisierten Schlüssel in den Entriegelungshebel stecken den Uhrzeigersinn drehen. •...
  • Page 36 enthalten. 12) STEUEREINHEIT CP.EVA2 12.1) ELEKTRISCHE ANSCHLÜSSE In der nachstehenden Tabelle sind die elektrischen und in Abb. 15 dargestellten Anschlüsse beschrieben: KLEMMLEISTE 1 Klemmen Funktion Beschreibung Anschluss Antenne/Karte integrierter Funkempfänger (ANT-Signal/SHIELD-Schirm). ANT-SHIELD Antenne Wird eine externe Empfangsantenne benutzt, ist das vorverdrahtete Kabel in der Klemmleiste ANT zu entfernen.
  • Page 37 12.2.3) SCHNELLPROGRAMMIERUNG - Das Menü INST einblenden. - Überprüfen, ob der Parameter BOOM richtig ist: 3-5 für EVA.5, 7-8 für EVA.7. - Die Schrankenposition im Menü POS einstellen, die Standard-Einstellung ist Schranke RIGHT. - Das Menü AUTO einblenden, mit OK bestätigen und die optimalen Betriebsparameter eingeben.
  • Page 38 Aktivierungsdauer des Kontakts der Hilfsbeleuchtung. Wert in Sekunden. Bei jeder Be- dienung wird der Kontakt für die eingestellte Dauer geschlossen. 1-240 (60) Siehe Beschreibung Parameter AUX1. Stellt eine kurze Umdrehung ein, sobald der Endlaufpunkt beim Öffnen erreicht wird. Ist saso 0-5 (0) für eine mühelosere manuelle Bedienung der Schranke von Nutzen.
  • Page 39 Aktiviert oder deaktiviert die Sendegeräte mit programmierbarem Code. On: Funkempfänger ist nur für Sendegeräte mit variablem Code aktiviert (Rolling-Code). Cvar (ON) Off: Funkempfänger ist für Sendegeräte mit variablem Code (Rolling-Code) und pro- grammierbare (Selbstlernfunktion und Dip-Schalter) Sendegeräte aktiviert. Wählt den Betriebsmodus der Schrankenlichter aus (Ausgang 24 VDC AUX2 oder N.O. Kontakt des Ausgangs AUX 1 mit Logik 2 konfiguriert).
  • Page 40 WARTUNGSZYKLEN (maci) Diese Funktion ermöglicht es, nach einer Anzahl von stattgefundenen Manövern, die vom Installateur festgelegt werden, die erforder- liche Wartungren. Zur Aktivierung und zur Auswahl der Manöver, gehen Sie wie folgt vor: Drücken der Taste <PG>, das Display zeigt OFF an, was heißt, dass die Funktion nicht zur Verfügung steht (Voreinstellung). Mit den Tasten <+>...
  • Page 41 12.4) SYNCHRONISIERUNG ZWEIER GEGENÜBERLIEGENDER SCHRANKEN Es besteht die Möglichkeit, eine aus zwei Schranken bestehende Anlage zu steuern. Hierzu wird auf jeder Karte CP.EVA2 die entspre- chende optionale Synchronisationskarte SIS eingesetzt, die man der Abb. 14 entsprechend in die jeweilige Steckvorrichtung einzufüh- ren hat.
  • Page 42 12.9) FEHLERMELDUNGEN Im Folgenden werden einige Meldungen aufgelistet, die auf dem Display bei Betriebsstörungen angezeigt werden: Allgemeiner Fehler Fehler Passworteingabe, Speicherung Sendegeräte. Die Motoranschlüsse überprüfen, Motor nicht angeschlossen oder nicht Fehler Motor Err1 funktionstüchtig, Problem an der Steuerung. Anschlüsse und Ausrichtung der Lichtschranke überprüfen oder Hindernisse Fehler Lichtschranken Err2 vorhanden.
  • Page 43 Fabricant: Automatismi Benincà SpA Adresse: Via Capitello, 45 - 36066 Sandrigo (VI) - Italie Déclare que le produit: l’automatisme pour barrières routières modèle EVA.5. est conforme aux conditions requises par les Directives CE suivantes: • DIRECTIVE 2004/108/CE DU PARLEMENT EUROPÉEN ET DU CONSEIL du 15 décembre 2004 concernant le rapprochement des législations des États membres relatives à...
  • Page 44 Toute utilisation différente de celle mentionnée dans les présentes instructions n’est pas autorisée et annule la garantie du fabricant. Nous tenons à vous rappeler qu’en vous enregistrant sur le site www.beninca.com, vous avez accès à toute la documentation mise à...
  • Page 45 
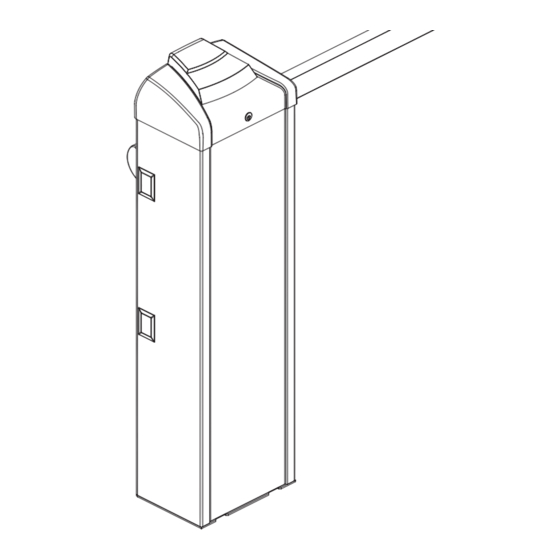
4) PRÉDISPOSITION BARRIÈRE DROITE-GAUCHE (FIG.3/4) La barrière EVA.5 est généralement fournie dans la version droite (Fig. 3 réf A : EVA.5 RIGHT). Par convention, on entend par barrière droite une barrière qui, vue de face du côté de la porte d’ouverture, ferme le passage en abais- sant la lisse vers la droite.
  • Page 46 5) MANŒUVRE MANUELLE D’URGENCE FIG.5 En cas de panne électrique ou de fonctionnement anormal, on peut bloquer la lisse et la manœuvrer manuellement: • Insérez la clé personnalisée dans le levier de déblocage et tournez-la dans le sens des aiguilles d’une montre. •...
  • Page 47 12) CENTRALE DE COMMANDE CP.EVA2 12.1) BRANCHEMENTS ELECTRIQUES ELETTRICI Dans la table ci-dessous il y a la description des branchements électriques illustrés dans la Fig. 15: BORNIER 1 Bornes Fonction Description Raccordement antenne carte radiorécepteur intégré (ANT-signal/SHIELD-écran). ANT-SHIELD Antenne En cas d’utilisation d’une antenne de réception externe, retirer le fil pré-câblé dans le bornier ANT.
  • Page 48 - Entrer dans le menu INST - Vérifier que le paramètre BOOM soit correct : 3-5 pour EVA.5, 7-8 pour EVA.7. - Régler la position de la barrière dans le menu POS, elle est configurée par défaut comme barrière RIGHT [droite] - Entrer dans le menu AUTO, confirmer en appuyant sur OK et exécuter l’acquisition des paramètres optimaux de fonctionnement...
  • Page 49 Sélectionne le mode de fonctionnement de la sortie auxiliaire 1 (contact sec N.O.) 0: Voyant lumineux barrière ouverte, contact fermé quand la barrière est ouverte, ouvert quand la barrière est fermée, intermittent lors de la manoeuvre (fig. 16, réf.SCA) 1: Deuxième canal radio de l’antenne réceptrice incorporée 2: Éclairage Barrière pour le contrôle des lampes LED installées sur la LISSE (art.
  • Page 50 Sélectionne le mode de fonctionnement des lampes de la barrière (sortie 24Vdc AUX2 ou contact N.O. de la sortie AUX 1 réglé par la logique 2). On : Les lampes sont éteintes lorsque la barrière est fermée, elles s’allument quand lBAR la barrière est en mouvement et lors de la phase d’ouverture.
  • Page 51 AUTOSET (AUTO) Cette fonction permet de configurer les valeurs optimales de fonctionnement de l’automatisme et, à la fin de la procédure,elle règle les valeurs moyennes de COUPLE (PMO/PMC et PSO/PSC). Pour effectuer l’autoréglage, procéder comme suit : a) S’assurer qu’aucun obstacle ne soit présent dans la zone de manoeuvre, si nécessaire, isoler la zone afin d’empêcher l’accès aux personnes, aux animaux, aux véhicules, etc.
  • Page 52 12.5) APPRENTISSAGE ELOIGNE DES EMETTEURS Si l’on dispose d’un émetteur déjà mémorisé dans la réceptrice il est possible d’effectuer l’apprentissage radio éloigné (sans besoin d’accéder à l’armoire). IMPORTANT : La procédure doit être exécutée avec la lisse en ouverture. La logique REM doit être sur ON. Procéder de la manière suivante: 1 Presser la touche cachée de l’émetteur déjà...
  • Page 53 Fabricante: Automatismi Benincà SpA. Dirección: Via Capitello, 45 - 36066 Sandrigo (VI) - Italia Declara que el producto: automatización para barreras de calles EVA.5. es conforme a las condiciones de las siguientes Directivas CE: • DIRECTIVA 2004/108/CE DEL PARLAMENTO EUROPEO Y DEL CONSEJO del 15 de diciembre de 2004 sobre la aproximación de las legislaciones de los Estados miembros con relación a la compatibilidad electromagnética y que abroga la Directiva 89/336(CEE, según...
  • Page 54 No está permitido ningún uso distinto del indicado en estas instrucciones, anulándose la garantía del fabricante en caso contrario. Le recordamos que registrándose en la página www.beninca.com tendrá acceso a toda la documentación técnica actualizada de todos los productos y accesorios, así como a la guía de elaboración del expediente técnico y de los documentos previstos por el anexo V de la Directiva de máquina, obligatorio en virtud de la legislación vigente.
  • Page 55 4) PREPARACIÓN BARRERA DERECHA-IZQUIERDA (FIG.3/4) La barrera EVA.5 se suministra normalmente en la versión de barrera derecha (Fig. 3 ref A: EVA.5 RIGHT). Se define normalmente como barrera derecha a una barrera que, si se observa de frente desde el lado de la puerta de abertura, cierra el paso bajando el poste hacia la derecha.
  • Page 56 5) MANIOBRA MANUAL DE EMERGENCIA FIG. 5 En caso de falta de alimentación eléctrica de red o en caso de funcionamiento anómalo, es posible desbloquear la barra y maniobrarla manualmente: • introducir la llave personalizada en la palanca de desbloqueo y darle la vuelta hacia la derecha. •...
  • Page 57 12) CENTRAL DE MANDO CP.EVA2 12.1) CONEXIONES ELÉCTRICAS En el cuadro siguiente se describen las conexiones eléctricas representadas en la Fig. 15: REGLETA DE BORNES 1 Bornes Función Descripción Conexión con la antena de la tarjeta del radiorreceptor integrado (ANT-señal/SHIELD-pantalla). ANT-SHIELD Antena En caso de uso de antena receptora externa, retire el cable precableado en la regleta de...
  • Page 58 12.2.3) PROGRAMACIÓN RÁPIDA - Entre en el menú INST - Compruebe que el parámetro BOOM sea correcto: 3-5 para EVA.5 y 7-8 para EVA.7. - Ajuste la posición de la barrera en el menú POS; por defecto, está configurada como barrera RIGHT.
  • Page 59 Selecciona la modalidad de funcionamiento de la salida auxiliar 1 (contacto limpio N.O.). 0: Piloto luminoso barrera abierta, contacto cerrado con barrera abierta, abierto con barrera cerrada, intermitente durante la maniobra (fig. 16, ref. SCA). 1: Según el canal de radio del receptor incorporado. 2: Luz de barrera para el control de las luces LED instaladas en el POSTE (art EVA.
  • Page 60 Habilita o inhabilita los transmisores con código programable. On: Receptor radio habilitado exclusivamente para los transmisores de código va- Cvar riable (rolling-code). (OFF) Off: Receptor habilitado para transmisores de código variable (rolling-code) y progra- mable (auto-aprendizaje y dip/switch) . Selecciona la modalidad de funcionamiento de las luces de la barrera (salida 24 Vcc AUX2 o contacto N.O.
  • Page 61 RESET (RES) REACTIVACIÓN de la centralita. ¡CUIDADO!: Restablece los valores de default de la centralita. Al apretar el pulsador <PG> por primera vez, destella la sigla RES, presionando el pulsador <PG> otra vez, se reactiva la centralita. Nota: No se borran los transmisores del receptor ni la contraseña de acceso. Se indican los valores por defecto de todas las lógicas y todos los parámetros;...
  • Page 62 conectado a la barrera SLAVE tendrá efecto únicamente sobre esta última, mientras que todos los comandos enviados a la barrera MASTER los replicará la SLAVE. Las conexiones de los dispositivos de seguridad (fotocélulas, bordes sensibles, etc.) pueden conectar indiferentemente a la tarjeta MASTER o SLAVE.
  • Page 63 Producent: Automatismi Benincà SpA Adres: Via Capitello, 45 - 36066 Sandrigo (VI) - Włochy oświadcza, że produkt: Automatyzm do szlabanów drogowych model EVA.5. jest zgodny z wymogami następujących dyrektyw WE: • DYREKTYWY 2004/108/WE RADY I PARLAMENTU EUROPEJSKIEGO z dnia 15 grudnia 2004r. w sprawie zbliżania usta- wodawstwa państw członkowskich w zakresie kompatybilności elektromagnetycznej i anulującej postanowienia dyrektywy 89/336/EWG,...
  • Page 64 Każde zastosowanie inne od wskazanego w niniejszej instrukcji jest niedozwolone i unieważnia gwarancję producenta. Przypominamy, że po zarejestrowaniu się w witrynie www.beninca.com uzyskuje się dostęp do całej najnowszej dokumentacji tech- nicznej dla wszystkich produktów i akcesoriów i możliwość uzyskania pomocy przy wypełnianiu broszury technicznej oraz dokumentów przewidzianych w załączniku V do Dyrektywy maszynowej, która jest obowiązkowa zgodnie z obowiązującymi przepisami prawa.
  • Page 65 Zwyczajowo szlaban prawostronny to szlaban widziany czołowo od strony drzwi, zamyka przejazd, opuszczając ramię w prawą stronę. Jednak kilkoma prostymi czynnościami można zmienić szlaban prawostronny na lewostronny (Rys. 3, odn. B: EVA.5 LEFT). W razie konieczności zmiany kierunku otwierania, należy postępować w sposób następujący, w innym razie przejść do kolejnego podrozdziału:...
  • Page 66 5) MANEWR RĘCZNY RYS. 5 W przypadku braku zasilania sieciowego lub nieprawidłowego działania można odblokować ramię poprzez zastosowanie manewru ręcznego: • Włożyć klucz osobisty do dźwigni odblokowania I obrócić nim w kierunku zgodnym z ruchem wskazówek zegara. • Obracać dźwignią odblokowania w kierunku zgodnym z ruchem wskazówek zegara aż do odblokowania ramienia w takim stopniu, żeby można było wykonać...
  • Page 67 12) CENTRALKA STEROWANIA CP.EVA2 12.1) POŁĄCZENIA ELEKTRYCZNE W poniższej tabeli przedstawione są połączenia elektryczne zilustrowane na Rys. 1: TABLICZKA ZACISKOWA 1 Zaciski Funkcja Opis Połączenie anteny karty wbudowanego odbiornika radiowego (ANT-sygnał/SHIELD-ekran). ANT-SHIELD Antena W przypadku zewnętrznej anteny odbiorczej odłączyć kabel przyłączony do tabliczki zacisko- wej ANT.
  • Page 68 12.2.3) PROGRAMOWANIE SZYBKIE - Wejść do menu INST - Sprawdzić, czy parametr BOOM jest prawidłowy: 3-5 dla EVA.5, 7-8 dla EVA.7. - Ustawić położenie szlabanu w menu POS, domyślnie jest ustawiony jako szlaban RIGHT - Wejść do menu AUTO, potwierdzić OK i wykonać akwizycję optymalnych parametrów działania - W menu PAR i LOG wybrać...
  • Page 69 Ustawia krótki nawrót po osiągnięciu punktu wyłącznika krańcowego otwierania. Może saso 0-5 (0) być użyteczny, ułatwiając ruch ręczny szlabanu. Ustawia krótki nawrót po osiągnięciu punktu wyłącznika krańcowego zamykania. Może sasc 0-5 (0) być użyteczny, ułatwiając ruch ręczny szlabanu. Wybiera tryb pracy wyjścia pomocniczego 1 (styk bezpotencjałowy N.O.) 0: Kontrolka otwartego szlabanu, styk zamknięty przy otwartym szlabanie, otwarty przy zamkniętym, z przerwami podczas ruchu (Rys.
  • Page 70 Wybiera tryb działania świateł szlabanu (wyjście 24Vdc AUX3 lub styk N.O. wyjścia AUX 1 skonfigurowanego z układem logicznym 2) . On: Światła szlabanu są wyłączone, gdy szlaban jest zamknięty, włączają się, gdy lBAR (OFF) szlaban jest w ruchu i podczas otwierania. On: Światła szlabanu migają...
  • Page 71 (RES) RESET ZEROWANIE centrali. UWAGA!: Przywraca dla centrali wartości default. Pierwszy nacisk przycisku <PG> włącza światełko migające z napisem RES, powtórne naciśnięcie przycisku <PG> wykonuje zerowa- nie centrali. UWAGA: Nie są usuwane nadajniki z odbiornika ani hasło dostępu. Dla wszystkich logik i dla wszystkich parametrów zostają przywrócone wartości domyślne, w związku z tym należy powtórzyć procedurę...
  • Page 72 Szlaban SLAVE z LOC ustawionym na ON może na przykład być przydatny okazjonalnie przy konieczności częściowego otwarcia przejazdu lub przejścia, którym zazwyczaj sterują dwa zsynchronizowane szlabany, uwzględniając fakt, że przycisk krokowy (lub OPEN/CLOSE) połączony ze szlabanem SLAVE będzie oddziaływał tylko na niego, natomiast wszystkie polecenia dla MASTER zostaną odtworzone przez SLAVE. Połączenia urządzeń...
  • Page 73 EVA.5 ISTRUZIONI PER L’UTILIZZATORE NORME DI SICUREZZA • Non sostare nella zona di movimento della barriera. • Non lasciare che i bambini giochino con i comandi o in prossimità della barriera. • In caso di anomalie di funzionamento non tentare di riparare il guasto ma avvertire un tecnico specializzato.
  • Page 74 EVA.5 USER’S HANDBOOK SAFETY MEASURES • Do not stand within the gate movement area. • Children must not play with controls and near the gate. • In the event of malfunctions, do not attempt to repair the failure but contact the specialised personnel.
  • Page 75 EVA.5 HANDBUCH FÜR DEN VERBRAUCHER SICHERHEITSVORSCHRIFTEN • Sich nicht im Bewegungsbereich des Flügels aufhalten. • Nicht zulassen dass Kinder mit den Steuerungen oder in der Nähe des Flügels spielen. • Im Falle von Betriebsstörungen, versuchen Sie nicht die Störung selbst zu beheben, sondern wenden Sie sich an einen qualifizierten Fachmann.
  • Page 76 EVA.5 MANUEL D’INSTRUCTIONS POUR L’UTILISATEUR NORMES DE SÉCURITÉ • Ne pas stationner dans la zone de mouvement du vantail. • Ne pas laisser les enfants jouer avec les commandes ou en proximité du vantail. • En cas d’anomalies du fonctionnement ne pas essayer de réparer la panne, mais appelez un technicien compétent.
  • Page 77 EVA.5 MANUAL DE INSTRUCCIONES PARA EL USUARIO NORMAS DE SEGURIDAD • No pararse en la zona de movimiento de la hoja. • No dejar que los niños jueguen con los comandos ni cerca de la cancela. • En caso de anomalía de funcionamiento no intentar reparar el avería sino avisar a un técnico especializado.
  • Page 78 EVA.5 KSIĄŻECZKA Z INSTRUKCJAMI DLA UŻYTKOWNIKA NORMY BEZPIECZEŃSTWA • Nie przestawać w obszarze przesuwu skrzydła bramy. • Nie pozwolić, żeby dzieci bawiły się sterowaniem bramy lub ogólnie w pobliżu skrzydła. • W przypadku nieprawidłowego działania nie próbować samodzielnie naprawiać uszkodzenie, należy zwrócić się do wyspecjalizo- wanego technika.
  • Page 79 EVA.5 Ref. Note Code 9686428 9686429 9688240 9686431 9686432 9686433 9686434 9688204 9688205 9688206 9686248 9688241 ENCODER 9686437 9686666...
  • Page 80 EVA.5 Ref. Note Code 9686110 9686112 9686111 9686107 9686109 9686555 9688210 AUTOMATISMI BENINCÀ SpA - Via Capitello, 45 - 36066 Sandrigo (VI) ITALY - Tel. 0444 751030 r.a. - Fax 0444 759728 www.beninca.com - sales@beninca.it...