Télécharger Imprimer la page
Beninca EVA.7 Mode D'emploi
Masquer les pouces Voir aussi pour EVA.7:

Publicité

Les langues disponibles
  • FR

Les langues disponibles

  • FRANÇAIS, page 41

Liens rapides

L854200161
072020 rev 1
EVA.7 - EVA.8
UNIONE NAZIONALE COSTRUTTORI
AUTOMATISMI PER CANCELLI, PORTE
SERRANDE ED AFFINI
IT
EN
DE
FR
ES
PL

Publicité

loading

Sommaire des Matières pour Beninca EVA.7

  • Page 1 L854200161 072020 rev 1 EVA.7 - EVA.8 UNIONE NAZIONALE COSTRUTTORI AUTOMATISMI PER CANCELLI, PORTE SERRANDE ED AFFINI...
  • Page 3 EVA.7: min 4,70m - max 6,70m Min 4,70m - Max 6,70m 1265 EVA.8: min 6,70m - max 7,70m EVA.7/8 - RIGHT (DX) EVA.7/8 (STANDARD) LEFT (SX)
  • Page 4 EVA.7/EVA.8 - RIGHT EVA.7/EVA.8 - LEFT (STANDARD)
  • Page 5 CLACK! Posa della piastra di fondazione VE.P650 (opzionale) Foundation plate positioning VE.P650 (optional) Montage der Fundamentplatte VE.P650 (option) Mise en place de la plaque de fondation VE.P650 (optionnel) Posicionamiento de la placa de alimenta- ción VE.P650 (opcional) Ułożenie płyty fundamentowej VE.P650 (opcjonalma) 30mm...
  • Page 7 Slow-down Open (SLDo) Slow-down Close (SLDC) (SWC)
  • Page 8 FTC.S Line 3x1,5mm Photo TX 2x0,5mm 2,9x16 Photo RX 4x0,5mm EVA.Led 2x0,5mm SC.EN 2x0,5mm...
  • Page 9 EVA.8 SOSTITUZIONE MOLLA SPRING REPLACEMENT FRÜHLING-ERSATZ REMPLACEMENT DES RESSORTS REEMPLAZO DEL RESORTE WYMIANA SPRĘŻYNY EVA.8 ASSEMBLAGGIO ASTA 8M 8M ROD ASSEMBLY 8M STAB-MONTAGE TIGE ARTICULÉE 8M MONTAJE DE LA BARRA 8M 8M PRZY MONTAŻU TŁOCZYSKA...
  • Page 10 - 24V + AUX2 BLINK 2xDA.BT2 (Optional) MENC ABS. ENCODER (Optional) CP.EVA2 LED 2 24Vdc 500 mA LED 1 - 24V + SA.24V LIGHT LAMP. 24Vdc 24Vdc AUX2 BLINK 100÷250 Vac...
  • Page 11 PHOTOTEST AUX1:0000 AUX1:0004 24Vdc tst1:on AUX1 AUX1 24Vdc PHOT 24Vac LAMP SERVICE LIGHT AUX1:0003 24Vdc 24Vac NC NO 24Vac AUX1 Relè 24Vdc 230Vac LAMP MASTER SLAVE Menu Menu ID=0 ID=1 3x0,5mm GND B A GND B A...
  • Page 12 Schema menu di programmazione - Menu programming layout Diagramm Programmiermenü - Menu de programmation Display OFF Menú de la carta de programación - Układ menu programowania Power ON v1. 0 5 Firmware Ver. (3s) 8888 Inst Boom Diagnostic ---0 0--- IBCA Mode Parc...
  • Page 13 Nman 0012 3456 MACI 2 Cycle AUTO PUSH OPEN/CLOSE RE-ENTER CODE 0000 9000 9C5a conf CODE Display OFF Inst Legenda Premere il tasto (-) / Press key (-) / Die Taste (-) drücken Appuyez sur la touche (-) / Presionar la tecla (-) / Wcisnąć przycisk (-) PUSH Premere il tasto (+) / Press key (+) / Die Taste (+) drücken Appuyez sur la touche (+) / Presionar la tecla (+) / Wcisnąć...
  • Page 14 SOMMARIO 1) DESCRIZIONE ......................13 13.3.1) INSTALLAZIONE (INST) ..............16 2) DIMENSIONI ......................13 13.3.2) PARAMETRI (PAR) ................16 3) CENTRALE DI COMANDO COMPATIBILE ARC ............. 13 13.3.3) LOGICHE (LOG) .................17 4) APERTURA (FIG.2) ....................13 13.3.4) RADIO (RADI) ...................18 5) PREDISPOSIZIONE BARRIERA DESTRA-SINISTRA (FIG.3/4) ........14 13.3.5) NUMERO MANOVRE (NMAN) .............18 6) MANOVRA MANUALE DI EMERGENZA (FIG.5) ............
  • Page 15 1) DESCRIZIONE Barriera stradale per passaggi fino a 7m (EVA.7) e 8m (EVA.8) dotata di centrale incorporata CP.EVA2 e di sblocco rapido esterno per la movimenta- zione manuale. E’ possibile la sincronizzazione di 2 motori per comandare due barriere contrapposte, in questo caso è necessario utilizzare la scheda di sincronizzazione SIS (opzionale), collegare tra di loro le due centrali come indicato in figura 14 e configurare le centrali come indicato nel paragrafo "Sincronizzazione di due barriere contrapposte".
  • Page 16 Si definisce convenzionalmente destra una barriera che, vista frontalmente dal lato della portina di apertura, chiude il passaggio abbassando l'asta verso destra. E' comunque possibile con poche semplici operazioni, modificare una barriera destra per ottenere una barriera sinistra (Fig. 3 rif B: EVA.7/EVA.8 LEFT).
  • Page 17 10) BILANCIAMENTO ASTA (FIG.8) Per un buon funzionamento della barriera è fondamentale che l’asta sia opportunamente equilibrata dalla forza contrapposta dalla molla di bilanciamento. Per verificare ciò agire come segue. Sbloccare meccanicamente la barriera tramite la chiave di sblocco. • L'asta correttamente bilanciata deve portarsi a circa 45° da qualsiasi punto venga rilasciata - se tende ad aprire diminuire la tensione delle molle - se tende a chiudere aumentare la tensione delle molle La tensione delle molle può...
  • Page 18 MIN-MAX-(Default) MEMO Selezionare la lunghezza dell'asta installata sulla barriera. Valore espresso in metri impostabile da 3m a 5m (EVA5) o da 7m a 8m (EVA.7/EVA.8) BOOM 3/5 -7/8 (7-8*) In base alla lunghezza dell'asta selezionata verranno impostati i valori ottimali di velocità.
  • Page 19 Regola la soglia di intervento del dispositivo antischiacciamento (Encoder) durante la fase di rallentamento*. SEAR 0-99-(0%) 0:Off -1: minima sensibilità - 99: massima sensibilità Tempo di attivazione del contatto luce di cortesia. Valore espresso in secondi. Ad ogni manovra il contatto viene chiuso per il tempo impostato. 1-240 (60) Vedi descrizione parametro AUX1.
  • Page 20 Abilita o disabilita la verifica delle fotocellule sull’ingresso PHOTO, attivo sia in chiusura, sia in apertura. On: Verifica abilitata. Se la verifica ha esito negativo non viene comandata nessuna manovra. TST1 (OFF) Vedi Fig.14 - “PHOTO TEST”. Off: Verifica delle fotocellule ad ogni manovra disabilitata. Abilita o disabilita la verifica motori.
  • Page 21 13.3.7) RESET (RES) RESET della centrale. ATTENZIONE!: Riporta la centrale ai valori di default. La prima pressione del pulsante <PG> provoca il lampeggio della scritta RES, una ulteriore pressione del pulsante <PG> effettua il reset della centrale. Nota: Non vengono cancellati i trasmettitori dalla ricevente ne la password di accesso. Vengono riportati ai valori di default tutte le logiche e tutti i parametri, è...
  • Page 22 13.5) APPRENDIMENTO REMOTO TRASMETTITORI Se si dispone di un trasmettitore già memorizzato nella ricevente è possibile effettuare l’apprendimento radio remoto (senza necessità di accedere alla centrale). IMPORTANTE: La procedura deve essere eseguita con asta in posizione di apertura. La logica REM deve essere ON. Procedere come segue: 1 Premere il tasto nascosto del trasmettitore già...
  • Page 23 INDEX 1) DESCRIPTION ......................22 13.3.1) INSTALLATION (INST) ...............25 2) DIMENSIONS......................22 13.3.2) PARAMETERS (PAR) ................25 3) ARC COMPATIBLE CONTROL UNIT ................22 13.3.3) LOGICHE (LOG) .................26 13.3.4) RADIO (RADI) ...................26 4) OPENING (FIG.2) ....................... 22 5) LEFT-RIGHT BARRIER (FIG. 3/4) ................23 13.3.5) CYCLES NUMBER (NMAN) ..............27 6) EMERGENCY MANUAL OPERATION (FIG.5) ..............
  • Page 24 1) DESCRIPTION Road barrier for passages up to 7m (EVA.7) and 8m (EVA.8) provided with built in control unit CP.EVA2 and quick external release for manual maneuver. It is possible the synchronization of 2 motors for controlling 2 opposed barriers, to do this it is necessary to use the synchronization control unit SIS (optional).
  • Page 25 Conventionally it is considered right a barrier which seen from the side of the cabinet door, closes the passage by lowering the boom towards right. However it is possible to reverse the barrier movement and turn a right barrier into a left one by means of few easy operations (Fig. 3 B : EVA.7/EVA.8 LEFT).
  • Page 26 10) BALANCING (FIG.8) For a good operation of road barrier, the beam must be suitable balanced by the spring. To check the correct balancing, proceed as follows. Mechanically release the road barrier through the release key. • The road beam, correctly balanced at approx. 45°, should remain still in any position: - if it tends to open, reduce the spring tension - if it tends to close, increase the spring tension The spring tension can be adjusted by tightening (anti-clockwise rotation) or loosening (clockwise rotation) the spring by hand.
  • Page 27 MIN-MAX-(Default) MEMO Select the length of the boom installed on the barrier. Value expressed in meter from 3m to 5m (EVA5) or from 7m to 8m (EVA.7/EVA.8) BOOM 3/5 -7/8 (7-8*) According to the selected boom length, the optimal value of speed will be set.
  • Page 28 Adjusts the intervention threshold of the anti crushing device (Encoder) during the slowdown speed*. SEAR 0-99-(0%) 0:Off -1: minimum sensitivity - 99: maximum sensitivity Activation time of the courtesy light contact. Value expressed in seconds. At the beginning of each maneuver the contact latches for the set time. 1-240 (60) See the description of AUX1 parameter.
  • Page 29 Enables or disables motors check. TSTm On: Check enabled. If the check has a negative result, no manoeuvre is commanded. (OFF) Off: Check disabled. Enables or disables the programmable code transmitters. IMPORTANT: The transmitters with programmable code can only be used in conjunction with the Rolling Code HCS transmitters.
  • Page 30 13.3.8) AUTOSET (AUTO) This function sets the optimal functioning values of the installation, at the end of the procedure, it sets the average values of torque (PMO/PMC and PSO/PSC). To carry out the AUTOSET, proceed as follow: a) Make sure that during the autoset there is no obstacle is in the maneuver area, if necessary, fence off the area so that persons, animals, cars, etc., cannot interrupt the procedure.
  • Page 31 13.7) BACK UP BATTERIES The control unit CP.EVA2 includes the power pack SA.24V predisposed for the connection of two batteries by 12Vdc 2,1Ah DA.BT2 (optional) which guarantee the regular functioning of the automation in case of temporary power failure. When the barrier is working with mains voltage the power pack SA.24V charges the batteries (Fig. 13). The maximum charging current is 1A, the average charging current is 300 mA.
  • Page 32 INHALT 1) BESCHREIBUNG ....................... 31 13.3.1) INSTALLIERUNG (PAR) ..............34 2) ABMESSUNGEN ...................... 31 13.3.2) PARAMETER (PAR) ................34 3) ARC-KOMPATIBLE STEUEREINHEIT ................31 13.3.3) LOGIKEN (LOG) .................35 4) ÖFFNEN (ABB.2)....................... 31 13.3.4) RADIO (RAD) ..................36 5) SCHRANKE VORBEREITEN RECHTS-LINKS (ABB. 3/4) ..........32 13.3.5) ZYKLEN (NMAN) .................36 6) MANUELLE NOTBEDIENUNG ABB.5 ................
  • Page 33 Strom- und Drehmomentwerte zu erfassen. Auf dem Display erscheint die Meldung „PRG“. 1) BESCHREIBUNG Straßenschranke für Durchfahrten bis zu 7m (EVA.7) und 8m (EVA.8) mit integriertem Steuergerät CP.EVA2 und externer Schnellentriegelung für die manuelle Bedienung. Es ist ein Synchronbetrieb von 2 Motoren möglich, um zwei gegenüberliegende Schranken zu steuern. In diesem Fall ist die Synchronisationskarte SIS (Optional) einzusetzen, es müssen wie in Abb.
  • Page 34 Eine rechtsseitige Schranke ist gewöhnlich eine Schranke, die auf der Seite der Öffnungstür von vorne gesehen den Durchgang schließt, indem der Baum nach rechts gesenkt wird. Es genügen jedoch einige einfache Eingriffe und aus der rechten Schranke wird eine linke (Abb. 3 Bez. B: EVA.7/EVA.8 LEFT).
  • Page 35 10) AUSWUCHTEN (ABB.8) Für den einwandfreien Betrieb der Schranke ist es wichtig, dass der Schrankenarm durch die Gegenkraft der Feder richtig ausgewuchtet ist. Zur Kontrolle folgendermaßen vorgehen: Die Schranke über den Entriegelungsschlüssel mechanisch entriegeln. • Ein richtig ausgewuchteter Schrankenarm muss bei 45° stillstehen, unabhängig davon von welcher Position aus er freigelassen wird. - Falls er sich weiter öffnet, die Spannung der Feder verringern - Falls er sich weiter schließt, die Spannung der Feder erhöhen Die Spannung der Feder kann durch Festschrauben (drehen gegen den Uhrzeigersinn) oder Lockern (drehen im Uhrzeigersinn) der Feder selbst von...
  • Page 36 MIN-MAX-(Default) MEMO Die an der Schranke installierte Baumlänge auswählen. Wert in Meter, von 3 bis 5 m (EVA5) oder 7 bis 8 m (EVA.7/EVA.8) einstellbar. Die Einstellung der optimalen Geschwindigkeitswerte richtet BOOM 3/5 -7/8 (7-8*) sich nach der ausgewählten Baumlänge.
  • Page 37 Regelt die Empfindlichkeit der Quetschschutzvorrichtung (Encoder) während der Verlangsamung*. SEAR 0-99-(0%) 0:Off -1: minimale Empfindlichkeit - 99: maximale Empfindlichkeit Aktivierungsdauer des Kontakts der Hilfsbeleuchtung. Wert in Sekunden. Bei jeder Bedienung wird der Kontakt für die eingestellte Dauer geschlossen. 1-240 (60) Siehe Beschreibung Parameter AUX1.
  • Page 38 Freischaltung oder Ausschaltung der Motorenprüfung. On: Überprüfung freigeschaltet. Ist das Ergebnis der Überprüfung negativ, wird keinerlei Bewegung TSTm (OFF) gesteuert. Off: Überprüfung ausgeschaltet. Aktiviert oder deaktiviert die Sender mit programmierbarem Code. WICHTIG: Sender mit programmierbarem Code können nur in Verbindung mit Rolling Code HCS- Sendern verwendet werden.
  • Page 39 13.3.7) RESET (RES) RESET der Steuerzentrale. ACHTUNG!: Bringt die Zentrale auf die Default-Werte zurück. Beim erstmaligen Drücken der Taste <PG> blinkt die Schrift RES, beim weiteren Drücken der Taste <PG> erfolgt das Reset der Steuerzentrale. Anb - merkung: Es werden weder die Sender vom Empfänger noch das Zugangspasswort gelöscht. Alle Logikschalter und alle Parameter werden auf ihre Vorgabewerte gesetzt, daher muss der Autoset-Vorgang wiederholt werden.
  • Page 40 4 innerhalb von 5s die Taste des neuen Senders, der dem unter Punkt 2 gewählten Kanal zugewiesen werden soll. Die Blinkleuchte geht aus. 5 Der Empfänger speichert den neuen Sender und steigt sofort aus dem Programmiermodus aus. 13.6) SICHERUNGEN F3 CP.EVA2: T1A - Schutzsicherung Versorgungsspannung Zubehör. F1 SA24V: T4A - Allgemeine Schutzsicherung 13.7) NOTSTROMBATTERIE Das Steuergerät CP.EVA2 umfasst die Netzteilkarte SA.24V, die den eventuellen Anschluss zweier Batterien 12V 2,1 Ah DA.BT2 (Optional) vorsieht.
  • Page 41 INDEX 1) DESCRIPTION ......................40 13.3.1) INSTALLATION (INST) ...............43 2) DIMENSIONS ......................40 13.3.2) PARAMETRES (PAR) ................43 3) CENTRALE DE COMMANDE COMPATIBLE ARC ............40 13.3.3) LOGIQUES (LOG) ................44 13.3.4) RADIO (RAD) ..................45 4) OUVERTURE (FIG.2) ....................40 5) PRÉDISPOSITION BARRIÈRE DROITE-GAUCHE (FIG.3/4) ........... 41 13.3.5) NOMBRE DE CYCLES (NMAN) ............45 6) MANŒUVRE MANUELLE D’URGENCE (FIG.5).............
  • Page 42 Toute utilisation différente de celle mentionnée dans les présentes instructions n’est pas autorisée et annule la garantie du fabricant. Nous tenons à vous rappeler qu’en vous enregistrant sur le site www.beninca.com, vous avez accès à toute la documentation mise à jour pour tous les produits et les accessoires ainsi qu’au guide pour remplir le fascicule technique et les documents prévus par l’annexe V de la Directive Machines, obliga-...
  • Page 43 
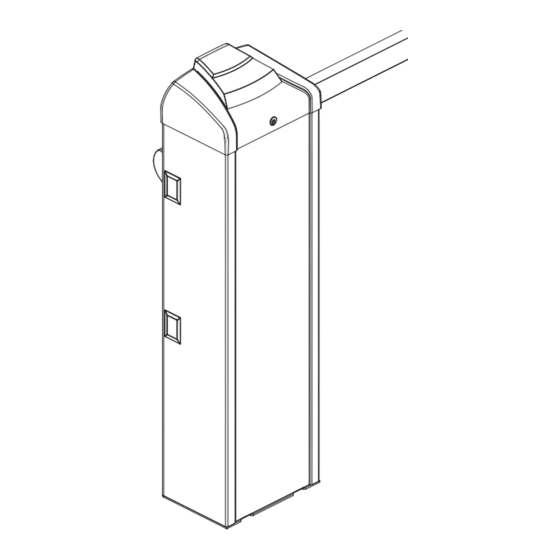
Par convention, on entend par barrière droite une barrière qui, vue de face du côté de la porte d’ouverture, ferme le passage en abaissant la lisse vers la droite. Il est en tout cas possible de modifier une barrière droite par quelques opérations simples afin d’obtenir une barrière gauche (Fig. 3 réf B : EVA.7/EVA.8 LEFT).
  • Page 44 10) EQUILIBRAGE (FIG.9) A’ fin d’assurer un bon fonctionnement de la barrière il est indispensable que la lisse soit équilibrée de manière adéquate par l’action du ressort concurrent. Pour le vérifier procédez comme suit. Débloquez mécaniquement la barrière à l’aide de la de la clé de déblocage. •...
  • Page 45 MIN-MAX-(Default) MEMO Sélectionner la longueur de la lisse installée sur la barrière. Valeur exprimée en mètres réglable de 3 m à 5 m (EVA5) ou de 7 m à 8 m (EVA.7/EVA.8) BOOM 3/5 -7/8 (7-8*) En fonction de la longueur de la lisse sélectionnée, les valeurs optimales de vitesse seront configurées.
  • Page 46 Temps d’activation du contact éclairage de courtoisie. Valeur exprimée en secondes. À chaque manoeuvre, le contact est fermé pendant la durée définie. 1-240 (60) Voir description paramètre AUX1. Définit une brève inversion après que le point de fin de course d’ouverture ait été atteint. Peut saso 0-5 (0) être utile pour faciliter la manoeuvre manuelle de la barrière.
  • Page 47 Active ou désactive la vérification des moteurs. TSTm On: Vérification activée. Si la vérification produit un résultat négatif aucune manœuvre n’est commandée. (OFF) Off: Vérification désactivée. Il active ou désactive les émetteurs à code programmable. IMPORTANT : Les émetteurs à code programmable ne sont utilisables que conjointement avec ceux Rolling Code HCS.
  • Page 48 13.3.8) AUTOSET (AUTO) Cette fonction permet de configurer les valeurs optimales de fonctionnement de l’automatisme et, à la fin de la procédure,elle règle les valeurs moyennes de COUPLE (PMO/PMC et PSO/PSC). Pour effectuer l’autoréglage, procéder comme suit : a) S’assurer qu’aucun obstacle ne soit présent dans la zone de manoeuvre, si nécessaire, isoler la zone afin d’empêcher l’accès aux personnes, aux animaux, aux véhicules, etc.
  • Page 49 13.7) BATTERIE D’URGENCE La centrale CP.EVA2 comprend la carte d’alimentation SA.24V, prédisposée au raccordement de deux batteries 12V 2, 1Ah DA.BT2 (en option) qui permettent le fonctionnement de l’automatisme mȇme en cas d’absence momentanée d’alimentation de réseau. Lors du fonctionnement normal de réseau, la carte SA.24V procède à la recharge des batteries (Fig.13). Le courant de charge maximal est de 1 A, le courant de charge moyen est de 300 mA.
  • Page 50 TABLA DE CONTENIDO 1) DESCRIPCIÓN ......................49 13.3.1) INSTALACIÓN (INST) ................52 2) MEDIDAS ........................ 49 13.3.2) PARAMETROS (PAR) .................52 3) CENTRALE DE COMMANDE COMPATIBLE ARC ............49 13.3.3) LÓGICAS (LOG) .................53 4) APERTURA (FIG. 3) ....................49 13.3.4) RADIO (RAD) ..................54 5) PREPARACIÓN BARRERA DERECHA-IZQUIERDA (FIG.3/4) .........
  • Page 51 “PRG”. 1) DESCRIPCIÓN Barrera de circulación para pasos de hasta 7 m (EVA.7) y 8 m (EVA.8) equipada con centralita incorporada CP.EVA2 y desbloqueo rápido externo para el movimiento manual.
  • Page 52 5) PREPARACIÓN BARRERA DERECHA-IZQUIERDA (FIG.3/4) La barrera EVA.7/EVA.8 se suministra normalmente en la versión de barrera derecha (Fig. 3 ref A: EVA.7/EVA.8 RIGHT). Se define normalmente como barrera derecha a una barrera que, si se observa de frente desde el lado de la puerta de abertura, cierra el paso bajando el poste hacia la derecha.
  • Page 53 10) BALANCEADO (FIG. 8) Para un buen funcionamiento de la barrera es fundamental que la barra esté oportunamente equilibrada poir la acción del muelle contrario. Para comprobar el balanceo actuar como sigue. Desbloquear mecánicamente la barrera utilizando la llave de desbloqueo. •...
  • Page 54 FUNCIÓN MIN-MAX-(Default) MEMO Seleccionar la longitud del poste instalado en la barrera. Valor expresado en metros, puede configurarse desde 3 a 5 m (EVA5) o desde 7 a 8 m (EVA.7/ BOOM EVA.8). 3/5 -7/8 (7-8*) Los valores óptimos de velocidad se configurarán en función de la longitud del poste seleccionado.* Para barrera superior a 5 m utilizan el valor (7-8) Configurar el sentido de apertura de la barrera (ver Fig.
  • Page 55 Regula el umbral de intervención del dispositivo antiaplastamiento (codificador) durante la fase SEAR 0-99-(0%) de desaceleración*. 0:Off -1: mínima sensibilidad - 99: máxima sensibilidad Tiempo de activación del contacto de luz de cortesía. Valor expresado en segundos. Con cada 1-240 (60) maniobra, el contacto se cierre durante el tiempo definido.
  • Page 56 Habilita o deshabilita el control de las fotocélulas en entrada PHOT, activa en cierre y en apertura. On: Control habilitado. Si el control no se realiza con éxito, no se controla ninguna operación. TST1 (OFF) Consulte la Fig.14 - “PHOTO TEST”. Off: Control de las fotocélulas con cada operación deshabilitada.
  • Page 57 13.3.8) AUTOSET (AUTO) Esta función permite configurar los valores óptimos de funcionamiento de la automatización y, al finalizar el procedimiento, ajusta los valores medios de PAR (PMO/PMC y PSO/PSC). Para realizar el autoset (autorestablecimiento), realice los siguientes pasos: a) Asegúrese de que no haya obstáculos de ningún tipo en la zona de maniobra y, si fuese necesario, cerque la zona para impedir el acceso a per- sonas, animales, vehículos, etc.
  • Page 58 13.7) BATERÍA DE EMERGENCIA La centralita CP.EVA2 incluye la tarjeta de alimentación SA.24V preparada para la conexión de dos baterías 12V 2,1Ah DA.BT2 (opcionales) que permiten el funcionamiento de la automatización, incluso en caso de falta temporal de alimentación de red. Durante el funcionamiento normal de red, la tarjeta SA.24V recarga las baterías (Fig.13).
  • Page 59 STRESZCZENIE 1) OPIS ......................... 58 13.3.1) INSTALACJA (INST) ................61 2) WYMIARY ........................ 58 13.3.2) PARAMETRY (PAR) ................61 3) CENTRALA STERUJĄCA KOMPATYBILNA Z ARC ............58 13.3.3) LOGIKA (LOG) ...................62 13.3.4) RADIO (RAD) ..................63 4) OTWIERANIE (RYS. 2) ....................58 5) ELEMENT PRZYSTOSOWUJĄCY SZLABAN PRAWY-LEWY (RYS. 3/4) ......59 13.3.5) LICZBĘ...
  • Page 60 Na rysunku 1 pokazano główne wymiary gabarytowe szlabanu EVA.7/EVA.8. EVA.7: Wymiary gabarytowe wyrażone są w mm. Długość ramienia może różnić się od minimum 5 m do maksymalnie 7 m. Ponieważ około 30 cm konieczne jest do zamocowania ramienia na barierze, wymiary przejścia użytkowego będą wynosiły od 4,70 m do 6,70 m, tak jak wskazane na Rys.1.
  • Page 61 Zwyczajowo szlaban prawostronny to szlaban widziany czołowo od strony drzwi, zamyka przejazd, opuszczając ramię w prawą stronę. Jednak kilkoma prostymi czynnościami można zmienić szlaban prawostronny na lewostronny (Rys. 3, odn. B: EVA.7/EVA.8 LEFT). W razie konieczności można zmienić barierę z prawo na lewostronną (lub odwrotnie). Należy postępować jak podano poniżej: •...
  • Page 62 10) ZRÓWNOWAŻENIE (RYS. 8) Dla prawidłowego działania bariery jest rzeczą podstawową odpowiednie zrównoważenie bariery w stosunku do zadziałania sprężyny. W tym celu należy postępować w następujący sposób. Odblokować mechanicznie barierę przy pomocy klucza odblokowania. • Prawidłowo zrównoważone ramię powinno podnieść się do 45° niezależnie od punktu jego zwolnienia: - jeżeli ma tendencję...
  • Page 63 MIN-MAX-(Default) MEMO Wybrać długość zainstalowanego na szlabanie ramienia. Wartość wyrażona w metrach, ustawiana od 3 m do 5 m (EVA5) lub od 7 m do 8 m (EVA.7/EVA.8) BOOM 3/5 -7/8 (7-8*) W zależności od długości wybranego ramienia ustawione zostaną optymalne wartości prędkości.
  • Page 64 Dostosowuje próg aktywacji urządzenia zapobiegającego zgnieceniu (Enkoder) podczas etapu SEAR z zwalniania*. 0-99-(0%) 0:Off -1: czułość minimalna - 99: czułość maksymalna Czas aktywacji styku światła działania. Wartość wyrażona w sekundach. Przy każdym ruchu styk jest zamykany na ustawiony czas. 1-240 (60) Patrz opis parametru AUX1.
  • Page 65 Załącza lub wyłącza sprawdzanie fotokomórek na wejściu PHOT, jest aktywne zarówno przy zamykaniu, jak i przy otwieraniu. TST1 On: Sprawdzanie załączone. Jeśli sprawdzanie daje wynik negatywny, nie zostaje wydane żadne (OFF) polecenie manewru. Patrz Rys.14 - “PHOTO TEST”. Off: Sprawdzanie fotokomórek przy każdym wyłączonym manewrze. Włącza lub wyłącza funkcję...
  • Page 66 13.3.6) CZĘSTOTLIWOŚĆ SERWISOWANIA (MACI) Dzięki tej funkcji, po wykonaniu ilości manewrów określonych przez instalatora, włącza się sygnalizacja żądania przeprowadzenia czynności serwiso- wych. Aby aktywować i wybrać ilość manewrów, należy wykonać następujące czynności: Nacisnąć przycisk <PG>, na wyświetlaczu pokaże się napis OFF, oznaczający, że funkcja jest wyłączona (wartość domyślna). Przy pomocy przycisków <+>...
  • Page 67 13.5) ZDALNE ZAPAMIĘTYWANIE NADAJNIKÓW Jeżeli użytkownik posiada już nadajnik wpisany do pamięci odbiornika, można przeprowadzić zdalne zapamiętywanie (bez konieczności wchodzenia do centralki). WAŻNE: Procedurę należy wykonać przy otwartym ramieniu. Układ logiczny REM powinie być włączony (ON). Należy postępować w następujący sposób: 1.
  • Page 68 EVA.7/EVA.8 ISTRUZIONI PER L’UTILIZZATORE NORME DI SICUREZZA • Non sostare nella zona di movimento della barriera. • Non lasciare che i bambini giochino con i comandi o in prossimità della barriera. • In caso di anomalie di funzionamento non tentare di riparare il guasto ma avvertire un tecnico specializzato.
  • Page 69 EVA.7/EVA.8 USER’S HANDBOOK SAFETY MEASURES • Do not stand within the gate movement area. • Children must not play with controls and near the gate. • In the event of malfunctions, do not attempt to repair the failure but contact the specialised personnel.
  • Page 70 EVA.7/EVA.8 HANDBUCH FÜR DEN VERBRAUCHER SICHERHEITSVORSCHRIFTEN • Sich nicht im Bewegungsbereich des Flügels aufhalten. • Nicht zulassen dass Kinder mit den Steuerungen oder in der Nähe des Flügels spielen. • Im Falle von Betriebsstörungen, versuchen Sie nicht die Störung selbst zu beheben, sondern wenden Sie sich an einen qualifizierten Fachmann.
  • Page 71 EVA.7/EVA.8 MANUEL D’INSTRUCTIONS POUR L’UTILISATEUR NORMES DE SÉCURITÉ • Ne pas stationner dans la zone de mouvement du vantail. • Ne pas laisser les enfants jouer avec les commandes ou en proximité du vantail. • En cas d’anomalies du fonctionnement ne pas essayer de réparer la panne, mais appelez un technicien compétent.
  • Page 72 EVA.7/EVA.8 MANUAL DE INSTRUCCIONES PARA EL USUARIO NORMAS DE SEGURIDAD • No pararse en la zona de movimiento de la hoja. • No dejar que los niños jueguen con los comandos ni cerca de la cancela. • En caso de anomalía de funcionamiento no intentar reparar el avería sino avisar a un técnico especializado.
  • Page 73 EVA.7/EVA.8 KSIĄŻECZKA Z INSTRUKCJAMI DLA UŻYTKOWNIKA NORMY BEZPIECZEŃSTWA • Nie przestawać w obszarze przesuwu skrzydła bramy. • Nie pozwolić, żeby dzieci bawiły się sterowaniem bramy lub ogólnie w pobliżu skrzydła. • W przypadku nieprawidłowego działania nie próbować samodzielnie naprawiać uszkodzenie, należy zwrócić się do wyspecjalizo- wanego technika.
  • Page 74 Ref. EVA.7 Code Note 9686428 9686440 9688240 9686441 968600966 9686443 9686444 9688204 9688205 9686117 9686115 9686473 968601523 ENCODER 9686666 9686517 1 pz (480mm) 9688213...
  • Page 75 Ref. EVA 8 Code Note 9686428 9686440 9688240 9686441 968600966 9686443 9686444 9688204 9688205 9686117 9686115 968601446 968601523 ENCODER 5780006 9686517 (480mm) 1 pz 9576001 (364mm) 1 pz F8621033 9688213...
  • Page 76 EVA 5 Ref. Note Code 9686556 968601519 968601520 9686107 9686109 968601524 9686555...
  • Page 77 36066 - Sandrigo (VI) - Italia +39 0444 751030 +39 0444 751030 Telefono: Telephone number: sales@beninca.it sales@beninca.it E-mail: E-mail address: Dichiara che il documento è rilasciato sotto la propria responsabilità e appartiene al seguente prodotto: Declare that the DOC is issued under our sole responsibility and belongs to the following product:...
  • Page 78 36066 - Sandrigo (VI) - Italia +39 0444 751030 +39 0444 751030 Teléfono: Telefon: sales@beninca.it sales@beninca.it E-mail: Adres e-mail: Declara que el documento ha sido emitido bajo la propia responsabilidad y pertenece al siguiente producto: Oświadcza, że dokument został wydany na własną odpowiedzialność i dotyczy produktu:...
  • Page 80 AUTOMATISMI BENINCÀ SpA - Via Capitello, 45 - 36066 Sandrigo (VI) ITALY - Tel. 0444 751030 r.a. - Fax 0444 759728 www.beninca.com - sales@beninca.it...

Ce manuel est également adapté pour:

Eva.8