Dorman 615-175 Notice Technique
Les langues disponibles
Les langues disponibles
Liens rapides
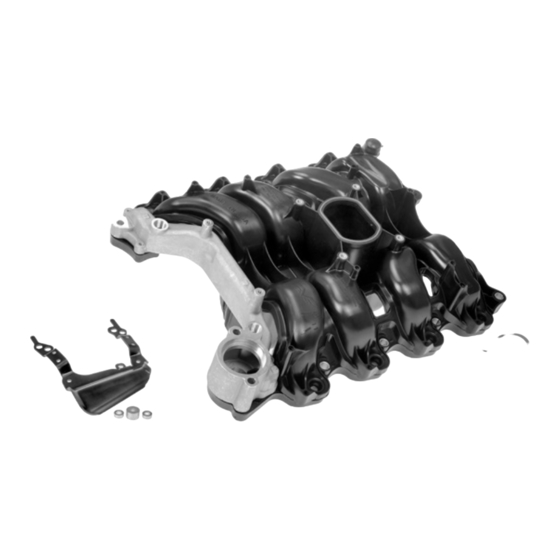
615-175
INTAKE MANIFOLD
BEFORE YOU BEGIN:
• Always wear proper safety
equipment when performing repairs.
• Ensure at your point of purchase
that this part fits your exact vehicle
configuration.
• Reference the appropriate service
manual for your vehicle. If you do
not have a service manual, and do
not have the training or experience
to perform the necessary
procedures correctly, seek the
services of a qualified technician.
NEED HELP?
Please call our Technical Support
team for assistance from our team of
certified automotive experts.
1-866-933-2911
© 2022 No reproduction in whole or in part without prior written approval.
615-175_Tech-Note_v2
This intake manifold features a Dorman-patented consolidated port
design (Patent #USD700621S1). This manifold will function for vehicles
using both square and round ports.
INSTALLATION SPECIFICATIONS
• This updated manifold does not require additional intake gaskets.
The intake gaskets are already installed into the manifold.
• Be sure to fully seat the injectors when installing the fuel rail.
Failure to do so will result in a vacuum leak.
• To install fuel rail, the M6 self-tapping fasteners are tightened by
angle and then by torque. First, start the fastener 1080° (three
turns), then tighten to 44-61 in-lb (5-7 Nm). You may find that
proper torque has been reached or exceeded within initial three
turns. This is acceptable and torque does not need to be lowered
if this occurs. Not all self-tapping screws are used for every
application. DO NOT OVERTIGHTEN!
• To attach ignition coils, use provided M5 self-tapping screws.
Tighten down 27 in-lb (3 Nm). NOTE: Initial turns
are not necessary for the M5 self-tapping screws.
DO NOT OVERTIGHTEN!
• The 4.6L engine was built at 2 different Ford plants (Romeo and
Windsor). There were several cylinder head designs produced at
these locations. We have found that sometimes the original OEM
gasket alignment holes in the head were placed a position near or
under our gasket's centerline location. If you find this is the case,
simply fill these holes with high-temperature RTV silicone prior to
manifold assembly to avoid a vacuum leak.
Dorman Products, Inc. Corporate Office and Customer Service: 1-800-523-2492.
Disclaimer: Even though every attempt is made to ensure this information is complete and accurate, it is impossible to account for all possible
circumstances or situations. Please consult with a qualified auto technician before attempting to perform any work you are not qualified to
do. Automobiles can be hazardous to work on; be sure to take all necessary safety precautions. Failure to do so may result in property damage
or personal injury. Certain motor vehicle standards and performance requirements may apply to your motor vehicle (such as Federal Motor
Vehicle Safety Standards by the National Highway Traffic Safety Administration). Be sure that your work is performed in accordance with such
standards and that you do not disable any motor vehicle safety feature.
PAGE 1 OF 6

Manuels Connexes pour Dorman 615-175

Sommaire des Matières pour Dorman 615-175
- Page 5 équipe d’experts automobiles certifiés. 1-866-933-2911 Dorman Products, Inc. Siège social et service à la clientèle : 1-800-523-2492 Clause de non-responsabilité: Malgré tous les efforts effectués pour s’assurer que l’information soit complète et exacte, il est impossible de prendre en compte toutes les situations et circonstances possibles. Veuillez consulter un technicien qualifié avant d’effectuer des travaux que vous n’êtes pas qualifié...
- Page 6 614-175: COLLECTEUR D’ADMISSION PAGE 6 DE 6 ÉTAPE 1 : ÉTAPE 5 : Retirez soigneusement la tubulure d’admission Installez la nouvelle tubulure d’admission conformément à la procédure d’entretien décrite conformément au manuel d’atelier. dans le manuel d’atelier. ÉTAPE 6 : ÉTAPE 2 : Installez les boulons d'admission.