Bosch 4000 Consignes De Fonctionnement/Sécurité
Masquer les pouces
Voir aussi pour 4000:
- Consignes d'utilisation/de sécurité (64 pages) ,
- Instructions d'installation et d'utilisation (60 pages) ,
- Manuel d'application (28 pages)
Table des Matières
Liens rapides
IMPORTANT:
Read Before Using
Operating/Safety Instructions
Consignes de fonctionnement/sécurité
Instrucciones de funcionamiento y seguridad
4000
Toll Free Number:
1-877-BOSCH99 (1-877-267-2499) http://www.boschtools.com.
For English
See page 2
IMPORTANT :
Lire avant usage
Consumer Information
Renseignement des consommateurs
Información para el consumidor
Appel gratuit :
Parlez-vous français?
Voir page 8
IMPORTANTE:
Leer antes de usar
Número de teléfono gratuito:
¿Habla español?
Ver página 14
Table des Matières

Manuels Connexes pour Bosch 4000


Sommaire des Matières pour Bosch 4000
- Page 1 Read Before Using Lire avant usage Leer antes de usar Operating/Safety Instructions Consignes de fonctionnement/sécurité Instrucciones de funcionamiento y seguridad 4000 Consumer Information Renseignement des consommateurs Información para el consumidor Toll Free Number: Appel gratuit : Número de teléfono gratuito: 1-877-BOSCH99 (1-877-267-2499) http://www.boschtools.com.
-
Page 2: General Safety Rules
All repairs, electrical or mechanical, should Personal Safety WARNING be attempted only by trained repairmen. Contact the nearest Bosch Factory Service Center, KNOW YOUR POWER TOOL Authorized Service Station or other competent repair Read and understand the owner’s manual and labels affixed service. -
Page 3: Additional Safety Rules
Additional Safety Rules Tool Care KICKBACKS AND POSSIBLE INJURY CAN USUALLY BE AVOIDED BY: DO NOT ALTER OR MISUSE TOOL a. Maintaining the rip fence parallel to the sawblade. These tools are precision built. Any alteration or modification b. Keeping the sawblade sharp. Replacing or sharpening not specified is misuse and may result in dangerous con- anti-kickback pawls when points become dull. - Page 4 Additional Safety Rules e. NEVER place your face or body in line with the cutting outward on the table) and then pushing thru sawblade. The tool. blade could pick up one or more pieces and cause a binding or loss of control and possible injury. •...
-
Page 5: Double Insulated Tools
Additional Safety Rules 12. THINK SAFETY Some dust created by power sanding, WARNING SAFETY IS A COMBINATION OF OPERATOR COMMON sawing, grinding, drilling, and other SENSE AND ALERTNESS AT ALL TIMES WHEN THE construction activities contains chemicals known to TABLE SAW IS BEING USED. cause cancer, birth defects or other reproductive harm. - Page 6 Table of Contents Page Page General Safety Rules ....2 Table Pointer Adjustment ... . . 28–29 Additional Safety Rules .
-
Page 7: Glossary Of Terms
Glossary of Terms WORKPIECE KERF The item on which the cutting operation is being performed. The space in the workpiece where the material was removed The surfaces of a workpiece are commonly referred to as by the blade. faces, ends and edges. KICKBACK An uncontrolled grabbing and throwing of the workpiece ANTI-KICKBACK PAWLS... -
Page 8: Consignes Générales De Sécurité
Adressez-vous à votre Centre de service en FAMILIARISEZ-VOUS AVEC VOTRE OUTIL usine Bosch le plus proche, à une Station-service Bosch agréée ou à Lisez attentivement le manuel de l’utilisateur et les étiquettes collées un autre service de réparation compétent. -
Page 9: Consignes De Sécurité Supplémentaires
Consignes de sécurité supplémentaires Entretien de l’outil y compris) de côté par rapport à la lame afin de ne pas vous trouver sur la trajectoire de l’ouvrage en cas de « REBOND ». ON PEUT GÉNÉRALEMENT ÉVITER LES REBONDS ET NE MODIFIEZ PAS L’OUTIL ET NE LE SOUMETTEZ PAS À... - Page 10 Consignes de sécurité supplémentaires e. Ne vous tenez JAMAIS (votre visage y compris) dans l’axe lon- g. Ne faites JAMAIS de coupe par lots (c’est-à-dire aligner plus d’une gitudinal de l’outil de coupe. pièce en face de la lame, verticalement ou horizontalement, et pous- ser le tout contre la lame).
-
Page 11: Double Isolation
Consignes de sécurité supplémentaires 12. LA SÉCURITÉ AVANT TOUT Les travaux à la machine tel que AVERTISSEMENT POUR ASSURER SA SÉCURITÉ, L’UTILISATEUR DOIT FAIRE ponçage, sciage, meulage, perçage et PREUVE DE BON SENS ET DE PRUDENCE PENDANT TOUT LE autres travaux du bâtiment peuvent créer des poussières TEMPS OÙ... -
Page 12: Table Des Matières
Table des matières Page Page Consignes générales de sécurité ....8 Réglage de l’indicateur de la table ... . . 28–29 Consignes de sécurité... -
Page 13: Lexique
Lexique OUVRAGE VOIE Pièce subissant l’opération de coupe. Les différentes surfaces de Épaisseur du trait de scie, correspond à l’épaisseur de matière l’ouvrage sont communément appelées faces, extrémités et bords. enlevée par la lame. TAQUETS ANTI-REBOND EXTRÉMITÉ AVANT Système qui, lorsqu’il est correctement entretenu, sert à empêcher Extrémité... -
Page 14: Normas Generales De Seguridad
únicamente por técnicos de reparación capacitados. Póngase en contacto con el Centro de servicio de fábrica Bosch más próximo, con la Estación de CONOZCA SU HERRAMIENTA MECANICA servicio Bosch autorizada o con otro servicio de reparaciones com- Lea y entienda el manual del usuario y las etiquetas puestas en la petente. -
Page 15: Normas De Seguridad Adicionales
Normas de seguridad adicionales Cuidado de la herramienta LOS RETROCESOS Y LAS POSIBLES LESIONES NORMALMENTE SE PUEDEN EVITAR: a. Manteniendo el tope-guía para cortar al hilo paralelo a la hoja de NO ALTERE NI HAGA USO INCORRECTO DE LA HERRAMIENTA sierra. - Page 16 Normas de seguridad adicionales e. NUNCA sitúe la cara o el cuerpo en línea con la herramienta de través de la hoja de sierra. La hoja podría enganchar una o más pie- corte. zas y causar un atasco o pérdida de control y posibles lesiones. •...
-
Page 17: Herramientas Con Aislamiento Doble
Normas de seguridad adicionales 12. PIENSE EN LA SEGURIDAD Cierto polvo generado por el lijado, ADVERTENCIA LA SEGURIDAD ES UNA COMBINACION DE SENTIDO COMUN POR aserrado, amolado y taladrado mecánicos, PARTE DEL OPERADOR Y DE ESTAR ALERTA EN TODO MOMENTO y por otras actividades de construcción, contiene agentes CUANDO SE ESTA UTILIZANDO LA SIERRA DE MESA. - Page 18 Indice Página Página Normas generales de seguridad ....14 Ajuste del indicador de la mesa ....28–29 Normas de seguridad adicionales .
-
Page 19: Glosario De Términos
Glosario de términos PIEZA DE TRABAJO SEPARACION DE CORTE El objeto en el cual se está realizando la operación de corte. Las El espacio entre la pieza de trabajo de donde la hoja quitó el material. superficies de una pieza de trabajo se conocen comúnmente como RETROCESO caras, extremos y bordes. -
Page 20: Getting To Know Your Table Saw
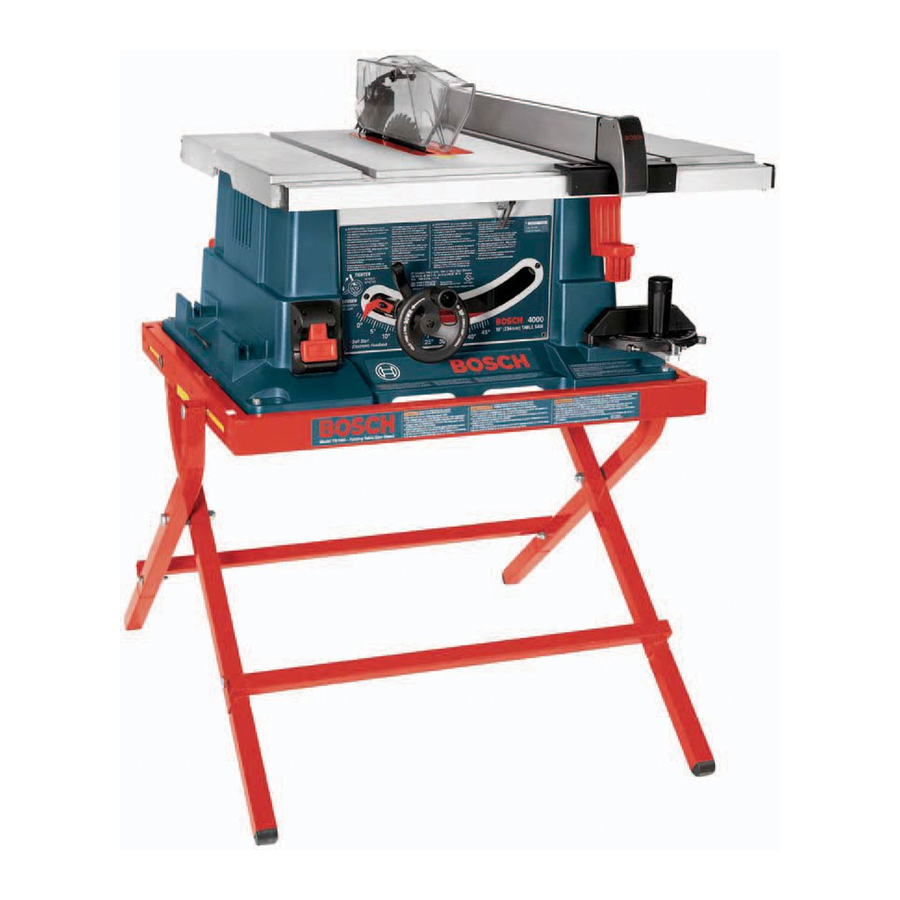
Getting To Know Your Table Saw 1. POWER SWITCH Has safety feature, which is intended to prevent accidental FIG. 1 starting (Page 36). 2. TABLE Provides large working surface to support workpiece. 3. BASE Supports table saw. For additional stability, holes are provided in base to bolt the saw to a workbench or stand. -
Page 21: Familiarisez-Vous Avec Votre Scie De Table
Familiarisez-vous avec Familiarización con la votre scie de table sierra de mesa 1. INTERRUPTOR DE ENCENDIDO 1. INTERRUPTEUR MARCHE-ARRÊTE Tiene un dispositivo de seguridad que está diseñado para evitar el arranque Comporte un dispositif de sécurité servant à prévenir les mises en marche accidental (página 37). - Page 22 Getting To Know Your Table Saw If you are making a rip type cut in thinner materials, the auxuiliary FIG. 1 facing should be attached to the fence so that the bottom edge touches the top surface of the table. In this situation, the facing must be lower than the fence.
-
Page 23: Protège-Lame
Familiarisez-vous avec Familiarización con la votre scie de table sierra de mesa Si usted está realizando un corte del tipo al hilo en materiales más delgados, Si vous voulez refendre une pièce de faible épaisseur, la planche doit être el refrentado debe sujetarse al tope-guía para cortar al hilo de manera que el fixée au guide de refente de façon à... -
Page 24: Unpacking And Checking Contents
This cord must remain unplugged whenever you are working on the table saw. Model 4000 Table Saw is shipped complete in one carton. 1. Unpacking and Checking Contents. Separate all parts from packing materials and check each one with the illustration and the list of Loose Parts to make certain all items are accounted for before discarding any packing material (Fig. -
Page 25: Ouverture De L'emballage Et Vérification Du Contenu
La scie de table modèle 4000 est expédiée complète dans un seul carton. La sierra de mesa modelo 4000 se envía completa en una caja de cartón. 1. Ouverture de l’emballage et vérification du contenu. Déballez toutes les 1. - Page 26 Adjustments Blade Tilting Control Loosen blade tilting lock handle 1 counterclockwise (Fig. 5), slide the elevation wheel 2 until pointer 5 is at desired angle and tighten blade tilt lock handle 1 clockwise. FIG. 5 FIG. 6 Adjusting 90 and 45 Degree Positive Stops Your saw is equipped with positive stops for fast and accurate positioning of the saw blade at 90 and 45 degrees to the table.
-
Page 27: Réglages
Réglages Ajustes Réglage de l’inclinaison de la lame Control de inclinación de la hoja Desserrez la poignée de verrouillage de l’inclinaison 1 en sens anti-horaire Afloje el mango de fijación de la inclinación de la hoja 1 en sentido contrario (Fig. - Page 28 Adjustments FIG. 8 Adjusting Blade Parallel To The Miter Gauge Slots The blade was adjusted parallel to the miter gauge slots at the factory. In order to insure accurate cuts and help prevent kickback, this adjustment should be rechecked. If adjustment is necessary, follow the steps below.
-
Page 29: Réglage Du Parallélisme De La Lame
Réglages Ajustes Réglage du parallélisme de la lame par Ajuste de la hoja paralela a las ranuras rapport aux rainures du guide del calibre de ingletes de coupe angulaire La hoja se ajustó en fábrica paralela a las ranuras del calibre de ingletes. Para asegurarse de que se realizan cortes precisos y para ayudar a evitar el Le parallélisme de la lame a été... -
Page 30: Aligning Rip Fence
Adjustments Aligning Rip Fence To prevent personal injury, always disconnect WARNING plug from power source before making any adjustments. The rip fence must be parallel with the SAWBLADE in order to prevent KICKBACK when ripping. FIG. 12 Your table saw is equipped with a Self-Aligning, Quick-Set rip fence. -
Page 31: Alignement Du Guide De Refente
Réglages Ajustes Alineación del tope-guía para cortar al hilo Alignement du guide de refente Para evitar lesiones personales, desconecte siempre el Pour éviter de subir des blessures, débranchez ADVERTENCIA AVERTISSEMENT enchufe de la fuente de energía antes de realizar toujours le cordon d’alimentation avant de cualquier ajuste. - Page 32 Assembly Attaching The Blade guard FIG. 15 To prevent personal injury, always disconnect WARNING plug from power source before making any adjustments. 1. Remove table insert. 2. Raise the blade as high as it will go and tilt to 45º . 3.
-
Page 33: Assemblage
Assemblage Ensamblaje Montage du protège-lame Colocación del protector de la hoja Pour éviter de subir des blessures, débranchez Para evitar lesiones personales, desconecte siempre AVERTISSEMENT ADVERTENCIA toujours le cordon d’alimentation avant de el enchufe de la fuente de energía antes de realizar procéder à... -
Page 34: Changing The Blade
Assembly FIG. 19 Changing The Blade To prevent personal injury, always disconnect WARNING plug from power source before changing blades. 1. Turn elevation wheel clockwise until the blade is up as high as it will go, using a screwdriver lift the table insert 1 out of the pocket of the table (Fig. -
Page 35: Changement De La Lame
Assemblage Ensamblaje Changement de la lame Cambio de la hoja Pour éviter les blessures, débranchez toujours le Para evitar lesiones personales, desconecte siempre ADVERTENCIA AVERTISSEMENT el enchufe de la fuente de energía antes de cambiar cordon d’alimentation avant de procéder à des réglages. -
Page 36: Mounting The Table Saw
Mounting The FIG. 22 Table Saw Mounting Table Saw to Workbench If table saw is to be used in a permanent location, it should be fastened securely to a firm supporting surface such as a stand or workbench, using the four mounting holes, 1 two of which are shown (Fig. -
Page 37: Installation De La Scie De Table
Installation de la scie Montaje de la sierra de de table mesa Installation de la scie de table Montaje de la sierra de mesa sur un établi en un banco de trabajo Si vous voulez installer la scie de façon permanente, il vous faut la fixer Si la sierra de mesa se va a utilizar en un lugar permanente, se debe sujetar solidement sur une surface robuste, telle qu’un support ou un établi, à... -
Page 38: Pre-Cut Locator
Basic Table Saw FIG. 25 Operation Pre-Cut Locator Allows you to mark and locate exactly where the blade will enter the workpiece. A . With the blade 90 degrees square to the table, cut off a piece of wood 1. Always make sure you turn the saw off before attempting step C. -
Page 39: Repère De Sciage
Utilisation de la Funcionamiento básico scie de table de la sierra de mesa Repère de sciage Ubicador de precorte Il permet de marquer et de repérer exactement l’endroit où la lame Permite marcar y ubicar exactamente el lugar en el que la sierra penetrará pénétrera dans la pièce. -
Page 40: Push Stick And Push Block
Push Stick and Push Block Make the Push Stick 1 using a piece of 1 x 2 as shown (Fig. 28). Make the Push Block 2 using pieces of 3/8" plywood 3 and 3/4" hardwood 4 (Fig. 29). For proper use of push block, (see page 48). FIG. -
Page 41: Baguette-Poussoir Et Plateau-Poussoir
Baguette-poussoir et plateau-poussoir Palo de empujar y bloque de empujar Fabriquez la baguette-poussoir 1 à l’aide d’un tasseau d’1 po x 2 po, suivant Haga el palo de empujar 1 utilizando un pedazo de 1 x 2 pulgadas tal como la fig. -
Page 42: Repetitive Cutting
Crosscutting CROSSCUTTING is known as cutting wood across the grain, at 90°, or square with both the edge and the flat side of the wood. This is done with the miter gauge set at 90° (Fig. 31). FIG. 31 The graduations on the miter gauge provide accuracy for average woodworking. -
Page 43: Coupe Transversale
Coupe transversale Corte transversal Se conoce como CORTE TRANSVERSAL a cortar madera en dirección Une coupe transversale est une coupe à 90° pratiquée à contre-fil, c’est-à- transversal a la veta, a 90°, o en ángulo recto tanto con el borde como con el dire une coupe perpendiculaire aux deux bords et à... -
Page 44: Bevel Crosscutting
Miter Cutting MITER CUTTING is known as cutting wood at an angle other than 90° with the edge of the wood. Follow the same procedure as you would for crosscutting (Fig. 33). Adjust the miter gauge to the desired angle, and lock it. The miter gauge may be used in either of the grooves in the table. -
Page 45: Coupe Angulaire
Coupe angulaire Corte a inglete On appelle COUPE ANGULAIRE le découpage à un angle autre que 90° par Se conoce como CORTE A INGLETE a cortar madera a un ángulo distinto a rapport aux bords de la pièce. Suivez la même méthode que pour la coupe 90°... - Page 46 C. Antikickback pawls are functioning properly. When ripping LONG BOARDS or LARGE PANELS, always use a work support. The Bosch table saw outfeed support table kit is an ideal accessory to use for this application. FIG. 37 A simple one can be made by clamping a piece of plywood to a sawhorse (Fig.
-
Page 47: Corte Al Hilo
Lorsque vous découpez de LONGUES PLANCHES ou des PANNEAUX DE El juego de mesa de soporte de avance de salida de la sierra de mesa Bosch GRANDES DIMENSIONS, soutenez-les toujours lorsqu’ils dépassent de la es un accesorio ideal para utilizarse en esta aplicación. -
Page 48: Making A Featherboard
39). Resawing RESAWING is known as ripping a piece of wood through its thickness. The Bosch model 4000 table saw is capable of re- sawing wood up to 6" wide by making two passes, one through each thickness edge. FIG. 39 NOTE: To RESAW a piece of wood wider than 3"... -
Page 49: Coupe De Dédoublement
Se conoce como REASERRADO a cortar al hilo un pedazo de madera a table de Bosch modèle 4000 peut dédoubler des planches de bois d’une través de su grosor. La sierra de mesa modelo 4000 de Bosch es capaz de largeur maximum de 6 po en deux passes permettant chacune d’enlever la reaserrar madera de hasta 6"... -
Page 50: Non Thru-Sawing
Non Thru-Sawing Add 8" high flat facing board to the fence, the full length of the fence (Fig. 42). Use featherboards for all “Non Thru-Sawing” operations (when sawblade guard must be removed). Featherboards 1 are used to FIG. 42 “C” CLAMPS keep the work in contact with the fence and table as shown, and SERRE-JOINTS EN C WORK... -
Page 51: Coupe Partielle
Coupe partielle Aserrado no pasante Añada una tabla de refrentado plano de 8" de altura al tope-guía a lo largo de Montez sur le guide de refente, sur toute sa longueur, une planche de 8 po toda la longitud del tope-guía (Fig. 42). de largeur (fig. -
Page 52: Special Cutting Techniques
Dado and Molding cuts should be made in the 90° position only. When using the dadoing and molding head it will be necessary to remove the Blade Guard and Spreader. USE CAUTION. 1. When dadoing or molding across the width of the board, use miter gauge to push the board. -
Page 53: Entretien De La Scie De Table
être effectuées que par un ser realizadas únicamente por técnicos de reparación technicien qualifié. Adressez-vous au Centre de service en usine Bosch ou à capacitados. Póngase en contacto con el Centro de servicio de fábrica más une Station-service Bosch agréée, ou à tout autre service de réparation próximo o con la Estación de servicio autorizada o con otro servicio de... -
Page 54: Lubrication
Lubrication The gear case has been completely lubricated at the factory. FIG. 45 However, after six months to one year, depending upon use, it’s wise to return your tool to the nearest Service Center for the following: • Brushes replaced. •... -
Page 55: Lubrification
Lubrification Lubricación Tous les engrenages ont été lubrifiés en usine. Toutefois, après six mois à La caja de engranajes ha sido completamente lubricada en fábrica. Sin un an, selon la fréquence d’utilisation, il est bon de renvoyer votre outil au embargo, después de seis meses a un año, según el uso, es aconsejable Centre de service le plus proche afin de faire procéder aux opérations llevar la herramienta al Centro de servicio más cercano para hacer lo... -
Page 56: Guide De Diagnostic
2. Remplacer le fusible ou réenclencher le disjoncteur. 2. Replace fuse or reset tripped circuit breaker. 3. Faire remplacer le cordon par un Centre de service ou 3. Have cord replaced by an Authorized Bosch Service une Station service Bosch agréés. Center or Service Station. -
Page 57: Localización Y Reparación De Averías
1. Enchufe la sierra. 2. Cambie el fusible o reajuste el cortacircuito que ha saltado. 3. Haga cambiar el cordón en un Centro de servicio Bosch autorizado o en una Estación de servicio Bosch autorizada. 4. Haga cambiar el interruptor en un Centro de servicio Bosch autorizado o en una Estación de servicio Bosch autorizada. - Page 59 TEMPLATE 1 - FOR ADDING MOUNTING HOLES (FOR ATTACHMENT OF AUXILIARY FACING) GABARIT 1 – POUR AJOUTER DES TROUS DE MONTAGE (POUR FIXER UN GUIDE AUXILIAIRE) PLANTILLA 1: PARA AÑADIR AGUJEROS DE MONTAJE (PARA COLOCAR UN REFRENTADO AUXILIAR) FOLLOW STEPS: SUIVEZ LES ÉTAPES : SIGA LOS PASOS:...
- Page 61 TEMPLATE 2 - FOR ADDING MOUNTING HOLES (FOR ATTACHMENT OF AUXILIARY FACING) GABARIT 2 – POUR AJOUTER DES TROUS DE MONTAGE (POUR FIXER UN GUIDE AUXILIAIRE) PLANTILLA 2: PARA AÑADIR AGUJEROS DE MONTAJE (PARA COLOCAR UN REFRENTADO AUXILIAR) FOLLOW STEPS: SUIVEZ LES ÉTAPES : SIGA LOS PASOS:...
- Page 63 MITER GUAGE TEMPLATE - FOR ADDING MOUNTING HOLES (FOR ATTACHMENT OF AUXILIARY FACING) GABARIT POUR GUIDE DE COUPE ANGULAIRE POUR AJOUTER DES TROUS DE MONTAGE (POUR FIXER UN GUIDE AUXILIAIRE) PLANTILLA PARA EL CALIBRE DE INGLETES: PARA AÑADIR AGUJEROS DE MONTAJE (PARA COLOCAR UN REFRENTADO AUXILIAR) FOLLOW STEPS: SUIVEZ LES ÉTAPES :...
- Page 68 S-B Power Tool Company ("el Vendedor") garantiza, únicamente al comprador original, que todas las herramientas mecánicas portátiles y para tablero de banco BOSCH estarán libres de defectos de material o de fabricación durante un período de un año a partir de la fecha de compra. LA UNICA OBLIGACION DEL VENDEDOR Y EL RECURSO EXCLUSIVO QUE USTED TIENE bajo esta Garantía Limitada y, hasta donde la ley lo permita, bajo cualquier garantía o condición...