Table des Matières
Publicité
Les langues disponibles
Les langues disponibles
Liens rapides
Istruzioni per l'uso
IT
GB
Italiano
English
ES
PT
Espagnol
Português
All manuals and user guides at all-guides.com
FR
Français
NL
Olandese
Indice
Installazione
Collocazione
Collegamento elettrico
Caratteristiche tecniche
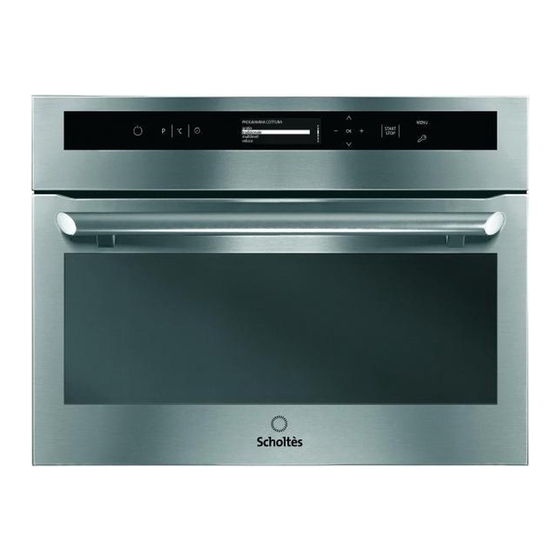
Descrizione dell'apparecchio
Veduta d'insieme
Quadro comandi
Display
Pentole
Accensione e utilizzo
Primo utilizzo
Regolare l'orologio
Regolare il contaminuti
Dispositivo di sicurezza bambini
Accensione del forno
Le ricette
Come programmare la cottura
Consigli di cottura
Tabella di cottura
Precauzioni e consigli
Sicurezza generale
Economie e tutela dell'ambiente
Pulizia e manutenzione
Spegnimento
Pulizia dell'apparecchio
Pulizia della porta
Assistenza
Istruzioni di sicurezza importanti.
Leggere attentamente e conservare per un utilizzo futuro.
FORNO
IT
Publicité
Table des Matières

Manuels Connexes pour SCHOLTES SMW2


Sommaire des Matières pour SCHOLTES SMW2
- Page 1 All manuals and user guides at all-guides.com Istruzioni per l’uso FORNO Indice Installazione Italiano English Français Collocazione Collegamento elettrico Caratteristiche tecniche Espagnol Português Olandese Descrizione dell’apparecchio Veduta d’insieme Quadro comandi Display Pentole Accensione e utilizzo Primo utilizzo Regolare l’orologio Regolare il contaminuti Dispositivo di sicurezza bambini Accensione del forno Le ricette...
-
Page 2: Installazione Dell'apparecchio
All manuals and user guides at all-guides.com Installazione dell’apparecchio fig.1 550 min SCELTA DELLA COLLOCAZIONE Gli schemi qui di seguito riportati definiscono le misure di un mobile nel quale è possibile mettere il forno. Il forno può essere installato indifferentemente sopra un piano di lavoro o sopra un mobile a colonna (aperto* o chiuso) con le dimensioni di incasso qui riportate (vedi schema a fianco). -
Page 3: Collegamento Elettrico
All manuals and user guides at all-guides.com Installazione dell’apparecchio Contatore 20 A Monofase 220-240 V ~ 50 Hz Linea Monofase 220-240 V ~ Salvavita o fusibile 16 A Presa della corrente elettrica 2 poli + + t t e e r r r r a a norma CEI 60083 Cavo d’alimentazione... -
Page 4: Norme Di Sicurezza
All manuals and user guides at all-guides.com Norme di sicurezza ché rischiano di esplodere. Importante: Conserva queste istruzioni insieme all’apparecchio. Si consiglia di non riscaldare le uova nel guscio o le uova sode intere Se l’apparecchio dovesse essere venduto o ceduto ad nel forno a microonde giacché... - Page 5 All manuals and user guides at all-guides.com Norme di sicurezza • CRITERIO FUNZIONALE • TUTELA DELL’AMBIENTE Le microonde utilizzate per la cottura sono onde elettromagnetiche. Il materiale d’imballaggio di questo apparecchio è riciclabile. Esistono comunemente nell’ambiente così come le onde radioelettri- Partecipa al riciclaggio e contribuisci alla tutela dell’ambiente get- che, la luce, o i raggi infrarossi.
-
Page 6: Descrizione Dell'apparecchio
All manuals and user guides at all-guides.com Descrizione dell’apparecchio PROGRAMMA COTT URA gra tin tradizionale multilev vel o ce Quadro di programmazione Barra dei comandi Scorrimento di livello Regolazione T T e e m m p p o o Réglage Temps Selezione Tasto... - Page 7 All manuals and user guides at all-guides.com Accessori • ACCESSORI • Griglia (Fig. 1) La griglia serve a dorare o cuocere alla griglia. La griglia non va in alcun caso utilizzata con altri recipienti metallici nella funzione microonde, grill + microonde o calore ventilato + microonde. Tuttavia, è...
- Page 8 All manuals and user guides at all-guides.com Accensione dell’apparecchio e utilizzo Alla prima accensione, fare funzionare il forno vuoto, con Regolare l’orologio la porta chiusa, per almeno un’ora, regolando la Per regolare l’orologio, premere innanzi tutto il tasto temperatura al massimo. per accendere il forno, premere poi il tasto “MENU”...
- Page 9 All manuals and user guides at all-guides.com Accensione dell’apparecchio e utilizzo Ad ogni accensione, il forno è regolato sul Menu esperto utilizza quotidianamente per ottenere i risultati CREAZIONE migliori. Per ritornare alla visualizzazione principale del menu di Per ogni funzione CREAZIONE, la seguente tabella selezione dei programmi, premere il tasto “P”...
- Page 10 All manuals and user guides at all-guides.com Accensione dell’apparecchio e utilizzo Programma TRADIZIONE I vantaggi sono notevoli: Per questa cottura classica, è preferibile cuocere su un • poiché le temperature di cottura sono molto basse (a solo livello. E’ consigliata per le cotture lente o a priori, inferiori alla temperatura di evaporazione), la bagnomaria.
- Page 11 All manuals and user guides at all-guides.com Accensione dell’apparecchio e utilizzo Mettere nel forno freddo. Se volete mettere nel forno Programmi di cottura AUTOMATICI caldo, dopo una cottura ad alta temperatura, sul display appare il messaggio “Forno troppo caldo” fintanto che la Non aprire la porta del forno per evitare di falsare i tempi temperatura del forno non sarà...
- Page 12 All manuals and user guides at all-guides.com Accensione dell’apparecchio e utilizzo • Riprendere la pasta e impastarla delicatamente; dividerla per ottenere diversi panetti. • Metterli sulla griglia ricoperta con carta da forno (tagliata a seconda delle dimensioni della leccarda) e cospargerli di farina.
- Page 13 All manuals and user guides at all-guides.com Accensione dell’apparecchio e utilizzo Come programmare la cottura Consigli di cottura Programmare la durata Per la cottura nel modo BARBECUE, mettere la leccarda La durata può essere selezionata soltanto per le cotture. sul livello 1 per recuperare il succo ed i grassi di cottura. La programmazione è...
- Page 14 All manuals and user guides at all-guides.com Accensione dell’apparecchio e utilizzo Programmi della cottura con MICROONDE Programma MULTILIVELLO Per ogni funzione MICROONDE, la seguente tabella indica per La funzione cottura con calore ventilato + microonde ogni modalità di cottura la potenza e la durata preselezionata. permette di associare la cottura con le microonde e la La Potenza viene determinata automaticamente, secondo il cottura con calore ventilato, facendo guadagnare un...
- Page 15 All manuals and user guides at all-guides.com Tabella di cottura...
-
Page 16: Guida Alla Cottura
All manuals and user guides at all-guides.com Tabella di cottura GUIDA ALLA COTTURA funzione microonde tipo quantità potenza durata livello osservazioni riscaldamento piatti precotti conservati in frigorifero (lasagne, teglia in vetro coperta poggiata sulla 400 g 800 W 5' - 7' 1 o 2 gratin, pesce, carne, griglia... - Page 17 All manuals and user guides at all-guides.com Tabella di cottura funzione microonde SCONGELAMENTO: Alimento Quantità Durata Consigli Poggiare su un foglio di carta assorbente e girare a metà Pasta sfoglia o pasta frolla 400 g 1 - 3 min cottura Pettini di mare 500 g 5 - 7 min...
- Page 18 All manuals and user guides at all-guides.com Tabella di cottura guida di cottura con la funzione grill Mettere l’alimento sulla griglia posizionata nella teglia del forno (per recuperare il succo di cottura) e mettere il tutto a livello 3. Girare l’ali- mento a metà...
-
Page 19: Pulizia E Manutenzione
All manuals and user guides at all-guides.com Pulizia e Manutenzione SPEGNIMENTO Prima di effettuare qualsiasi operazione di pulizia o manutenzione, staccare l’apparecchio dalla rete elettrica. PULIZIA DELLA SUPERFICIE ESTERNA Per pulire il quadro della programmazione elettronica e la porta del forno, utilizzare un panno morbido con un detersivo per la pulizia dei vetri. - Page 20 All manuals and user guides at all-guides.com Pulizia e Manutenzione INTERVENTI Gli eventuali interventi sull’apparecchio devono essere effettuati da personale qualificato e autorizzato dalla ditta depositaria del marchio. Al momento della chiamata, indicare le referenze complete dell’apparecchio (modello, tipo, numero di serie). Queste informazioni sono riportate sulla targhetta delle caratteristiche (fig.1).
- Page 21 All manuals and user guides at all-guides.com Instructions for use OVEN Contents E E n n g g l l i i s s h h Italiano Français Installing your appliance Choice of location Electrical connection Technical characteristics Español Português Nederlands Description of the appliance Overview...
-
Page 22: Installing Your Appliance
All manuals and user guides at all-guides.com Installing your appliance fig.1 550 min C C H H O O I I C C E E O O F F L L O O C C A A T T I I O O N N The above diagrams determine the dimensions of a cabinet that will be able to hold your oven. - Page 23 All manuals and user guides at all-guides.com Installing your appliance Single-phase 20A Counter 220-240V ~ 50Hz 220-240 V Single-phase line ~ 16A fuse or differential circuit breaker Electrical outlet 2 prong receptacle + + e e a a r r t t h h CEI Standard 60083 Power supply cable...
-
Page 24: Important
All manuals and user guides at all-guides.com Notice to the user The contents of baby bottles and baby food jars must be stir- Important red or rearranged and the temperature must be checked befo- Important safety instructions - Read carefully and retain re consumption, so as to prevent burns. -
Page 25: Protecting The Environment
All manuals and user guides at all-guides.com Notice to the user •HOW YOUR OVEN WORKS WARNING: The accessible parts of the appliance may become The microwaves used for cooking are electromagnetic hot during use. Be careful not to touch the heating elements waves. -
Page 26: Description Of The Appliance
All manuals and user guides at all-guides.com Description of the appliance PROGRAMMA COTT URA gra tin tradizionale multilev vel o ce Programmer Control panel Wire shelf supports Setting the Réglage time Temps OK button START/ Programming Touche Sélection de Flèche START/ arrow STOP... -
Page 27: Accessories
All manuals and user guides at all-guides.com A A c c c c e e s s s s o o r r i i e e s s • ACCESSORIES • Wire shelf (Fig. 1) The wire shelf allows you to brown or grill food. The shelf should not, under any circumstances, be used with other metal cookware when using the microwave, grill + microwave or fan + microwave settings. - Page 28 All manuals and user guides at all-guides.com Getting started & using your oven Before using the oven for the first time, heat it to maximum S S e e t t t t i i n n g g t t h h e e t t i i m m e e temperature, empty, and leave it on for at least one hour, To set the time, first press the button to switch on the...
- Page 29 All manuals and user guides at all-guides.com Getting started & using your oven Each time the oven is switched on, the CREATION menu the best results. appears. For each CREATION function, the following table indicates To return to the main display of the programme selection whether the dish should be placed in a cold or hot oven.
- Page 30 All manuals and user guides at all-guides.com Getting started & using your oven T T R R A A D D I I T T I I O O N N programme Main advantages: • Since the cooking temperatures are very low (in theory, For this traditional cooking programme, it is best to cook lower than evaporation point) the cooking juices are not on one level only.
- Page 31 All manuals and user guides at all-guides.com Getting started & using your oven Cook from cold. If the oven is already hot from prior A A U U T T O O M M A A T T I I C C c c o o o o k k i i n n g g p p r r o o g g r r a a m m m m e e cooking, the display will show the message “Oven too hot”...
- Page 32 All manuals and user guides at all-guides.com Getting started & using your oven • Take the dough and knead it lightly; divide it into several pieces. • Place the bread rolls on the grid covered with baking parchment (cut to size, to fit the drip tray) and sprinkle them with flour.
- Page 33 All manuals and user guides at all-guides.com Getting started & using your oven P P r r o o g g r r a a m m m m i i n n g g a a c c o o o o k k i i n n g g c c y y c c l l e e C C o o o o k k i i n n g g a a d d v v i i c c e e P P r r o o g g r r a a m m m m i i n n g g t t h h e e d d u u r r a a t t i i o o n n For fan-assisted cooking, do not use shelf 1 or 5: they are in...
- Page 34 All manuals and user guides at all-guides.com Switching on and using your oven MICROWAVE cooking programmes MULTI-LEVEL programme For each MICROWAVE function, the following table shows the The circulating heat + micro-wave cooking mode power and pre-selected cooking time for each cooking mode. combines microwave cooking with circulating heat The power is fixed automatically depending on the type of cooking, which saves you considerable time.
-
Page 35: Cooking Chart
All manuals and user guides at all-guides.com Cooking chart... -
Page 36: Cooking Guide
All manuals and user guides at all-guides.com Cooking chart COOKING GUIDE Micro-wave function type quantity power time level notes reheating dishes cooked straight from the refrigerator 400 g 800W 5-7 min 1 or 2 covered glass dish on the wire shelf (lasagne, gratins, fish, meats, rice, etc.) frozen cooked dishes... - Page 37 All manuals and user guides at all-guides.com Cooking chart microwave function DEFROSTING: Food Quantity Time Recommendations Flaky or short crust pastry 400 g 1 - 3 min Place on paper towels; turn midway through programme Scallops 500 g 5 - 7 min Place on a plate;...
- Page 38 All manuals and user guides at all-guides.com Cooking chart Grill function cooking guide Put the food on the shelf, inside the enamel dish (to collect the cooking juices), and fit everything at level 3. Turn the food half way through cooking. F F o o o o d d Q Q u u a a n n t t i i t t y y T T i i m m e e...
-
Page 39: Cleaning And Maintenance
All manuals and user guides at all-guides.com Cleaning and Maintenance SWITCHING OFF THE POWER Before any cleaning or maintenance operation, disconnect the oven’s power supply. CLEANING THE OUTER SURFACES To clean both the electronic programmer window and the oven door, use a window cleaning product applied with a soft cloth. Do not use abrasive creams or scouring pads. - Page 40 All manuals and user guides at all-guides.com Cleaning and Maintenance S S E E R R V V I I C C E E C C A A L L L L S S Any repairs that are made to your appliance must be handled by a qualified professional authorised to work on the brand.
- Page 41 All manuals and user guides at all-guides.com Mode d’emploi FOUR Sommaire Installation Italiano English Français Positionnement Raccordement électrique Caractéristiques techniques Description de l’appareil Espagnol Português Néerlandais Vue d’ensemble Tableau de bord Afficheur Casserolerie Mise en marche et utilisation Première mise en service Régler l’horloge Régler le minuteur Sécurité...
-
Page 42: Installation De Votre Appareil
All manuals and user guides at all-guides.com Installation de votre appareil fig.1 550 min CHOIX DE L’EMPLACEMENT Encastrement Les schémas ci-dessus déterminent les cotes d'un meuble qui Pour ce faire : permettra de recevoir votre four. 1) Effectuez un trou dans la paroi du meuble pour éviter Le four peut indifféremment être installé... -
Page 43: Raccordement Electrique
All manuals and user guides at all-guides.com Installation de votre appareil Compteur 20A Mono 220-240V ~ 50Hz Ligne Mono 220-240 V ~ Disjoncteur différentiel, fusible ou fusible 16A Prise de courant 2 pôles + + t t e e r r r r e e norme CEI 60083 Câble d'alimentation... -
Page 44: Précautions Et Conseils
All manuals and user guides at all-guides.com Précautions et conseils Important Ne chauffez jamais un biberon avec sa tétine (risque d’explo- Instructions de sécurité importantes - Lire avec attention et gar- sion). der pour de futures utilisations. Si l’appareil devait être vendu Utilisez toujours des gants isolants pour retirer les plats du ou cédé... -
Page 45: Protection De L'environnement
All manuals and user guides at all-guides.com Précautions et conseils Protection de l’environnement Les matériaux d'emballage de cet appareil sont recyclables. Participez à leur recyclage et contribuez ainsi à la protection de l'environnement en les déposant dans les conteneurs municipaux prévus à... -
Page 46: Description De L'appareil
All manuals and user guides at all-guides.com Description de l’appareil PROGRAMMA COTT URA gra tin tradizionale multilev vel o ce Programmateur Barette de commandes Gradins fil Réglage Temps Touche Sélection de Flèche START/ la programmation Haut STOP Touche de sélections Touche + Touche Réglage... -
Page 47: Accessoires
All manuals and user guides at all-guides.com Accessoires • • ACCESSOIRES • Grille (fig.1) La grille permet de dorer ou de faire griller. La grille ne doit en aucun cas être utilisée avec d’autres récipients métalliques en posi- tion micro-ondes, gril + micro-ondes, ou cuisson par chaleur tour- nante + micro-ondes. -
Page 48: Mise En Marche Et Utilisation
All manuals and user guides at all-guides.com Mise en marche et utilisation Lors de son premier allumage, faire fonctionner le Régler l'horloge four à vide, porte fermée, pendant au moins une Pour régler l'horloge, appuyer d'abord sur la touche heure en réglant la température à son maximum. pour allumer le four;... - Page 49 All manuals and user guides at all-guides.com Mise en marche et utilisation A chaque allumage, le four est réglé sur le Menu résultats. CRÉATION Pour chaque fonction CRÉATION, le tableau suivant Pour retourner à l'affichage principal du menu de indique si le plat doit être enfourné à froid ou à sélection des programmes, appuyer sur la touche "P"...
- Page 50 All manuals and user guides at all-guides.com Mise en marche et utilisation Programme TRADITION Des avantages à ne pas négliger: • les températures de cuisson étant très basses Pour cette cuisson traditionnelle mieux vaut cuire sur (inférieures en principe à la température un seul niveau.
- Page 51 All manuals and user guides at all-guides.com Mise en marche et utilisation message "Four trop chaud" tant que la température du Programmes de cuisson SUCCES four ne sera pas redescendue à 40°C. Enfourner alors le pain. Pour éviter de fausser les temps de cuisson et de modifier les températures, éviter d'ouvrir la porte du four.
- Page 52 All manuals and user guides at all-guides.com Mise en marche et utilisation • Reprendre la pâte et la pétrir délicatement; la diviser pour obtenir plusieurs pains. • Les disposer sur la grille recouverte de papier sulfurisé (découpé en fonction de la taille de la lèche-frite) et les saupoudrer de farine.
- Page 53 All manuals and user guides at all-guides.com Mise en marche et utilisation le four est en mode attendre, suivre la procédure indiquée plus haut. Comment programmer une cuisson Pour annuler une programmation, éteindre le four Programmer la durée Conseils de cuisson La durée n'est sélectionnable que pour des cuissons CRÉATION.
- Page 54 All manuals and user guides at all-guides.com Mise en marche et utilisation Programmes de cuisson MICRO-ONDES Programme MULTINIVEAUX Pour chaque fonction MICRO-ONDES, le tableau suivant La fonction cuisson par chaleur tournante + micro-ondes vous indique pour chaque mode de cuisson la puissance et la permet d’associer la cuisson par micro-ondes avec la cuisson duré...
- Page 55 All manuals and user guides at all-guides.com Tableau de cuisson...
- Page 56 All manuals and user guides at all-guides.com Tableau de cuisson G G U U I I D D E E D D E E C C U U I I S S S S O O N N f f o o n n c c t t i i o o n n m m i i c c r r o o - - o o n n d d e e s s type quantité...
- Page 57 All manuals and user guides at all-guides.com Tableau de cuisson f f o o n n c c t t i i o o n n m m i i c c r r o o - - o o n n d d e e s s D D E E C C O O N N G G E E L L A A T T I I O O N N : : Aliment Quantité...
- Page 58 All manuals and user guides at all-guides.com Tableau de cuisson guide de cuisson en position cuisson par chaleur tournante Aliments Température Niveau d’insertion Durée Viandes Rôti de porc (1 kg) 160°C Sur la grille au 2e niveau 90 min Rôti de veau (1 kg) 180°C Sur la grille au 2e niveau 70 - 75 min...
-
Page 59: Nettoyage Et Entretien
All manuals and user guides at all-guides.com Nettoyage et Entretien MISE HORS TENSION Avant toute opération de nettoyage ou d’entretien, couper l’ali- mentation électrique de l’appareil. NETTOYAGE DE LA SURFACE EXTERIEURE Pour nettoyer la fenêtre du programmateur électronique, ainsi que la porte du four, utilisez un chiffon doux, imbibé de produit à... - Page 60 All manuals and user guides at all-guides.com Nettoyage et Entretien INTERVENTIONS Les éventuelles interventions sur votre appareil doivent être effectuées par un professionnel qualifié dépositaire de la marque. Lors de votre appel, mentionnez la réfé- rence complète de votre appareil (modèle, type, numéro de série).
- Page 61 All manuals and user guides at all-guides.com Instrucciones de uso HORNO Índice Instalación Italiano English Français Posicionamiento Conexión eléctrica Características técnicas E E s s p p a a ñ ñ o o l l Português Nederlands Descripción del aparato Vista general Panel de control Pantalla...
-
Page 62: Instalación Del Aparato
All manuals and user guides at all-guides.com Instalación del aparato fig.1 550 min E E L L E E C C C C I I Ó Ó N N D D E E L L E E M M P P L L A A Z Z A A M M I I E E N N T T O O Los esquemas anteriores determinan las cotas de un mueble que permitirá... - Page 63 All manuals and user guides at all-guides.com Instalación del aparato Contador 20 A Monofásico 220-240V ~ 50Hz Línea Monofásica 220-240 V ~ Disyuntor diferencial o fusible 16 A Toma de corriente 2 polos + + t t i i e e r r r r a a norma CEI 60083 Cable de alimentación...
-
Page 64: Seguridad General
All manuals and user guides at all-guides.com Seguridad general Hay que agitar o remover el contenido de los biberones y de Importante los potitos de alimentos para bebés, así como comprobar su Instrucciones de seguridad importantes - Léalas con temperatura, antes de dárselos al niño para evitar quemadu- atención y consérvelas para consultarlas en el futuro. -
Page 65: Principio De Funcionamiento
All manuals and user guides at all-guides.com Seguridad general •PRINCIPIO DE FUNCIONAMIENTO ADVERTENCIA: las partes accesibles del aparato se pueden Las microondas que se utilizan para la cocción son ondas calentar al utilizarlo. Tenga cuidado de no tocar los elementos electromagnéticas. -
Page 66: Descripción Del Aparato
All manuals and user guides at all-guides.com Descripción del aparato PROGRAMMA COTT URA gra tin tradizionale multilev vel o ce Programador Barra de mandos Niveles de altura varilla Ajuste del Réglage tiempo Temps Botón Flecha START/ Sélection de Touche Flèche Selección de la START/ Arriba... - Page 67 All manuals and user guides at all-guides.com Accesorios • ACCESORIOS • Parrilla (Fig. 1) La parrilla permite dorar o asar. La parrilla no debe ser utilizada en ningún caso con otros recipientes metálicos en posición de microondas, grill + microondas, o cocción por calor giratorio + microondas.
-
Page 68: Puesta En Marcha Y Utilización
All manuals and user guides at all-guides.com Puesta en marcha y utilización La primera vez que se encienda, se debe hacer funcionar el R R e e g g u u l l a a r r e e l l r r e e l l o o j j horno vacío, con la puerta cerrada, durante al menos una Para poner en hora el reloj, pulsar primero el mando hora con la temperatura regulada al máximo. - Page 69 All manuals and user guides at all-guides.com Puesta en marcha y utilización Al encenderlo, el horno estará siempre regulado en el Menú La elección del modo de cocción, la temperatura y la altura CREACIÓN. de colocación dentro del horno son los que él utiliza diariamente para conseguir los mejores resultados.
- Page 70 All manuals and user guides at all-guides.com Puesta en marcha y utilización Programa T T R R A A D D I I C C I I Ó Ó N N Ventajas importantes: • como las temperaturas de cocción son muy bajas (en Para realizar esta cocción tradicional es mejor cocinar en principio, inferiores a la temperatura de evaporación), se un sólo nivel.
- Page 71 All manuals and user guides at all-guides.com Puesta en marcha y utilización Introducir con el horno frío. Si se desea introducir con el P P r r o o g g r r a a m m a a s s d d e e c c o o c c c c i i ó ó n n A A U U T T O O M M Á Á T T I I C C O O S S horno caliente, tras una cocción a alta temperatura, la pantalla mostrará...
- Page 72 All manuals and user guides at all-guides.com Puesta en marcha y utilización • Recuperar la masa y amasarla delicadamente; dividirla para conseguir varios panes. • Colocarlos sobre la parrilla cubierta con papel sulfurizado (cortado según el tamaño de la bandeja profunda) y espolvorearlos con harina.
- Page 73 All manuals and user guides at all-guides.com Puesta en marcha y utilización C C ó ó m m o o p p r r o o g g r r a a m m a a r r u u n n a a c c o o c c c c i i ó ó n n Para anular una programación, apagar el horno C C o o n n s s e e j j o o s s d d e e c c o o c c c c i i ó...
- Page 74 All manuals and user guides at all-guides.com Puesta en marcha y utilización Programas de cocción por MICROONDAS Programa MULTINIVELES El cuadro siguiente indica, para cada función MICROONDAS, La función por calor giratorio + microondas le permite la potencia y la duración seleccionadas en cada modo de combinar la cocción por microondas con la cocción cocción.
-
Page 75: Modos De Cocción
All manuals and user guides at all-guides.com Modos de cocción MANUAL DE COCCIÓN Función microondas tipo cantidad potencia tiempo altura observaciones recalentado platos preparados a T°C del frigorífico (lasañas, bandeja de cristal tapada colocada 400g 800w 5' a 7' 1 ó 2 gratinados, pescados, sobre la parrilla carnes, arroz…) - Page 76 All manuals and user guides at all-guides.com Modos de cocción Función microondas DESCONGELACIÓN: Alimento Cantidad Duración Recomendaciones Colóquelo sobre papel absorbente, déle la vuelta cuando Pasta de hojaldre o quebrada 400 g 1 - 3 min el programa vaya por la mitad. Colóquelas en un plato, muévalas cuando lleve medio Vieiras 500 g...
- Page 77 All manuals and user guides at all-guides.com Modos de cocción guía de cocción en posición grill Coloque el alimento en la parrilla colocada en el plato esmaltado (para recuperar el jugo de la coc- ción), e introduzca el conjunto en el nivel 3. Gire el alimento en la mitad de la cocción. A A l l i i m m e e n n t t o o C C a a n n t t i i d d a a d d D D u u r r a a c c i i ó...
-
Page 78: Limpieza Y Mantenimiento
All manuals and user guides at all-guides.com Limpieza y mantenimiento DEJAR EL HORNO SIN TENSIÓN Antes de efectuar una operación de limpieza o de mantenimiento, cortar la alimentación eléctrica del aparato. LIMPIEZA DE LA SUPERFICIE EXTERIOR Para limpiar la ventana del programador electrónico y la puerta del horno, utilice un trapo suave empapado con un producto limpiacristales. - Page 79 All manuals and user guides at all-guides.com Limpieza y mantenimiento I I N N T T E E R R V V E E N N C C I I O O N N E E S S Las eventuales intervenciones sobre su aparato deben ser efectuadas por un profesional cualificado depositario de la marca.
-
Page 80: Modo De Utilização
All manuals and user guides at all-guides.com Modo de utilização FORNO Índice Instalação Italiano English Français Posicionamento Ligação eléctrica Características técnicas Descrição do aparelho Español P P o o r r t t u u g g u u ê ê s s Nederlands Vista geral Painel de comando... -
Page 81: Instalação Do Seu Aparelho
All manuals and user guides at all-guides.com Instalação do seu aparelho Imagem 1 550 min E E S S C C O O L L H H A A D D O O L L O O C C A A L L Os esquemas acima determinam as cotas de um móvel que permitirá... - Page 82 All manuals and user guides at all-guides.com Instalação do seu aparelho Contador 20A Mono 220-240V ~ 50Hz Linha Mono 220-240 V ~ Disjuntor diferencial ou fusível 16A Tomada eléctrica 2 pólos + + t t e e r r r r a a norma CEI 60083 Cabo de alimentação...
-
Page 83: Precauções E Conselhos
All manuals and user guides at all-guides.com Precauções e conselhos O conteúdo dos biberões e boiões de alimentos para bebés Importante deve ser mexido ou agitado e a temperatura deve ser Instruções de segurança importantes - Leia com atenção verificada antes de consumir, para evitar queimaduras. e guarde para futuras utilizações. -
Page 84: Princípio De Funcionamento
All manuals and user guides at all-guides.com Precauções e conselhos •PRINCÍPIO DE FUNCIONAMENTO CUIDADO: As peças acessíveis do aparelho podem ficar quentes As microondas utilizadas para a cozedura são ondas durante a utilização. Não toque nos elementos de aquecimento electromagnéticas. Elas existem correntemente no nosso que se encontram no interior do forno. -
Page 85: Descrição Do Aparelho
All manuals and user guides at all-guides.com Descrição do aparelho PROGRAMMA COTT URA gra tin tradizionale multilev vel o ce Programador Barra dos comandos Encaixes em fio Regulação do Réglage t t e e m m p p o o Temps Seta para c c i i m m a a... - Page 86 All manuals and user guides at all-guides.com A A c c e e s s s s ó ó r r i i o o s s • ACESSÓRIOS • Grelha (Fig. 1) A grelha permite alourar ou grelhar. A grelha não deve, em caso algum, ser utilizada com outros recipientes metálicos na posição microondas, grelhador + microondas ou cozedura por calor ventilado + microondas.
- Page 87 All manuals and user guides at all-guides.com Ligação e utilização Durante a primeira ligação, utilize o forno vazio, porta A A c c e e r r t t a a r r o o r r e e l l ó ó g g i i o o fechada, durante, pelo menos, uma hora, regulando a Para acertar o relógio, prima o botão para ligar o forno.
- Page 88 All manuals and user guides at all-guides.com L L i i g g a a ç ç ã ã o o e e u u t t i i l l i i z z a a ç ç ã ã o o Cada vez que o liga, o forno está...
- Page 89 All manuals and user guides at all-guides.com Ligação e utilização Programa T T R R A A D D I I Ç Ç Ã Ã O O As vantagens a não negligenciar: • As temperaturas de cozedura, sendo muito baixas Para esta cozedura tradicional, é...
- Page 90 All manuals and user guides at all-guides.com Ligação e utilização Enforne a frio. Se desejar enfornar a quente, após uma P P r r o o g g r r a a m m a a s s d d e e c c o o z z e e d d u u r r a a A A U U T T O O M M Á Á T T I I C C O O S S cozedura a alta temperatura, o visor apresentará...
- Page 91 All manuals and user guides at all-guides.com Ligação e utilização • Volte a pegar na massa e amasse-a delicadamente. Divida-a para obter vários pães. • Disponha-os na grelha coberta com papel vegetal (recortado de acordo com o tamanho da pingadeira) e polvilhar com farinha.
- Page 92 All manuals and user guides at all-guides.com Ligação e utilização C C o o m m o o p p r r o o g g r r a a m m a a r r u u m m a a c c o o z z e e d d u u r r a a C C o o n n s s e e l l h h o o s s d d e e c c o o z z e e d d u u r r a a P P r r o o g g r r a a m m a a r r a a d d u u r r a a ç...
-
Page 93: Colocação Em Funcionamento E Utilização
All manuals and user guides at all-guides.com Colocação em funcionamento e utilização Programas de cozedura MICROONDAS Programa MULTI-NÍVEIS Para cada função MICROONDAS, a tabela seguinte indica, A função cozedura por calor ventilado + microondas para cada modo de cozedura, a potência e o tempo pré- permite-lhe associar a cozedura por microondas com a seleccionado. -
Page 94: Tabela De Cozedura
All manuals and user guides at all-guides.com Tabela de cozedura GUIA DE COZEDURA função microondas tipo quantidade potência tempo encaixe observações aquecimento pratos cozinhados à T°C frigorífico (lasanhas, tabuleiro de vidro coberto pousado 400g 800w 5' a 7' 1 ou 2 gratinados, peixes, em cima da grelha carnes, arroz…) - Page 95 All manuals and user guides at all-guides.com Tabela de cozedura função microondas DESCONGELAÇÃO: Alimento Quantidade Tempo Recomendações Coloque em cima de papel de cozinha; vire a meio da Massa folhada ou quebrada 400 g 1 - 3 min cozedura Coloque em cima de um prato ; misture a meio da Vieiras 500 g 5 -7 min...
- Page 96 All manuals and user guides at all-guides.com Tabela de cozedura guia de cozedura na posição grelhador Coloque o alimento na grelha posicionada no tabuleiro esmaltado (para recuperar o molho de cozedura) e insira o conjunto no nível 3. Vire o alimento a meio da cozedura. A A l l i i m m e e n n t t o o s s Q Q u u a a n n t t i i d d a a d d e e D D u u r r a a ç...
-
Page 97: Limpeza E Manutenção
All manuals and user guides at all-guides.com Limpeza e Manutenção COLOCAÇÃO FORA DE TENSÃO Antes de qualquer operação de limpeza ou manutenção, desligue a alimentação eléctrica do aparelho. LIMPEZA DA SUPERFÍCIE EXTERIOR Para limpar a janela do programador electrónico, bem como a porta do forno, utilize um pano macio, embebido de produto para a limpeza de vidros. - Page 98 All manuals and user guides at all-guides.com Limpeza e manutenção I I N N T T E E R R V V E E N N Ç Ç Õ Õ E E S S As eventuais intervenções no seu aparelho devem ser efectuadas por um profissional qualificado que trabalhe para a marca.
-
Page 99: Installatie
All manuals and user guides at all-guides.com Handleiding OVEN Inhoud N N L L I I T T G G B B F F R R Installatie Italiano English Français Plaatsing Elektrische aansluiting E E S S P P T T N N L L Technische kenmerken Español... -
Page 100: Installatie Van Uw Apparaat
All manuals and user guides at all-guides.com Installatie van uw apparaat N N L L fig.1 550 min K K E E U U Z Z E E V V A A N N D D E E P P L L A A A A T T S S De schema’s hierboven geven de afmetingen aan van een meubel waarin uw oven ingebouwd kan worden. - Page 101 All manuals and user guides at all-guides.com Installatie van uw apparaat N N L L 20A Monometer 220-240V ~ 50Hz Monokabel 220-240 V ~ Aardlekschakelaar of zekering 16A Stopcontact 2 polen + + a a a a r r d d i i n n g g norm CEI 60083 Voedingskabel lengte ongeveer...
-
Page 102: Voorzorgsmaatregelen En Advies
All manuals and user guides at all-guides.com Voorzorgsmaatregelen en advies De inhoud van zuigflessen en potjesvoeding voor de baby Belangrijk moet eerst worden geschud of geroerd en de temperatuur Belangrijke veiligheidsinstructies - Lees ze aandachtig moet, om verbranding te voorkomen, voor consumptie worden door en bewaar ze voor toekomstig gebruik. - Page 103 All manuals and user guides at all-guides.com Voorzorgsmaatregelen en advies •WERKINGSPRINCIPE WAARSCHUWING : De toegankelijke delen van het apparaat De microgolven die voor het koken worden gebruikt, zijn elek- kunnen tijdens het gebruik warm worden. Raak de verwarmings- tromagnetische golven. Deze zijn aanwezig in ons dagelijks elementen in de oven nooit aan.
-
Page 104: Beschrijving Van Het Apparaat
All manuals and user guides at all-guides.com Beschrijving van het apparaat N N L L PROGRAMMA COTT URA gra tin tradizionale multilev vel o ce Programmaschakelaar Bedieningstoetsen Zijroosters Instellen Réglage t t i i j j d d Temps P P r r o o g g r r a a m m m m a a k k e e u u z z e e Toets Pijltje Touche... - Page 105 All manuals and user guides at all-guides.com Oventoebehoren N N L L • OVENTOEBEHOREN • Rooster (fig. 1) Met behulp van het rooster kunt u uw gerechten grillen of een goudbruin laagje geven. Gebruik het rooster nooit samen met metalen schalen of bakken in de standen magnetron, gril + magnetron of hete lucht + magnetron.
- Page 106 All manuals and user guides at all-guides.com Inschakelen en gebruik Bij het eerste maal inschakelen, laat u de oven leeg D D e e k k l l o o k k i i n n s s t t e e l l l l e e n n N N L L functioneren, met de deur dicht, gedurende minstens een Om de klok in te stellen drukt u eerst op de toets...
- Page 107 All manuals and user guides at all-guides.com Inschakelen en gebruik Elke keer dat u de oven inschakelt is deze ingesteld op Deze keuze van de bakmethode, de temperaturen en de N N L L Menu CREATIE niveaus van het product in de oven worden door hem dagelijks gebruikt om de beste resultaten te behalen.
- Page 108 All manuals and user guides at all-guides.com Inschakelen en gebruik Programma T T R R A A D D I I T T I I E E Een paar interessante voordelen: N N L L Voor deze traditionele methode wordt bij voorkeur slechts •...
- Page 109 All manuals and user guides at all-guides.com Inschakelen en gebruik In een koude oven zetten. Als u het deeg in de warme oven N N L L A A U U T T O O M M A A T T I I S S C C H H E E b b a a k k p p r r o o g g r r a a m m m m a a ’ ’ s s . . wilt zetten, na bakken op hoge temperatuur, geeft de display “Oven te warm”...
- Page 110 All manuals and user guides at all-guides.com Inschakelen en gebruik Il • Neem het deeg weer op en kneed het zachtjes; verdeel N N L L het in meerdere broden. • Zet de broden op het met bakpapier bedekte rooster (uitknippen volgens de afmetingen van het rooster) en bestrooi ze met bloem.
- Page 111 All manuals and user guides at all-guides.com Inschakelen en gebruik H H o o e e p p r r o o g g r r a a m m m m e e e e r r i i k k e e e e n n b b a a k k c c y y c c l l u u s s B B a a k k a a d d v v i i e e s s N N L L D D e e b b a a k k t t i i j j d d p p r r o o g g r r a a m m m m e e r r e e n n...
- Page 112 All manuals and user guides at all-guides.com Inschakelen en gebruik Kookprogramma voor de MAGNETRON Programma MULTINIVEAUS N N L L Voor elke functie van de MAGNETRON geeft de volgende tabel Met de functie hete lucht + magnetron kunt u de voor iedere bereidingswijze het vermogen en de ingestelde magnetronbereiding combineren met bereiding in de bereidingsduur weer.
-
Page 113: Kookaanwijzingen
All manuals and user guides at all-guides.com Kooktabel KOOKAANWIJZINGEN N N L L magnetronfunctie type hoeveelheid vermogen tijd niveau opmerkingen opwarmen kant-en-klare gerechten uit de koelkast (lasagna, 400g 800W 5 tot 7 min. 1 of 2 afgedekte glazen schaal op rooster gegratineerde schotels, vis, vlees, rijst …) kant en klare... - Page 114 All manuals and user guides at all-guides.com Kooktabel magnetronfunctie N N L L ONTDOOIEN: Voedingsmiddel Hoeveelheid Tijd Aanbevelingen Op keukenpapier leggen; halverwege de bakcyclus Bladerdeeg of kruimeldeeg 400 g 1 - 3 min omdraaien Op een bord leggen; halverwege de bakcyclus Jakobsschelpen 500 g 5 - 7 min...
- Page 115 All manuals and user guides at all-guides.com Kooktabel handleiding voor bakken met grill functie N N L L Leg het voedingsmiddel op het rooster dat in de geëmailleerde schaal ligt (om het kookvocht op te vangen) en plaats het op niveau 3.
-
Page 116: Reiniging En Onderhoud
All manuals and user guides at all-guides.com Reiniging en onderhoud UITSCHAKELEN N N L L Voordat u het apparaat reinigt of onderhoudt, moet u de elektrische voeding van het apparaat uitschakelen. REINIGING VAN DE BUITENKANT Om het venstertje van de elektronische programmaschakelaar en de ovendeur te reinigen, gebruikt u een zachte doek bevochtigd met wat ruitenreiniger. - Page 117 All manuals and user guides at all-guides.com Reiniging en onderhoud I I N N G G R R E E P P E E N N Eventuele ingrepen op het apparaat dienen door een gekwalificeerde vertegenwoordiger van het merk te worden uitgevoerd.