NEC LCD3000 Manuel Utilisateur
Masquer les pouces Voir aussi pour LCD3000:
Table des Matières

Publicité

Les langues disponibles
  • FR

Les langues disponibles

Liens rapides

All manuals and user guides at all-guides.com
LCD3000
30" LCD Colour Monitor
User's Manual
Bedienerhandbuch
Manual del usuario
Manuel Utilisateur
Manuale utente
00Cover_all.p65
1
15/10/02, 12:07 pm

Publicité

Table des Matières
loading

Sommaire des Matières pour NEC LCD3000

  • Page 1 All manuals and user guides at all-guides.com LCD3000 30" LCD Colour Monitor User’s Manual Bedienerhandbuch Manual del usuario Manuel Utilisateur Manuale utente 00Cover_all.p65 15/10/02, 12:07 pm...
  • Page 2 C-UL: Bears the C-UL Mark and is in compliance with Canadian Safety Regulations according to CAN/CSA C22.2 No. 950. FCC Information 1. Use the attached specified cables with the LCD3000 (L30HV201) colour monitor so as not to interfere with radio and television reception.
  • Page 3: Declaration Of The Manufacturer

    We hereby declare that the equipment specified above conforms to the technical standards as specified in the FCC Rules. Windows is a registered trademark of Microsoft Corporation. NEC is a registered trademark of NEC Corporation. E NERGY is a U.S. registered trademark. All other brands and product names are trademarks or registered trademarks of their respective owners.
  • Page 4: Safety Precautions, Maintenance & Recommended Use

    • If monitor or glass is broken, do not come in contact with the • When operating the LCD3000 LCD monitor with its liquid crystal and handle with care. AC 220-240V power supply, use a power supply cord that •...
  • Page 5 AUDIO ..............................English-25 PICTURE IN PICTURE ........................English-25 CONFIGURATION ..........................English-25 Controlling the LCD monitor via RS-232C Remote Control ................English-27 Features ................................ English-29 TroubleShooting ............................English-30 Specifications for LCD3000 ........................... English-31 Pin Assignment ............................. English-32 00Cover_all.p65 15/10/02, 12:07 pm...
  • Page 6 OSM-Steuerungen (On-Screen-Manager) – AV-Eingangssignale ............... Deutsch-24 BILD ..............................Deutsch-24 AUDIO ..............................Deutsch-25 BIB ..............................Deutsch-25 KONFIGURATION ..........................Deutsch-25 Steuern des LCD-Monitors mittels RS-232C-Steuerung ................Deutsch-27 Merkmale und Funktionen ........................... Deutsch-29 Fehlerbehebung ............................Deutsch-30 Technische Daten für den LCD3000 ......................Deutsch-31 Pinbelegung ..............................Deutsch-32 00Cover_all.p65 15/10/02, 12:07 pm...
  • Page 7 IMAGEN EN IMAGEN ........................Español-25 CONFIGURACIÓN ..........................Español-25 Control del monitor LCD mediante control remoto RS-232C ............... Español-27 Características ............................. Español-29 Solución de problemas ..........................Español-30 Especificaciones para LCD3000 ........................Español-31 Asignación de clavijas ..........................Español-32 00Cover_all.p65 15/10/02, 12:07 pm...
  • Page 8 AUDIO ............................... Français-25 IMAGE DANS IMAGE ........................Français-25 CONFIGURATION ..........................Français-25 Contrôle à distance du moniteur via une interface RS-232C ..............Français-27 Fonctionnalités ............................Français-29 Résolution des problèmes .......................... Français-30 Spécifications du LCD3000 ......................... Français-31 Brochage ..............................Français-32 00Cover_all.p65 15/10/02, 12:07 pm...
  • Page 9 PICTURE IN PICTURE ........................Italiano-25 CONFIGURAZIONE ........................... Italiano-25 Controllo del monitor LCD attraverso il controllo remoto RS-232C ............... Italiano-27 Caratteristiche ............................... Italiano-29 Risoluzione dei problemi ..........................Italiano-30 Specifiche tecniche per LCD3000 ......................... Italiano-31 Assegnazione spinotti ........................... Italiano-32 00Cover_all.p65 15/10/02, 12:07 pm...
  • Page 10 All manuals and user guides at all-guides.com 00Cover_all.p65 15/10/02, 12:07 pm...
  • Page 11 All manuals and user guides at all-guides.com English Deutsch Español Français Italiano 01b_XChapterOpener 15/10/02, 12:07 pm...
  • Page 12 All manuals and user guides at all-guides.com 01b_XChapterOpener 15/10/02, 12:07 pm...
  • Page 13 All manuals and user guides at all-guides.com Contents Your new LCD3000 LCD monitor box* should contain the following: • LCD3000 LCD monitor with stand • Power Cord (3 m) • PC - Video Signal Cable SC-B113 (4 m) • User’s Manual •...
  • Page 14: Parts Name And Functions

    All manuals and user guides at all-guides.com Parts Name and Functions Control Panel INPUT 10 10 buttons EXIT INPUT MUTE POWER button ( ) DOWN ( ) button Switches the power on/off. See also page 16. Activates the OSM menu when the OSM menu is turned-off. Acts as button to move the highlighted area down to select the adjustment with OSM menu.
  • Page 15: Terminal Panel

    All manuals and user guides at all-guides.com Terminal Panel AUDIO VIDEO RGB OUT VIDEO VIDEO O O IN IN IN 3 IN 2 R/Cr/Pr RGB 2 (D-SUB) RGB 1 (DVI-D) AUDIO 1 S-VIDEO IN PC IN AC IN connector AUDIO IN 1, 2, 3 Connects with the supplied power cord.
  • Page 16: Wireless Remote Control

    All manuals and user guides at all-guides.com Wireless Remote Control PICTURE MODE button Selects from picture mode, [HIBRIGHT], [STANDARD], [sRGB], [CINEMA]. HIBRIGHT: for moving images STANDARD: for images sRGB: for text based images CINEMA: for movies. See page 17. MUTE button To switch the mute function on/off.
  • Page 17: Operating Range For The Remote Control

    All manuals and user guides at all-guides.com Operating Range for the Remote Control Point the top of the remote control toward the LCD monitor’s Handling the remote control remote sensor during button operation. Use the remote control within a distance of about 7 m from Do not subject to strong shock.
  • Page 18: Setup Procedure

    All manuals and user guides at all-guides.com Setup Procedure 1. Determine the installation location 3. Connect external equipment (See pages 9~15) CAUTION: DO NOT ATTEMPT TO INSTALL THE LCD MONITOR BY YOURSELF • To protect the connected equipment, turn off the main power before making connections.
  • Page 19: How To Mount And Attach Options To The Lcd Monitor

    All manuals and user guides at all-guides.com How to Mount and Attach Options to the LCD Monitor You can attach mounting accessories to the LCD monitor in Ventilation Requirements for enclosure one of the following two ways: mounting To allow heat to disperse, leave space between surrounding In the upright position objects as shown in the diagram to the right.
  • Page 20: How To Remove The Stand

    All manuals and user guides at all-guides.com How to install stand 1. Please turn monitor off. 2. Insert claws of monitor to stand holes until clicks. 3. Fasten 2 screws of both side. Upper M5 x 55 Lower M5 x 45 Torque 280 ~ 300N cm Screw M5 x 45 Screw M5 x 55...
  • Page 21: Wiring Diagram

    All manuals and user guides at all-guides.com Connections Before making connections: First turn off the power of all equipment to be attached. Refer to the user manual in regard to this equipment. Wiring Diagram Personal computer LCD monitor Audio signal of input device DVD player Equipment with...
  • Page 22: Connecting A Personal Computer

    All manuals and user guides at all-guides.com Connecting a Personal Computer Connecting your computer to your LCD monitor will enable you to display your computer’s screen image. Some video cards may not be able to create a correct image resolution. Connect the LCD Monitor to a Personal Computer •...
  • Page 23: Connect The Lcd Monitor To Macintosh

    All manuals and user guides at all-guides.com ® Connecting to a Macintosh Computer Connecting your Macintosh ® computer to your LCD monitor will enable you to display your computer’s screen image. Some video cards or drivers may not display images correctly. Connect the LCD Monitor to Macintosh ®...
  • Page 24: Connect The Lcd Monitor To A Computer With A Digital Output

    All manuals and user guides at all-guides.com Connections with Digital Interface Equipment Connections can be made with equipment that is equipped with a digital interface compliant with the DVI (Digital Visual Interface) standard. Connect the LCD Monitor to a Computer with a Digital Output •...
  • Page 25: Connecting A Vcr

    All manuals and user guides at all-guides.com Connecting a VCR Connecting your VCR or laser disc player to your LCD monitor will enable you to display your VCR’s or laser disc player’s video. Refer to your VCR or laser disc player owner’s manual for more information. Connect the LCD Monitor to a VCR or Laser Disc Player •...
  • Page 26: Connecting A Dvd Player With Component Out

    All manuals and user guides at all-guides.com Connecting a DVD Player with component out Connecting your DVD player to your LCD monitor will enable you to display DVD video. Refer to your DVD player user’s manual for more information. Connect the LCD Monitor to a DVD Player •...
  • Page 27: Connect The Lcd Monitor To A Stereo Amplifier

    All manuals and user guides at all-guides.com Connecting a Stereo Amplifier You can connect your stereo amplifier to your LCD monitor. Refer to your amplifier user’s manual for more information. Connect the LCD Monitor to a Stereo Amplifier • Turn on the LCD monitor and the amplifier only after all connections have been made. •...
  • Page 28: Basic Operation

    All manuals and user guides at all-guides.com Basic Operation Power ON and OFF Modes The LCD monitor power indicator will turn green while powered on, or red when in off mode. The monitor can be powered on or off using the following three options: 1.
  • Page 29 All manuals and user guides at all-guides.com Power Indicator Information OSM RGB1, 2, 3 Status Power ON Green Power OFF RGB2 Video Input mode 1024 x 768 Input signal Information Power Standby Red and Green 48kHz 60Hz AUDIO : 1 Audio input mode SCREEN SIZE : FULL Picture Size mode...
  • Page 30 All manuals and user guides at all-guides.com OSM (On-Screen-Manager) Controls - Computer Input Press UP or DOWN button Press SET button to Press UP or DOWN, and PLUS or Press SET button to to select sub-menu decide MINUS button to select function, or decide control which you like Remote Control...
  • Page 31 All manuals and user guides at all-guides.com To adjust the colour temperature of entire screen. COLOR TEMPERATURE COLOR BRIGHTNESS Adjusting power colour temperature make the screen CONTRAST SHARPNESS TEMPERATURE reddish and adjusting higher colour temperature make BLACK LEVEL COLOR CONTROL COLOR TEMPERATURE the screen bluish.
  • Page 32 All manuals and user guides at all-guides.com Main-Menu PICTURE SCREEN AUDIO AUDIO PICTURE IN PICTURE CONFIGURATION 1 CONFIGURATION 2 Sub-Menu :SEL EXIT:PRE SET:NEXT MENU:END To accentuate or reduce the high frequency sound. TREBLE TREBLE BASS AUDIO RESET TREBLE Press + button to increase TREBLE sound. Press - button to decrease TREBLE sound.
  • Page 33 All manuals and user guides at all-guides.com Selecting the power management ON/OFF mode. AUTO SETUP AUTO ADJUST POWER SAVE AUTO BRIGHTNESS POWER SAVE LANGUAGE POWER SAVE OSM TIME OFF TIMER SCREEN SAVER FACTORY PRESET :SEL EXIT:PRE SET:NEXT MENU:END :SEL EXIT:PRE MENU:END OSM control menus are available in seven languages.
  • Page 34 All manuals and user guides at all-guides.com OSM (On-Screen-Manager) Controls - DVD&HD Input Main-Menu PICTURE AUDIO PICTURE IN PICTURE PICTURE CONFIGURATION Sub-Menu :SEL EXIT:PRE SET:NEXT MENU:END Adjusts the overall image and background screen BRIGHTNESS BRIGHTNESS brightness. CONTRAST SHARPNESS BRIGHTNESS COLOR BLACK LEVEL PICTURE RESET Press + button to increase brightness.
  • Page 35 All manuals and user guides at all-guides.com Main-Menu PICTURE PICTURE IN PICTURE AUDIO PICTURE IN PICTURE CONFIGURATION Sub-Menu :SEL EXIT:PRE SET:NEXT MENU:END Selecting the size of picture inserted at the “Picture-in PIP SIZE Picture” (PIP) mode. PIP SIZE LARGE PIP SIZE PIP AUDIO “Large”, “Middle”, and “Small”...
  • Page 36 All manuals and user guides at all-guides.com OSM (On-Screen-Manager) Controls - AV Input Main-Menu PICTURE AUDIO PICTURE IN PICTURE PICTURE CONFIGURATION Sub-Menu :SEL EXIT:PRE SET:NEXT MENU:END Adjusts the overall image and background screen BRIGHTNESS BRIGHTNESS brightness. CONTRAST SHARPNESS BRIGHTNESS TINT COLOR BLACK LEVEL NOISE REDUCTION...
  • Page 37 All manuals and user guides at all-guides.com Main-Menu PICTURE AUDIO PICTURE IN PICTURE AUDIO CONFIGURATION Sub-Menu :SEL EXIT:PRE SET:NEXT MENU:END To accentuate or quiet the high frequency sound. TREBLE TREBLE BASS AUDIO RESET TREBLE Press + button to increase TREBLE sound. Press - button to decrease TREBLE sound.
  • Page 38: Off Timer

    All manuals and user guides at all-guides.com To select OFF TIMER mode ON/OFF. OFF TIMER LANGUAGE OSM TIME OFF TIMER OFF TIMER In the OFF TIMER menu, you can select monitor auto SCREEN SAVER COLOR SYSTEM turn off time after monitor has been turned on. CONFIGURATION RESET A time between 1 and 24 hours, is available.
  • Page 39 All manuals and user guides at all-guides.com Controlling the LCD monitor via RS-232C Remote Control This LCD monitor can be remote controlled by connecting a computer with RS-232C interface. The following functions can be controlled by a computer: • Turn the monitor ON or OFF. •...
  • Page 40 All manuals and user guides at all-guides.com 3) Control sequence (1) The command from a computer to the LCD monitor will be sent within 400ms. (2) The LCD monitor will send a return command 400ms* after it has received and executed a code. If the command isn’t received correctly, the LCD monitor will not send the return command.
  • Page 41 512 dot x 384 line, which is 25.728 cm (W) x 19.296 cm (H) (2) Set the window’s color to dark red (R=128,G=0,B=0). There should not be any text, line, pattern, etc in the window. Set Monitor (LCD3000) as follows: (3) Select “PICTURE IN PICTURE” on OSM. (4) Select “PIP SIZE” on OSM.
  • Page 42 NOTE: As with all personal display devices, NEC-Mitsubishi Electronics Display Europe recommends using a screen saver at regular intervals whenever the screen is idle. Image is unstable, unfocused or swimming is apparent •...
  • Page 43 All manuals and user guides at all-guides.com Specifications for LCD3000 Product Specifications Analog Input Digital Input LCD Module (29.5" / 75cm diagonal) Pixel Pitch: 0.5025mm Resolution: 1280 x 768 dots (WXGA) Colour: 16,777,216 Brightness: 450cd/m (Typ.) Viewing Angle: Up 85°/ Down 85°/ Left 85°/ Right 85° (typ) @ CR>10...
  • Page 44: Pin Assignment

    All manuals and user guides at all-guides.com Pin Assignment 1) Analog RGB input (MiniDsub15p): R G B 2 Pin No Name Video Signal Red Video Signal Green Video Signal Blue Mini D-SUB 15P DDC-GND Red-GND Green-GND Blue-GND SYNC-GND DDC-SDA H-SYNC V-SYNC DDC-SCL 2) S-VIDEO input: V I D E O...
  • Page 45: Inhalt Der Verpackung

    All manuals and user guides at all-guides.com Inhalt der Verpackung Der Karton* mit Ihrem neuen LCD-Monitor LCD3000 sollte folgende Komponenten enthalten: • Monitor LCD3000 mit Fuß • Netzkabel (3 m) • PC-Signalkabel SC-B113 (4 m) • Bedienungsanleitung • Fernbedienung und Mignon-Batterien (Größe AA) •...
  • Page 46: Die Teile Und Ihre Funktionen

    All manuals and user guides at all-guides.com Die Teile und ihre Funktionen Bedienfeld INPUT 10 10 Tasten EXIT INPUT MUTE Netzschalter ( ) Taste AB ( ) Schaltet den Monitor ein bzw. aus. Vgl. Seite 16. Aktiviert das OSM-Menü, wenn es deaktiviert ist. Dient als Taste , mit der Sie bei Verwendung des OSM- Menüs die Markierung nach unten zur gewünschten...
  • Page 47 All manuals and user guides at all-guides.com Anschlüsse AUDIO VIDEO RGB OUT VIDEO VIDEO O O IN IN IN 3 IN 2 R/Cr/Pr RGB 2 (D-SUB) RGB 1 (DVI-D) AUDIO 1 S-VIDEO IN PC IN Wechselstromeingang (AC IN) AUDIO IN 1, 2, 3 Hier wird das mitgelieferte Netzkabel angeschlossen.
  • Page 48 All manuals and user guides at all-guides.com Fernbedienung Taste MUTE Schaltet die Stummschaltung ein bzw. aus. Taste VOLUME UP Erhöht die Lautstärke. Taste VOLUME DOWN Reduziert die Lautstärke. Taste PIP (Bild im Bild) Taste ON/OFF: Schaltet zwischen PIP-ON und POP-ON/OFF um. Taste INPUT: Dient zur Auswahl des „Bild-im-Bild“- Eingangssignals.
  • Page 49: Reichweite Der Fernbedienung

    All manuals and user guides at all-guides.com Reichweite der Fernbedienung Richten Sie die Vorderseite der Fernbedienung bei der Umgang mit der Fernbedienung Tastenbenutzung auf den Fernbedienungssensor des LCD- Monitors. Schützen Sie die Fernbedienung vor starken Stößen. Sie können die Fernbedienung in einem Abstand von etwa Schützen Sie die Fernbedienung vor Wasser oder 7 m von der Vorderseite des Fernbedienungssensors am anderen Flüssigkeiten.
  • Page 50: Einrichten Des Lcd-Monitors

    All manuals and user guides at all-guides.com Einrichten des LCD-Monitors 1. Wählen Sie den Installationsstandort. 3. Schließen Sie externe Geräte an. (Siehe Seiten 9~15.) VORSICHT: INSTALLIEREN SIE DEN LCD-MONITOR KEINESFALLS ALLEINE. • Schalten Sie den Monitor zum Schutz der angeschlossenen Geräte am Hauptnetzschalter aus, Die Installation des LCD-Monitors muss von einem bevor Sie Geräte anschließen.
  • Page 51: Montage Und Anbringung Von Zubehör Am Lcd-Monitor

    All manuals and user guides at all-guides.com Montage und Anbringung von Zubehör am LCD-Monitor Es gibt zwei Möglichkeiten, Montagezubehör am LCD- Belüftungsanforderungen bei Einbau- Monitor anzubringen: Montage Halten Sie die im nachfolgenden Diagramm angegebenen Bei aufrecht stehendem Monitor Abstände zur Umbauung ein, damit die Wärme entweichen kann.
  • Page 52 All manuals and user guides at all-guides.com Anbringen des Monitorfußes 1. Schalten Sie den Monitor aus. 2. Schieben Sie die Öse am Monitor in die Öffnungen am Fuß, bis es klickt. 3. Befestigen Sie an jeder Seite zwei Schrauben. Obere Schraube M5 x 55 Untere Schraube M5 x 45 Drehmoment 2,8 ~ 3,0 Nm Schraube...
  • Page 53: Anschließen Von Geräten

    All manuals and user guides at all-guides.com Anschließen von Geräten Bevor Sie Geräte anschließen: Schalten Sie alle anzuschließenden Geräte aus. Befolgen Sie die Anweisungen in der Bedienungsanleitung für das entsprechende Gerät. Anschlussübersicht Computer LCD-Monitor Videorekorder Audiosignal des Eingabegeräts DVD-Player Gerät mit digitaler Schnittstelle INPUT Computer...
  • Page 54: Anschluss Eines Computers

    All manuals and user guides at all-guides.com Anschluss eines Computers Wenn Sie Ihren Computer an den LCD-Monitor anschließen, können Sie die Bildschirmanzeige des Computers auf dem Monitor anzeigen. Manche Grafikkarten erzeugen eventuell nicht die korrekte Bildauflösung. Anschluss des LCD-Monitors an einen Computer •...
  • Page 55 All manuals and user guides at all-guides.com ® Anschluss an einen Macintosh -Computer Wenn Sie Ihren Macintosh ® -Computer an den LCD-Monitor anschließen, können Sie die Bildschirmanzeige des Computers auf dem Monitor anzeigen. Manche Grafikkarten oder -treiber zeigen Bilder möglicherweise nicht korrekt an. Anschluss des LCD-Monitors an einen Macintosh ®...
  • Page 56: Anschluss An Geräte Mit Digitaler Schnittstelle

    All manuals and user guides at all-guides.com Anschluss an Geräte mit digitaler Schnittstelle Sie können Geräte anschließen, die mit einer dem DVI-(Digital Visual Interface-) Standard entsprechenden digitalen Schnittstelle ausgestattet sind. Anschluss des LCD-Monitors an einen Computer mit digitalem Ausgang • An den RGB 1 IN-Anschluss kann auch ein DVI-D-Kabel angeschlossen werden.
  • Page 57 All manuals and user guides at all-guides.com Anschluss eines Videorekorders Wenn Sie einen Videorekorder oder Laser-Disk-Player an den LCD-Monitor anschließen, können Sie die Video- oder Laser- Disk-Filme auf dem Monitor anzeigen. Weitere Informationen finden Sie in der Bedienungsanleitung zu Ihrem Videorekorder oder Laser-Disk-Player.
  • Page 58: Anschluss Eines Dvd-Players Mit Component-Ausgang

    All manuals and user guides at all-guides.com Anschluss eines DVD-Players mit Component-Ausgang Wenn Sie einen DVD-Player an den LCD-Monitor anschließen, können Sie DVD-Filme anzeigen. Weitere Informationen finden Sie im Benutzerhandbuch zu Ihrem DVD-Player. Anschluss des LCD-Monitors an einen DVD-Player • Um den RGB 3 DVD/HD IN-Anschluss (BNC) am LCD-Monitor für den Anschluss zu nutzen, verwenden Sie ein separat erhältliches BNC-Anschlusskabel.
  • Page 59: Anschluss Eines Stereoverstärkers

    All manuals and user guides at all-guides.com Anschluss eines Stereoverstärkers Sie können einen Stereoverstärker an den LCD-Monitor anschließen. Weitere Informationen finden Sie im Benutzerhandbuch zu Ihrem Verstärker. Anschluss des LCD-Monitors an einen Stereoverstärker • Schalten Sie den LCD-Monitor und den Verstärker erst ein, nachdem Sie das Gerät korrekt angeschlossen haben. •...
  • Page 60: Grundlegende Bedienung

    All manuals and user guides at all-guides.com Grundlegende Bedienung Stromversorgung EIN und AUS Wenn der LCD-Monitor eingeschaltet ist, leuchtet die Betriebsanzeige grün. In ausgeschaltetem Zustand leuchtet sie rot. Sie haben die folgenden drei Möglichkeiten, den Monitor ein- und auszuschalten: 1. Sie drücken den Netzschalter. Hinweis: Bevor Sie die Fernbedienung verwenden, müssen Sie den LCD-Monitor am Hauptnetzschalter einschalten.
  • Page 61 All manuals and user guides at all-guides.com Betriebsanzeige OSM-Informationen RGB1, 2, 3 Status Stromversorgung EIN Grün Stromversorgung AUS RGB2 Videoeingangsmodus 1024 x 768 Informationen über das Standby-Modus Rot und Grün 48kHz 60Hz Eingangssignal AUDIO : 1 Audioeingangsmodus SCREEN SIZE : FULL Darstellungsgröße Verwendung der (PICTURE SIZE)
  • Page 62 All manuals and user guides at all-guides.com OSM-Steuerungen (On-Screen-Manager) – Computer-Eingangssignale Taste AUF oder AB Taste SET drücken, Taste AUF oder AB bzw. PLUS Taste SET drücken, drücken, um ein Untermenü um die getroffene oder MINUS drücken, um die um die getroffene zu wählen Auswahl festzulegen gewünschte Funktion oder...
  • Page 63 All manuals and user guides at all-guides.com Wählen Sie eine der sechs vordefinierten Farbeinstellungen. FARBSTEUERUNG Mit jeder Einstellung wird eine andere Farbtemperatur HELLIGKEIT KONTRAST SCHAERFE FARBSTEUERUNG ausgewählt. R, Y, G, C, B, M, S: Hier können die Werte für SCHWARZWERT FARBSTEUERUNG FARBTEMPERATUR die Farben Rot, Gelb, Grün, Cyan, Blau, Magenta und die...
  • Page 64 All manuals and user guides at all-guides.com Hauptmenü BILD BILDSCHIRM AUDIO AUDIO BILD IM BILD KONFIGURATION 1 KONFIGURATION 2 Untermenü :SEL EXIT:PRE SET:NEXT MENU:END Durch Erhöhen oder Verringern des Werts werden die HOEHEN HOEHEN Höhen verstärkt bzw. gedämpft. TIEFEN AUDIO-RUECKSETZUNG HOEHEN Drücken Sie die Taste +, um die Höhen zu verstärken.
  • Page 65 All manuals and user guides at all-guides.com Hiermit schalten Sie die Energiesparfunktion EIN und AUTOM. EINRICHTUNG AUTOM. EINSTELLUNG ENERGIESPAREN AUTOM. HELLIGKEIT AUS. ENERGIESPAREN SPRACHE ENERGIESPAREN OSM-ZEIT ABSCHALT-TIMER BILDSCHIRMSCHONER WERKSEINSTELLUNG :SEL EXIT:PRE SET:NEXT MENU:END :SEL EXIT:PRE MENU:END Die OSM-Menüs sind in sieben Sprachen verfügbar. AUTOM.
  • Page 66 All manuals and user guides at all-guides.com OSM-Steuerungen (On-Screen-Manager) – DVD&HD-Eingangssignale Hauptmenü BILD AUDIO BILD IM BILD BILD KONFIGURATION Untermenü :SEL EXIT:PRE SET:NEXT MENU:END Passt die Bild- und Hintergrundhelligkeit des Bildschirms HELLIGKEIT HELLIGKEIT KONTRAST SCHAERFE HELLIGKEIT FARBE SCHWARZWERT BILDRUECKSETZUNG Drücken Sie die Taste +, um die Helligkeit zu erhöhen. Drücken Sie die Taste -, um die Helligkeit zu verringern.
  • Page 67 All manuals and user guides at all-guides.com Durch die Auswahl von AUDIO-RUECKSETZUNG werden AUDIO- AUDIO-RUECKSETZUNG HOEHEN alle OSM-Einstellungen im Zusammenhang mit AUDIO- TIEFEN AUDIO-RUECKSETZUNG RUECKSETZUNG NEIN Optionen zurückgesetzt. Wählen Sie JA und drücken Sie die Taste SET, um die :SEL EXIT:PRE MENU:END Werkseinstellungen wiederherzustellen.
  • Page 68 All manuals and user guides at all-guides.com OSM-Steuerungen (On-Screen-Manager) – AV-Eingangssignale Hauptmenü BILD AUDIO BILD IM BILD BILD KONFIGURATION Untermenü :SEL EXIT:PRE SET:NEXT MENU:END Passt die Bild- und Hintergrundhelligkeit des HELLIGKEIT HELLIGKEIT Bildschirms an. KONTRAST SCHAERFE HELLIGKEIT TOENUNG FARBE SCHWARZWERT RAUSCHMINDERUNG Drücken Sie die Taste +, um die Helligkeit zu erhöhen.
  • Page 69 All manuals and user guides at all-guides.com Hauptmenü BILD AUDIO BILD IM BILD AUDIO KONFIGURATION Untermenü :SEL EXIT:PRE SET:NEXT MENU:END Durch Erhöhen oder Verringern des Werts werden die HOEHEN HOEHEN Höhen verstärkt bzw. gedämpft. TIEFEN AUDIO-RUECKSETZUNG HOEHEN Drücken Sie die Taste +, um die Höhen zu verstärken. Drücken Sie die Taste -, um die Höhen zu dämpfen.
  • Page 70 All manuals and user guides at all-guides.com Hiermit schalten Sie den ABSCHALT-TIMER-Modus EIN ABSCHALT-TIMER SPRACHE bzw. AUS. OSM-ZEIT ABSCHALT-TIMER ABSCHALT-TIMER Im Menü ABSCHALT-TIMER können Sie die Zeitspanne BILDSCHIRMSCHONER FARBSYSTEM nach dem Einschalten festlegen, nach der der Monitor KONFIG. RUECKSETZUNG automatisch ausgeschaltet wird. :SEL EXIT:PRE SET:NEXT MENU:END :SEL EXIT:PRE...
  • Page 71 All manuals and user guides at all-guides.com Steuern des LCD-Monitors mittels RS-232C-Steuerung Sie können diesen LCD-Monitor per Fernzugriff steuern, indem Sie einen Computer mit RS-232C-Schnittstelle anschließen. Folgende Funktionen können vom Computer aus gesteuert werden: • Ein- und Ausschalten des Monitors •...
  • Page 72 All manuals and user guides at all-guides.com 3) Steuerungsablauf (1) Der Befehl von einem Computer an den LCD-Monitor wird innerhalb von 400 ms gesendet. (2) Der LCD-Monitor sendet 400ms*, nachdem er einen Code empfangen und ausgeführt hat, einen Rückkehrbefehl. Wenn der Befehl nicht korrekt empfangen wurde, sendet der LCD-Monitor keinen Rückkehrbefehl. (3) Der Computer prüft den Befehl und kontrolliert damit, ob der gesendete Befehl ausgeführt wurde.
  • Page 73: Merkmale Und Funktionen

    (2) Stellen Sie die Fensterfarbe auf Dunkelrot ein (R=128, G=0, B=0). Das Fenster darf weder Text noch Zeilen oder Muster usw. enthalten. Stellen Sie den Monitor (LCD3000) wie folgt ein: (3) Wählen Sie „BILD IM BILD“ im OSM. (4) Wählen Sie „BIB-GROESSE“ im OSM.
  • Page 74 „Geist“ dieses Bilds sichtbar, sollte der Monitor mindestens eine Stunde ausgeschaltet werden, damit der Bildschatten verschwindet. HINWEIS: NEC-Mitsubishi Electronics Display Europe empfiehlt die Aktivierung eines Bildschirmschoners auf allen Anzeigegeräten, wenn sich das Bild längere Zeit nicht verändert. Bild ist nicht stabil, unscharf oder verschwimmt •...
  • Page 75 All manuals and user guides at all-guides.com Technische Daten für den LCD3000 Produktspezifikationen Analoger Eingang Digitaler Eingang LCD-Modul (29,5" / 75 cm diagonal) Pixelabstand: 0,5025 mm Auflösung: 1280 x 768 Punkte (WXGA) Farbe: 16,777,216 Helligkeit: 450 cd/m (Typ.) Betrachtungswinkel: Oben 85°/ Unten 85°/ Links 85°/ Rechts 85° (typ.) @ CR>10 Ausgangswiderstand für...
  • Page 76 All manuals and user guides at all-guides.com Pinbelegung 1) Analoger RGB-Eingang (Mini-D-SUB, 15-polig): R G B 2 Pin-Nr. Bezeichnung Videosignal Rot Videosignal Grün Videosignal Blau Mini-D-SUB, 15-polig DDC-GND Rot-GND Grün-GND Blau-GND SYNC-GND DDC-SDA H-SYNC V-SYNC DDC-SCL 2) S-VIDEO-Eingang: V I D E O Pin-Nr.
  • Page 77 All manuals and user guides at all-guides.com Contenido Su nueva caja de monitor LCD LCD3000* debería contener: • Un monitor LCD LCD3000 con soporte • Un cable de alimentación (3 m) • Un cable de señal PC - Vídeo SC-B113 (4 m) •...
  • Page 78: Denominación De Las Piezas Y Funciones

    All manuals and user guides at all-guides.com Denominación de las piezas y funciones Panel de control INPUT 10 10 botones EXIT INPUT MUTE Botón de ENCENDIDO ( ) Botón ABAJO ( ) Enciende y apaga el monitor. Véase también la página 16. Activa el menú...
  • Page 79: Panel Del Terminal

    All manuals and user guides at all-guides.com Panel del terminal AUDIO VIDEO RGB OUT VIDEO VIDEO O O IN IN IN 3 IN 2 R/Cr/Pr RGB 2 (D-SUB) RGB 1 (DVI-D) AUDIO 1 S-VIDEO IN PC IN Conector de entrada CA AUDIO IN 1, 2, 3 Conecta el cable de alimentación que se suministra con el Para introducir señales de audio desde un equipo externo,...
  • Page 80: Mando A Distancia Inalámbrico

    All manuals and user guides at all-guides.com Mando a distancia inalámbrico Botón MUTE Para activar y desactivar la función de silencio. Botón VOLUME UP Aumenta la señal de salida de audio. Botón VOLUME DOWN Reduce la señal de salida de audio. Botón PIP (Picture In Picture: Imagen en Imagen) Botón ON/OFF: permite cambiar entre PIP-ON/ POP-ON/OFF.
  • Page 81: Funcionamiento Del Mando A Distancia

    All manuals and user guides at all-guides.com Funcionamiento del mando a distancia Señale con la parte superior del mando a distancia hacia el Manejo del mando a distancia sensor de control remoto del monitor LCD mientras pulsa el botón. No lo exponga a golpes fuertes. Utilice el mando a una distancia máxima de 7 m de la parte Evite el contacto del mando a distancia con agua u otros frontal del sensor de control remoto del monitor LCD, y...
  • Page 82: Procedimiento De Configuración

    All manuals and user guides at all-guides.com Procedimiento de configuración 1. Determine la ubicación de la instalación 3. Conecte el equipo externo (Véanse las páginas 9~15) PELIGRO: NO INTENTE INSTALAR EL MONITOR LCD USTED MISMO • Para proteger el equipo conectado, apague el interruptor principal antes de realizar las conexiones.
  • Page 83: Cómo Montar Y Conectar Elementos Opcionales Al Monitor Lcd

    All manuals and user guides at all-guides.com Cómo montar y conectar elementos opcionales al monitor LCD Puede conectar accesorios adicionales al monitor LCD de Requisitos de ventilación para el montaje una de las dos formas siguientes: de la caja Para que se disperse el calor, deje espacio entre los objetos En posición vertical circundantes, tal como aparece en el dibujo de la derecha.
  • Page 84 All manuals and user guides at all-guides.com Cómo instalar el soporte 1. Apague el monitor. 2. Introduzca los ganchos del monitor en los orificios de sujeción hasta que queden sujetos. 3. Apriete los 2 tornillos de cada lado. Superior M5 x 55 Inferior M5 x 45 Par motor 280 ~ 300N cm Tornillo M5 x 45...
  • Page 85: Antes De Realizar Las Conexiones

    All manuals and user guides at all-guides.com Conexiones Antes de realizar las conexiones: Primero, apague todos los equipos que desee conectar. Consulte el manual del usuario de dicho equipo. Esquema de conexiones eléctricas Ordenador personal Monitor LCD Señal de audio del dispositivo de entrada Reproductor de DVD Equipo con...
  • Page 86: Conexión De Un Ordenador Personal

    All manuals and user guides at all-guides.com Conexión de un ordenador personal Si conecta un ordenador al monitor LCD podrá ver la imagen que aparece en la pantalla del ordenador. Es posible que algunas tarjetas de vídeo no puedan crear una resolución de imagen adecuada. Conecte el monitor LCD a un ordenador personal •...
  • Page 87: Conexión A Un Ordenador Macintosh

    All manuals and user guides at all-guides.com ® Conexión a un ordenador Macintosh Si conecta un ordenador Macintosh ® al monitor LCD podrá ver la imagen que aparece en la pantalla del ordenador. Es posible que algunos controladores o tarjetas de vídeo no permitan visualizar las imágenes adecuadamente. Conecte el monitor LCD a un Macintosh ®...
  • Page 88: Conecte El Monitor Lcd A Un Ordenador Con Salida Digital

    All manuals and user guides at all-guides.com Conexiones con equipos de interfaz digital Se pueden establecer conexiones con equipos que tienen una interfaz digital que cumpla el estándar DVI (Digital Visual Interface). Conecte el monitor LCD a un ordenador con salida digital •...
  • Page 89 All manuals and user guides at all-guides.com Conexión a un vídeo Si conecta un vídeo o un reproductor de discos láser al monitor LCD, podrá ver en éste las imágenes reproducidas por el vídeo o por el reproductor de discos láser. Consulte el manual del fabricante del vídeo o del reproductor de discos láser para obtener más información.
  • Page 90: Conexión De Un Reproductor De Dvd Con Salida Para Componentes

    All manuals and user guides at all-guides.com Conexión de un reproductor de DVD con salida para componentes Si conecta un reproductor de DVD al monitor LCD, podrá ver en éste las imágenes del DVD. Consulte el manual del usuario del fabricante del DVD para obtener más información. Conecte el monitor LCD a un reproductor de DVD •...
  • Page 91: Conexión De Un Amplificador Estéreo

    All manuals and user guides at all-guides.com Conexión de un amplificador estéreo Si lo desea, puede conectar un amplificador estéreo al monitor LCD. Consulte el manual del usuario del fabricante del amplificador para obtener más información. Conecte el monitor LCD a un amplificador estéreo •...
  • Page 92: Funcionamiento Básico

    All manuals and user guides at all-guides.com Funcionamiento básico Modos Encendido y Apagado El indicador de corriente del monitor LCD se iluminará de color verde cuando esté encendido y de color rojo si está apagado. El monitor se puede encender o apagar utilizando las tres opciones siguientes: 1.
  • Page 93 All manuals and user guides at all-guides.com Indicador de corriente OSM de información RGB1, 2, 3 Estado Encendido Verde Apagado Rojo RGB2 Modo Entrada de vídeo 1024 x 768 Información de señal de entrada En espera Rojo y verde 48kHz 60Hz AUDIO : 1 Modo Entrada de audio SCREEN SIZE : FULL...
  • Page 94 All manuals and user guides at all-guides.com Controles OSM (On-Screen-Manager: gestor de pantalla) - Entrada del ordenador Pulse el botón ARRIBA o Pulse el botón SET Pulse los botones ARRIBA o Pulse el botón SET ABAJO para seleccionar un para decidir ABAJO, y MÁS o MENOS para para decidir submenú...
  • Page 95 All manuals and user guides at all-guides.com Con los seis colores predefinidos se selecciona la CONTROL DEL COLOR BRILLO configuración del color deseada. La temperatura de color CONTRASTE DEFINICIÓN CONTROL aumenta o disminuye en cada preajuste. R, A, V, C, A, M, NIVEL DE NEGRO CONTROL DEL COLOR DEL COLOR...
  • Page 96 All manuals and user guides at all-guides.com Menú principal IMAGEN PANTALLA AUDIO AUDIO IMAGEN EN IMAGEN CONFIGURACIÓN 1 CONFIGURACIÓN 2 Submenú :SEL EXIT:PRE SET:NEXT MENU:END Para acentuar o reducir el sonido de alta frecuencia. AGUDOS AGUDOS GRAVES REAJUSTE DEL AUDIO AGUDOS Pulse el botón + para aumentar el sonido de AGUDOS.
  • Page 97 All manuals and user guides at all-guides.com Encendido y apagado de la gestión de energía. CONFIG. AUTOMÁTICA AUTO AJUSTE AHORRO DE ENERGÍA AHORRO BRILLO AUTOM. AHORRO DE ENERGÍA IDIOMA DE ENERGÍA ENCENDIDO DURACIÓN OSM: APAGADO TIEMPO DESACTIV. PROTECTOR PANTALLA CONF. DE FÁBRICA :SEL EXIT:PRE SET:NEXT MENU:END :SEL EXIT:PRE...
  • Page 98 All manuals and user guides at all-guides.com Controles OSM (On-Screen-Manager: gestor de pantalla) - Entrada DVD&HD Menú principal IMAGEN AUDIO IMAGEN EN IMAGEN IMAGEN CONFIGURACIÓN Submenú :SEL EXIT:PRE SET:NEXT MENU:END Ajusta el brillo de la imagen global y del fondo. BRILLO BRILLO CONTRASTE...
  • Page 99 All manuals and user guides at all-guides.com Al seleccionar Reajuste de la imagen puede restablecer REAJUSTE DEL AUDIO REAJUSTE AGUDOS todos los ajustes OSM relacionados con el AUDIO. GRAVES REAJUSTE DEL AUDIO DEL AUDIO SÍ Seleccione “Sí” y pulse el botón “SET” para restaurar la :SEL EXIT:PRE MENU:END...
  • Page 100 All manuals and user guides at all-guides.com Controles OSM (On-Screen-Manager: gestor de pantalla) - Entrada AV Menú principal IMAGEN AUDIO IMAGEN EN IMAGEN IMAGEN CONFIGURACIÓN Submenú :SEL EXIT:PRE SET:NEXT MENU:END Ajusta el brillo de la imagen global y del fondo. BRILLO BRILLO CONTRASTE...
  • Page 101 All manuals and user guides at all-guides.com Menú principal IMAGEN AUDIO IMAGEN EN IMAGEN AUDIO CONFIGURACIÓN Submenú :SEL EXIT:PRE SET:NEXT MENU:END Para acentuar o reducir el sonido de alta frecuencia. AGUDOS AGUDOS GRAVES REAJUSTE DEL AUDIO AGUDOS Pulse el botón + para aumentar el sonido de AGUDOS. Pulse el botón - para reducir el sonido de AGUDOS.
  • Page 102 All manuals and user guides at all-guides.com Para encender y apagar el modo TIEMPO DESACTIV. TIEMPO DESACTIV. TIEMPO IDIOMA En el menú TIEMPO DESACTIV., puede seleccionar el DURACIÓN OSM TIEMPO DESACTIV. ENCENDIDO 24H DESACTIV. tiempo que transcurrirá antes de que el monitor se PROTECTOR PANTALLA APAGADO SISTEMA DE COLOR...
  • Page 103 All manuals and user guides at all-guides.com Control del monitor LCD mediante control remoto RS-232C Este monitor LCD puede controlarse a distancia conectando un ordenador con interfaz RS-232C. Un ordenador puede controlar las funciones siguientes: • Encender y apagar el monitor. •...
  • Page 104 All manuals and user guides at all-guides.com 3) Secuencia de control (1) El comando de un ordenador al monitor LCD se enviará dentro de un tiempo máximo de 400ms. (2) El monitor LCD enviará un comando de retorno 400ms* después de recibir y ejecutar un código. Si el comando no se recibe correctamente, el monitor LCD no enviará...
  • Page 105: Características

    (2) Ajuste el color de la ventana en rojo oscuro (R = 128, G = 0, B = 0). En la ventana no debe haber texto, líneas, tramas, etc. Ajuste el Monitor (LCD3000) del siguiente modo: (3) Seleccione “IMAGEN EN IMAGEN” en OSM.
  • Page 106: Solución De Problemas

    “sombra” de esa imagen, debería tener el monitor apagado durante una hora para borrarla. NOTA: como en todos los dispositivos de visualización personales, NEC-Mitsubishi Electronic Display Europe recomienda utilizar un salvapantallas con regularidad siempre que la pantalla no se esté utilizando.
  • Page 107 All manuals and user guides at all-guides.com Especificaciones para LCD3000 Especificaciones del producto Entrada analógica Entrada digital Módulo LCD (29,5" / 75 cm diagonal) Tamaño del píxel: 0,5025 mm Resolución: 1.280 x 768 puntos (WXGA) Color: 16.777.216 Brillo: 450cd/m (típ.) Ángulo de visión: Arriba 85°/ Abajo 85°/ Izquierda 85°/ Derecha 85°...
  • Page 108 All manuals and user guides at all-guides.com Asignación de PIN 1) Entrada RGB analógico (MiniDsub 15 clavijas): R G B 2 Nº clavijas Nombre Señal de vídeo roja Señal de vídeo verde Señal de vídeo azul Mini D-sub de 15 clavijas GND DDC GND roja GND verde...
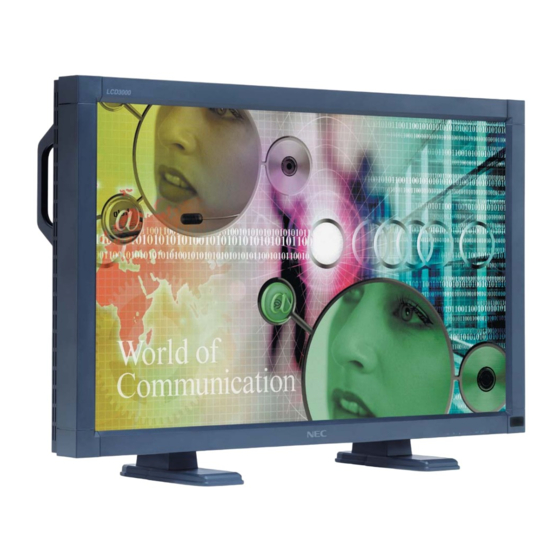
  • Page 109 All manuals and user guides at all-guides.com Sommaire La boîte* de votre nouveau moniteur LCD LCD3000 doit contenir les éléments suivants : • Moniteur LCD3000 avec son support • Cordon d’alimentation (3 m) • PC – câble vidéo SC-B113 (4 m) •...
  • Page 110: Noms Et Fonctions Des Pièces

    All manuals and user guides at all-guides.com Noms et fonctions des pièces Panneau de commande INPUT 10 10 boutons EXIT INPUT MUTE Bouton d’alimentation ( ) Bouton BAS ( ) Allume et éteint l’appareil. Voir également page 16. Réactive le menu OSM lorsque celui-ci est désactivé. Joue dans le menu OSM le rôle de bouton pour déplacer vers le bas la zone en surbrillance et sélectionner le réglage.
  • Page 111: Panneau Des Connexions

    All manuals and user guides at all-guides.com Panneau des connexions AUDIO VIDEO RGB OUT VIDEO VIDEO O O IN IN IN 3 IN 2 R/Cr/Pr RGB 2 (D-SUB) RGB 1 (DVI-D) AUDIO 1 S-VIDEO IN PC IN Prise CA IN AUDIO IN 1, 2, 3 Se connecte au cordon d’alimentation fourni avec le Pour recevoir le signal audio provenant d’un matériel...
  • Page 112: Télécommande Sans Fil

    All manuals and user guides at all-guides.com Télécommande sans-fil Bouton MUTE Pour couper ou rétablir le son. Bouton VOLUME UP Augmente le niveau de la sortie sonore. Bouton VOLUME DOWN Diminue le niveau de la sortie sonore. Bouton PIP (Picture In Picture) Bouton ON/OFF : Bascule entre PIP-ON/POP-ON/OFF.
  • Page 113: Distance D'utilisation De La Télécommande

    All manuals and user guides at all-guides.com Distance d’utilisation de la télécommande Pointez pendant le réglage des boutons le haut de la Manipulation de la télécommande télécommande en direction du capteur à distance du moniteur. Evitez de soumettre la télécommande à des chocs Utilisez la télécommande à...
  • Page 114 All manuals and user guides at all-guides.com Installation 1. Choix de l’emplacement du moniteur 3. Connexion de matériel externe (Voir les pages 9 à 15) ATTENTION : NE TENTEZ PAS D’EFFECTUER VOUS- MÊME L’INSTALLATION DU MONITEUR • Pour protéger le matériel que vous connectez, mettez-le hors tension avant d’effectuer des branchements.
  • Page 115: Comment Monter Et Brancher Des Accessoires Au Moniteur

    All manuals and user guides at all-guides.com Comment monter et brancher des accessoires au moniteur Vous pouvez brancher des accessoires de montage sur le Ventilation moniteur en vous y prenant de l’une des manières suivantes : Pour permettre à la chaleur de se disperser, laissez de l’espace entre les objets environnants comme dans la partie En position verticale droite du schéma.
  • Page 116: Comment Installer Le Support

    All manuals and user guides at all-guides.com Comment installer le support 1. Eteignez le moniteur. 2. Insérez les pattes du moniteur dans les perforations du support jusqu’à ce que vous entendiez un clic. 3. Fixez 2 vis de chaque côté. Supérieures M5 x 55 Inférieures M5 x 45 Torsion 280 à...
  • Page 117: Connexions

    All manuals and user guides at all-guides.com Connexions Avant d’effectuer les branchements : Commencez par mettre hors tension tous les matériels à brancher au moniteur. Consultez la documentation fournie avec ces matériels. Schéma de câblage Micro-ordinateur Moniteur Magnétoscope Signal audio du périphérique d’entrée Micro-ordinateur...
  • Page 118: Connexion Du Moniteur À Un Pc

    All manuals and user guides at all-guides.com Connexion à un PC La connexion d’un PC à votre moniteur vous permettra d’afficher l’image présente sur l’écran de votre micro-ordinateur. Certaines cartes vidéo risquent de ne pas être capables de créer une résolution correcte. Connexion du moniteur à...
  • Page 119: Connexion Du Moniteur Au Macintosh

    All manuals and user guides at all-guides.com ® Connexion à un Macintosh La connexion d’un Macintosh à votre moniteur vous permettra d’afficher l’image présente sur l’écran de votre ordinateur. Certaines cartes ou certains pilotes vidéo risquent de ne pas afficher correctement les images. Connexion du moniteur au Macintosh ®...
  • Page 120: Connexions Avec Du Matériel À Interface Numérique

    All manuals and user guides at all-guides.com Connexions avec du matériel à interface numérique Il est possible d’établir des connexions avec du matériel équipé d’une interface numérique compatible DVI (Digital Visual Interface). Connexion du moniteur à un ordinateur équipé d’une sortie numérique •...
  • Page 121: Connexion D'un Magnétoscope

    All manuals and user guides at all-guides.com Connexion d’un magnétoscope La connexion au moniteur d’un magnétoscope ou d’un lecteur de disques laser vous permettra d’afficher la vidéo de vos cassettes ou de vos disques laser. Consultez la documentation fournie avec votre magnétoscope ou votre lecteur de disques laser.
  • Page 122: Connexion Du Moniteur À Un Lecteur De Dvd

    All manuals and user guides at all-guides.com Connexion d’un lecteur de DVD La connexion au moniteur d’un lecteur de DVD vous permettra d’afficher la vidéo de vos DVD. Consultez la documentation de votre lecteur de DVD. Connexion du moniteur à un lecteur de DVD •...
  • Page 123: Connexion Du Moniteur À Un Amplificateur Stéréo

    All manuals and user guides at all-guides.com Connexion d’un amplificateur stéréo Vous pouvez connecter un amplificateur stéréo au moniteur. Consultez la documentation de votre ampli. Connexion du moniteur à un amplificateur stéréo • Ne mettez le moniteur et l’amplificateur sous tension qu’après avoir effectué tous les branchements. •...
  • Page 124: Opération De Base

    All manuals and user guides at all-guides.com Opération de base Modes MARCHE et ARRÊT L’indicateur d’alimentation du moniteur passe au vert lorsque ce dernier est sous tension, et au rouge lorsque le moniteur est en mode ARRÊT. Il existe trois manières d’allumer et d’éteindre le moniteur : 1.
  • Page 125 All manuals and user guides at all-guides.com Indicateur d’alimentation Informations OSM (On-Screen Manager – Gestionnaire à l’écran) Statut Position MARCHE Vert RVB1, 2, 3 Position ARRÊT Rouge Position VEILLE Rouge et vert RGB2 Mode entrée vidéo 1024 x 768 Informations signal en entrée 48kHz 60Hz Gestion de l’énergie AUDIO : 1...
  • Page 126: Commandes Osm (On-Screen-Manager) - Entrée Ordinateur

    All manuals and user guides at all-guides.com Commandes OSM (On-Screen-Manager) – Entrée ordinateur Appuyez sur les boutons Appuyez sur le Appuyez sur les boutons HAUT ou Appuyez sur le HAUT ou BAS pour bouton SET (fixer) BAS, et PLUS ou MOINS pour bouton SET (fixer) sélectionner un sous-menu.
  • Page 127 All manuals and user guides at all-guides.com Six préréglages de couleurs déterminent la configuration CONTRÔLE COULEURS LUMINOSITÉ de couleurs désirée. Augmente ou diminue la température CONTRASTE NETTETÉ CONTRÔLE de couleur dans chaque préréglage. R, J, V, C, B, M, S: NIVEAU DE NOIR CONTRÔLE COULEURS DES COULEURS...
  • Page 128 All manuals and user guides at all-guides.com Menu principal IMAGE ÉCRAN AUDIO AUDIO IMAGE DANS IMAGE CONFIGURATION 1 CONFIGURATION 2 Sous-menu :SEL EXIT:PRE SET:NEXT MENU:END Pour accentuer ou réduire le son hautes fréquences. AIGUS AIGUS GRAVES RÉINITIAL. AUDIO AIGUS Appuyez sur le bouton + pour augmenter les aigus. Appuyez sur le bouton - pour diminuer les aigus.
  • Page 129: Menu Principal

    All manuals and user guides at all-guides.com Sélection de la marche/arrêt de l’économie d’énergie. INSTALLATION AUTO. RÉGLAGE AUTO. ÉCONOMIE D’ÉNERGIE ÉCONOMIE LUMINOSITÉ AUTO. ÉCONOMIE D’ÉNERGIE LANGUE D’ÉNERGIE MARCHE DURÉE OSM ARRÊT PROGRAMMATEUR ARRÊT ÉCONOMISEUR ÉCRAN PRÉRÉGLAGE USINE :SEL EXIT:PRE SET:NEXT MENU:END :SEL EXIT:PRE MENU:END...
  • Page 130: Commandes Osm (On-Screen-Manager) - Entrée Dvd&Hd

    All manuals and user guides at all-guides.com Commandes OSM (On-Screen-Manager) – Entrée DVD&HD Menu principal IMAGE AUDIO IMAGE DANS IMAGE IMAGE CONFIGURATION Sous-menu :SEL EXIT:PRE SET:NEXT MENU:END Règle la luminosité globale de l’image et du fond de LUMINOSITÉ LUMINOSITÉ l’écran. CONTRASTE NETTETÉ...
  • Page 131 All manuals and user guides at all-guides.com Menu principal IMAGE AUDIO IMAGE DANS IMAGE IMAGE DANS IMAGE CONFIGURATION Sous-menu :SEL EXIT:PRE SET:NEXT MENU:END Il est possible de choisir parmi les options suivantes la TAILLE IDI taille de l’image insérée en mode Image dans image TAILLE IDI GRAND TAILLE IDI...
  • Page 132: Commandes Osm (On-Screen-Manager) - Entrée Av

    All manuals and user guides at all-guides.com Commandes OSM (On-Screen-Manager) – Entrée AV Menu principal IMAGE AUDIO IMAGE DANS IMAGE IMAGE CONFIGURATION Sous-menu :SEL EXIT:PRE SET:NEXT MENU:END Règle la luminosité globale de l’image et du fond de LUMINOSITÉ LUMINOSITÉ l’écran. CONTRASTE NETTETÉ...
  • Page 133 All manuals and user guides at all-guides.com Menu principal IMAGE AUDIO IMAGE DANS IMAGE AUDIO CONFIGURATION Sous-menu :SEL EXIT:PRE SET:NEXT MENU:END Pour accentuer ou réduire le son hautes fréquences. AIGUS AIGUS GRAVES RÉINITIAL. AUDIO AIGUS Appuyez sur le bouton + pour augmenter les aigus. Appuyez sur le bouton - pour diminuer les aigus.
  • Page 134 All manuals and user guides at all-guides.com Pour sélectionner la marche/arrêt du programmateur PROGRAMMATEUR ARRÊT PROGRAMMATEUR LANGUE d’arrêt. DURÉE OSM PROGRAMMATEUR ARRÊT MARCHE D’ARRET Dans le menu PROGRAMMATEUR ARRÊT, vous ÉCONOMISEUR ÉCRAN ARRÊT SYSTÈME DE COULEUR pouvez sélectionner au bout de combien de temps après RÉINITIAL.
  • Page 135: Contrôle À Distance Du Moniteur Via Une Interface

    All manuals and user guides at all-guides.com Contrôle à distance du moniteur via une interface RS-232C Il est possible de contrôler ce moniteur LCD en lui connectant un ordinateur doté d’une interface RS-232C. Un ordinateur peut contrôler les fonctions suivantes : •...
  • Page 136 All manuals and user guides at all-guides.com 3) Séquence de contrôle (1) La commande sera envoyée d’un ordinateur au moniteur LCD dans les 400 ms. (2) Le moniteur LCD retournera une commande 400 ms* après avoir reçu et exécuté un code. En cas de mauvaise réception de la commande, le moniteur n’émettra pas de commande de retour.
  • Page 137: Fonctionnalités

    (2) Définir la couleur de la fenêtre en rouge foncé (R=128,G=0,B=0). Il ne doit y avoir aucun texte, ligne, motif, etc... dans la fenêtre. Réglez le moniteur (LCD3000) comme suit : (3) Sélectionner « IDI » (IMAGE DANS IMAGE) dans l’OSM.
  • Page 138: Résolution Des Problèmes

    « fantôme » de cette image, il faut mettre le moniteur hors tension pendant une heure pour effacer l’image. REMARQUE : Tout comme dans le cas des écrans personnels, NEC-Mitsubishi Electronic Display recommande l’utilisation d’un économiseur d’écran à intervalles réguliers lorsque l’écran n’est pas utilisé.
  • Page 139: Spécifications Du Lcd3000

    All manuals and user guides at all-guides.com Spécifications du LCD3000 Spécifications du produit Entrée analogique Entrée numérique Module LCD (29,5" / diagonale de 75 cm) Pas : 0,5025 mm Résolution : 1280 x 768 points (WXGA) Couleur : 16,777,216 Luminosité : 450 cd/m (Typ.)
  • Page 140 All manuals and user guides at all-guides.com Brochage 1) Entrée RVB analogique (Mini D-Sub 15 broches) : R, V, B 2 N° broche Signal vidéo rouge Signal vidéo vert Signal vidéo bleu Mini D-sub 15 broches DDC-GND Rouge-GND Vert-GND Bleu-GND SYNC-GND DDC-SDA H-SYNC...
  • Page 141 All manuals and user guides at all-guides.com Contenuto La confezione del nuovo monitor LCD LCD3000* deve contenere le seguenti parti: • Il monitor LCD LCD3000 con il supporto • Il cavo di alimentazione (3 m.) • Cavo di segnale PC-video SC-B113 (4 m.) •...
  • Page 142: Nome Delle Parti E Delle Funzioni

    All manuals and user guides at all-guides.com Nome delle parti e delle funzioni Pannello di controllo INPUT 10 10 pulsanti EXIT INPUT MUTE Pulsante di ACCENSIONE ( ) Pulsante FRECCIA IN BASSO ( ) Accende e spegne il monitor. Consultare inoltre pagina 16. Attiva il menu OSM quando il menu OSM è...
  • Page 143: Pannello Posteriore

    All manuals and user guides at all-guides.com Pannello posteriore AUDIO VIDEO RGB OUT VIDEO VIDEO O O IN IN IN 3 IN 2 R/Cr/Pr RGB 2 (D-SUB) RGB 1 (DVI-D) AUDIO 1 S-VIDEO IN PC IN Connettore AC IN AUDIO IN 1, 2, 3 Collega il cavo di alimentazione fornito.
  • Page 144 All manuals and user guides at all-guides.com Telecomando Pulsante MUTE Per attivare/disattivare la funzione Mute. Pulsante VOLUME UP Aumenta il livello di uscita audio. Pulsante VOLUME DOWN Diminuisce il livello di uscita audio. Pulsante PIP (immagine nell’immagine) Pulsante ON/OFF: Commuta gli interruttori tra PIP-ON/ POP-ON/OFF.
  • Page 145: Campo Operativo Per Il Telecomando

    All manuals and user guides at all-guides.com Campo operativo per il telecomando Puntare la parte superiore del telecomando verso il sensore Precauzioni d’uso per il telecomando remoto del monitor LCD quando si utilizzano i pulsanti. Utilizzare il telecomando entro una distanza di circa 7 m. Non sottoporlo a urti violenti.
  • Page 146: Procedura Di Installazione

    All manuals and user guides at all-guides.com Procedura di installazione 1. Determinare la posizione di installazione 3. Connessione delle apparecchiature esterne (consultare le pagine 9~15) ATTENZIONE: NON TENTARE DI INSTALLARE IL MONITOR LCD DA SOLI • Per proteggere le apparecchiature collegate, staccare l’alimentazione prima di effettuare qualsiasi L’installazione del display LCD deve essere eseguita da un connessione.
  • Page 147: Montaggio E Collegamento Delle Opzioni Al Monitor Lcd

    All manuals and user guides at all-guides.com Montaggio e collegamento delle opzioni al monitor LCD È possibile attaccare accessori di montaggio al monitor LCD Requisiti di ventilazione in caso di utilizzando una delle due procedure seguenti: installazione ad incasso Per permettere al calore di disperdersi, lasciare dello spazio In posizione normale tra gli oggetti circostanti come mostrato nella figura a destra.
  • Page 148: Installazione Del Supporto

    All manuals and user guides at all-guides.com Installazione del supporto 1. Spegnere il monitor. 2. Inserire gli agganci del monitor nei fori del supporto fino a quando non fanno clic. 3. Fissare due viti su ogni lato. In alto le viti M5 x 55 In basso le viti M5 x 45 Coppia 280 ~ 300N cm Vite M5 x 45...
  • Page 149: Schema Di Collegamento

    All manuals and user guides at all-guides.com Connessioni Prima di effettuare le connessioni: Per prima cosa spegnere tutte le apparecchiature che devono essere collegate. Fare riferimento ai Manuale Utente delle singole apparecchiature. Schema di collegamento Personal computer Monitor LCD Segnale audio del dispositivo di ingresso Lettore DVD...
  • Page 150: Collegamento Del Monitor Lcd Al Pc

    All manuals and user guides at all-guides.com Collegamento a un PC Se si collega il computer al monitor LCD è possibile visualizzare le immagini delle schermate del computer. Alcune schede video potrebbero non essere in grado di creare una corretta risoluzione dell’immagine. Collegamento del monitor LCD al PC •...
  • Page 151: Collegamento Ad Un Computer Macintosh

    All manuals and user guides at all-guides.com ® Collegamento ad un computer Macintosh Se si collega il computer Macintosh ® al monitor LCD è possibile visualizzare le immagini delle schermate del computer. Alcune schede o driver video potrebbero non visualizzare le immagini correttamente. Collegamento del monitor LCD a Macintosh ®...
  • Page 152: Collegamento Del Monitor Lcd Con Un Computer Con Uscita Digitale

    All manuals and user guides at all-guides.com Connessioni con apparecchiature ad interfaccia digitale È possibile effettuare collegamenti con apparecchiature equipaggiate con interfaccia digitale conforme con lo standard DVI (Digital Visual Interface). Collegamento del monitor LCD con un computer con uscita digitale •...
  • Page 153 All manuals and user guides at all-guides.com Collegamento ad un VCR Se si collega il VCR o il lettore dischi laser al monitor LCD è possibile visualizzare video del VCR o del lettore dischi laser. Per ulteriori informazioni fare riferimento al Manuale Utente del VCR o del lettore dischi laser. Collegamento del monitor LCD al VCR o al lettore dischi laser •...
  • Page 154: Collegamento Del Monitor Lcd Al Lettore Dvd

    All manuals and user guides at all-guides.com Collegamento di un lettore DVD Se si collega il lettore DVD con il monitor LCD è possibile visualizzare i video DVD. Consultare il Manuale utente del lettore DVD per ulteriori informazioni. Collegamento del monitor LCD al lettore DVD •...
  • Page 155: Collegamento Del Monitor Lcd All'amplificatore Stereo

    All manuals and user guides at all-guides.com Collegamento ad un amplificatore stereo È possibile collegare un amplificatore stereo al monitor LCD. Consultare il Manuale utente dell’amplificatore per ulteriori informazioni. Collegamento del monitor LCD all’amplificatore Stereo • Accendere il monitor LCD e l’amplificatore solo dopo aver effettuato tutte le connessioni. •...
  • Page 156: Operazioni Di Base

    All manuals and user guides at all-guides.com Operazioni di base Modalità di ACCENSIONE e SPEGNIMENTO La spia di alimentazione diventa verde quando il monitor LCD viene acceso e rossa quando viene spento. Il monitor può essere acceso o spento utilizzando le seguenti tre opzioni: 1.
  • Page 157 All manuals and user guides at all-guides.com Spia alimentazione Informazioni OSM RGB1, 2, 3 Stato Alimentazione ON Verde Alimentazione OFF Rosso RGB2 Modalità di ingresso video 1024 x 768 Informazioni sul segnale Alimentazione Standby Rosso e verde 48kHz 60Hz d’ingresso AUDIO : 1 Modalità...
  • Page 158 All manuals and user guides at all-guides.com Controlli OSM (ON-Screen-Manager) - Ingresso computer Premere il pulsante FRECCIA Premere il pulsante Premere il pulsante FRECCIA IN Premere il pulsante IN ALTO o FRECCIA IN SET per confermare ALTO o FRECCIA IN BASSO e il SET per confermare BASSO per selezionare il pulsante PIÙ...
  • Page 159 All manuals and user guides at all-guides.com Esistono sei impostazioni di colore predefinite per selezionare CONTROLLO COLORE l’impostazione di colore desiderata. La temperatura di LUMINOSITÀ CONTRASTO CONTROLLO NITIDEZZA colore aumenta o diminuisce, in ogni preimpostazione. LIVELLO DI NERO CONTROLLO COLORE COLORE R, Y, G, C, B, M, S: Aumenta o diminuisce il rosso, il giallo, il TEMPERATURA COLORE...
  • Page 160 All manuals and user guides at all-guides.com Menu principale IMMAGINE SCHERMO AUDIO AUDIO PICTURE IN PICTURE CONFIGURAZIONE 1 CONFIGURAZIONE 2 Sottomenu :SEL EXIT:PRE SET:NEXT MENU:END Per accentuare o ridurre i suoni ad alta frequenza. ALTI ALTI BASSI RESET AUDIO ALTI Premere il pulsante + per aumentare il suono ALTO.
  • Page 161 All manuals and user guides at all-guides.com Per attivare e disattivare la gestione del risparmio SETUP AUTOMATICO REGOLAZIONE AUTOM. SALVA SCHERMO RISPARMIO LUMINOSITA' AUTOM. energetico. RISPARMIO ENERGIA LINGUA ENERGIA TEMPO OSM TEMPO SPEGN. AUT. SALVA SCHERMO RESET CONFIGURAZIONE :SEL EXIT:PRE SET:NEXT MENU:END :SEL EXIT:PRE MENU:END...
  • Page 162 All manuals and user guides at all-guides.com Controlli OSM (ON-Screen-Manager) - Ingresso DVD&HD Menu principale IMMAGINE AUDIO PICTURE IN PICTURE IMMAGINE CONFIGURAZIONE Sottomenu :SEL EXIT:PRE SET:NEXT MENU:END Regola la luminosità dell’immagine e dello schermo. LUMINOSITÀ LUMINOSITÀ CONTRASTO NITIDEZZA LUMINOSITÀ COLORE LIVELLO DI NERO RESET IMMAGINE Premere il pulsante + per aumentare la luminosità.
  • Page 163 All manuals and user guides at all-guides.com Menu principale IMMAGINE AUDIO PICTURE IN PICTURE PICTURE IN PICTURE CONFIGURAZIONE Sottomenu :SEL EXIT:PRE SET:NEXT MENU:END Permette di selezionare le dimensioni dell’immagine DIMENSIONI PIP inserita nella modalità Picture in Picture (immagine DIMENSIONI PIP GRANDE DIMENSIONI PIP AUDIO PIP...
  • Page 164 All manuals and user guides at all-guides.com Controlli OSM (On-Screen-Manager) - Ingresso AV Menu principale IMMAGINE AUDIO PICTURE IN PICTURE IMMAGINE CONFIGURAZIONE Sottomenu :SEL EXIT:PRE SET:NEXT MENU:END Regola la luminosità dell’immagine e dello schermo. LUMINOSITÀ LUMINOSITÀ CONTRASTO NITIDEZZA LUMINOSITÀ TINTA COLORE LIVELLO DI NERO RIDUZIONE RUMORE...
  • Page 165 All manuals and user guides at all-guides.com Menu principale IMMAGINE AUDIO PICTURE IN PICTURE AUDIO CONFIGURAZIONE Sottomenu :SEL EXIT:PRE SET:NEXT MENU:END Per accentuare o ridurre i suoni ad alta frequenza. ALTI ALTI BASSI RESET AUDIO ALTI Premere il pulsante + per aumentare il suono ALTO. Premere il pulsante - per diminuire il suono ALTO.
  • Page 166 All manuals and user guides at all-guides.com Per attivare e disattivare lo spegnimento automatico. TEMPO SPEGN. AUT. TEMPO LINGUA Nel menu TEMPO SPEGN. AUT. è possibile selezionare OSM TIME TEMPO SPEGN. AUT. SPEGN. AUT. lo spegnimento automatico del monitor dopo l’accensione. SALVA SCHERMO SISTEMA COLORE È...
  • Page 167 All manuals and user guides at all-guides.com Controllo del monitor LCD attraverso il controllo remoto RS-232C Questo monitor LCD può essere controllato in modo remoto collegandolo ad un computer con interfaccia RS-232C. Le seguenti funzioni possono essere controllate da un computer: •...
  • Page 168 All manuals and user guides at all-guides.com 3) Sequenza di controllo (1) Il comando lanciato da un computer al monitor LCD viene inviato entro 400 ms. (2) Il monitor LCD invia un comando di ritorno 400 ms* dopo aver ricevuto ed eseguito un codice. Se il comando non viene ricevuto in modo corretto, il monitor LCD non invia il comando di ritorno.
  • Page 169 12.864 cm (L) x 7.236 cm (H) o a 512 punti x 384 linee, che corrisponde a 25.728 cm (L) x 19.296 cm (H) (2) Impostare il colore della finestra su rosso scuro (R=128, G=0, B=0). Non ci devono essere testo, linee, modelli, etc. nella finestra. Impostare il monitor (LCD3000) come segue: (3) Selezionare “PICTURE IN PICTURE” sull’OSM. (4) Selezionare “DIMENSIONI PIP” sull’OSM.
  • Page 170: Risoluzione Dei Problemi

    “fantasma”, per cancellarlo il monitor deve rimanere spento per un’ora. NOTA: Come per tutti i dispositivi di visualizzazione, NEC-Mitsubishi Electronic Display Europe raccomanda di utilizzare a intervalli regolari uno screen saver quando lo schermo non è attivo.
  • Page 171 All manuals and user guides at all-guides.com Specifiche tecniche per LCD3000 Specifiche del prodotto Ingresso analogico Ingresso digitale Modulo LCD (29,5" / 75 cm diagonale) Passo pixel: 0,5025 mm Risoluzione: 1280 x 768 punti (WXGA) Colore: 16,777,216 Luminosità: 450cd/m (tipo).
  • Page 172 All manuals and user guides at all-guides.com Assegnazione spinotti 1) Input RGB analogico (MiniDsub15p): R G B 2 N. Pin Nome Segnale video rosso (Red) Segnale video verde (Green) Segnale video blu (Blue) Mini D-SUB 15P DDC-GND Red-GND Green-GND Blue-GND SYNC-GND DDC-SDA H-SYNC...
  • Page 173 All manuals and user guides at all-guides.com xx_Back 15/10/02, 12:11 pm...
  • Page 174 All manuals and user guides at all-guides.com Printed in Japan Printed on recycled paper Part No. 7A812481 xx_Back 15/10/02, 12:11 pm...

Table des Matières