GE JCSP42 Instructions D'utilisation
Installation
Instructions
If you have questions, call 1.800.361.3400 or visit our website at:
www.GEAppliances.ca
Before You Begin
Read these instructions carefully and completely.
IMPORTANT
•
instructions for local inspector's use.
IMPORTANT
•
governing codes and ordinances.
Parts Included
Rear Filler
2 Screws
Materials Needed
Lag Bolts
(For Concrete Floors Only)
(CSA Approved 40 or 50 AMP)
4-Wire Cord
1.2 m (4') long
31-10623-1
01-06 JR
—Save these
—Observe all
Screws
Anti-Tip Bracket
Anchor Sleeves
OR
3-Wire Cord
1.2 m (4') long
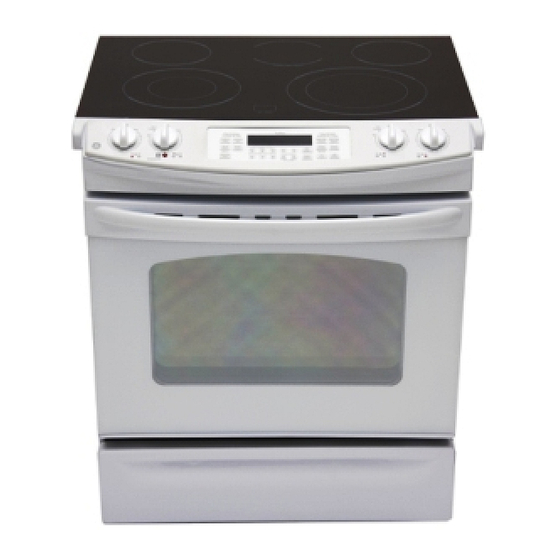
Self-Cleaning Radiant
Electric Slide-In Range
JCSP42, JCS968, JCS905
• Note to Installer—Be sure to leave these
instructions with the consumer.
• Note to Consumer—Keep these
instructions for future reference.
• Proper installation is the responsibility
of the installer and product failure due
to improper installation is NOT covered
under warranty.
• NOTE—This appliance must be properly
grounded.
Tools Needed
1/8" (3 mm) Drill Bit and
Electric or Hand Drill
Level
Tape Measure
Straight Edge
or Square
Hand or Sabre Saw
1
Wrench or Pliers
(for 1-7/16" Nut)
1/4" Nut Driver
Pliers
Pencil
Safety Glasses
Table des Matières

Manuels Connexes pour GE JCSP42


Sommaire des Matières pour GE JCSP42
- Page 1 Self-Cleaning Radiant Installation Electric Slide-In Range Instructions JCSP42, JCS968, JCS905 If you have questions, call 1.800.361.3400 or visit our website at: www.GEAppliances.ca Before You Begin • Note to Installer—Be sure to leave these instructions with the consumer. Read these instructions carefully and completely.
-
Page 2: Installation Instructions
Installation Instructions IMPORTANT SAFETY INSTRUCTIONS For Your Safety Electrical Requirements WARNING: For personal This appliance must be supplied with the safety, remove house fuse or open proper voltage and frequency, and connected circuit breaker before beginning to an individual, properly grounded branch installation. - Page 3 To obtain Kits: a. Visit GE Web Site (See page 1) b. Call GE Answer Center (See page 1) c. Contact Dealer (Continued on following page)
- Page 4 Installation Instructions Pre-Installation Checklist cont. Door removal is not a requirement for Storage Drawer Removal installation of the product, but is an added convenience. To remove the door: Pull the drawer out until it stops. Open the oven door as far as it will go. Lift the front of the drawer until the stops clear the guides.
- Page 5 Installation Instructions Pre-Installation Cutout and Required Clearances If cabinets are placed less than 76.2 cm (30”) above the range, see Alternate Construction, section AF, on page 12. 76.2 cm (30”) ranges conform to CSA requirements for 0 cm (0”) spacing from vertical walls below countertops.
-
Page 6: Standard Installation
Installation Instructions Standard Installation STANDARD INSTALLATION Wall 6.3 mm (1/4”) Min. Flat Flat Area 63.5 cm (25”) 58.9 cm Typically (23-3/16”) 1.4 cm 1.4 cm (9/16”) Min. (9/16”) Min. Flat Flat 91.4 cm (36”) 6.3 mm (1/4”) Smooth Cut 76 cm (29-15/16”) – 76.4 cm (30-1/16”) If the construction of your cabinet cannot Center the 76.2 cm (30”) wide opening provide a 6.3 mm (1/4”) flat area at the... - Page 7 Installation Instructions Installing the Anti-Tip Bracket Locating the Bracket Installing the Bracket in Wood or Concrete a. Decide whether the bracket will be INSTALLATION—WOOD CONSTRUCTION installed on the right or left side of the range opening. a. Locate the centers of the 4 holes identified b.
- Page 8 Installation Instructions Installing The Range Slide Range Into Opening Slide Range Into Opening (cont.) Position the range in front of the Plug the range cord into the receptacle. cabinet opening. Locate the cord in the back of the range in a manner that it will not touch or be Make sure that the glass which moved by the drawer.
-
Page 9: Replacing The Oven Door
Installation Instructions Installing The Range cont. Replacing the Oven Door Replacing the Storage Drawer Place the NOTE: The oven door is heavy. You drawer rail may need help lifting the door high on the guides. enough to slide it into the hinge slots. Push the Do not lift the door by the handle. -
Page 10: Operation Checklist
Installation Instructions Final Checklist Check to make sure the circuit breaker is closed (Reset) or the circuit fuses are replaced. Be sure power is in service to the building. Check to be sure that all packing materials and tape on metal panel (if applicable) under control knobs and drawer have been removed. - Page 11 Installation Instructions Alternate Construction If you use the filler kit, place the metal filler Optional Maintop Filler or piece supplied with the range to the back Backguard Kit of the range as shown in the figure below. Start the 2 screws into the upper holes at the If counter opening extends to the wall, it will outside rear of the range above the louvers require Maintop Filler Kit (supplied with the...
- Page 12 Installation Instructions Alternate Construction cont. Countertops Higher Than Island Installation 92.7 cm (36-1/2”) Attach the Anti-Tip bracket per instructions If countertop height is between 92.7 cm in section C, making sure that the rear of (36-1/2”) and 96.5 cm (38”), a lower trim kit the bracket is 63.5 cm (25”) from the front (JXS56XX) is recommended.