Elipson REFERENCE Serie Manuel D'utilisation

Manuels Connexes pour Elipson REFERENCE Serie

Sommaire des Matières pour Elipson REFERENCE Serie
- Page 1 P1 F GAMME RÉFÉRENCE PRÉAMPLIFICATEUR REFERENCE SERIES PRE-AMPLIFIER MANUEL D’UTILISATION USER MANUAL www.elipson.com...
- Page 2 ATTENTION ASSUREZ-VOUS DE LIRE CE MANUEL D’INSTRUCTIONS AVANT DE METTRE SOUS TENSION OU DE BRANCHER CE PRÉAMPLIFICATEUR.
- Page 3 Cette modularité, tant pour la partie analogique que numérique est supportée par un software interne « upgradable » par l’utilisateur au moyen d’une prise USB facilement accessible. Votre préamplificateur Elipson est donc un appareil du présent tourné vers le futur.
-
Page 4: Table Des Matières
SOMMAIRE I. INFORMATIONS GÉNÉRALES : III. MODULE ADDITIONNEL : - Déballage et remballage des éléments - Module Phono MM & MC - Utilisation, panneau avant, télécommande - Installation - Les entrées, panneau arrière - Mise à jour - Précautions avant branchement - Module DAC - Installation - Mise à... -
Page 5: Informations Générales
I. INFORMATION GÉNÉRALES DANS L’EMBALLAGE VOUS Y TROUVEREZ : Préamplificateur Elipson P1 / P1F Le câble d’alimentation secteur standby display INSTRUCTIONS volume source mute Télécommande avec pile incluse La notice d’utilisation Une paire de gants Nous vous recommandons vivement de conserver cet emballage... -
Page 6: Déballage Et Remballage Des Éléments
DÉBALLAGE ET REMBALLAGE DES ÉLÉMENTS Dans son emballage, votre appareil est pris en étau entre deux films de suspension pour garantir un maintien optimal de l’appareil durant son transport. L’emballage est constitué de deux cales, dites cales basse et haute qui doivent être mises dans le sens suggéré par le texte inscrit sur celles-ci : Positionnez la cale basse dans Placez l’appareil, bien centré,... - Page 7 Cale haute Appareil Cale basse Emballage...
-
Page 8: Utilisation, Panneau Avant, Télécommande
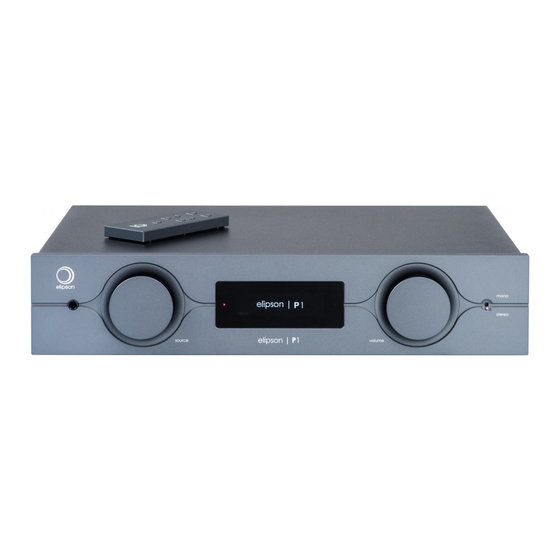
UTILISATION, PANNEAU AVANT Prise casque jack Afficheur Switch 6.35 mm numérique mono/stéréo Molette de mise Molette de réglage de en veille / mise en volume de balance et fonction et de selection de mute des sources... - Page 9 TÉLÉCOMMANDE Standby : mise en fonction / mise en veille Display : gestion de l’affichage standby display Volume : augmenter le niveau (+) / Sélection des sources diminuer le niveau (-) volume source Mode muet mute...
-
Page 10: Les Entrées, Panneau Arrière
LES ENTRÉES, PANNEAU ARRIÈRE Entrée / Entrée Entrée Port USB pour Interrupteur Sortie analogique 2 analogique 2 effectuer une 0 : arrêt pour canal Droit Sorties caisson canal Gauche mise à jour du 1 : marche trigger (AN 2) de basse (AN 2) logiciel Porte fusible... - Page 11 LES MODULES ADDITIONNELS Module numérique (MDAC I) additionnel pour P1 (inclus pour le modèle P1F), détaillé page 19 Vis moletée Entrée USB B Entrée S/PDIF Entrée S/PDIF Tostlink Coaxiale Module phono RIAA (MPH II) additionnel pour P1 (inclus pour le modèle P1F), détaillé page 19 Vis moletée / mise à...
-
Page 12: Précautions Avant Branchement
PRÉCAUTIONS AVANT BRANCHEMENT Toujours éteindre l’alimentation de votre amplificateur et de votre préamplificateur avant d’effectuer toute connexion. Avant de remettre en marche votre amplificateur et votre préamplificateur, assurez-vous que le volume de votre préamplificateur soit au minimum et qu’aucun court-circuit ne soit présent au niveau du câblage. Lorsque vous décidez de l’emplacement final, gardez à... -
Page 13: Branchements
CONNEXION À UN AMPLIFICATEUR DE PUISSANCE Le préamplificateur est pourvu de sorties Balanced / Symétriques Pour une association avec l’amplificateur Elipson A2700 nous et Unbalanced /Asymétriques autorisant la connexion à une vous recommandons d’utiliser la sortie symétrique de la manière multitude d’amplificateur de puissance. -
Page 14: Connexion À Vos Sources
CONNEXION À VOS SOURCES Nativement, vous pouvez connecter une source Balanced/ symétrique ainsi que deux sources Unbalanced/Asymétriques aux elipson | P1 entrées situées sur le panneau arrière. Veillez à bien respecter les canaux droite et gauche entre votre Préamplificateur et vos sources pour garantir une image stéréo fidèle. - Page 15 Sélection des sources Si vous disposez de la carte Phono : MPH II, un sélecteur arrière de Une fois l’appareil allumé, la source précédemment utilisée votre module MPH II, vous permet de sélectionner le type de votre apparaît à l’écran. Pour changer de sources, il vous suffit de cellule : aimant mobile (MM) ou bobine mobile (MC).
- Page 16 Réglage de la balance droite/gauche Pour augmenter le niveau sonore sur votre enceinte de gauche, il Si vous percevez un déséquilibre de niveau entre vos enceintes vous suffit de tourner la molette de droite dans le sens anti-horaire. gauche et droite à votre position d’écoute, le préamplificateur P1 Cette fois-ci la valeur de votre réglage sera précédée de la lettre intègre un réglage fin de balance par pas de 0,5 dB.
- Page 17 Vous retournez alors dans le menu principal de votre source active Pour une écoute en Stéréo et visualiserez un curseur faisant fois de votre réglage de balance : Pour profiter d’une écoute en stéréo, il vous suffit de placer le curseur à...
-
Page 18: Trigger
Pour une écoute au casque Trigger Lorsque vous connectez votre prise jack 6.35mm de casque Pour synchroniser l’allumage du préamplificateur avec celui des au préamplificateur, les sorties vers votre amplificateur sont autres appareils de votre système, vous pouvez le relier via une automatiquement coupée et le dessin suivant apparaît sur connectique mini-jack 3.5mm mono à... -
Page 19: Module Additionnel
à télécharger le dossier "driverMDAC_1" disponible arrière de la carte pour insérer totalement celle-ci. Vous n’avez sur la page de votre appareil Référence du site www.elipson.com. plus qu’à resserrer les vis moletées pour solidariser l’ensemble. La procédure d’installation est détaillée dans un fichier PDF de ce dossier. -
Page 20: Informations Additionnelles
La phase de l’alimentation secteur en courant alternatif peut faire vous ajoutez ou remplacez une carte optionnelle ou sous conseil une différence significative pour le rendu sonore en terme de de votre représentant Elipson. spatialisation et précision du timbre. La procédure doit être faite avec un ordinateur WINDOWS. Prenez Utilisez un tournevis testeur de phase (non fourni) pour vérifier quelle... -
Page 21: Temps De Mise En Fonction
TEMPS DE MISE EN FONCTION RACKER SON PRÉAMPLIFICATEUR L’appareil est de suite fonctionnel dès sa première mise en œuvre. Si vous souhaitez placer votre préamplificateur dans un rack, Il vous suffit de positionner l’interrupteur d’alimentation arrière sur Vous trouverez en option auprès de votre revendeur, des équerres "... -
Page 22: En Cas De Panne
EN CAS DE PANNES DYSFONCTIONNEMENT POSSIBLE ET PROCÉDURES DE TEST : • Bruit parasite type ronflement dans les enceintes : • Signal faible ou absent sur un ou deux canaux : 1. Le ronflement peut être causé par un problème 1. -
Page 23: Garantie
Si vous ne pouvez pas contacter votre fabrication dans des conditions normales revendeur d’origine, ou si vous utilisez votre d’utilisation avec un produit égal et/ou produit Elipson en dehors du pays d’achat, courant. vous devez contacter distributeur national Elipson dans le pays de résidence,... -
Page 24: Caractéristiques
IV. CARACTÉRISTIQUES TECHNIQUE DIVERS Nombre total d’entrées ENTRÉE LIGNE Tension de sortie maximale Entrées Ligne 21 dBu (18,8 dBV)@ THD=1 % 2 x Line RCA + 1 x Sym XLR Diaphonie Sorties < -100 dB jusqu’à 10 kHz 1 x RCA stereo (Asym) + 1 x XLR stéréo (Sym) + sub + trigger out Impédance d’entrée (symétrique/asymétrique) Mode Stéréo/Mono 500 kΩ... - Page 25 CARTES OPTIONNELLES ETAGE PHONO RIAA (MPH II) ETAGE DAC (MDAC I) MM & MC : Aimant mobile et bobine mobile S/PDIF & USB asynchrone Entrées Entrées 1 x RCA Stéréo + châssis 1 x USB B 1 x S/PDIF optique Toslink Amplification entrée (1kHz) MM / MC 1 x S/PDIF coaxiale RCA 41 dB / 61 dB...
-
Page 26: V.conditions De Sécurité
V. CONDITIONS DE SÉCURITÉ ATTENTION Avertissement Pour réduire risque 3. Intrusion d’objet ou de liquide UTILISER ABSOLUMENT UN FUSIBLE DE RECHANGE d’incendie ou de choc électrique, n’exposez Veillez à ce que des objets ne tombent pas et IDENTIQUE pas cet appareil à la pluie, à l’humidité et à... - Page 27 7. Racks et supports L’interrupteur d’alimentation est un interrupteur le immédiatement et débranchez-le de la Utilisez uniquement un rack ou un support unipolaire. Lorsque l’interrupteur est en position prise murale. Contactez immédiatement votre stable recommandé pour les équipements "Off ou 0", l’appareil n’est pas complètement revendeur.
- Page 28 2.4g and 5g Statements which can be determined by turning the Le présent appareil est conforme aux CNR This device complies with Part 15 of the FCC equipment off and on, the user is encouraged d’Industrie Canada applicables aux appareils Rules.
- Page 29 AV-INDUSTRY. Le symbole DEEE indique que ce produit ELIPSON marque déposée ELIPSON est conforme à la directive 2012/19/ AV-INDUSTRY. UE du Parlement et Conseil Européen relatif aux déchets d’équipements électriques et AV-INDUSTRY électroniques (DEEE). Ce produit doit être 309 avenue du Général de Gaulle...
- Page 30 P1 F GAMME RÉFÉRENCE PRÉAMPLIFICATEUR www.elipson.com...
- Page 31 P1 F REFERENCE SERIES PRE-AMPLIFIER USER MANUAL ENGLISH VERSION www.elipson.com...
- Page 32 WARNING PLEASE READ CAREFULLY THIS USER MANUAL BEFORE TURNING ON OR CONNECTING THIS PREAMPLIFIER.
- Page 60 P1 F REFERENCE SERIES PRE-AMPLIFIER www.elipson.com...