
Manuels Connexes pour Janome MY LOCK 644D


Sommaire des Matières pour Janome MY LOCK 644D
- Page 1 INSTRUCTION BOOK MANUEL D’INSTRUCTIONS LIBRO DE INSTRUCCIONES MODEL MODÉLE MODELO...
- Page 2 OPERATING INSTRUCTION: For appliances with a polarized plug (one blade wider than the other): To reduce the risk of electric shock, this plug is intended to fit in a polarized outlet only one way. If the plug does not fit fully in the outlet, reverse the plug. If it still does not fit, contact a qualified electrician to install the proper outlet.
- Page 3 IMPORTANT SAFETY INSTRUCTIONS Your sewing machine is designed and constructed only for HOUSEHOLD use. Read all Instructions before using this appliance. DANGER – To reduce the risk of electric shock: 1. An appliance should never be left unattended when plugged in. Always unplug this appliance from the electrical outlet immediately after using and before cleaning.
- Page 4 DIRECTIVES IMPORTANTES SUR LA SÉCURITÉ Cette machine à coudre est conçue et fabriquée uniquement pour l’usage DOMESTIQUE. Lire toutes les instructions avant d’utiliser la machine à coudre. DANGER : Pour réduire le risque de secousse électrique : 1. Cette machine à coudre ne devrait jamais être laissée sans surveillance lorsqu’elle est branchée. Débrancher toujours cette machine à...
- Page 5 IMPORTANTES INDICACIONES DE SEGURIDAD Su máquina de coser está diseñada y construida solo para uso DOMÉSTICO. Lea todas las instrucciones antes de utilizar (este aparato). PELIGRO - Para reducir el riesgo de un choque eléctrico: 1. Un aparato eléctrico nunca se debe dejar desatendido cuando está enchufado. Siempre desenchufe este aparato del tomacorriente inmediatamente después de usarlo, y antes de limpiarlo.
- Page 6 Do’s and Don’ts 1. Always be aware of the up-and-down movement of the needle and do not turn your attention away from the machine while it is running. 2. When leaving the sewing machine unattended, the main switch of the machine must be switched off or the plug must be removed from the socket-outlet.
-
Page 7: Table Des Matières
TABLE OF CONTENTS ROLLED HEMMING, PICOT EDGING AND PREPARATION NARROW HEMMING Names of Parts ............8 Machine Setting and Thread, Fabric and Attaching the Waste Chip Box ......10 Range of the Tension Dial ........76 Storing the Accessory Box ........10 Thread Tension ............. - Page 8 TABLE DES MATIÈRES PRÉPARATION ROULEAUTÉ, REVERS Á PICOTS ET OURLET ÉTROIT Nom des pièces ............... 9 Pose de la boîte de rebut ..........11 Réglage de la machine et fil, tissu et portée du cadran de Rangement de la boîte d’accessoires......11 tension ................
- Page 9 ÍNDICE RUEDO ENROLLADO, BORDE PICOT Y PREPARACIÓN RUEDO ANGOSTO Nombres de las piezas ............. 9 Para acoplar la caja de desperdicios ......11 Graduación de la máquina y el hilo, tela y alcance del Para guardar la caja de accesorios ......... 11 regulador de tensión ............
-
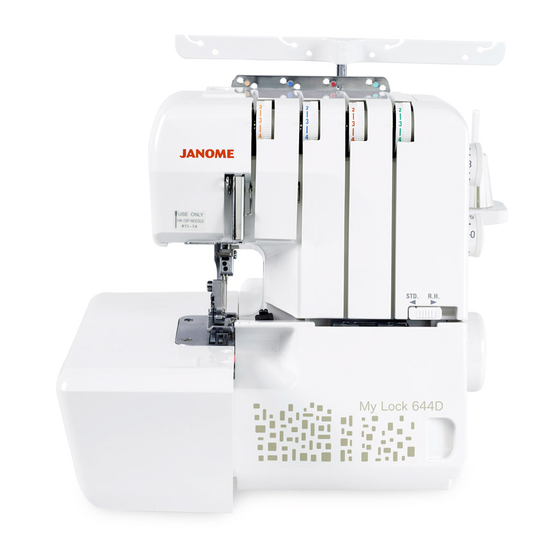
Page 10: Preparation Names Of Parts
PREPARATION Names of Parts Left needle thread tension dial Right needle thread tension dial Upper looper thread tension dial Lower looper thread tension dial Side cover Looper cover Handwheel Power switch Machine socket Differential feed dial Stitch length dial Spool stand Spool holder Spool pin Thread guide bar... -
Page 11: Nom Des Pièces
PREPARACÓN PRÉPARATION Nombres de las Piezas Noms des pièces Regulador de tensión de hilo de la aguja izquierda Cadran de tension du fil d’aiguille gauche Regulador de tensión de hilo de la aguja derecha Cadran de tension du fil d’aiguille droite Regulador de tensión de hilo del lazador superior Cadran de tension du fil du boucleur supérieur Regulador de tensión de hilo del lazador inferior... -
Page 12: Attaching The Waste Chip Box
Attaching the Waste Chip Box Insert the hook into groove on looper cover. Groove Looper cover Waste chip box Hook Storing the Accessory Box Insert the accessory box into the waste chip box. Waste chip box Accessory box Standard Accessories Screwdriver (Large) Screwdriver (Small) Tweezers... -
Page 13: Pose De La Boîte De Rebut
Pose de la boîte de rebut Para acoplar la caja de desperdicios Insérer le crochet dans l’encoche du couvercle du Introduzca el gancho dentro de la ranura de la cubierta boucleur. superior Encoche Ranura Couvercle du boucleur Cubierta del lazador Boîte de rebut Caja de desperdicios Crochet... -
Page 14: Connecting The Machine To The Power Supply
Connecting the Machine to the Power Supply 1. Turn off the power switch, and connect the machine plug to the machine socket. 2. Connect the power supply plug to your power supply. 3. Turn on the power switch. Power switch Machine plug Machine socket Power supply plug... -
Page 15: Raccordement De La Machine À La Source D'alimentation
Raccordement de la machine à la source d’alimen- Conectar la máquina a la energía eléctrica tation 1. Desconecte el interruptor de energía, y conecte el 1. Éteindre l’interrupteur et brancher la prise de la enchufe de la máquina al tomacorriente de la machine à... -
Page 16: How To Turn The Handwheel
How to Turn the Handwheel Always turn the handwheel toward you (Counterclockwise). Handwheel Opening and Closing the Side Cover To open: Push the side cover to the left. To close: Push the side cover to the right. Side cover Opening and Closing the Looper Cover To open: (A) While pushing with the thumb to the right as far as it will go, pull the looper cover toward you. -
Page 17: Comment Tourner Le Volant
Comment tourner le volant Cómo voltear el volante Toujours tourner le volant vers soi (mouvement anti- Siempre voltee el volante hacia usted (en sentido contrario horaire). al reloj). Volant Volante Ouverture et fermeture du couvercle latéral Abrir y cerrar la cubierta lateral Pour ouvrir : Para abrir: Pousser le couvercle latéral vers la gauche. -
Page 18: The Position Of Thread Guide Bar
The Position of Thread Guide Bar 1. Pull the thread guide bar up as far as it will go. 2. Turn the thread guide bar so that the thread guides are right above the spool pins. Thread guide bar Thread guide Stoppers Spool pin * Make sure the two stoppers on the thread guide... -
Page 19: Position De La Barre Du Guide-Fil
Position de la barre du guide-fil La posición de la barra guíahilos 1. Tirer la barre du guide-fil aussi loin que possible. 1. Hale la barra guíahilos hacia arriba lo más que pueda. 2. Tourner la barre du guide-fil pour que les guide-fils se trouvent juste au-dessus des broches à... -
Page 20: Changing Needle
Changing Needle Turn off the power switch and unplug the machine. Raise the needle to its highest position. Then loosen the left or right needle clamp screw for the needle you are going to remove. Needle clamp screw on the left Needle clamp screw on the right * Use HA-1SP No.14 Needle or No.11. -
Page 21: Changement De L'aiguille
Changement de l’aiguille Cambiar la aguja Éteindre l’interrupteur et débrancher la machine. Apague el interruptor de corriente y desenchufe la máquina. Soulever l’aiguille à sa position la plus haute. Levante la aguja a su posición más alta. Desserrer ensuite la vis de pince-aiguille gauche ou droite pour l’aiguille qui sera retirée. -
Page 22: Raising Or Lowering The Presser Foot
Raising or Lowering the Presser Foot By raising or lowering the presser foot lifter, the presser foot goes up or down. * While in operation, keep the presser foot lowered except when threading the machine or test running without threads. Thread tension will be released when the presser foot lifter is raised. -
Page 23: Soulever Ou Baisser Le Pied Presseur
Soulever ou baisser le pied presseur Subir o bajar el pie prensatela Levantado o bajando el elevador del pie prensatela, el pie En soulevant ou en baissant le releveur de pied presseur, prensatela subirá o bajará. le pied presseur monte et descend. * Cuando esté... -
Page 24: Adjustment Of Stitch Length
Adjustment of Stitch Length To select stitch length, turn the dial. The larger the number, the longer the stitch. The stitch length can be adjusted from 1 to 5 mm. Position “R” is for rolled and narrow hemmings. Stitch length dial Setting mark Adjustment of Differential Feed Ratio The differential feed ratio can be altered by turning... -
Page 25: Réglage De La Longueur Des Points
Réglage de la longueur des points Ajuste del largo de puntada Pour sélectionner la longueur des points, tourner le Seleccione el largo de la puntada volteando el regulador. cadran. Cuanto más alto el número más larga será la puntada. Plus le chiffre est élevé, plus la longueur des points est Se puede graduar el largo de la puntada de 1 a 5 mm. -
Page 26: To Deactivate The Upper Knife
To Deactivate the Upper Knife 1. Turn off the power switch and unplug the machine. 2. Open the looper cover and side cover. 3. Pull out the upper knife release knob and slide it down along the guide until it comes to its lowest position. -
Page 27: Désactiver Le Couteau Supérieur
Désactiver le couteau supérieur Para desactivar la cuchilla superior 1. Éteindre l’interrupteur et débrancher la machine. 1. Apague el interruptor de corriente y desenchufe la máquina. 2. Ouvrir le couvercle du boucleur et le couvercle latéral. 2. Abra la cubierta del lazador y la cubierta lateral. 3. -
Page 28: Adjustment Of Cutting Width
Adjustment of Cutting Width When cutting width is too narrow or too wide against seam width, adjust it as follows. 1. Turn off the power switch and unplug the machine. 2. Open the looper cover and side cover. 3. Turn the cutting width adjusting dial to get desired position of the lower knife. -
Page 29: Réglage De La Largeur De Coupe
Réglage de la largeur de coupe Ajuste del ancho del corte Cuando el ancho del corte es muy angosto o muy ancho en Lorsque la largeur de coupe est trop étroite ou trop large par rapport à la largeur de couture, la régler relación con el ancho de la costura, ajústelo como sigue: comme suit : 1. -
Page 30: Adjustment Of Needle Plate Setting Knob
Adjustment of Needle Plate Setting Knob (Changing to Standard Serging or Rolled Hemming) The needle plate setting knob is connected with the chaining finger. The chaining finger will slide back and forth when you set the needle plate setting knob at "S" or "R". 1. -
Page 31: Réglage Du Bouton De Réglage De La Plaque À Aiguille
Réglage du bouton de réglage de la plaque à aiguille Ajuste de la perilla de graduación de la plancha de (changement au surfilage standard ou aguja (Cambio a surjete estándar o ruedo enrollado) rouleauté) La perilla de graduación de la plancha de aguja está Le bouton de réglage de la plaque à... -
Page 32: Setting The Lower Looper Pre-Tension Setting Slider And Changeable Thread Guide
Setting the lower looper pre-tension setting slider and changeable thread guide STD. R.H. Standard serging(STD.) Standard serging with 2, 3 or 4 threads Lower looper pre-tension setting slider Rolled hemming(R.H.) Rolled hemming with 2 or 3 threads STD. R.H. 3/4 thread serging Serging with 3 or 4 threads Changeable thread guide 2 thread serging... -
Page 33: Adjuste Del Dispositivo Deslizante De Pretensión Del Ojo- Guía Inferior Y Del Guia-Hiro Cambiante
Réglage du dispositif de glissement de réglage de Ajuste del dispositivo deslizante de pretensión del ojo- pre-tension du pied-de-biche inférieur et du guide- guía inferior y del guía-hilo cambiante fil changeant Surjet normal(STD.) Surjete estándar(STD.) Surjet normal à 2, 3 ou 4 fils Surjete estándar con 2, 3 o 4 hilos Dispositivo deslizante de pretensión del ojo-guía Dispositif de glissement de pretension du boucleur... -
Page 34: Changing To Two-Thread Serging
Changing to two-thread serging * In case of two-thread serging, use one needle thread and the lower looper thread. Remove other threads. To attach the spreader Put the tip of the spreader into the hole on the upper looper, and slide the spreader down into the holder. Spreader Upper looper Holder... -
Page 35: Changement Au Surjet À Deux Fils
Changement au surjet à deux fils Cambio al costura de dos hilos Pour installer l’épandeuse Para colocar la máquina extendedora Placez le bout de l’épandeuse dans le trou du pied-de- Ponga la punta de la máquina extendedora en el agujero biche, et glissez l’épandeuse vers le bas dans le support. -
Page 36: Threading The Machine
Threading the Machine The left illustration shows the completed threading conditions of the four threads. Lower looper thread Upper looper thread Right needle thread Left needle thread Thread guide Thread guide plate Threading chart The machine is pre-threaded to make threading easier. -
Page 37: Enfilage De La Machine
Enfilage de la machine Enhebrar la máquina L’illustration de gauche montre les conditions d’enfilage La figura a la izquierda muestra la condición del enhebrado terminé des quatre fils. ya terminado de los cuatro hilos. Fil du boucleur inférieur Hilo del lazador inferior Fil du boucleur supérieur Hilo del lazador superior Fil d’aiguille droite... - Page 38 • If one of the threads is broken, follow the re-threading procedure as follows: * Turn off the power switch and unplug the machine. 1. Raise the presser foot and pull the thread chain out to the back of the presser foot, and cut the chain to separate each of the threads.
- Page 39 • Si l’un des fils est cassé, suivre la procédure de • Si uno de los hilos se rompe, siga el procedimiento réenfilage comme suit : de re-enhebrado como sigue: * Éteindre l’interrupteur et débrancher la machine. * Apague el interruptor de corriente y desenchufe la máquina.
-
Page 40: Threading The Lower Looper
• Threading the Lower Looper Open the looper cover. Place the spool of thread on the right side spool pin. * The points to thread for lower looper are marked in green. * A convenient threading chart is placed on the machine body inside the looper cover. -
Page 41: Enfiler Le Boucleur Inférieur
• Enfiler le boucleur inférieur • Enhebrar el lazador inferior Ouvrir le couvercle du boucleur. Abra la cubierta del lazador. Placer la bobine de fil sur la broche à bobine droite. Coloque el carrete de hilo en la espiga para carrete en el * Les points à... - Page 42 4. Hook the thread on the corner , and then pass the thread through the looper thread guide. 5. Pass the thread through the changeable thread guide. 6. Pass the thread through the looper thread take-up lever (lower). 7. Pass the thread through the lower looper thread guide (1).
- Page 43 4. Accrocher le fil sur le coin (A), puis faire passer le 4. Enganche el hilo en la esquina (A), y luego páselo a fil dans le guide-fil du boucleur. través del guíahilo del lazador. 5. Faire passer le fil dans le guide-fil changeant. 5.
- Page 44 10. Move the lower looper to its rightmost position by turning the handwheel, and draw the thread with a pair of tweezers through the hole on the lower looper 10 cm (4˝) or more. * Make sure the needle threads are not tangled on the lower looper.
- Page 45 10. Déplacer le boucleur inférieur à sa position 10. Girando el volante, mueva el lazador inferior a su d’extrême droite en tournant le volant et faire posición extrema derecha, y con unas pinzas saque passer le fil à l’aide de pinces dans le trou du 10 cm (4 pulgadas) o más del hilo a través del boucleur inférieur sur 10 cm (4˝) ou plus.
-
Page 46: Threading The Upper Looper
• Threading the Upper Looper Place a spool of thread on the spool pin second from the right. * The points to thread for upper looper are marked in red. * A convenient threading chart is placed on the machine body inside the looper cover. 1. -
Page 47: Enfiler Le Boucleur Supérieur
• Enfiler le boucleur supérieur • Enhebrar el lazador superior Placer une bobine de fil sur la deuxième broche à bobine Coloque el carrete de hilo en la segunda espiga para carrete à partir de la droite. de la derecha. * Les points à... -
Page 48: How To Thread Only The Upper Looper
4. Hook the thread on the corner , and then pass the thread through the looper thread guide. Looper thread guide 5. Pass the thread through the looper thread take-up lever (upper). Looper thread take-up lever (upper) 6. Pass the thread through upper looper thread guide. -
Page 49: Boucleur Supérieur
4. Accrocher le fil sur le coin (B) et faire passer le fil 4. Enganche el hilo en la esquina (B), y luego páselo a dans le guide-fil du boucleur. través del guíahilo del lazador. Guide-fil du boucleur Guíahilo del lazador 5. -
Page 50: Threading The Needle On The Right
• Threading the Needle on the Right Place the spool of thread on the spool pin second from the left. * The points to thread for needle on the right are marked in blue. * A convenient threading chart is placed on the machine body inside the looper cover. -
Page 51: Enfiler L'aiguille De Droite
• Enfiler l’aiguille droite • Enhebrar la aguja derecha Placer la bobine de fil sur la deuxième broche à bobine à Coloque el carrete de hilo en la segunda espiga para carrete partir de la gauche. desde la izquierda. * Les points à enfiler pour l’aiguille droite sont * Los puntos para ensartar la aguja de la derecha marqués en bleu. -
Page 52: How To Use The Needle Threader
4, 5, 6. After passing through the front cover thread guide (1), pass the thread from the bottom of the front cover thread guide (2) and the take-up lever cover from right to left. 7. Guide the thread over the front cover thread guide (3). -
Page 53: • Emploi De L'enfile Aiguille
4, 5, 6. Après avoir franchi le guide-fil du couvercle 4, 5, 6. Después de pasarlo por el guíahilo de la avant (1), faire passer le fil à partir du bas du cubierta frontal (1), pase el hilo desde abajo del guide-fil du couvercle avant (2) et du couvercle guíahilo de la cubierta frontal (2) y la cubierta du levier tendeur de la droite vers la gauche. -
Page 54: Threading The Needle On The Left
• Threading the Needle on the Left Place the spool of thread on the left side spool pin. * The points to thread for needle on the left are marked in orange. * A convenient threading chart is placed on the machine body inside the looper cover. -
Page 55: Enfiler L'aiguille De Gauche
• Enfiler l’aiguille gauche • Enhebrar la aguja izquierda Placer la bobine de fil sur la broche à bobine gauche. Coloque el carrete de hilo en la espiga de carrete del lado izquierdo. * Les points à enfiler pour l’aiguille gauche sont indiqués en orange. - Page 56 4, 5. Slide the thread from the bottom of front cover thread guide (2) and the take-up lever cover right to left. 6. Guide the thread over the front cover thread guide (3). 7. Insert the thread into the left slot of the needle thread guide plate.
- Page 57 4, 5. Glisser le fil du bas du guide-fil du couvercle 4, 5. Pase el hilo desde abajo del guíahilo de la avant (2) et du couvercle du levier tendeur, de la cubierta frontal (2) y la cubierta de la palanca droite vers la gauche.
-
Page 58: Test Stitching Starting Sewing
TEST STITCHING Starting Sewing 1. Insert the fabric under the toe of the foot. (It is not necessary to raise the foot.) 2. Turn the handwheel gently toward you a couple of turns and check the thread chain. Then start sewing slowly. -
Page 59: Points D'essai Commencer À Coudre
POINTS D’ESSAI COSTURA DE PRUEBA Comenzar la costura Commencer à coudre 1. Introduzca la tela bajo la punta del pie. (No es 1. Insérer le tissu sous l’orteil du pied. (Il n’est pas necesario levantar el pie). nécessaire de soulever le pied). 2. -
Page 60: Securing Ends
Securing Ends To avoid unravelling, it is necessary to leave a thread chain about 5 cm (2˝) long at the beginning and at the end of a seam. To secure the beginning and end of a seam, choose one of the following methods. -
Page 61: Retenir Les Extrémités
Retenir les extrémités Cómo asegurar los cabos Para evitar que se desencadenen, es necesario dejar una Pour éviter l’effilochage, il est nécessaire de laisser une cadeneta de hilo de unos 5 cm (2 pulgadas) de largo, al chaîne de fils d’environ 5 cm (2˝) de long au début et à... -
Page 62: Thread Tension (4 Threads)
Thread Tension (4 threads) Correct tension The illustration at left shows sewing results with correct tension settings. However, adjusting the thread tension may be required depending upon the type of fabric and thread being used. Wrong side of fabric Right side of fabric Right needle thread Left needle thread Upper looper thread... -
Page 63: Tension Des Fils (4 Fils)
Tension des fils (4 fils) Tensión del hilo (4 hilos) Tensión correcta Bonne tension La figura a la izquierda demuestra el resultado de la L’illustration de gauche montre les résultats de couture costura con una graduación correcta de la tensión. Sin avec les bons réglages de tension. - Page 64 Looper thread tension is out of balance (1) The illustration shows sewing results when the lower looper thread tension is too tight and/or upper looper thread tension is too loose. Remedy: Loosen lower looper thread tension and/or tighten upper looper thread tension. Wrong side of fabric Right side of fabric Right needle thread...
- Page 65 Tension du fil de boucleur non équilibrée (1) La tensión del hilo del lazador no está equilibrada (1) L’illustration montre les résultats de couture lorsque la La figura muestra el resultado de la costura cuando la tension du fil du boucleur inférieur est trop serrée et/ou tensión del hilo del lazador inferior está...
-
Page 66: Threading The Machine (3 Threads)
Threading the Machine (3 threads) Using the needle on the right only (for regular three-thread serging) When you use the right needle, the standard sewing width is 3.5 mm. The illustration on the left shows you how to thread the needle. Note: Tighten the needle clamp screw on the side that is not being used to prevent losing the screw. -
Page 67: Enfiler La Machine (3 Fils)
Enfiler la machine (3 fils) Enhebrar la máquina (3 hilos) Emploi de l’aiguille droite seulement Usando la aguja de la derecha solamente (pour surfilage à trois fils régulier) (para surjete común de 3 hilos) Lorsque l’aiguille droite est utilisée, la largeur de couture Cuando usa la aguja derecha, el ancho estándar de la standard est de 3,5 mm. -
Page 68: Thread Tension (3 Threads)
Thread Tension (3 threads) Correct tension The illustration at left shows sewing results with correct tension settings. However, adjusting the thread tension may be required depending on the type of fabric and thread being used. Wrong side of fabric Right side of fabric Right or left needle thread Upper looper thread Lower looper thread... -
Page 69: Tension Des Fils (3 Fils)
Tension des fils (3 fils) Tensión del hilo (3 hilos) Bonne tension Tensión correcta La figura a la izquierda demuestra el resultado de la L’illustration à gauche montre les résultats de couture avec les réglages de tension appropriés. costura con una graduación correcta de la tensión. Sin Toutefois, le réglage de tension du fil peut être requis embargo, podría necesitarse un ajuste de la tensión del hilo selon le type de tissu et fil utilisés. -
Page 70: Threading The Machine (2 Threads)
Threading the Machine (2 threads) Using the needle on the right only (for regular two-thread serging) When you use the right needle, the standard sewing width is 3.5 mm. The illustration on the left shows you how to thread the needle. Note: Tighten the needle clamp screw on the side that is not being used to prevent losing the screw. -
Page 71: Enfilage De Machine(2 Fils)
Enfilage de la machine(2fils) Enhebrado de la máquina(2hilos) Utilisation de l’aiguille(côté droit) Utilización de la agujia derecha únicamente (pour le surjet á trois fois large ou pour le surjet á deux (Para la costura de tres hilos regular o para la costura de fils réglier): 3,5 mm de large dos hilos estrecha): 3,5 mm de ancho Lorsque l’aiguille droite est utilisée,la largeur de couture... -
Page 72: Thread Tension (2 Threads)
Thread Tension (2 threads) Correct tension The illustration at left shows sewing results with correct tension settings. However, adjusting the thread tension may be required depending on the type of fabric and thread being used. Wrong side of fabric Right side of fabric Right or left needle thread Lower looper thread Thread tension adjustment... -
Page 73: Tension Du Fils(2 Fils)
Tensión del hilo (2 hilos) Tension du fil (2 fils) Tensión correcta Bonne tension La figura en la izquierda muestra los resultados de la L'illustration à gauche montre une couture avec les bons r costura cuando la tensión está regulada correctamente. églages de tension. - Page 74 Needle/Lower looper thread tension is out of balance (2) The illustration shows sewing results when the needle thread tension is too tight and/or lower looper thread tension is too loose. Remedy: Loosen needle thread tension and/or tighten lower looper thread tension. Left needle thread tension dial Right needle thread tension dial Lower looper thread tension dial...
- Page 75 Tension du fil d'aiguille/boucleur inférieur non éq La tensión del hilo de la aguja/lazador inferior no está uilibrée (2) equilibrada (2) L'illustration montre les résultats de couture lorsque la La figura muestra los resultados de la costura cuando la tension du fil d'aiguille est trop serrée et/ou lorsque la tensión del hilo de la aguja está...
-
Page 76: Thread And Needle Chart
Thread and Needle Chart Differential Needle Type of thread Stitch length feed ratio Type of fabric Lightweight Organdy, Cotton: No. 80 – 100 HA-1 SP 2.0 – 3.0 0.5 – 1.0 Georgette, Silk: No. 80 – 100 No. 11 Lawn, Crepe Synthetic: No. -
Page 77: Cuadro De Hilos Y Agujas
Tableau des fils et aiguilles Rapport Longueur des Aiguille Type de tissu Type de fil d’entraînement points différentiel Léger : organdi, Coton : n°80 – 100 HA-1 SP 2.0 – 3.0 0.5 – 1.0 crêpe georgette, soie Soie : n° 80 – 100 N°... -
Page 78: Rolled Hemming, Picot Edging And Narrow Hemming
ROLLED HEMMING, PICOT EDGING AND NARROW HEMMING Machine Setting and Thread, Fabric and Range of the Tension Dial The setting of tension dials may vary depending on the type and thickness of fabric and thread being sewn. Picot Edging Narrow Hemming Rolled Hemming Stitch Length... -
Page 79: Tableau Des Fils Et Aiguilles
ROULEAUTÉ, REVERS À PICOTS ET OURLET ÉTROIT Réglage de la machine et fil, tissu et portée du cadran de tension Le réglage des cadrans de tension peut varier selon le type et l’ép aisseur du tissu et du fil utilisés. Rouleauté... -
Page 80: Ruedo Enrollado, Borde Picot Yruedo Angosto Graduación De La Máquina Y El Hilo, Tela Y Alcance Del Regulador De Tensión
RUEDO ENROLLADO, BORDE PICOT Y RUEDO ANGOSTO Graduación de la máquina, y el hilo, tela y alcance del regulador de tensión La graduación de los reguladores de tensión pueden variar dependiendo del tipo y grosor de la tela y el hilo que se usa. Ruedo angosto Borde picot Ruedo enrollado... - Page 81 (Blank page)
-
Page 82: Thread Tension
Thread Tension For rolled hemming and picot edging Correct tension The illustration at left shows sewing results with correct tension settings. Adjusting the thread tension may be required depending on the type of fabric and thread being used. Wrong side of fabric Right side of fabric Right needle thread Upper looper thread... -
Page 83: Tension Du Fil
Tension du fil Tensión del hilo Pour rouleauté et revers à picots Para el ruedo enrollado y el borde picot Bonne tension Tensión correcta L’illustration de gauche montre les résultats de couture La figura a la izquierda muestra el resultado de la costura avec les bons reeglages de tension. -
Page 84: For Better Results
For Better Results Rolled hemming Pull the end of thread chain to the back lightly in the beginning and end of sewing. Fabric Thread chain Picot edging Pull the fabric lightly to the back while sewing. Fabric For narrow hemming Correct tension The illustration at left shows sewing results with correct tension settings. - Page 85 Pour de meilleurs résultats Para obtener mejores resultados Rouleauté Ruedo enrollado Tirer légèrement l’extrémité de la chaîne de fils vers l’ Hale el extremo de la cadeneta de hilo ligeramente hacia arrière au début et à la fin de la couture. atrás al comienzo y al final de la costura.
-
Page 86: Decorative Overedging
DECORATIVE OVEREDGING * Refer to pages 60, 62, 66 for thread tension balance adjustment. * For the best results, pull the thread chain to the back lightly at the beginning and end of sewing. Overedging Thread and Fabric Thread Fabric Synthetic : No. -
Page 87: Pour De Meilleurs Résultats
SOBREBORDE DECORATIVO SURJET DÉCORATIF * Se référer aux pages 61, 63, 67 pour le réglage * Refiérase a las páginas 61, 63, 67 para hacer los d’équilibre de tension du fil. ajustes del equilibrio de tensión del hilo. * Pour obtenir de meilleurs résultats, tirer légèrement * Para obtener mejor resultado, hale la cadeneta de la chaîne de fils vers l’arrière au début et à... -
Page 88: Pin Tucking
PIN TUCKING * Refer to page 76 (Narrow Hemming) for thread tension balance adjustment. Pin tucking Thread and Fabric Thread Fabric Synthetic : No. 60~80 Needle thread on the Light to Silk : No. 50~80 right Medium Upper looper thread Synthetic : No. -
Page 89: Nervure
NERVURE ALFORZAS * Se référer à la page 77 (ourlet étroit) pour le réglage * Refiérase a la página 78 (ruedo angosto) para hacer d’équilibre de la tension du fil. los ajustes del equilibrio de la tensión del hilo. Nervure Alforzas Fil et tissu Hilo y tela... -
Page 90: Care Of Your Machine
CARE OF YOUR MACHINE Replacing the Upper Knife To remove: 1. Turn off the power switch and unplug the machine. 2. Open the looper cover and side cover. 3. Turn the handwheel toward you until the upper knife reaches its highest position. 4. -
Page 91: Entretien De La Machine Remplacement Du Couteau Supérieur
ENTRETIEN DE LA MACHINE CUIDADO DE SU MÁQUINA Remplacement du couteau supérieur Reemplazo de la cuchilla superior Retrait : Para sacarla: 1. Éteindre l’interrupteur et débrancher la machine. 1. Apague el interruptor de corriente y desenchufe la máquina. 2. Ouvrir le couvercle du boucleur et le couvercle latéral. -
Page 92: Replacing The Light Bulb
Replacing the Light Bulb 1. Turn off the power switch and unplug the machine. 2. Loosen the face plate set screw, and remove the face plate. Face plate Set screw To remove: Push and twist to the left. To attach: Push and twist to the right. -
Page 93: Remplacement De L'ampoule
Remplacement de l’ampoule Reemplazo de la bombilla de luz 1. Éteindre l’interrupteur et débrancher la machine. 1. Apague el interruptor de corriente y desenchufe la máquina. 2. Desserrer la vis de réglage de la plaque frontale et retirer la plaque frontale. 2. -
Page 94: Oiling The Machine
Oiling the Machine Apply a few drops of fine quality sewing machine oil to the parts indicated with arrows. It is recommended to apply oil once a week in normal use, once in ten hours in continuous use. * Open the side cover and apply oil. * Open the looper cover and apply oil. -
Page 95: Huilage De La Machine
Huilage de la machine Aceitado de la máquina Appliquer quelques gouttes d’huile de machine à coudre Aplique unas cuantas gotas de aceite de calidad fina para de bonne qualité aux pièces indiquées par máquina de coser en todas las partes indicadas por una des flèches. -
Page 96: Troubleshooting
Troubleshooting Condition Cause Reference The fabric is not 1. The feed dog is packed with lint. See page 90. being fed 2. The presser foot has been raised. Lower the presser foot. smoothly. The needle 1. The needle is incorrectly inserted. See page 18. -
Page 97: Recherche Des Pannes
Recherche des pannes Référence Cause Condition Voir la page 91. 1. La griffe d’entraînement est remplie de charpie. Le tissu n’avance pas Baisser le pied presseur. 2. Le pied presseur est soulevé. régulièrement. Voir la page 19. 1. L’aiguille est mal insérée. L’aiguille casse. -
Page 98: Solución De Problemas
Solución de problemas Condición Causa Referencia La tela no avanza 1. Los dientes de avance están llenos de pelusa. Vea la página 91. suavemente. 2. El pie prensatela está levantado. Baje el pie prensatela. La aguja se 1. La aguja está mal introducida. Vea la página 19. - Page 99 (Blank page)
-
Page 100: Optional Parts
OPTIONAL PARTS Blind stitch foot Use to blind stitch a cuff or a skirt. Taping foot with Use for sewing tape on a tape reel shoulder or armpit line to protect from stretching or to decorate. Works well with the taping foot or the cording foot. -
Page 101: Pièces Facultatives
PIÉCES FACULTATIVES PIEZAS OPCIONALES Pied d’ourlet Utiliser pour faire des points Se usa para la puntada invisible en Pie para puntada puños o faldas. invisible invisibles sur une manchette ou ciega une jupe. Pie para cinta con Se usa para coser cintas en la línea Pied à...